Our 2021 garden: marking spaces

After working things out and making some decisions on where we want to plant things, we are ready to mark out beds in preparation for planting. We have seeds than need to be direct sown before our first frost, and those are the areas we want to focus on.

We’d decided to mark off blocks at 20′ x 20′ (about 6m x 6m) for the corn and 20′ x15′ (about 6m x 4.5m) for the sunflowers, and then make 3′ x 8′ (about 1m x 2.5m) beds for most of the rest.

With that in mind, I figured the easiest way to mark off blocks would be with knotted cord. I used 2 lengths of paracord with a loop at one end. From the loop, I tied knots at 3′, 8′, 15′ and 20′ We have a bundle of small marker flags, and I grabbed those to mark the corners of the plots.

The first thing I did was mark off a 20′ x 20′ block in the furthest corner, from which everything else would be lined up.

I decided to start the rectangular plots roughly 4′ (just over 1m) away from where the corn will be. Once I started marking off the first one, though, I quickly threw away the idea of making them only 8 ft long. For this space, that is just minuscule!

I made them 20′ long, instead.

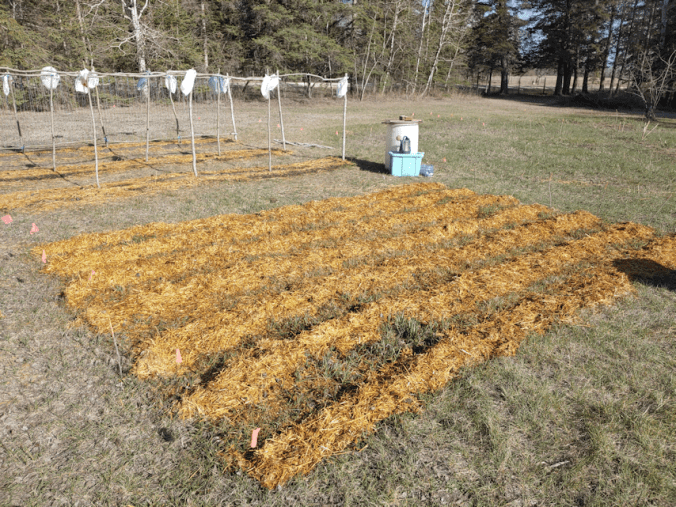
In the above photo, there are 4 plots marked off, with 3′ paths between them.

I added 1 more and ran out of flags, so I used a stick from the pile of branched I’d pruned a few weeks back.

Then I went back and made more marker sticks. We’ve got the bright orange marking paint, so I used that on one end of the sticks so they would be more visible.

Using the two knotted ropes to find where to place the markers worked really, really well. With the looped ends at markers or flags, lining up the knots to find the next spot to mark also made it easy to keep straight lines and right angles at the corners. It’s not perfect, of course. The rough ground alone made that impossible. They don’t need to be perfect. All of this is just temporary, anyhow, until we plant trees here.

I took the time to make more markers from sticks, spraying one end with the bright orange paint, then made another row of plots.

This is how it looked when I was done.

Yeah. I know. Hard to see!

So I edited it to as close as I could match the lines.

The big block by itself is where the corn will start. It’s hard to know how much space we’ll actually need, but at least we have the general area worked out.

With just the rectangular plots, this is an area that’s 15′ wide and 66′ long (about 4.5m x 20m), including the paths in between.

We will be marking more of the rectangular plots, as well as another corn block at this end.

Our three varieties of bush beans will be planted in the plots nearest the corn, though I’m already rethinking that. The peas, which need to be planted right away, will need to be trellised, so they need to be to the north, so they don’t shade other plants. We have only 2 varieties, but one of them is a bag of 200 seeds, while the other is a typical seed envelope, so having two sections of the green peas and one of the purple should work out. The three varieties of beans can take the next three sections.

The actual dimensions of the area, compared to what we thought we had on the satellite image, means we’ve got three plots at the end that does not have anything specific planned for them. It’s hard to see in the photo, but even the furthest plots are still far enough away from the apple trees that they will still get full sun.

We’re out of cardboard, and we’ll be running out of straw very quickly. It’s going to be a challenge with all that grass, until the plants fully mature. By planting densely, they should shade out and choke out the grass and weeds. When we do add the soil, we will have to be careful in how we use it, or we’ll run out very quickly! One of the things to keep in mind, as always, is that this is meant to be temporary. When it comes to food trees, they take so long to reach productions stage, we really need to get those planted quickly. If we can swing it next year, that would be amazing, but even if we can only afford to do a few a year, rather than a whole nut orchard, all at once, that will be a good start.

Until then, we’ll be breaking up and amending the soil with vegetables. :-)

The Re-Farmer

Our 2021 garden: unplanned garden bed

My daughters and I have spent quite a bit of time, working out where to plant what, so we know where to build beds to plant in. Then I realized we completely forgot about the purple asparagus crowns that will be shipped later, to arrive at time of planting in our zone 3 region.

We’d talked about them before, but hadn’t made any decisions. Where my mother had asparagus was ruled out. She’d planted trees and bushes in that garden, so that area no longer gets enough hours of sun in a day. Asparagus will produce for up to 20 years, so we couldn’t include them in most of the areas we will be planting in this year.

After talking about it, we settled on a spot where we had not originally planned to have any garden beds at all this year.

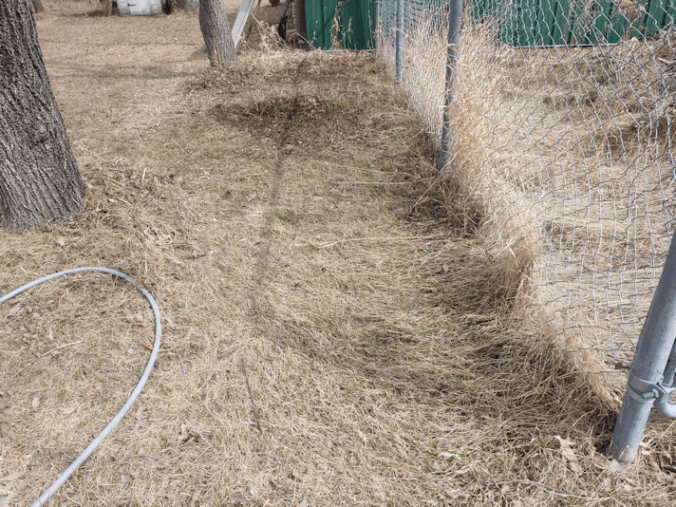
This is the spot we settled on, after I’d raked it out.

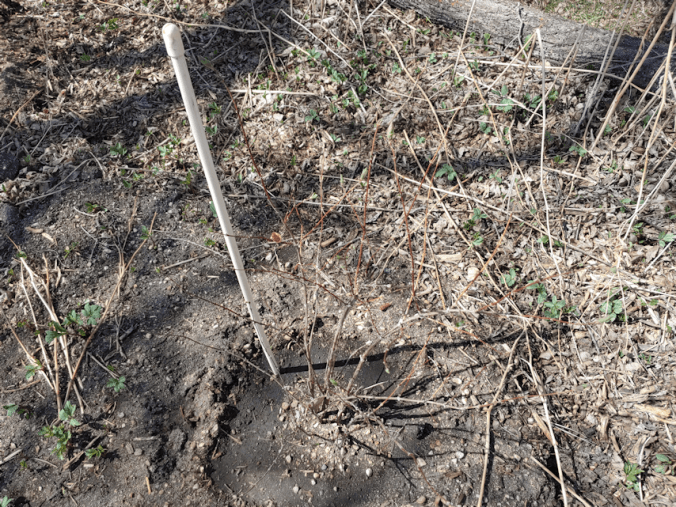
Part way down is where there used to be one of my mother’s tire planters that I’d taken out. I’d dumped the soil out to remove it, and found it was on top of the remains of an old maple.

I know it was an old maple, because it immediately began sending up suckers.

I had covered it with the soil inside the planter as much as I could. The flowers that were in that planter have been showing up, which was nice to see at least. :-) Much of this area is difficult to maintain, though. So now we will be planting two things here. At the far end, on the other side of the remains of maple, is where we will be planting the Strawberry Spinach. In reviews on the Baker Creek website, where I bought the seeds, it was mentioned that these self seed easily, and it was recommended to plant them in a permanent location because of this. That was kept in mind when we chose this location.

In the foreground is where the asparagus will go. For that, we will need to dig a trench long enough for the 6 crowns we will be getting.

Digging a trench here is going to be a challenge.

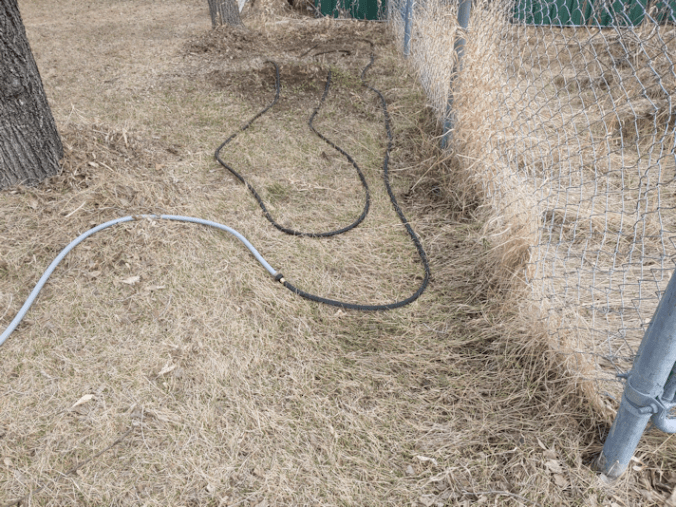
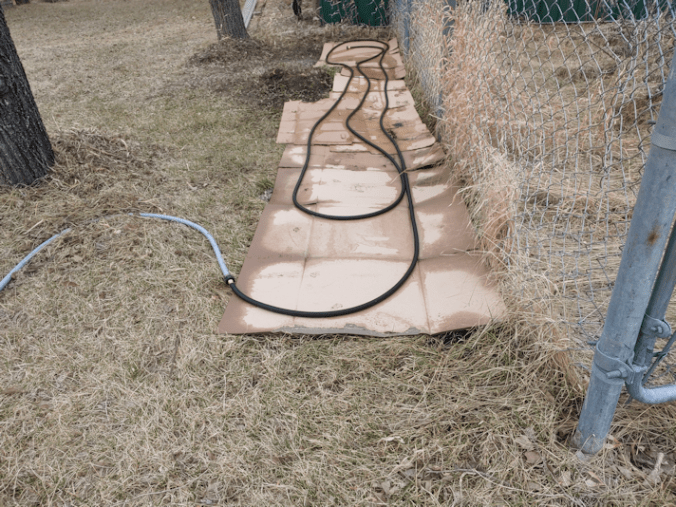
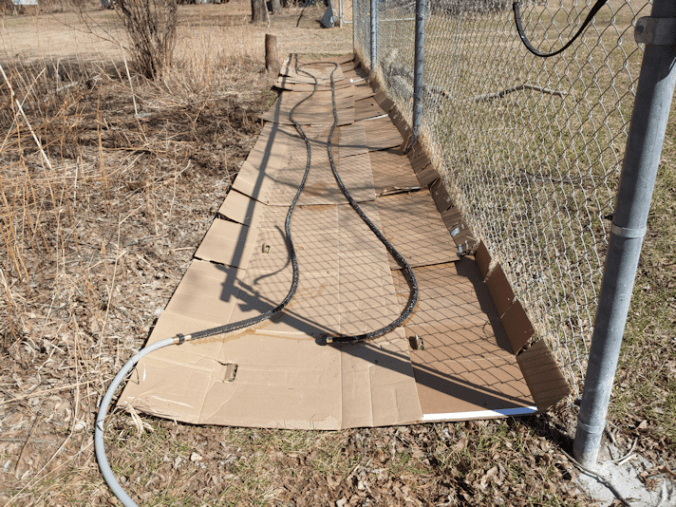
So today, I set up the soaker hose directly on the ground to start. Saturating the soil will make it easier to dig the trench.

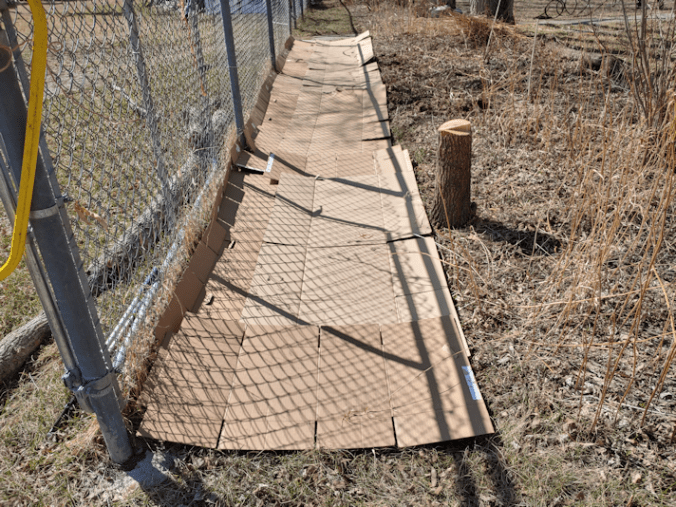
While that was soaking, I prepped as many cardboard boxes as I could find, removing any tape or stickers on them.

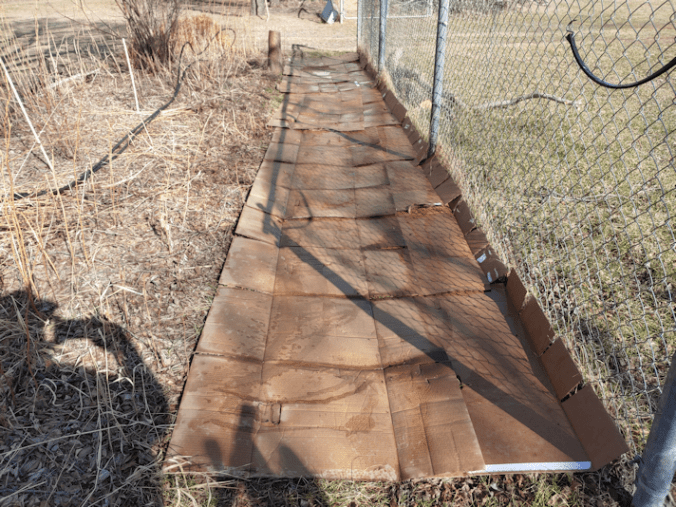
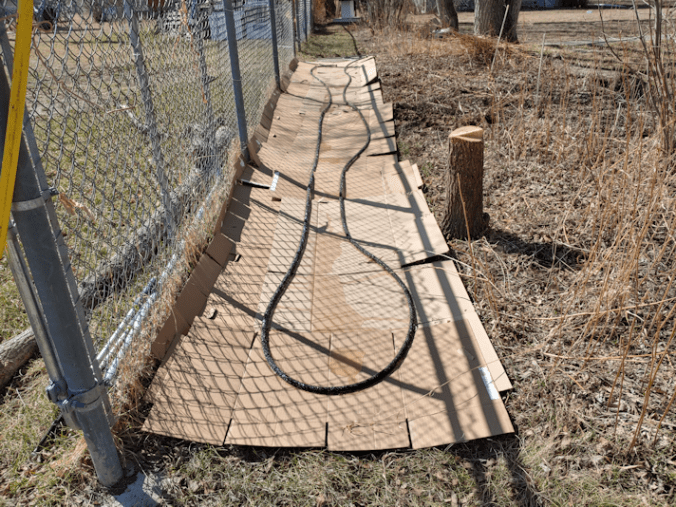
My daughters helped me to lay the cardboard under the soaker hose, and we left it running for a while as we checked other areas. The rain barrel was full, so we used it to fill our watering cans and wet down the cardboard more, and finally just left the soaker hose going for about an hour. The above photo is what it looked like when I turned off the water.

(We are now out of cardboard. :-/ We do still have some moving boxes left, but they’re in really good shape, so we’re saving them for something else.)

We were planning to put straw over the cardboard, too, but it was way too windy today. We have several weeks before the asparagus crowns will arrive, so covering the area now will help kill off the grass, as well as make it easier to dig a trench, later. We’ll just have to keep soaking it. Where the Strawberry Spinach will be planted can have mulch and soil added to it at any time.

I’ve been looking at instructions for planting asparagus, and some places say to dig a trench 15 inches/38cm.

That’s not going to happen!

Those articles, however, also say to fill the bottom third of the trench with compost. We don’t have compost left.

Other articles say to soak the crowns in compost tea for 30 minutes before planting.

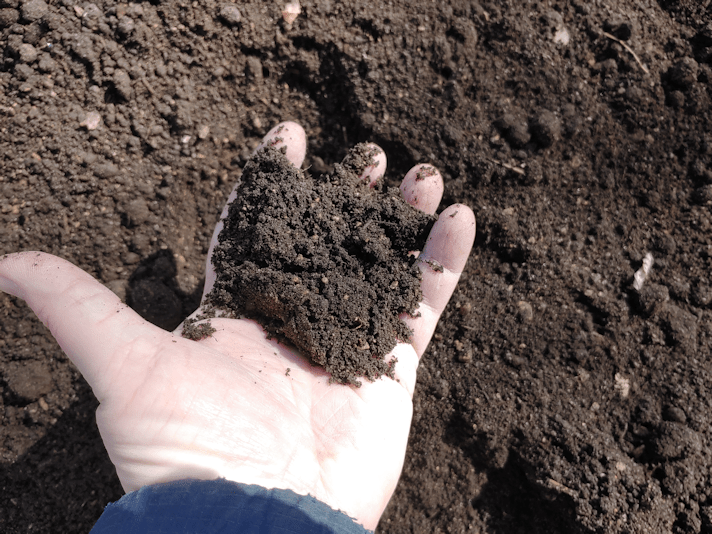
Since we don’t have compost to make compost tea with, that’s not happening, either. Our new garden soil, however, has plenty of compost in it.

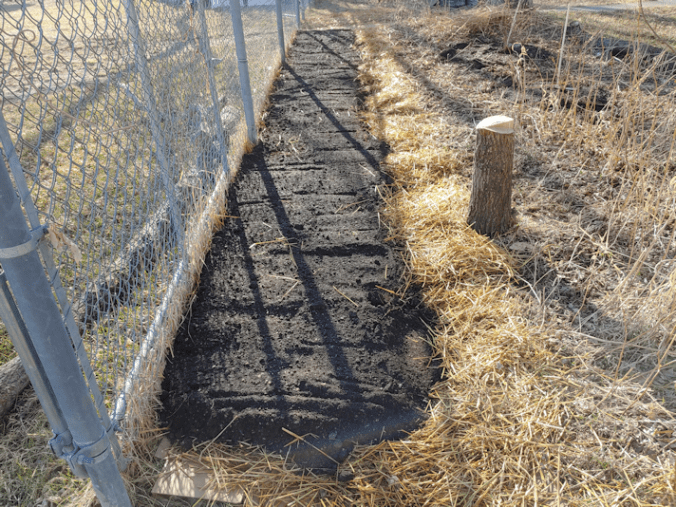
I’m reading that the crowns should be planted 1 1/2 – 2 ft/46-61cm apart. We will be getting 6 crowns. That space isn’t long enough to plant them in one long row, but it’s wide enough to plant them in 2 rows, so we’ll need to made a double wide trench – about 24-30 in/61-76cm wide. A depth of 8 inches/20cm should be good, but we will be building the area up, so we won’t need to go quite that deep. I don’t know if we even could go any deeper, with the trees being so close. I expect to find a lot of roots under there. By the time we’re done, this area should be about 4-6 inches/10-15cm higher than it is now, so all we really need to do is get rid of the top layer of grass roots.

Hopefully, we will be able to remove more of that tree stump and cover the remains over, in the process.

Once it’s done, we should be able to leave things here and just keep them maintained, for the next couple of decades.

The Re-Farmer

Soil tests, first area (with technical distraction)

Before I get into this post, I just wanted to add that this is my first post written using the SeaMonkey browser. It’s also the first time I’m actually using the browser, yet I’m already seeing a HUGE difference while working in the WordPress editor. Everything is loading SO much faster. The image uploads, the block editor, everything. I’ve just opened a whole bunch of blogs I follow in new tabs, and not a single one is showing the weird colours, not a single image has failed to load, and when I scroll the bottom of posts, everything is loaded. Including the “like” button which, frustratingly, was often the one thing that would fail to load, even as the rest of the page would load. I have yet to try and leave a comment anywhere, but I’ve uploaded media, including directly into this post, without a single problem. I had been using Mozilla Firefox for this blog (to keep is separate from my personal stuff), and it’s been really awful. SeaMonkey is like Mozilla Netscape, and it works a dream, so far! Many thanks to The Hinoeuma for telling me about it!

And now, back to our regularly scheduled post…

I broke out our soil tester and began with a sample from the newest garden bed. This is soil that was under the old wood pile. You can read about that massive clean up job, here. Under it was the only soft soil we had!

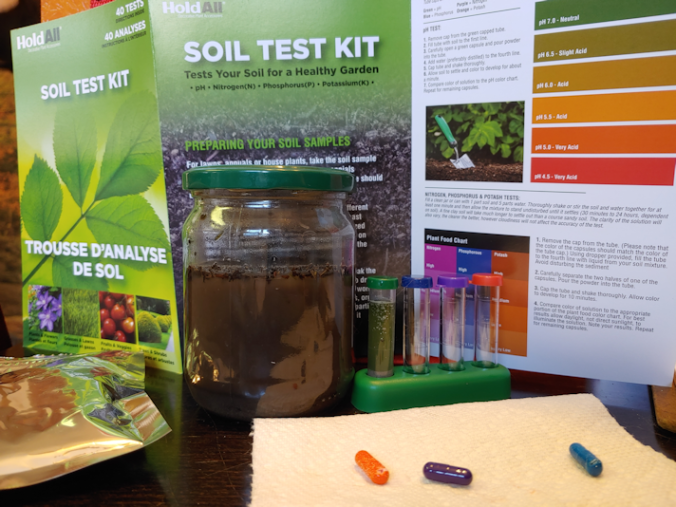
The soil test kit I have is from HoldAll Decorative Plant Accessories, and this is our first use. It has the supplies to do 40 tests; 10 each for pH, nitrogen, phosphorous and potash.

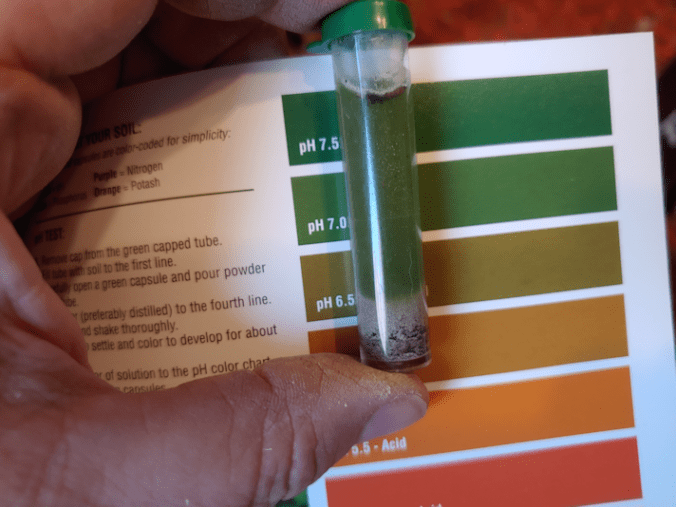
The test of pH is the quickest; soil gets put directly into the test tube with the contents of a capsule (all are colour coded), shaken, then allowed to sit for a minute. The other tests required a soil sample to be mixed with water at a ratio of 1 part soil to 5 parts water, so I started that first. Though only the pH test could be done right away, I readied the capsuled for all the tests, so I wouldn’t have to go into the mylar bag again.

I had just finished setting the pH sample in the test tube holder when something large and white caught my eye through the window.

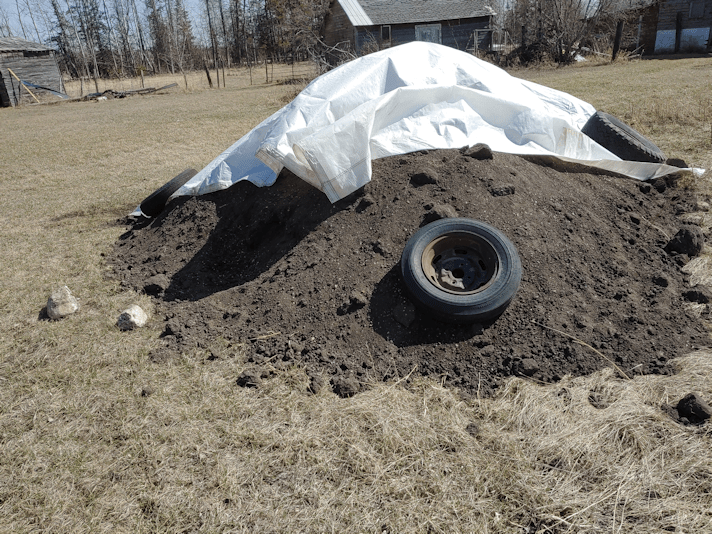
It was the tarp over the load of garden soil in the outer yard, blowing around!

A daughter and I dashed off to get it before it blew away.

The wind has only been picking up! I don’t think I’ll be moving soil onto the new garden bed today. :-(

We fixed the tarp, adding more rocks and even a tire rim onto it, to keep it from blowing away.

Then we came inside, and I found three cats on the table, going after the remaining three test capsules!

They were licking them, and the gel capsules were starting to dissolve. :-( I don’t think any of the powder was ingested, though. They are now sealed in a container.

The pH test had more than enough time to be ready, but the water and soil mixture will need a lot more time! The instructions said it could take anywhere from 30 minutes to 24 hours, depending on how much clay is in the soil.

The soil in the new garden bed came up as neutral. We have a soil meter that is simply stuck into the ground that reads sunlight, moisture and pH. It had been used in the area that now has garlic, and read at about 7.5, so this was pretty much what I was expecting. Most of the things we are planting do better in a slightly acid soil – about 6 – 6.5 – but what we planted in this area last year did pretty good anyhow.

As I write this, the soil and water mixture has been sitting for more than an hour, and is still totally opaque! From the looks of it, it may need to stay overnight.

Meanwhile, I’ve already gathered a sample of the next test I want to do: the new garden soil! I suppose I could do a pH test right away, but I’ll wait until the other three tests on this first sample is done, first.

Testing the soil in the old garden is going to be a challenge. The samples are supposed to be as free of rocks and organic matter as possible.

Ha!

We’ll see how close to that we can manage!

Meanwhile…

As I was working on this post, I got a phone call from my mother. After a while, she asked what we’ve been doing, so I told her about the new garden beds. I tried to describe to her where we put the new bed for the tomatoes, and made the mistake of starting with, “you know where your yellow flowers are?” She immediately launched into “you mean you destroyed my flowers!!” I had to stop her and tell her, “wait, no… you know that space between those flowers and the chain link fence?”

I honestly think my mother forgets that the chain link fence even exists at times! It took her a while before she realized I was talking about the grassy area. Which confused her even more, because nothing was ever grown there, and how can I plant without plowing the soil first? Or at least tilling it? So I described to her what we did with the layers of cardboard, straw and soil. Once she knew our garden soil was delivered, that helped, but she still accused me of killing off her flowers again! Then she brought up the shade of trees, and I told her we only had to take down the one tree that was killing her lilac, anyhow, and that we picked that spot because it will get full sunlight now.

She still had a hard time understanding that we’re planting anything on that side of the house, in the yard, and was all, “so you’re letting the garden go to weeds again”, meaning the area she used to garden in. I told her no, we’re going to be planting all sorts of things there. Without plowing? Yes. Without plowing.

That lead to a whole lot more explaining of things, even though we’ve had this conversation several times, now. She has the hardest time with the concept of no-till gardening. It’s just too wrong! :-D

At least this time, she ended by saying, when everything is in and growing, we need to bring her over so she can see it! :-D So that’s progress, at least! She certainly wasn’t impressed by what she saw last year, but we’ll see how it goes this year. I’m sure she’ll find lots to be angry about! :-D

I didn’t even try to explain to her about the soil testing, though. Maybe another time. Us planting in an area she never planted in was already pressing her limits! :-D Which is funny, because she would stick little gardens in, or plant trees, all over the place. Some of them in places that are now very difficult to work around! :-D So it’s not like I’m doing something she hadn’t already done herself.

One thing that was funny was when we talked about starting things indoors, and I mentioned needing to start squash. She asked if we were growing zucchini, and I told her yes, in green, yellow and a different green, plus the bright yellow round squash (the pattypans) that I’d given her last year. Oh, those are just toys! she tells me. :-D I reminded her that we find them quite delicious!

Hmm. Now I’m suddenly wondering. Did she eat the fresh pattypan squash I’d given her? Or did she get rid of them, because they were too new for her?

I don’t think I want to know the answer to that. :-D

As we talked more about starting things indoors, she had the hardest time understanding that yes, we already have tomatoes started from seed. I think she was disappointed that she couldn’t chastise me for not having them started already. :-D

Talking to my mother about this place can be very challenging! I don’t think she forgets that she doesn’t own it anymore, but she still wants to control everything that is done here, including things she doesn’t understand (if only because my dad and brothers took care of them for her, over the years). I try to respect her wishes as much as possible, but our job is to take care of the place, not keep it in stasis. It’s slowly working out, though. It just takes a lot of explaining, sometimes! Or, in some cases, not even bringing them up.

Like testing soil. I’ll bring that up only if we have a lot of time for me to explain things in ways that make sense to her. It’s not so much that she isn’t aware of some things; it’s more likely she’s never encountered the terms to describe them before.

It’ll work out. It’ll just take time and patience!

The Re-Farmer

Our 2021 garden: new bed built

It was an absolutely gorgeous day today!

My younger daughter and I took advantage of it and built a new garden bed in the area we plan to plant tomatoes.

The tomato seedlings are doing well, as are the luffa.

They have roots starting to show out the bottoms of the pots already!

The onions in the sun room are doing well, but not to much the ones planted more recently.

As for the gourds, none have sprouted yet but, from what I’ve read, they do take a long time to germinate.

Here is where the tomatoes will be going.

We did absolutely nothing to the ground before we started. There really wasn’t any point of even trying.

The first step was to cover the grass.

Actually, the first step was to cut down that maple. I’d already noted that it was creating so much shade when in full leaf, that a unique lilac in the flower bed beside it was being killed off. The stump was left high and will become the support for a seat. The main trunk and some of the larger branches are being kept for future projects.

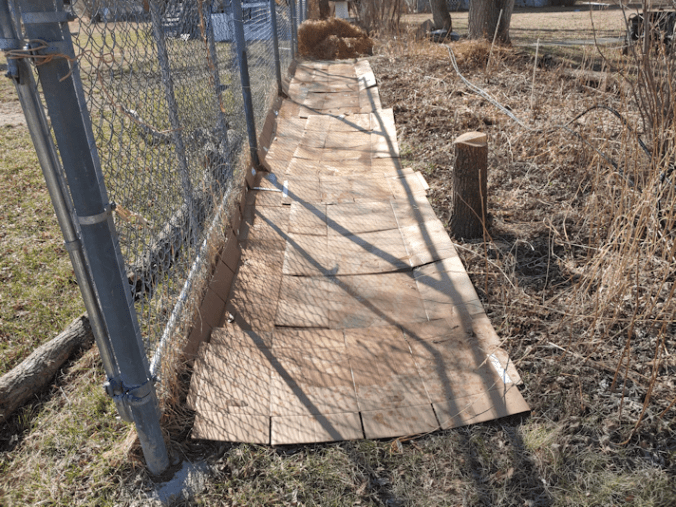
We’ve been saving the cardboard boxes from cat litter, and their flaps were placed against the fence as a short barrier to hold in the soil.

Well… after spending some time removing all the tape. It took more time to get all the tape off than to lay out the cardboard!

Those and some moving boxes were enough to cover the entire space between the flower bed and the fence. :-)

Then, we broke out the new soaker hose! :-)

We will likely be going below freezing tonight, so the water will still need to be shut off from the basement when we’re done, but for a warm day like today, we could use the hoses for a while.

The soaker hose is 50 ft/15m, so we’re looking at approximately 25 ft/7 1/2m for the new bed.

While letting that soak, my daughter and I began bringing loads of straw over from the bale in the big garden area.

We probably could have left the water running all day to soak it thoroughly, but we didn’t bother. We did move the soaker hose over by the haskap berry bushes, though, and left the water running while we moved on to the next step: spreading the straw.

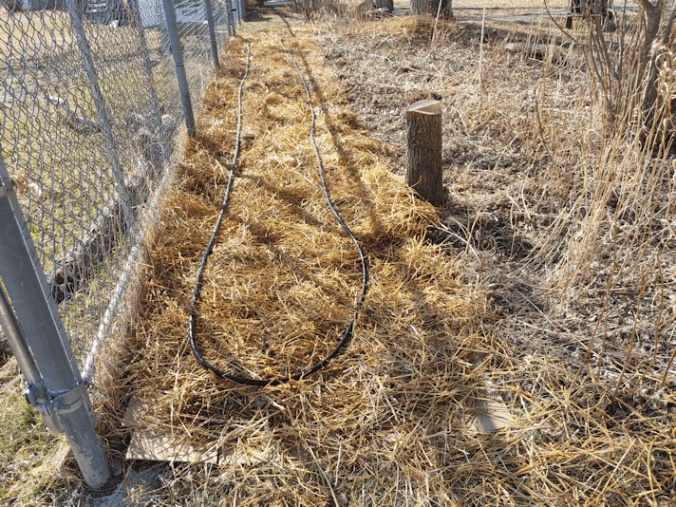
Actually, I spread the straw while my daughter filled a couple of wheelbarrows of soil and brought them over. Once the cardboard was covered, we tromped back and forth on it, stamping it down, then lay the soaker hose back over it.

We left that to soak and took a walk around the big garden area and talked about changing a few things.

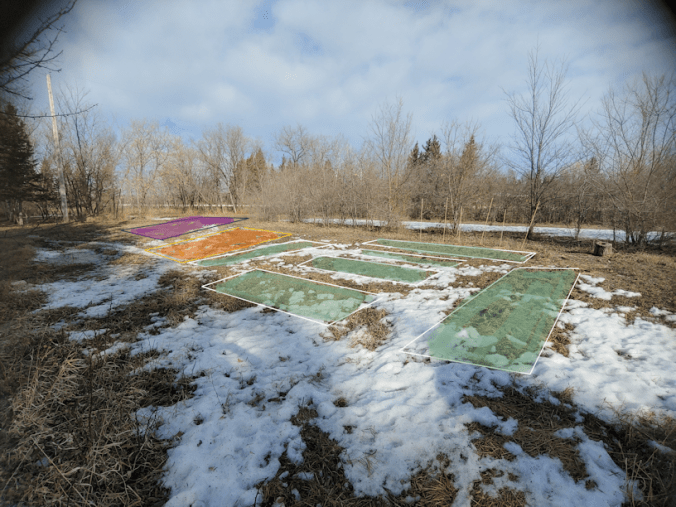
The above image shows the existing beds from last year’s garden, in green. The three smaller beds in the middle were going to be where our three varieties of spinach would be planted. I was thinking we might change those up completely. Instead of three short beds oriented East-West, it would probably be better to have two longer beds oriented North-South, like the two we already have. One of the North-South beds was supposed to have shallots planted in it, but the shallot seedlings failed, so we’ll still have three beds available to plant spinach (and whatever else we interplant with them).

Eventually, we will be building accessible raised beds here, so nothing is permanent at this point, anyhow.

There’s also the two small beds – the shorter green rectangles in the above pictures – where we’d planted potatoes last year. There’s nothing stopping us from making those longer, stretching into the skinny bit that’s marked in orange.

So that’s what we’ll do with those areas.

By the time we went back to the new bed, my older daughter was done work for the day and was able to join us.

The first thing they did was stop using the larger wheelbarrow, because it sucks. :-/ Actually, they both do. We need to get a new wheelbarrow! Just one good one is enough. :-)

So one daughter had shovel duty, filling the smaller wheelbarrow, while the other brought it over and dumped it, then I spread the soil until a new load was brought. The job was done very quickly!

The area of straw left uncovered will be a pathway. At some point, we’ll put in some pavers or something, but for now, the straw and cardboard will keep the weeds and grass down. That and lots of tromping it down with our feet. :-)

Each of the haskaps got a load of soil around them, too.

Then, because the hose was handy, the soil got a brief watering, more to keep it from blowing away than anything else.

Our last frost date is June 2, so this will have more than a month for the straw to settle. We’ve got one more warm day, then we’re supposed to get snow. Long range forecast sees more snow and rain into the first few days of May. Any precipitation we get will help settle it more, and we’ll be able to see if we need to add more soil or not.

If all goes well, I will use tomorrow to dig a new bed next to the garlic beds, before things cool down again. That one will be a lot more physical labour than this one was!

I’m looking forward to it. :-)

One area done, many more to go! :-)

The Re-Farmer
Our 2021 garden: Checking the haskap and planning ahead

This morning, none of the kitties were cooperative about getting their pictures taken, so I had to settle for something that didn’t move.

Much.

;-)

While doing my rounds these days, I check all the areas we planted things in the fall. I found more garlic coming up under the mulch, but we’re still leaving them covered. Ideally, we’d have plastic row covers over them, but we don’t have any sort of hoops or frames to hold it up right now. They’ll be fine; a cover would just kick start them a bit more.

This morning, I decided to clean up the old flower stalks in the bed our two haskap bushes are in. Those flowers are among the things my mother insists we keep, but I wanted to open up the space around the bushes more, so if a few fresh roots came up with the flower stalks, I didn’t mind.

This meant I finally got the first good look at how the haskaps were doing.

I had to hold the branches to get a photo, because of the wind! :-D

This is the male plant, and it’s starting to leaf out quite nicely! It did well last year, too.

It’s the female plant that I am more concerned about.

Last year, I was sure it had died, but it did grow and even managed to produce a couple of berries. It’s still very weak and spindly, with branches so thin, the camera on my phone couldn’t focus on them! There’s the tiniest bit of green showing, though, so at least I can tell it’s still alive. We need to pick up a couple more of the female plants. I never saw any last year, so we will likely have to order them in.

I want to side dress the ones we have with our nice, new garden soil, but probably not today. It started to snow while I was out there. The snow has already stopped, but it’s going to stay chilly today. We’re supposed to warm up a lot over the next two days, then get snow again. During those two warm days, I’m hoping to start prepping the areas at the chain link fence, so we’ll be able to tend the nearby haskap at the same time.

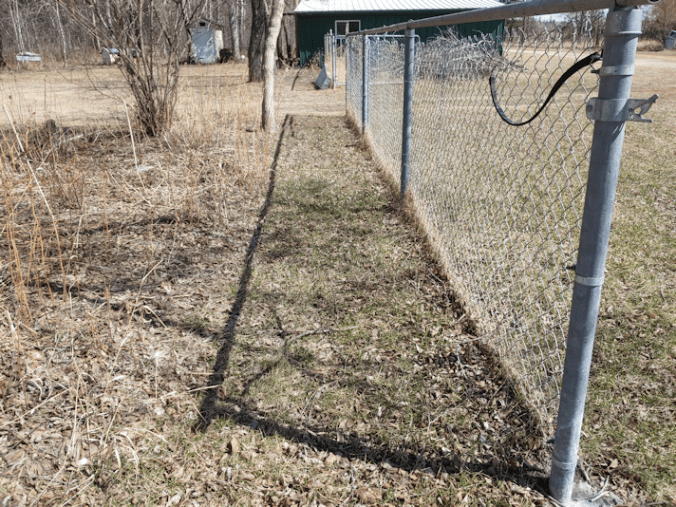
We’ve been saving our cardboard for the past while, and will be laying that over the grass between this bed and the chain link fence, then adding a layer of old straw before topping with soil. This is where the tomatoes will be planted, with the fence to use as support. On the other side of the person gate, we’ll lay cardboard down as well, but that side is where we’re planning to put the remaining old chimney blocks to use as planters. This year, they will be used for the cucamelons but, in the future, they will be good for anything we need to keep contained. We still need to get those blocks out of the old basement. We ended up having to use them to barricade the screen “door” we made over the opening between the two basements. The cats were managing to push their way through, so we’ll have to find an alternate way of bracing the frame before we can remove the blocks. Unfortunately, the opening is basically just a hole that was cut into the wall around the time the new basement was built, so it’s oddly shaped, plus the floors are at slightly different levels. It makes creating a barrier the cats can’t push through much more challenging! Once we figure that out, we can haul the blocks out. I do want to keep one in the new basement, though. I found it was the perfect height to use as a hard surface to brace on while I was rough shaping wood to carve. The rest will be set up along the chain link fence. We want to transplant the grapes to the chain link fence, where they will get more sunlight, but not this year.

I keep forgetting that we also have some chain link fence on the other side of the vehicle gate. Just a short stretch to the garage. Part of it is shaded by the garage in the morning, but it does get full sun overall. It’s another area we can keep in mind for any future garden plots for things than need support. There’s a lot more of the chain link fencing towards the west, but that stretch doesn’t get much sunlight. Once we clean up the dead branches and trees on the outside of the fence, it’ll be better and we’ll have more options.

It feels great to finally be able to start these preparations now, even though we can’t plant anything for almost another month, at the earliest. Getting the soil delivered yesterday means we can work on different areas a little at a time, rather than rushing to get it all done at once, later.

Little by little, it’ll get done! :-)

The Re-Farmer

I got dirt!

Oy, what a day today has been!

Of course, the best part was getting the garden soil in. I figured I’d call and it would be brought in after a few days or something. I never imagined they’d be able to bring it so quickly!

We now have a load both in the outer yard, and by the old garden area, near where we were be doing most of our gardening this year.

It’s absolutely gorgeous soil! I’m so incredibly happy with it!

I want more.

:-D

In truth, we probably will end up using both piles up this year. We will be using it judiciously, but once a load was no longer in the truck, it suddenly looked very small! :-D We were already expecting to finish on one load and use at least part of the second, so this is not too unexpected. For the price we got it for, we will be able to get more if we need to, when the permanent raised beds are built.

Just a little while ago, my daughters and I scrounged around in the barn and found a tarp that could mostly cover the nearby pile. Then we brought over some of the old tires that were stacked behind the pump shack after I cleaned up there and fixed a window. May as well get some use out of them! There’s also a rock pile with some trees growing out of it, nearby, so we grabbed some of those. Hopefully, it’ll be enough to keep the tarp from blowing away – and the tarp will keep most of the soil from blowing away! We’ll cover the other pile, too, but not tonight.

Along with the soil delivery and the septic tank getting cleaned, we kept getting phone calls. One was from the place I’d bought our baby chainsaw from. The spare battery I’d ordered had come in! Which was a very pleasant surprise, all things considered. I was fully prepared for it to take weeks, or even months, before it came in.

Then we got an odd call from the tax preparer. We’d dropped off my older daughter’s papers. We did TurboTax last year, but they are so messed up this year, we just gave up. My daughter does her transactions through PayPal, and the Excel spreadsheet she downloaded from there was not something that could be printed out and make any sense, so I put it on a memory card and included it.

The tax preparer had no idea what it was. Her computer doesn’t have a port for it. That never even occurred to me!

So we were going to put it on a thumb drive and bring it over, but my daughter went back to her PayPal to try and find something that made more sense. She ended up finding a sales summary that we could print out. So my younger daughter and I headed out to run some errands and I swung by to drop off the printouts.

I ended up talking to the tax preparer, who seemed totally lost. She had a hard time understanding that everything my daughter does is digital and online. She took some notes and said she would call if they had any more questions.

By the time we got to our next errand, we got a text that the tax preparer had called and left and exasperated sounding message, but no details.

I don’t get it. This should be a very simple return.

*sigh*

We’ll call them back tomorrow.

We ran the rest of our errands in town, including picking up the spare battery – it’s a good thing we had to drive by the place because I almost forgot! – then paid for the garden soil on the way home.

After we got home, my older daughter was finished work for the day, so we went outside and ended up covering the one pile of soil. My younger daughter has already started to move soil over to the old kitchen garden! :-D This is one of the areas we can start adding soil to right way, as we’ve already been building it up for the past couple of summers.

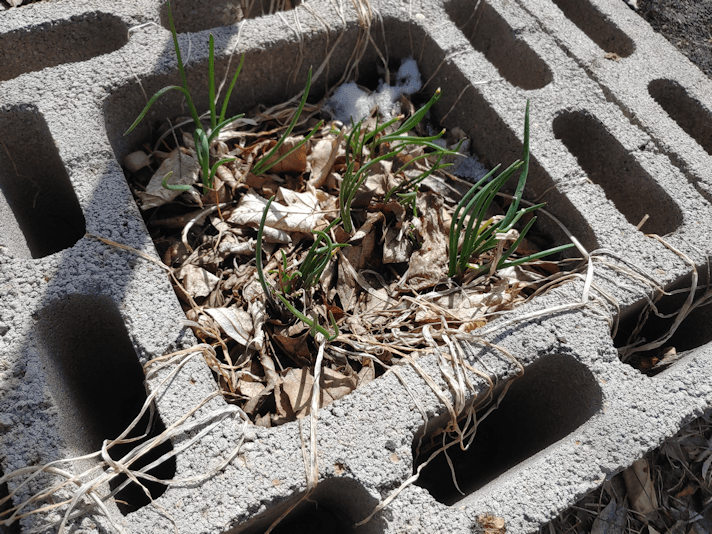
The chives we transplanted into two of the old chimney blocks making up the retaining wall are coming up quite strongly. Which is nice, because they’d been pretty spindly, before. Prolific, but not a lot of substance! The rest of these blocks, where we had planted cucamelons, were topped up with soil last fall, so they’re already good. :-)

Along the south edge of this garden, my daughter planted bulbs, and it looks like one or two of her irises has emerged! It’s hard to tell with one of them, they’re so small, still. We also found more garlic sprouts, and my daughter found more snow crocuses. Everything is so tiny, but it’s still very exciting to see them coming up.

While checking the areas we planted all the grape hyacinth and snow crocuses, we can also check out the wild strawberries.

They have been visible through their leaf mulch for a while. Such tiny, delicate things, yet very hardy! They get quickly overgrown with wildflowers, so the plan it to transplant them as soon as we can.

It was good to get all these big things done, but I usually like to have them more spread out, not all in one day! :-D The one thing that didn’t get done, was taking my husband to the lab for some blood work. He’s been in too much pain to go to the clinic, so late last week, I asked and they faxed the requisition to the lab that’s closer. With so many things going on, we’ll just do it tomorrow. It’s already a few months late. One more day isn’t going to make a difference! :-)

For now, I think it’s time for a nice pot of tea, while I daydream about dirt, and plan all the things we’ll be doing with it!

It doesn’t take much to make me happy. :-)

The Re-Farmer

Clean up: spruce grove, clearing to the dead trees

Today turned out to be such a hot and sunny day, I took advantage of it to do a bit of work in the spruce grove. Specifically around the dead trees near where we intend to plant the mulberry tree that will be shipped later in the spring.

I normally post the before pictures at the start, and the after pictures near the end, but this time I’m going to set them side by side. It’s the only way I can see the difference 2-3 hours of work resulted in. :-/

Here is the first area, and where the mulberry tree will be planted.

They’re a bit hard to see in the before picture, but there are two steel wheels leaning against the reddish dead tree. Those have joined the “found object” art display for now. ;-) Then there was the remains of what appears to have been a bench made with two logs as support, and another log that I think was just there to sit on.

It must have been a very pleasant place to sit, when they were first set up.

Someone (probably my mother) had gone to some effort to make sure the seats were stable. I found these, under them.

These were under where the bench was, with a group of bricks under where each log would have been. It was a good idea to put the bricks under the logs, but nothing had been done to keep them from sinking into what is essentially composted leaves and spruce needles, so the logs started to rot from below.

It wasn’t until I found these that I realized the other log was intended as a seat, too.

I had to cut away what I thought were two small trees, just to access the area. It wasn’t until I tried to cut them down to ground level that I realized, it wasn’t two trees.

I had to dig out and cut away the roots to get them out, and they were both growing out of the same root, which ran under the bricks.

This was, hands down, the most difficult part of the clean up today. Partly because there were other roots running under the roots I was trying to cut! Some belonged to the dead spruce they were next to, but I later ended up pulling out about 8 feet of root, and never finding out what tree it came from!

While trimming the undergrowth, I realized I need to get thicker gloves than the gardening gloves I’ve been using.

Another reason to encourage the wild roses – they make great security barriers! Those spines go right through ordinary garden gloves!

I don’t mind cutting away the roses for now, though. They will grow back, and with clearing out the other stuff, they should have more sun and space to spread out, too.

It was really hot work, though, so I stopped for a rest in the shade. I look forward to when we set up new seating areas around the yard. It would be much more pleasant than sitting on concrete steps!

With how hot it was feeling, I just had to check the temperature. I was thinking we were certainly about 15C/59F Maybe even approaching 20C/68F

Nope.

It was 10C/50F

RealFeel, 8C/46F

Yeah. I know. You folks from the south are laughing at me right now! :-D

Meanwhile, the thermometer in the sun room was approaching 30C/86F. I opened the solid doors to allow air circulation through the screen doors, and increased the speed of the ceiling fan, so the onion seedlings would not be too hot!

One of these days, we should set up our own weather station, so we can have more accurate readings!

But I digress…

I did have a visitor while I was taking a break on the stairs.

I love how the woodpecker likes to get to the seeds on the ground by way of the bird feeder’s support. :-)

Then it was back to clearing away the undergrowth, and working my way towards the stone cross. Here is that section, taken from the same spot I took the first before and after pictures from.

I’m having a hard time seeing the difference between these two pictures. In fact, the “after” picture looks worse, because I didn’t line the angle up the same. :-/ Trust me. I did take out quite a bit of undergrowth in the distance!

In the second picture, you can see the tarp covering the junk pile. The tree beside it is dead, as is the tree my supplies are under. That whole area is full of spirea. It’s better to pull those up by the roots, but I just didn’t have the energy for that, today. Too hot! :-D

I worked more into this area.

In the before picture, I’d already started cleaning up the undergrowth a bit. The row of trees you can see on the right are part of north edge of the spruce grove. My older brother planted those, before I was born. It’s hard to believe they were planted at the same time as the huge spruces on the north edge of the grove, but there were three rows planted, close together. The further into the grove the rows were planted (at a time when the rest of the grove’s trees were in their prime), the less light they got, and the less growth there was. I’d cleaned up along the north side of the grove, taking out a lot of little dead spruces in the process. Hopefully, the more things are cleaned up, the better it will be for the surviving trees.

Most of the large spruces in the pictures are dead, so once those are cleaned up, that will allow a lot more light into here. If their trunks are still solid enough, I want to turn them into supports for benches and maybe a table or two. Over time, more spruces will be transplanted into the spruce grove, as well as more food trees – the mulberry tree being our first – that need the extra protection these spruces will give them. The mulberry tree should grow quite large, and will provide quite a bit of shade, so we need to keep things open around where we plant it. Long term, I want this area to be a pleasant, park-like setting. I will have to keep in mind that the benches and possible tables that I hope to make on the tree trunks nearby will end up covered with berries when the mulberry tree gets bigger! I’ve read warnings that mulberry trees can be quite messy. :-D

I’m sure the birds will clean it up for us, though. ;-)

I probably won’t get a chance to work here again for a while, as we are supposed to start snowing tomorrow evening, and it will be a few days before the temperatures warm up again. I want to get the spirea out, in particular – they’re lovely, but very invasive, so we’re keeping them in one area of the yard, and taking them out everywhere else. I know some of what I’ve already taken out today were chokecherry trees. We have lots of those, and it turns out they can be invasive, too! What we really want to clear up around are the Saskatoon bushes. These ones are still healthy, and keeping the area around them clear and open will help keep them that way. They are crowded by spirea and chokecherry right now, so when I work my way to where they are, I will back off until they are in full leaf, or even starting to bloom, so I don’t accidentally cut any down, mistaking them for chokecherry.

Today has been a very deceiving day! It got so hot, and when I was shoveling around those roots, I didn’t hit any ice or frozen ground at all. Quite a few of our garden seeds say to direct sow “as soon as the ground can be worked.” Well, that would be now, but it’s still another month an a half before our last frost date. Not only are we expected to have snow starting tomorrow evening, but we could easily get more snow later in the month, or even in May, so anything we tried to sow would likely not survive.

Which is fine for now. We can’t do anything until the garden soil is delivered! I keep forgetting to call about it. I’m sure the soil is thawed out enough to load into their trucks by now, and I still need someone to come by so we can look at where would be the best places to drop the loads.

I get excited, just thinking about it! :-D The girls and I are so looking forward to gardening this year!

The Re-Farmer
Slowing it down a bit

We got some furry visitors last night. :-)

They tend to show up near the end of the day, when the light makes is hard to get good photos! You can still see, at least a little, the growing antler nubbins on the deer on the right.

If all goes well, this will be the last bag of feed for the deer that we buy until the fall. Looking at the long range forecast, we’re expected to dip below freezing again, with snow on Monday (three days from now). They’re predicting 3-6cm. After a couple more days, the temperatures will be back above freezing during the day, though we’ll have below freezing temperatures overnight for a while longer.

I’m hoping we actually get that snow, and that it slowly melts. The deer should have fresh growing things to eat after that. We were supposed to have rain over the past couple of days, but once again I watched on the weather radar, as the system moved right past us. We didn’t even get a sprinkle.

Yesterday was a very lazy day for me. There is something about it being overcast that leaves me feeling like I’m ready to fall asleep, all day. Plus, with the cooler temperatures and hopes of rain, I didn’t want to be working outside with power tools. ;-) I did make a trip into town, though. Our darling daughter treated us to pizza for our anniversary. My husband and I celebrated 33 years together this month. :-) While driving into town to pick it up, there actually was a bit of rain, but it was nothing but a tease!

Today, I finally made the trip to the smaller city to pick up the last few things I wasn’t able to get during my Costco trip. They were actually sold out of cat litter, of all things! While there, I started chatting with another customer, who is also feeding a lot of cats. Mostly outside cats. He estimates he spends about $3000 a year on cat food – and spent another $5000 to get 40 cats fixed. !! That’s through some sort of program, where getting a female done is only about $80-$100, instead of the $350 we’re paying. I’ve had all sorts of organizations recommended to us, but either we can’t get through to them, or they don’t operate as far out as we are. :-(

(Oh, just got a phone call. The people who are adopting Two Face are on their way to pick her up. :-) )

While talking to the other customer, he mentioned using wood pellets instead of litter. I’ve heard of people using them, and talking about how much better it is, so I asked him more about it. It turns out that these are just the wood pellets sold as fuel for pellet stoves. He told me that when the cats use the pellets, they absorb all the moisture and break apart into sawdust. They also absorb the odor, so the only thing you smell is wood. When cleaning the litter pans, you simply dump out all the pellets in the pan and replace it with fresh – and the old pellets can still be burned. !! I don’t know that I’d want to do that. At least not in the fire pit (or a pellet stove, if we had one!), but we do still have a burn barrel. Or compost them, while burn bans are in effect. That would save us from having to haul those heavy bags to the dump. He told me the pellets are a lot cheaper, too, and they come in 40 pound bags, so they last a long time, too.

I think it’ll be worth trying it out. Maybe start with just a few litter pans, first, and see how the cats like it.

The conversation got me thinking about just how much we spend on critters. With the cats, it’s about $350-$400 a month in wet and dry cat food, plus litter. So, about $4,800 a year, on the high end. Plus the deer, which we do only for about 6 months, which works out to about $300 a year. Then there’s the bird seed, which we do all year, and works out to about $1000 a year.

Which we’re doing my husband’s disability payments.

Thank God for private health insurance!!

There are a lot of things we are doing without, to keep the critters fed. We include it all in our grocery budget. If, however, we were just setting that money aside, we’d have been able to save enough to replace the roof in only 2 years.

Now, we’re not going to stop feeding the animals, but we really need to find a way to address that expense. This is not sustainable. The problem goes back to my not simply being able to go out and get a job, since any income I would make would get deducted from my husband’s disability payments. If I ever made enough to bring that replace my husband’s disability payments, he would lose his insurance entirely (since he would no longer “need” it) – and he’d no longer have coverage for his prescriptions. So it’s a lose-lose situation. That’s why we had to be so careful when fund raising for Ginger’s vet care. We can accept gifts. We can’t have additional income.

*sigh*

Reducing the costs will help, which is why I want to try the wood pellets instead of cat litter. Cat food isn’t going to get any cheaper, though. It’s another reason why we want to grow and preserve as much food for ourselves, as well.

Slight interruption in writing this, as the people adopting Two Face arrived. As a thank you for Two Face, we were gifted with a bag full of brand new, still in their wrappers, Tupperware! Looks like the lady is a distributor. :-)

I hope Two Face is happy in her new home. We’re going to miss her!

Well, with the weather getting colder again for the next while, we’ll be slowing things down as well. At least, outside. Not so much, inside. The tray of bulb onions are now in the sun room. It’s warmer in there, but with the cooler temperatures coming, we’ve got them heated from below. By the time things warm up again, we should be ready to move more seedlings from the aquarium greenhouses to the sun room, then use the aquariums to start the summer and winter squash.

If all goes to plan, we should be ready to start direct sowing some things near the end of May, then do the final direct sowing and transplanting after our last frost date of June 2.

We’ll have a lot of work to do in between!

The Re-Farmer
Our 2021 Garden: first luffa, and sun room is ready

It was very exciting last night! We spotted our very first luffa seedling!

I am not surprised that it is closest to the light we’ve got in there for its heat!

There was just one this morning, but when I turned the tray so the others would get a bit more direct warmth, just before starting this post, I found a second one, in a different pot, had broken ground!

Tomorrow, I will start planting other gourd seeds.

Today, a daughter and I headed into the city for our monthly shop (except some things we needed were out of stock, so we’re going to have to make another trip). I made sure to pick up a shelf for the sun room. It’s time to transfer the tray of bulb onions to the sun room, to make room for more seed starts in the aquarium greenhouses. The tomatoes and the new batch of bunching onions to replace the ones that failed will stay in the aquarium a bit longer.

When we got home, we quickly unloaded the van, then I headed out again to the post office, where I could also pick up more deer feed and bird seed. My new monitor arrived in the mail, and I’m using it now. What a difference! Unfortunately, there are still some pages that do the weird colour thing that is why the monitor was replaced. It’s better, but not gone. Which means the monitor was only part of the problem.

I must say, though, I’m glad to have it. It’s quite a bit bigger than my old one! Meanwhile, my husband tested my old monitor, and it worked just fine while hooked up to his computer. My younger daughter has been wanting to have a second monitor for a while, so she’ll be able to use it.

Which all means it was a while before I could set up a corner of the sun room in preparation for our seedlings.

While Ginger was in isolation in here, we used the frame of the mini-greenhouse to hold the terrarium heater bulb above the bed we set up for him, since it still got pretty chilly in the sun room overnight. I didn’t realize until I put the plastic cover back on that the cats had torn it at the back. It will still work, though.

Some seed trays will be moved here after being started under the lights of the aquarium greenhouses, but later in the season, less delicate things can be started in the sun room. This room gets long hours of sunlight, so while I will probably have to rotate trays, I shouldn’t need to add supplementary light. The lights we have are designed to fit over fish tanks. I might be able to rig them up, if necessary, but it would hardly be ideal.

As for temperatures, the thermometer in the sun room has been reaching as high as 30C/86F during the day. Granted, the thermometer is hanging at the top of a pair of windows, so it would be hotter there than head height, but it’s still quite roasty toasty in there. If for some reason we feel the overnight temperatures would be a bit too low for the seedlings, we do have the ability to warm things up at least a little bit.

So the luffas are started already, which I now know should have been started back in January (we’ll see how those turn out!), which leaves the remaining gourds to start. I know they’re supposed to be started “late April”, but gourds have such long growing seasons, and our frost dates can be so early, I’m going to take the chance and start them a bit early.

Starting the summer and winter squash should be interesting. With the gourds, we’ll be planting just a few seeds of each, but with the squash, we intend to plant most, if not all, the seeds in their packages. We have two packages of the patty pan squash, which we enjoyed so much last year, and intend to plant all the seeds! :-D

If all goes well, we’re going to have squash coming out of our ears. ;-)

By late May, if all goes well, we’ll have our garden soil in and will be able to direct sow those things that can be planted before our last frost date.

I’m really looking forward to seeing how the gardening goes this year! Right now, as we start things indoors, we’re also praying for some rain! Fire bans are already in effect (and likely were in effect before the grass fire that started near our place last week), and not a lot of farms were able to do controlled burns.

We are such a tinder box right now!

The Re-Farmer
Gardening beyond the inner yard: potential location changes, and fence plans
A while back, I wrote about two areas we were considering building a permanent, accessible raised bed garden outside the inner yard, and asked for feedback. You can read about that here.

While walking with my daughter this evening, it occurred to me, we could start in a very different location.

I hadn’t considered this area before, because I had something else in might for it.

This is the space.

This is the area in front of the garage, where I’ve been able to keep up with the mowing. As you can see by the tire tracks in the foreground, there is traffic here. The red lines mark where we tend to drive, either as part of our turning radius to get in and out of the garage, or in the access lane to the barn, and the “gate” in the fence beside it. The opening has a chain across it, as well as the renter’s electric fence. I found the remains of the barbed wire gate that used to be there, buried in the tall grass. :-/

This is actually where I was thinking we’d want to build a new fire pit/outdoor cooking area. Our current fire pit is too near trees and a collapsing log building. A wide open space like this would be much safer for a fire pit. With the winds we get, we were thinking of building a sheltering wall of around the fire pit, as well as making sure the ground around the pit was fire proofed with bricks, stone, gravel, sand or even just bare soil. I’d also like to build an outdoor clay oven, and a shelter of some kind, and turn the whole arrangement into an outdoor kitchen. The practical purpose is to have somewhere we can cook if power is lost.

These plans, however, won’t come into fruition for some years yet, and can either be moved, or be integrated into any garden layouts we end up doing. I’ll go further into that in a bit.

The most obvious advantage of this location is that it’s flat and dry. There are also no buried pipes we need to work around, no rough soil to level, and now low spots that gather water in wet years. While the one shed, with the wide open front, is not worth salvaging, it can still be sort of used until it finally collapses, or we take it down. The other shed is worth salvaging, and we can use it for storing garden tools and equipment.

There is that pile that needs to be dealt with. While it has branches on top, those branches are on top of what I was told is a pile of insulation. !! I believe my late brother salvaged it from a demolition job or something, and had plans for it that never came to fruition. We need to clear it out. However, there is enough space that we could probably build a few raised beds around it, even taking into account the dimensions needed for accessibility, until we can figure out what to do with it.

Getting water to it will be a bit harder than the area to the west that I was thinking off, but not as difficult as the area even further west that we were considering. Plus, it’s an area we can see from the house.

We will still need to figure out how to deal with deer, of course. In fact, as I started writing this post, I saw some movement on the security camera, flashing through this area. A look out the door, and I could see two deer standing by the pile. The deer cut through the old hay yard at the fence between the two shacks, as well as going through here to reach the “gate” by the barn. That’s one downside to this space. It’s a higher traffic area, both for humans and animals!

We have broader plans for this part of the outer yard, as we work towards getting rid of most of the fencing around the inner yard, making the inner and outer yards are one, large, usable space.

This is the other area we want to work on, in the short term.

In these photos, I am at the North end of the old hay yard. In fact, we never had hay stacked this far from the barn, and it was used as pasture. When hay wasn’t being store here, this area was used as a corral and/or pasture area. The orange lines in the above photos mark the fence around the area that is functional. The black lines mark a collapsed fence line. I believe this second fence line was added after some trees were planted, to keep the cows away from them. Here and there, I can see the dead remains of trees that look like they were planted in a row, rather than self-sown.

I want to get rid of the fence marked in orange, but that can’t be done until we have something to replace it. In the short term, I want to put temporary fencing where the fallen fence marked in black currently is. It needs to be strong enough to hold back the renter’s cows, but it will eventually be removed, too.

This is an area I want to get worked on.

The blue is a low area that used to be a dugout, and should be filled with water right now. It’s so dry this spring, there isn’t even mud in there. One of these years, I want to hire someone with an excavator to dig it deep enough to be a pond in all but the driest of years. It’ll be a nice water feature, and the intention is to allow bull rushes (aka: cattails) and other aquatic plants to grow, and hopefully have a little haven for other creatures.

Trees would be planted along the property line in the background for privacy from the road, to keep out road dust from vehicles driving by, and as part of a shelter belt from those wicked south and south-easterly winds. The trees that are there now just aren’t enough to shelter from those winds!

The black lines in these photos mark more or less where a permanent fence would go.

As you can see, some clean up needs to be done behind the shed. What the shed hides is the space in front of the barn, where the fence surrounding the outer yard ends, and where there is a collapsing ramp for loading cattle onto a truck.

Shelter belt trees would also be planted along or near these lines, though not all the way to the barn. There would likely be a gate of some kind, there, too. We may shift the whole line so that it lines up with the corner of the barn, instead of lining up with the shed. That decision can be made when we are in a position to start building the fence, which will be a few years from now.

So if we build the permanent fence here, there will be plenty of room to build the outdoor kitchen/fire pit area, if we wanted it to be closer to the future pond site. Or, as mentioned before, we could integrate it in with the garden beds, which I think it more likely to happen.

So, what do you think? Is this a better idea than what was written about here?

Ooh… I just had an idea. That old shed that’s starting to fall apart will eventually need to be cleared out. It could some day be replaced with a greenhouse! Again, no need to level or raise the ground. It’s already flat and dry.

Hmmm. Something to think about!

The Re-Farmer