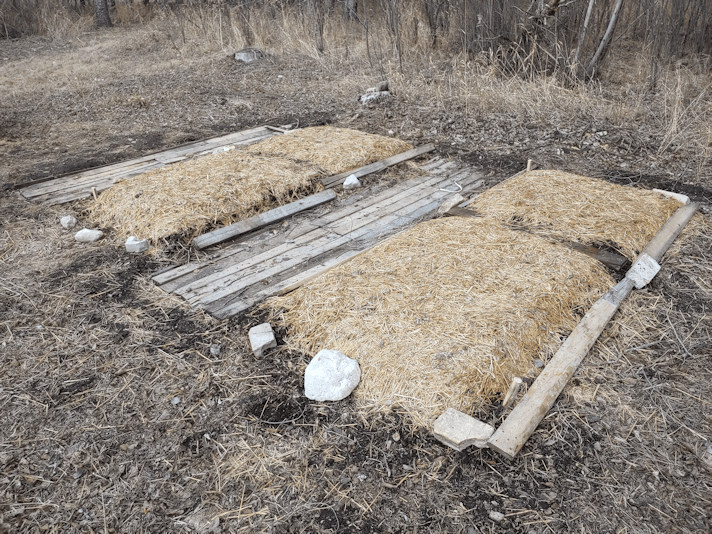
My older daughter and I headed out for a walk, and we decided to go ahead and remove the plastic covering our garlic beds.
When looking up how to plant winter garlic, all the resources said to cover the garlic with a heavy layer of mulch.
What none of them did was mention when to take off the mulch in the spring. I knew the mulch was removed, because all the videos and photos I saw that were taken later in the growing season showed the garlic growing out of bare soil. No mulch in sight. It took some dedicated searching, but I finally found resources that said to remove the mulch after overnight temperatures were consistently above -6C/21F. Looking at our long range forecasts, we seem to be at that point, as overnight temperatures are generally supposed to stay above freezing. We’ve started by just removing the plastic for now, though. We’re supposed to get some much needed rain tomorrow, and have decided to leave the mulch a bit longer. Right now, it’s keeping the beds from drying out, like everything else has done this spring. With so little snow over the winter, and very little precipitation so far this spring, every little bit of moisture is precious.
When I dug these beds out, I moved the soil to one side, put the contents of our compost heap on the bottom, added straw on top, then put the soil back, including the soil that was in what are now paths. I dug those areas down to the gravel, using it to raise the garlic beds higher, then filled the space with scrap wood to create the paths.
I won’t be adding another path on the other side of the third bed, which means I’ll only have what soil I take off the top. I’ll be emptying out our compost heap into the bottom, then add in the mulch from the garlic beds, before putting the soil back. I don’t think it’ll be as high as the other beds, but hopefully we’ll have our loads of garden soil delivered soon, so I’ll be able to top it off with that. The mulch will probably be removed before then, and I’ll just move it onto the paths at first.
We’ve had quite a few warm days. I think I’ll call the company up in the next day or two and see if their soil is thawed out enough to load into their trucks or not.
I might be just a little bit excited about getting that soil! :-D
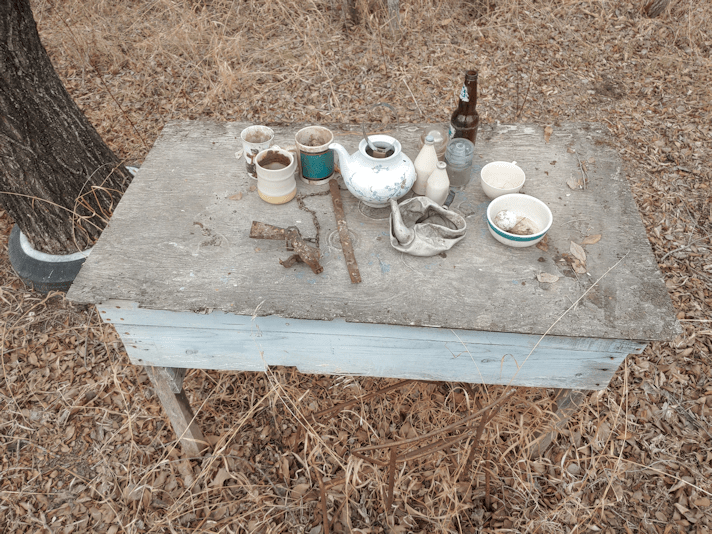
While doing my evening rounds, I figured it was time to get a recent photo of our found object “art” display. ;-)
The table itself was dragged out from under a fallen tree while clearing the edge of the spruce grove. We weren’t able to get at it until the old wood pile was cleaned up. The chair frame (barely visible at the bottom) was found somewhere else in the yard.
My daughter showed me where they found that crushed tea kettle, and now I’m even more perplexed as to why it was there and how it got crushed. Being driven over is not as likely as I thought, since it was in between some trees, where no vehicle – not even an ATV – could fit. The steel trap and the strip of rusted metal beside it was buried in the dirt under where the wood pile used to be, found while clearing out roots to turn the space into garden beds. Quite a few of what’s on there was found while cleaning up that old wood pile! The beer bottle was found along the East fence line along the spruce grove, most likely left there by my late brother. He did like his beer! The group of three cups to the right of the tea pot, plus the two Old Spice bottles, are the newest additions, found by my daughter in the junk pile way out by the plowed field.
While walking around and thinking of the things we need to do, and what we need to do it, I decided to drag something out of one of the sheds. We’d seen some wire mesh fencing rolled up in a corner, and I thought it might be useful for when we build our trellises or something. So I moved a few things to get to the corner, dragged it out and brought it to the house.
I was really surprised. There is a LOT more in there than I thought there was. As far as I have seen, we don’t have any fences made with this wire, so I have no idea why it’s here or what it was used for. Whatever it was for, not much of the roll was used!
This will come in very handy.
This morning, after switching out the memory cards on the trail cams, I took another look at the fence by the gate post, where we want to put in a small people gate. The gate post itself has three holes in the steel where we could potentially attach things. At the moment, the ends of the barbed wire are attached to the post through these holes. We’ll have to put in a new post first, attach the wire to the post, then detach the wire from the gate post. We still need to settle on how wide we want the gate to be, before we know where to put in a post.
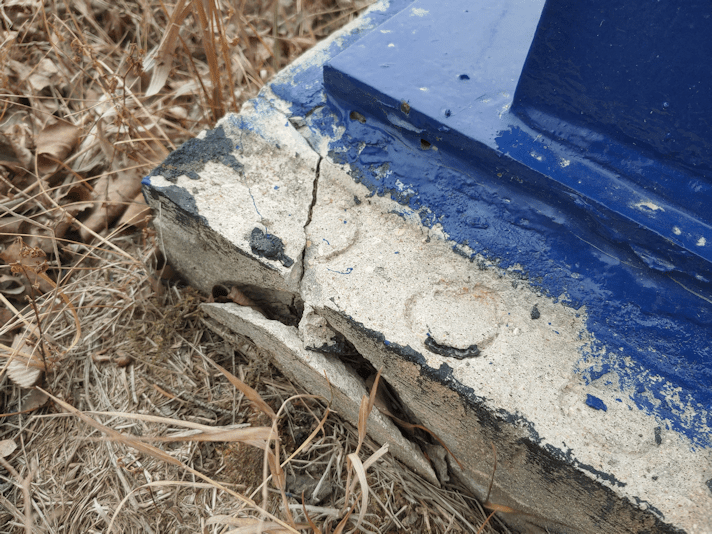
While looking at where the barbed wire was attached to the gate post, I noticed this.
*sigh*
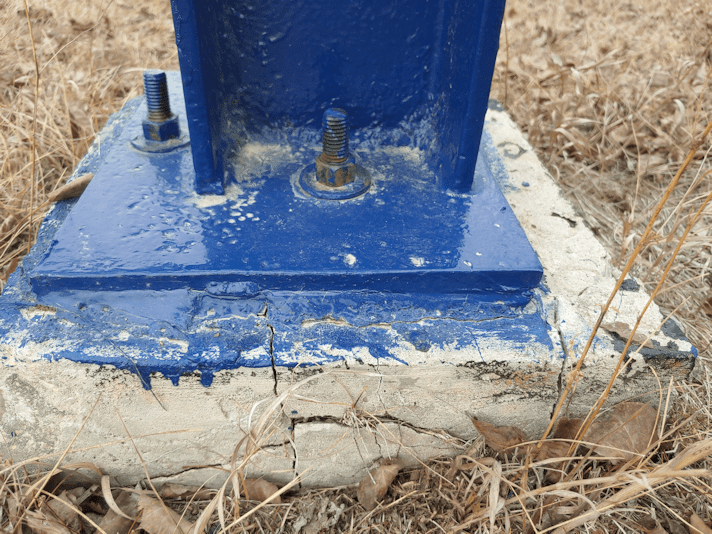
It wasn’t like this in the fall. This is damage from temperature fluctuations over this past winter.
I checked the other sides, and the other gate post. The other gate post has no cracks in the concrete at all, but this one…
These are the two corners of the south facing side.
These are the west and east facing sides.
I don’t know that these can be patched, or if the base needs to be replaced. I recall my brother telling me about a particular type of concrete he wants to use to repair the cracks in the bottom portion of the barn wall, that could probably be used on these cracks. I will bow to his greater knowledge and ingenuity on this one!
Well, this does show which post was responsible for the gate shifting. When we hung the gate back up after repairing our vandal’s damage, it was level. Over the winter, it shifted enough that the pin for the sliding bar could no longer be used. By the end of the winter, however, the gate shifted back, and the pin can be used again. My daughter had thought it was the other gate post that had shifted, but with these cracks, I’d say it was this one!
Since I had to slip through the fence to get pictures on all sides of the gate post’s base, I decided to check out the fence line from that side. New fence posts had been put in until just past the end of the spruce grove. The rest of the fence has been slowly falling down. From the outside, I was able to shift the posts – they are so rotted, they’re broken loose at ground level – so that they were leaning into the yard, rather than towards the road.
The entire stretch of fence is basically toast. I think there might be one fence post that isn’t broken. At one point, I noticed a large tree had fence wire on either side of it. One of the wires had a break repaired. It looks like, when the break was fixed, whoever did it deliberately put the wire on the other side of the tree, so the tree would keep the fence up.
For that spot, at least, it’s working.
I will have to prioritize cleaning up along this fence line, so it can be repaired. We’ll need to pick up more fence posts; I’ve found some scattered all over the place, but I don’t think there are enough, and they’re different sizes, too.
My daughter just popped in and we talked about the fence. If we were just replacing a post or two, we could make do with the old post hole diggers we found around the property. However, there are just too many posts to replace for that to be practical for us. We’re not that able bodied! And since the equipment that we could have used is gone (the Bobcat had a soil auger attachment), or no longer functional (the post pounder my late brother built), we figure it might be better to just hire someone. All we really need is for the posts to be installed. Once they’re in, we can do the rest ourselves. Since this is a permanent fence line, we would also want to not just have posts in dirt, but to install them in such a way that they won’t rot away as quickly.
We also want to move away from barbed wire, so we would probably want to install posts closer together, and use other materials. We might start off with the “rustic look” and use materials on hand to make a simple rail fence, until we can come up with something more durable and permanent – and preferably deer proof!
But first, that section of fence line needs to be cleared. We’ll lose a lot of privacy in the process, but once the corn and sunflowers are grown in, that will suffice for the summer, at least.
As we plan this year’s garden, we are also looking towards the permanent, accessible garden beds we plan to make, both near the house, and in the outer yard.
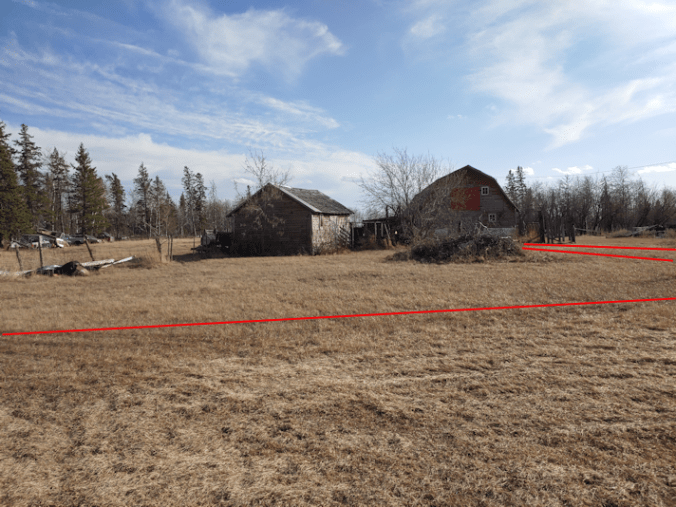
The satellite image I used to plan things out for this year’s gardening was cropped from an image that included the outer yard and beyond. Looking at the image, I figured out the line where the pipes run from the house towards the barn. Back when my parents still had cows, they set up water to the barn, and to a pair of water fountains for the cows. There is also the pipe from the septic tank by the house, to where it drains well away from both house and barn.
I was thinking of putting the permanent raised beds directly south of the house, making sure not to do anything above where the pipes are, in case they some day need to be excavated. Looking at the satellite image, I figured that would require putting everything to the West of the pipes. My sense of perspective is really off when looking at the satellite image, though. This morning, I stood right where the pipes should be, and realized we might not have to do that.
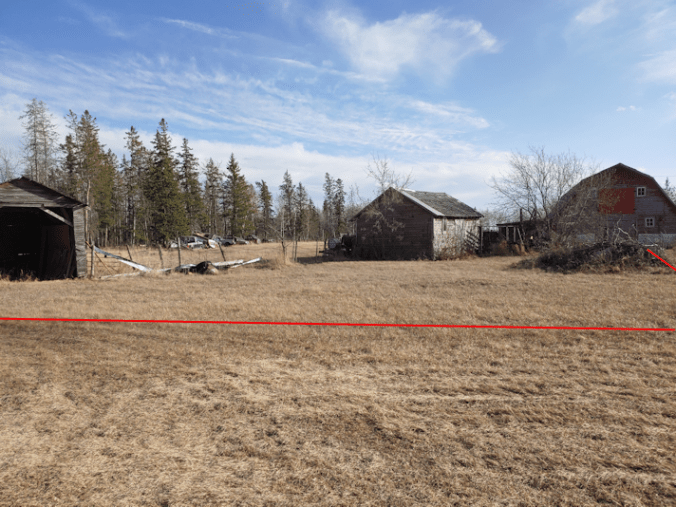
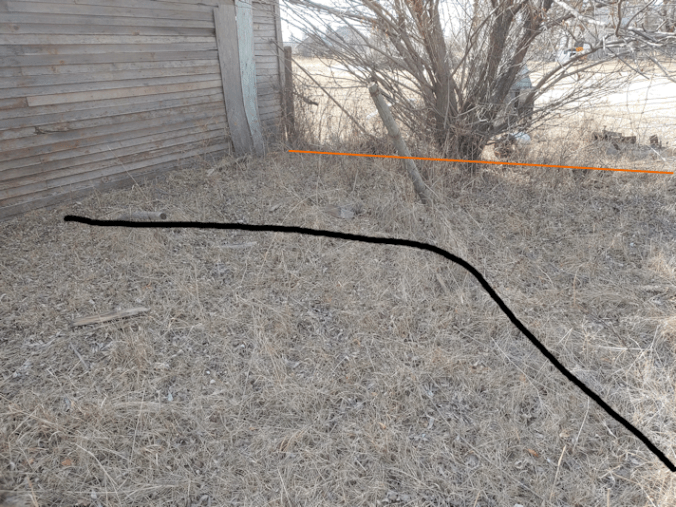
The lines mark approximately where the pipes should be, under my feet and running towards one of the fountains (the little bit of orange you see in the distance). The pipe from the septic tank diverts off to the West (to the right, in the photo). The grey water gets pumped to an outlet hidden by the collapsing log building. The water pipes go to the fountain, to the barn and to a second fountain on the other side of the barn. I have zero memory of how pipe was laid to get to the fountain behind the barn. I only remember the trench from the house towards where the fountain is. I would have to confirm with my brother to get a more exact idea of where the pipes are.
The yellow line going to the left is running through a power pole, holding the electrical lines that power the barn.That is about midway between the barn and the main power pole, so while it looks far away, it’s actually not much past half way to the outer fence, from where I’m standing to take this shot. There is a vehicle gate through the fence, though, so we wouldn’t be going much beyond that post. It still leaves us with a lot of space.
There is a shut off valve at the well pump in the basement, for the water to the barn and fountains. I don’t know how many decades it’s been shut off, but I do know that, at some point, a smaller pressure tank was installed, so even if we did dare turn it on, we don’t have an adequate pressure tank to supply water to the barn and the house at the same time. The fountains are designed to be refill continuously as cows drank the water, so they have no “off” switch, other than the float that keeps them from overflowing. One of the fountains looks to be in pretty good shape and probably still works, but the other – the one in the picture – looks like it’s been bashed around. It used to have a box built around it, but that has been falling apart. I think the renter’s cows have knocked it about.
I have no idea how they are powered, nor how the power to them is turned on and off.
Which is all my roundabout way of saying that, any gardens in this area would be watered from the house, not the barn.
In the distance, you can see the fence for the outer yard. At some point, we want to make sure that is fixed up and cow proof enough to eventually remove many sections of the fences around the inner yard, so it’ll all be one big yard around the house.
One of the reasons why I want to set up in this area is because it’s fairly close to the house, we can see it out our windows, and it would be easy to water it. There’s a tap on the south side of the house, and it’s basically a straight line over the chain link fence to this area.
The area in the above picture is shows quite a bit; I had to set my phone to wide angle to get as much as I did, which is partly why the perspective is so off. It doesn’t show all of this area, though.
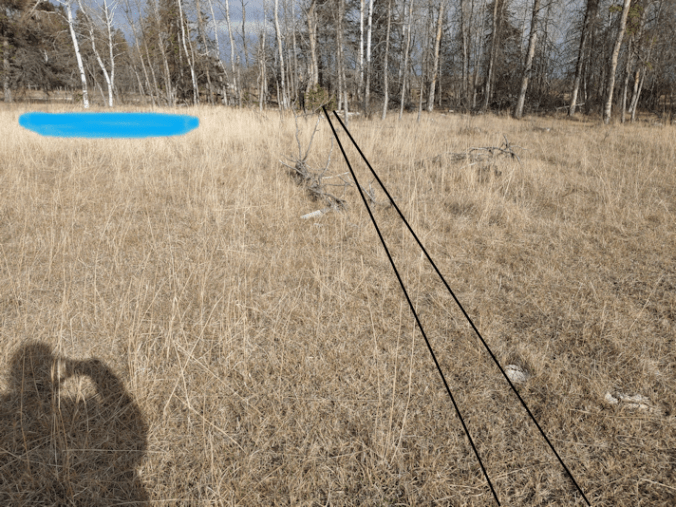
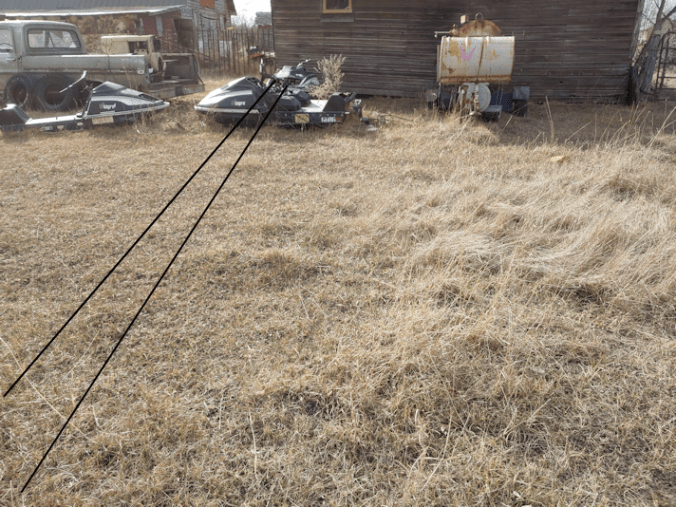
Here is the rest of it.
The yellow lines mark roughly where the pipes run.
I think you can see some of the problems with this area. It’s not just overgrown, but rough, with low patches. That patch of brighter coloured tall grass is basically marsh grass growing in one of the lowest spots. The area needs to be leveled, or at least smoothed out. That antique tractor needs to be moved, and the trees trying to grow through it taken out. There’s an old disk rake beside the tractor, and other miscellaneous parts and pieces floating about. Of course, there’s also that collapsing building. That’s a log building that was the second of three log cabins previous owners had built, with the third one being the old part of the house we’re living in now. Sadly, no effort was made to preserve it. It is full of all sorts of stuff that was “stored” there until the roof collapsed on top of it all.
At least the old chicken coop, behind the tractor, is still pretty solid, though the entire roof structure is slowly sinking.
We wouldn’t need to go as far as the stuff that needs cleaning out until we’re starting to build greenhouses or some such.
So this area is where I was thinking we could set up the permanent garden beds, and maybe even a greenhouse or poly-tunnel, some day.
While walking around the area with my daughter, however, I found out she thought I meant somewhere else.
She thought I meant on this side of the pump shack and old chicken coop. That yellow line, marks where there is a buried cable providing power to the storage building. Which, some day, I’d like to empty of my parents’ stuff and turn back into a workshop. My late brother had a marvelous set up in there, but it’s now stuffed full of my parents’ things that we emptied from the house. It’s so full, that when we finally cleaned out the basements and the old kitchen, we had to use the barn and the “extra” house in the inner yard to store things.
So… not someplace we can put garden beds (though if we cleaned it up, we could use the space between the pump shack and the old chicken coop).
My daughter then suggested this area.
In the foreground is where we need to be able to drive, and you can see the start of what is a very rough driveway to the back gate. It’s the area between that driveway and the shed that she is talking about. We’d have to remove the pile of stuff there, which includes a stack of massive steel doors and what I think are pieces of steel door frames. There are also what look like steel balcony rails. They’re quite large and heavy, too.
This area would be easier to clean up. It’s rough, but not as rough as parts of the other area. The shed does create some shade, but most of the area gets full sunlight. The main problems are that this is getting pretty far from the house, we can’t see if from the house, and it’ll be harder to get water to it.
Unless we can get the old well and manual pump in the pump shack going again. Which we want to do, anyhow, so that we have a back up water supply if we ever lose power.
The yellow in this photo marks the “driveway” to the back gate, with a turn off that leads to a gate in the outer fence line. Someone drove through here when it was muddy, leaving deep ruts that are still a problem. We will be cleaning up the dead and dying trees in that shelter belt row there, and will be planting nut trees in the area closer to the fence, and behind where that pile of branches is – one of several piles we need to get chipped.
This photo shows where the drive leads to the gate in the outer fence. It’s hard to see the fence line, but in the corner there is roughly where we would like to someday build a small, barrier free house for my husband and I, and the girls will get the main house to themselves. That is many years in the future, however, and may never happen. Meanwhile, we could start putting garden beds in the foreground area.
Also, that’s a cat path cutting through the grass! :-D
For these permanent garden beds we are planning, they will be designed for accessibility. That means the beds themselves will be about 3-4 ft high (roughly a meter) and no more than 4 feet (1.2m) wide. The lengths are flexible, but the paths in between must be at least 4 ft wide as well. This is enough room for a walker or wheelchair to go through, and be able to turn around. Which means the paths also have to be level and solid for wheels. Handily, that will also make it easier to move around with wheel barrows or wagons, too. The space needed for the paths means that everything will be pretty spread out, compared to your typical raised bed garden layout. Space, we have. Functional space… that’s a completely different issue.
If we can get the old well going again, that solves a lot of problems. The old chicken coop used to be a “summer kitchen” before my parents bought the property from a family member. It had a wood burning cook stove and was used to do the canning and cooking, without over heating the house in the summer. If the old well can be fixed, it would be worthwhile to rebuild the pump shack, and I’d love to turn it into a summer kitchen. Maybe not with a wood burning stove (that would increase the property insurance rates for my brother, significantly), but I like the idea of having a place to cook outside of the house, that’s still sheltered.
A moot point, if we can’t get the well going. We will test it out this spring, once we can move things around in there to access the pump again.
Okay. These are our options.
There’s the area between the house and the barn.
Pluses:
Southern exposure: gets full sun all year.
Easy to get water to by running the hose straight from the house.
Can be seen from the house.
Easy to get to from the house. It’s straight from the main doors.
Minuses:
No wind protection from the south. We’ve found the southern winds to be much more of a problem than any other directions.
Must work around pipes running underground.
The ground is very rough and uneven in parts. Will need to be smoothed and leveled. We’d likely have to hire someone with heavy equipment to get the area to the West of the pipes leveled.
Then there’s the area by the storage shed.
Pluses:
Relatively easier to clean up. Does not need as much leveling.
Does have some shade, but most of the area gets full sun, all year.
More potential space, if we decide to continue adding beds along the “driveway” to the secondary gate.
Minuses:
Further from the house.
Can’t be seen from the house.
Harder to get water to (unless the old well can be fixed).
No protection from winds from both South and North.
With vehicle access needed to the storage shed and gates, there is less flexibility in space.
Personally, I’m leaning towards the space I can see from the house, but my daughter thinks the other area would be better.
What do you think? Can you think of other pluses and minuses for either area? Any suggestions?
Well, it was time to throw in the towel on some of our seed starts.
The bunching onions in the small fish tank never recovered from the cats being able to get at them, there were mold issues, and watering problems. At least with those, we still had seeds left and could start more.
The shallots (in the background, out of focus) are another loss.
This is one of the potential problems of using whatever was on hand. We started them in the cardboard egg cartons, but had no way to put a tray of any kind under them, where we could water them from below. Even though we did take them out and give them a thorough watering from below, it wasn’t enough. I regularly sprayed them with water, trying to get the cartons themselves wetter, but again, it wasn’t enough. The shallots are a complete loss, and I have no more seeds to try again. So we’ll be down from four types of onions to three. :-( Unless I find and buy sets later on.
In the future, I would not use the cardboard egg cartons to start seeds in again, unless I were able to keep them in a tray of some kind, and keep the cardboard wet all the time. In spite or watering them every evening, when I pulled them out of their makeshift greenhouses this morning, they were pretty much bone dry. So, they went into the compost heap this morning. :-(
The little tank is now empty, and the tomatoes and bunching onions have been shifted around in the big tank. We are seeing more and more seedlings pop up, though there are still a couple of cups that have no seedlings at all. We’re not after a lot of tomato plants, but I am hoping for more of the Red Baron onion seeds to germinate. At least the bulb onions seem to be doing all right. From what I’ve read, I should be trimming them a few inches, about now.
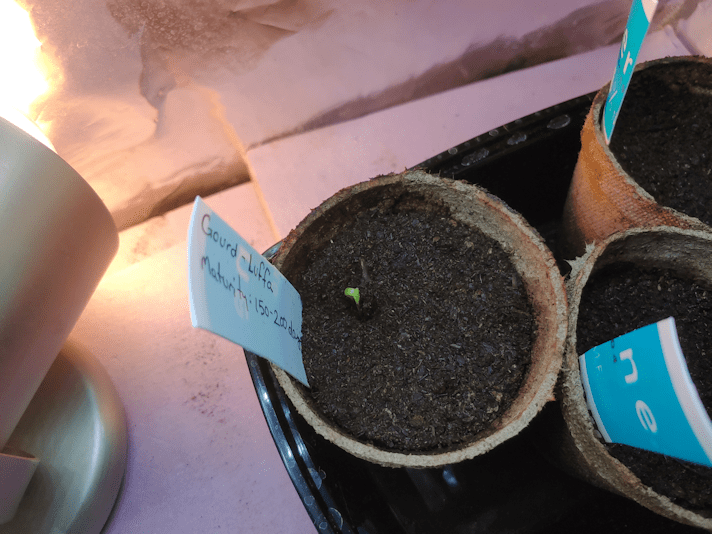
Yesterday, I picked up some Jiffy pots. I’ve been looking things up about growing luffas, which have a very long growing season to reach that sponge stage I’m after. I’ve decided I will start a few seeds of those in the next few days, and set them up in the little tank. With the screen I found in one of the sheds as a “lid”, we’ve solved the cat problem, so I can raise the level closer to the light, too. From what I’ve been reading/watching, luffa doesn’t like to be transplanted (more so than other gourd types), so using pots which can be buried should help reduce transplant stress. With the size the pots are, I should be able to still double cup them with the red solo cups, which would allow me to water them from below.
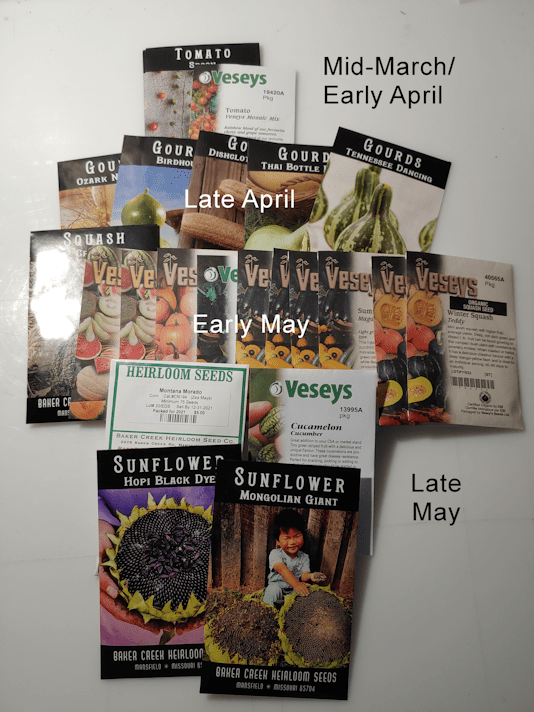
So that’s a goal for the next few days, and I will also be preparing to start the other seeds that need to be starting in April.
Meanwhile, as I do my morning rounds, I’ve been studying the different areas we intend to garden in this year.
This strip has never had a garden in it. You can see where the ground starts to get rough on the left, where the old garden started. That rough part is from the crappy plow job that was done before we moved here.
This stretch will have alternating blocks of three varieties of Peaches ‘n Cream corn and two varieties of sunflowers.
In years where we had more snow, where I’m standing to take this picture had a large puddle of water from melted snow. This year, there is only that whitish patch you can see on the left foreground. That’s ice from the small amount of water accumulated this spring. This is something to keep in mind when we are planting food trees here, as we don’t want saplings being drowned out in the spring. So part of our goal when growing here is leveling things out a bit more.
The further out we go, however, the drier it gets. By the time we reach the corner, past the low hanging spruce branches I will have to prune away, it’s very dry. Weeds and grass barely grow there. Which means that, when we have corn growing there, we are going to have to find ways to keep them well watered. This entire area is going to be a challenge to water, simply because it’s so far from the house.
This time of the morning is the only time this area is in shade. It gets full sun for most of the day, and also gets incredibly hot. To the left of where the corn and sunflowers will be planted is where we will be having beds of melons and gourds. They’ll get the heat they need (especially if we have summer like last year!). We just have to make sure they get the water they’ll need. The winter squash will also be more on this side, while the summer squash will be planted closer to the house, where they will be closer for continual harvesting over the summer.
We’re also going to have to work on keeping the deer out. There are a number of options we can try. If we make use of several of them together, it should work out.
The fence line the trees on the right are hiding is pretty much toast. New posts had been put in along the spruce grove, which I’m guessing my late brother did, but he never got to finish the job. The remaining stretch of fence has rotting fence posts, some of which are held up by nothing but the barbed wire. My late brother had a soil auger attachment for the Bobcat, and we still have the post pounder he built, but the Bobcat and its accessories are with our vandal now, and the post pounder had been sitting, exposed to the elements and covered in junk, for so many years, there’s lichen growing on the belts. So if we’re going to be putting in new fence posts, we’re going to have to do it the old fashioned way. I’ve found a couple of post hole diggers that we can try out. One of them is a very different design, and I’m curious as to how it would be used.
Meanwhile, that entire strip along the West fence line needs to be cleaned up. I might have to take the remains of the fence out entirely. The North fence line, which runs behind the lilac hedge, is in even worse shape, but at least the lilacs are there to provide some privacy and a bit of security. Once the strip along the West fence line is cleared out, it’ll be pretty open.
It would be nice to not need a fence there at all.
Since these fences mark the property lines at the roads, these are areas where we can consider putting in something very permanent for fencing. Something along the lines of a hedgerow, perhaps, or a “palisade” type of wall that would give both privacy, and keep the deer out! The corner at the far end is one of the places they regularly jump the fence (well… what’s left of the fence…). The road on the North side is very busy (as such things are in this area), and in the summer, a LOT of dust gets kicked up. On a windless day, it just hangs in the air like a fog, slowly drifting across the property, for a surprisingly long time. The lilac hedge helps keep that out of the garden area quite a bit, so that’s another thing to keep in mind as we work on the area. Dust control!
When it comes to gardening in this area, it’s all temporary. If things go well, it’ll just be for one year, and then next year, we’ll be able to start planting food trees here, while permanent garden beds get placed to the south of the house. The area we intend for permanent beds is very rough, though. It might be easiest to clear it as much as we can, then get someone in to plow and smooth it out as much as possible. We’ll be building accessible raised beds there, so it’s the leveling that’s more important to our needs. It would be good if we could get the old farm equipment moved, and the collapsing building dismantled and cleared away, but that might be just too much for this year!
We’ve got a lot of work to get done! Last year, with first the heavy rains, then the excessive heat, we didn’t get anywhere near as much done as I wanted. Hopefully, this summer will be not be as extreme.
So much of what we want to do depends on the weather!
I’m really glad we were able to plug power back into the cat’s house, when we couldn’t do it through the sun room any more. Temperatures have dropped, and while we are reaching above freezing during the day, it’s getting quite a bit colder overnight.
Since it’s too cold to continue with the clean up, when I was finishing my morning rounds, I decided to move the poles closer to the house and the garden area, so they will be handy when it’s time to start building the trellises and supports.
This gave me the opportunity to somewhat sort them by size. While I deliberately chose our winter squash to be smaller, shorter season, varieties, they will still need very sturdy supports, as will the gourds. While all of these will be temporary, they still need to be strong enough to hold a fair bit of way, and sturdy enough to not blow over in high winds.
We haven’t even decided on what form these supports will take, yet! But at least we’ll have ample materials, and can figure things out as we go.
A while back, I used a satellite image to plan where we could plant our garden this year.
Getting a gasp of dimensions was difficult on this, though, but at least it could be used as a guide. Things need to be pretty flexible at this point, anyhow.
With the snow clearing away, we have been getting into the areas and realized that there was a lot more room to the West of the existing beds than there appeared to be, in the satellite image.
Here is the areas with the existing beds where we had planted squash last year.
The perspective makes it look a bit strange.
Two years ago, the area where the green marked beds are was mulched with straw, then covered with black … tarps? Possibly landscaping fabric? Whatever it was we salvaged when cleaning up the old wood pile. That log marks one of the corners of the area we mulched. This made a HUGE difference in the workability of the soil when we planted last year, as well as killing off a lot of the grass and weeds. This area was no longer hard as concrete, and could actually be worked, though we did still dig out pockets to fill with a soil mix that we could transplant into, because of all the rocks.
The long bed in the back has bamboo poles marking where I’d stuck the seed potatoes found last fall that, for some reason, didn’t sprout but still looked completely fresh. There is one more potato than I had poles to mark the spots with. :-D When the garden was prepped for winter, that bed was actually widened a bit, so even if the potatoes do miraculously start to grow, there is room for something in front. Which will probably not be use this year, but it’s an option. If we are unable to get rid of that row of self-sown trees, then we will likely create a series of long, narrower, bed with trellises on the North side, for any climbing plants we decide to grow in the future.
Then there are the three beds down the middle, which used to be pumpkin mounds, with longer beds on either side. The three beds down the middle are all the about same size, while the two on either end are almost exactly the same size as each other. With our current plan, the three smaller beds in the middle will have our three varieties of spinach, while the larger beds on either side will have two of our varieties of onions, which in turn will probably be interplanted with other things. Possible kale and kholrabi, as the onions will help protect them from insects. We shall see.
In the back of the photo is a purple block which is where we are planning to plant the Montana Morado corn. That leaves a surprisingly large space (in orange) that didn’t get marked on the satellite image, where we can plant something else. Perhaps one of the three bush bean varieties can go there.
After we dig out the huge rock that’s half buried in there. When this area was plowed last, the person who did it went around the rock, creating a hill in one area, and a low spot in the other. :-/ This is one of the roughest areas of the entire old garden space. Even where the Montana Morado corn will be planted in ridiculously rough.
As you can see, there is a substantial area in shadow, so there is quite a bit of space that can only have shade loving plants. Most of what we have requires full sun, and even the cool weather plants still need more sun than those areas get. An unplanned consequence of my parents crowding more and more trees into what used to be part of the garden.
Still, it is here that we are intending to make permanent, accessible, raised bed gardens. The plots we have now do not have the dimensions needed for that (which must include the paths as well as the raised beds), so even here, everything we do is temporary. One of the reasons this area was chosen for permanent gardening is its nearness to a water source, and to the house itself. Accessible raised beds will also be high enough to address the shadow problem, at least somewhat.
Now to the other side…
In the foreground is one of the old squash beds marked off in the earlier photo. The smaller two beds are where we had potatoes last year, and where we hope to plant the shallots and bunching onions, if the seedlings survive. Those two beds are a bit under 4″x8″ in size (or a little more than 1m x 2m), to give you some perspective.
All the orange area will be for new garden beds. Most of it was part of the old garden that had been plowed before we moved here. Of that space, the only area that has seen and mulching was where we planted the sunflowers. As with the squash, we dug holes and filled them with a soil mix, in which we planted the sunflowers, because of how hard and full of rocks the soil is. As we were able, we added grass clippings around the seedlings for mulch.
The furthest we’d planted the sunflowers are almost to the very end of the row of crab apple trees. Again, for perspective, we could just barely reach those ones with 260′ of garden hose – almost 80 meters.
Way in the back, at the corner, there is a large L shape inside the orange area that has never had any garden in it. We will be working this area for gardening for the first time. I would estimate the orange area, along the edge on the right, near the old potato beds, to be probably 250′, or about 76 meters, long. The far end, along the fence line, is probably 300’/91m.
Funny. It sounds so much bigger when I write that down. When I’m standing in the middle of it, remembering the garden of my childhood, it feels very… small.
The orange area gets full sun, up until you get close to the crab apple trees that are beyond the right edge of the photo. It gets very hot and dry, so we will have our work cut out for us to grow the corn, sunflowers, beans, peas, melons, radishes, summer and winter squash, and gourds we intend to plant there. Getting water that far out from the house is going to be the biggest challenge.
Part of the goal in breaking soil here is for the future planting of nut trees. Many varieties do very well in poor conditions, but not all. Any improvement of the soil will give them a better chance of survival, and when we’re talking about something that may not produce for at least ten years, any losses have much longer term effects.
The orange area closest to the green areas may become part of the permanent garden beds on this side of the house, but that has yet to be determined. Our plans still need to be very flexible at this point.
After taking these photos this morning, I also took photos of the spruce grove areas we need to work on.
Here are out garlic beds. Another bed will be created to the left, near the current compost ring location. There will likely be beets grown there.
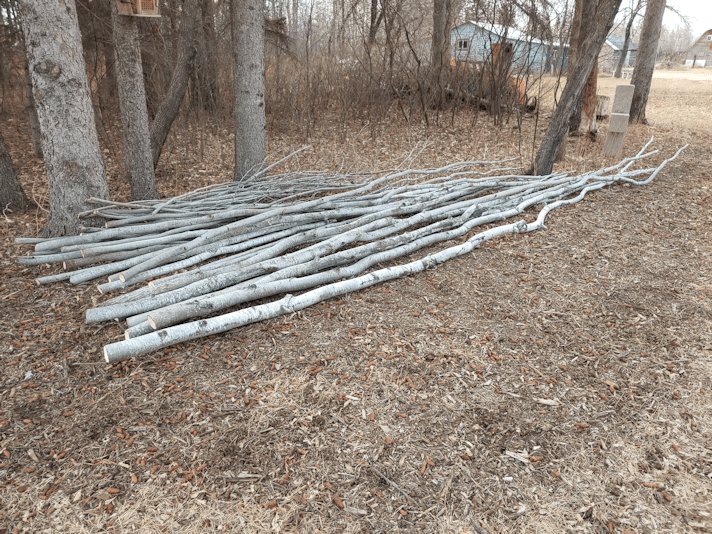
The mess of little trees beyond the garlic beds all need to be cleared out. The ones with whitish trunks are poplar trees, and there are many, many, MANY more of them growing towards the garage, and then down towards the road. They also keep trying to come up in the yard. I had not realized how invasive they could be! These will become the materials to build trellises and arbors for our climbing plants.
The darker colours stems that you see are mostly cherry, from a parent plan from Poland. Something we saw happen since we’ve moved here, and probably happens often, is that the cherries start to bloom quite early in the spring, as soon as it warms up. This, however, is Canada, not Poland, and they got hit by a late frost. This killed off the trees that had bloomed. New shoots, however, come up from the base. So what we’ve got is a lot of dead cherry trees, surrounded by immature new growth.
Cherry trees, we’ve learned, also spread by their roots. I had to deal with that while clearing out the area under the old wood pile, so we could plant carrots, beets and parsley here, last year.
So we’ve decided all of that is going to be cleaned out, as far back as we can. It’s a huge area, and the clean up will likely be done in stages over several years. We don’t want to take too long on that, though, because this is where we would like to plant berry bushes and fruit trees.
Then there’s this area…
Every red line marks a dead spruce tree. The two on the left, by the junk pile, are the ones closest to the house that we were already looking to hire someone to take down for us, along with the dead spruce by the garage and outhouse. Counting that one, there’s a dozen dead spruces that need to be taken down, before they fall down, in this area. There are also plenty of fallen trees that need to be cleaned up, along with the junk pile and the spirea (which is hiding at least one, maybe two, fallen trees). There are Saskatoon bushes beyond the junk pile that we want to clean up around, including removing some chokecherries, which will provide them with the air flow and sunshine they need to thrive. So far, none of these has shown signs of disease.
In the middle of the photo, tucked into where there are so many dead trees, is where we planned to plant the mulberry tree that’s set to arrive later in the spring, in time for planting in our zone. We chose this location, because it’s a zone 4 tree and needs the protection the other trees will provide (the ones still alive, anyhow), and still get a lot of sunlight. With so many dead trees to take down first, however, I’m almost thinking we might want to put it in a pot until next year!
In the foreground, behind the compost ring, is where we intend to build the cordwood outdoor bathroom. I had been upset that we were not able to at least get started on leveling a foundation for it last year, due mostly to the excessive heat, but now that I’ve realized how many dead trees there are, I’m glad it didn’t happen. Any one of those trees could come down in a storm or high winds. Can you imagine doing all that work to build a cordwood shed, only to have a tree fall on it?
Oh, and along with these, I was able to make my way through the spruce grove near the fence line and take a closer look. I found five more dead trees. Those ones are not as urgent to take down, though. It’s the ones near the house and garage that have priority. Of course, there are the trees that have already fallen that need to be cleaned out, too. Focus that far out, however, will be on the south end of the spruce grove, along the driveway, where there are almost no spruces left. Lots of little poplars to take out, and probably some larger ones, too, and lots of underbrush, fallen trees and dead branches to clear away. Only then can we figure out if the crab apple trees my mother planted in there can be salvaged. They’re not as overshadowed as the other ones I found near the maple grove, but last spring, I only saw one branch bloom, and no apples produced. I think I would rather take those out and transplant more spruces in that area, and save the fruit trees for better locations. There are a number of little, self-sown spruce trees that I would rather transplant than get rid of. I’ve had to kill enough trees while cleaning up, already, and will have to do more. If transplanting some is an option, I will be happy to take it!
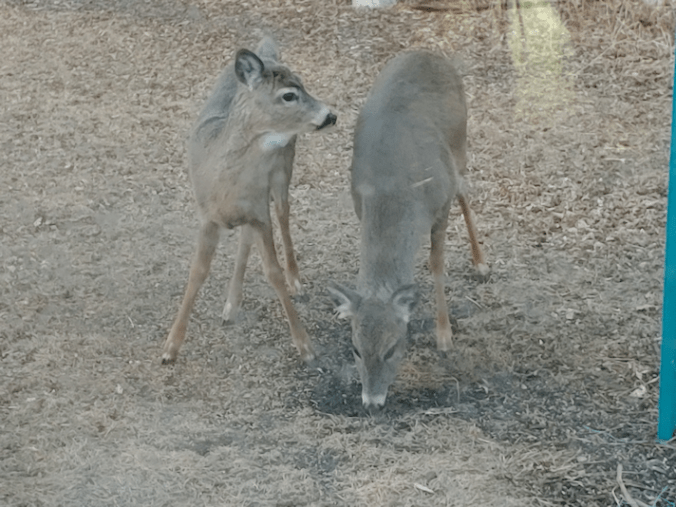
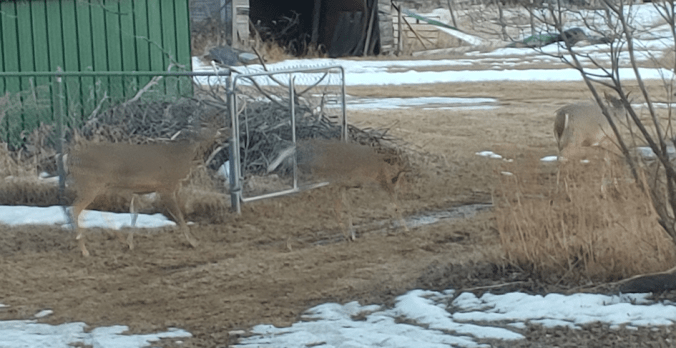
With the temperatures staying warmer, and the days getting longer, I’ve been starting to bring back my evening rounds. I was all ready to head out the door yesterday evening, when I saw three deer, running and jumping through the outer yard, from the direction of the barn!
Then they stopped and seemed hesitant.
I had a suspicion as to why.
I was right.
There were other deer!
These two were already hanging out at the feeding station.
I was able to open the inner door without startling them, so I could see them better. I could tell they saw me and were watching me, but they didn’t run off. So awesome!
The three made their way into the inner yard, but eventually left rather than joining the two at the feeding station.
There they go, all in a row! :-D
I was losing light fast, so I took the chance and went outside. They actually watched me for a bit, before running off.
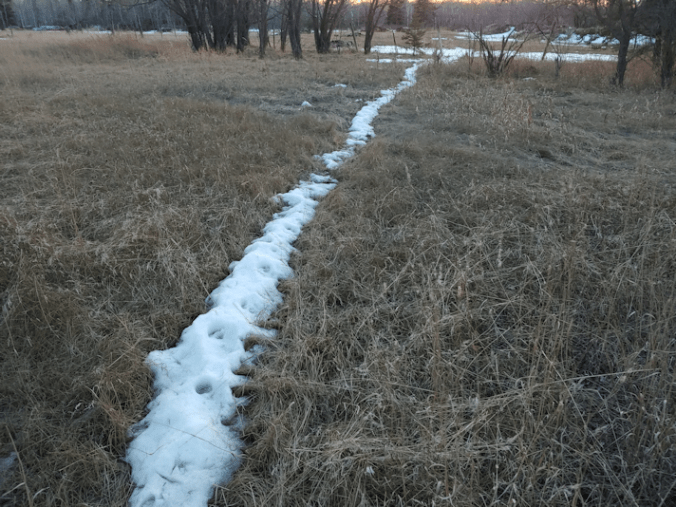
As I was checking things out in the outer yard, and making my way to the back gate, I had to pause to take these photos.
I was in the path I mow to the back gate, half way between the fences for the inner and outer yards. The line of snow is what was hard packed from so many hooves, it left their mark in snow that’s taking longer to melt away.
Last winter, they seemed to prefer to jump the gate by the old garden area, where it is more open, but this winter, they definitely seemed to prefer going through the maple grove, then jumping the fence near the massive old willow.
Every time I see them making their way through the trees, or along the spruce grove, it makes me glad we were able to clear the trees out so much. It’s not only much easier and more pleasant for us to be able to go through the trees, but the deer prefer it, too!
While doing my rounds this morning, my daughter joined me as I took a closer look into the spruce grove, where we have SO much clearing to do. I had earlier identified 6 dead spruce trees that we’d like to cut down, on top of the 3 that are closer to buildings that we plan to hire someone to take down. We were able to go further into the grove and look more closely.
It’s not 9 dead trees. It’s a full dozen.
And that doesn’t include any others further into the grove, but just along the Western edge, where we need to work on cleaning things out first. It also doesn’t count the dead trees that have already fallen, and are either on the ground, or leaning on other trees, that need to be cleared away.
Looking in the area behind the garlic beds, it’s almost all little poplars, and those cherry trees that aren’t right for our climate. They bloom beautifully, but produce almost no cherries. They’re all relatively small, so I will be taking them right out. The little bendy poplars will be used to build trellises and arches, among other things. The cherries… they don’t look all that good. They have been killed off by late frosts, then regrowing, so often, none of them are particularly big, and are growing in clumps around whatever parent plant had died off in the middle. They might just end up being really nice wood to cook over.
The size of this area that has no large trees in it is pretty significant. Any spruces that used to be there have died off long ago – I expect to uncover more stumps as we clear back there. It also gets quite a bit of sunlight, so this will be a good area to plant some of the food trees and bushes we are planning on.
Once it’s all cleaned up and cleared away, I expect to see a lot more deer cutting through the spruce grove, rather than skirting around it!
As for the additional trees we identified as being dead and in need of removal, I noticed a couple of groups of three. Depending on the condition of the stumps, they might work well to use as the supports, to make a table with a bend on each side. We are wanting to create pleasant little seating areas throughout, where we can sit and enjoy the wild roses and red barked dogwood that we plan to leave as undergrowth, along with the Saskatoons we are finding (we’ll be taking out the chokecherries, though), and the other trees and bushes we intend to slowly plant in the area.
Like the mulberry tree that will be shipped late in the spring, so we’re going to need to get those dead trees out sooner, rather than later!
Plus, in other areas of the grove, we intend to transplant more spruce trees, into the spruce grove!
This whole area is going to be completely transformed over the next few years.
If all goes well, it will be a haven for both humans and deer. :-)
As the temperatures have gotten warmer and the snow melts away, I’ve been able to expand my morning rounds. Today, I was able to reach the barn and a shed near it, for the first time in months.
I had a purpose in mind.
One of the things we have found all over the place, beside mirrors and tires, are windows. All kinds of windows.
If there are windows, could there be… ??
… yes there could!
I found a fairly large screen at first, then found at least three like this one. It has an aluminum frame, and a very strong metal mesh.
This may work as a “lid” for the small fish tank greenhouse. It’s much bigger than the tank itself, but if I can secure it safely, I should be able to use it, even with the amount of overlap there will be at the front and sides. I can remove the light fixture from under the lid of the tank, and attach it to the underside of the screen – unlike the light on the big tank, this one can’t handle the weight of even one of our skinny cats on it. There is even a space I can use for the power cord from the light.
The screen itself is probably strong enough to hold even Dah Boy and Cheddar’s weights! As long as no jumping is involved. They don’t tend to try and get on the tanks in general, so I’m not too concerned about them.
The screen has been scrubbed and sanitized and is now set aside to dry. I have time to figure out what I can use to secure it to the tank, while still being able to open it easily to get at the seedlings inside.
Here’s hoping it works!!
Also, there are a LOT of old windows in the barn and shed. Some are broken, but others are still intact. I took a closer look at some in the barn. I am continually amazed by one group of reclaimed windows. They are so filthy with years of dust and grit, I actually didn’t realize they were windows until my brother told me that’s what they were! While some sort of canvas was draped over the middle one, to keep them from touching each other, they are thoroughly stuck to each other at the ends. I estimate them to be about 7 ft by almost 5 ft, and they are at least double pane. Possibly triple. There are a couple of others about 4 ft square that are double pane.
I am sure we will be able to find some use for these. Especially the big ones, if we can manage to separate them without breaking them. I see potential cold frames and mini greenhouses in them! :-)
Today has been one of those days of getting things done that were also enjoyable. Like a morning spent converting feed bags into grow bags while watching/listening to videos about crossbow safety. More listening than watching, since I was, after all, hand stitching the bag bottoms into shape. :-D
I also got to enjoy watching deer through my window, making their way to the feeding station.
I saw a couple, earlier, but that early in the day, our East facing living room window is so full of reflections, I can’t get any good shots, but I could get some shots with my phone through the North window. At one point, I was seeing 4 deer, and I think there was a fifth hidden away in the maple grove.
I made a quick trip into town to refill a couple of our 18.9L water bottles, then pick up prescription refills. I timed it so that I could hit the post office on the way home. My husband had been expecting a parcel all week, and today we found out why it hadn’t come in earlier. The padded envelope it came in was sealed in a plastic bag with “apologies from Canada Post” on it. I had no idea what my husband had ordered, so seeing oil stains on the package was a bit alarming.
It turned out he’d ordered honing oil, and the bottle leaked! No harm done, thankfully. :-)
I was excited to see a catalogue I’d ordered had arrived. This is from a company I had included in my list of cold climate seeds sources, which also included nurseries. Whiffletree Farm and Nursery. They specialize in “Cold hardy, disease resistant, fruit trees, shrubs, vines and canes.”. I love how the back page includes phone numbers, a physical address (in Ontario), a map, plus their latitude and longitude!
How very… rural Canadian. :-D
I actually went through the Irrigation Instructions insert, first. They’ve got add on kits designed for new plantings, mature plantings and tree plantings. I found it a lot more informative, both textually and visually, that most of the kit sources I’ve been looking at. Though we don’t plan to plant our fruit and nut trees for a while, yet, where we are extending the garden to this year is well away from the house, and an irrigation system would be well worth the investment, even if we have to McGyver something cheap for the first couple of years.
As for the catalogue itself, I was very impressed.
First off, it’s just plain beautiful. It is printed on the heaviest paper of any catalogue I’ve seen. More than sturdy enough to withstand cats clambering all over it, demanding my undivided attention! Even how the photographs are lined up with the write ups is the best I’ve seen. There is a also LOT of extra information included.
The range of products they have available is amazing. After just a few pages, I started over again with a highlight marker, marking off everything that was Zone 2, Zone 3 or Zones 2/3. I didn’t bother marking Zones 3/4 or higher, because there were SO MANY Zone 2 and 3 choices, it wasn’t necessary. The only exception I made was for a mulberry tree that was Zone 3/4.
Did I mention how informative it is?
I learned something new that really caught my attention. There is a section on Buffaloberries, Peashrubs and Autumn Olives.
I was curious about what Peashrubs were, but it turns out that we already have some! They are caraganas! In our clean up, I’ve had to cut away and cut back a lot of caraganas that were either dying or overtaking other trees and shrubs. It’s been a balancing act between clearing them away and keeping them.
Though I am familiar with the shrub, I discovered that the seed pods are actually edible! At least the Siberian Peashrub (caragana arborescens) are. They have two other varieties. The Siberian variety is “A multi-stemmed upright growing shrub covered with delicate yellow flowers in spring, followed by small edible seedpods which can be eaten as a vegetable. By late summer the dried seedpods snap open, dropping the seeds which are 36% protein and make good chicken feed. So it is sometimes planted in poultry yards.”
Who knew?
I also learned that they are good nitrogen fixers, and wind breaks. We should see if we can figure out what variety we have here!
The catalogue also displays an excellent sense of humour. As an example, in the section on edible lilies and high bush cranberries, there is this write up for the Common Snowball.
“Okay, we admit it – this plant is neither edible nor medicinal to the best of our knowledge. In fact, it produces no fruit at all, not even for the birds. Our only excuse for offering it is for the nostalgic memories is evokes for many folks. Every year in early summer, these old-fashioned, carefree bushes become covered with fleecy, white pompoms. The ‘snowball’ name is visually very fitting, but that’s not all. Perhaps we should market it as a weather prognostic – according to a local, time-honoured adage, there is always a brief, unseasonably cool spell when the snowball bush begins to bloom. Like many weather maxims, you can count on it, it always holds true – except when it doesn’t!”
Ya gotta love it! :-D
While we are not in a position to start ordering food trees for this year, we are shooting to do so as soon as possible, given how long it can take for trees to mature enough to start producing fruit. And let’s face it; at my age, pretty much any fruit or nut tree we plant is for our daughters and future generations, because my husband and I will probably be long gone by the time some of them reach maturity!
There is so much information in this catalogue, we can use it for planning purposes. Especially when it comes to their orchard growing equipment and supplies.
With that in mind, these are some of the things that interest us, that also grow in Zones 2 or 3.
Apples: there are many varieties suitable for our zone, including larger eating apples, edible crab apples and cider apples. They have columnar varieties, dwarf varieties and varieties that are good for espalier training. When it comes to apples, they are not something we tend to eat a lot of, on their own, but we would be using them for things like apple cider vinegar, hard apple cider, or freezing them to use for baking later on. We will have to take into consideration that we need to cut down a lot of our crab apple trees due to fungal disease. It may be worthwhile to get rid of the diseased trees, then wait several years before planting new varieties, or planting new varieties in locations well away from where the diseased trees are.
Plums: This is one of those things that we almost never eat, but if we had them, we would eat them. We do have plum trees, but they are not an edible variety – more stone than fruit – that my late father used to make wine, but having larger, fleshier plums that can be eaten fresh would be really nice.
Pears: I remember we had a pear tree when I was a child. It was a variety that produced small, hard fruit that needed to be exposed to frost before they could be eaten. They are another type of fruit we rarely buy, mostly for budgetary reasons, but would eat more of if we had our own trees, so having cold hardy varieties that can be eaten fresh would be enjoyed, and this catalogue has several such varieties that can grow in our zone.
Cherries: the variety of cherry are from a tree from Poland, which has a warmer climate than we do. They bloom wonderfully, but in the time we’ve been here, produce almost no fruit. Their bloom time doesn’t match when the pollinators come out. So getting a variety or two that is good for our zone is something I would like. They do tend to spread through their roots, though, and can become invasive, so we would have to carefully plan where they would go. Some varieties make good hedge trees, wind breaks and privacy screens, so that’s an option, too.
Nuts: there are only two types of nuts suitable for our zone; several varieties of hazelnuts, and butternuts. We are still looking into planting other varieties. They may not have a long enough season to produce edible nuts, but the trees themselves are an investment.
Rugosa Roses: we already have wild roses growing in the spruce grove that we will be encouraging, as other types of underbrush will be cleared away, but these varieties are specially noted for their large hips, and high nutrient contents. These are for the “apothacary” plants we will also be adding, over time.
Kiwis, grapes, gooseberries and currants, saskatoons, haskaps, raspberries and blueberries: we already have some of these, but will be adding more over time. Some are poorly situation and need to either be taken out, starting over with new, or transplanted.
Companion plants and wildlife packages: they’ve got a number of different plants that are beneficial to plant near trees, for various reasons. Some because they attract pollinators, or attract predator insects that will eat nuisance insects. Others because they are good to plant in paths instead of grass, can handle foot traffic, but don’t need to be mowed. There are even seed mixes to provide grazing for deer and other wildlife, and even have wildlife tree packages, made up of a mix of excess trees, or trees that didn’t make the grade for orchard/yard use, which may not even be labelled. They would be useful for a food forest or permaculture set up to feed both humans and wildlife. These are all things that fit in with our long term goals.
All in all, I am very excited by this catalogue, and look forward to being able to order from this truly unique company as soon as possible!
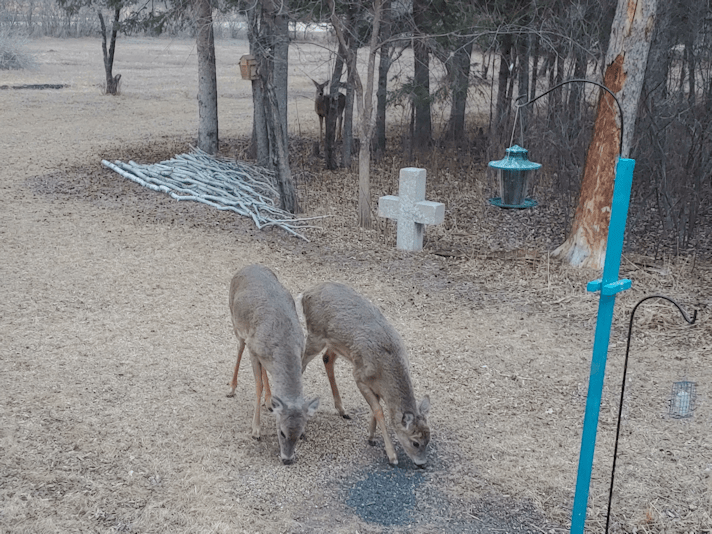
First, I wanted to share with you a photo of some visitors out our living room window last night.
There were actually five in total, but they were chasing each other around. The mama of the two in front chased the one you can see behind the cross, who chased another deer out of that spot before I got the picture. The fifth one that I saw making its way long the edge of the spruce grove disappeared before reaching the feeding station, and I missed what happened with that one.
The deer are definitely getting feistier as the weather warms!
It’s not quite warm enough, though!
I hadn’t received a call about the garden soil over the weekend, so I called them back this morning. The woman who answered seemed at a bit of a loss with how to help me, and ended up giving me the cell phone number for a particular person (since I want someone to come here in advance to see where the loads will be dumped), but there was no point in trying to call them until after 7pm, because they were in a cell phone dead zone. It ended up not being necessary. She called me back not long after.
Their pile of garden soil is too frozen.
She suggested I call back in about a month. Hopefully, it’ll be thawed enough for the equipment to be able load the truck! It would have been nice to get the soil well before we actually need it, but as long as we get it before we need to actually start planting, it should be fine.
I also called the garage to follow up on the van, and we’re now booked to bring it back tomorrow morning, so he can clean out that new EGR valve.
My husband got a requisition for blood work some time ago, but between the polar vortex, van issues (my mother’s little car is far too painful for him to ride in, and his walker wouldn’t fit in it, even folded up, anyhow) and pain levels, we just never made it in. I called the clinic to make sure the form was still at the reception, and that was confirmed. We had planned to go in today to get that done, but my husband’s pain levels were too high. We’ll try again on Wednesday.
On the positive side, my husband’s tax return came in. We had plans for part of it that I tried to take care of last night, only to discover we couldn’t use our debit Visa.
With no trip to the clinic today, I was open for making a trip to the city.
This is what we picked up.
Yup. We got a crossbow kit.
More specifically, we got a Killer Instinct Boss 405.
It’s an early 33rd anniversary gift. :-D
Now, what we really wanted to get was a rifle, but we have not been able to get our PALs yet, and with certain political activities going on right now, we were seeing our window of opportunity closing fast. However, having a gun on the farm is needed, if only to ward off the coyotes and other predators. Plus, I want to be able to hunt.
My husband and I both know guns (me from growing up on the farm, him from his time in the military), and bows. I used to shoot recurve, and my husband shot compound. We were both rather good at both guns and bows, too. However, with age and injuries, anything with a draw weight suitable for hunting is getting beyond our levels of mobility.
We decided that a crossbow would best meet our needs, while still being something we can actually get. Plus, the archery hunting season is much longer than rifle hunting season. As a bonus, a crossbow is quiet. I like quiet!
With that in mind, we did our research and decided on a crossbow at Cabela’s. It’s not high end, by any means, but it’s hardly bottom of the barrel, either. It will meet our needs.
Then, since I had to drive well over an hour to get to the store, I took advantage of the situation, asked questions, and picked up a few other things. (Happily, they accept medical mask exemptions, too!)
One of the things I’d tried to buy on the website was a crossbow rated target. I called ahead, and the crossbow and target were both waiting for me when I got there. After seeing it in person, I decided to get a larger target. I didn’t take pictures, but I ended up getting a Morrell Yellow Jacket YJ-425.
I also got these.
The crossbow kit comes with 3 bolts with field points. Bolts will get lost or damaged, so I picked up a 6 pack of extras. The spares do not come with points, so I picked up a 12 pack of field points. They are slightly heavier than the ones in the kit, so we won’t be using the kit points at all. I also picked up hunting points that need to be assembled, but they are the same weight as the field points. I also got a de-cocking bolt, which can be safely shot into the ground.
After taking this picture, I had to hide everything in a closet, because the cats were ALL OVER everything.
Susan tried to chew on the fletching of the de-cocking bolt.
Tomorrow, the bow will be assembled, but I don’t know when we’ll be able to test it out and start practicing. Not only is it very wet and messy right now, but we’ve got rain in the forecast tomorrow, and snow in the forecast a couple of days later!
And for those who are wondering, no, we don’t plan to hunt the deer that come to our yard.
Over the next while, I’ll be searching out local crossbow groups and hopefully be able to find a hunting mentor. I will still need to take the hunter’s safety course to get a hunting license, and while it would be nice to have a freezer full of venison next winter, I don’t expect to be ready to hunt this year. While all of us can practice shooting with this, it is likely that I will be the only one that will take the course and get a license to hunt.
At least, that’s the plan for now. Plans have a terrible habit of changing at the last minute, but it’s a goal we are shooting for.