Usually, my daughter works a short shift on Sundays, so I spend time in town as part of keeping Sunday as a day of rest. It feels weird to not be doing that, but the pharmacy is now closed on Sundays. It’s also totally messing with my sense of time! :-D
When my husband called in his prescription refills, he was asked to get our daughter to pick them up during her break, so we figured she was getting another weekday to make up for the loss of Sundays.
We were wrong.
Her hours have been cut back to just 3 shifts every 2 weeks. The pharmacist must have assumed she’d be in. I’ll just have to make a special trip in to town for the refills.
I just checked the government website. An $82 Billion aid package was recently passed to help people who are struggling financially due to the Wuhan virus shut downs. Last I saw, people who lost more that 8 hours a week could get aid, but that was before the bill was completed and passed. That is gone now. She’s have to lose all hours completely, in order to qualify for aid. :-/ Thankfully, she’s okay with that.
Once again, I am so incredibly thankful for my husband’s excellent private insurance disability payments. That and living here on the farm, where we pay “rent” by taking care of the place.
Last night, I managed to find a Canadian Orthodox Lutheran church service for this 5th Sunday of Lent to watch this morning. Celebrating Easter this year is going to be another strange one. No blessing of the baskets at church this year!
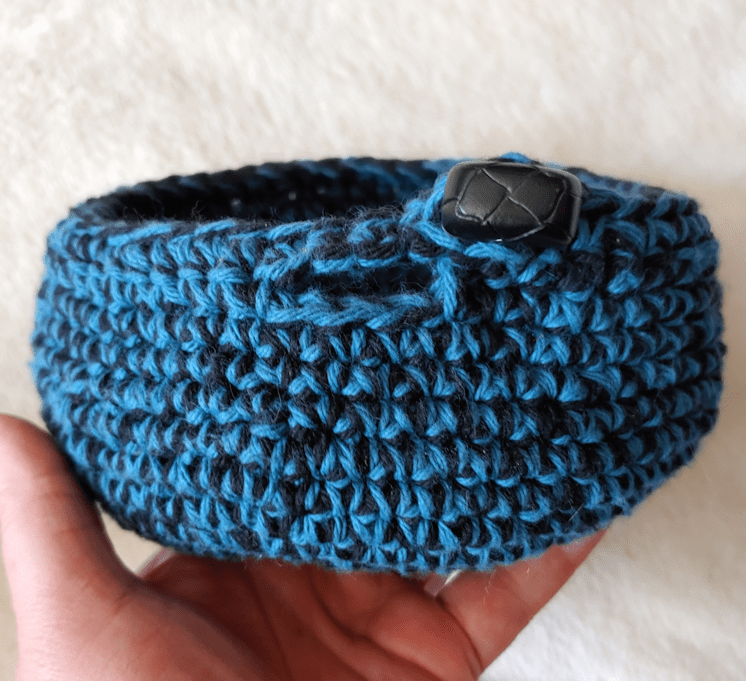
One of the things I decided to do to recharge my batteries today was finish a small crochet project; a yarn basket. I’ve made three slightly different versions of them so far, and am quite enjoying the process.
Here is the first one I made. (click on the images to see them better)
I used 2 strands of Handicrafter Cotton yarn, which holds structural shapes quite well. (I can get the little skeins of this yarn at a dollar store in town, but have to go to the city to be able to get the large skeins it also comes in.) I had no pattern, but saw one on Pinterest and realized it was just a simple bowl shape with an opening for the working ends of yarn.
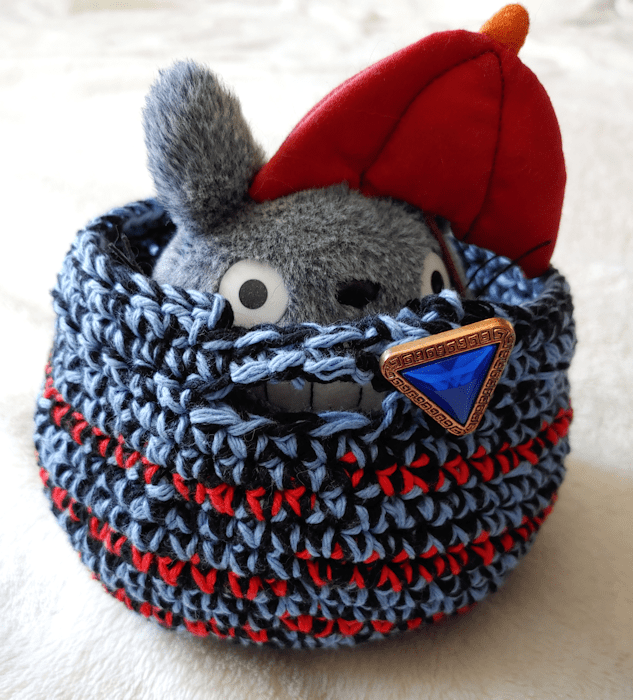
This is the one I just finished.
This is actually the third one I’ve made, and the first where I added an extra colour. I wanted to use up some of the little balls of yarn I had left over from other projects.
I like to reball my yarn into centre pull balls, and the first yarn bowl I made was large enough to hold two full sized and one little centre pull ball of yarn. Having the yarn threaded through the opening in the bowl helps keep it flowing smoothly – especially when using multiple strands at once.
It also helps protect my yarn from cats! :-D
The second one I made used one strand of solid gray and one strand of variegated yarn that included the same shade of grey in its colours. My daughter picked that one for herself. :-) Each bowl is slightly different in size and shape as I experimented with the design.
I’m quite happy with how these are turning out. They are great to work on while watching a movie or something, since they’re made almost entirely with one stitch, and require very little counting.
Tomorrow, it’s back to work. The girls plan to do baking, so I plan to head out and shovel away the drift in front of the barn doors, so we have someplace to store the things we will be taking out of the basement. Then it’s time to start clearing things out, so that we can clean it and turn it into …
A maternity ward. From the looks of her, Butterscotch is pregnant, and may have kittens before things melt away and dry up enough to empty and clean out the sun room, so we can use it as a maternity ward like we did last year. Plus, we have to get Two-Face indoors as quick as we can. She’s booked to be spayed in mid April, but there’s a risk of her going into her first heat before then.
*sigh*
So we’ll have inside cats, outside cats and basement cats!
After all the snowmelt yesterday, we had ourselves a few skating rinks around the yard! The ice wasn’t quite thick enough to hold my weight as I did my rounds.
Boy am I glad I found those rubber boots. Even if I had to cut the tops. Wider would have been nice, too, but at a size 12 men’s, I could at least get my feet in them. :-D
So, there is definitely a reason the south fence posts are not doing very well.
When we first tried moving on the driveway side of this fence, there was a really rough area along the fence line that we couldn’t use the riding mower on without risking damage (now that we’ve got a working push mower, I should be able to get in there). When I asked my brother about it, he said it was a drainage ditch.
Hhhmm. It looks like someone took a tiller along the fence line. Not much of a ditch at all.
At the end of the fence, there is an actual trench leading to the ditch along the road; deep enough that I’ve had to make a “bridge” to cross it with the riding mower when I used it to drag the top of a tree away.
The posts in the south fence are all rotting on the bottom, and some are only being held up by the barbed wire they are supposed to be holding. Even the ones that are still holding out, I could probably break them out of the ground easily.
What we’ll have to decide on is whether or not we should dig a better drainage ditch along this fence. I want to get rid of it completely, but we might not do that for some time. At the very least, I’ll probably take out the two bottom strands of barbed wire, so I can duck through the fence more easily, but the top one is holding the power cable. Having an outlet on the east fence is very useful, and not just for the lights. I’d like to bury the line instead but, as you can see, if I bury it along the current fence line, it’ll end up having water over it. Yeah, I’d make sure to run it through protective tubing, but still… water and electricity don’t mix! Plus, we might decide to run it through a different location, instead, so I don’t want to do anything as relatively permanent as burying it just yet.
Today is supposed to be another warm one. At this rate, I’ll be able to start accessing the barn easily in just a day or two. That will be a big help in getting the new part basement cleared out of stuff!
Having received shipping confirmations for the seeds we ordered, the girls and I have been talking about just where we are going to plant what we’re getting, and what we need for what we’re getting.
In the two years we’ve been here, we’ve been working at reclaiming neglected spaces before we could even consider planting anything. The area where there used to be a huge garden has had more and more trees planted into them – without adequate planning, unfortunately, and causing a lot more shade areas I remember used to get much more sunlight. We currently have some spots here and there that we will be able to plant in, rather than one big vegetable garden, like my parents had for so many decades.
This is what we’ve come up with.
At the top of the sketch is the area we mulched over, then covered with tarps, last summer. This is where we will be planting the varieties of squash we’ll be getting, and the birdhouse gourds. The two giant varieties of sunflowers will be planted in a part of the old garden that I was finally able to mow last year. It’s more lawn than garden now.
The house is where the happy little gardener is standing. On the left is the old kitchen garden. This had been mostly a flower garden, though my mother did plant some onions there. The trouble with this location are the two ornamental apple trees. Still, we’ve already got chives and onions planted overwinter in the chimney block retaining wall. In the rest of the blocks, and in the area against them where I’d been able to add some soil to try and reduce the slope away from the house, is where we will plant fennel, and some of the varieties of carrots and beets we’ll be getting (we’re getting three varieties of each). The other area carrots and beets will be added is in the soft, deep, loose soil uncovered when we cleaned up the old wood pile area.
We’ve decided to set up the remaining chimney blocks along the chain link fence, between the fence and the white lilac bushes. Right now, there is an area of lawn just wide enough to get a mower through, but it would be great to not have to squeeze through there with a mower at all, and use the space to grow cucamelons. The chain link fence will be the trellis for the cucamelons, which need full sun. We chose the lilacs side of the gate, as they will not be affected by the shade created once the cucamelons cover the fence (assuming the grow successfully!), whereas the section of fence on the other side of the gate has flowers and haskap berries, and they’re already shaded too much from an elm, a maple and another variety of lilac.
What isn’t anywhere on the sketch is potatoes. We’ve ordered 6 pounds of Yukon Gem potatoes, but they are back ordered. These would not be shipped until the right planting time for our area, so they can go into the ground right away, so I hope they were get more stock before then. We weren’t billed for them, though. The gourds were back ordered, too, but we were billed for those – and I got a shipping confirmation for those the day after I got one for the other seeds. This suggest to me that they may not be expecting to get more of the Yukon Gem variety of potatoes. Depending on how that goes, we might end up buying some Yukon Gold, locally. We shall see.
We ended up buying quite a few plants that are climbers, so we will be building trellises, too. We will have to go through the barn to see what materials are left that are suitable to build with. When we do build them, we will keep in mind that they will need to be moved after the growing season. These are temporary planting locations, and very much experiments, as there are quite a few plants we have never tried to grow before.
With all the crazy stuff going on right now, with the Wuhan flu, shelter in place recommendations and grocery stores in many places being cleaned out of inventory, I’ve noticed quite the increase in people interested in growing their own food, so I thought I’d talk a bit about our decision making process.
For us, we’ve long sought to increase our level of self sufficiency as much as possible. When it came to gardening, this was not something we could do much of. Partly due to moving so frequently, but also because we usually lived in apartments with no real space to grow in. When we did find ourselves living in homes with nice, big south facing decks, we did container gardening, with varying levels of success.
Now that we’re back on the farm I grew up on, we finally have the space for all kinds of things, but with all the clean up needed first, we can only do a bit at a time, so we have to be quite selective on what we choose to grow.
When it comes to choosing what to grow, there are two ways you can go. You can look at the things you buy the most of and, if they can be grown in your climate zone, grow those, thus reducing your grocery bill. Or, you can look at the things you don’t buy, or buy rarely, either because they are too expensive at the grocery store, or hard to find. The grocery budget may not change, but you’ll have a greater variety of produce, and more “treat” foods, which has substantial psychological benefits, too.
We’ve done a combination of the two.
Carrots, beets and potatoes, for example, are things that are easy to find in the stores. At least the plain ones. It wouldn’t really be worthwhile for us to, for example, grow Russet potatoes. They are still pretty cheap at the grocery store, and common. What we’ve ordered are common foods in uncommon varieties.
Fennel is one of those things we buy as a rare treat. They’re not significantly more expensive, but enough that when the budget is considered, it’s more economical to buy more of the cheaper produce.
The squash varieties are similar. We like them, but rarely do. Some, like the pattypan squash, are pretty rare in stores, and more expensive.
The sunflower seeds are intended to play several roles. These varieties are good for eating in general, but we’re going to be planting a lot of these to use as bird feed in the winter. The large size and strength of the plants themselves will act as wind breaks, as well as privacy screens. Plus, we’ll be planting them in an area that the leaves will hopefully shade the ground enough to prevent the grass and weeds in the area from growing. (This is where we’re going to need more hoses; the area is quite parched, and there is no nearby source of water.) The straw bale we have now will be used as mulch, though it won’t be enough on its own for such a large area. We’ll likely use most of that up when we get and plant potatoes. I’m hoping to get more straw or old hay over the summer. I’m planning to contact the renter of the rest of the farm, whom we have been buying our straw bales from, to see if he has any – and maybe some well composted manure, as well!
You’ll notice one of the things we don’t have on our list are lettuces. These are often recommended for new gardeners, as they produce relatively quickly, and with successive sowing, you can have 3 seasons of lettuce. We’ve tried growing lettuces in our container gardens before but, ultimately, find they are not really be worth the hassle. We’ve found them to be fragile produce, both as a plant to grow, easily killed off by too many things, and as produce to buy at the store, which inevitably go soggy before we can finish them. We just don’t eat enough lettuce to make it worthwhile.
Cabbage, on the other than, will be something we’ll grow in the near future. We use them more than lettuce, and they store very well over winter.
So a lot of what we’re going to be doing for gardening this summer is pretty experimental for us. How things work out will do a lot to help us decide what we’ll do next year.
Meanwhile, we will continue to clean up, reclaim space, and work out where we want to plant the things that will continue to feed us, year after year; berry bushes, fruits trees and, hopefully, nut trees.
It’s going to be a fun (and, hopefully, tasty) learning experience!
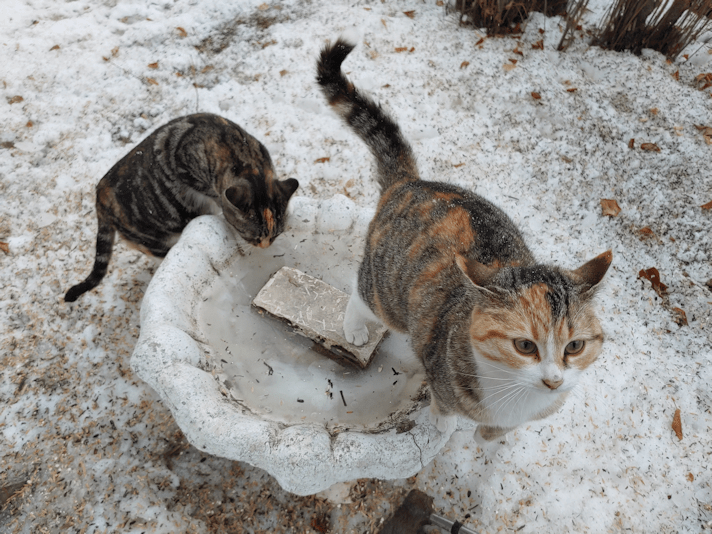
While doing my rounds this morning, I was able to take a closer look at the bird bath.
Throughout the winter, when chipping ice out to add water, I’ve been very careful not to touch the bird bath itself. It already had cracks showing on it, and now that the ice is melting away again, I can see that at least one has gotten worse. I’m sure my ice chopping didn’t help. :-D
Yeeeaaahhh…. I’d say the bird bath is toast.
The kitties still like it! :-D
Since completing my rounds outside, it has started to snow. A gentle snowfall, just enough to start coating the trees again. It won’t last long. Looking at the long range forecast, we’ll be staying above freezing every day. By Sunday, we’re even supposed to hit 10C (50F)! It’s going to get muddy out there, but I’m looking forward to the warmth, and the snow melting away enough to be able to extend my rounds again.
The girls and I have decided it’ll be worth heading to the city to try and do our monthly shop, though I expect we’ll split it again, make a smaller trip and go back again later in April.
I should try and find some rubber boots again. Last year, I couldn’t find anything that would fit over my burly calves. :-D
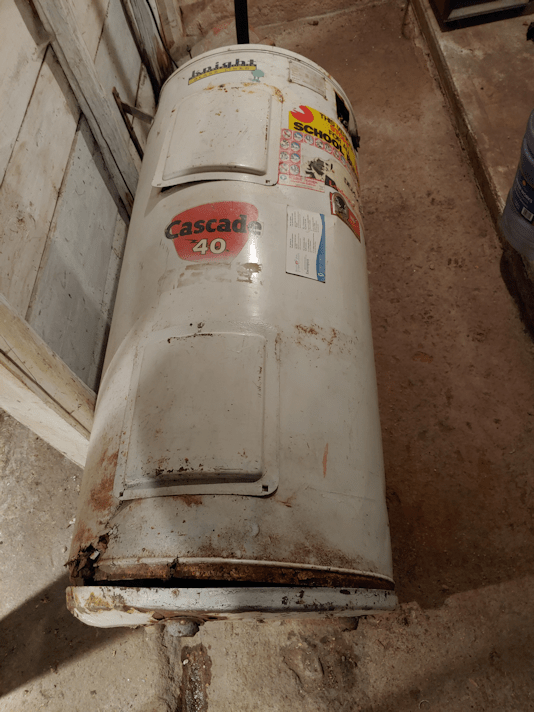
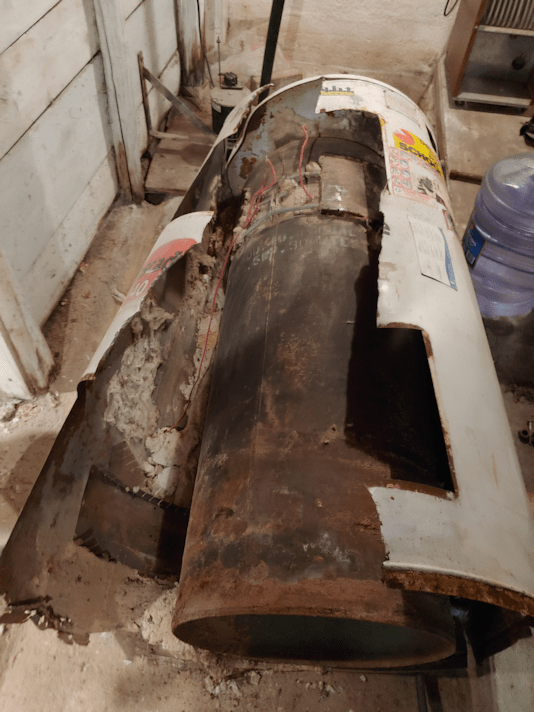
Today, it was back to the old basement to finally do something about the old hot water tank that died on us, shortly after we moved here.
A job that didn’t go as well as I’d hoped in some ways, while better than I hoped in others! :-D
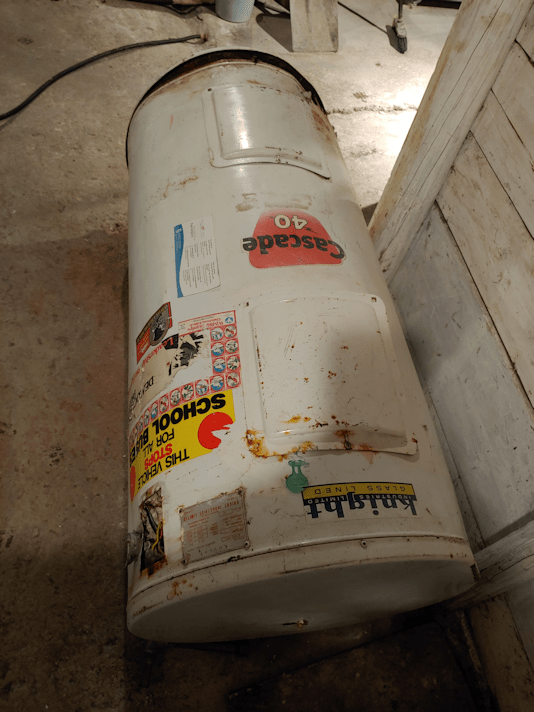
Here is the state of the tank, before I started.
You can see that the bottom of the tank is quite rusted out and falling apart. The top, however, is still quite secure. It’s held in place by 4 screws, so I thought I’d try to take those off, first.
The first challenge was to figure out what type of screwdriver to use. They were so full of grit, I at first thought I’d need a star tip, but after digging some crud out with the tip of a box cutter, I discovered they needed a square tip.
Not that it mattered. The screws immediately stripped, as soon as I tried to loosen them. They weren’t going to move.
I was able to get the access panels on the side off easily enough, since they were barely put back on before the tank was moved.
I should note that yes, I was wearing safety gear before I started.
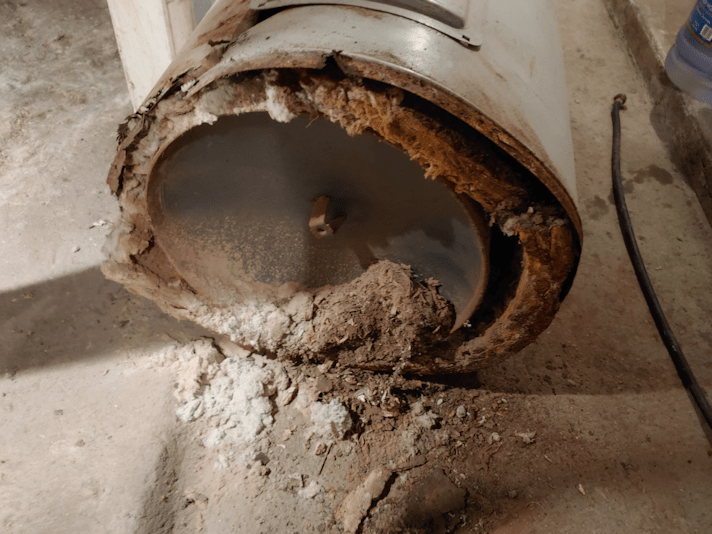
The bottom came off quite easily, and all sorts of rotted insulation and rust started to fall out!
I had a box ready for the smaller pieces of metal, and garbage bags for the insulation. I was using the old ash shovel as a dust pan as I swept up the smaller stuff, trying as much as possible not to kick dust up. Impossible, of course, but I could at least minimize it a bit, and using a shovel for a dust pan gave me a bit of distance as I worked.
Then, I took out insulation through the access panels. It wasn’t as rotten, higher up, but still…
… lots of rust on there!
I then had a couple of problems to work around. The screws on the top weren’t going to come out. I even tried a crow bar, but couldn’t get the leverage. The tank has a seam that I hoped to pop open, but that was more solid than the rest of the tank. Even if I opened it, though, it would hang up on the drain pipe near the base.
Then I remembered something.
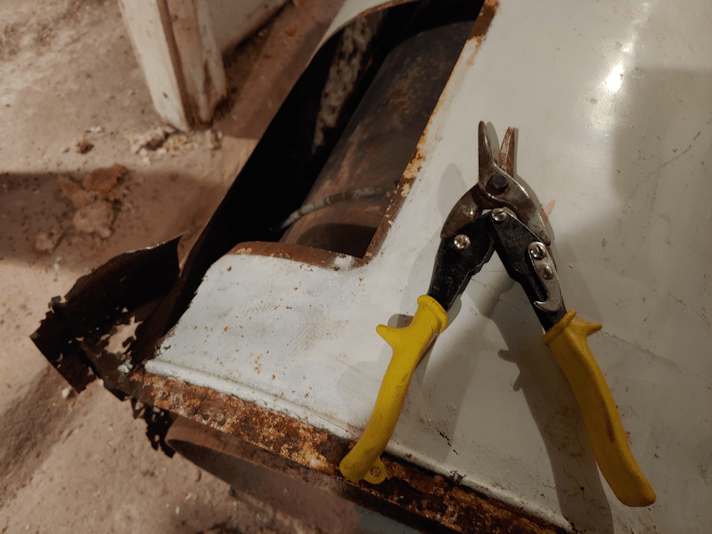
In my late brother’s work shop, which we are now using to store all my parents’ stuff as we clear out the house, we found a pair of cutters. My oldest bother spotted them and told me they were sheet metal cutters. So I brought it to the house, and my husband sharpened them (they really needed a sharpening!).
They cut through the metal beautifully!
Cutting where the access panel openings where made it much easier. I also cut to the drain pipe so the metal could be pulled up around it, as well as going as close to one of the screws in the top panel as I could.
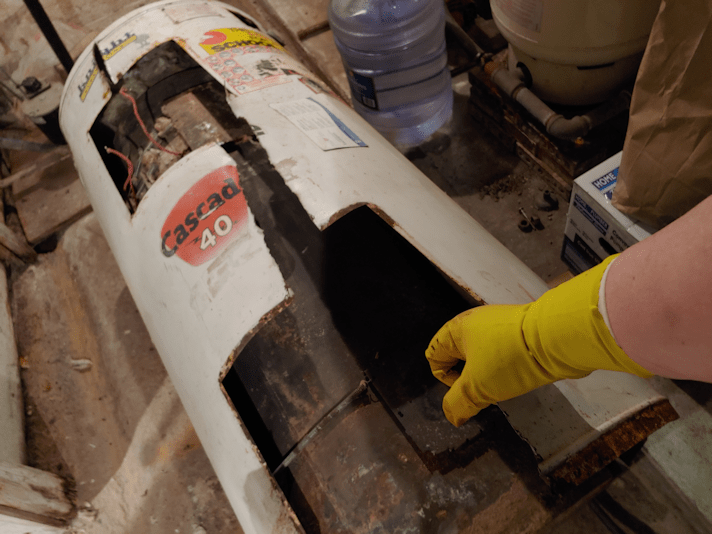
After yanking on it a bit, the outer shell panel broke free from the top cap and the whole thing popped open!
So. That’s what it looks like on the inside!
The next while was spent removing more insulation, taking off the springs that held the bands in place, and pulling out some of the wiring. I was also able to basically tear off the cap without any extra cutting near the screws. The metal of the shell tore pretty easily at the screws, once it started to open up.
In the process, I discovered a problem.
That cylinder is where all the weight is – and as I manhandled it, I could hear water sloshing inside! Yes, we let it drain before it was removed, but there’s no way to get all of it out completely, without cracking it open somehow.
This thing is heavy, and I needed to get the stuff out from under it. There wasn’t a lot of space to work in, either. (You can see the box with the new well pump waiting to be installed, and the jug of water that was intended to be used to prime the pump after installation.)
The first thing to do was clean up as much of the insulation as I could, then try and get the bands out from under it. I was able to get the bottom band out, a little at a time, but would not be able to do the same at the top. I had somewhere to grip and lift the bottom, but nothing to grip at the top. The obvious solution would have been to stand the cylinder up and move it off the shell, but there was simply no way to safely grasp the rounded top and lift that much weight.
I might not be able to stand it up, but thanks to that very strong drain pipe at the bottom, I could drag it!
And this is as far as it’s going to get for now!
I honestly don’t know how we’re going to safely get it out of the house. I had hoped that taking it apart would reduce the weight more than it did, but I probably took of maybe 10 pounds of material, in total. That’s barely noticeable.
As for the shell…
I could now remove the top band and use the shovel and broom to get rid of the majority of the insulation that had been crushed under the cylinder.
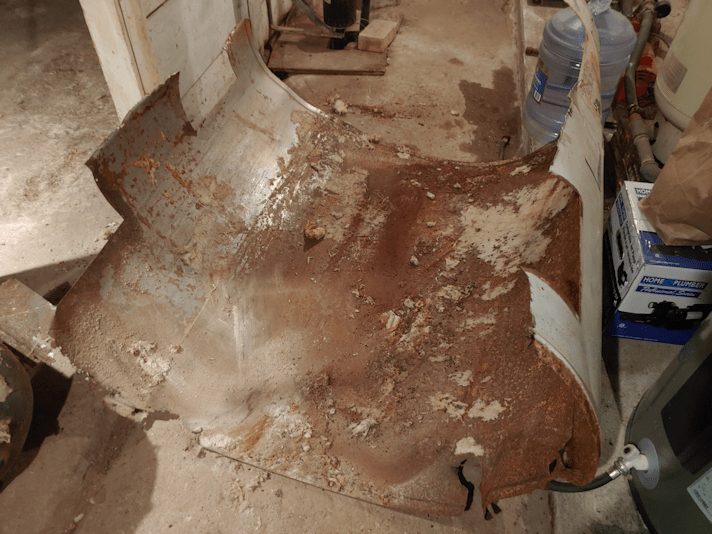
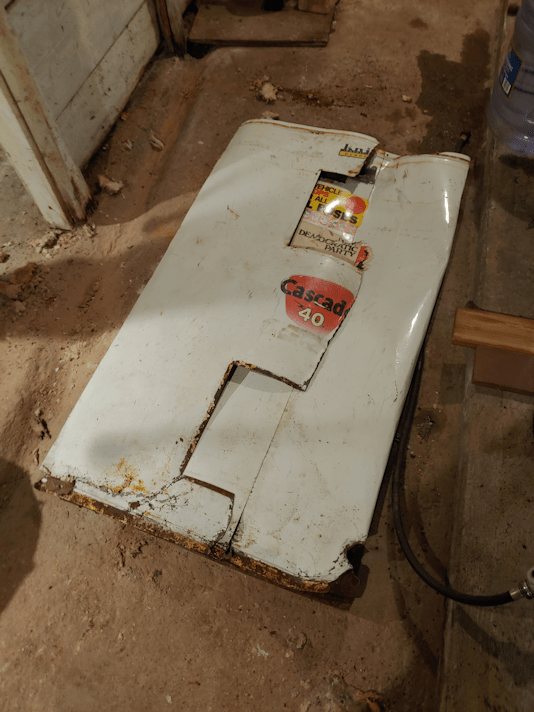
Then, I folded it.
And squished it.
Into a nice, flat pancake that could easily be moved.
It was very satisfying! :-D
The parts and pieces will be taken outside through the new part basement, with its safer stairs that are right next to the entryway door! But not until more of the snow has melted and we can reach the junk pile.
Next, I had to carefully clean up the dust and rust underneath. I wanted to make sure as little as possible could end up washed into the sump pump reservoir. I do NOT want this stuff clogging up the pump!
In the end, I used a wet mop to pick up as much as I could, because sweeping was just kicking up way too much dust.
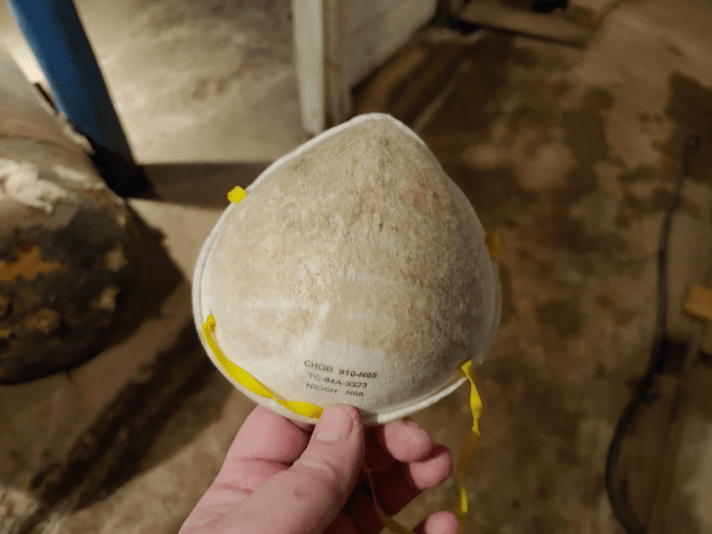
I am so glad I was able to find these thicker masks at the pharmacy, before everyone went crazy and bought them all up. This is actually my second mask. One of the elastics broke on the first one. I have no more. I do still have some dust masks I’d found in the hardware store, but they’re not as thick as these ones.
Once I finished cleaning up the mess in the basement, I proceeded to take a shower, then put my clothes in the wash. Fiberglass insulation dust can be dangerous stuff. Especially when it’s as old and rotted out as this stuff was. When it comes time to take the garbage bags of insulation to the dump, I’ll have to make sure to keep them separate, so they go to the proper disposal area, and not with household garbage. I’ll also have to double bag them.
For now, I’m glad that the space in front of the pumps and tanks is finally clear of this thing. It’s been there for over 2 years! :-D It’ll make it much easier for when the well pump gets replaced.
I’m looking into finding a filter to install between the well and the pump. Or pre-filter, these are apparently called. I’ve found several kinds, but I can’t tell if they are suitable for use with a deep well pump, rather than a shallower well pump. The problem is that the deep well pump has two hoses, one above the other. From the looks of how they are installed, the second hose would be in the way. It would be good to use one, though. They are designed just to filter out the bigger stuff, and should help extend the life of the pumps and tanks. I’ve sent some links to my older brother, who knows this system better than anyone, and hopefully he’ll be able to tell me something, one way or the other. Or, perhaps, inform me of something better to use.
At this point, I’ve done almost as much as can be done in the old basement. The other things that need doing are little things, like getting plastic utility shelves to replace the wood shelves on bricks, and organizing.
Which means we will now work on the new part basement.
Oh, that reminds me. I was chatting with my brother about the clean up I’d done so far, and commented on the collection of car batteries down there. I said that, unless he knows if any of them are still usable and he wants them, I would probably take them to the dump for proper disposal. He very adamantly told me not to do that. It turns out that these can be taken to a scrap yard, in the same way we plan to do with our aluminum collection. They will pay by the pound for the lead in them, and each battery can bring in quite a lot. He tells me that the amount of aluminum we have is probably enough to make it work taking in.
I figure we can do that in the spring. Anything we get from the aluminum or the batteries is going to go into a tax free savings account we set up for our contingency fund, and the money will go to replacing the roof.
It’ll take a while. Based on the two estimates we got, and assuming that they will find rot under there, we’re looking at $10,000 we have to come up with. Assuming no emergencies happen before then. :-(
Ah, well. For now, we just deal with what we can.
Like figuring out how to get that beast of a cylinder out of the basement!
I went into town today, driving my daughter to work. We got there at our usual 10-15 minutes early, but there were already several cars in the parking lot, and people standing by the doors. I’ve seen this before, but not with so many people. Weird.
Since I was in town anyhow, I made a quick run through the grocery store. My husband was running out of brown rice (he’s the only one who eats it) and the girls were running low on lactose free milk. There was plenty of milk, but almost no rice of any kind at all. Oddly, there were no potatoes, squash or onions. Entire sections of fresh produce were empty. I find myself thinking there are other reasons for the stuff to be gone, besides more panic buying. There was no shortage of bread or meat on the shelves, but they haven’t restocked in things like flour, sugar or yeast yet.
Still no toilet paper, either.
Thankfully, we are not in any need of these items.
Once at home, I did a couple of different breads. One was a sourdough soda bread from Alaska Sourdough, the cookbook that got me into sourdough many years ago, though I acquired my own copy much more recently.
This recipe uses 4 cups of sourdough starter, along with oil, sugar, salt and baking soda. I tried to get a video of the chemical reaction when the baking soda (mixed into a “jigger glass” of warm water) is added, but it just couldn’t capture how the mixture just… foams. It’s really quite fun to watch!
The recipes in this cookbook are hand written, and in this one, the instructions forget to mention when to add the salt! I just add it with everything else, before the soda and flour are added.
The recipe also said to use 8 – 10 cups of flour.
Eight to 10??? What’s with all these recipes that use huge amounts of flour? I barely got 3 in. I’d wonder if my sourdough starter is too thick or something, but it’s the same with non-sourdough bread recipes, too. I know we’re really dry here, this time of year, but it shouldn’t make that much of a difference!
This recipe requires just one rising, so it got shaped into loaves right away and I left them in a warm oven to rise while I made another double batch of my seedy bread. I ended up making it into a bunch of mini-loaves this time, just for fun. By the time that bread had its two risings, and finished baking, the sourdough bread was ready to go into the oven.
They came out so pretty!
While I was working on that, my other daughter came down for a break and let me know her sister is now working in a tent.
A tent?
The cash desk now has a plastic curtain around it, to protect the cashiers from plague customers who won’t keep their distance. It hangs from the ceiling, and is Tuck Taped to the counter, with windows cut into it to reach products for scanning. The pharmacy counter has its own plastic wall, with a slit for the pharmacists to go in and out at one end, and a slit at the pick up counter. Customers, apparently, are still trying to stick their faces right up to the openings.
People suck, sometimes.
After I picked my daughter up at work, she needed to go to the grocery store, so we swung by on the way home. Some of the empty produce displays were no longer empty – there were onions again, though not many. Still no potatoes or squash. So very odd!
As we were going through the till, I couldn’t help but comment to the cashier about how nice it must be, to be able to clean the belt more often. She confirmed that, yes, it is! She was quite enjoying the cleanliness. Customers still try to shove things onto the belt, but at least now the cashiers are allowed to tell them to stop, so the belt can be cleaned. I remember only too well how difficult it was to keep things clean in between costumers, when I worked as a grocery store cashier!
They’re also back to single use plastic bags. This franchise had only recently made such a big deal about no longer having plastic bags and encouraging people to bring, or buy, reusable bags. Now, if people bring their own bags, they have to pack them themselves. It’s long been known that reusable bags are very unsanitary, but it took the Wuhan flu for that to finally be taken seriously. :-(
Well, we’ll be able to go back to staying home for the next few days. No plague people hiding among the deer that visit us. There is plenty to keep us busy! The only thing I’ll need to remember to go out for is to get the mail, since I’m expecting my seed order to come in soon. I look forward to starting some of them indoors.
Oh, I also broke down and ordered a bottle cutter. This is not something we can find locally. I chose a type that can cut square bottles, as well as round. I look forward to using it to help make bottle bricks! Since I already know we plan to make the walls on our cordwood practice building 8 inches think, we can get a head start on making these.
Also, my daughter found a really nice recipe for no-knead Focaccia that I think we’ll be trying out tomorrow.
Among the many things we are interested in doing in the future is making cheese.
We already make yogurt cheese (see here and here) whenever we make yogurt, which can be used right away, but we’re interested in making cheeses that need to be aged.
Which requires a place to age them. Like a cheese cave.
Well, we do sort of have a “cave” in the basement. The old root cellar.
In the research I’ve been doing (watch out for a future “Recommended” post for a home cheese making resource!), the aging cheeses need temperatures and humidity to stay within a certain range.
I don’t know that our root cellar has that range. For starters, I think it might actually be too cold, but that can be helped with appropriate insulation. I think our greater challenge will be the humidity.
Since this is not something we’ll be able to do for quite some time, that means we have time to gather data.
Which begins today.
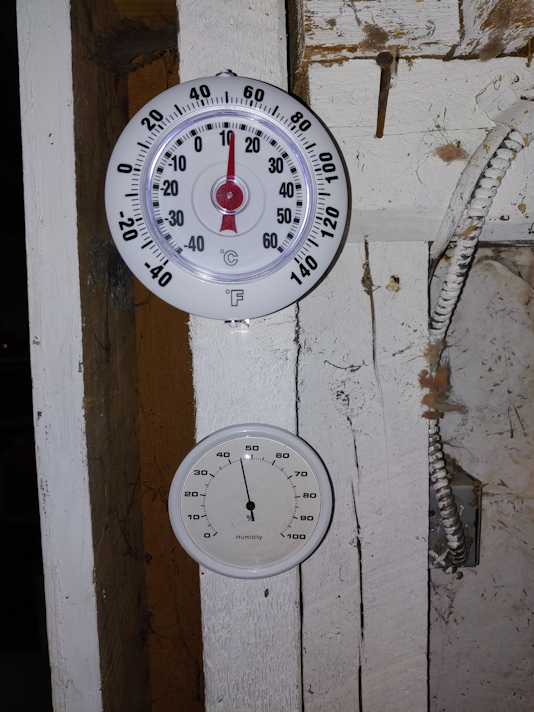
I went to pick up a cheap thermometer at the dollar store and found a hydrometer right next to it, which was great, because I didn’t even think of such a device existing. At least not in household form. These are not mounted just inside the door of the root cellar. This is probably the warmest part of the room, but the best location for hanging them. Ah, well.
As you can see, the temperature gauge had already dropped quite a bit.* The humidity is about the same as it was upstairs, so I don’t know if that was the actual reading, or if it still needed time to adjust for the new location.
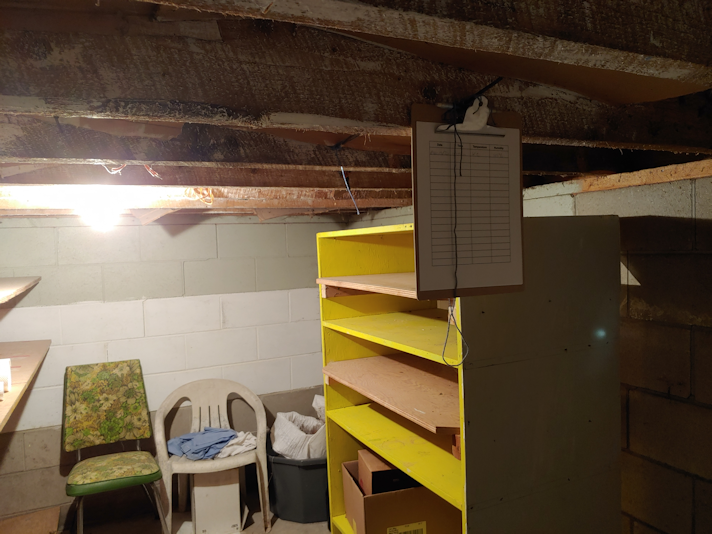
There were already huge nails hammered into the floor joists of the entry above (I’m finding nails like this all over the basements, garage, sheds, barn – anywhere there is wood, there are nails hammered in for hanging things), so I used one that was accessible, but still out of the way enough to not bash my head, for the clip board. I printed out some chart sheets to record date, time, temperature and humidity. The plan is to come down here once a week, at different times of the day, and record the gauge readings.
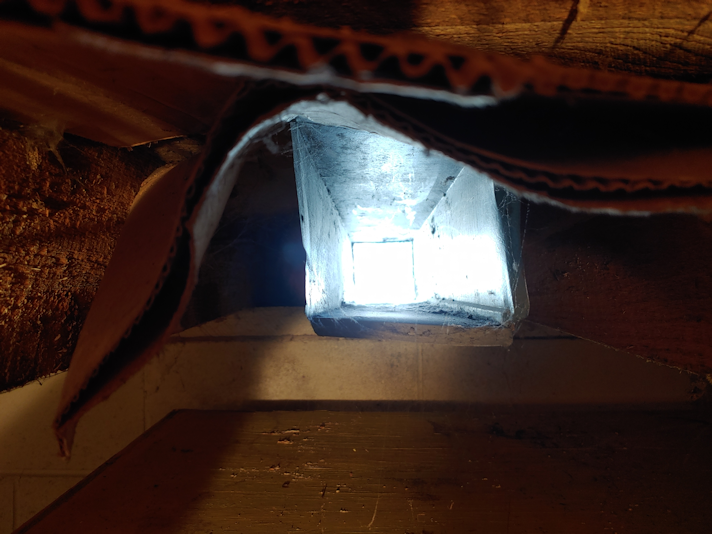
This would be why it’s so cold in here. This vent duct goes directly outside. The only thing at the end is a screen to keep the critters out. While I was down there, I felt an actual wind coming through this duct.
Over the next year, we will get the weekly readings and slowly empty the room out and give it a good cleaning. I figure, in a year we’ll be able to chart the data and use that to determine how much would need to be done to make it functional as a cheese cave, or if we have to go with something else. Like a modified refrigerator.
If the room turns out to not be appropriate as a cheese cave, I already know it works well as a root cellar. :-) So either way, it will be used in the future!
The Re-Farmer
*edit: for some reason, my brain just assumed that, like every other thermometer I’ve seen, the 0C was at the top, so when I looked at it, I saw 2C instead of 12C!! Which is a bit of a relief, because while the temperature did continue to drop, it was not as severe as I originally thought.
Welcome to my “Recommended” series of posts. These will be weekly – for now – posts about resources I have found over the past while that I found so excellent, I want to share them with you, my dear readers. :-) Whether or not I continue to post these, and how often they are posted, will depend on feedback. Please feel free to comment below, and if you have a favorite resource of your own, do share, and I will review them for possible future posts.
I hope you find these recommendations as useful and enjoyable as I have!
Since we decided to try our hand with some cordwood practice buildings, starting this summer with what will be an outdoor bathroom, I’ve been doing a fair bit of research. I’m learning that this building technique has had some modern changes to it that have greatly improved the final result.
One thing I found, as I did online searches, what that time and again, I kept finding myself back at one site. Cordwood Construction: The Essence of Cordwood Construction. There are many, many sites, blog posts, videos and books about the technique out there, but I’m not finding anything else more informative and practical. There is so much information at the site – even house plans! – one could easily spend many hours there. (I’m loving their post about cordwood flooring, too!) Their blog seems to be kept up quite often, too. They also have a Facebook group, bookstore and newsletter.
They do have a YouTube channel as well. There are not many of their own videos there, but if you check their playlist tab, you’ll find lots more videos.
The information they have is very hands on. I find myself wishing I could attend one of their workshops but, alas, they are too far away.
They also get right into the basic, essential details in a way that is so very helpful.
My previous experiences with cordwood (aka stackwood) construction are historical buildings, and this resource is where I first heard of using an inner layer of insulating material between outer layers of mortar. It’s also where I first encountered the notion of bottle bricks, outside of Pinterest images that led to nowhere useful.
They provide so much basic information that I really feel that someone like me, who has never built anything major before, can do it. I’ve already downloaded their shed plans ebook, and it is so very thorough! I plan to rely on it heavily, and I’m downright excited about building some practice buildings over the next couple of years. Who knows. A few years from now, we might be using the technique when it’s time to build a barrier free house for myself and my husband!
Obviously, this is a resource useful for someone who is – or hopes to be – in a position to construct their own cordwood building, but I think the technique itself is a sort of “lost art”. Given some of its many advantages, which include lower costs, being fire retardant, and more “eco-friendly”, I think this is a building method that deserves a resurgence. Resources like Cordwood Construction are a fantastic place to learn more about it, and be inspired. Of all the other sites I’ve looked at, this one is, hands down, the best of the lot!
I’m really looking forward to putting what I learn from this resource into practice, and definitely recommend this resource for anyone to check out, even if it’s just to learn more about this fascinating building method.
Today, I was finally able to continue working on cleaning up the old part basement.
For those who are new to visiting this blog (Welcome! Thanks for popping by!), click here to read about what happened, and you can see the clean up progress here, here, here and here. (All links will open new tabs, so you won’t lose your place! :-) )
I’ve really been kinda dreading what I need to work on next, which is to start putting back some of the things I had to move out during cleanup, and try and figure out what to keep, what to store elsewhere, and what needs to be disposed of. Hopefully, I won’t be finding any more hidden “poison for tree” containers hidden somewhere!
The first thing I did today was move the blower fan to a different area, so I could do a bit more clean up in the last section I had worked on.
The photo on the left is how it looked when I last worked in this section. There was still a lot of dust and dirt in the area, but trying to sweep it did more to kick the dust into the air than get rid of it.
In the process, I discovered a light fixture hidden between two furnace ducts! I had to have seen it before, but simply forgot it existed. It’s very well hidden! (As an aside, I had my phone on one of the ducts near where I was working, held in place by the magnetic case, playing music. I later found out the girls could hear my music on the second floor, through the vents!)
There are so many odd little lights around this old basement. This half of the basement alone has one of two lights that turn on with the switch at the top of the stairs, one that has its own switch at the side closer to the new part basement, and one above the septic pump that has no switch. It is screwed in and out to turn it on and off. Now I find the light with the pull chain between the ducts, so that’s 4 lights on this side of the stairs. On the other side of the stairs is the other light that’s turned on by the switch at the top of the stairs, a light with a pull chain above the sump and well pumps, and another with its own light switch closer to the furnaces.
That’s a total of 7 lights in one little basement!
Anyhow. Where was I? Oh, yes. Cleaning.
I was even able to wash this section of wall a bit. The other walls were too crumbly, and the best I could do was sweep them gently, but this wall is solid. Since this wall is part of the original basement, but became an internal wall after the new part was added, it tells me that the crumbing of the exterior basement walls is probably due to all sorts of moisture from the soil around it.
Waterproof sealants probably didn’t exist when this basement was built.
As for the clean up today, this time I didn’t even try to use the mop bucket, and just set up in the laundry sink. That water got so black! Even after changing the water several time and rinsing the floor several times, it was still really filthy.
We’re not going to be able to use this mop anywhere else in the house anymore. :-D No amount of washing and rinsing of the mop will get it clean enough!
Once the floor was washed and rinsed as best I could, I set up the blower, then turned my attention to the two shelves we will be able to reuse.
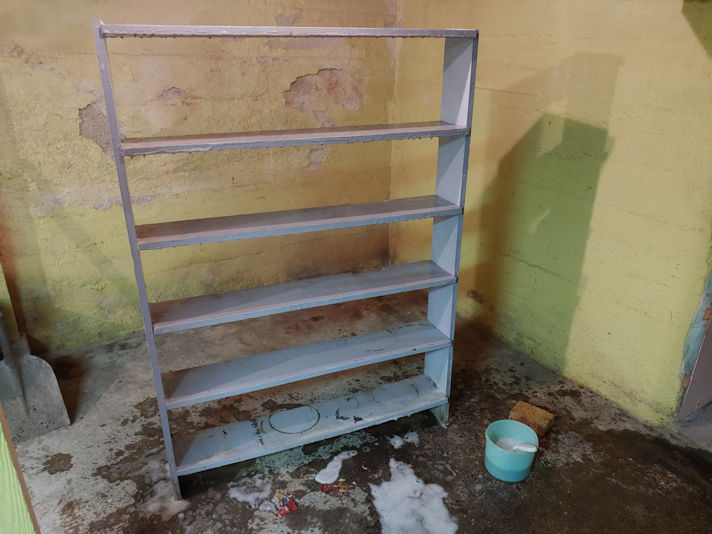
I started by washing and scrubbing the shorter one.
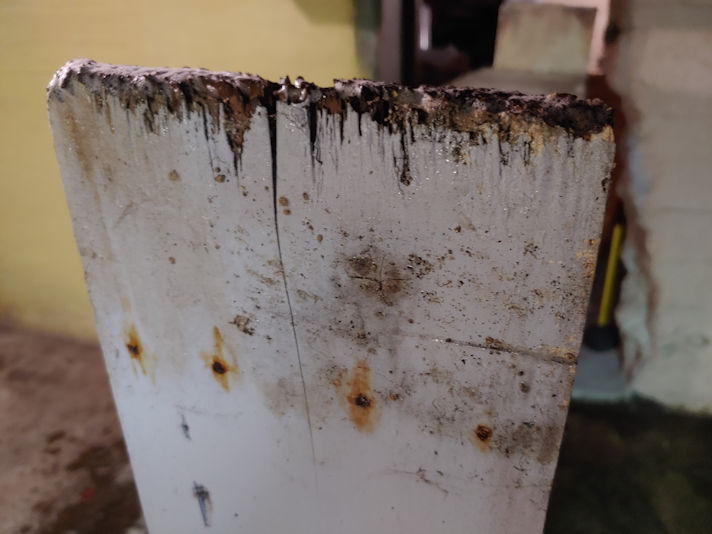
I gave it a good scrubbing – after first removing the nails that were used to attach it to the pillar it was next to, originally – then flipped it upside down to do the bottoms of the shelves. You can see the water damage on the “legs” of the shelf, even though it was raised off the floor by bricks.
When this shelf was scrubbed and rinsed (and I took advantage of all that soapy water to mop that section of floor again), I dragged out the taller shelf.
It needed some nails removed before I could start cleaning it, too.
This one has less water damage on its bottom, but was a lot dirtier. The section of wall it was next to is crumbling a lot more than where the shorter shelf was set up. At least this shelf is a lot sturdier, which made it easier to scrub.
Once they were done, I set them up where the blower is aimed, on bricks to keep the air circulating.
Though we will be using these shelves, because we need to, it will be temporary. When we are able to, we’ll pick up some plastic utility shelves to use instead. No wood. No metal. Not for this area!
Once we figure out what goes where of the stuff that got moved out of the shelves, we plan to use them to store bottles. We’ve got a stack of bottles from hard apple cider that we’ve been accumulating over the past two years that will be used as bottle bricks when we do our cordwood practise building. There are also lots of other bottles and jars all over the place, and as we clean those up, we will set aside the one we want to use at bottle bricks as well, so we’ll have other colours as well as ones with no colour at all. The outdoor bathroom we’re planning to make as our first practice building is not going to have any windows in it. Bottle bricks will be used, instead, so all light while maintaining privacy. Whichever wall ends up facing south the most, will have the most bottle bricks with no colour in them for maximum sunlight.
Storing these in the old basement will also mean we’ll have access to water, and the old laundry sink that has turned out to be so very handy. The bottles and jars will need to be cleaned and sterilized before they can be made into bricks.
Little by little, it’s getting organized!
All of this took only about an hour, and it feels like I should have done more, but everything needs to dry before I can continue. Hopefully, I’ll get a bit more progress in tomorrow.
Now, before I forget again, I’m going to go back into the basement and get the dehumidifier that’s down there running.
I want to thank those who reached out to me after my post about the various situations we’re having to deal with on the property. Your kind words and encouragement are greatly appreciated. Thank you.
The night I wrote about all that, one more thing got added to the list.