Morning in the garden

I just spent a bit of time going back over garden photos from last year. For all the drought and heat waves we had, the garden was well ahead of most of this year’s garden. It’s amazing how much the extended cold and excessive moisture has set things back. At this time last year, I was picking at least a few summer squash, and even beans in the morning. As much as they struggled in the heat, the peas were starting to produce pods. The melons were setting fruit and looking really prolific, and even the Mountain Morado corn was starting to develop cobs. The cherry tomato mix and spoon tomatoes had sprays of green tomatoes, with some ripening and ready to eat, soon after.

This morning, I was able to give more onions a hair cut.

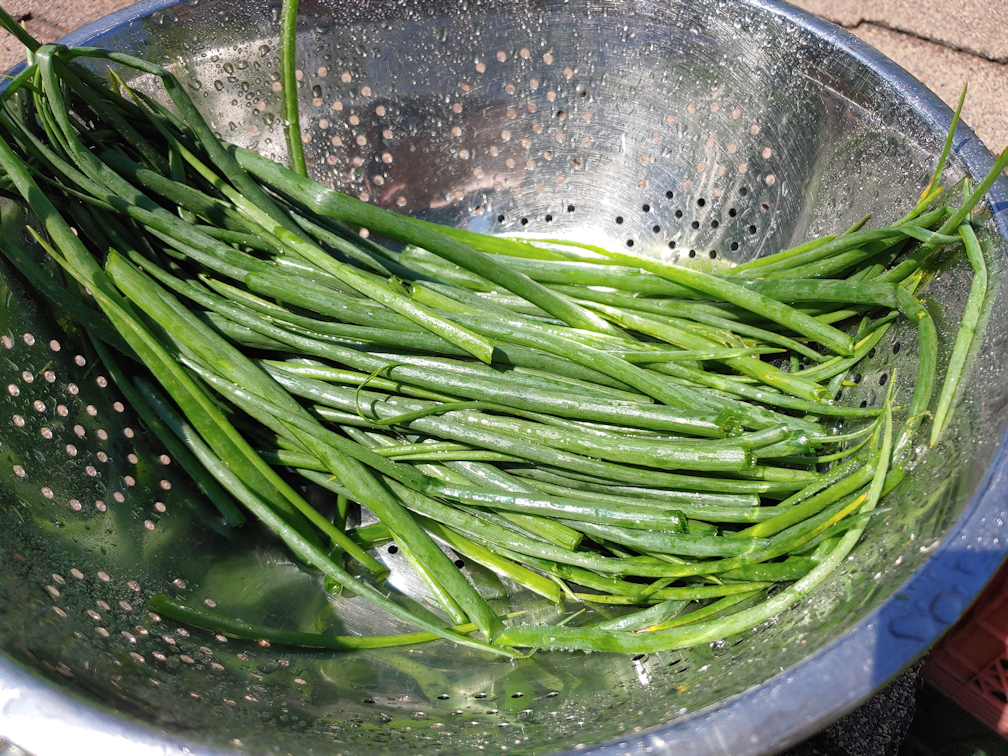
These are onions from seed, taken from the high raised bed, which had the most, plus a few from one of the low raised beds. We picked so many from the onion sets last time, most of these went straight to getting dehydrated.

Kitchen shears makes the job to much faster. After a more thorough washing, then trimming off the browned tips, it was quick work to snip them into small pieces. As I write this, they are in the oven under the warm setting, at 145F (the lowest temperature our new oven can go).

Even with the onions, there’s a difference. They they are looking pretty good, last year they were developing bulbs by now.

I got to taste our first strawberry from the transplants! It was so very sweet! Not the one in the photo; that one’s not ready yet. Nor the first one that developed. That one rotted before it ripened for some reason. There are plenty more developing, and lots more flowers, though, so I hope we will have a decent amount from our 4 little plants. Hopefully, they will also develop runners that we can propagate, to have more plants next year. :-)

Still nothing from the bare root white strawberries we got, though. Looks like a total loss, there.

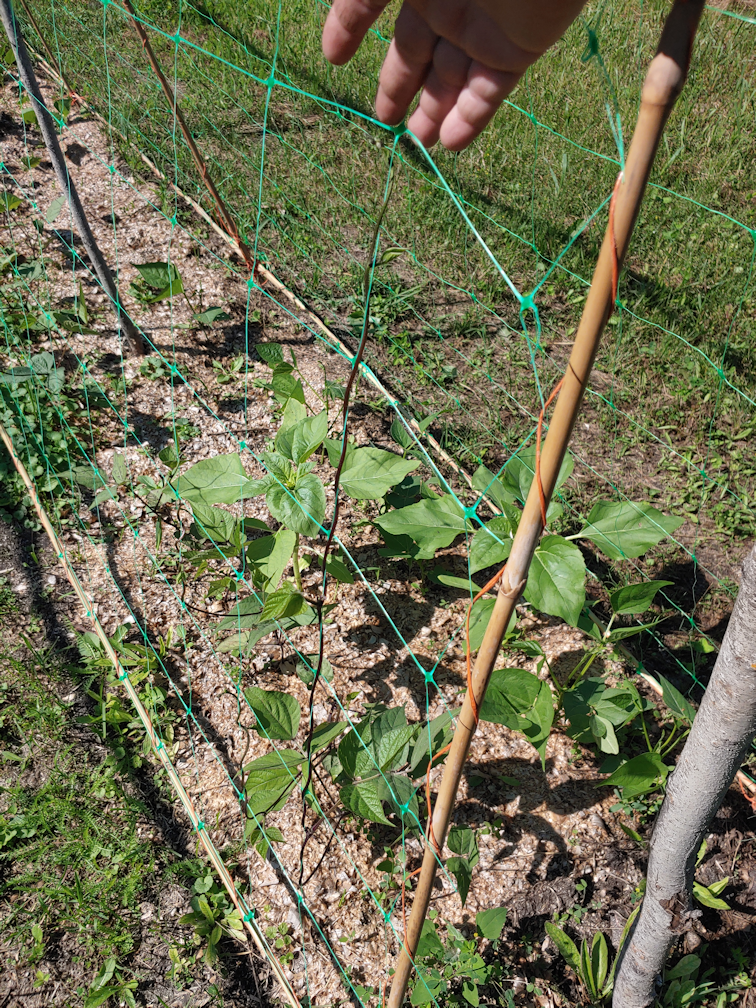
Some of the Carminat pole beans are getting very enthusiastic about climbing! The pole beans on the other side of the trellis aren’t quite there yet. There are a couple of self seeds (or should I say, bird-poop seeded) sunflowers that I am allowing to grow. There are some in other beds that I’m letting grow, too.

I was sure the beans I planted at the tunnel were also vining types, but I’m starting to think they are actually a bush bean. They are getting bigger, but so far, I see nothing to show that they are climbers!

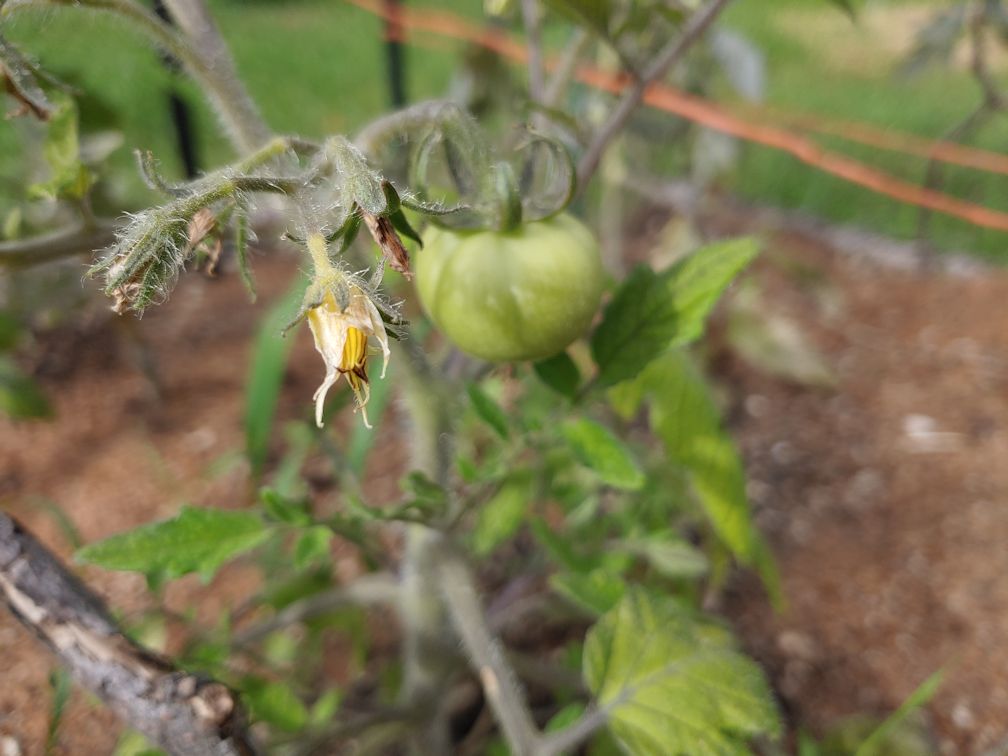
While the Chocolate Cherry and Yellow Pear tomatoes are not showing fruit yet, the tomatoes that were started so much earlier indoors are really starting to fill out! Almost all the plants are starting to show fruit now. The photo above is one of the first Sophie’s Choice tomatoes to develop, and it’s getting surprisingly large, from what I can tell for the variety.

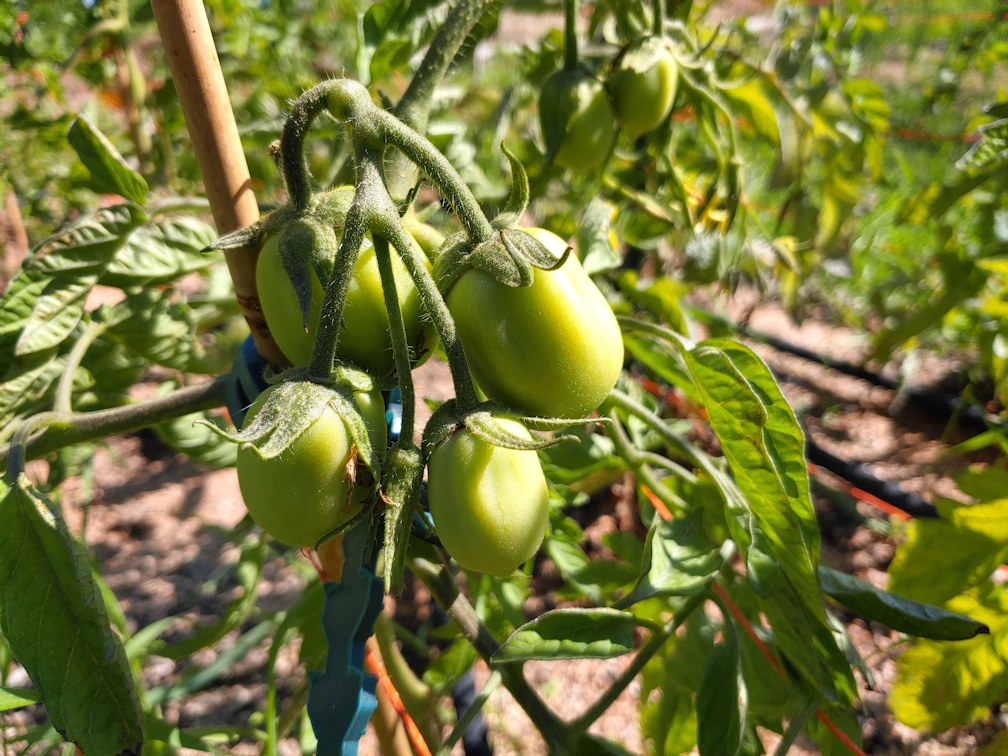
There is a distinct shape difference between the Sophie’s Choice and the Cup of Moldova tomatoes. In fact, it looks like the row that I thought was all Sophie’s Choice actually has a few Cup of Moldova in it. There are a LOT more of the CoM than the SC tomatoes.

The big surprise are the giant pumpkins. Do you see that flower above? And all the buds around it, both male and female?

That’s on the pumpkin I found with a broken stem. The one I didn’t think would survive. Turns out that pushing the broken surfaces together and burying them was enough to save it.

The rest of the squash nearby are not really doing well. Most are still very small, and even the ones that are growing more are nowhere near as big as they should be for this time of the growing season. I am starting to think we might not get any of the winter squash in this patch (the Red Kuri at the chain link fence is doing really well, at least), and we’ll be lucky to get any summer squash, too. The melons are all so small, I just don’t see them making it. Squash and melon all need lots of water, but it looks like they still got too much, this wet-wet spring, and just aren’t recovering. Unless we have a ridiculously long and mild fall. Some of the hulless pumpkins seem to be doing better, but I still don’t think they’re recovered enough to get a crop this year.

We planted SO much this year, and it seems much of it is going to be wasted effort. Hard to believe that it’s pretty much all having a much harder time this year, with so much moisture and more average temperatures, than last year with the heat waves and drought. I would have expected it to be the other way around. Looking at what is working and what isn’t, it definitely confirms that we need to go with the high raised beds. Even the low raised beds, while better than what’s at grade, are not all doing as well as one would expect. The tomato bed is the only thing I would say is doing really well. Most of the onions are doing all right, though even the shallots from sets planted near the Chocolate Cherry tomatoes are struggling at one end of the bed. Though the bet was raised about 4 inches when we framed it with bricks, the end near the vehicle gate had a lot of water around it. So much, it even looks like the shallots at the end were largely drowned out. At least there are more, further down the bed, that escaped nature’s wrath!

I’m struggling with disappointment right now. We planted more then we “needed”, with the expectation that we’d lose some, so that we could at least still be able to preserve food for the winter. Now it’s looking like we’ll barely have fresh produce for the summer.

The Re-Farmer

Making chive blossom oil

Last night, I found a large enough, liquid tight jar that would be great for making chive blossom oil.

It’s big enough that all the cleaned and dried blossoms could fit into it. The jar was saved from some Christmas nuts that were available at a local grocery store. Buying the nuts and keeping the jar was cheaper than getting the same type of jar (without the decorative glass) on its own!

After putting the blossoms in, the jar was filled with olive oil, then gently muddled with the handle of a wooden spoon to get out any air bubbles. A label on the top has the date and a reminder to turn the jar a bit, at least once a day. It should be stored in a cool dark place, but with the temperatures we’ve been having, we’d got it in a dark cupboard that is just a little bit cooler than the rest of the house. Thankfully, we aren’t expecting any unusually high temperatures for the next while.

This should be ready to use in about 5-7 days – or longer, if we want the flavour to be stronger.

Making infused oil can be quite easy!

The Re-Farmer

Our 2022 garden: morning in the garden, and first tomatoes!

My morning rounds are taking longer, as I am able to do more in the various garden beds as I go along.

I harvested the largest of the chive blossoms, before they go to seed. While I continued with my morning rounds, one of my daughters washed and de-bugged them, then laid them out on a cooling rack in a baking tray to dry. They are in the oven, with no heat at all, to protect them from the cats. Once the wash water is dried off, we’ll stick as much of them in a jar as we can, with olive oil. Any extras will go in the freezer. Or maybe I should split them into two jars and use them all. There are more chive blossoms to harvest later on, so we’ll have plenty to infuse in vinegar, too.

Speaking of drying things, during the night that cats did manage to get at the stacked screens of drying mint leaves. We’ve lost about 2 screen’s worth of mint leaves to the floor. :-(

When I moved on from the old kitchen garden to check on the squash patch, I noticed one of the giant pumpkins was no longer upright. I thought it might be because it had grown large enough to start leaning over, but I was wrong.

The stem is broken, right at ground level. Possibly from the high winds we’ve been having. Or…

Possibly weakened by the ant hill that has formed on that side of the pumpkin mound!

I built soil up around to support the stem again, in the off chance that it will survive, but with a break that large, I don’t expect it to. We are likely down to just one giant pumpkin plant.

Everything else in the squash patch seems to be surviving so far, and I’m seeing new growth in most. The squash that were started at 4 weeks are so very small, though. I kinda feel like maybe we should have started them at 6 weeks.

I had a very pleasant surprise in the tomato patch nearby, though!

Of course, the camera on my phone didn’t focus where I wanted it to. :-D

We have our first tomatoes forming!

These are on the Sophie’s Choice tomato plants. We got these seeds as a freebie with my order from Heritage Harvest, which was a very pleasant surprise. They have a much shorter growing season, and were started indoors at around 10 weeks or something (it’s a good thing I am using the blog as a gardening journal to record the details, because I’m already forgetting!). So I am not surprised that these are the first to start forming fruit.

We did get some rain last night, but it was light enough that much of the water in the garden was able to get absorbed by the soil, and the paths are just really wet, instead of big puddles of water. That meant I could finally do some much needed weeding in the summer squash bed, then pruning of tomatoes.

I took some of the strongest, healthiest looking branches that I pruned off the Sophie’s Choice tomatoes and transplanted them in the open spaces between the summer squash. I don’t know if I’m breaching any companion planting rules here (do tomatoes and squash go well together?), but whatever. If they take, great. If not, that’s okay, too. I specifically wanted to propagate more Sophie’s Choice tomatoes, as they are listed as extremely rare, so if I can save seed and help keep the variety going, that would be a good thing. Because they start producing so much faster than the other varieties we have, I’m not as concerned about cross pollination.

While I was weeding and tending different parts of the garden, I had Rolando Moon hanging out and keeping me company. Not wanting attention. Just being nearby.

I had to chase her out of one of the sweet potato bags, as she decided to start rolling in it! Then she jumped up into the high raised bed and lay down on some onions. THEN, she moved into the squash and corn patch, and sat on some corn seedlings!

That cat seems determined to be destructive!

Meanwhile…

The tomatoes are not the only things blooming. Two of the Styrian hulless pumpkins have suddenly burst into bloom, and they are all covered with buds again. Their first buds had been pruned away when they were transplanted. They look to still be all male flowers. I’m debating whether these flowers should be pruned away, too, so more energy can go to the plants establishing themselves more. It hasn’t been that long since they were transplanted, after all.

Anyone out there know if it would be helpful to prune the flowers off now or not?

The beans and peas at the trellises and bean tunnel are looking quite good. The cucumbers seem more touch and go. The first peas that were planted are getting quite large, and the snap peas are already large enough that some have latched onto the vertical trellis strings already. The snap peas are growing noticeably faster than the pod peas.

There is a single, out of place pea plant that showed up, right near the upright post at the start of the row. It seems to be a pea from last year that finally germinated! It germinated quite a bit earlier than the others, and I’m trying to train it up the support post, since it’s too far from the vertical lines to climb. Last year, we planted the King Tut purple peas here, so that’s what this one would be. It’s even almost as large as the purple peas we started indoors from saved seed, and transplanted against the chain link fence to climb. They are all tall enough that they’ve attached themselves to the fence and are making their way upwards, even though they are still looking kinda spindly.

The Wonderberries have been ripening, though the plants haven’t really gotten any bigger, and have what looks like weather damage. I’ve been able to taste them. They are lightly sweet, but don’t have any predominant flavour. This may be something we just leave for the birds. I’ll have to get the girls to try them, too, and see if they like them. I don’t mind them self seeding in this location, as I’d rather have the berry bushes that produce food, either for us or for the birds, than the invasive flowers.

In other things, my plans for the day have had to change. My sister never made it out to my mother’s yesterday, because my mother told her it was “too soon” to start packing and bagging things in preparation for her apartment being sprayed for bed bugs. She has a shift today, so that’s out. My brother, meanwhile, is out of town for a funeral that had been delayed until now by the lockdowns. So it looks like I’ll likely have to go to my mother’s to help out. I’ll phone her, first, once I’m sure she is back from church. My sister will be able to come out tomorrow morning, and I hope to come out in the early afternoon for the last of the packing and bagging, and moving of larger items. Then she’s back the next morning to bring our mother to her place for the night. I’ll head over in the early evening to check on the place and make sure it’s locked up while my mother is gone.

On Tuesday, I should be heading into the city for the first half of our monthly shopping, too. I will time it so I can check her place on my way home.

Which means I’ll be getting very little accomplished at home over the next few days!

The Re-Farmer

Preserving the harvest: minted

Yesterday, I weeded mint out of the beet bed – one entire end was completely stunted because they were shaded out – then kept on going, harvesting mint from the path as well. The sump pump drains into here, and the growth is absolutely lush! By the time I was done, I had a huge arm full! This is all mint that was here before we moved in, so we have no idea what variety it is. I know it’s not spearmint. I don’t think it’s peppermint, either, but I really can’t say for sure.

Once inside, I took the best leaves off the stems and gave them a wash. Then I cleaned up and dragged in the old window screens we used last year for curing onions, drying spinach, etc. I covered the mesh with paper towels, then set out as many leaves as I could fit onto them to dry.

I didn’t even use half of what I’d gathered!

Yes, this is the drying mint!

I used small glasses and jars as spacers so we could stack the screens on top of each other, but the cats were incredibly interested in what was going on. So we put more little jars as spacers on the top and covered the whole thing with a cloth. We still caught them on top of the stack, but at least the cloth kept the leaves clean.

Then, some time later, my daughter got Cheddar out from under the cloth at one end. *sigh* We tucked the ends under the bottom screen as best we could.

When I lifted the cloth on one side this morning, however, I found the cats had still managed to get under it!

I salvaged what I could and set it up again on the old dishwasher that’s still waiting to be taken out to the junk pile. Since the leaves have shrunk, I was able to fit them closer together on the screens that needed to be redone. For now, we’re keeping the sheet off, so they can get more air circulation.

Drying things on screens like this can work quite well, but protecting it from the cats is a problem!

Meanwhile, I used fresh mint to make a big pot of strong mint tea this morning, and there is still lots left in the fridge. There is much more to harvest in the garden, as we want, too.

The chives are blooming right now and ready to harvest if we want to make infused chive blossom oil or vinegar again. We have the olive oil to do that now, but I won’t be picking up more of the white wine vinegar I like to use until we do our next city trip. I might just harvest the chives, anyway, and freeze the extra until we are ready to make the infusion.

I love that we can already start harvesting things and preserving them!

The Re-Farmer

First time canning, and garden clean up progress

Just a bit of catching up on how things went yesterday.

The short version: Long.

It went long. Very long!

For me, it was working on pickling beets using the water bath canner. Until now, we have only done refrigerator canning, and my only experience with water bath canning was helping my mother, as a child. This is the first time I’ve done it myself, from start to finish.

It took WAY longer than I expected!

I have a Ball cookbook of canning recipes. The pickled beets recipe was for a half dozen 500ml jars. They had the basic pickle recipe, but also variations. After looking over our quantities of beets, I figured I could do two batches, with one batch being a “sweet pickle” using cloves and cinnamon sticks instead of the pickling spice mix of the basic recipe.

One batch called for 10 cups of beets. I decided to use up as much of the little beets as I could. Since they would be blanched and trimmed, and their small size would pack tighter than cubed larger beets, I made sure to grab more than 10 cups. I figured, if there was extra, we could just include them with supper or something.

While the first batch was blanching, which filled the blanching pot I found stored in a barely accessible space in the kitchen, I prepped a second batch to blanch. At the same time, I cooked the liquid with the pickling spice bag, and had everything ready to do the sweet spice version.

I was all ready to can the first batch, when I realized I had a problem.

These are the first batch of fully prepared beets.

I doubt I could have filled three jars with that, never mind six!

So I added the second batch.

I still wasn’t sure there would be enough to fill the six jars I had prepped in the canner!

The next step was to put them into the pickling liquid and bring it to a boil, then start filling the jars. After my first jar, I realized I would likely have another problem. Not enough liquid! So I started the spiced version going and continued. I ended up being able to do only four jars with the basic pickling liquid, and the last two got the sweet spice version.

I started working on this before my daughters headed out to work in the garden. They came back four hours later, and I was JUST reaching the point where I actually start putting beets into jar. Most of that time was spent scrubbing beets, blanching beets, removing the outer skins, trimming the tops and tails, and waiting for water to boil.

I know “a watched pot never boils”, but my goodness, it takes a long time for large amounts of water to come to a boil!

But, if finally got done! Our first time canning AND our first time canning our own produce!

Pulling my first jar out of the water, though, was a bit of a surprise.

I mean, I know our water is hard, but wow! For the jars to come out with a layer of scale like this is crazy! You can see on the jar on the far right, where I wiped some of it with a paper towel. They’re going to need to be washed!

I finally had a chance to remove the rings and check the seals, just a little while ago, and they all came out fine! I made sure to keep track of which ones had the different pickling liquid, for when the scale gets washed off and they can be labelled.

Except the jars we open to taste test! :-D

By the time I was done, it was full dark, so it wasn’t until this morning that I could get a photo of the girls’ hard work outside.

They got three of the four remaining beds in the main garden area done – and most of that time was spent on just one of them! The first two weren’t too bad, but the third one was filled with crab grass, and it took them ages to get as many of the rhizomes out as they could!

I am amused by all the cat footprints in the loose soil! :-D

I’m glad they were able to get these done. Today turned out to be a write-off for outside work, but I will cover that in my next post. :-)

The Re-Farmer

Deliciousness

While I was outside, using the wood chipper, my daughter was busy dealing with our last summer squash!

She made four 750ml jars of refrigerator pickles with most of them.

The rest went into a summer squash and tomato soup. I think she actually used canned soup as a base, with the summer squash and the teeny tomatoes we’d harvested recently, plus our own onions and garlic, added in, then whizzed with the immersion blender when they were cooked.

It was absolutely delicious!

The Re-Farmer

Our 2021 garden: so many beans!

For the past while, we’ve been harvesting a handful of beans, every couple of days. Just enough for the day’s meal, really. It would mostly be the yellow beans, with a few greens, and maybe three or for purple beans.

This morning, we had our biggest harvest, yet!

It is still mostly yellow beans, but they are on the bottom. It’s remarkable to me how, the plants that are the smallest and having the hardest time in this heat, is producing the most right now! Not for long, though, I think. There are LOTS of immature green and purple beans hiding under the leaves. We should start getting hauls like this more often, soon. :-)

This is the first time we had enough to make it worthwhile to preserve them. Not enough to make it worth breaking out the canner or doing some quick pickles or something, but enough to fill a bag for the freezer.

After trimming the ends, then cutting them to more equally sized pieces, I was able to use the blanching pot I’d found in the storage area of the kitchen, while trying to cat proof it (it’s right up by the ceiling and hard to get to!). This is the first time we’ve been able to use it. :-)

All those ice packs we have to help keep our food cold or frozen when we do our city trips are coming in handy. I used a bunch of them to make an ice bath to chill the blanched beans in. We don’t typically make ice with our well water, and the ice we do have is purchased, so I didn’t want to use any of that!

This variety of purple beans turn green when cooked or blanched. They are a somewhat less bright green; you can tell them apart in the foreground.

The blanched beans were laid out on a couple of trays and are now in the chest freezer, to be bagged later.

One thing about freezing produce. It’s very fast! I still hope to have enough to pickle or pressure can, so we have shelf-stable beans, too. :-)

The Re-Farmer

2021 garden: into the root cellar

With the blessed rain we’ve had, our garlic and onions hanging in the canopy tent did not get rained on, but when I checked them this morning, I was concerned about the effect the humidity might have on them. They need cool and dry to cure, but our options were hot and dry, or cool and damp. Suddenly hot and humid changes things. :-)

We did not get more rain today, and by the end of the afternoon the bulbs felt dry again, so I prepped them to bring into the root cellar.

The garlic got their tops trimmed, and everything got their roots trimmed off as well. The job was very quick and easy to do, with them all hanging in the tent!

It seems like so little, when they’re in the grocery bag I used to bring them inside!

I left them as they were on their twine, so they could be hung in the root cellar.

The root cellar is under the entryway, which is two steps lower than the rest of the new part of the house. I’m about 5’4″, and I had to make sure not to hit my head on the floor joists for the floor above! It’s definitely cramped in here!

There are quite a few large nails hammered into the floor joists. I used those to hang the strings up again, so they can continue to cure. You can’t see it in the photo, but there is a duct running between a pair of floor joists to outside, for air circulation. The duct is covered with mesh on the outside, to keep the critters and insects out.

We had been thinking of converting this room into a cheese cave and monitored the temperature and humidity in here for about a year, taking once a week readings. We missed a few weeks here and there, but still spanned a year.

The average temperature in here was 12C/54F, and the average humidity was 62%. The highest temperature was 18C/64F, which is what it was at while I was hanging the garlic. The lowest temperature was 6C/43F. The highest humidity reading was 88%, and the lowest was 28%. While I was hanging the garlic, it was just under 80% humidity.

The ideal average temperature for a root cellar should be between 0C – 4C (32F – 40F) with the humidity ranging from 85%-95%

So the conditions we should be getting, for a good root cellar, are winter temperatures and summer humidity levels.

:-/

One of the things I noticed while ducking around the ceiling to hang the garlic, is that the light bulb in there is putting off a lot of heat.

I was thinking of setting a fan up in here, but there is no outlet.

After scrounging and digging around, I found a low lumen “chandelier” LED bulb, and an outlet adapter for the fixture. My husband isn’t using his box fan right now, so I set that up in the root cellar, plugged into the outlet adapter. The adapter has a pull cord so that the light can be turned off while the outlet still gets power, but because of the type of light bulb in there now, it didn’t want to shut off, and just blinked on and off. So I left it on. It won’t add to the heat, and won’t use much power. We’ll just have to check the garlic and onions regularly, until they are cured.

Once the garlic is finally cured, they will be taken off their twine and packed into cardboard boxes or paper bags, depending on what we have available at the time, for storage. The onion braid will probably just stay hanging. I expect, before those are ready, we’ll have harvested the rest of the onions and will have them hanging in the canopy tent for a while, before moving them into the root cellar, too.

Hopefully, by winter, we will have more food stored in here, such as melons, winter squash and potatoes. We had high hopes of being able to store canned goods here, too, but between the critters and the drought, we’ll be lucky to be able to do some refrigerator pickles. :-( Anything else we have will be in quantities that will be more practical to freeze or dehydrate, rather than can. Even if we won’t be able to can much from the garden, I am planning on pressure canning heat and eat meals, at least, like chili or stew. Things like that are just really handy.

We shall see how things go over the next couple of months!

The Re-Farmer

Our 2021 garden: first garlic done

Yesterday evening was so lovely out, I spent as much time outside as I could! I took advantage of this to finished up the garlic we harvested some time ago. They have been hanging from the rafters under our gazebo tent to cure. It was not ideal conditions. They should be somewhere cool and dry. What we had available was outside, where it was hot and dry, or in the basement, where it was cool and humid.

I figured hot and dry was better than cool and moist!

The stalks and roots were trimmed, the soil brushed off, then they were tied up in twine.

They are not as cured as well as they should – some of the stems are still showing a bit of green – so these will need to be eaten fairly quickly. Which is sssuuuccchhh a hardship… Ha! I look forward to using them. They are currently hanging from the ceiling in the kitchen.

I think garlic soup would go over very well! It’s usually made at the end of winter, as a sort of spring tonic, but I think it’s good, at any time! I use an entire bulb of garlic to make it, but these are so small, I might just use up a whole bunch of the littlest bulbs. :-)

While these were dying back way too early and had to be harvested, the rest of the garlic is now looking ready to harvest, too. It’s still early, and I don’t expect very large bulbs, but that’s okay. We’ll be buying more to plant for next year, rather than try and save bulbs from this year’s garden.

The Re-Farmer

Making things

Today has been another day of rain and high winds.

After today, we’re going to be back to high temperatures and sun. My Weather Network is forecasting 37C/99F on Wednesday! I think that must be some kind of typo, because I’m not seeing that anywhere else. The highest I’m finding is on my phone’s app, which is forecasting 27C/81F on the same day. Even so, it’s going to get hot again, and I am really, really glad we’re getting this rain right now!

In between rainfalls, we managed a trip into town, and I even got a bit of weeding done in the garden. We’re going to need to do a LOT of weeding once this rain passes. The weeds are loving the rain as much as the things we actually planted.

Speaking of which, while weeding among the corn earlier, I did find some radish sprouts. They are recent sprouts, not the ones that came up before the corn did, then disappeared. So we will have at least a couple of radishes. Unless these sprouts disappear, too!

Gosh, I’m just watching the trees outside my window as I write this. If a section of that big maple came down right now, it wouldn’t surprise me at all!

With this weather, our internet is seriously cutting out. It’s taken me more than an hour just to be able to start this post, and I still can’t get images to load. So this will be a quick one!

I wanted to share some of the new things we’re trying this year. The chives are blooming, and we decided to try making chive blossom vinegar.

I got a small bottle of white wine vinegar, and we’re simply putting clean, dry chive blossoms into it (after removing a bit of vinegar to make space. Some of the blossoms are left whole, while others had the bit at the bottom taken off, so all the individual flowerettes are loose. We’ve been adding to the bottle as more blossoms open up, then we’ll let it sit for a couple of weeks, in a cool, dark place, giving it a few turns every now and then. After that, the vinegar will be strained and re-bottled. I’m looking forward to seeing how this turns out!

I’ve also started to dehydrate spinach leaves.

I use our oven to dehydrate things, using the “warm” setting, reduced to it’s lowest temperature of 145F (default is 170F). For something as light and thin as spinach leaves, I shut it off and let the oven light on to stay warm. We can only fit two trays in the oven at a time, but after I went to turn the leaves and found they’d shrunk enough, I combined them into one pan and left it for the night. In the morning, I just crushed them lightly, and put them in an air tight canister. There’s maybe 1/3rd of a cup of dried, crushed leaves from the 2 trays. We’ll keep doing small batches like this and, eventually, we’ll reduce them to a powder instead of flakes. It kind of reminds me of dehydrating celery. You start off with what looks like so much, but by the time it’s completely dehydrated, it looks like there’s nothing there! :-D

Now it’s time to see if I have enough connection to publish this!

The Re-Farmer