Clean up: spruce grove, further down the line

Another lovely day for yard work!

The girls were awesome and hauled away what I took down yesterday, while I made a run into town to get the prescription refills that got missed yesterday.  By the time I got back, they were just finishing, and I could get started! <3

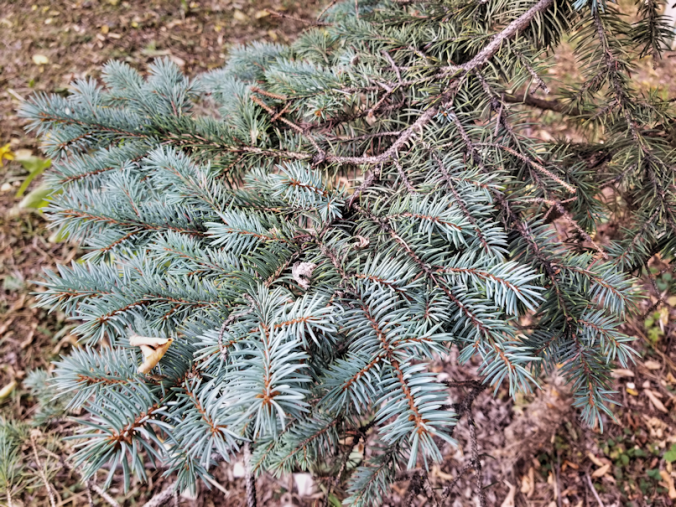
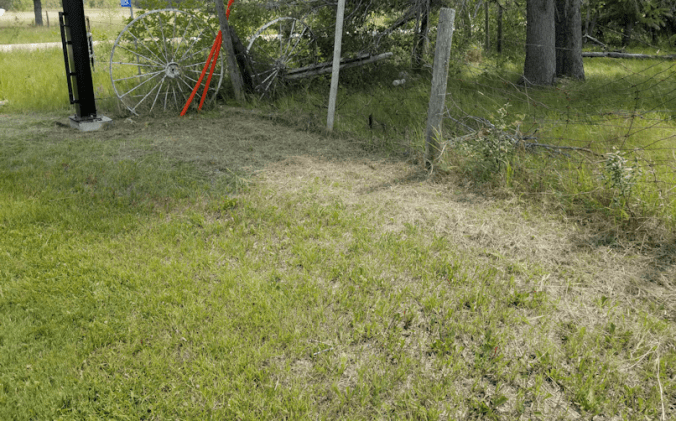
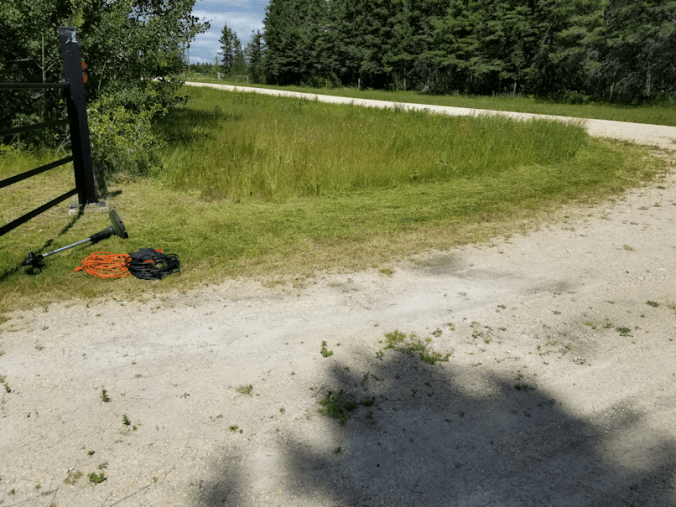
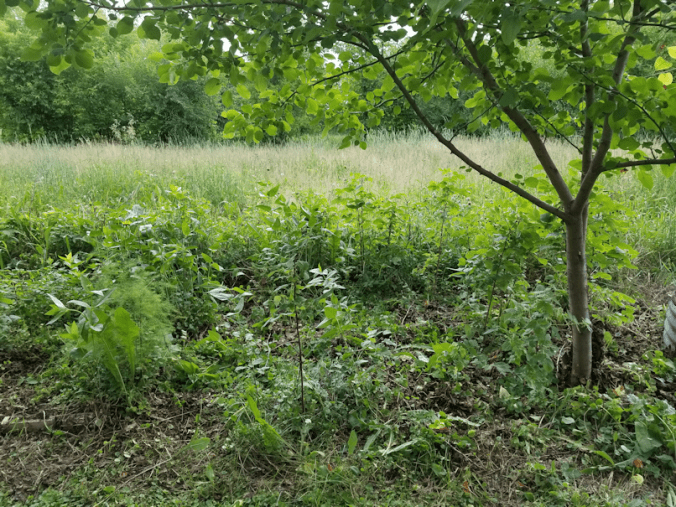
Before I started on the next section of trees, I got the anvil sheers out and worked on the area that was under the overhanging branches.  Here’s a look back at the area I cleared yesterday.

20180821.cleanup.sprucegrove.downtheline.lookingback

The wheel barrow is filled with all the little things I pruned out, and a few things dug out of the leaves, etc.

If you look in the wheelbarrow, there is a lighter coloured stem sticking out, to the right of the handle.

Notice it looks slightly… fuzzy?

That’s a wild rose.  And the “fuzzy” is thorns.

Wild rose stems are basically all thorns.  Little, skinny, vicious thorns.

The gloves we have are decent gloves.  Not the highest end, by any means, but good, mid-range quality gloves.

Wild rose thorns can go right through them.  I had to stop and get a daughter to use tweezers to pull one out of a finger, because I wasn’t able to do it one handed in the spot it pierced me!

When I start working further into the spruce grove next year, I plan to keep as much of the wild roses in the undergrowth as I can.  What I’ve cut away here will likely grow back, since I just pruned them.  The root stocks remain.  I will make decisions about them next year, as they grow back.

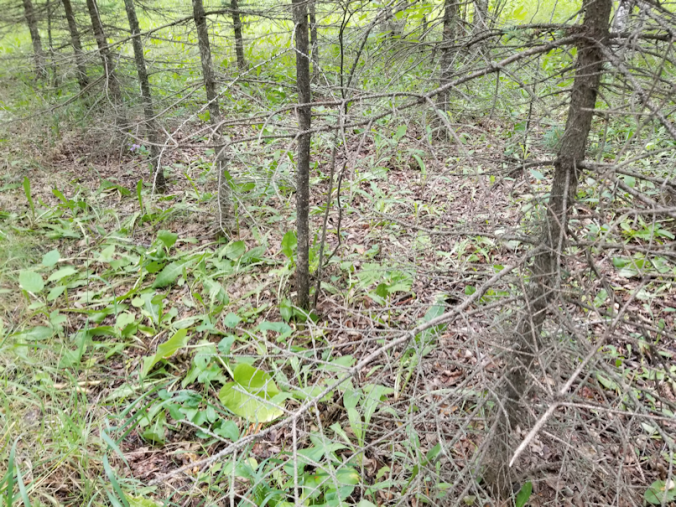
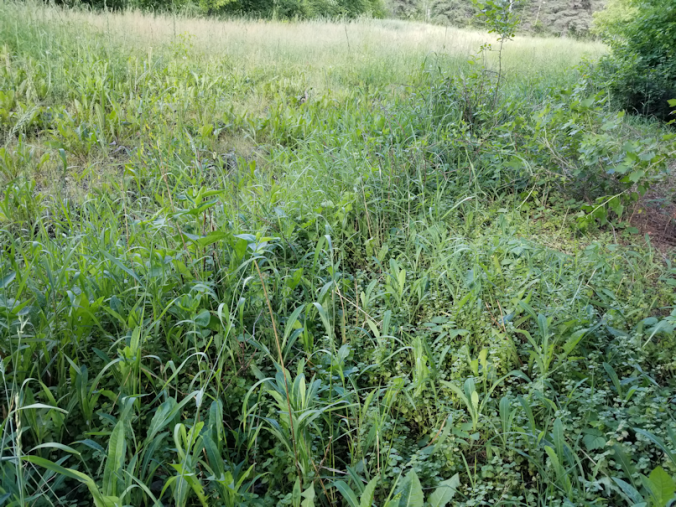
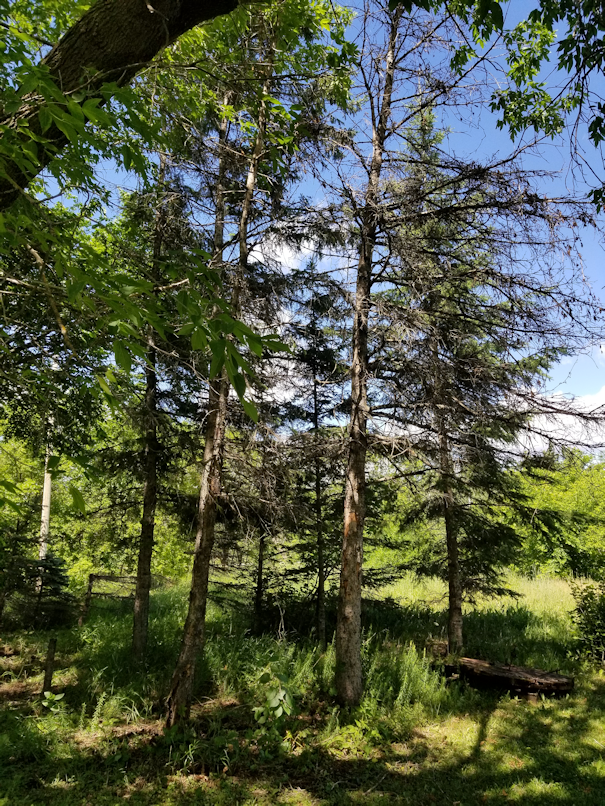
Here are the before and after photos of today’s progress.

This is basically where I left off, yesterday.  Once I took out the dead and dying tree next to the last tree I worked on yesterday, I was able to finish that one up, taking out more dead branches with the extended pruning saw.

My goal for today was to work my way down to a maple tree.

No, you can’t see it either of the photos above!

Nor the photos below.

Though I did thin out some smaller poplars, I’ve left the bigger ones.  I am hoping, as they get more sunlight throughout the day, they will not lean quite so much as they grow larger.

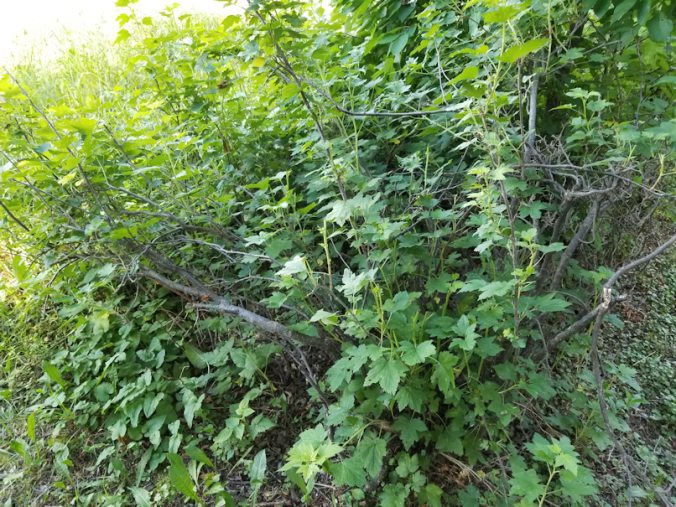
The farther I worked down the line, the spruces seemed to get thinner, and more crowded.  Quite a few were dead, but I was surprised by how many still had live growth happening.  I still avoided working the inner row of trees, which is where most of these are.  A few times, I did have to prune away dead branches and twigs, so I could access the trees in the outer row better.  It should be interesting to see how they fare, next year.  It is very typical for the lower branches of black spruce to be dead, and it’s not always a reflection on the health of the tree.

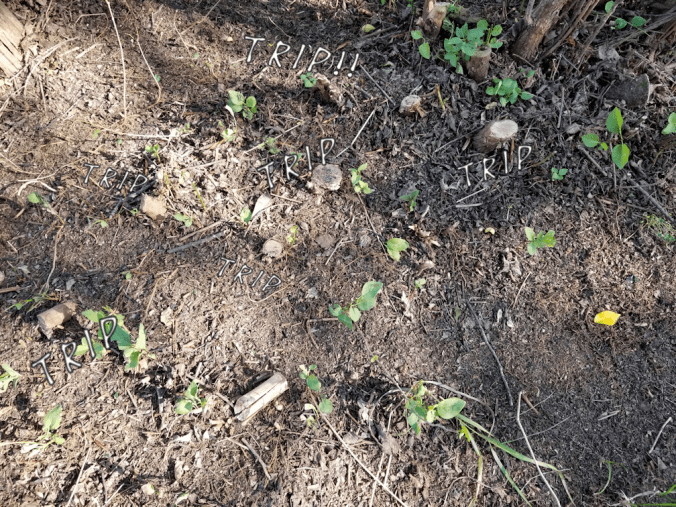
As I cleared away the low hanging branches, I found more and more wild roses and, among them, little dogwood bushes.  I took out those that were large enough to be a tripping hazard, and will clear the rest out another day.  When I work further into the grove, I intend to leave any dogwood I find.  They make great underbrush.  It will be interesting to find that balance between open space and undergrowth that I want to foster in here.

But that will wait.

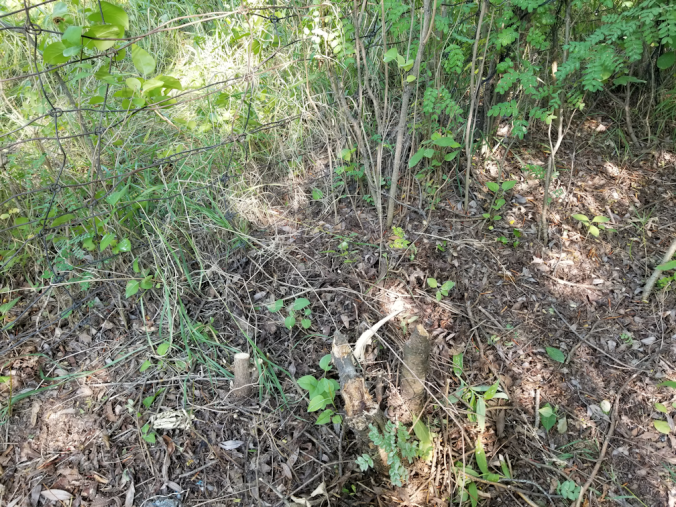
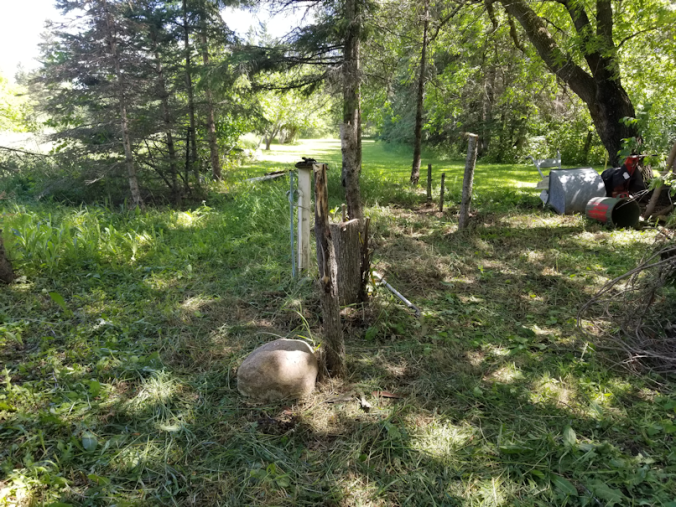
The maple I was using as my goal post was something I was intending to keep, like I am with some of the poplars.  Then I reached it and found that it was not the original tree, but growing out of the base of a rotten stump.

After removing the rotten bits, I found the rot extended quite low into the moss (all along the outer edge of this area, where the poplars and this maple are growing, the moss is several inches deep).  I wasn’t sure if the tree had much support, so I basically yanked it back and forth.  It seems to be holding its own, so I straightened it as much as I could and tamped the ground down to support it.

We shall see if it survives.

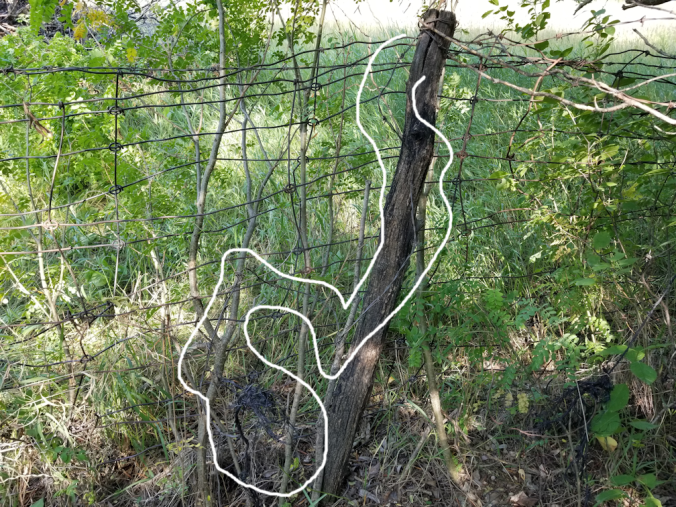
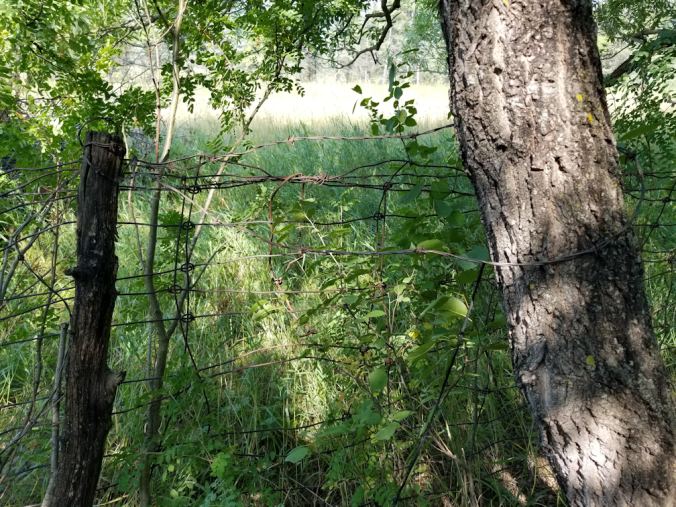
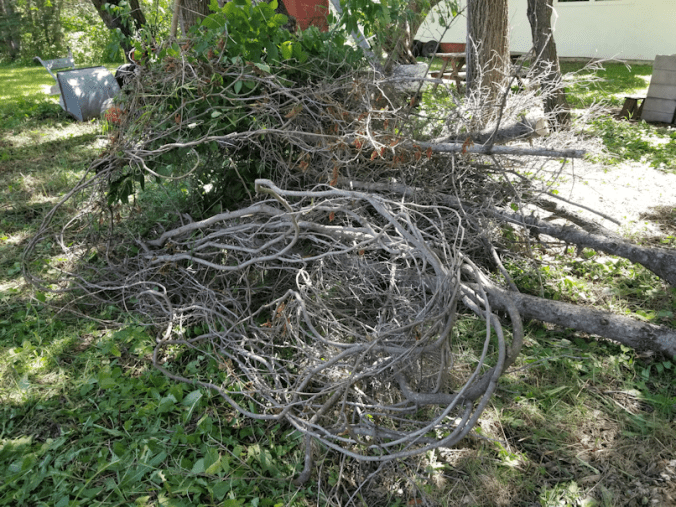
When I work on the next section, I should be able to reach the fence line.  After that spruce you see in the background, there is an open space of moss that I’ve been using to turn around with the mower. :-D  There won’t be a lot to clear, there.

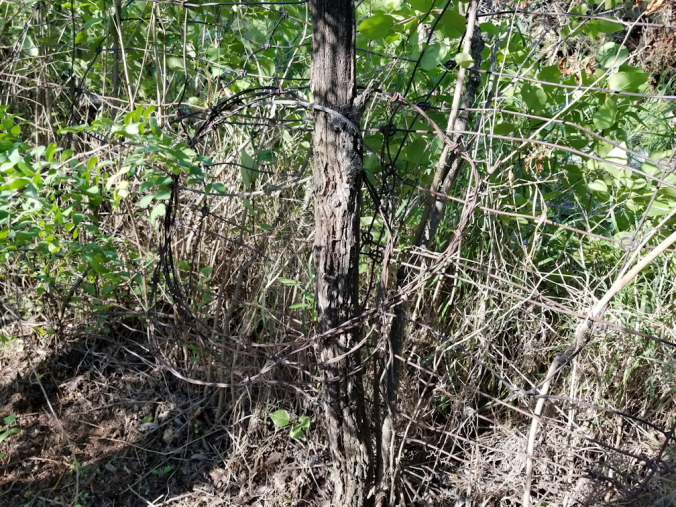
There are a number of larger, downed trees around here, too.  Once I reach the fence, I will start working towards the driveway.  The goal is to make the fence accessible, so I’ll be leaving the downed trees unless they are at the fence line.  I know there is at least one that had fallen on the fence itself, before we moved out here, that my older brother had cut loose.  So I will also be examining the fence itself, as I go along, and see what repairs might need to be done.

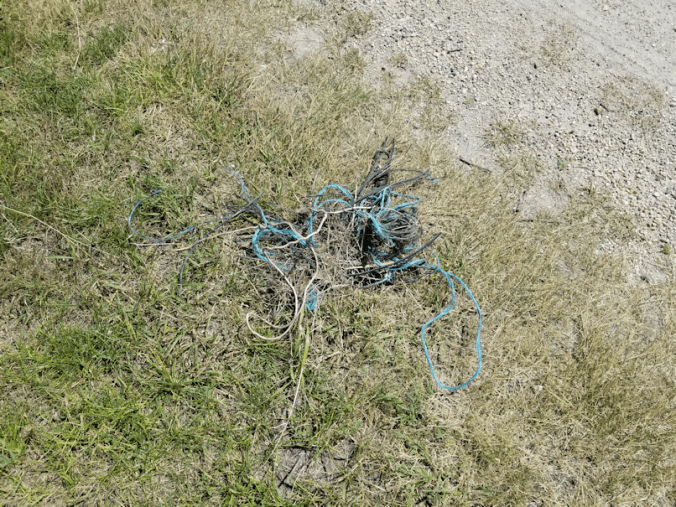
I’m quite happy with the progress and how it is looking.  The labour is not without it’s price, however!

20180821,scratches

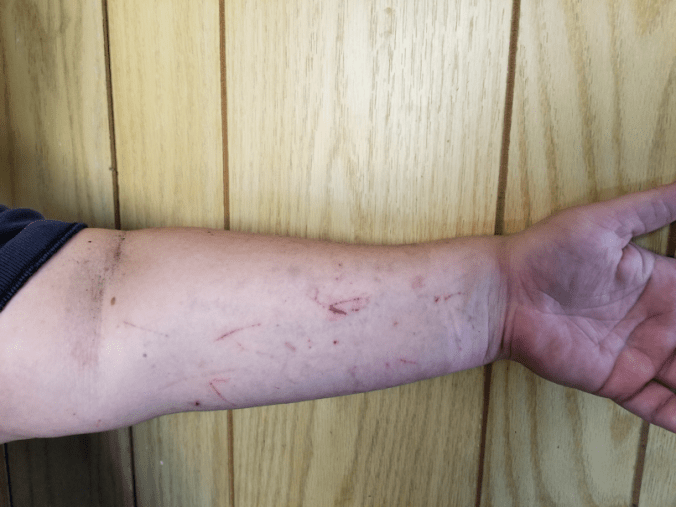
Both arms, my lower legs, and even my abdomen, are covered in scratches!

It’s sweaty, dirty and sometimes bloody work.

And I’m loving every minute of it!

The Re-Farmer

A visible difference

While walking around the maple grove with my daughter (and finding mushrooms growing on trees!  Will post those later…), I found myself looking at the lonely little Colorado Blue Spruce near the main garden.

Here is how things looked about a month and a half ago.

This first picture was taken at the very end of June.

20180630.cleanup.maplegrove.near.gardenpath.lookingeast

On the left, you can see three sad looking trees, grouped together.

This next photo was taken on July 2.

20180702.cleanup.maplegrove.eastside.progress.evening

I cut away two of the three trees, and pruned the dead branches on the remaining one, hoping it would survive, and maybe even thrive.

Well, this is how it looks now.

20180813.colorado.blue

As you can see, the new growth filled in vigorously!

It’s even looking blue. :-D

Here’s a closer look at one of the branches.

20180813.colorado.blue.branch

Here, you can really see the older, greener, needles contrasted with the new, bluer, growth.

It is already becoming a happy little tree, instead of a sad little tree. :-D

This is exactly what I was hoping to see – and faster than I expected!

This is a tree with the potential to grow 65 ft tall, with a width from 10-20 ft, though I have read they can reach 135ft high and 30 ft wide. They can grow anywhere from 12 – 24 inches in a single growing season.  This is a tree that needs space!  It’s unfortunate that the three of them had been planted so close together.  There are others that I hope I can clear up around and salvage.  This one, at least, might actually make it!

This makes me happy. :-)

The Re-Farmer

Clean Up, West fence line

After dropping my daughter off at work this morning (and a quick visit to the beach), I continued clearing the west fence line, working away from the fire pit area.

When I did my evening walk around the yard last night, there was still enough light to rake up the dead leaves and twigs where I had been working last time. It was not really something I’d intended to do yet, but I had issues last time that I wanted to check out.

This morning, with enough light to see, I checked it out.

20180809.cleanup.firepitarea.neargate.triphazards

Yikes!  No wonder I kept stubbing my toes, tripping and twisting.

I had cut those lilacs and caragana to as close to ground level as I could at the time.  I didn’t take into account the thickness of years of dead leaves.  Once raked out, I could see that I was no where near ground level on these!

Thankfully, I did not need to go over this area again today, because I didn’t want to use up what little time I had before the heat hit, cutting it down shorter.

This is the next section I worked on.

(Click on the images to see larger)

There’s one before picture, and two after pictures of the space around the two elms.

I did end up taking down some caragana and lilac growing together that I’d originally though I could leave.  You can see it to the right of the two elm trees in the before picture. However, to clear the fence line, they had to go.  Like so much else, there was a lot more dead in there than I expected.  Even after I’d already cut away dead sections, some time ago!

Here is how it looks now.

20180809.cleanup.westfenceline.2.after.lilac.caragana

I had no energy to cut it down closer to the ground than this.  By the time I’d got to this point, the heat was already getting to be an issue.

I also needed to clear it to get to the next section, which I had not expected to get to this morning.  Here are some before pictures.

The first two are around a bigger maple with three trunks.  The third picture is of some maple next to it.  All dead, it turned out.  When I grabbed the first piece, preparing to cut it, it just broke loose immediately!

Here is how it looks now.

Two of the three trunks in the bigger maple turned out to be dead.  I will take them down, the next time I’m working in the area.

On clearing away the smaller maple, I found the remains of an old, rotting stump under the leaves.  What I cleared away had been the suckers growing out of a maple that had been cut down long ago, that did not survive for very long.

The next section I will be working on will include that big willow in the background.

Of course, while clearing and cleaning, I found questionable things.

The first was…

20180809.cleanup.westfenceline.found.sock

A single sock, buried in the leaves.

When I first saw fabric, I figured it would be a painter’s glove, like the many I packed away from various places as we put my parents’ things in storage.  Nope.  A sock.  Just one.

Then there was the barbed wire.

20180809.cleanup.westfenceline.found.barbed.wire.1

The first being this rolled up wire on a fence post.  You can also see the end of the cable that extends from the gate post.  I can’t quite figure out why it’s there.  It doesn’t seem to be actually supporting anything.

Note the post itself.  It’s basically just a piece of tree someone cut to size and used as a fence post.  Untreated wood like this cannot last long.

Most of this fence seems to be made up of this sort of post. :-(

On the next post over, there was more barbed wire.

20180809.cleanup.westfenceline.found.barbed.wire.2

Just a length of barbed wire, with worn out twine at its end, dangling there.

I’ve left the lilacs and caragana growing through the fence at this point, to hold the fence up.  It’s no longer even attacked to some of the fence posts at the top anymore.

It wasn’t until I had cleared around the bigger maple that I realized what I was seeing.

20180809.cleanup.westfenceline.found.barbed.wire.3

Someone wrapped a loop of barbed wire around the trunk to hold up the fence post.

A temporary fix like this, I can understand.  But the whole point of temporary fixes is that they are… well… temporary.

That maple trunk is the one that’s still alive of the three trunks growing together.

I don’t think I was out much more than and hour, working on this, before I had to get out of the heat.  We’ve got heat wave warnings for the rest of the week, across the prairies.  As I write this, we’re at 31C (87.8F), with a humidex of 35C (95F).  It’s not expected to start cooling down for the evening until about 7pm.  At least we’re not supposed to go any higher, today.  By Saturday and Sunday, we’re expecting to get temperatures of 35C with a humidex of 41C (105.8F).

Ah, Canada.  Where the summers can get as much above freezing as the winters can get, below freezing! :-D

The Re-Farmer

Clean up: firepit area, gate and fence line start

This evening, I decided to be methodical about clearing the west yard trees, and get right into the fence line.

It was a lot more work than I expected!

This is what it looked like when I left it last time.

I didn’t get photos from this angle today, but if you look behind the dead trees I cut down, that’s the area I focused on.

I had not really intended to start on the fence line on this side yet, but the mess was starting to get to me.

I am using the row of elm trees as my guide line for clearing the fence.  Anything between where those trees are and the fence line will be taken out.  This will leave a walkable path to access the fence.

I started at the gate post and made a discovery.

20180806.cleanup.firepitarea.gateposts

There’s two of them.

From what I can figure out, as the older gate post started to become unstable, a second post as added, and new and old were tied together with a loop of barbed wire.

It was most likely a temporary fix that ended up a permanent one.

The problem is…

Both posts are rotten and broken at the bottom.

The hedge that had grown into the fence was pretty much the only thing holding it up.

I don’t really want to replace this fence.  I’d rather take it out completely.  I am wanting to install new fencing that will include both driveways, instead.  So for now, this old fence will remain for as long as it holds up.

As I worked down the line, I also discovered that there’s not just two gate posts, but two fences!  Somewhere along the way, the old barbed wire fence got a mesh wire fence added with it.  Then other cable type wire was also added, along the bottom.  You can see part of it at the bottom of one of the gate posts, above.

This made clearing away the lilacs more challenging, because it was woven through both the barbed and mesh wire.  For many of them, I had to cut them at least twice, so I could get the pieces out of the fence.

A surprising amount of the lilac was already dead.  Most of the living lilac is on the other side of the fence.  Which I will leave for now.  It’s keeping the fence from falling over.

In the end, it took me almost two hours to clear barely 8 feet of fence line!

20180806.cleanup.firepitarea.fenceline.start

I’m also clearing in between and around the lilac and caragana that is in line with the row of elm trees.  That included taking down a dead lilac that was a thick as a tree!

I’m going to have to change up when I work in the yard.  We’re getting heat wave weather warnings for the next week.  I like to do the work in the afternoon or evening, but the hottest part of the day tends to be around 5pm.  It’s almost 9pm as I write this, and we’re still at 25C, with a “feels like 29C”.  I’m going to have to start working on this stuff in the morning, instead, when it’s cooler, because by afternoon, it’s supposed to reach 29C, and feel like 34C, but be only 18C in the morning.

I am not a morning person. :-D

Well, if I’m driving my daughter to her shifts that start at 8 or 9am anyway, it will work out for me to do yard work when I get back in the morning, instead of after I pick her up at 4 or 5pm.

She has a road test booked in September.  She’ll be able to drive herself to work, if we don’t need the van for something else.

It is becoming increasingly clear we are going to need a second vehicle for the girls.  That and our utter dependency on having a vehicle makes me extra paranoid about having only one.  It’s not like there are any buses we could use instead, or anything is close enough to walk to!  We went about a month not driving our van until we had the money to replace the fuel pump, to avoid causing more damage (which our mechanic really appreciated), and that was enough for us!

At least we’ve finally reached a point where we are caught up.  As of this month, we have no expenses left related to our move.  Yay!  It only took us 9 months. :-/  Starting next month, we can start diverting money to a contingency fund to pay for things like getting the trees cleared from the power lines and roof in the fall, or towards getting a second bathroom installed.  Or unexpected emergencies, like the van breaking down!

The problem is, there are SO many things that need work around the house and yard, it will be hard to prioritize.  We had hoped to get the second bathroom installed this summer.  It’s high on the priority list, but clearing the trees became the higher priority since… well… we’d really like to NOT have our roof damaged or have branches knock out our power lines.

Little by little, it’ll get done.

The Re-Farmer

Clean up, west maple grove, continues

Such a lovely day today!

We had a gentle rainfall this morning, and when it cleared up, it stayed nice and cool.

Perfect weather for some manual labour!

So after a run into town this morning for a medical appointment for my husband, I spend the afternoon working on the next section of the west side of the maple grove.

Photo heavy post, ahead! :-D

Here are some before and after pictures, starting from the south side.  I took this from where I last finished off. (click on the images to see larger versions)

I decided to take out the little caraganas, since there are two large ones in the areas I’d cleaned up before.

I didn’t use the weed trimmer first, as I had last time, since it’s corded and there had been rain.  I suppose the electrical cords likely would have been fine, but trimming damp greenery just makes a mess that needs to be scraped off the trimmer guard, frequently.  That, and I didn’t mind leaving the flowers to bloom longer, though dragging trees or pushing a wheel barrow through them sort of negated that particular thought! :-D

In the background, you can see the dry, small-wood pile that we use for the fire pit.  Almost everything I took out today got hauled outside the yard, mostly by wheel barrow, so very little was added to that pile.

Mostly little things to clean out here.  I am finding quite a bit of these…

20180725.cleanup.maplegrove.west.stump

… very old stumps of either maple or elm (this one is maple) that have a whole lot of suckers around it.  When I find these, I choose one that looks the strongest, straightest and healthiest, then cut away the rest, plus any dead suckers that are around as well.  After this, I’ll just need to maintain around them, cutting back suckers and doing judicious pruning, and the remaining sucker should survive.  With proper care, ten or twenty years from now, they should be very big, strong trees. :-)

I didn’t need to do a lot in this section.  A bit of clearing away in one area, and finding plenty of dead branches buried in the tall grass.

I was able to do a fair bit of clean up on the nearer willow, which you can see somewhat better in these pictures.  The willow was as far west as I worked, today.  There are two big old willows in here, including one you can see way out at the very end of the row, at the fence line.  The nearer one, unfortunately, it showing a lot of rot.  It sounded quite hollow as I worked around it.  It has had sections at the bottom cut away and, at one point, I climbed up on them to reach a dead branch to trim away, only to have one part of it collapse under my foot, because it was so rotten.  I am actually not sure how it’s still standing, to be honest.  And yet, it looks quite green and healthy at the top!

Another area that needed very little work; I mostly used the pruning saw to take down dead branches higher up.  That and removing dead branches hidden in the grass.

Here, things started needing a lot more clean up.  The wheel barrow in the background is as far West as I worked.

There were some small, dead and dying spruce trees that I took out.

Removing these is a multi-stepped process.  As you can see in the before picture, there are a lot of dead branches on the lower trunks.  I would cut away these branches from the bottom 5 or so feet, then top the tree by cutting the trunk at about 4 1/2 feet.  After dragging the top out to the wood pile, I’d then cut the remaining trunk to between 1 and 2 feet.  I will go back to them later to cut them as level to the ground as I can.

After I had topped one dead spruce tree, I starting cutting the remaining trunk at about 2 feet from the ground.  The trunk, however, would vibrate so much, my saw blade would bounce right out of the cut.   So I grabbed it and gave it a yank, watching the ground as I did.  The tree looked like it could just be torn from the ground, so I set myself up and started pulling.

Things where going well, until there was a sudden crack; the next thing I knew, I was flat on my a$$, my hat flying one way, and my glasses another.

Crud.

I very carefully squirmed to my knees, making sure there was no chance of me accidentally crushing my glasses, and began looking for them.  The problem with this was, I needed my glasses to be able to see!

Thankfully, I eventually saw some metallic reflections next to the wheel barrow.  They were fine!  What a relief.  That last thing we would have needed is the expense of a new pair of glasses!

This is why I fell.

20180725.cleanup.maplegrove.west.break

That little tree had been dead for a good long time!

When looking through this section of spruces before, I had estimated that I would need to take out 2 out of every 3 spruces, just to get them spaced well enough to thrive.

20180725.cleanup.maplegrove.west.crowded.row

I hoped that taking out the dead and dying trees would be enough to take care of that spacing I wanted, though they were all looking pretty dead.

I was mostly right.

As I began taking down some spruces and pruning the dead branches of the ones I hoped would survive, I worked my way over to where I figured I should take down another spruce, only to realize…

20180725.cleanup.maplegrove.west.crowded.row.tamarack

…it wasn’t a spruce at all.

It was a sad little tamarack, hidden in between the dead and dying spruces.

Spacing wise, it was right where I should be removing a tree, so I could salvage the spruces.  There was a second tamarack a couple of trees over, and that’s it.

None of them look all that healthy, to be honest.

I decided to keep the tamaracks and took out the spruce, instead.

Which turned out to be a good thing.

After topping off the spruce I had originally intended to keep, I discovered it was so weak, I was able to tear it out of the ground.

I didn’t work beyond the second tamarack.  I think there’s a different type of spruce in there.  There are some Colorado blues in there, but one of them has almost silvery needles.  There are so few living branches on it, though, it’s hard to tell if it’s a different type, or if it’s just dying.  When I get to that section, I’ll take a closer look and figure it out.

The birch trees are as far North as I’m working in this section.  Aside from picking up fallen branches from them, I didn’t do anything with the birch, yet.  From what I can see so far, they aren’t going to need much.

Here, I had some interesting finds.  While pruning the lower branches of some spruces, there were a few times where I would decide that some particular branches were high enough and strong enough to leave, but on top of them were dead branches, fallen from nearby trees!

My pruning saw has a really well designed hook at its very end that is perfect for grabbing these and pulling them down.  Some, however, had been dangling there for so long, when I tried to pull them down, they would just shatter into pieces!

Now, I think I’m going to have a hot soak in the tub.  My shoulders are a bit achy for some reason.  ;-)

The Re-Farmer

I have the power! See; there it is.

You know how you decide to do a thing that should be pretty straightforward? Then you start the thing and it ends up being more complicated than you thought?

Yeah. You know what I’m talking about, I’m sure! :-D

That was how it turned out for the job I just finished.

Since we only have the riding mower, when I do the driveway, I’ve only done the driveway inside the gate and as close to the gate and fence lines as I can. I didn’t go outside the gate at all because I wasn’t sure how clear it was. Plus, I don’t usually carry the gate key with me when I’m doing yard work.

Today, after mowing the areas by the storage shed and to the other driveway that I wasn’t able to do earlier, I decided to grab the weed trimmer and an extension cord and clear by the gate, and the driveway outside the gate. The grass there was starting to encroach into the gravel a fair bit. There is a heavy duty power line running from the side shed of the garage, where I park the mower, to the gate. It’s for some Christmas lights that are on the fence line.

Now, I’ve seen where the cord ends by the gate, and I could see where the Christmas lights started at the gate end, so I figured the plug was somewhere hidden in the bushes there. With that in mind, I grabbed the 30ft extension cord for the weed trimmer, instead of lugging one of the 100ft cords. 30ft should have been enough to do the areas I wanted to. Maybe a bit tight on the south side, though.

Over I go with the weed trimmer and cord, plug the power cord in at the garage, open the gate, then go to where I knew the Christmas lights started to plug it in. I was impressed to see the lights were actually working, too!

That’s when I discovered I wasn’t looking at the start of the Christmas lights.

I was looking at the end.

Hmm. Okay. I’ll just follow the lines. Both the string of Christmas lights and the power cord were woven along the top wire of the fence, wrapped around posts or tree branches along the way, until… there it was! I found the plug in!

20180716.plugin

This picture was taken after I moved the outlet box, which was carefully set facing downwards, so no moisture could get into the plugins. (Yes, I did remember to put it back that way when I was done!)

What you can’t see is the broken light bulb, right by the plug in. I’m sure there are plenty more of those along the two strings of lights!

This was about 30 feet away from the gate.

Well, now.

Back I go to the house, where I know there’s another extension cord that’s 50ft long. I also grab gloves, saw and pruning shears, because there were things that needed to be cleared before I could start.

First, I cut away some dead stems from a bush by the gate. Then some little trees that had seeded themselves along the driveway that were big enough to mess with the trimmer line. Then I cut away a poplar that was growing outside the fence line and was half blocking access to the power. You can see part of it to the left of the plug ins in the photo. I had to move some just to get the picture.

Then I could finally plug in my extension cords (I used both) and start trimming.

This is the first area I finished.

20180716-inner-driveway-south.png

This is the south side of the gate. The old barbed wire gate was still there and, after finding the loose barbed wire with the weed trimmer, I wrenched it all out and over the fence.

Those orange things? I’m pretty sure they are to mark where the culvert is on either side of the drive way in the winter, but they would fit over pre-existing posts. Which I don’t see anywhere.

Then I started clearing the north side.

20180716.inner.driveway.north

When mowing on this side, I don’t try to go all the way to the fence line with the mower at all, because it is very rough and I don’t want to break the mower. So I trimmed by the gate to match the mowing line.

While clearing between the gate post and the wagon wheel, my trimmer found this.

20180716.things.found.with.weed.trimmer

The black pieces are the remains of some kind of bungee cord type thing. It has a hook at only one end; I’m guessing at least half the cord itself is simply gone. Someone just hung it there, rather than throwing it away. The ball of twine was completely hidden by the tall grass. The wire was partly hanging on the bottom wire of the fence, its other end buried in the grass for me to find when it got tangled in the trimmer line. :-/

Finding stuff like this is why I don’t want to use the mower out there until I am sure it’s clear!

Here is how the outer part of the driveway looks now. First on the south side;

20180716.outer.driveway.south

And here’s the North side.

20180716.outer.driveway.north

The eventual goal is to clear the fence line of trees completely. When I get to working on the spruce grove, I want to open it up enough that we can see the gate from the house, so we know if anyone is there and needing us to open it.

That will probably not be started until next year.

Before then, though, I am think it would be nice to replace the strings of Christmas lights. I’m thinking some LED lights all in one colour, and then using them all year. :-)

Now that we have the power. ;-)

The Re-Farmer

Power Pole installed: stage one

Yay!!!

Our new power pole was installed today.

20180708.drill.png

Here, they are lining up the drill to dig the hole, making sure it’s straight.

I wanted to take pictures and video, but I also didn’t want to be in their way, so I didn’t.

Part way through drilling, it sounded like they hit a rock.  The electrician got down on the ground and I guess he was able to move things out of the way, as the drilling continued soon after.  Then the drill attachment was switched for a bucket, which they used to lift and line up the pole itself into position.  By then, I was inside, because I didn’t want to hover, so I didn’t see how they moved the pole into place.  I only saw them lifting the pole at one end, and using chain to secure it so it could be moved.

20180708.new.pole

We have a fairly shallow topsoil, then its sand, gravel and clay.  Once the pole was in, they pushed the soil back around it, and you can see that clay heavy soil ended up on top.  The electrician poured a bucket of water over it to help things settle.

20180708.old.and.new.poles

Old and new!

It now needs to sit for at least a few days for the ground to settle.  He will come back, likely at the end of the week, to unhook the wire from the old pole, move it to the new one, and hook up the power.  If he were to do that now, the weight of the wire would cause the pole to tilt.

Only after the wire is transferred can the old pole finally come down.

By next weekend, we should have power hooked up to the garage and the barn again. :-D

The Re-Farmer

Clean Up: Maple Grove, evening progress

I wrote up my last post while taking a hydration break from working in the maple grove.  By the time I was done, I found myself nodding off at the keyboard.  I figured lying down wouldn’t be a bad idea.

Three hours later… :-o

But, I’ve got it done as much as I can for now.

Here are the before and after pictures of the two North rows.

I cleared out two of the tree spruces in the foreground of the second picture.  The two I took out had a few green sprigs here and there, but were otherwise dead.  I also cut off the dead branches from the one in the middle.  I am hoping that, now that it’s open and clear, it will survive.

The remaining spruces in that northernmost row are doing pretty good.  I trimmed the lowest branches, as well as the dead ones that I could reach with a hand saw.  The dead ones were mostly on the south side of the trees, where they had no light.  The other living spruce trees, I only took off what was in my way as I moved around.  I will finish cutting away the dead branches when my birthday gift comes in. :-)

20180702.cleanup.maplegrove.eastside.raspberry.patch

This is the remains of a row of raspberry bushes.  I can see some dead canes from years past, but no fresh canes in this area.

To the right, you can also see a gooseberry bush I found.  I had cleared out a broadleaf tree that was between two spruces, and discovered the gooseberry under it!

20180702.cleanup.maplegrove.eastside.big.gooseberry

Then there’s this gooseberry bush, in dire need of having the deadwood cut away.  It’s growing next to a chokecherry tree, which was also overgrown and in need of pruning at its base.

20180702.cleanup.maplegrove.eastside.gooseberry.chokecherry.cleared

It was amazing how cutting just one sucker at the bottom of the chokecherry tree cleared almost everything up!  A few downward hanging branches to clear away, and various saplings, burdock and stinging nettle to clear away at the base, and what a difference!  I even found some raspberry bushes with baby berries on them.

The gooseberry, on the other hand, has almost no sign of berries on it at all, and what little it does have are not looking good.

20180702.cleanup.maplegrove.eastside.appletree.before

This is the very end of the “raspberry” row, with an apple tree near the compost pile.  There’s even a lonely little asparagus fern growing in here!

20180702.cleanup.maplegrove.eastside.appletree.after

I found more salvageable raspberry canes.  After cutting away some lower branches and saplings at the base of the apple tree (including maple and elm saplings), it was basically just weeding and removing old raspberry canes.  There are some plants in there I recognize as flowers my mother planted, so I tried to avoid taking those out.  Lots of creeping charlie and burdock in here.

At this point, I called it a night.  Which worked out perfectly, because that’s when I got a call from the second tree care company about coming over.  It was another father and sons team. :-)

When they got here, I showed them the areas I wanted work done on, plus the trees to come down.  He asked questions about how far back I wanted to cut things (basically, enough to not have to do this again for 5 years).  He wanted to know about the overhanging branches, which would normally be left if they are not touching the lines.  One of them is a very healthy maple tree, and cutting it back would mean removing pretty much half the tree.  When I pointed out it was from those overhanging branches that we got the burned branch from, and that it had happened before, causing a power outage, he understood why I didn’t want ANY overhanging branches at all.  They even measured the trunks of the trees that will be taken down, including the dead spruce.  They had to take into account being able to get their equipment in, too, and I told them about the three different gates that were available.  We also talked about cleanup.  He charges extra if they bring in a chipper, but I did say I wanted to keep the chips for mulch, and to keep the bigger wood, too.  He mentioned they don’t usually chip dead branches, because it dulls the cutting edges, but the stuff they’ll be cutting back will mostly be life branches.

He took a whole bunch of notes, and I will get the estimate emailed to me.

I told him about how we don’t own the land, and that I am getting estimates to talk to my mother and brother about before a decision is made, and that I’m hoping to get it done in the fall.  Or spring, if the cost is higher (which I suspect it will be, with these guys, but we shall see).  He was good with fall, mentioning after August is when they’d be available to do the work, so that works out.

And that’s it for the next while.  Tomorrow will be a trip to the city for my daughter, which should give my body time to rest.  Feeling pretty stiff and sore right now! :-D

The Re-Farmer

Clean Up: maple grove progress

Today, I am continuing working on the East end of the maple grove, and have just stopped for a hydration break before finishing for the day.

I am thinking it would be a good idea to rent a wood chipper in the fall.  There is just SO much wood being cleaned and cleared away.

So this is what the area looked like on Saturday, after I cleared out the old garden path.

20180630.cleanup.maplegrove.near.gardenpath.lookingeast

Apparently, the only photos I have taken from the other end don’t show the whole area.  Ah, well.

An interesting thing about my taking all these before and after pictures, as that I have a time record, too.  I don’t typically pay attention to what time I start or finish, but my phone’s camera is set to use the date and time in the file names.  This means I can say with confidence that I worked about 1 1/2 hours, starting just before noon, in this area.

This is what I did in that 1 1/2 hours. :-)

I started by clearing away by the water tap.  For that one, I just had to take some video.

So… that post isn’t doing anything useful anymore. :-(

I cleared out a couple of dead spruces beside the tap, one of which was rotten enough that I just broke the trunk at ground level and pulled it out.  There were some elms growing out of an old trunk that was pretty big when someone finally cut it down.  That’s the one that has me wondering if the roots have caused any problems with the underground water pipe.

There was another dead spruce nearby that I took down.

20180702.cleanup.maplegrove.eastend.downed.spruce

I even got it to fall right on my pile! :-D

As I moved on and went to pull some stuff out of the grass by another dead tree, I stepped on something that sank under my foot.

Do you see it?

20180702.cleanup.maplegrove.eastend.hiddenstuff

Neither could I.  Even after using the weed trimmer here, I see nothing.

20180702.cleanup.maplegrove.eastend.hiddenwire

It was some fence wire that was rolled up, but ended up flattened at some point. From the looks of the rusty old soup can I also found under it, it’s been here for quite a long time!

I moved the two tillers closer to the shed so I could clear where they were sitting.  That included moving two garbage cans (one of which was partially sheltering a tiller) and piece of aluminum that looks like it is part of ducting for a large building that used to shelter a push mower.  My brother took the mower to see if he could fix it.

When I went to take out some other fence wire in the area I found…

20180702.cleanup.maplegrove.eastend.tree.wire

… a chokecherry tree and some vines growing through it.

Some of this is going to wait until my telescoping pole chainsaw arrives – I got a shipping notification in my email this morning. :-)  I also won’t be going back through this area with the weed trimmer until after I’ve cleaned it out more and cut trunks down to ground level.  I was finding too many rocks, branches, brick and pieces of wire.  I got the cheapest weed trimmer I could find, so I don’t want to wreck it!

At the Easternmost end of this area is a couple of dead spruces.  One of them had thick vines growing out the bottom of it that I had cut, but left hanging.

Today, I pulled them out.

The vines may have started at the base of one tree, but part way up, it spread to the other dead spruce tree (and is likely what killed both of them).

20180702.cleanup.maplegrove.eastend.triffid.vines

Looks like some kind of triffid!!  Some of it broke off and is still in the tree, but this is most of it.

20180702.cleanup.maplegrove.eastend.triffid.trees

These are the two dead spruce threes it was attached to.  Funny.  They look MUCH emptier, now that the triffid vine is out.

Oh, my SIL told me about an app called Plant Snap that I downloaded and tested out.  These vines are Virginia Creeper.  It is related to grapes, but their berries are poisonous to humans (birds can eat them), and the sap can be an irritant.  Because they spread through rhizomes so aggressively, it looks like the only way to permanently get rid of them is with some Roundup.  Which I plan to use elsewhere, at some point, so that works out.  I’m told that spruces are impervious to Roundup, but clearly not to these vines!

This is what the area looks like now.

20180702.cleanup.maplegrove.eastend.progress.afternoon

Later today, I plan to work on that north row.  After that, this section will be pretty much done, other than what is waiting for a chain saw.

20180702.cleanup.maplegrove.eastend.afternoon.treepile

Here is the pile of what 1 1/2 hours of cleaning and clearing trees looks like, including the vines.

Yeah.  Wood chipper.

The Re-Farmer


Clean Up: Old Kitchen – getting started

Today’s plans ended up changing a bit.  (photo heavy post ahead! :-) )

Originally, the only thing on the schedule for today was a medical appointment for my husband in the morning, so that was a drive into town.  After we got back, my daughters and I talked about plans to head into the city tomorrow for the Costco shopping.  My husband’s disability payment doesn’t come in until Friday, but his CPP disability came in today.  With Canada Day happening this weekend, the last thing I wanted to do was shop on Friday!  My plan was to move the big freezer in the old kitchen, which we emptied last night, to a more accessible spot, while starting to pack things up for the storage shed.  Doing the old kitchen is going to be a bit different, since we ended up having to store some of our own stuff in there for the winter, so it’s a mix of things we need to pack and move out, and things we need to keep.

My younger daughter had her own errand to run in the city, and we ended up deciding to do both her errand and the Costco shopping today, instead of tomorrow.  So I started on the old kitchen, just enough to move the freezer.

Here are the before pictures.

20180627.cleanup.oldkitchen.before1

Under this window is where the younger of my brothers had his freezer, which they took out before winter.  My older daughter’s tent ended up in there, and the taped up parts of a utility shelf is ours, along with the watering can.  This is the window where we have extension cords going into the sun room.

20180627.cleanup.oldkitchen.before2

The shelf in the corner is going to be removed at some point.  Both it and the wall mounted shelf are full of mostly jars.  There is also a very light, folding walker in there that my dad used indoors, tucked away in front of that purple curtain.  The round wooden thing in the corner is a seed sifter.  The bath transfer seat was my dad’s, and we will be keeping that.  He didn’t use it for long before he went to the nursing home, so it’s still in good shape.  It’s also sturdy enough that it’s been used to get up onto the shelf, so that we can reach the breaker panel above.

Once we move the shelves out, we’ll need to have something handy to access the breakers.  My older brother, wonderful man that he is, wired in a new breaker for the drier when he moved the washer and drier out of the basement and into the main entry.  In the process, he added extra wire, so when we are ready to, we can add another breaker for something else.  It was VERY difficult to add more electrical, so this will save some future problems.

And yes.  That is aluminum foil on the other window.  I’m guessing it’s because it faces West, so it is to block the sun as it sets and helps keep the room cool.

20180627.cleanup.oldkitchen.before3

There is my parents’ freezer that we are using.

Yeah, we had to crawl over the stuff to get at it.

Those are the only areas I intended to work on today.  I cleared out the stuff under the window, where the freezer was going to go, moved the stuff in front of the freezer, all into the sun room or outside, then move the shelf with the drawers out of the way.

Those drawers are full of odds and ends.  I haven’t even tried to do more than take a quick peek in them, so far.

20180627.cleanup.oldkitchen.progress1

Yay!  We can access the freezer, now!

I also got rid of the curtain on the window.  I’m kinda liking the fact that we don’t need to have curtains or blinds to keep people from seeing into our home.  We can have privacy AND light at the same time! :-D  My mom, on the other hand, put curtains everywhere, including using them to hide the contents of shelves, like the purple one here.

20180627.cleanup.oldkitchen.progress2

This is what was under the freezer and shelf.

Ew.

All I can do for now is sweep.  That floor is going to need a lot of work!

20180627.cleanup.oldkitchen.progress3

Now, the utility shelf can finally be used.

Do you see that big, black enameled bowl on the shelf on the right?  Somewhere, there is a lid for it.  That’s the bowl my mother used to mix bread dough for her once a week bread baking.  She would start the dough in the morning, cover it and leave it for the first rising while she went to milk the cows.  By the time she was done, the dough would have overflowed the container, which would be pushed back, punched down and left for a second rising.  After more chores, she would punch down the dough again, then start forming buns.  Before long, the kitchen and dining table would be covered with trays of buns, as she would start baking them in batches.  She would continue, late into the night, before she was done.  I am sure she made bread loaves, too, but I only remember buns; we loved them, so that’s what she made the most.  Once the buns started coming out of the oven, however, we would go at them like ravenous wolves!  They were meant to be bagged up, with some frozen for later in the week, but I think there were some days when we ate too many, too quickly.  I have a memory of seeing her face, once, with this sort of dismayed look on it, as she looked over what was left of her day’s labour.

As an adult, I now understand that feel, but as a child, I just loved her bread!  It was awesome.

And now I have the bowl.  Not sure if I’ll put it into storage or not.  Depends on if I find the lid. :-)

20180627.cleanup.oldkitchen.progress4

And now, it all looks like crap again! LOL  I just put most of the stuff back again, to wait until we can pack things up and put it into storage.

Meanwhile, here is what the rest of the room looks like.

Keep in mind that this is just a tiny addition to the main log part of the house.

20180627.cleanup.oldkitchen.before4

Well, this picture didn’t turn out very well.

The grid wall is my daughter’s, and goes with her tent, so those will be kept.  The giant mirror behind it is one of many we’ve found around the house (and there’s still one that needs to come down) that are huge, and damaged.  Likely salvaged from who knows where.

The aquarium box is from when we had to get a small aquarium for my aquatic plants, since we were never able to set up the 90 gallon tank.  Without being able to replace the broken piece on the filter, I might not be able to set that up until we can buy a whole new filter, which I certainly don’t want to do.  I got the one I have at a massive discount.  A new equivalent one would cost me $400!  I can’t even find the part I need online, at the brand’s website. :-(

The tank is past warranty now, so the box can go.

You can see the stove pipe in the back from the wood burning cook stove that’s completely hidden by all the stuff in front of it.  This is the stove we used until the new part was added to the house, and we got an electric stove, running water, and an indoor bathroom.  We continued to use it when there were power outages.  Those happened fairly regularly, until the power lines were all upgraded.  Country lines were pretty low on the priority list.

The stove is mere inches away from the wall, and there is no fireproof protection behind it.  That was normal, back in the day, but completely against fire safety regulations today.  We’d never be able to use it, as is.

The stove is covered with stuff, and the warming shelves are also full of stuff.  All things we will be packing away.  Tucked into a corner on the right are wall shelves, full of more stuff.  Including, I think, the parts and pieces of our old cream separator.  The basin, at least, is there.

I am hoping to completely clear the stove so that we can clean it up and have it as basically an historical decoration.

20180627.cleanup.oldkitchen.before5

More odd bits of scrap carpet and rug pieces on the floor.  The Christmas lights are ours; we didn’t put up our tree for our first Christmas here, so they didn’t get used.  That dual cassette player on the floor used to be mine!  My dad had it in the sun room, so he could listen to the radio.  I’ve put that thing away so many times, and somehow, it always ended up on the floor.  Now it’s in the utility shelf, and it had darn well better stay there! :-D

20180627.cleanup.oldkitchen.before6

The blue bit of carpet is now gone.  That window is waiting and ready to replace the one with aluminum foil on it.

20180627.cleanup.oldkitchen.before7

My mother’s salt and pepper shaker collection.

Those, and the shelf they are on, will be packed and put into storage.

I also got rid of the curtain on the door.

Not only was part of it stuck at the hinge, but it was taped in place, as well as being on a tiny curtain rod.  Likely to keep it from billowing as the door was opened and closed.

This is the last usable room we need to pack and clean.  (I’m not really counting the basements and attic above the old kitchen, since they are not spaces we use regularly.)  I’m looking forward to being able to open the door and not have to worry about the cats sneaking in.  The door doesn’t latch well, so if we could just leave it instead of having to fight with it every time we open and close it, that would make life easier! :-D

The Re-Farmer