Okay, so the garden is pretty much done.
The red onions have been left, since they can handle the cold nights, and still aren’t quite ready for picking. With various distractions related to our plumbing issues, the potatoes still need to be harvested. The sunchokes are still green and growing, so they won’t be harvested for a while. Mostly, the beds are ready for winter clean up – once we can get to them!
What I wasn’t expecting was this.
That’s right. I harvested tomatoes this morning!
When my daughter harvested this bed, she left behind the really tiny tomatoes, or the damaged ones. However, as more of the foliage died back, I could see some green tomatoes that looked fine, and seemed to have gotten missed. The foliage in this bed was so dense, that’s no surprise. I basically ignored them, though, figuring they were frost damaged by then.
This morning I could see they had continued to ripen! Hidden in the middle like that, it seems they got protected from our first frost and following cold nights, too.
So I picked them and added them to the bins and boxes of green tomatoes in the old kitchen to ripen.
We have quite a few things slowly ripening. Yesterday, my older daughter grabbed all the ripe hot peppers, cleaned and prepped them, then set them in the oven to dehydrate. Eventually, they will be made into a powder.
Now… my older daughter is pretty much the only one that can eat these. My husband used to love spicy food, but the medications he’s on have really messed with his ability to taste or tolerate foods. My younger daughter can handle a bit of heat, but not as much. My, I can’t tolerate spicy food at all.
So she has taken over preparing the hot peppers as they ripen and, once dehydrated and powdered, she will have enough to last a very long time! We won’t need to grow hot peppers for some years. 😁
Now, these are hot peppers, but not exceptionally hot peppers. They’re not the kind where you need to wear gloves or anything.
Normally.
It turns out that, after processing about a dozen remarkably large hot peppers, that becomes a problem.
Not right away, though. My daughter had no issues at all while working on them. She was careful about washing her hands before touching things, too.
Then she made herself a sandwich.
The pepper oils from her hands – even after being washed – got onto her sandwich, and it was so spicy, it started to burn her mouth. She ended up having to drink straight cream to reduce the pain!
Then her fingers started to burn.
It happened slowly, over several hours, but eventually she could barely even use one hand.
She sprung for take out for supper, so I went into town to pick up the food. By the time I got back and she regaled me on what had happened, I could see the tips of all her fingers were bright red!
Lesson learned. Even mildly hot peppers can become a problem, if you’re processing enough of them at once!
Gloves needed!
Meanwhile, even her lungs were starting to burn!
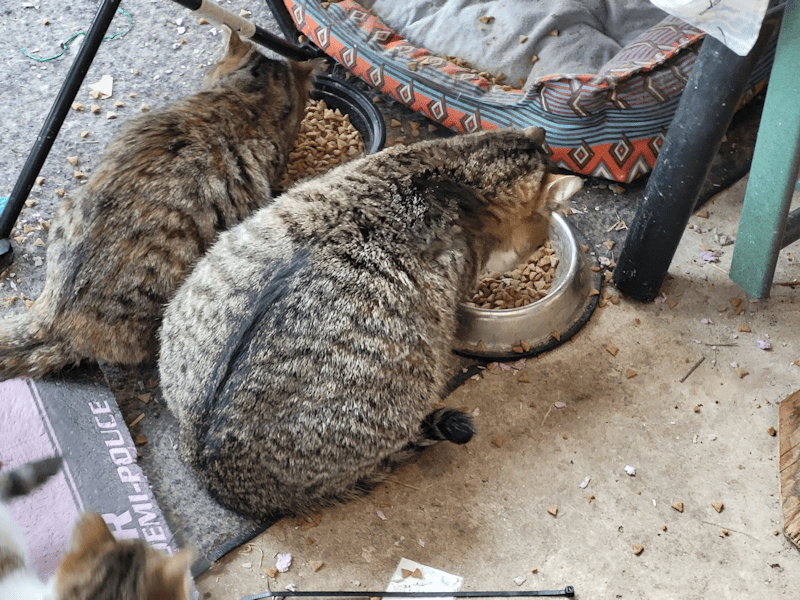
These were being dehydrated in the oven. We had the kitchen window open and the fan running. The house smelled amazing, but we still had to stay out of the kitchen as much as possible, so as not to breathe too many of the hot pepper fumes. Even the cats were staying out of the kitchen!
Speaking of cats, they added another distraction. My younger daughter tried to go to bed early, only to discover a cat with a messy butt made a mess on her bed. She had to wash all her bedding.
We had been working to clear my husband’s bedroom, and started doing his laundry, too, so that was already set up (yes, we are still running the hose out the window for the washing machine to drain into the yard). The girls were going to start the laundry and my younger daughter was going to use her sister’s bed for the night.
Which is when they discovered more mess in the middled of her sheets, from a cat or cats that squirmed its way under her covers.
So they were both up all night, doing load after load of laundry. Some things needed to be washed twice, just because of their size. They didn’t get to bed until past 6am.
We’ll be more laundry today, too. My husband has set up his CPAP in my bedroom so he could sleep with me.
Sleeping in the same bed as my husband! Imagine that. 😄
That will give us a chance to strip his hospital bed and wash things like his pillows and body pillows, along with the extra blankets he puts under his sheets. The mattress for the hospital bed has a sort of thick vinyl instead of fabric, so it’s easier to clean. Unfortunately, it doesn’t breath, and causes my husband to sweat. The extra layers under the sheets help prevent that.
I did finally find an XL twin fitted sheet on Amazon for his mattress, which is several inches longer than a standard twin mattress. We’ve confirmed the new sheet fits properly, so we’ll need to get a few more. For now, though, he has only one fitted sheet that actually fits the mattress on his hospital bed.
We’ve been working most of yesterday on clearing his room so we can access the corner behind the plumbing for the tub. This is where we will be cutting an access panel, but it’s still covered by the wardrobe. My husband doesn’t really use the wardrobe, and the girls have said they’ll take it upstairs – but they will need to move out their little bar fridge for the space. They don’t use that much anymore, so we were already talking about moving it to my room. I’ll have to find space for that, though.
Once we get that figured out, we can start moving things around but, for now, we still have one more corner of husband’s room to clear and clean, where has his own tiny fridge to store his injections. This will give us the opportunity to defrost and clean it, too, then move it to where it will be more easily accessible.
The bonus of moving the girls’ fridge out from upstairs, to make room for the wardrobe, is that it frees up a grounded outlet.
That means they can get an air conditioner and actually be able to plug it in! The upstairs gets so insanely hot in the summer, they really need one up there.
That will not happen for a while, though, since my daughter will be paying for what we end up needing to get the bathroom walls repaired.
So all of this rearranging and cleaning and figuring things out is happening at the same time – all because the hot water tap in the tub broke.
There is nothing we can do in the bathroom itself right now. The fan it still running to dry the rotted aspenite. My brother will be looking at it when he comes out on Friday evening (today is Wednesday).
We will have to pull out the tub to be able to find and cut away all the rot, and I’m not even sure how that will be done. It does seem like the tub is in two parts; the tub itself, resting on top of a flat panel that hides the underside of the tub.
Well, we’ll find out when the time comes.
Until then, we’ll just take advantage of the disaster and do the clearing, cleaning and rearranging we need to do, anyways.
On the one hand, I’m glad this has happened now, and not in the middle of winter.
On the other, this keeps me from getting outside stuff done, and from finishing the cat isolation shelter!
Hopefully, I’ll be able to get some of that done today, since there’s only so much I can do in my husband’s bedroom before I need my daughters to help out. It’s so close to being finished, too!
Ah, well. It is was it is.
Little by little, it’ll get done!
The Re-Farmer