Okay, so today, we didn’t end up hauling dirt. Partly because we need to take a bit more of a break from that. We’ll just have to make up for it, tomorrow. The Dorinney corn can wait another day or two before direct sowing.
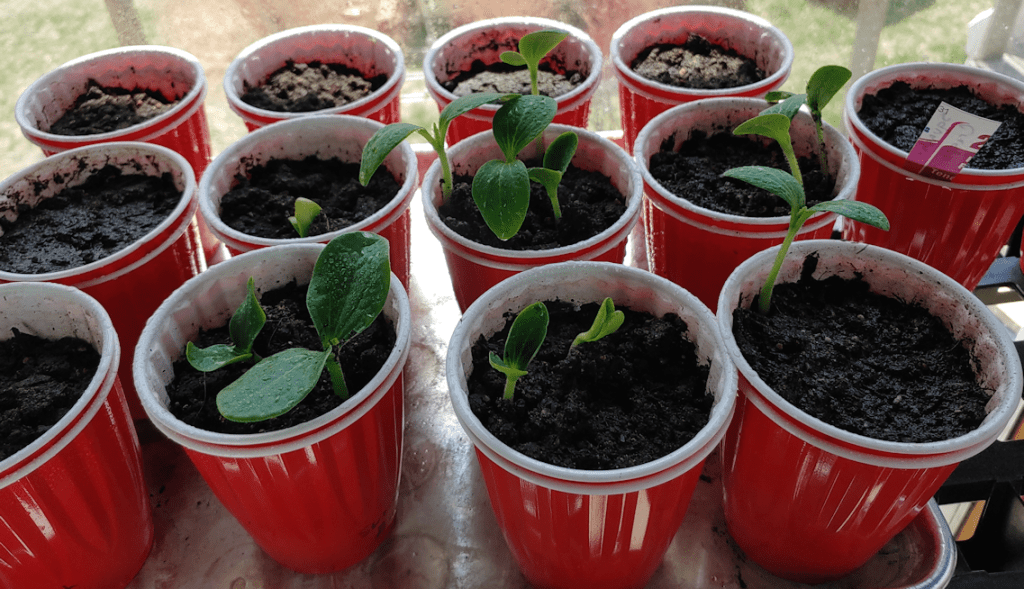
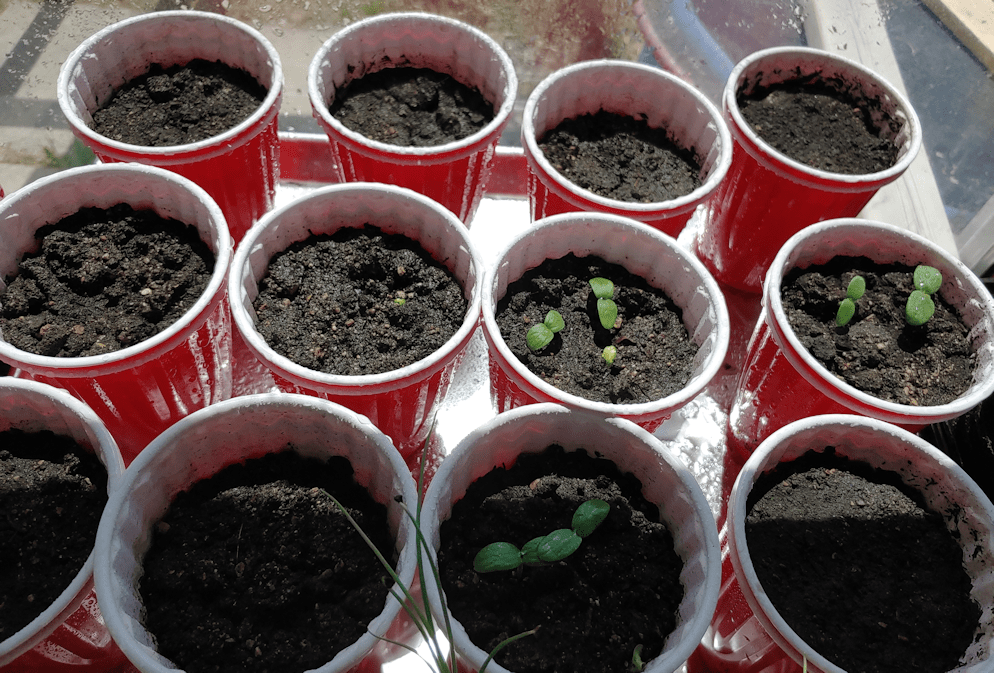
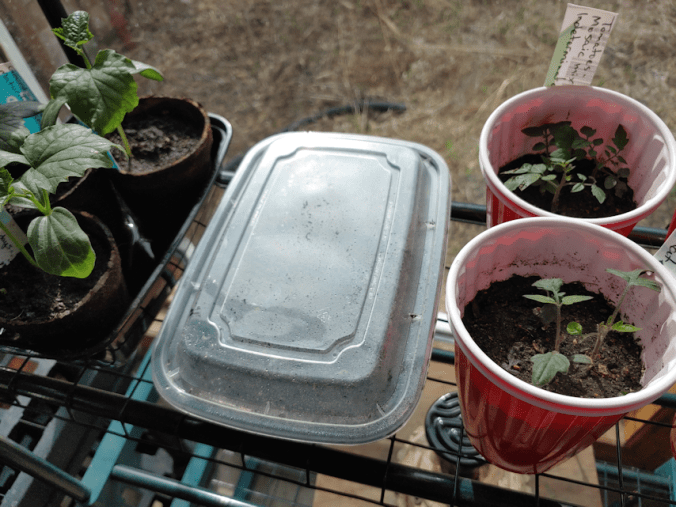
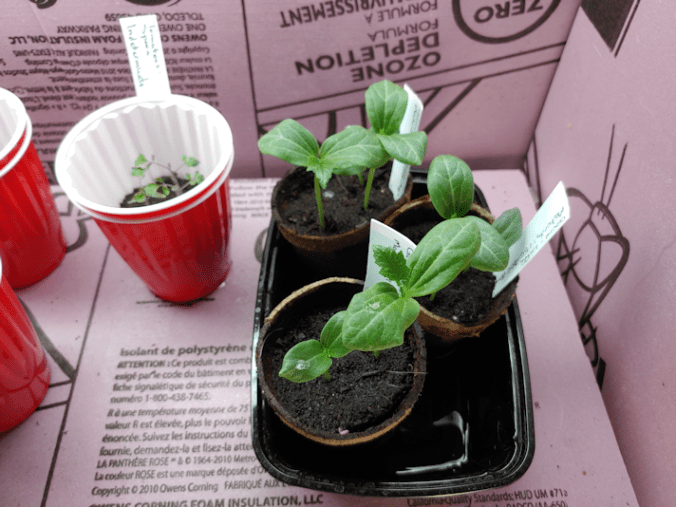
Before I get into another reason why hauling dirt wasn’t going to happen today, I finally remembered to take photos of our seedlings, while I was spritzing and rotating them this morning.
We’ve got some summer squash, winter squash and melons growing. The melons are almost all the Halona variety, but one little Pixie melon is starting to push its way through!
They were too small to even try for a photo, but the pink celery is starting to sprout, too. Still nothing with the gourds.
I did have quite a surprise, though.
Quite a few of the Mongolian Giant Sunflowers were starting to show! That’s the photo on the left. On the right, those two, tiny, barely visible specks?
Those are the Montana Morado corn! I can’t believe how quickly they’re starting to sprout!!
While watering outside, I pulled the plastic back on the carrot bed in the big garden to give it a bit of a soak and thought I might have seen some sprouts. I put the plastic back, but made sure to ask the girls to check again when they were doing the evening watering. Sure enough, there were sprouts, and they took the plastic off. The Strawberry Spinach was checked, and they had sprouts, too. I’m not positive, but I think I could even see flashes of green in one of the spinach beds while I was watering it this morning. :-)
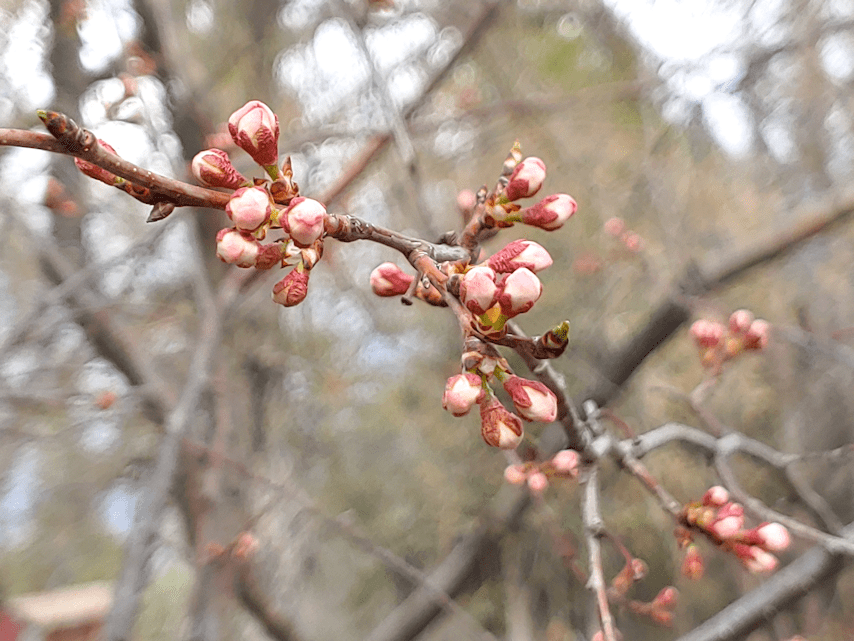
After we were done with our evening garden tending, the girls and I went to look at the crocuses, hyacinths and tulips. There are so many tulips pushing their way through the leaf litter now! They were planted under some plum trees, and I noticed the trees are starting to bud!
I love trees that bloom before they start forming leaves. They are so dramatic and spectacular in full bloom!
I aaallllmost got the camera to focus on the minuscule spider in its web!
In between all this, my younger daughter and I made a trip into town, which included a stop at the post office on the way home. We got packages!! More on that in my next post. :-)
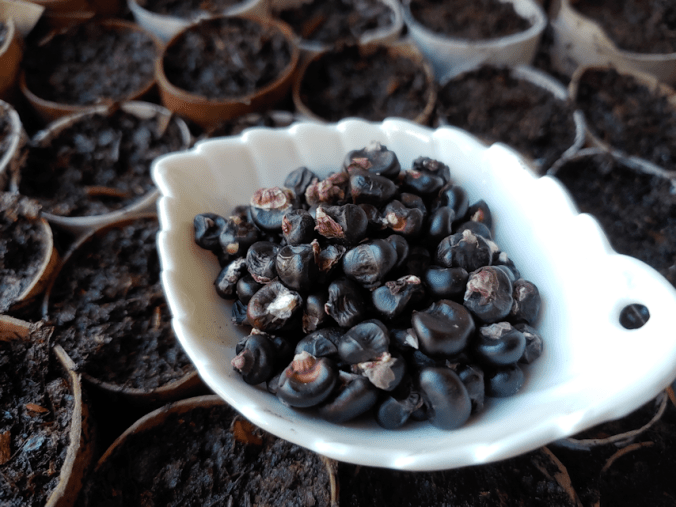
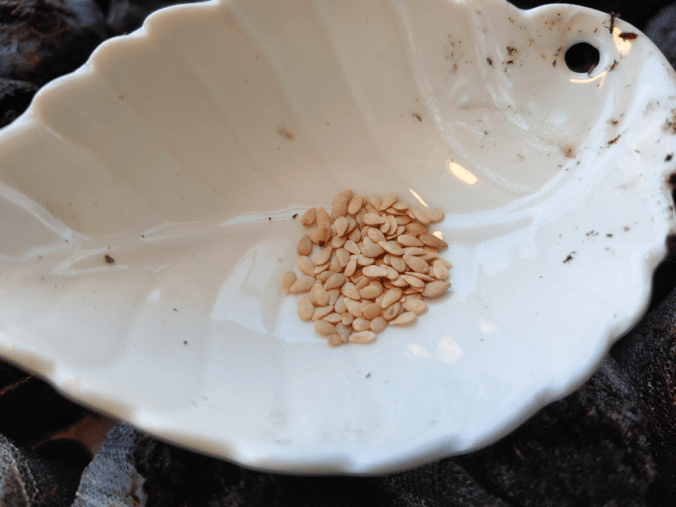
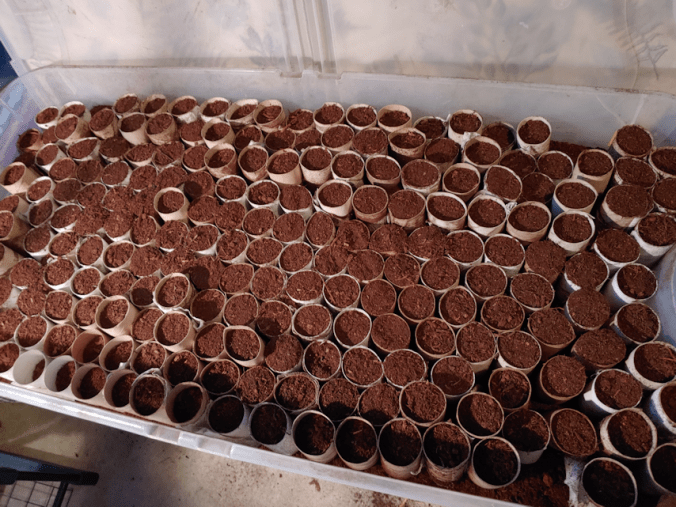
Today’s priority was to start the last of the seeds indoors. I’d been preparing a bin with toilet paper tubes, as something that would allow the least root disruption when transplanting (at least, so I’ve read). After a couple of days, it was time to start planting the Montana Morado corn!!
Aren’t they gorgeous?
The seed packet said “at least 75 seeds”. That’s a lot more than 75!
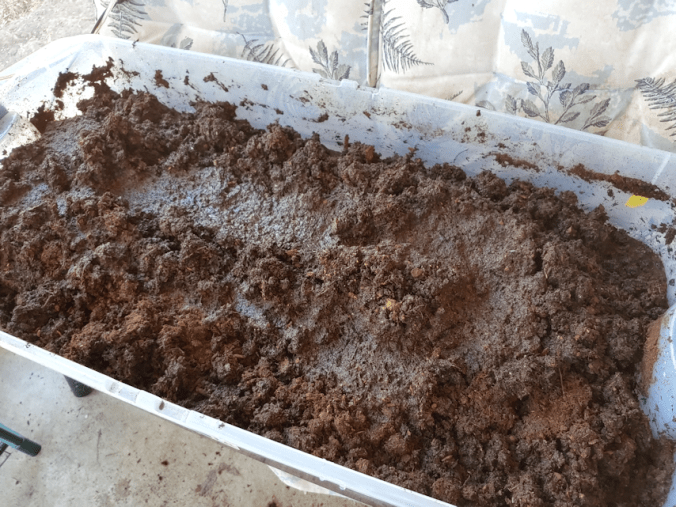
I started puttering with the peat filled tubes in preparation of planting in them, but something felt wrong. Ever after a couple of days, some of the tubes were still floating on a layer of water, and as I made holes in the medium, it seemed really dry below the very top.
I didn’t want to take a chance, and decided to crack open one of the tubes.
I am very glad I did.
It was completely dry inside!
Well, so much for that idea. If the peat didn’t absorb the water after all this time, it wasn’t going to happen.
For the next while, I opened every one of those tubes to empty them.
Once that was done, I kneaded it like bread dough, to work in the water. Then added more water and kept working the mixture until it was completely wet.
I should have done that right from the start!
I did work in the last of the sifted garden soil, too. The soil absorbs the moisture faster than the peat, so I thought that might help. The amount was quite small, compared to the quantity of peat!
As for the toilet rolls, they will not go to waste. These were dumped into the old kitchen garden, where they be composted directly into the garden, as we add soil.
The bin is still being used, though.
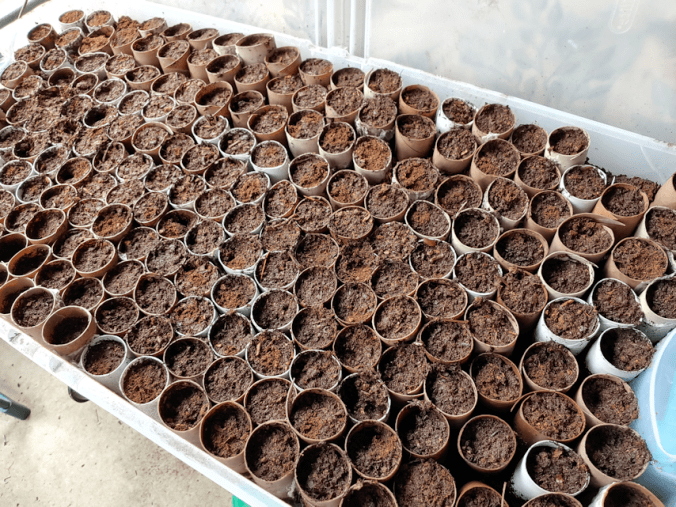
After punching holes into the bottoms of more cups and filling them, I ended up quite quite a bit of unused peat mix.
I made sure to water them from the top again, just to be sure, and left them to drain for a while.
For small seeds, I like to use a bamboo skewer to handle the seeds, but for larger seeds like this, I find a straw works great. It’s just the right size to push holes into the medium, and is perfect for pushing the seeds down to the right depth.
I knew I wouldn’t use up all the cups, so I didn’t cover up the seeds until they were all done, so I could easily see which cups were planted, and which were not.
Then I used some twine to wrap around and between the cups, to mark between the planted and unplanted cups.
I ended up with 33 cups with corn in them; 31 with 4 seeds each, and 2 with 3 seeds each.
I have some concerns about doing it this way, but starting corn indoors has been an active topic of discussion on several cold climate gardening groups I’m on. Most of the experienced Zone 3 gardeners say all corn should be started indoors (my mother never did; I would say the varieties make a difference!). Some insist that corn is too tender for transplanting, but the few who say that usually have many others commenting, saying they start their corn indoors all the time, and have never had issues with transplant shock.
So I’m hoping this works out. I really want to successfully grow this variety here!!
The remaining cups were planted with Mongolian Giant sunflowers. There isn’t a lot in the package, but the remaining 13 cups all got 2 or 3 seeds in them. I think there was a total of 33 seeds in the packet.
They all gone one last watering when all the planting was done.
The cover can be placed over the bin to help keep the moisture and warmth, if necessary. I think it should be fine, without, but we’ll see.
That done, it was time to plant the Hopi Black Dye sunflower seeds, and the cucamelons.
Again, there weren’t a lot of sunflower seeds in the packet. I’d forgotten how small the cucamelon seeds are! :-D
Since these were going into Jiffy pellets, the sunflower seeds each got their own pellet. It still filled less than half of the tray. There were 28 seeds in the pack, and I used the twine to mark between the two seeds. The cucamelons each got several seeds per pellet. I didn’t keep track of those. We still have the tubers from last year’s cucamelons, so it should be interesting to see which do better after they are planted out in June.
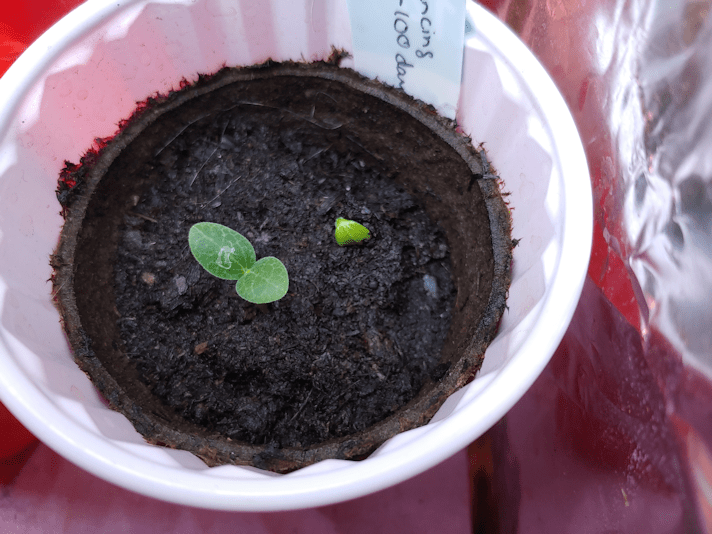
After these were done, we did the onions outside, which freed up shelves in the sun room. All the remaining seeds in the aquarium greenhouses are now in the sun room. I’m starting to be a bit concerned. Not a single squash or gourd has sprouted since the one Crespo squash germinated. That one is doing well (as are the dancing grouds), at least. I know gourds take a long time to germinate, but I would have at least expected more Crespo squash to germinate by now. I’m hoping the warmth of the sun room will be what they finally need to get them going. We shall see!
Starting the seeds indoors – and having to change plans on how to do some of them – took a lot longer than expected.
So did planting outdoors. Because, of course, things got changed up there, too!
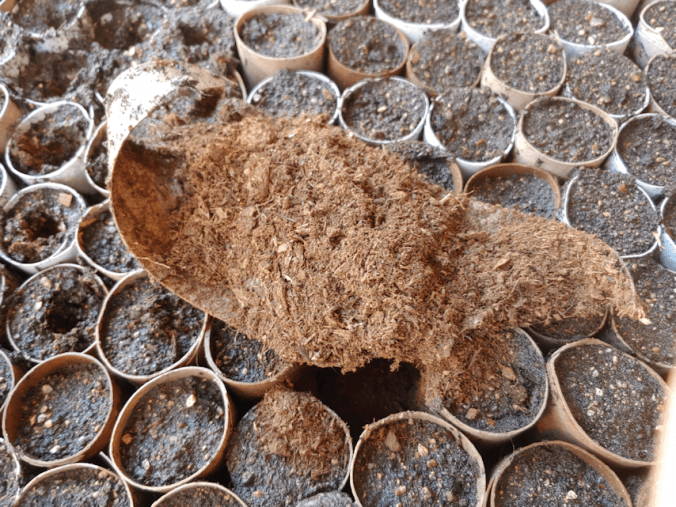
Today I took my mother to her doctor’s appointment, so I got very little garden stuff done today. Last night, however, I was able to start prepping the toilet paper tubes we’ll be using to start the Montana Morado corn in.
I picked up this coolant funnel long ago, because it’s perfect for jobs like this! :-D
I neglected to take photo of the next step. After filling all the tubes with peat, I used the 1/4″ hardware cloth I still have a piece of, laid it over the bin, then sifted peat over everything. Aside from topping up the tubes, I wanted it to get in between the tubes and fill the gaps to hold them in place. Especially in the spots where the wheels of the bin are, with a “fender” on the inside that I couldn’t put tubes on because it was too uneven.
After that, a whole lot of water was poured over all the tubes using a watering can. It would have been much easier to use a hose on “mist”, but by then it was night and too cold to use the hose.
The sun room was nice and warm still, though!
Adding the water had two unexpected effects.
The first was, the tubes started to float! I should have expected that. The problem was, you can’t actually see that it was floating. I’d added another watering can of water before I reached out to even the tops of some tubes, and the whole thing sank!
The peat may have been all light and floating, and it takes a long time to absorb moisture, but the tubes are a different story! They not only quickly absorbed water, but some of them started to come apart at the seams. Thankfully, they’re packed tightly enough to hold each other in place.
It did make be wonder if this would work at all.
I think it will. Here is how it looked this morning.
The cardboard actually seems to be helping the peat absorb more moisture. I went over the surface with a spray bottle. You can see in the photo that some of them still have dry areas. This is all being absorbed from bottom, though, so they should have been mostly moistened through. Normally, I would have premoistened the peat, but there was just too much needed for this job.
I’ll check it again tonight and see if I can start planting the corn, or if it will wait until tomorrow. There is still enough water in there that the tubes in the middle are still floating a bit, as the bottom of the bin is sagging from the weight of the water in that area.
After I got home from helping my mother, I made a quick run into town and made a special trip to a dollar store. I picked up some hula hoops. We haven’t been able to find row cover supports, so my daughter thought of cutting hula hoops and using those. If it works out, we can get more later.
I also cleaned the store out of pinwheels (they only had 6 left), plus I got some spinners and wind vines. When I did my rounds this morning, I found birds digging in the dirt in the bed we planted carrots in. :-( All those beds now have shiny metallic pinwheels in them. I’ve set up wind vines at the strawberry spinach, and as close to the garlic beds as I could. I put spinners in the ornamental apple trees over where the spinach was planted. We still have a few more of those, but we’ll save them for later. I will probably get more pinwheels after the store restocks. It would be good if we could replace the plastic grocery bags on the pea trellises with things like that. I noticed there was a solar motion sensor floodlight that would be good for startling deer, but it was out of budget. :-/
The girls and I were quick about putting the bird scarers out. I had hoped to cover the beds with plastic, but it was just too windy. So I watered the beds again. The water will help regulate the temperature in the soil as temperatures dip overnight. At least, that’s what I’ve read! I didn’t get any photos because, to be frank, I just wanted to get back inside again! When I checked the weather once I was inside, it said we were at 2C/32F – but the windchill was -6C/21F! It certainly felt like it was below freezing. Meanwhile, the thermometer in the sun room was reading about 28C/82F.
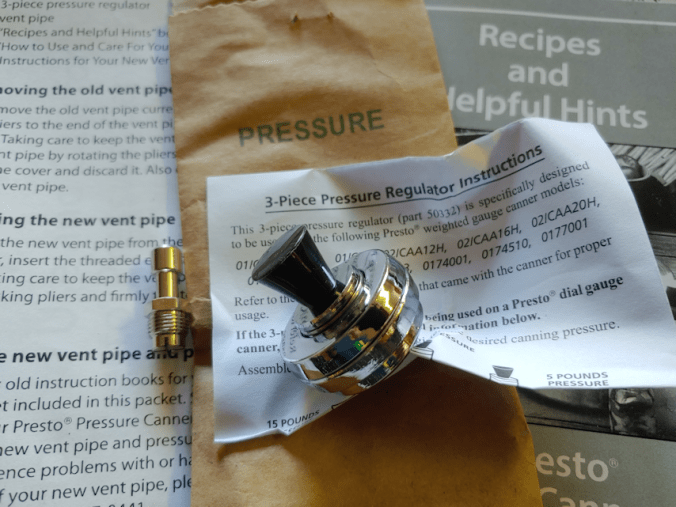
One of the things I made sure to do before I went to my mother’s was to get the mail. The last of our onion sets were in, but so was another pleasant surprise!
The kit to convert our pressure canner to use a weighted gauge (aka: jiggler) is in!!!
I can hardly wait until we can test it out!
That might be a while, though. We’ve got lots of outside stuff that needs to get done, and we won’t be in a position to continually monitor the canner while it’s being tested.
After hauling to many loads of soil over the rough, rough ground, none of us were up to doing it again today.
So our Sunday remained a day of rest!
We did still go out to soak down the beds we are working on, though, along with other watering and checking of things. There is fresh new growth on the grapes, which was good to see. I wasn’t sure they’d survived February’s deep freeze. We’ve got rhubarb coming up, and the one haskap is leafing out nicely. The other is still struggling. :-( The garlic is looking awesome. Unfortunately, the birds are digging into the soil, as they have been digging into all the leaves on the ground all over the place. They’re not after the garlic, but they’re scatting soil all over, and some are getting partially uncovered in the process. We’re going to have to come up with a way to cover those!
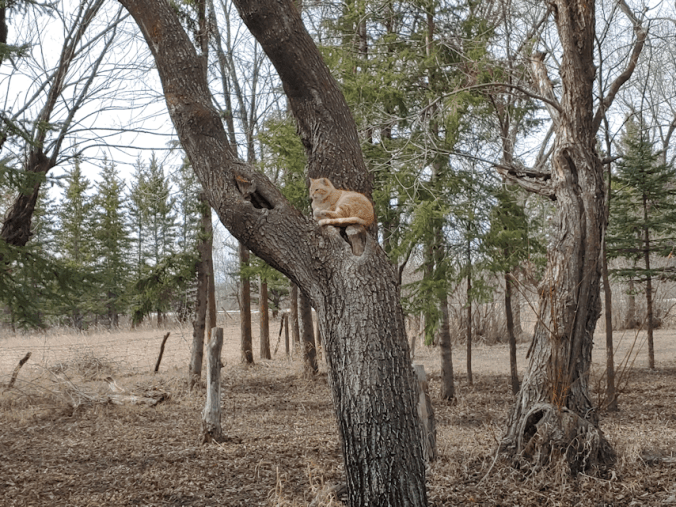
While checking out the snow crocuses and grape hyacinths (so many are coming up now!), we found a strange, furry, orange mushroom in a tree.
Rolando Moon found a perfect spot to settle down and groom herself! :-)
The girls and I talked about where we are going to plant things; the space we have to work with is turning out very different than we expected while working with the satellite image, and we’re going to have open spaces where we had expected to have garden beds.
Which is okay. Nothing is written in stone, and most of the beds are going to be temporary.
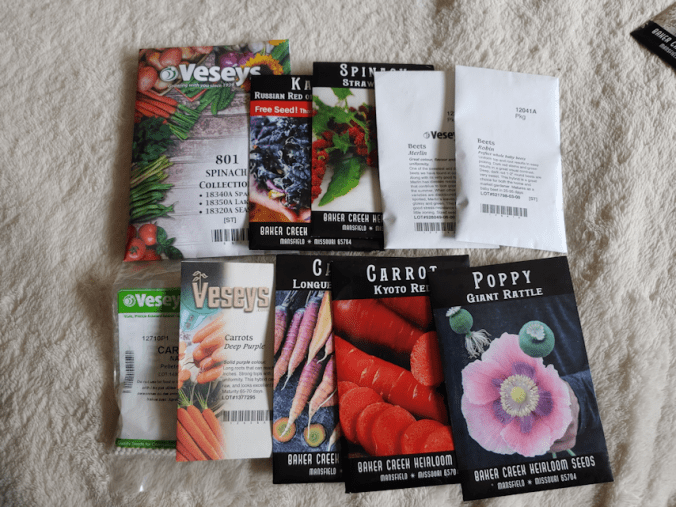
We then went through our seed packets, sorting out the ones that need to be planted before the last frost date.
There are a lot of things that should have been planted “as soon as the ground can be worked”, but we aren’t ready for all of them.
These are the ones that should be in the ground right now.
Two of the three beds for the spinach collection are not ready yet. The kale will be interplanted with onions, and one of those beds is ready. The bed for the strawberry spinach is ready. The beets will be going into the new bed beside the garlic, and that one’s not quite ready. It’s a small bed, so we will probably be planting one type there, and another somewhere else. The poppies will be going in the old kitchen garden, which also is not ready yet.
We still aren’t sure where the carrots will go. They need deep soft soil, so I think they will be going where the potato beds were last year. We are making those longer, so only the part that was used last year will have the soft soil needed. Some might end up in the old kitchen garden, too.
Then there is the next batch.
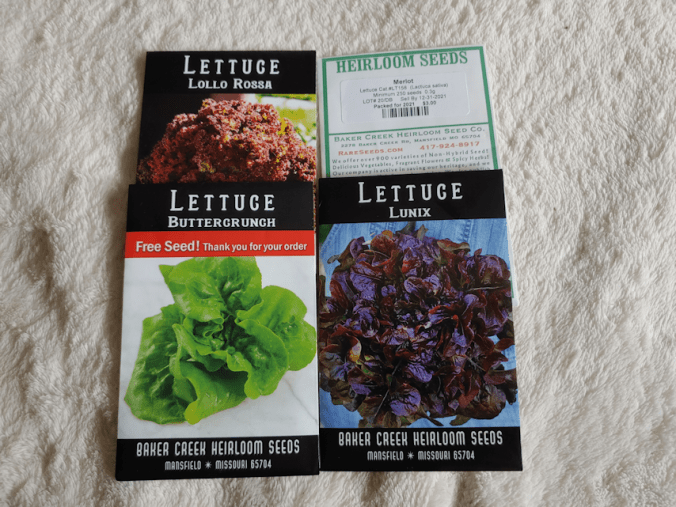
We can start planting lettuces now, with successive sowing every couple of weeks until about the middle of June, before it gets too hot. These will go in the old kitchen garden, with some of them going into the retaining wall blocks, which are ready now, and others further into the garden, once we’ve worked out where the paths will go and add more soil.
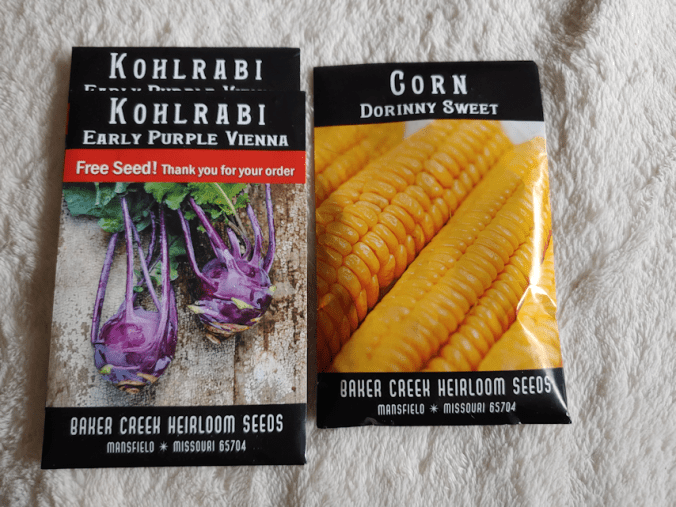
These can be planted in the middle of May. It’s a bit surprising for a corn to be planted before first frost. Once we’re done with the beds that need to be direct sown right away, I’ll be marking off the block the corn will be planted in. At the same time these are being direct sown, I will be starting the Montana Morado corn indoors, along with half of the sunflowers.
The kohlrabi will be interplanted with onions. Onions are supposed to repel those beetles we had issue with last year.
While going through the seed packets, we discovered an oops.
The pink celery should have been started 8-12 weeks before last frost!!
So we quickly planted them now.
The seeds are absolutely minuscule! They are surface sown, so they just needed to be scattered on the soil and pressed down, so we used a take-out container as a mini-greenhouse. The sun room is warmer than the house, and there’s no room in the aquarium greenhouses, so we set it up with the tomatoes and luffa. We still use the ceramic heater bulb at night, but according to the thermometer in the sun room, it reached almost 30C/86F in there today!
They’re getting less than half the time to start than they should, but we’ll see how it goes. Who knows? We might have a long summer this year.
Everything else that needs to be direct sown has to wait until after our lost frost date. Especially the Peaches ‘n Cream corn collection. The radishes (two varieties) will be interplanted with some of them, to help break up the soil. They mature very quickly, so being overshadowed by the corn will not be an issue. The sunflowers will be a mix of transplants and direct sowing, to see which works better. And finally, there are the three varieties of bush beans.
If all goes well, we’ll be transplanting all the squash, gourds, cucamelons and tomatoes at about the same time. The potatoes and asparagus should be in and ready to plant by then, too.
The first few weeks of June are going to be very busy, and we’ve got a lot of manual labour to get done ahead of that!
Wow. It’s coming up on 10pm as I start this, and this is the first time I’ve had to sit down for most of the day!
Today was our monthly shop, so after doing my rounds, my younger daughter and I headed out to the city. We were going to do our usual shop when I remembered I wanted to pick up some wood pellets to try as a litter replacement, so we added a stop at Canadian Tire, first.
Canadian Tire is a dangerous place for me to be, on payday! ;-)
While we were there, I got my daughter to choose a paint colour so we can finally paint the kibble house. We’ll be able to paint the cat house, too. This is the colour she chose.
She actually chose two colours, then asked me which one I preferred, and I chose the darker one. “Citrusy”, I think it’s called. The girls have declared we don’t have enough colour around the farm, and they would like to change that.
It’s going to be colourful, all right! :-D The kibble house is going to be really bright!
One of the other things we picked up was a new axe. We’ve found a whole collection of them, mostly in the old basement, but the girls have examined every one, and they’re all in terrible shape. I suppose we could fix them, but we’d much rather have something new and higher quality. After we paid for our stuff and were heading for the van, my daughter suddenly asked, “where’s the axe?”
Yup. We’d forgotten it at the cash desk!
So off my daughter went with the receipt to get it. It was so hilarious to see her coming out again, long flowing hair, skirt swirling in the wind, and an axe over her shoulder. A woman happened to be getting out of her vehicle beside us and called out, “walk proud, and carry a big axe!” Too funny!
With our rather meager success with onion seeds, when I saw some onion sets at Canadian Tire, I did pick some up.
When we got home and I quickly checked my email, I found a shipping notification from Vesey’s. The onion sets we ordered from them have shipped, with an expected arrival of May 7. Those are a red variety, so between the two, we’ll have a couple hundred onion sets to plant, on top of the surviving seedlings. We shall see how they compare! I’d rather grow onions from seeds, if only because there are so many more choices in varieties, but I’m not too fussy about it! We use a lot of onions, so I’ll take whatever will grow.
After all the shopping was put way and we had supper, the girls and I then worked on planting the squash seeds. That required taking everything out of the big tank to make room for the new starts, so the tomatoes, luffa and the last onion seeds I started have all been moved to the sun room.
All of the onions have been moved to the new shelf we got for our transplants.
This photo was taken somewhere around 9pm. I love how bright it still is outside! It was an overcast and rainy day today, so not a lot of light, but the sun room was still quite warm.
Not warm enough for the new seedlings, though. I had to get creative.
I rigged up the light we’ve been using to keep the small tank warm, so it hangs from the support bar holding the top points of the mini greenhouse in place. It has a full spectrum bulb in it, so they’ll get both good light and warmth from above, as well has warmth from below, where the ceramic heater bulb is set up. We still need to use that at night.
The small tank now has all the remaining gourds that have not sprouted yet. Without the light fixture that was helping to keep the tank warm, I added a couple of bottles filled with hot water help maintain the temperature.
We changed the level of the base in the big tank, so the cups would be closer to the lights. One of the fixtures does give off warmth, but the other does not, so I added bottles of hot water to this tank, too.
This tank now has the one cup with the Tennessee Dancing Gourds, and one cup with a single tomato seedling in it that isn’t doing well, but we just can’t bring ourselves to get rid of. Everything else is summer and winter squash. We planted fewer of the winter squash, pumpkin and zucchini, and lots of the melons and pattypan squash.
We are really looking forward to lots of summer squash in particular! The pattypans are our favourite vegetable, and we really miss being able to pick a bunch of summer squash every morning, for that day’s meals. :-)
We now have a couple of weeks or so before we start the last of our seeds; the Montana Morado corn, cucamelons, and half of our sunflowers. The corn will be in toilet paper tubes, so they’ll be in their own bin to keep the tubes supported. By then, we should be able to use the sun room exclusively, instead of the aquarium greenhouses. The gourds might even have germinated by then! ;-)
The next few days are going to be odd ones. Our days are going to warm up again, but check out those expected lows…
Tomorrow, we’re supposed to have a fairly decent 7C/45F, but then drop to -4C/25F with flurries overnight! Then, two days later, we’re supposed to reach a high of 19C/66F, only to drop to 4C/39F overnight. Then Sunday’s overnight low is back below freezing again! At least the long range forecast shows no lows below freezing after that, but… well, we do have a frost date of June 2, so there’s a good chance will dip below freezing a few times more. I just wish it wouldn’t lurch back and forth like that! Still, those daytime temperatures will give us plenty of opportunity to get garden beds prepped, and the early planting started. We have lots of work to do outside, and will need to take advantage of every good day we get!
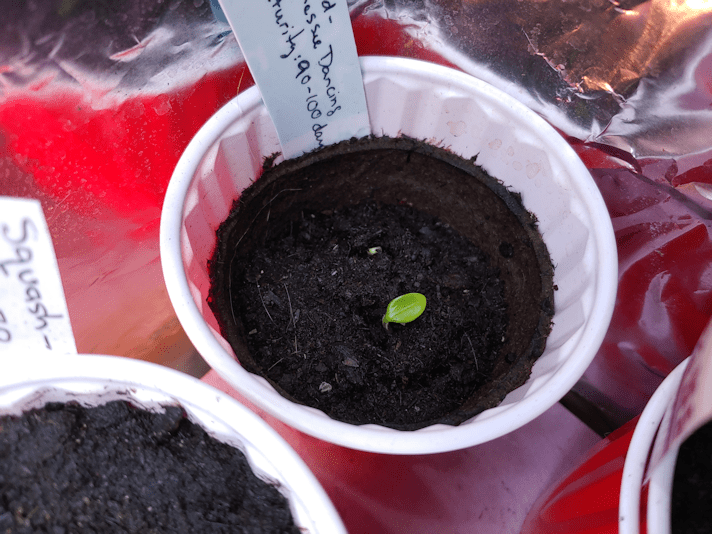
These are the Tennessee Dancing Gourds, and they are the first of the gourds to sprout!
This is how they looked this morning! So awesome, to see how much they grew in less than 24 hours!
I’m hoping this means we’ll start seeing some of the other gourds sprouting soon, too. :-)
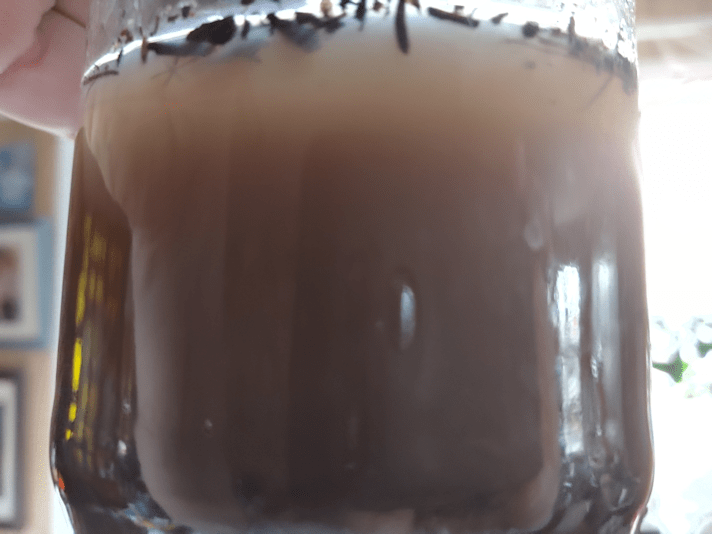
I also checked on the soil sample that was left overnight to settle.
Hmm.
It looks completely unchanged!
The instructions said that soil heavy with clay could take 24 hours to settle, but… I don’t think that’s clay. I think it may actually be organic material.
With how long this is taking, I think I’ll find another jar and test the next soil sample while this one continues to sit.
But not right away.
My older daughter got a call back from the tax preparer. They can’t log into her file at Canada Revenue. Like with her sister, it’s telling them there’s something wrong with her name. We have no idea what that could be. We’re going to have to call up Canada Revenue again. I’ve found a directory, and the numbers all have wait times listed. The number we need to call has a wait time of just over 2 hours.
So we’ll be taking turns monitoring the phone while on hold.
My daughters and I regularly check the areas we planted things in the fall. Especially where we planted so many corms and bulbs.
For those new to this blog (welcome! I’m very happy you’re here!), last fall we planted 200 grape hyacinths in one area (day one, day two). In another, we planted about 100 snow crocuses. My daughters also planted some Iris, Bulls Eye Tulip, plus a variety pack of other tulips, in other areas. We also planted three varieties of hardneck garlic. (all links will open in new tabs, so you won’t lose your place. :-) )
Today, we actually found sprouts!!!
This is a snow crocus. We found one other sprout a few feet away, too. We were so excited!!!
There’s still no sign of anything else, but it’s the crocuses that are supposed to be the earliest to emerge, so this is pretty awesome! We probably won’t see any of the others for some weeks, yet.
We also found…
… a garlic emerging through the mulch!
It wasn’t until I uploaded the photo and was resizing it that I realized there was a second one in the back, the tip just barely visible! I had been checking the garlic beds every now and then, since we took the plastic off, pulling the mulch back to see if there were any sprouts. I had done that earlier, but in a different spot and completely missed the bit of green poking through! Even when my daughter pointed it out, it took a while for me to see it.
These ones are Purple Stripe. After finding them, I checked in the Porcelain Music bed, pulling back the mulch, and I did find a sprout there, too. I put the mulch back. The overnight temperatures are still too cold to take the mulch off.
We are really, really excited to see these!! We have sprooooooots!
*doing the happy dance*
Meanwhile…
After putting some seeds to soak for 24 hours, we planted some Crespo squash seeds.
We planted only 2 seeds in each of 3 double cups. We’ll see how many germinate. They went into the small aquarium greenhouse, along with the more recently planted gourds (still no seedlings sprouting there, yet), and the light fixture that’s there to keep the tank warm.
I keep catching Saffron lying on the screen cover, directly over the light! The little bugger has discovered it’s even warmer than sitting on the light fixtures of the big tank. At least she’s tiny and light!
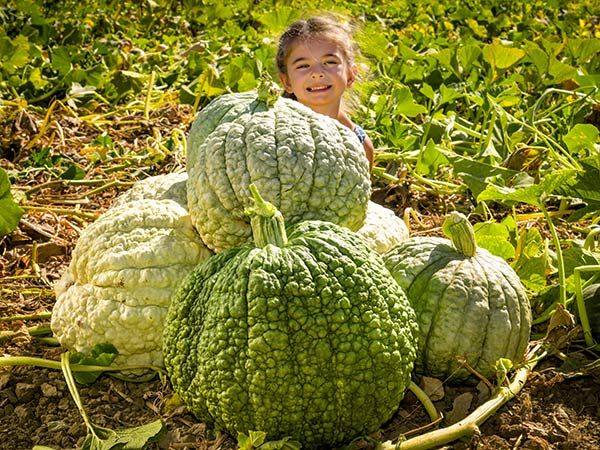
As you can see in this image from Baker Creek, Crespo squash can get quite large! The only information I can find about these is from the Baker Creek site, and it’s new for them, so there isn’t very much information, and there are no reviews at all. There isn’t even a “days to maturity” available. The package just says to harvest when the skin is very hard. ??
These are from Peru and Bolivia, which do have areas that are the equivalent of our Zone 3 climate, but I have no idea if these are from any of them. Probably not. :-D
Still, I couldn’t resist these amazing looking edibles!! It would be really something, if we could grow these to full maturity.
The luffa have joined the tomatoes and onions in the big aquarium greenhouse. They are big enough now that I’m not as concerned about keeping them extra warm.
I really hope these work out!
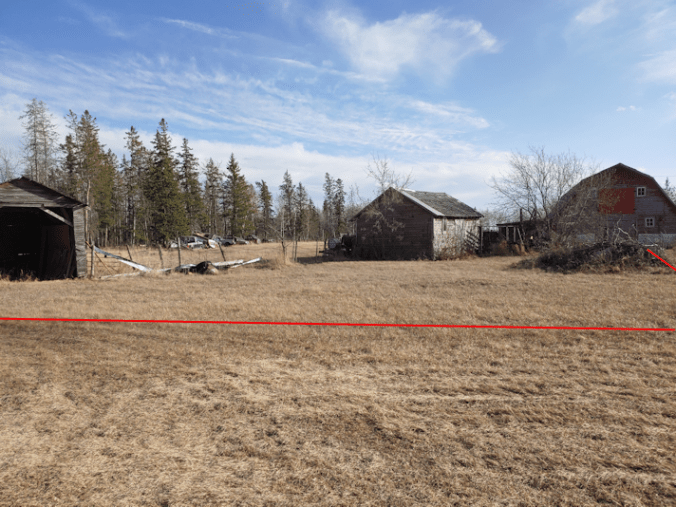
Thinking ahead, while the girls and I were walking around, we went by the other area we are considering to put our permanent garden beds and talked about it.
We have decided that this will be it. Our future permanent, accessible raised bed garden.
One of the hesitations about this spot is that it’s always been a high traffic area – that’s why it’s so flat that I’ve been able to mow it! There is a gate to the old hay yard next to the shack by the barn. On the other side of the shack is the ramp that was used to load cattle onto trucks. The gate, however, has had other wire placed across it and it can no longer be opened, and even if that old cattle ramp wasn’t rotting and falling apart, we don’t plan to have cattle. At least not so many that we’d be sending them off to auction. We still drive through parts of it, to access the garage, the barn, etc., but that still leaves a huge area that no one drives through anymore.
In our shorter term plans, we were talking about putting a temporary fence up in the old hay yard, where the remains of another fence still sits.
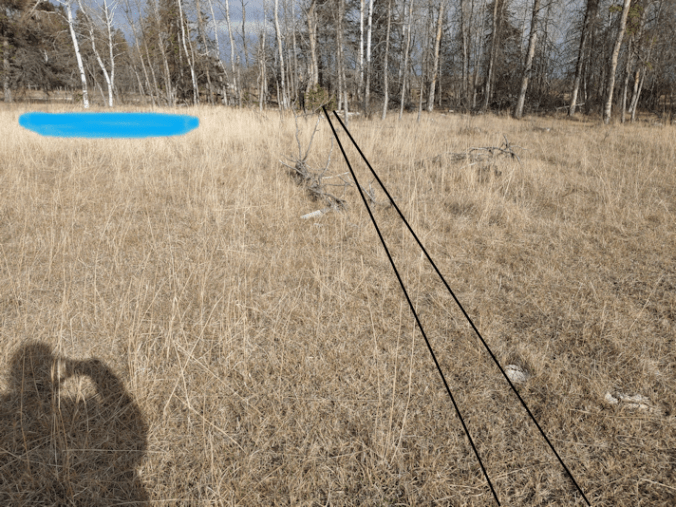
It’s marked in black in the above photos. This would allow us to remove part of the main fence (marked in orange) and still keep the renter’s cows from getting through.
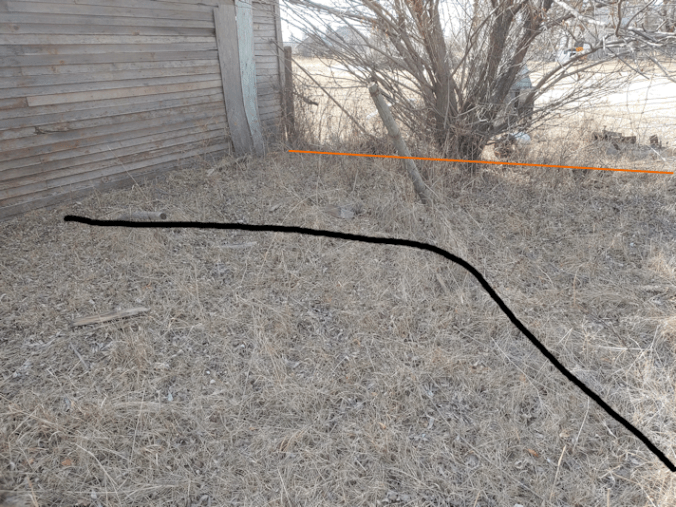
But if we’re going to put permanent raised beds by the old hay yard, we will want to plant a wind break even sooner, and that was going to be along a permanent fence.
Which would be about where the black lines are in these photos.
If we do that, we can get rid of a lot more of the fence around the old hay yard, much of which is in terrible shape, anyhow. That, in turn, will open up more of the hay yard area to other options. Right now, with that gate blocked off, the only way we can get into the old hay yard that doesn’t involve clambering over a wire fence is either through the barn, or through the electric wire fence at the gate by the barn, then go around the back of the barn, and through the collapsed rails of an old corral.
We will have to do some work on the fence around the outer yard, though, to fill in any areas the renter’s cows can get through, if his electric fence fails again. It wasn’t an issue before, because we could close up the gates to the inner yard, but if we have a garden out there, the cows would make shorter work of it than the deer!
The advantages of this area compared to the others – mostly that it’s already nice and flat – also means that we will probably be able to build the permanent garden beds here sooner than in any of the other locations.
On top of everything else in favour of this area, it’s visible in live feed from the garage security camera. We will be able to see if there are any deer getting into the garden.
Well. Not when we’re asleep, of course, but it’s a start! :-D
Thanks to some feedback from Kensho Homestead, I decided to go ahead and trim our bulb onion seedlings this morning.
Though our temperatures dipped below freezing lat night, the sun room remained nice and warm. I didn’t even bother putting the plastic cover over the mini greenhouse to keep more of the heat from the ceramic heater bulb in.
Now that they’re trimmed, you can really see the difference between those in the Jiffy pellets, and hose in the K-cups. They’re both peat, so the growing medium is not the reason.
This tray was designed for the pellets, and to water from below. The bottom of the tray has channels for the water, with a felted mat on top, then a molded tray that holds the pellets, while also keeping the bottoms in contact with the mat below. The K-cups have drainage holes, but they don’t seem to have enough contact at the bottom for watering from below to work well, and they dry out much faster. At first, the ones in the K-cups were doing better, but now it’s the ones in the Jiffy pellets that are noticeably stronger and healthier.
I did water them after this photo was taken, making sure to get the K-cups thoroughly wet. I’m trying to think if I have something I can transfer the K-cups to that will let me water them from blow. I think it’ll be the only way to keep them well watered, without over watering the rest.
Lesson learned: don’t mix two very different starter “pots” in the same tray. I used the K-cups because I only had enough Jiffy pellets to fill half the tray. I should have just used half the tray with the Jiffy pellets, and found something else to put the K-cups in. The K-cups do work well – as long as they can be adequately watered.
Meanwhile…
The luffa are coming in strong and healthy, and doing very well!
Perhaps too well!
I used these pots, so they can be buried directly into the ground when it’s time to transplant them, with no root disruption. Which means we’re going to have to reduce each pot to just one, strongest plant. It seems like such a waste to discard strong seedlings, but if we separate them out to plant more of them, that will create the root disruption we’re trying to avoid!
Three plants should be more than enough for our needs. Especially since we don’t even know if they’ll get the time they need to reach full maturity before first frost in September.
I bet they’d do great if we could find a way to grow them in pots in the sun room! LOL Pretty sure they’d overgrow that corner rather quickly, though. ;-)
Oh, my goodness, but our internet connection has been bad tonight! It’s taken me forever to finally be able to load the editor to start this post! It’s not done giving me grief yet, either!
Still, I wanted to get this posted before calling it a day, since I’m basically using this blog as a journal that I can reference later on, if I need to.
The last 4 varieties of gourds have been started!
The luffa are the three pots together on the right. The one sprout at the top got visibly bigger, just today! You can see a second one coming up at the bottom. The pot inside the red solo cup is the Tennessee Dancing gourd. On the left are the Ozark Nest Egg, Thai Edible and Birdhouse varieties. The light fixture inside the tank is, as before, just there for its warmth.
Next on the list to start indoors are the summer and winter squash.
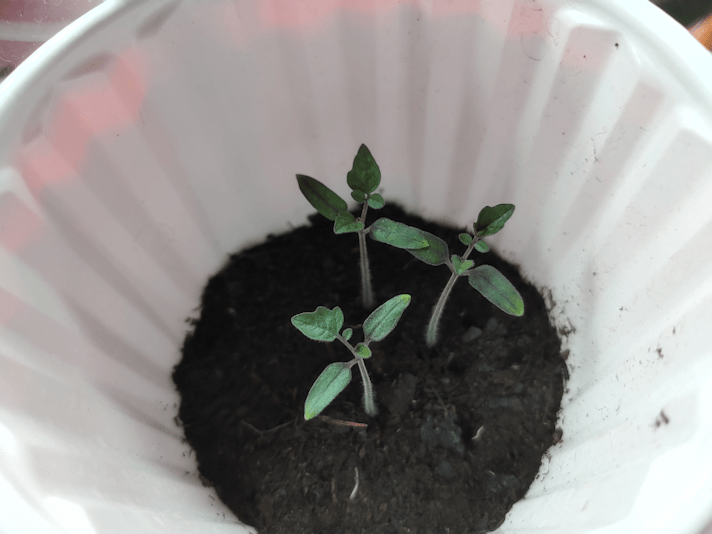
While tending the seedlings last night, I finally remembered to take one of the tomato pots out, so I could actually get a picture.
These are the Spoon tomatoes (from Baker Creek). I planted three seeds in each of four cups, and so far there is one that has not shown any growth at all, while all the seeds have sprouted in the others, for a 75% germination rate – though it’s still possible something might show up in the fourth cup. The Mosaic Medley seeds (a mix of cherry and grape tomatoes from Veseys) were also planted with three seeds in each cup. Three of them all sprouted at close to the same time as the Spoon tomatoes, and all look pretty much identical in size and health. In the last cup, two finally did sprout, though they are looking much weaker than any of the others.
I would be happy with only 3 plants from each seed pack, since only half of us actually like tomatoes. We’ll see how they look when it’s time to transplant. In the future, we plan to grow varieties suitable for making tomato paste or maybe for drying, but not so much for fresh eating or even canning. A lot of gardeners in groups or channels I follow get so excited about growing massive amounts of tomatoes. I don’t see us ever going that far with tomatoes! We hardly even use them as an ingredient.
Last night, we broke out the rest of the gourd seeds.
We had seven of the Jiffy pots left, and four types of gourds. We decided we will do the Tennessee Dancing Gourd in just one cup (each cup will get three seeds). Someone on the Baker Creek website had left a review stating that their one plant had at least 250 tiny gourds on it. If they’re that prolific, I think we’re good with fewer plants! :-D
We’ll be planting two cups of three seeds of the other varieties. I had to do some searches to find the maturity information for them, as there’s nothing on the seed packets (they’re all from Baker Creek). It’s different with the Thai Bottle Gourd, as they are meant to be eaten like zucchini, while very young, though some will be left to fully mature. I’m sure the other varieties could be eaten while very young, too, but those are all intended to be dried out and used for crafting purposes.
The peat was saturated with water already, and added to the Jiffy pots at the same time as we set the seeds to soak, so the pots themselves would absorb excess water. After finding how much the cardboard egg cartons sucked the moisture out of the growing medium with our bunching onions and shallots, we don’t want any chance of that repeating, and I want to make sure these pots are in trays or containers to allow watering from below. We’ll be wanting to keep those pots damp.
So these will be planted later today. Until then, they are inside an under-bed storage container with a lid, to protect them from cats.
Meanwhile…
… when the girls went out for a walk last night, they managed to extricate this old wooden ladder from where it was sitting by the storage shed. It was a bit difficult to get to, and it’s been there for so long, I was sure it would fall apart if we tried to move it. It turns out to be surprisingly not-rotten!
It’s interesting to see how each step is supported by steel wire!
The girls are thinking it could be used as a trellis. I’d like to find some way to preserve it, if we can, so it doesn’t degrade too much. At the very least, find a way to protect where it will be coming in contact with soil. I’m sure the only reason this thing didn’t rot away is because it was sitting on top of other things, well above the ground.
I think the girls are pretty excited about gardening this year. :-D