Our 2025 Garden: setting up a trellis, and transplanting melons

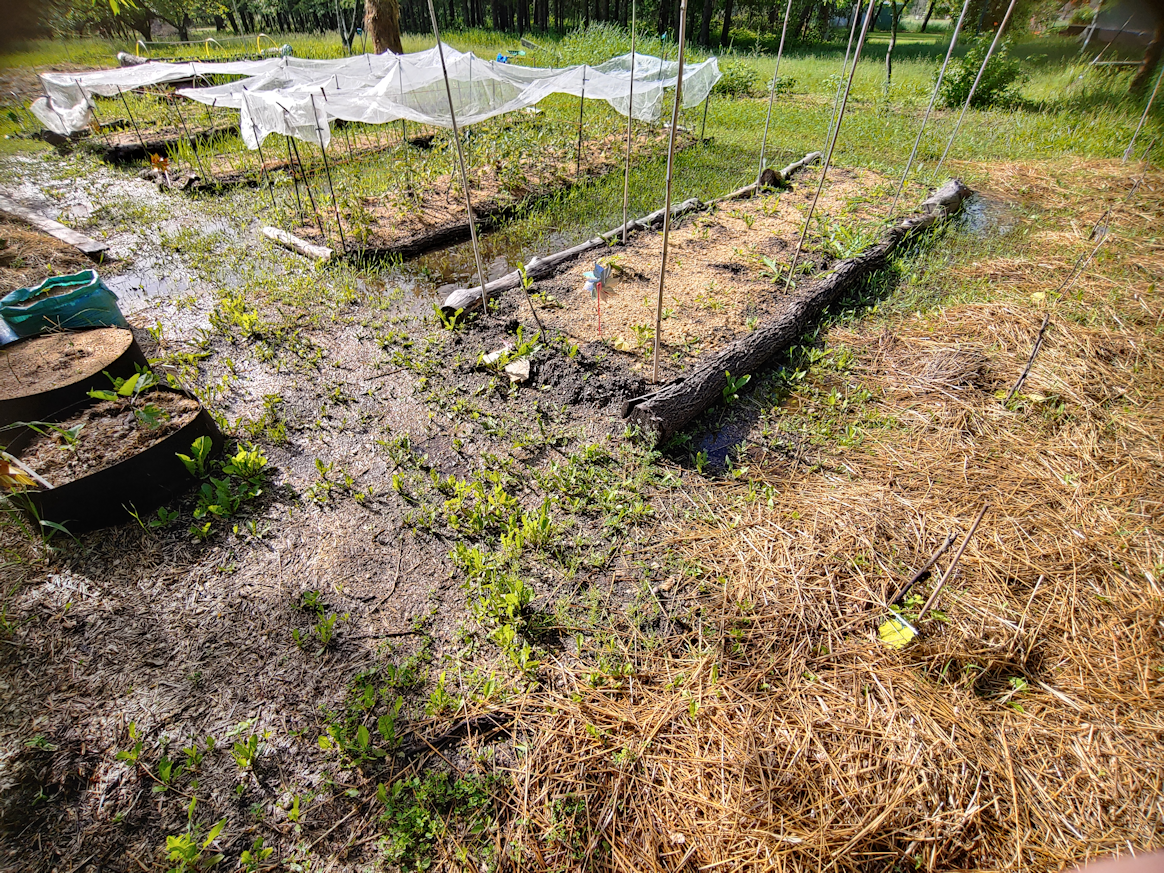
Once the frame for the low raised bed was finally assembled, it was time to set up a trellis, then do some transplanting.

This time, I got to use actual new, never before used by anyone else, metal posts to hold the wire! I had picked up four of these posts at Dollarama, and they seem like a really good product.

Rather than set the posts right at the freshly attached end logs, I set the end posts about a foot in from the ends, which turned out to be roughly 15′ apart in the 18′ bed, so the other two were set about 5′ apart. And by “feet”, I mean literally my booted feet. 😁

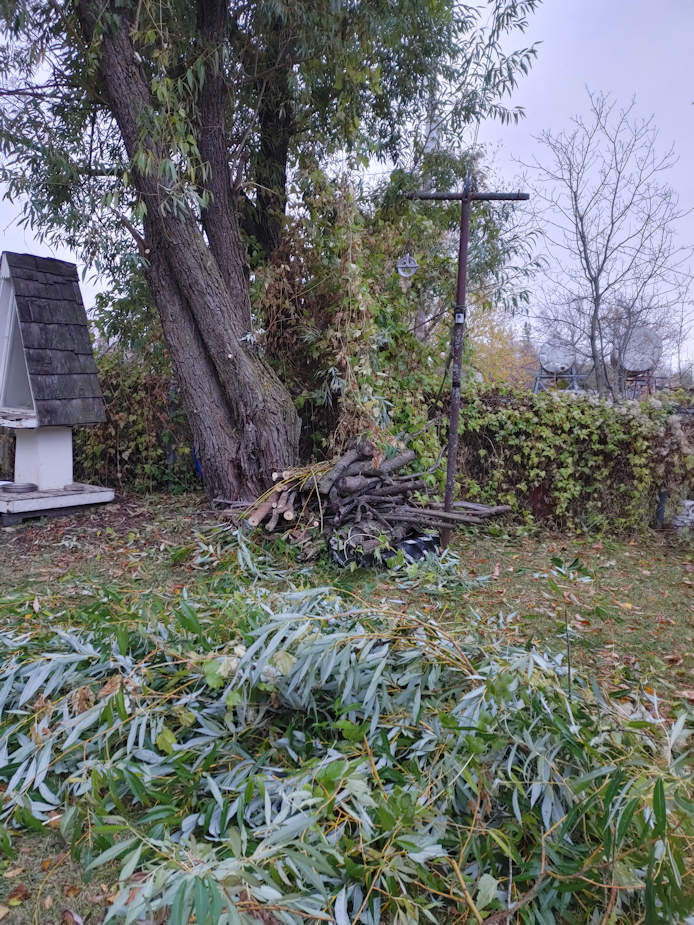
At the end closer to those trees we need to get rid of, I had to actually dig around with the garden fork to pull up the rocks I kept hitting, trying to push the post in!

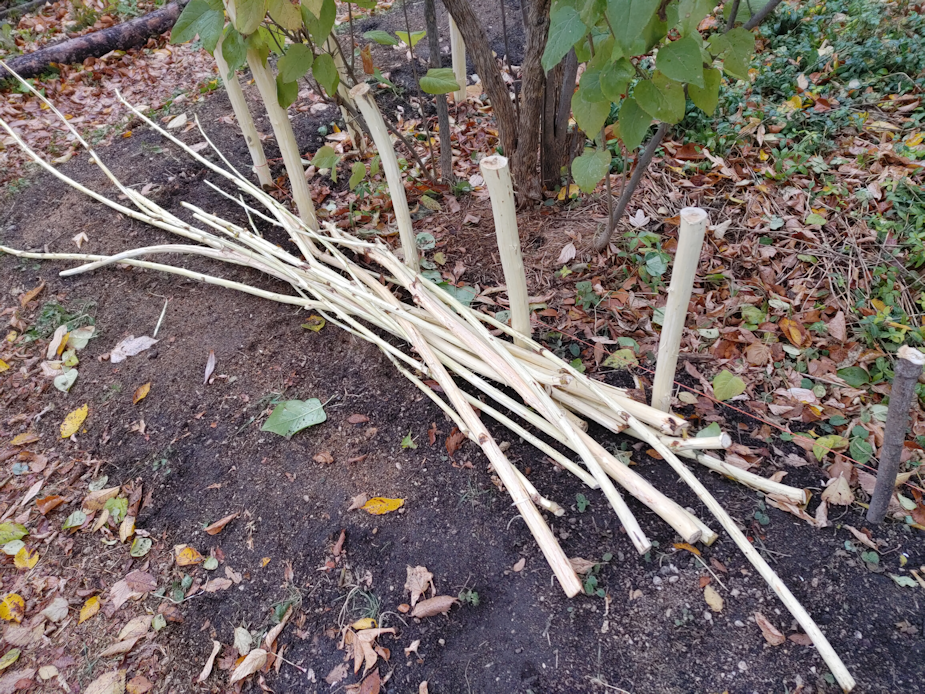
Then I went to the old squash tunnel and snagged the last 2″ square wire mesh. There’s still one section with chicken wire on it. I find the 6 sided shapes bend and stretch out of shape too much for my liking, so I’m not sure what I’ll use that for.

The square wire mesh was about 18′ ong, so there was excess to work with.

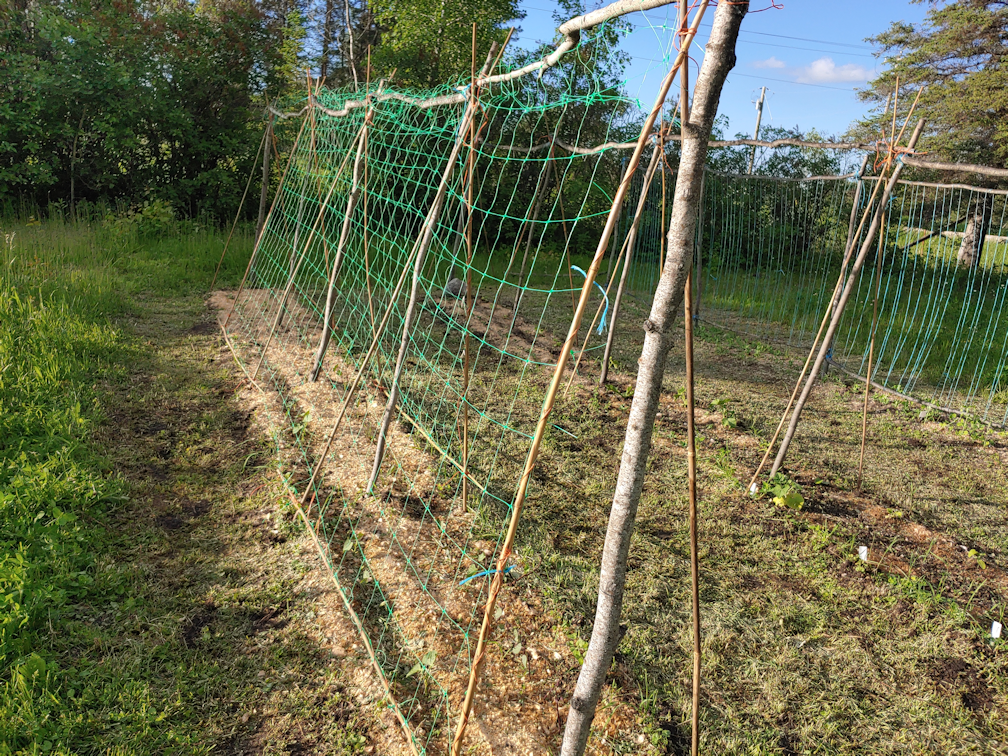
One of the things about these posts is that they have hooks on them to hold stuff like this, which you can see in the second image of the slideshow above. There’s four hooks like that, with the opening facing up, along the top 2/3 or so, then two in the bottom third, facing the other way.

Very convenient, except it was remarkably difficult to get all of them hooked up at the same time!

It was still much easier to get the wire mesh up evenly than on the salvaged T posts I used for the pea trellis.

Once the trellis was done, it was time to finally do some transplanting!

Once again, the trellis posts dividing the bed into 3 sections came in handy, as I had three types of melon to transplant. There were four each of the honeydew and Sarah’s Choice (cantaloupe type) melons. Then there were the Cream of Saskatchewan watermelon. There are two larger plants, plus one really tiny one I probably shouldn’t have bothered with, but I can’t just toss the poor thing!

I decided to transplant all of them melons on the East side of the trellis, so they will get the morning sun, and the three watermelons would be on the south end of the bed.

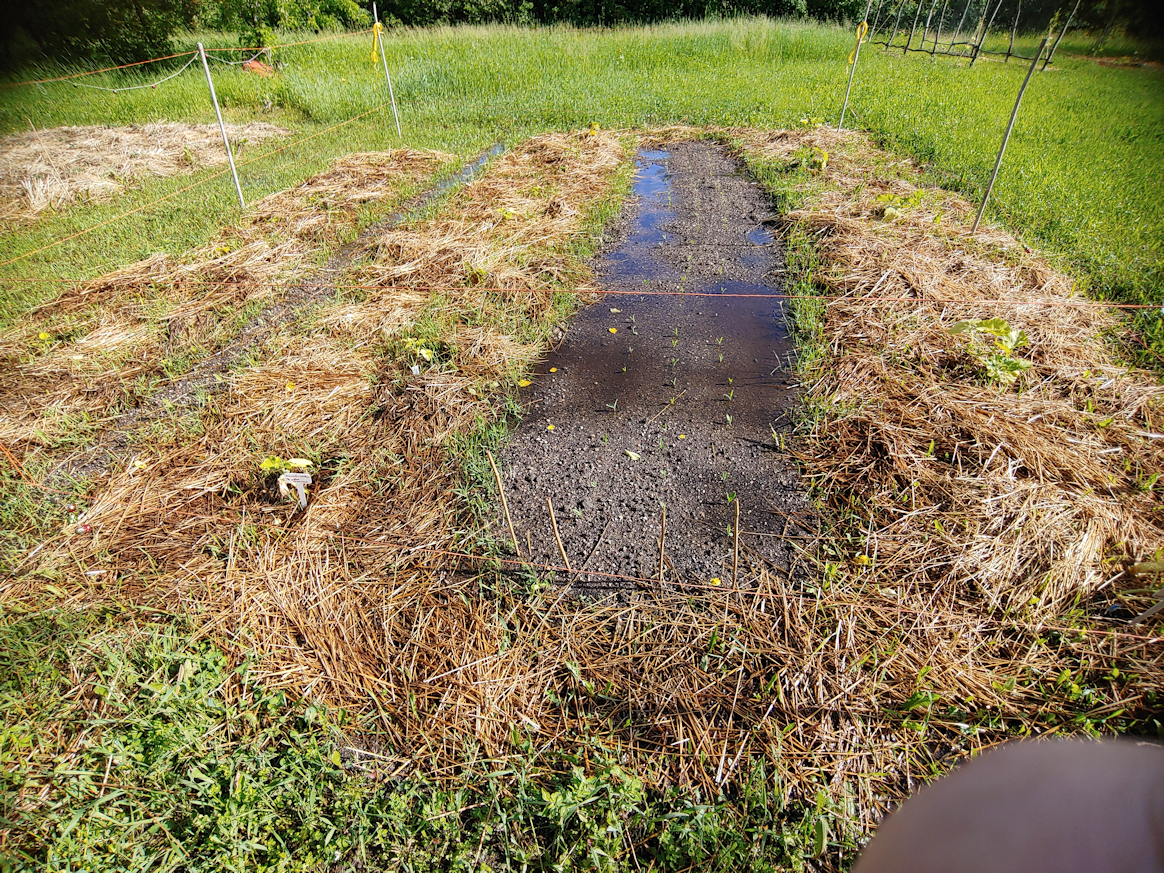
As with the winter squash, I set up collars made from 4L water bottles that my husband uses for his CPAP humidifier. Those are turning out to be very handy!

Once I spaced out each collar and set them into the soil, just enough to keep them from blowing away, I added a handful of manure into each. That got well mixed into the very, very dry soil, the collars reset in place, and then I made low trenches in the soil around them, to drain water down towards the roots.

Then everything got a thorough soaking. Which got sucked up like a sponge, so I did it again.

Even with filling the collars with water, as well as the trenches around them, when I dug down to plant the melons, I was still reaching super dry soil!

Everything got another thorough watering, once the transplants were in.

Then I grabbed the wagon and headed to the outer yard to rake up grass clippings to use as mulch. Thankfully, that area is far enough away that it’s not filled with Chinese elm seeds! The inner yard is practically drifted with them.

Once the melons were surrounded by mulch, it got yet another thorough watering. I wanted to make sure the mulch was wet all the way through, not just on top.

As these get bigger, I plan to train them up the trellis as best I can. Last year, we had a 4″ plastic trellis net, and it really sagged under the weight of the vines, so I’m hoping this set up will work better. I will probably still have to add cross pieces at the tops. The wire extends about 4″ above the top hook on the posts, so I should be able to weave supports through the mesh fairly easily. The posts also have holes in them so, if necessary, I can use twine or something to stake them out at the ends, so the weight of melons doesn’t pull them towards the middle.

That took care of one half of the bed.

I have decided that I will plant our Spoon tomatoes in the other half.

Several of them are staring to bloom now! These are indeterminants that can grow quite tall, so they will have their own individual supports, plus the trellis, to hold them up. I’ve got nine Spoon tomato transplants, so there will be room to plant something else with them, if I wanted to. Some bush beans, perhaps.

I’m hoping to be able to get them in tomorrow morning, since the bed is pretty much ready, and there’s even extra mulch waiting in the wagon for them. My daughter has a doctor’s appointment tomorrow, and we’re planning on leaving early. Chances are, we’ll need to go to the pharmacy after her appointment, and I will likely take advantage of the driving around to do some of the shopping we weren’t able to do during our stock up shops, so it might be a long day of driving around! Which means the morning will be pretty much the only time I’ll have available to get any more transplants in.

After the Spoon tomatoes are in, that leaves the peppers and eggplant to be planted in the old kitchen garden, and the rest of the tomatoes should fit in one of the low raised beds in the East yard. The other low raised bed will have our short season corn planted in it, with more bush beans planted in between.

By the time those are in, the elm seeds should be done dropping, and I can finally do something about that bed along the chain link fence. The mesh tunnel may be all bent up, but it’s still doing its job of keeping the bed from being suffocated by seeds. I’ll be replanting the bed with my remaining packet of Hopi Black Dye sunflower seeds, and pole beans.

I might skip planting into the chimney block planters at the other section of chain link fence entirely, this year. I’ll have to see how badly the elm roots have invaded. There’s still the trellis bed that still needs work, but can be planted in before that’s done. Plus, the bed in the old kitchen garden that will be getting wattle weave walls added. It could probably be planted in before that’s done, too.

It feels like I’m way behind on getting the direct sowing done, but it’s only June 2 today – our previous average last frost date. Which means most things couldn’t actually be safely direct sown until after today, anyhow! We had so many insanely hot days, lately, everything feels off.

Having said that, it’s June, now.

Half the year is pretty much gone already.

Good grief.

The Re-Farmer

Today’s garden progress

With no rain on the horizon and lower temperatures, I finally had a chance to work on the low raised bed with the logs in place. With the winter squash getting so big right now, it was getting to be a “now or never” situation!

These are some before and after pictures. I started on the side facing the high raised bed first. The vines needed to be lifted safely out of the way, and I was able to use the pea trellis to hold them.

I look forward to when we have our permanent trellis beds done. The temporary trellis is fine for beans and peas, but can’t hold the weight of squash vines. The permanent trellis tunnels will be built with the weight of large vines and heavy squash in mind.

Once they were safely lifted out of the way, I went over the path with the weed trimmer, then rolled the 18′ log towards the high raised bed. I did some weeding on the inside of the where the log was, then used a stirrup hoe to loosen and level the soil under where the log was. Then, cardboard was laid out so that part of it was covering the soil inside the bed, as well as under the log. The cardboard got a soaking with the hose, then the log rolled back. I have a couple of 4′ lengths of wood cut for the ends of the trellis bed that ended up not being used. I set them against the high raised bed and the log to both keep the path at 4′ wide, and keep the log from rolling out of place.

Then I took the wheelbarrow and forced my way through the overgrown grass – some of it reached to my shoulders! – to the wood chips. One load of wood chips was enough to lay on the outside of the log, using my foot to press them solidly under, so it won’t roll away, plus some on the cardboard on the inside, too.

Once that was done, I could take the vines down from the netting. The less time up there, the less chance of damage, though some did get damaged as I was doing this. When laying them down, I set them to train them to grow along the sides of the log, rather than into the path. Some of the vines were growing adventitious roots, and I made sure those were over the wood chips.

I had considered not doing the short ends at all, but in the end, I went for it. The squash at the ends are the largest, and there’s no trellis netting at the ends to hang them off of, so greater care needed to be taken to move them aside.

I did the south end, first, using the same process: move the vine, weed trim, move the log, weed by hand, cover with cardboard, soak the cardboard, then put the log back. With this one, I had a rock I could use to keep it from rolling away, as I didn’t have any wood chips left. When returning the vine, I worked it around so that it will grow along the side of the log I’d put the wood chips against.

Then it was time to do the other side. This time, I weed trimmed the path, plus the end, and moved both the 18′ log and the 4′ log at the North end, then hand weeded. This side required more leveling of the soil as there was quite a gap under the North end of the 18′ log. I had just enough cardboard left to place on the ground, then rolled the logs back. This time, I had a wheel barrow load of wood chips ready and waiting, and got that laid out on both sides of the logs. Last of all, the vines were laid down and laid out in the direction I wanted them to grow. It wasn’t intentional, but I ended up with the vines all running counter clockwise around the bed.

What I am not going to do is permanently attached the end pieces to the side pieces, yet. There’s too much risk of damaging the vines. We’ll do that in the fall, when it’s time to get it ready for the winter. Having the cardboard and wood chips down will be enough for now.

That done, I decided I needed to set up a temporary trellis for the melons. Getting the permanent supports isn’t going to happen quite yet, and the melons were starting to make their escape!

Since this was going to be a temporary trellis, I made it closer to the middle of the bed, rather than the outside. I had recently picked up more plastic coated metal supports at the Dollarama recently, in 4′ and 5′ lengths. I set up six of the 5′ lengths along where the melons are growing, then added 4′ lengths across the tops.

The netting I had was quite a bit longer than the bed. After setting the netting in place along the melons, with jute twine woven through along the bottom to hold it in place, the excess height was draped over the top. I didn’t open up the excess length, and wrapped it around the other side.

Once that was secured, the melon vines needed to be trained up the netting. If I’d had some, I would have used more of the 4″ square trellis netting. With the finer mesh, I wanted to make sure the melon vines were all facing the outside, so they can be more easily tended and harvested from. Some of them were so long, I secured them by fixing one end of some jute twine to the bottom, wrapping it around the stem of the vine, then securing the twine high enough on the netting to hold the vine up. Now that they’re set where they are, their tendrils will naturally start grabbing onto the netting as they grow, but until then, I’ll be checking them and training them towards the netting.

It may be a cooler day today than the last couple of days, but it was still hot out there. I’d considered doing more weed trimming around the house when I was done, but I was just too hot, tired and dehydrated by this time. So that will wait a bit longer. Tomorrow is supposed to have a high of 18C/64F, which will be perfect for the weed trimming. Most areas are still too wet, but we might be able to get at least some areas mowed. Unfortunately, the temperatures are supposed to start getting hotter again after tomorrow, but at least we’re not supposed to be getting more rain. We’re still waiting for the yard to dry out enough to finally be able to use the truck to get that tree off the outhouse!

I’m happy to finally get as much done in the garden as I did today, though. With the temporary melon trellis up, there won’t be any rush to get those vertical support posts in place, so we can take more time to do a solid job of it.

Little by little, it’ll get done!

The Re-Farmer

Netting up, and socialization progress

The shelling peas planted in one of the winter squash beds are starting to get tall, so it was time to put up the trellis netting. My older daughter and I headed out early in the morning to avoid the heat.

It didn’t really work. 7am, and it was already feeling too hot!

The first thing we had to do was steal some of the lighter posts marking the 4′ distances for the low raised beds and attaching them to the tops of the bamboo stakes already in place, to support the netting at the top.

The netting wasn’t long enough, but we were reusing wire twist ties, and some of them were long enough to cross the distances at the ends. Later on, I’ll use jute twine or something to lace through the ends, so they don’t pull and sag too much once the weight of the peas are on it. We also made sure to leave a gap at the bottom for the winter squash vines to pass through. We don’t want any of those climbing! They would be way too heavy for this set up.

Later, we’ll at another trellis net on the other side, for the pole beans. The Seychelle beans planted in the gaps between the few carminate haven’t germinated yet, so it’s entirely possible we won’t end up needing it.

After that, it was just the usual morning rounds which, these days, includes cuddling as many kittens as we can convince to let us.

Right now, there is one white and grey that doesn’t run away and allows us to pick it up at any time. It even purrs. The tiny foundling – I think we’ll call it Button – needed no time at all to be okay with human contact. In fact, I have to watch my feet when it’s around! It is SO much smaller than the other kittens! It starts purring pretty much as soon as we picked it up, will crawl around on our shoulders, and when we put it down near out feet, it starts to rub on them.

I make sure to put it down near a food or water bowl as a distraction. 😄

I’ve made a point of adding water to one or two of the sun room kibble bowls to soften the kibble. I’m also seeing Junk Pile nursing the new baby. It appears to be in good hands!

I just came back from topping up the kibble outside, and Syndol was back and very hungry. I hadn’t seen him since yesterday evening.

When I paused to take a picture of Button, he wanted me to take his picture, too!

Oh, and today, I finally found a spot to transplant the Orange Butterfly flowers (milkweed) that have still been languishing in their Jiffy Pellets. Only three had germinated, and I had intended to direct sow more, but we just didn’t have a good place for it.

Well, since we didn’t end up planting poppies in where I’d intended, and yesterday, I buried Driver there, I figured it would be appropriate to transplant the butterfly flowers onto his grave. This bed can be a milkweed bed.

There are a lot of things that need to be done outside, of course – the list is never ending – but it’s going to have to wait. There are dozens of little thunderstorms blowing across the prairies right now, in both the US and Canada. I was hearing thunder while I was out, just a little while ago. Plus, as I write this, we are 26C/79F, with the humidex putting us at 30C/86F. I think the garden, in general, is going to like the heat we’re supposed to have over the next while. Much of what we planted this year prefers hotter temperatures. We’re supposed to keep getting hotter over the next few days and, a week from now, we’re supposed to have highs of 30C/86F. We’re supposed to have the storms blowing through today, plus a bit of rain tomorrow afternoon, but after that, we’re not expected to get more rain withing the 10 day forecast.

We shall see.

The Re-Farmer

First one, nine more to go

I am so tired.

I’m going to pay for today, tomorrow! It’s a good thing it’s Thanksgiving, so I’ll have a break to recover.

My goal was to get the felled tree that was stuck for so long, cleared and cut to size and, hopefully, start clearing access to the other tree my brother cut down for me that is almost completely hidden by the underbrush.

The first task was to clear away a small spruce tree I had to cut to allow the felled tree to drop. It was such a perfectly straight little tree, I ended up debranching in and setting it aside for future use. There were a couple of other dead trees plus underbrush to clear before I could reach the broken tree top that was laying across the trunk. The tree it was from had lost its top at some point, so a pair of branches grew upwards to create a double top. The whole thing was too big and heavy to bother taking out completely. Instead, I cleared away some of the branches, then cut it away from either side of the trunk I was after, giving myself enough space to work. I was able to use the mini-chainsaw for this, so once it was clear, I kept cutting away branches from the trunk I now had access to, until the battery died. I was already on my second battery, and the first one hadn’t had time to recharge yet, so I switched to the loppers. This part of the tree extended outside the north “wall” of the spruce grove, and I was able to use the loppers to clear all the way to the end.

The next step was clearing access to the bottom of the trunk. Between a machete and the loppers – our weed trimmer isn’t heavy duty enough for what was grown back since we were last able to work in this area – I was able to make a path. There was still the top of a dead tree I’d harvested before, laying on the undergrowth, that I dragged out. It’s straight enough, we might be able to use parts of it. Then I had to clear the trunk itself, which not only meant clearing underbrush around and branches on the trunk I was after, but even some low hanging dead branches from the spruces the trunk was wedged in between.

Once everything was finally clear, I measured off and marked 10′ from the base of the trunk, then the next 18′. The 18′ length will be for the next trellis bed. There’s still at least another 18′ of trunk left, but the closer we get to the top, the less straight the trunk is, and the more full of branch stubs it is. It will likely still be used; just not for the side walls of the next trellis bed.

Once everything was accessible and de-branched, I was finally able to cut the 10′ length.

Then I had to drag it out.

Good grief, that log was heavy!

As I’ve done with most of the logs, I dragged it out by a rope tied to one end. Getting it out of the spruce grove was quite a challenge. I even tried wrapping a plastic bag around the far end to help it slide better across the ground, but this time, it made no difference. I ended up taking it off again, as it seemed to actually make things worse.

Once it was out of the spruce grove, I left it and went into the barn. I found some scrap pieces of wood that were used as spacers between some old salvaged lumber we’ve been scavenging for various projects. The pile used to be a log bigger, before we got here, so there were quite a few of these scrap bits.

I decided to store the 10′ lengths beside the garage and lay the pieces on the ground to keep the log from direct contact with the soil. Then it was back to the log!

It wasn’t long before I gave up trying to drag it. It was not at all co-operative! I ended up simply rolling it the rest of the way.

Here it is!

The very first 10′ length of what will be the vertical supports for the roof of our future outdoor kitchen.

Only 9 more to go.

I wonder how much that thing weighs? I just tried looking at some log weight calculators, but they either require information I don’t have (oven dried weight and bark??), or they don’t have black spruce in their species list. I’ve tried a couple of species of spruce, but they don’t grow here. I also tried tamarack, which does grow here, but I think tamarack is a denser wood. The results ranged from just over 140 pounds to over 200 pounds. That’s a huge range! Plus, this tree has been dead for a very long time, so it’s very dry. If I had to guess, after looking at the calculators, I’d put it at maybe 150-170 pounds. Which isn’t really a lot. I’m definitely not as strong as I used to be! 😥

The other felled tree that I need to access looks like another big one. I have no idea how tall that one is, but I’m hoping I’ll get another 10′ length, and 18′ length again.

Anyhow.

Once the 10′ length was cleared, I went back and measured out the 18′ again, then started cutting it. With the top of the tree still hovering above ground, I was expecting its weight to drop at the top, which would have made for an easy cut.

Of course, it didn’t go easy.

Instead of the top dropping, the entire trunk slid down a couple of inches, pinching the chain saw’s bar. The chain was still free and could spin, but the bar couldn’t move any further to finish the cut. It could only just rotate in place. In the end, I had to take the bar off the chainsaw. I was then able to get the bar out, but the chain was still stuck. I had to find something large enough and strong enough to lift the log – a steel pipe my brother had found and used when the tree first got stuck on him! – high enough to open the cut enough that my daughter to pull the chain free.

At which point, I was done for the day! It was starting to get dark, anyhow.

So I almost got the tree cut to size!

I’m not actually sure how I’m going to get the rest of it out, though. The top of the tree, once free, will be easy to drag clear. This 18′ section, though, is right in between three other trees. They’re dead, too, and slated to be cut down, but they don’t have clear paths to fall. There are other dead trees that need to be cleared out, first.

I never imagined that one dead tree would be so difficult to harvest! It’ll get easier as we clear away more of the dead trees, but these first few just don’t have a lot of space around them. There’s still more than a dozen more dead spruces to cut down, and some of them are quite a bit bigger. These ones that my brother cut down for me were specifically chosen because they were smaller and more suitable for the trellis beds!

So… yeah. I’m pretty tired now! 😄 I also forgot to take painkillers before I started this. I’ve taken some since then, but by the end of it, it was getting hard to move! My daughter had to take over removing the sheets we’re using to cover the peppers from the clothes line, because I was having such a hard time of it – then did to covering of peppers for me, too!

And now it’s almost midnight, already! Where did the time go? Time to try and get some sleep. Tomorrow, we feast!

The Re-Farmer

Yesterday’s progress: trellises down, and pruning willow

Things turned out to be rather pleasant yesterday afternoon, so I took advantage of it to get some stuff off my to-do list.

First, the trellises.

The netting and bamboo stakes are all put away. I even unwound the blue twine from the pea trellis. We won’t be planting vegetables here again. We’ll be planting food trees and bushes in the area, instead (except for the area over the phone line, wide enough to drive a vehicle through, that we’ll be keeping clear). So, the trellises are coming down!

The five uprights from the pea trellis all broke at ground level. I was able to pull the others straight out of the ground, with only a little big of wiggling. You can tell by the dirty on the ends, which pile has those!

Since I had the materials, I used some of the pieces to make a buck and pole “fence” over the sea buckthorn. Only two have survived, so I only wanted it long enough to go over those. Hopefully, that will dissuade deer from nibbling on them. The gap in the hedge is right near here. One end is far enough out that it should make a deer not want to jump the fence there at all. On the trail cams, I’ve been seeing quite a few deer walking around this corner of the property, so it seems they are already not jumping the fence here much. There is another spot they prefer to jump the fence at.

Later on, I decided it was worth working on the willow. I’m after branches to weave into the wattle wall I’m building in the old kitchen garden, so this is getting two things done at once.

The trunks were barely visible from all the branches that had grown along them. Thankfully, we have an extended pole pruner that I can use for the higher branches, instead of trying to get at them with loppers from a ladder. You can see the vine has climbed it quite a bit, too!

The power line to the house is still not clear of branches. This job will be continued later, and includes the trees on the other side of the chain link fence.

The longest and straightest branches were kept, stripped of side branches and leaves, and a daughter started debarking the biggest ones for me while I pruned more, until it started raining. Then I grabbed a knife and helped debark. Wattle fencing isn’t normally debarked, but I want to debark the branches that are going to have contact with soil – because the last thing I want is for willow to start growing right next to the house! I love willow, but that is not a tree you want close to infrastructure!

There were some really straight, thin branches I kept, too, putting them on the pile of maple and cherry wood that’s already there. Who knows. We might find some use for them.

This is all the branches we got out of there, so far. Not even close to how many will be needed to weave a wall. Only the bottom few inches needs to be tightly woven, as it will be holding soil in, but eventually that will be on all sides, not just the “back” that is the focus to get finished first. The high parts of the back wall are to keep things out, rather than in. It’s going to be a challenge to find enough suitable branches for this!

Today is supposed to be a semi-warm day – with both rain and snow expected – then we’ll have several days with highs just barely above freezing, before it warms up again and stays warm for about a week. Hopefully. At least the rain will keep those willow branches from drying out. I’m hoping to at least get these ones woven in, some time today!

The Re-Farmer

Got it done!

This morning, after finishing my morning rounds, I headed over to a town north of us to pick up our freezer pack of beef that we ordered from a local rancher. I had a chance to chat with her about the flooding this spring. The town had some massive road damage, and it’s still being repaired. Their farm, however, is slightly elevated from the town, so they had no flooding. The way she put it, if they ever got flooding where they are, the town would be under water.

The moisture and rains have been both a blessing and a challenge. Because of the weather, their cattle got put out to pasture later than usual, but for the first time in many years, the grass was already high. Last year at this time, there was almost no pasture at all, and everything was crispy. They grow their own feed as well, and her husband finally got out to finish seeding just today. It’s late, but if we get another long fall, that should be fine.

We also talked about our arrangements to get a quarter beef in the fall again. Ordering so early helps them plan things out. As for the monthly payments, my thing is, if I’m going to have to set the money aside anyhow, I would rather the money go to them, to help feed the cow we’re going to be eating! :-D It’s a win-win, for sure. :-)

Since we met in the grocery store parking lot, I quickly popped in to pick up a few things. We are confirmed for company in a couple of days, and I’m still hoping for a cook out. Then I took the opportunity to go to the hardware store. I’m happy to say, I was able to find the trellis net I was looking for!

I got three, just in case, and I’m glad I did.

The nets are 12 ft long, but these rows are about 20 feet long, at the centre poles. The actual planting area and the A frame uprights are a bit less than that, but not much. With the second trellis I wored on, on the right, I’d had one trellis to lay out on one side. It’s long enough to reach across 4 upright poles, with twin to lash them taught. With the first one I worked on, on the left, I hadn’t had enough poles to do the cross pieces on the bottoms at first, so I put two on each side, alternating which pair of poles they were attached to. When I put up the 2 nets we had left over from last year, so that they were attached to the bottom poles, that meant the empty gaps were at opposite ends.

For the trellis on the right, I was able to put up a new net across from the one I’d put up before, leaving the space between the last poles open. That allowed me to take a second net and wrap it around the end, where the big rock is.

With the other one, I had to got the last net in half to cover the gaps at opposite ends. I’d much rather have not had to do that, but the alternative would have been to undo and move one of the trellis nets that were already up.

They are VERY thoroughly lashed in place.

I wasn’t going to do that. :-D

The trellises are now ready for the pole beans, peas and gourds to start climbing!

One of the things I did while in town was pick up a package of green bush beans. The ones we planted with the sweet corn are not coming up at all, so I decided we can replant them. With bush beans, we can get away with planting this late. That’s something I’ll be doing later today.

My other project outside was to see if I could get my daughter’s old market tent frame useable again. A couple of summers ago, we had it set up near the fire pit in preparation for a cookout when we suddenly got high winds. A couple of pieces that were joined in the middles at a pivot point, snapped. It’s a really good tent, so even though it was broken, we kept all the pieces.

We used the frame to support the surface used to harden off our seedlings. I’d made an insert to join the snapped ends and keep them from bending too far, then duct taped the ends together. Today, I took a couple of very short metal pieces from the canopy tent I dismantled once things thawed out enough to remove the tree that fell on it, and taped them to the broken bars to support them even more. Then I dug out the tent roof and set it up near the fire pit. Once the roof was on, the tent fully set up and I confirmed the patch was holding, I folded it all closed again. It was too windy to leave out. However, it is now ready for us to use near the fire pit. I want to set the picnic table up inside it, and have at least two of the walls hung, so we can set up some citronella candles to help keep the mosquitoes at bay!

The big problem with that plan is, the picnic table is on it’s last legs. Every time I’ve moved it, some other part either bends, or pops off it’s screws. Which is to be expected. We cleaned it up and painted it, but it was still very rotten, and we knew it wasn’t going to last much longer. We can still use it, as long as we’re gentle with it.

Which means no more moving it around with just one person!

The Re-Farmer

Wet, wet and more wet!

I am so, so glad the girls were able to get the clogged downspouts cleared yesterday! We had a thunderstorm last night, and are currently under weather alerts for more severe thunderstorms.

This is the one, draining into the north yard, that was causing the most problems. It is under this corner that the most water is leaching into the basement. This basement does have weeping tile, but they are not working as they should anymore, and are probably clogged at this end.

There is another downspout at the south end, but it had only the short piece of eavestrough at the end to divert the water away from the house. For some reason, we’ve got about a dozen or more downspouts in the garage, so I grabbed one for them, and they set it up to extend into the bed where the dwarf Korean lilac is. With how tall the grass is in the outer yard, it was actually a struggle to get through it, to reach the barn!!

I’ll put up with the extension blocking the path along the house. It’s not as bad as the north corner, but we do have water seeping into the basement a bit in the south corner, too. The wall is partly damaged by the roots from the Chinese elm my mother planted for shade in front of the kitchen window. :-(

While they worked on that, I worked on the trellises.

I decided I’m just going to have to buy more of those bamboo stakes once pay comes in. A pair of them was set up at each of the uprights for the two rows that need trellising. That left me with 4 stakes left. I lashed them to the bottoms of alternate A frames, for 2 on each side. To finish the job on both rows, I’ll need 10 more of these 6′ bamboo poles. Then I used the net from last year and set that up, lacing twine along the ends and at the bottom stakes, to snug it up. We need to get more of this type of net. The spacing is large enough that we can reach through to harvest our beans, peas or cucumbers. The other net we have is 1/4 inch mesh.

After this, I also put a simple rope fence around where we have squash, beans and corn planted. At this point, I just want to stop the deer from walking through it. They’re not after anything there – yet. You’ll see that set up in a photo below.

During the night, the skies opened and the rains poured down! I actually slept through it, awakened only by one exceptionally loud peal of thunder. While doing my rounds this morning, however, I could not believe how much water there is, everywhere! It must have been quite the deluge! I’m still holding out hope to be able to mow the west and north lawns, but that’s not going to happen today, that’s for sure! The west lawn is now mostly under water. Most of the north lawn as well. I’ve never seen that much open water in those areas before.

The squash patch is very wet – thankfully, the straw mulch is helping keep that under control. We’ve had paths between the low raised beds filled with puddles before, but not this much around where the grow bags and the small potato bed are.

I’m actually surprised the mosquito netting has held out. Their purpose is to keep the plants from being pounded by rain or hail, while still letting the water through, and it seems to be working. They’re only held in place with wooden clothes pegs!

I’m standing in water to take the above picture. There is even a large puddle next to the remains of the straw bale. The melons are likely good with the wet – they do need a lot of water, normally – but I’m concerned that some of the potatoes might get drowned.

This is the patch I “fenced” off last night. I used some old conduit pipes I found in the barn and pounded them in place as fence posts. They’ve got 2 lengths of twine running around them, far enough apart that we can just bend down and step through to get to the plants. I also dangled lengths of bells in different places, so even if a deer decided to step through, it would hopefully make a noise and distract it away. I added one of the pinwheels we have to the top of a pipe for the distraction. Little by little, we’ll set up more distractions and noise makers around the garden beds. Eventually, we will probably have to put a hardware cloth fence up, to at least protect the corn.

Assuming the corn and beans survive. As you can see, the sprouting corn is under water in places. The north end of the row with the popcorn in it is all under water. Still no beans coming up next to the sweet corn. Will they survive? I have no idea.

Even the area where the trellises are is full of water. This corner of the yard has been notorious for being incredibly dry and baked hard by the sun. Thankfully, the rows themselves are slightly elevated with the addition of garden soil and mulch, and even our digging and weeding before planting means where the plants are growing, the soil has better drainage.

The nearby sea buckthorn is high enough to not be in puddles – and they are finally unfurling their leaves! Nice to see they all took.

The silver buffalo berry is also doing surprisingly well. Moving south, the land slowly slopes downwards, so the last 10 or so silver buffalo berry are in pools of water. At least three of those have been in water for quite a while, and are still okay. They seem to be quite resilient!

The beds in the east yard are almost surrounded by water. Remarkably, the ground cherries are doing all right. I think that grass mulch is acting as a sponge, keeping them from being drowned out completely. There are pools of water right next to the mulch.

The paths between the low raised beds, and the entire lawn in front of them, is full of water. There is basically a pond in front of the outhouse. Thankfully, the raised beds are making a difference. There is increased growth visible in the Kulli corn, and the beans between them are looking very healthy. The tomatoes and onions are also looking strong – and those onions are really taking off! The 6 transplanted garlic at the far end of the third bed may not all make it, but the rest of the garlic is finally looking like they are taking off. I figure they are at least a month behind the garlic in the main garden area.

The other beds in the south yard are all high enough to be out of water. It looks like all 10 of the sunchoke tubers planted are now sprouted; some of the tubers have multiple stalks coming up. The asparagus and strawberry bed are right next to the vehicle gate, which is full of water, but the bed is doing well. Likewise, the beds along the chain link fence, on either side of the people gate, are above water and doing well. Still no signs of white strawberries.

The old kitchen garden has a slightly different situation. We’ve deliberately built it up over the past 4 years and have the retaining wall at one end, so it’s above the water that is in the lawn surrounding it. The house itself also usually keeps parts of it from getting rained on as much, not to mention the ornamental apple trees. However, the sump pump hose drains into the sun room garden, and that pump is going off quite frequently. It drains next to the bed where we’ve got the beets planted. I shift the end every now and then, so it’s either draining straight down a mulched path between the bed and the laundry platform, or it’s draining into the mulch at the end of the bed, and partly down the path on the other side.

These are all areas that are normally drier than everywhere else. Until this year, the sump pump basically never went off, because we’d been so dry. Now, not only are we getting more rain, but there’s all that nice, clear water from the sump pump reservoir being added. There is currently so much lush growth along the house side of the old kitchen garden that the path we made using salvaged cap stones, bricks and rocks along the house is almost hidden. The high end of the beet bed is almost overgrown with mint – and I dug up and transplanted as much of the mint from there as I could, last fall. Then again in the spring, I pulled up more of it when getting the bed ready for planting! The path is also full of mint at that end, along with loads of crab grass. Moving north along the house, it’s more of those invasive wildflowers, some of which my mother planted deliberately, not knowing they were invasive, and some are the same ones we’ve got taking over all over the place. I don’t mind them in the paths too much, but they’re coming up in the L shaped bed, too, and choking out the lettuce.

We have a drainage hose for the sump pump, but it’s currently being used for the washing machine to drain outside (it sounds like whatever is causing the water to back up in the pipes is still a problem). I’d like to add an extension so that the sump pump drains further away. With the length these hoses come in, we could even move the end to different areas of the old kitchen garden that might need more water, if we wanted. The area it’s draining into right now is getting to be too much of a jungle! :-D

We had already determined that we’ll be building high raised beds for mobility reasons. For some crops, like corn, tomatoes and vining plants, we would still want to have low raised beds. High raised beds are notorious for drying out quickly and needing more water, which is why we are using modified hügelkultur methods to fill them, with all those layers of wood and organic matter acting as a sponge to hold water. This spring has shown us that even for a wet year, there are benefits to having raised beds, as they are keeping things from being drowned, too. Even a few inches of elevation or a mulch is making a difference.

When we get around to building permanent high raised beds in the outer yard, from what I’ve been seeing so far, water like this will be less of a problem. There are patches with water collecting in them, but where we are planning to build the beds seems clear. We’ll see better once we finally get that overgrown grass cut. It’s about 3 ft high, at least! I almost feel like asking one of our neighbours if they have a grazing animal we could borrow. Otherwise, it feels like such a waste to cut it all!

We’ll figure it out.

The Re-Farmer

Our 2021 garden: building the first pea trellis

We had a beautiful warm day today – prefect for working outside!

Our peas are among the things that require the most preparation before we can direct sow them, so we decided to focus on building trellises for them. After looking over some design ideas, drawing some sketches and making some decisions, I headed out with my baby chain saw and rifled through the pile of poplar poles we kept after doing some clean up and testing out the cordless pruner.

That baby chainsaw made cutting poles to size very fast!

In the background are the support poles, cut to 6 ft lengths. The poles on the wagon are the cross pieces. I am short a few to be able to complete all the beds, but I ran out of medium sized poles. We are saving the bigger ones for the squash trellises, as they will have the most weight on them. The smaller ones will be good as stakes, but are too thin to be cross pieces.

I’ll just have to do more clean up and gather more poles! :-)

Our purple peas have the fewest seeds, so it got the simpler trellis design.

I started by laying out the support poles near where they will be set. Each bed will have 5 support poles, with the biggest ones on the ends, and the middles.

That rain barrel in the background is the one I patched up last year, to keep water at ambient temperature near our squash beds. We will need to fill it with water soon, so it doesn’t blow away! It’s going to take all our hoses put together, to reach that far.

After finding the centre of the first bed, I started digging a post hole – and immediately started hitting roots and rocks!!

I did drag over one of the post hole diggers we found, to try it out.

I’m pretty sure it has pieces missing. :-D

It can handle smaller pebbles, but roots and larger rocks were a problem. For some of the rocks, I had to get in there and bring them out by hand, because not even the spade could get them out. We only have one spade, and I don’t want to break it! We did have a second spade. The handle broke while I was digging holes for the haskaps. :-/

First pole is in!

The pile of rocks was later added to the top of the soil around the post. The soil that was put back into the hole and tamped down was a lot softer, and sank down quite a bit.

Shortly after that, my younger daughter was able to join me, and the rest of the poles went in much faster. :-)

Attaching the cross pieces was a bit of an issue. What I really would have liked to do was screw them together. There’s no way to do that manually, since we’d end up pushing the poles around in their holes. We don’t have enough extension cords to reach this area to use a corded drill and drill pilot holes. Our cordless drill is old and the batteries no longer hold a charge – and it’s old enough that the brand no longer uses the same batteries and does not make them anymore. Once we work out a solution, we’ll go back and put in screws.

Before adding the cross pieces, we measured and marked heights at the top and bottom of each support pole, then cut flattened spots on the ends of the cross pieces and at the marked areas of the support poles. When cleaning up the basements, we found a ball of old bale twine, so we used that to tie the crosspieces in place. That twine is really old, so while it’s holding surprisingly well right now, I expect it to disintegrate fairly quickly.

Once that was done, I used the twine to weave on strings for the peas to climb.

Which took quite a long time! The ball of twine was lots of shorter pieces. I kept stopping to tie ends together and make centre pull balls, to make wrapping around the cross pieces easier. I ended up using most of the ball, so we’ll have to find something else to use for the other trellises.

This bed is now ready to layer straw and soil down. We might even be able to find something usable in the old compost pile to add to the layers. We don’t have a lot of material that can be used to build over that grass, but anything is better than what’s already here! And we can deal with weeds.

It seems a bit much, to do all this burying of posts for a temporary garden, but wind is something we have to take into consideration. Hopefully, we were able to get the support poles deep enough that they won’t be blown over.

The other two beds will have double rows of peas planted in them, so the trellises we build there will not have the cross pieces at the bottom. Instead, we will put cross pieces about a foot away from the centre poles, at about the same height as these ones. Once these trellises are strung, they will form a sort of A frame, with each row having it’s own side of strings to climb.

When I was a kid, my mother always grew peas, but never used trellises. One of my jobs as a child was to flip the rows of peas, so that the sun could reach the other side of the plants. I do remember a lot of yellowed or rotted leaves when flipping my mother’s un-trellised peas. This would have been due to lack of sunlight in the bunched up plants, and contact with the soil. There was likely fungal issues, too, but as a child, I wouldn’t have recognized it for what it was. It worked, and we always had lots of peas, but this will be healthier for the plants, and should result in better yields.

While I was working out here, I was able to hear people out and about, walking on the road, etc. The old house across the road from us has no one living there, but the current owners come out regularly. It was so wonderful to hear the voices of children, playing outside! At one point, I was even visited by a very friendly little dog. The only down side was having our vandal come driving by on his ATV, very studiously avoiding looking our way and pretending to be doing something else other than creeping on me. As if his driving over, turning around and going home again wasn’t making it really, really obvious. :-/

We definitely need privacy screens! The corn and sunflowers will help, once they’re tall enough, but when we clear the fence line so we can repair the fence, we’ll be removing what little screening we have in that area right now.

For now, I’m rather pleased with our “rustic” pea trellis. Not too bad for something made of completely salvaged materials!

The Re-Farmer