Thanks to my wonderful daughter taking over for me, yesterday, we had a couple of fresh loaves of bread to try this morning.
I’d started by having the dough baby soak overnight, then added flour to make a sponge. After several hours, this is what the sponge looked like.
My daughter set aside half of this, then used the remaining sponge to make our basic bread. Instead of using loaf pans, she made two big, flat loaves on a baking tray. Here is what I used for breakfast, this morning! :-)
The bread had a very mild sourdough flavour. For all the months the dough baby sat in the flour, it did not get any stronger in flavour. It was mild enough that I could put them with slices of brie under the broiler, and the flavour of the bread did not overpower the flavour of the cheese. The bread had a very nice texture to it, too.
As for the sponge that had been set aside; my daughter had used the flour from the dough baby’s canister in the bread, but there was still some left. I kneaded some into the sponge to make a stiffer dough, then refilled the canister half way with fresh flour, added the bough baby, then topped it with more flour. The canister is semi-transparent, so when I checked on it an hour or so later, I could see the dough baby had risen enough to work its way through the flour, so I gave the canister enough of a shake to cover it up again. With our temperatures slowly cooling (though I saw a 30C day in the forecast!!), we’ll be using this more often, which should further develop the flavour.
As someone who has never managed to keep a sourdough going for more than a couple of years, I really appreciate how low maintenance the old dough method is. If we can’t going to bake as often, it’ll just stay in its flour bed and dry up. It doesn’t need to be constantly used, fed, stirred, or kept warm. I think this will work out really well for us!
The plan was to head over to the outhouse, quickly do a second coat of paint until we ran out, then get back to working on the bread baking.
Instead, I kept adding more things to do, and by the time I got inside, I had to get my daughter to continue the bread baking, as I was no longer physically able to do it. Which is what she is working on now, as I write this blog post!
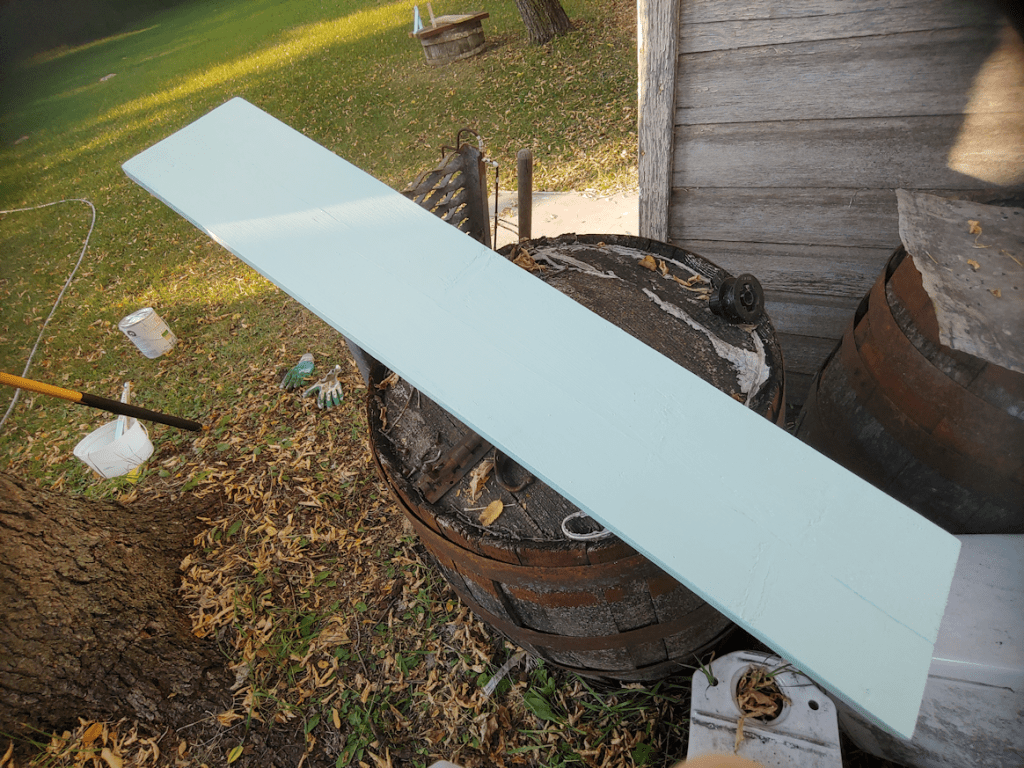
While looking for something else entirely, I found a pair of wooden shelf supports and instantly realized that they could be painted and used to put a shelf in the outhouse. So when I headed out to do the second coat of paint, I also poked around the barn and a shed to find a thin board wide enough for the supports. It was about six feet long, though, so I basically held it up to the outhouse door from the outside, and eyeballed where to cut it to fit along the back of the outhouse. It ended up being just over half the length of the board, so I figured if I was off with the longer one, I could still use the slightly shorter one.
It ended up being just a hair too wide to fit between the corner posts. A few swipes with a micro plan and some sand paper was enough to get it to fit perfectly!
That done, I sanded the rough edges, then scrubbed and hosed it down before setting it aside to dry. Then I added a second coat of paint, just to the seat box inside, before painting the shelf supports.
I’m thinking I might paint the rest of the board, too. If we get more shelf supports, we can add it onto one of the side walls.
It took a while for the washed shelf board to dry, so I decided to give the mirrored shelf a scrub down, too, then once that was dry, I hung it back up inside the outhouse.
Rolando Moon decided she absolutely had to be on top of where I was putting the tools and screws! The violent beast went from demanding I pet her, to attacking the hand that was petting here, making me bleed! I did manage to get the screws with washers out from under her, though.
I just wanted the washers, though. There were just two, for the top screw holes, which are slightly wider than the bottom ones. I used new screws to hang the mirror back up. After washing the blood off the new screws and washer, from the wound Rolando Moon gave me!
Previously, it had been hung up right against the centre joist, but I chose to centre it between the corner and the joist, instead.
Then, I just had to do it…
I just had to put the little mermaid I found while I first emptied and cleaned out the outhouse, inside the cabinet.
She lives here now.
:-D
Once we’ve picked one up, the LED battery operated light switch will be mounted directly opposite the mirror.
By the time this was done, the shelf board was dry.
After removing Rolando Moon, I got the one side painted. Tomorrow, I will paint the other side. By then, I should be able to mount the shelf supports, using the boards on the wall to make sure they are level, then attach the shelf board once the paint is dry. Only then will I continue doing the second coat of paint inside, until the can is empty. If I end up not doing the ceiling, or the narrow parts around the door, that’s not going to be a problem. As long as the areas that are most likely to get scrubbed in the future get a second coat, it’s all good.
Since I could no longer work on the inside, I decided to work on the outside, and empty the pit of groundhog gravel.
The wire mesh on the back was held in place by being hooked onto two bent nails, that were nowhere near each other. You can see one at the top right. The other is barely visible, near the bottom left. It didn’t take much to remove the mesh.
There was a second, smaller piece of mesh, partly buried until a thick layer of grass and roots.
*sigh*
That took some doing to move out of the way.
I thought I would be able to remove the two bottom boards by taking off the smaller pieces on the side, then pulling them off. They where, however, thoroughly nailed in place, with old and rusted nails that were not about to come out. So, I instead dug out my jig saw and used it to cut a piece off the bottom.
As you can see, it’s solid gravel against it! I ended up having to cut a second piece off. I was then able to start shoveling the gravel out, and when I could no longer get the shovel far enough in before the 2×4 across the bottom stopped me, I used a garden hoe to move more gravel closer, then shoveled some more.
I never did reach the … compost… layer. I did hit a lot of rocks, though! I emptied it as best as I could, without removing the more recent… deposits.
Then it was time to cover the hole back up.
I put the two pieces of siding back, then screwed the bottom one to the 2×4 behind it. The next time we need to get under there, we can just remove the screws and the boards will easily pop out again.
I then folded the smaller piece of wire mesh to fit the opening. I found a scrap piece of board with screw holes already in it, so I used that to fasten the mesh in place. The wire is folded at the bottom and weighted down with rocks. Critters can still get in if they really wanted to, but this is temporary. When we get to painting the outside, we’ll make things more permanent, perhaps replacing the cut boards with a hinged flap that can be latched to keep the critters out. Who knows.
I have no idea why that other large piece of wire mesh was used to cover almost the entire back of the outhouse. It really served no purpose, since only the gap at the bottom needed to be covered. Even the smaller one on the bottom couldn’t keep the critters out.
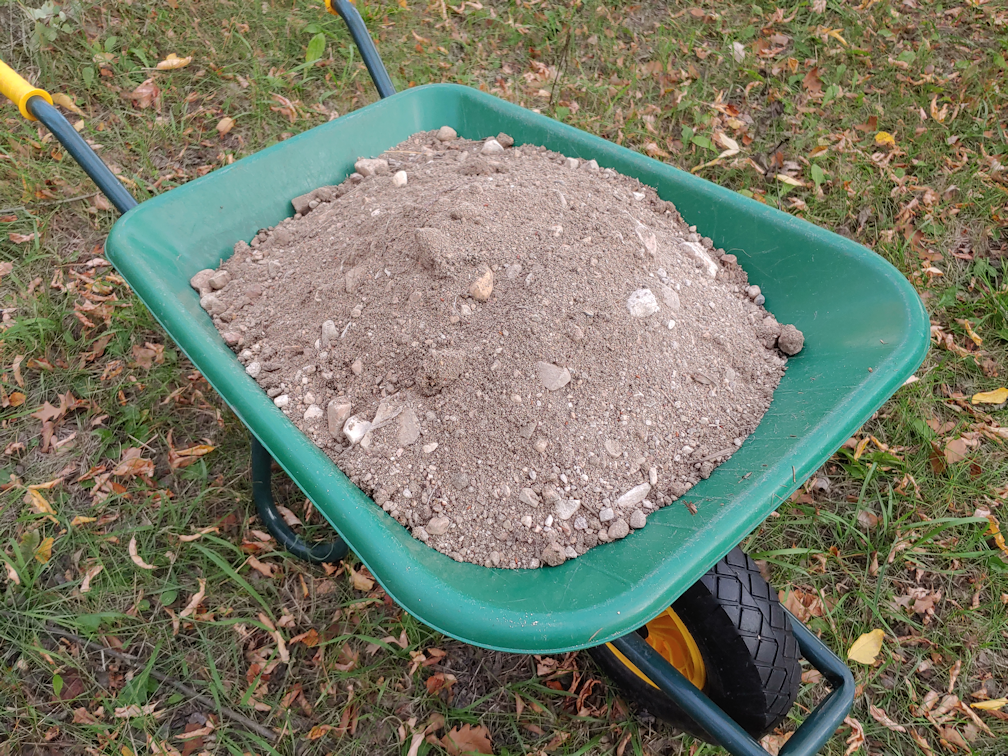
I was able to fill the wheelbarrow with clean groundhog gravel! If there was any chance the shovel full I pulled out wasn’t clean, it went onto the nearby cat litter compost pile, instead.
The clean gravel was put to good use.
It was enough to make a thin layer on top of the boards in the path between the new low raised bed boxes. The bigger rocks went up against one of the boxes, where there is a larger gap, then it all got spread out and hosed down, so that the finer particles would wash into the gaps between the boards below. It seems to be more clay than sand and gravel, though. We will still need to add more, but this is a good start.
And that was it for today!
Deciding to include a shelf added at least an extra day to finishing the inside, but I think it will be worth it. I’m more happy about getting the pit clean up over and done with for now!
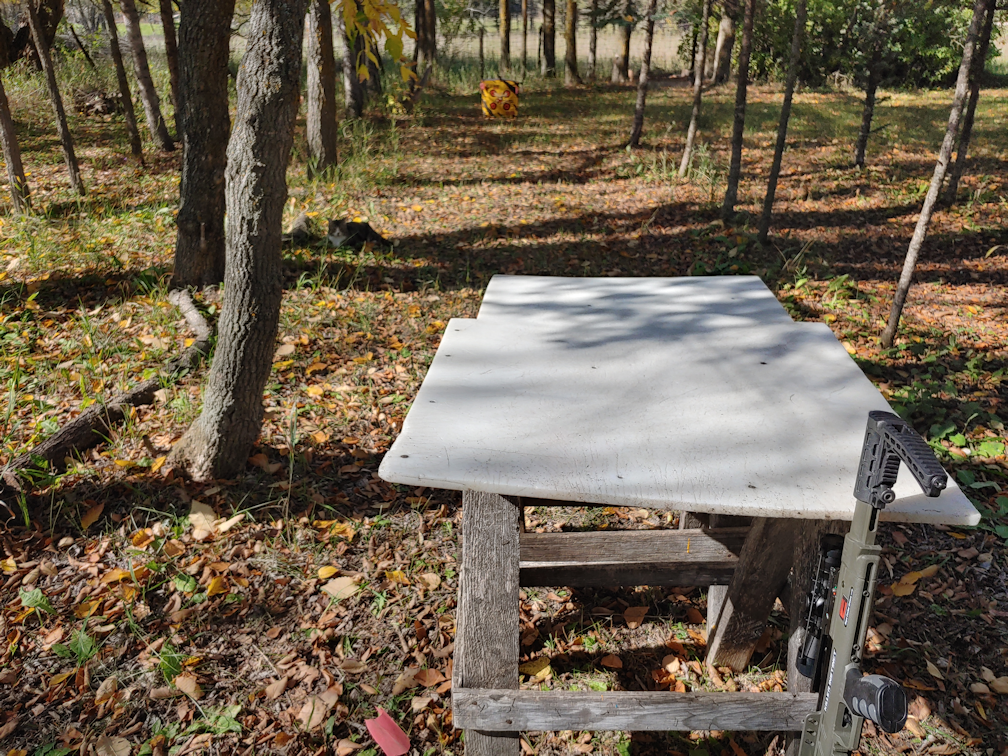
Today, my husband was finally up to heading outside to help me sight the crossbow. I found an excellent spot for a shooting range and got us set up.
The instructions said to sight at 10 yards, then micro adjust at 20 yards. I pre-measured the distance on some paracord, then used flags to mark where the target was placed, at 10 yards, then 20 yards. In the photo, we are set up at at 10 yards.
I did try to use the cocking cable myself, first, but even after my husband shortened the cable, I’m just too short! He had to do it for me.
Unfortunately, cocking the bow turned out to be very hard on him. To cock the bow, you lean over the bow, hook the cord up in the appropriate spots, grab the handles, pull and straighten up at the same time.
Which is really, really painful for someone with a lower back injury.
He did it a few times, took a few shots and adjusted the sight. When it comes time to micro adjust, we’ll have to take into account that he shoots left handed, and I shoot right handed. I quickly called it a day, though. I did not want him to injure his back even more.
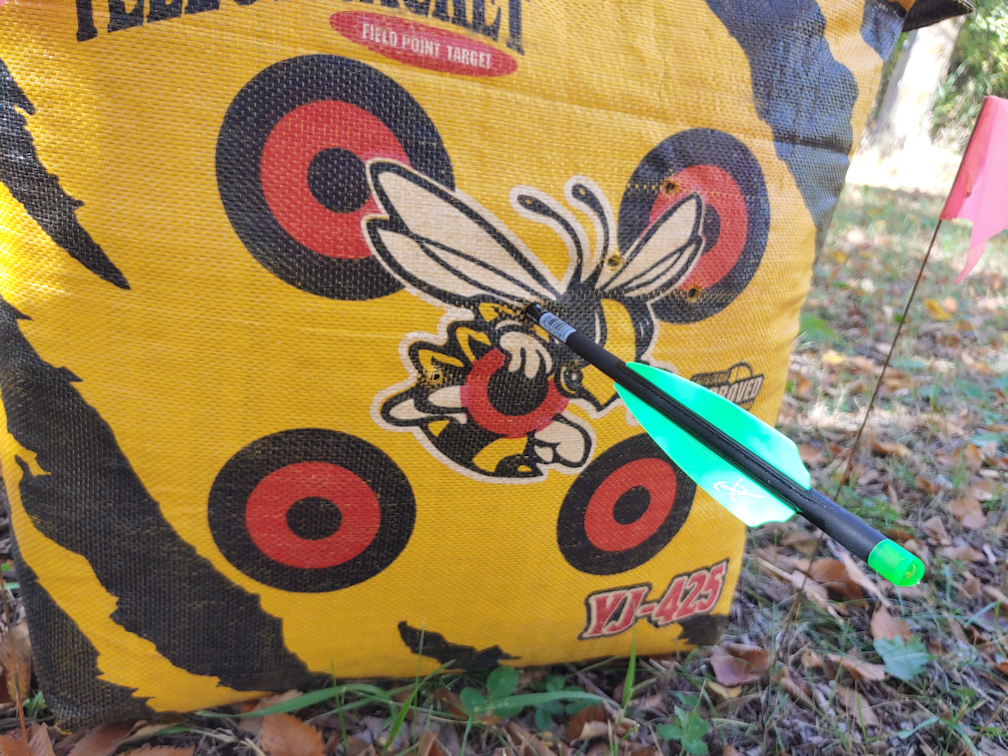
I did, however, get one shot in, myself, before we packed up. Here is my first ever shot with the crossbow!
I was aiming for that centre target. The holes above, right, were my husband’s shots while adjusting the sight. The other holes were from when my brother in law was adjusting the sight at 20 yards.
The crossbow has an adjustable stock, and I didn’t noticed my husband had shortened it while cocking the bow, because it was digging into his abdomen uncomfortably, then didn’t return it to where it was. So when I fired, I was a bit too close to the sight. There’s just enough recoil that the sight smacked me in the glasses. Oops.
We definitely need to get a crank. Unfortunately, Cabelas, where I bought it, doesn’t seem to carry them anymore, and Killer Instinct, the manufacturer, doesn’t seem to make them anymore. The only one my husband has been able to find has been on eBay, and it’s pretty expensive.
I may have to just shorten the cord even more and try again. Even if I do get it to a length that works for me, I still want a crank. The crank is silent. The pulleys on the cocking cord squeak. If I’m going to be hunting, I need to be able to cock it silently!
Things are really enjoying the rain we’ve had recently. Including the Ozark Nest Egg gourds.
I noticed that there were both male and female flowers blooming at the same time, so I decided to try hand pollinating them. The previous newly formed gourds have all withered away, so I hope these will take.
The problem is that by the time there are more male flowers blooming, the female flowers have already closed up. I opened the larger ones to pollinate, just to see if they will take. I had to do the same thing with the luffa gourds. We shall see if it works!
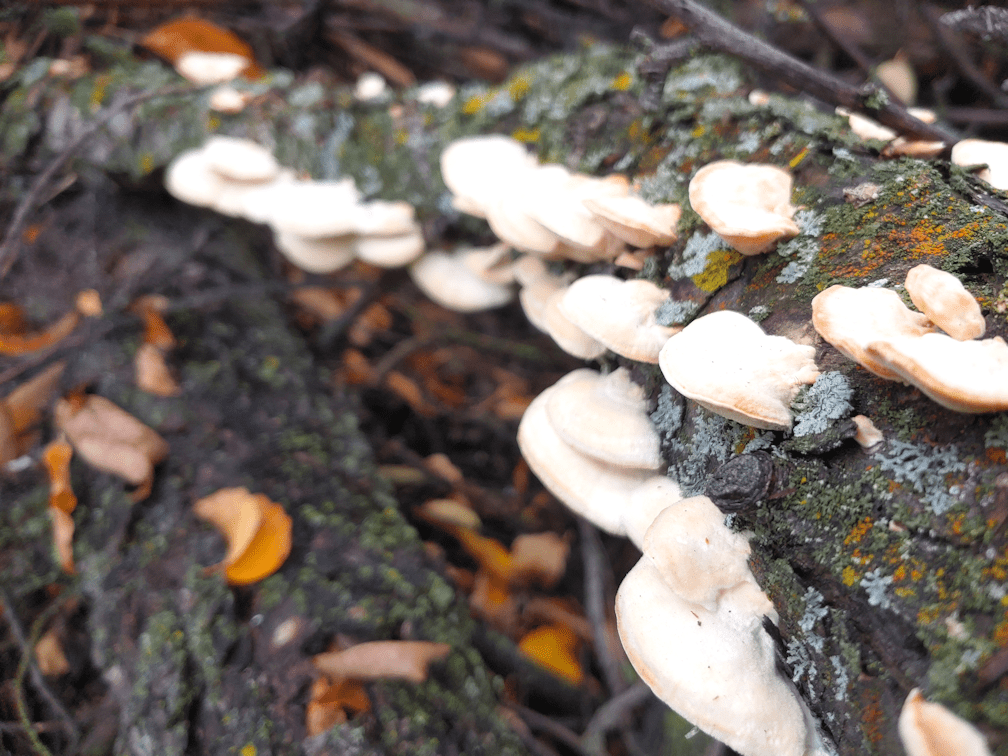
The gourds were not the only things to appreciate the rain.
These weren’t there when I walked past this branch pile, yesterday!
It’s amazing how quickly mushrooms can develop quite large, pretty much overnight!
The Re-Farmer
(ps: this was supposed to be posted yesterday, but my computer stopped responding and I had to shut it down. :-/)
With how hot it’s been all summer, we’ve done no baking at all. It was simply too hot in the house to do baking and heat it up even more! Only recently did my daughter finally start baking some bread again.
Which means that our dough baby has been sitting in its flour, unused, for several months. That’s one beauty of using this type of dough starter; it doesn’t need to be regularly used and fed, the way a wet sourdough starter needs to be, and will just go dormant.
Last night, I woke it up! :-D
It really doesn’t look any different, once it was dug out of the flour.
The flour it was in, however, did look a bit different.
The dough baby has its own canister of flour, which had started to form a sort of shell around the dough. When I opened it, I could really get that sourdough smell, and it was as much in the flour as from the dough baby. I will be using this flour when doing the bread baking, as it is probably infused with yeast, too.
As dry as it was, the dough baby had lots of air pockets in it, making it easy to crumble apart.
I stirred in 2 cups of very warm water, then set it in a warm oven overnight, lightly covered. After a few hours, I checked it and decided to go ahead and cheat by sprinkling a bit of traditional yeast (not the fast acting type) and a bit of sugar into it as well, then swirling it about.
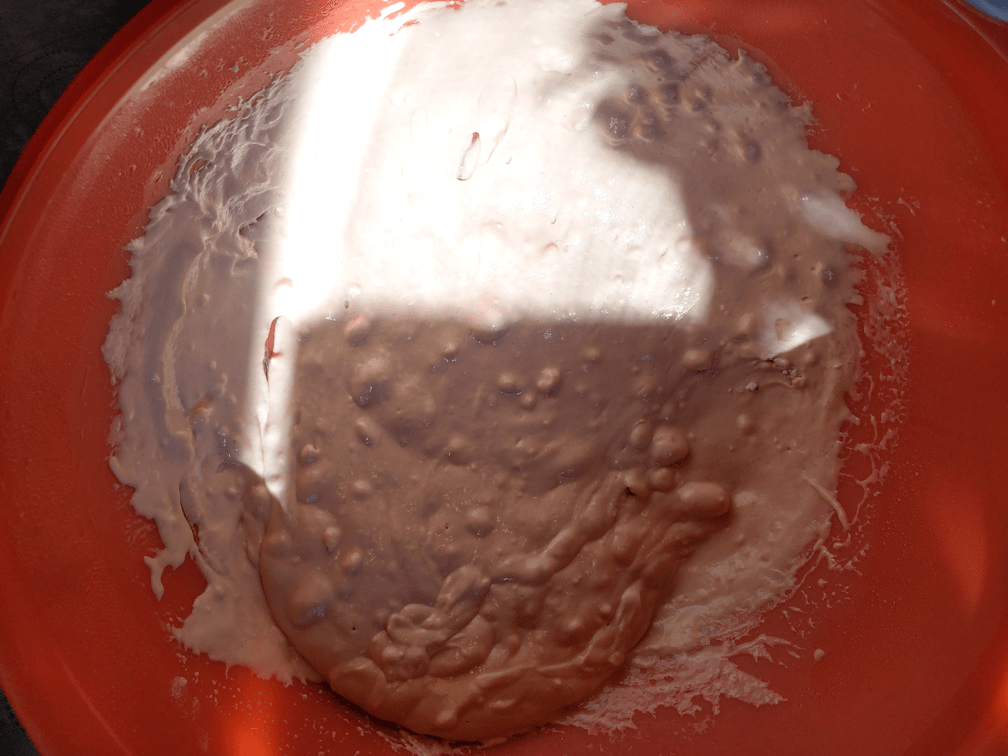
This is how it looked in the morning, after being stirred again.
That orange bowl really messed with the colour!
Anyhow, it was lightly bubbly by morning. After stirring it down, I added some of the flour from the dough baby canister.
I tried to get some natural light on there, so you can see the proper colour!
I broke up the flour as much as I could, but I’m not too worried about the lumps at this point. I added maybe a cup and a half of flour to get it to the consistency of a thick batter. It then went back into the warm oven for the sponge to develop.
It will take a long time for the sponge to develop without adding more commercial yeast, so bread baking with it is going to be an all day process, today! It’ll be checked regularly, but for this sponge stage, I figure it will take a few hours before I continue with the bread baking. :-)
The outside cats were out in full force, eager for breakfast, but first I wanted to share some indoor adorableness!
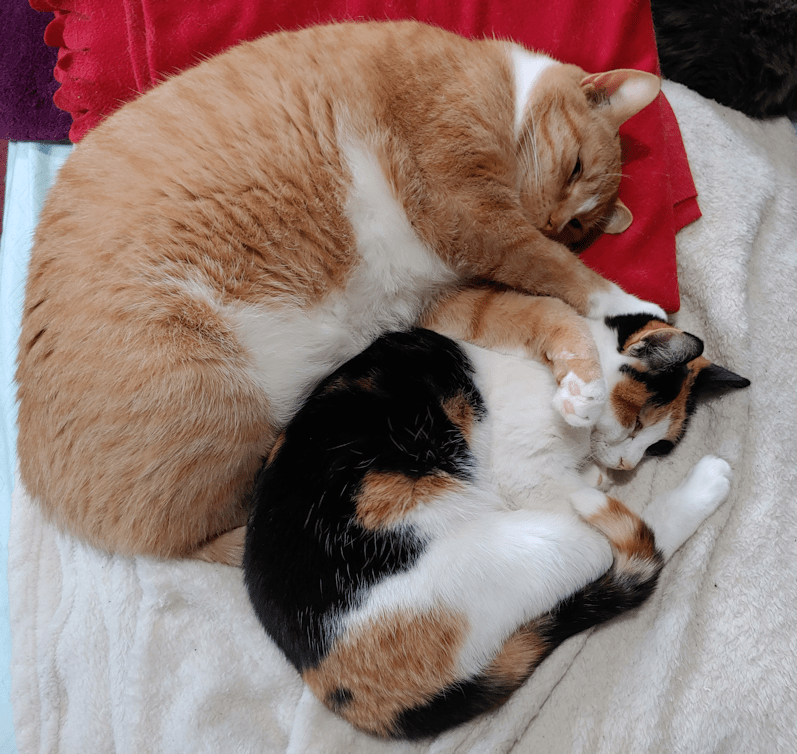
Cabbages and Cheddar, all snuggled together for a nap!
The size difference just blows me away. Cabbages is more than a year old now, so she is pretty much her full adult size. Cheddar… he’s just huge.
Yesterday evening, I decided to use our Roku device and watch some TV. We’ve got the Great Courses on Amazon Prime, and I’m watching Cooking Through the Ages right now. Cheddar decided to join me and trap my hand under his head as a pillow!
He eventually got driven out, though, when Tissue came over and started bugging him. After he left…
… she took his spot!
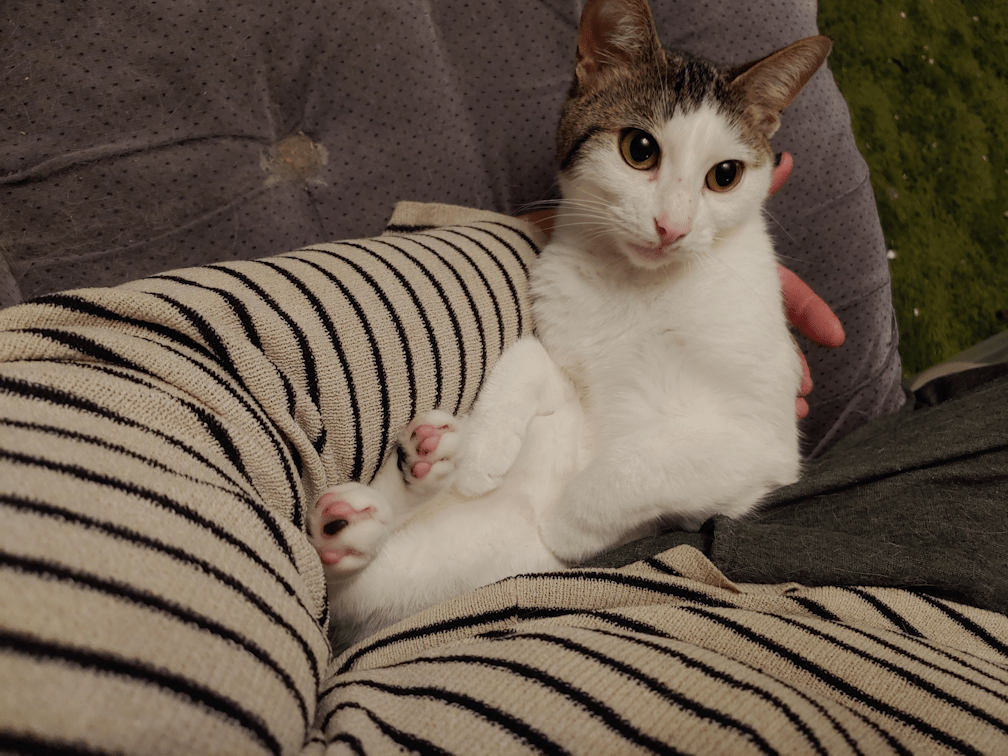
She would not stop squirming, though, and when I brought my phone over to take pictures…
… she went for it, and tried to eat it!
Gosh, she has the strangest facial structure! Like a little alien.
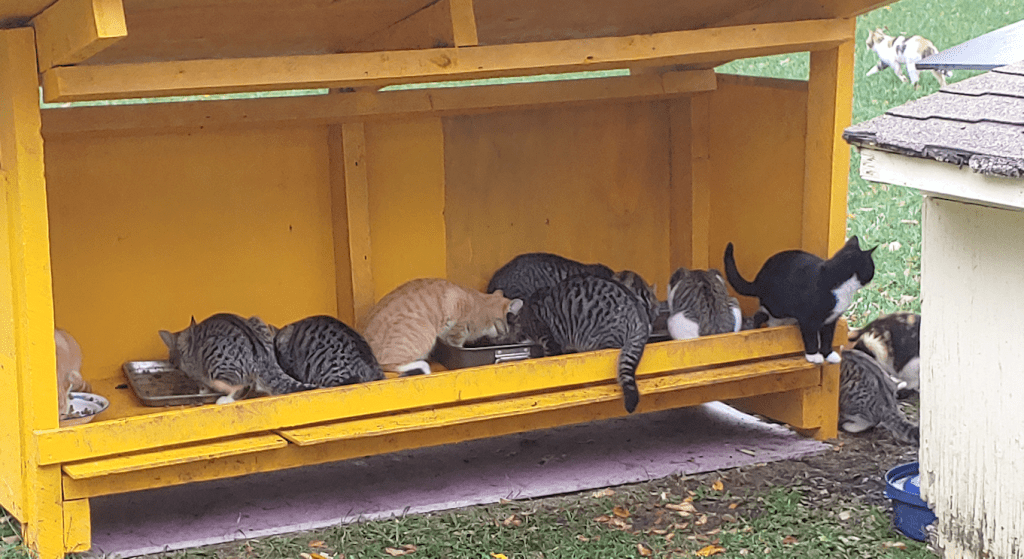
Meanwhile, her younger siblings outside were joining the breakfast buffet.
While I was pouring the kibble out, Broccoli jumped into the kibble house, and I actually got to pet her! She was torn between startled and wanting to go at the food. The confused expression she gave me as I pet her back was hilarious. She seemed to like the pets, though, and tolerated them for a little while.
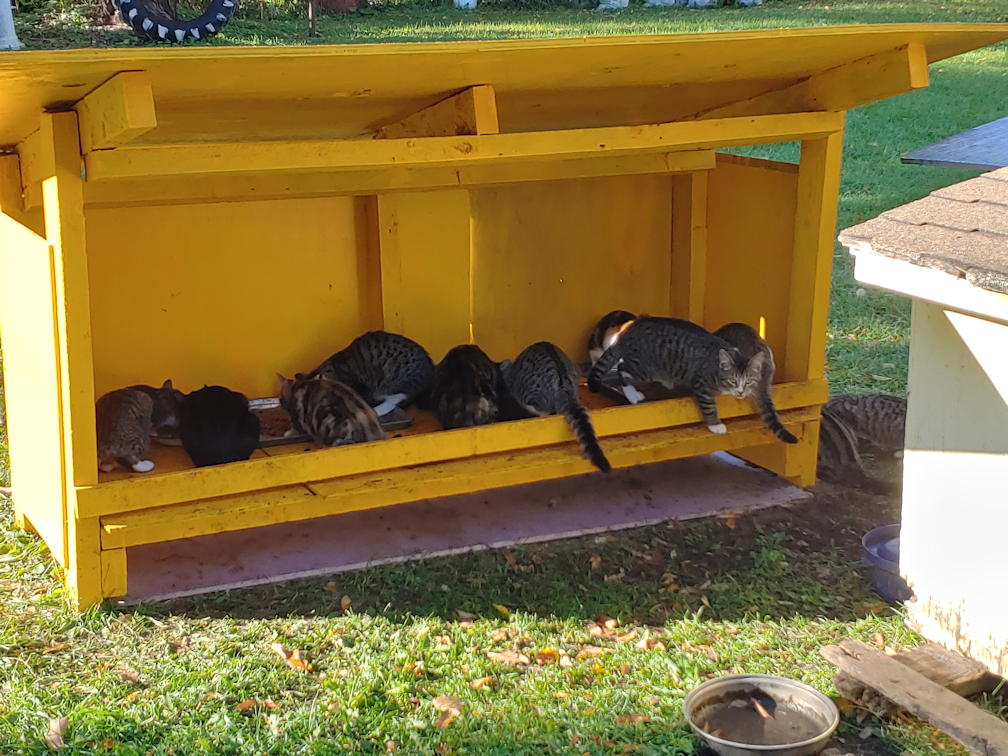
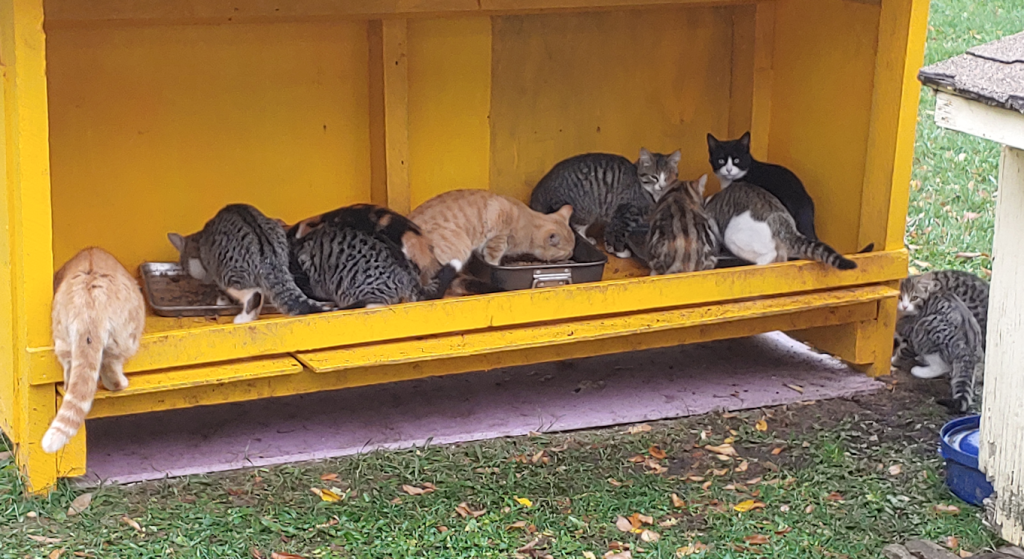
There are nine kittens in the above photo. Potato Beetle is one of the adults, and he’s at the tray on the ground. Butterscotch is inside the kibble house. Nutmeg was around, too, but on the other side of the kibble house, out of view.
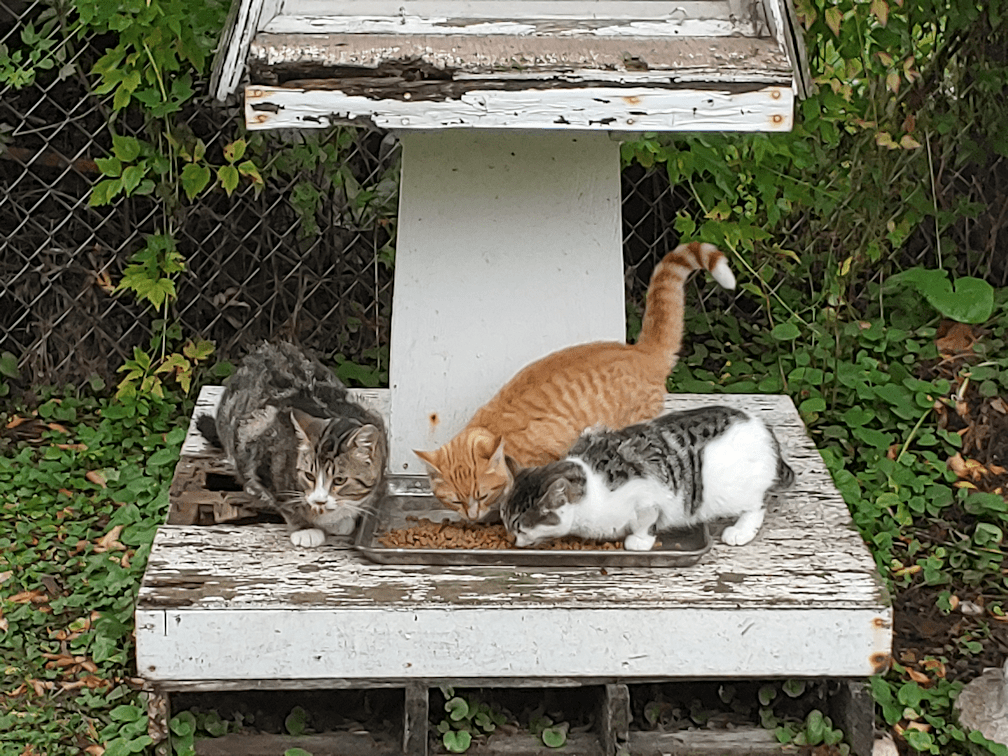
Rosencrantz, Nosencrantz and Toesencrantz, enjoying breakfast together!
More progress; while walking back from pouring kibble onto the tray under the shrine, Nosencrantz came running right up to me, and let me pet her, before continuing on to the food!
I really, really like Nosencrantz.
I guess this is a good time to promote our Ko-fi page. If you are interested in helping with the feeding and care for the kitties, you can click here, or on the donation button on the side bar. All donations go towards the cats, either for their food, to get them fixed, or for any needed vet care, and are gratefully appreciated.
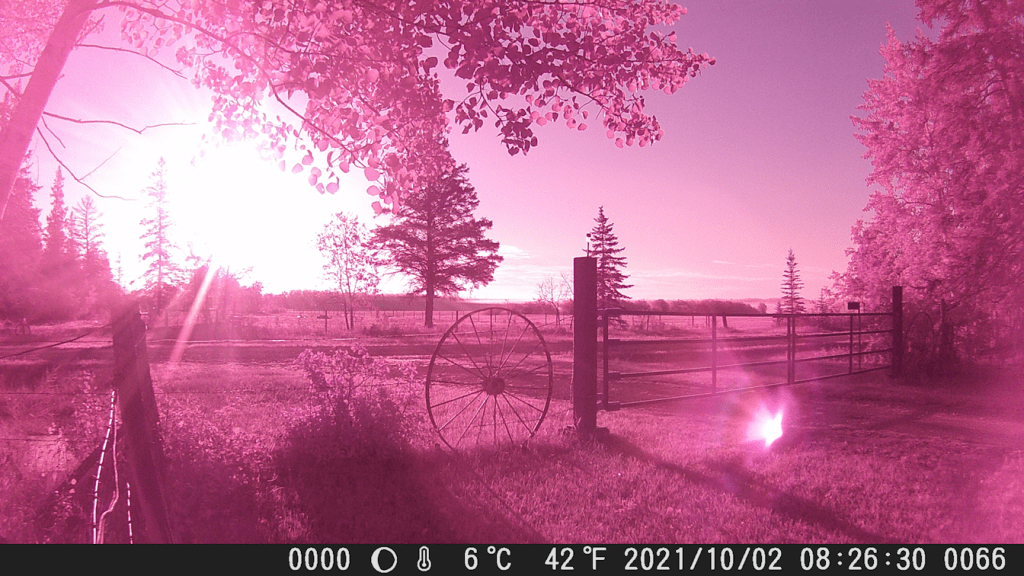
Well, this is one way to tell the temperature are getting chilly at night.
And that I need to change the batteries in the newer trail cam.
Until the camera warms up enough, it starts recording things in pink!
Also, during night shots, the infrared flash stops working and the files have a red law battery warning across the bottom. I’ve taken down the white string lights that had been along the top barbed wire on the fence, as they were getting pretty damaged and burnt out. There is now a solar powered string of lights long enough to reach from the gate to the corner fence post. When the infrared flash doesn’t turn on, they are quite nice and bright! :-)
I’ll have to head back out later with some fresh batteries. :-)
I got to pet Nosencrantz this morning, but had to move away before Toesencrantz would come to eat.
I am NOT happy with Potato Beetle. He attacked Rosencrantz this morning. Again. Drove her off. She did get a chance to come by and eat with her babies, later, but he is really nasty towards her!
We had nine kittens in the kibble house again (the two orange cats are the adults). I was looking at the photos with my daughter and talking about the five grey tabbies. There’s Bradicous, Chadicous, Sadicous and Tadicous. What would number five be called? Why not Gaticous? (a play on the movie title, Gattaca)
Gaticous, it is! :-D
Ghost Baby made an appearance, too, dashing by in the background. :-)
You know what else made an appearance?
Toe pints. Itty, bitty kittie toe prints!
Dirty little toe prints!
At least the paint was dry before it got walked on. :-D
Odd that the camera in my phone turned the mint green paint into white!