I was greeted by some very hungry kitties, this morning!
I spotted two orange kitties this morning, and neither was big enough to be Rolando Moon. You can’t really see, but one of them is behind another cat under the shrine, in the background. There are two adults and two babies under there.
The orange cat sitting in his food in the kibble house turned out to be Nutmeg, back from wherever his other home is. :-)
They were all unusually hungry this morning, because when I came out again just a couple of hours later, there wasn’t any kibble left in any of the trays! Usually, we don’t need to do a refill until late in the day, but when I topped them up early, I got another rush of kitties coming over to indulge.
Potato Beetle is looking very roly poly these days! He was been super skinny when he reappeared after being gone for so many months. Having a reliable food source looks good on him. ;-)
Today worked out to be a longer day than planned. I had intended to do a Costco trip to the city tomorrow but decided that 1) I didn’t want to deal with weekend crowds and 2) Halloween is around the corner, and I didn’t want to deal with even bigger crowds because of it! So I headed into the city this morning. After this, we’ll need to go over what’s left that we need to pick up, then make one more trip – after Halloween!
Once that was done and everything was put away, I headed to the finished high raised bed, to start filling it, modified hügelkultur style.
While making the bed, I tried to put all the scrap bits of wood inside, so the first order of business was to spread those out more evenly. Then the short logs that had been used to frame this bed over the summer were added to the bottom. There weren’t a lot of those, but we have plenty of piles of wood to raid. I tried to put the bigger pieces on the bottom, then smaller pieces on top, using them to fill gaps as best I could. Then I started adding bark to fill gaps, too. Ideally, there would be no gaps, but with so many odd shaped pieces of wood, that wasn’t really an option.
Thankfully, we have lots of bark debris. This spot used to have a pile of logs between the two spruces. There is just one long one with a weirdly shaped end left. It needs to be cut up before we can use it.
The nice thing is, along with the partially decomposed bark, I was able to pick up quite a bit of spruce needles. Not enough to increase the acidity of our very alkaline soil, but every little bit helps!
I added a couple of wheelbarrow loads of bark into here, and even went around the bed to pick up little bits of wood and handfuls of sawdust to toss in. I wanted to fill the gaps as much as I possibly could.
Next, a few shovels full of soil was added. This is the soil that had been dug out of this bed before the high raised bed was built. Just a very thin layer was added to fill in the gaps a bit more, and give the breakdown of the wood a bit of a boost of soil microorganisms.
Next came a nice thick layer of corn stalks that we saved, just for this! If we did not have the corn stalks, this layer would have been straw, because straw takes longer to decompose than the other things that will be added.
Yes, we have straw, now!
This got delivered while I was working on the corn stalk layer.
I broke that baby open almost right away!
With the layers, I was alternating between “brown” and “green” layers. The corn stalks were a brown layer, so the next layer (after a bit more soil) was grass clippings, which are considered a “green” element.
I stole the grass clippings from the nearby garlic bed, replacing it with straw. I was concerned the grass clippings might smother the garlic. Later, we will replace the grass clipping mulch on the other two beds with straw as well.
But not today.
With each additional layer of soil, I added a bit more than the previous soil layer. The layers were still pretty thin, comparatively speaking, but I could already notice the weight of it was causing the looser layers below to settle and sink. If I had any, I would have been using compost or manure to layer instead of, or in addition to, the soil.
The next brown layer was leaves.
The final green layer got all the bitter lettuce and frozen chard that had been pulled from the other beds. The kitchen compost buckets got added as well, so there’s also things like egg shells and coffee grounds in there.
Now, it was time to add the rest of the soil. This job actually took the longest, because I frequently stopped to spread it out, pull out the roots and rocks, break up clumps, and make sure any worms that hitched a ride were gently and safely buried.
I stopped adding soil when I was getting too many crab grass rhizomes and rocks to make it worthwhile anymore, and the last of it got raked out evenly, as did the soil in the raised bed.
The very last layer was a mulch of wood chips. Thanks to my mother’s generosity in getting us the wood chipper, we had enough to add a couple of inches to the top.
I expect the contents to settle and sink over the next while. We’ll probably be down a few inches, by spring. Which is okay. We will continue to add more organic matter to build it up.
I must say, I am so thrilled with the height of this. It is SO much easier on the back to work at this height! I don’t even have a back injury. I’m just old. ;-) It might be a bit low for my husband, if he ever wanted to do a bit of gardening, but he would be able to reach while sitting in his walker just fine.
One down, five more to go!
Eventually. :-D
Temperatures are expected to continue to be mild over the next couple of weeks; a few degrees above freezing during the say, and just barely below freezing overnight. We’re expecting some rain tomorrow, then possible rain and snow over the next couple of days. Which means we can still continue preparing garden beds for next year. I might even be able to start cutting down more dead trees before things start getting too cold. It would be good to have the lengths pre-cut to build more beds, even if building them ended up waiting until next fall. Mind you, there’s nothing stopping us from adding more beds to the main garden area, other than possibly running out of material to layer with. My only hesitation is that we intend to expend our garden area into the outer yard, where there is better sun exposure, and those will all be high raised beds. Perhaps by the time we’re ready to build those, we’ll be able to use materials other than salvaged dead spruce trees!
Yesterday, as I was cleaning up and putting things away for the evening, I walked past the shelf in front of the sun room, and found myself being watched from the depths!
I am so happy to see Nosencrantz enjoying the cat bed I crocheted, long ago!
It’s certainly been an… interesting… four years! Mostly in a good way! I’m certainly glad that we are here, even with some of the less than positive things that have happened over the past while. The world has gone crazy, but we’ve managed to maintain a certain level of normalcy that we could not have done, if we were still living in the city.
We made plans, adjusted plans, dropped plans and made new plans. Which we did expect to have to do, even if there was no way to predict the how or the why behind it!
One thing I can say for sure is, I am really excited and looking forward to the next few years out here!
Oh, my goodness, what a difference having that new chainsaw made!
But before I could break it in, I needed to drag down the stuck tree, so I could use the wood in the high raised bed. Thanks to my husband very securely attaching the hooks I got to the rope I got – rope rated to 450 pounds – it was a simple matter to use the van to pull it out.
My goodness, where those top branches ever entangled! When I started pulling it, it didn’t fall, but stayed stuck until I got far enough that the tree was no longer dragging on the ground, but lifting up. At which point, it rolled up and got dragged over the compost ring, then finally it broke free from the branches and dropped.
Right on the cherry trees we are intending to cut away, so there’s no loss there!
After replacing a large divot of sod that got dragged out, I then used the baby chain saw to start cutting away the branches, and cutting away the top of the tree.
Then it got rolled onto the compost ring, so the rest of the branches could be trimmed off.
Finally, it was time to break out the new chainsaw!
Of course, I took the time to read the manual, first, then added chainsaw oil to the reservoir.
Then I measured out and cut a pair of nine foot lengths from the tree trunk.
The bucksaw does a great job, but the chainsaw did in mere seconds what would have taken me probably 5, maybe even 10, minutes, per cut, by hand!
Then, while I dragged the logs over to the high raised bed, I helped a daughter move the rest of the tree trunk aside, so they could set up the wood chipper. They cleaned up all the dead branches from the tree, as well as the little cherry trees we’d cut away to access the last tree we’d cut down.
They spent more time prepping the branches to fit the chipper and shredder, than actually doing the chipping and shredding! Unfortunately, the little spruce branches were so twisted, they ended up clogging the shredder chute to the point that my daughter had to take it off to unclog it. Once that was cleared up, they did a few celebratory shreds before heading inside to start on supper.
Meanwhile…
I started working on the high raised bed by first taking it apart! I cut away the notches in the base logs so that the cross pieces would sit lower, and no longer have that gap that was there before. I also was able to clean up the cuts and make adjustments, as needed.
The new nine foot lengths were thicker than I thought, so after I put the bottom cross pieces back, I used the new logs for the next level.
I ended up not needing to cut notches in them at all. Instead, I was able to just adjust and cut the notches in the next level of cross pieces to fit.
It was SO much faster and easier to cut the notches with the chain saw! Pretty much every notch we’d cut before needed modification.
I used smaller, thinner, logs at the top, which turned out to be a pain. These are from higher in the tree, which meant they were not as straight, and had more little branch stubs all over. I ended up having to trim logs along their lengths to get rid of lumpy bits, so things would sit against each other better.
Then I went and cut two more four foot lengths to do the last cross pieces.
There we have it! The high raised bed is built!
Standing next to a corner, it’s just barely reaches my hip. For mobility and accessibility purposes, we could probably have gone higher than this, but I think this will be fine.
Now, we just need to fill it! We’ve got old logs for the bottom, with corn stalks, leaves, grass clippings and garden waste to layer in. I’ll add thin layers of soil in between each layer of organic matter before topping it off with soil for about the depth of the top logs.
That will be a job for tomorrow!
I may have had to juggle the budget a bit to get that chainsaw, but it was worth every penny. There is no way I could have finished this today, without it. In fact, I have my doubts I would have been able to finish it before winter, at the rate things were going!
About the only other thing we might end up doing with this is maybe get some short pieces of rebar, drill holes through the top couple of logs and set the rebar in them to really make sure the logs stay in place.
It’s really a horrible, messy, slapdash job, but it will still probably last us many years.
Now we just need to cut down more dead trees, so we’ll have the material to build more!
While things were still pretty wet from rain this morning, I used some of the stuff I picked up yesterday and worked on the outhouse.
The chain latch was something we already had in the basement, and the handle was something I picked up yesterday. I got a second one that I put on the outside of the back door into the garage, so I don’t have to pry that open with my fingers anymore. :-D This door is kept closed from the outside by a piece of wood that spins on a nail in the door frame. Turn the wood over the door and it holds it closed, rotate it 90 degrees and it basically just pops open. When we get around to replacing the hinges and rehanging the door so that it is straight, it should close better again, but for now, it needs a way for the door to stay closed while someone is inside!
I didn’t find the switch plate LED light I was after, so for now, I just screwed in a cup hook and hung the LED light I’d already brought over for use in here. You can see the sunlight on the wall from the door – and the reflected light from the mirror, too! The switch plate light I’m after can be mounted either with screws that fit into slots on the back, or with self adhesive velcro strips. When it’s mounted, we’ll use it to cover the hole I made with the cup hook, and the hole left behind by a nail from before. I was going to put the cup hook in the pre-existing hole, but it seems that there is a piece of metal broken off inside the hole!
There was enough light in here with the door closed that the auto-flash did not turn on when I took the photo. :-)
The main thing I wanted to do was add the second shelf, not that I have brackets for it.
Of course, if there is a shelf, there must be something on it!
I rifled through the garage again and found these miniature picnic tables. I believe they are condiment holders. They have larger holes cut into the table tops that look big enough to hold those round mustard and ketchup squeeze bottles, and a pair of smaller holes look like they could hold salt and pepper shakers. There were a few of the same flowers I used to decorate inside the mirror cabinet, left in the garage, so I grabbed them, too.
It occurred to me while I was working that the paint I picked up to do the lettering on the sign would be perfect for the floor in here. I’m in no hurry to do the lettering, so the floor boards will probably not get painted until spring.
I had been concerned that things would start raining again, but the sun came out while I was working on this, which meant I could get the stuck tree dragged down, and finish the high raised bed!
Every now and then, I’ll walk into the bathroom and find the sink looking back at me.
While there are several cats that like to drink from the tap, David likes to sleep in the sink.
Is that the most adorable face, or what? What a sweetie!!
The outside cats were in full cuteness mode, too!
Also, I have been able to confirm that Tuxedo Mask is, indeed, a male. I was able to confirm one of the ‘icouses, too, but I’m not sure which one it was. It wasn’t Bradicous, with his (her?) distinctive white tail tip, and it wasn’t the one ‘icous that has mostly white hind legs. That’s the one next to Junk Pile in the kibble tray on the far right, inside the kibble house. The others can be told apart mostly from their faces, and… well… it wasn’t the face I was seeing at the time! ;-)
It was a very wet morning, but I’m hoping things will dry up this afternoon. The weather forecasts have changed, and it looks like we’ve got just today and tomorrow to get work done before we start getting rain and snow over the next several days.
With our goal of stocking up as much as we can for the winter, on the assumption that we will have a month or two where we cannot get out to buy necessities, our monthly shop is being split up into multiple trips, so as not to overload the van.
Also, I hate shopping, so… babying the van is a handy excuse to keep it shorter. ;-)
I was heading out on my own for this trip, so I made the smaller Walmart trip, which let me make a shorter trip to the nearer, smaller city. The main thing I wanted to stock up on there was the cat kibble. They have more variety than Costco does.
Well. Most of the time.
Almost all the dry cat food was out of stock!
At least they still had the big bags of the cheap stuff – which even got restocked while I was there.
Yikes!
With six bags of dry cat food in the cart, there wasn’t much room for people food, but I got enough to tide us over until we can make the Costco trip. I even remembered to pick up a couple of shelf brackets for the second shelf in the outhouse, but I had no luck finding the battery operated LED switch plate I want to put on the wall across from the mirror.
Once I got what I needed there, I then went across the street to a Canadian Tire. Normally, we’d pick up more of the wood pellets we use for litter there, but I didn’t have room for more big bags in the van, so that will wait for the big trip. I got a quart sized can of paint to do the lettering on the sign I’m making, to replace the one that was stolen. We still have some of the bright blue we used to paint the picnic table left, but I decided to go with something darker for the sign.
The person in the paint department that knew how to use the machine to tint the paint was on break, so I used that time to find the heavy duty rope, and some hooks, so we can finally pull that stuck tree down. I also looked for the LED switch plate light I wanted for the outhouse, but there was nothing. It’s a novelty light, so I’m not too surprised they haven’t been restocked. Ah, well.
Canadian Tire is a dangerous place for me to be, with money!
Of course, I found a few other little things we needed, but then I found my new toy.
Yes, I bought a chain saw!
It was on clearance. I decided it was worth going into my seed budget to buy it – and I still have half my seed budget left!
Yes, it’s just a house brand, and yes, it’s electric. I figure I can realistically at least get a couple of years out of it before I wear it out completely. ;-)
It will, however, save me massive amounts of time and labour! Now that we have what we need to pull that stuck tree out, it’ll be much faster to break it down into the lengths I need to finish the high raised bed. Heck, I’m even thinking of taking it apart so I can tidy up the notches and make it fit together, better! No more using the baby chainsaw until the batteries are dead, then using a hammer and chisel for the rest! No more bucksaw to cut the lengths I need! Heck, with a 14″ blade, I might even be able to get more of the dead trees down this fall! If the weather holds – dare I consider it? – I might even be able to make at least one more high raised bed. Gotta clean up the existing beds, first, however, there is one bed left the girls didn’t get to clean up in the main garden area, yesterday. We might be able to “clean up” that bed, by making a second high raised bed there, instead! We’d have to cut down at least one, maybe two, more dead trees to do it, though.
Oooo… Let’s not get ahead of ourselves, here!
We shall see. Today, we got rain. Lots of rain, so it’s a write off for working on the garden beds. We should have two or three days to get work done before we get a day with rain and snow. After that, it’ll get chilly, with possible snow, but the long range forecast tells me we will remain above freezing during the day, well into November.
With the chain saw and the wood chipper, we should be able to get a lot more done, in a much shorter time. Meanwhile, while I was working on this post, my husband securely attached the new hooks to the new rope I got, which means I can pull that tree out tomorrow, and get to work!
Gosh, I’m all excited, just thinking about it.
So the trip was very productive, though I was more than glad to be done. Half way down an aisle at Canadian Tire, one of my knees decided to try and dislocate, making me VERY glad to have a shopping cart to lean on!
Being old and broken kinda sucks. ;-)
Once at home, after the girls unloaded the van and I changed a burnt out bulb in one of my headlights, I took the time to top of the kibble for the outside cats. It was still raining, so the cats were… well, check it out!
Hilariously adorable, is what they were!
They love that space under the kibble house! I’m sure they love having that sheet of insulation to keep their toes warm, too. :-)
One of the things I hoped to do was build smaller version of the kibble house for the water bowls. I don’t think we’ll be able to build it this year; from what I’ve seen in the barn and sheds, we don’t have the materials to complete it. They really like having a nice shelter from the rain, for their food, though!
Just a bit of catching up on how things went yesterday.
The short version: Long.
It went long. Very long!
For me, it was working on pickling beets using the water bath canner. Until now, we have only done refrigerator canning, and my only experience with water bath canning was helping my mother, as a child. This is the first time I’ve done it myself, from start to finish.
It took WAY longer than I expected!
I have a Ball cookbook of canning recipes. The pickled beets recipe was for a half dozen 500ml jars. They had the basic pickle recipe, but also variations. After looking over our quantities of beets, I figured I could do two batches, with one batch being a “sweet pickle” using cloves and cinnamon sticks instead of the pickling spice mix of the basic recipe.
One batch called for 10 cups of beets. I decided to use up as much of the little beets as I could. Since they would be blanched and trimmed, and their small size would pack tighter than cubed larger beets, I made sure to grab more than 10 cups. I figured, if there was extra, we could just include them with supper or something.
While the first batch was blanching, which filled the blanching pot I found stored in a barely accessible space in the kitchen, I prepped a second batch to blanch. At the same time, I cooked the liquid with the pickling spice bag, and had everything ready to do the sweet spice version.
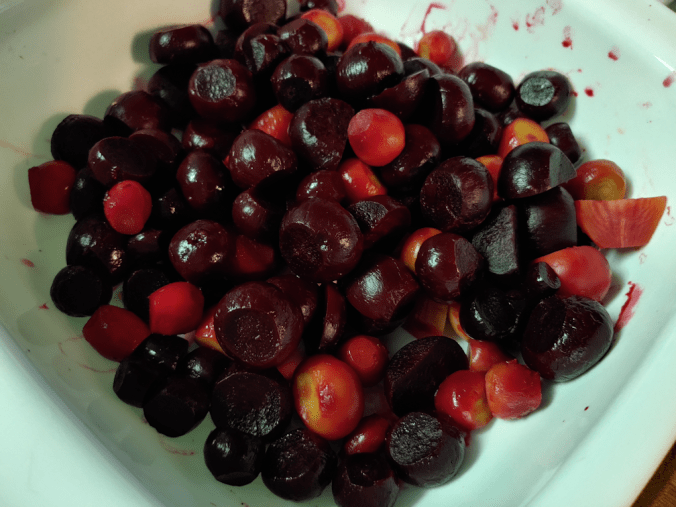
I was all ready to can the first batch, when I realized I had a problem.
These are the first batch of fully prepared beets.
I doubt I could have filled three jars with that, never mind six!
So I added the second batch.
I still wasn’t sure there would be enough to fill the six jars I had prepped in the canner!
The next step was to put them into the pickling liquid and bring it to a boil, then start filling the jars. After my first jar, I realized I would likely have another problem. Not enough liquid! So I started the spiced version going and continued. I ended up being able to do only four jars with the basic pickling liquid, and the last two got the sweet spice version.
I started working on this before my daughters headed out to work in the garden. They came back four hours later, and I was JUST reaching the point where I actually start putting beets into jar. Most of that time was spent scrubbing beets, blanching beets, removing the outer skins, trimming the tops and tails, and waiting for water to boil.
I know “a watched pot never boils”, but my goodness, it takes a long time for large amounts of water to come to a boil!
But, if finally got done! Our first time canning AND our first time canning our own produce!
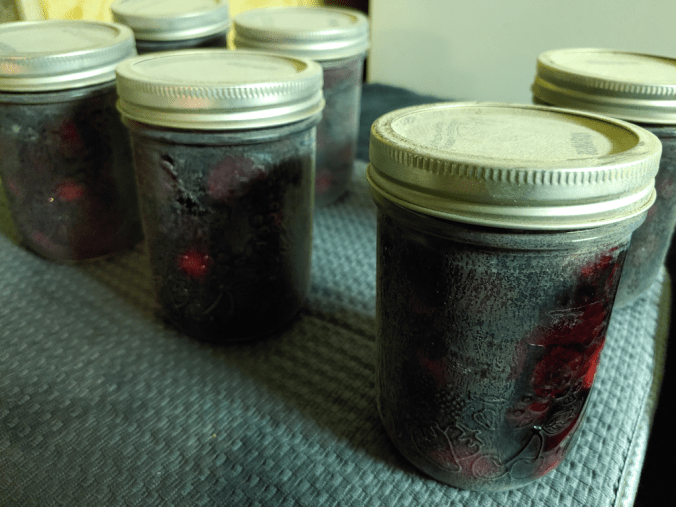
Pulling my first jar out of the water, though, was a bit of a surprise.
I mean, I know our water is hard, but wow! For the jars to come out with a layer of scale like this is crazy! You can see on the jar on the far right, where I wiped some of it with a paper towel. They’re going to need to be washed!
I finally had a chance to remove the rings and check the seals, just a little while ago, and they all came out fine! I made sure to keep track of which ones had the different pickling liquid, for when the scale gets washed off and they can be labelled.
Except the jars we open to taste test! :-D
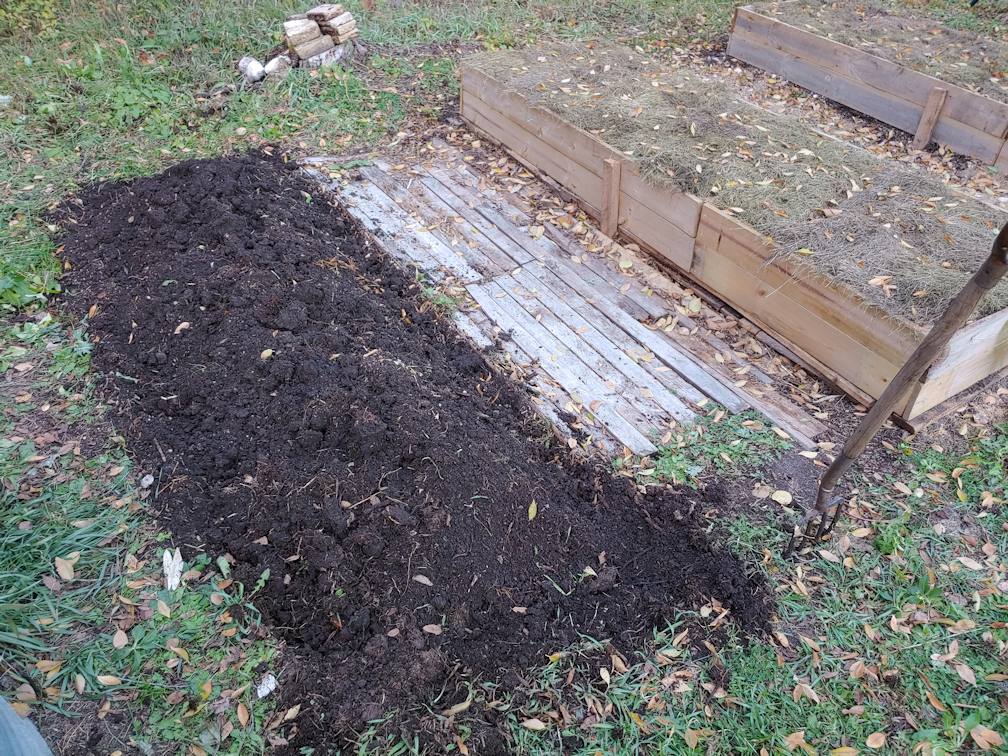
By the time I was done, it was full dark, so it wasn’t until this morning that I could get a photo of the girls’ hard work outside.
They got three of the four remaining beds in the main garden area done – and most of that time was spent on just one of them! The first two weren’t too bad, but the third one was filled with crab grass, and it took them ages to get as many of the rhizomes out as they could!
I am amused by all the cat footprints in the loose soil! :-D
I’m glad they were able to get these done. Today turned out to be a write-off for outside work, but I will cover that in my next post. :-)
I worked on some of the garden beds yesterday, until it got too dark to keep it up. Here is what I managed to get done.
The first bed I worked on was the beet bed by the garlic, as this one will be getting a box frame soon. I started by removing the bricks and rocks around the edges, some of which you can see in the background.
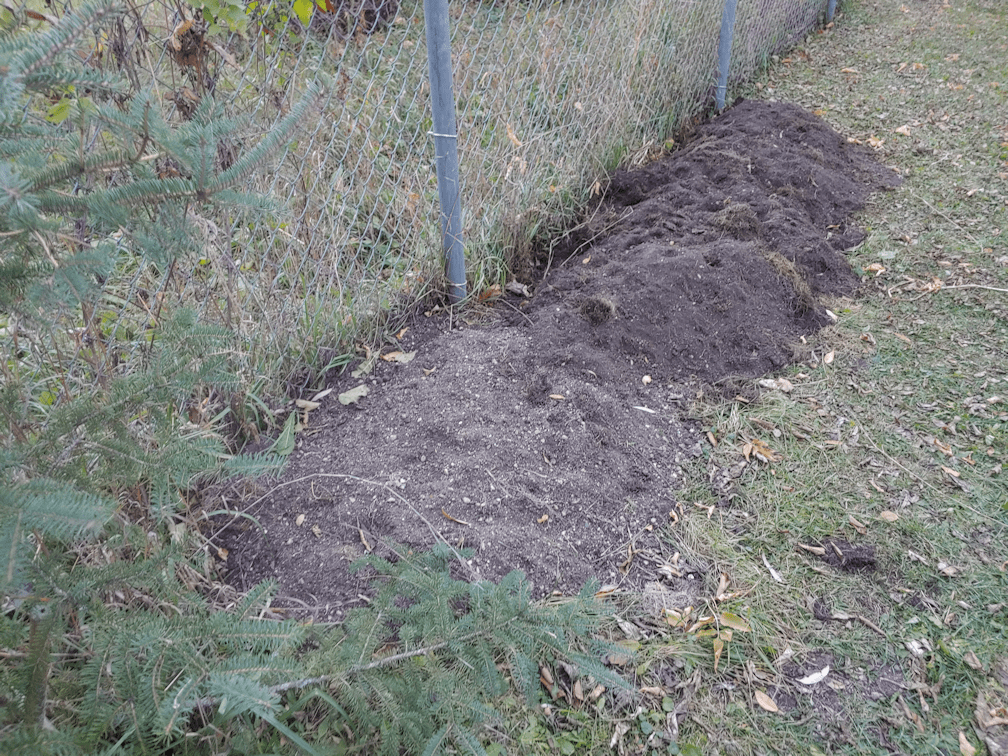
I had to come back this morning to get a picture of this area. The beet bed had a row of red bricks along one side, which I moved over by the tomato bed. Then I went around the house and yard to pick up all the red bricks I could find and brought them over. When this bed gets cleaned up, we’ll re-do the boards along the fence, so that they fit better between the fence posts and line the entire length of the fence, to keep soil from washing through the chain link. The rest of the bed will be framed with these bricks, to keep the soil from washing into the path.
Amazingly, even though the vines are quite dead, there are still tomatoes ripening. I did not expect that, with the temperatures we’ve been having!
The beet bed then got weeded, and lengthened to match the garlic beds. I also moved the soil more towards the middle. I will not be digging out the soil to do the layering like I did with the others on this one. We only have wood enough to make a box frame one board high, so even though the boards I found are wider than the ones used in the other beds, it still won’t make a bed as deep as the others. This bed also got layers of material buried in it as it was made this spring, and quite a lot of the new garden soil was added, so it won’t need as much material to fill it. Once the box is built, it’ll pretty much just be laid over the existing bed. About the most I’ll do is make a “foundation” of old boards, like I did with the other two beds. Once that’s in place, I will make a trench in the middle of the soil and bury more organic material from the compost pile, but that’s about it.
The next area I worked on was a quick job. I just had to spread out and level the soil from the potato bags (and even found a few missed potatoes!). Nothing fancy is happening here. There are some lilies that need to be broken up, and they will be transplanted here.
The last spot I worked on before it started getting too dark was where the poppies had been. One of the things my daughters and I observed over the summer is that we needed to make areas to walk through, without stepping on plants. So at one end, by the rhubarb, I used the flat stones I found under the old wine barrel planter along the spruce grove as stepping stones. The rhubarb covered the poppies that had been planted near it, so I’m considering transplanting those somewhere else completely, but that won’t be done until the spring. We have only three interlocking bricks, so I used them as stepping stones at the end nearer the laundry platform.
The poppies that were here would have self seeded, which my loosening of the soil would have disturbed, but that’s okay. I did harvest a few little pods. I will broadcast more seeds some time over the next few days, then do it again in the spring. Once they have established themselves, this should end up being a permanent bed for Giant Rattle Breadseed Poppy. I do plan to get another variety of edible poppies I found from a Canadian source, but those will be planted in a completely different area.
So that’s as far as I got, yesterday evening. Today, I won’t be working on the garden clean up at all. My daughters will be working on that, later today. It’s supposed to warm up a bit more, but I’m really hoping the winds will die down. They made things quite bitter while I did my rounds this morning!
I’ve asked them to take before and after pictures for me. :-D
As for me, I have decided that I will can some of our beets. After going over my recipes, we do have enough to pickle. My daughter has been doing refrigerator pickles with the summer squash, which is great, but they take up a lot of room in the fridge, so I want to do water bath canning, so they will be shelf stable. I should at least get a half dozen 500ml jars.