One of the most fun things about heading outside in the mornings has become seeing all the cats waiting for me, outside the sun room door.
Most were moving around too much to try and get photos through to door, but Nosencrantz was willing to post for me!
Gosh, she looks so much like Nicky the Nose!!! I wonder if she will get big like him, too?
Junk Pile Jr. was patiently waiting for me to move on, so she could get back to the kibble!
As was her brother (sister?), Tuxedo Mask, and her cousin, Caramel. :-D
Nosencrantz is getting so comfortable with me! I could walk right up to her, pet her and take photos, without her even looking like she was about to run off.
Caramel was perched and watching me from the old tire planter, but when I moved to take her picture, that was a bit too much for her!
Meanwhile, four other kittens were prowling in the nearby white lilacs!
Two of them are completely hidden by the leaves in this photo, but if you look closely, you’ll find part of a little orange face – just one eye and one ear – peaking through the leaves.
I did a fair bit of running around this morning, and was even able to get a quick visit in with my mother. We are hopefully now well stocked with cat kibble for the rest of the month. It’s also coming up on Thanksgiving here in Canada, which means cheap turkey season, so I got one for this weekend, and another for the freezer. :-)
Once back at home, I grabbed a quick lunch and the girls and I headed outside. While they worked on raking leaves for me – and running to and from the house for any tools I needed – I worked on the high raised bed.
The bottom got prepared a bit, first. I straightened out the edges and shoveled out some more soil, then used a thatching rake on the bottom. I eye-balled four feet across and raked up the edges where the logs would go. Then I got two nine foot lengths in. The first one was placed right where I wanted it to go (that’s the one on the right), then placed the two sticks against it. From the sticks, I measured four feet and placed two more sticks, then rolled the second log up against the second pair of sticks.
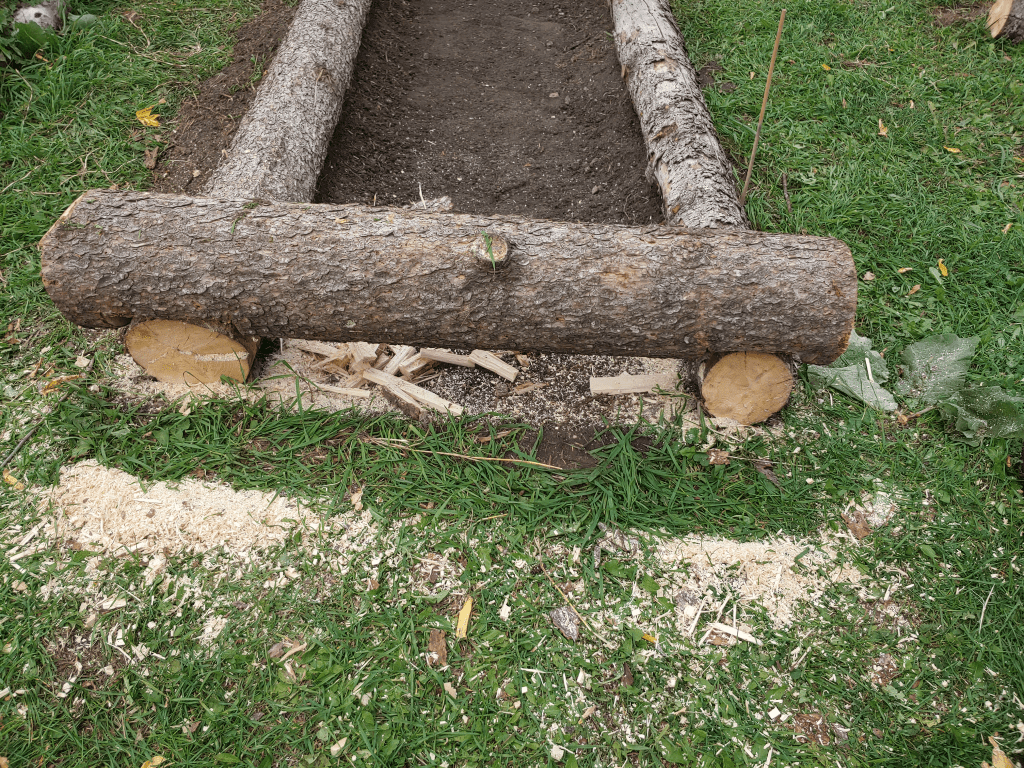
Once those were in place, I rolled an end piece against them and used their width to judge where to begin cutting. This end piece was the bottom of the trunk, so it had one very uneven end. It was measured and cut at more than four feet to compensate for that. That made it long enough to cut a notch out to fit the logs, rather than cutting right to the edge.
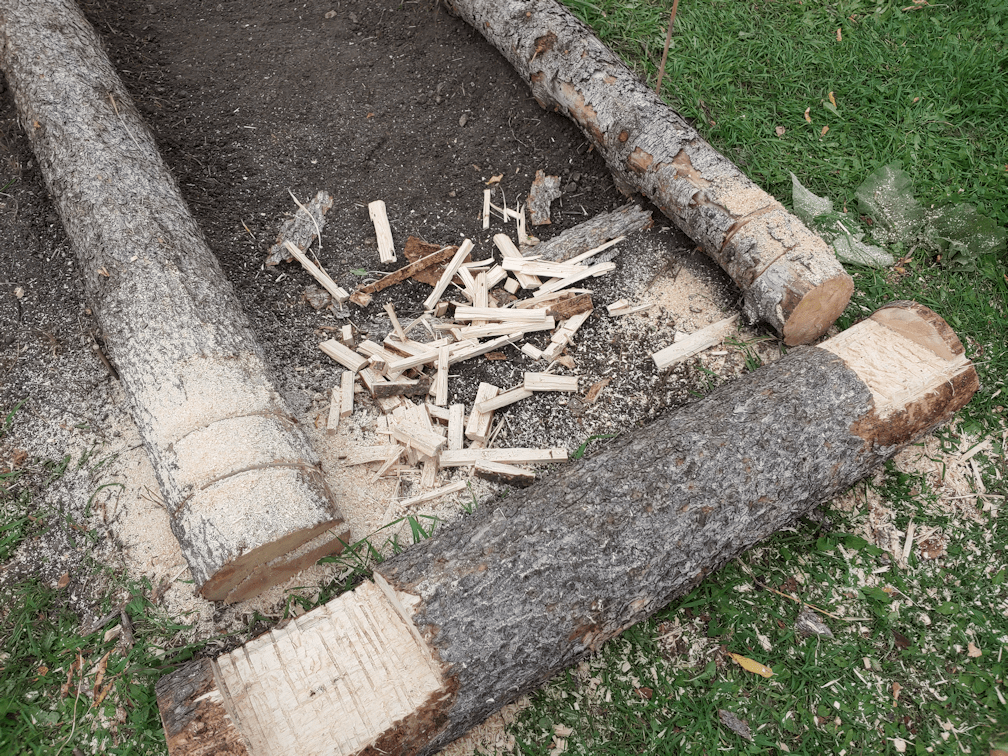
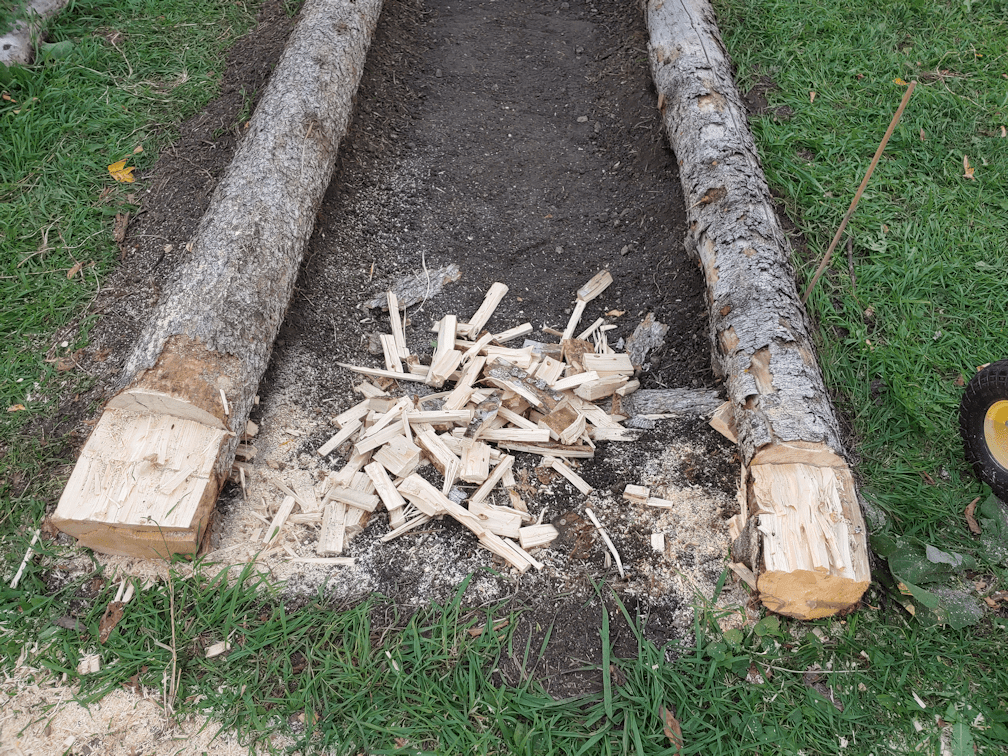
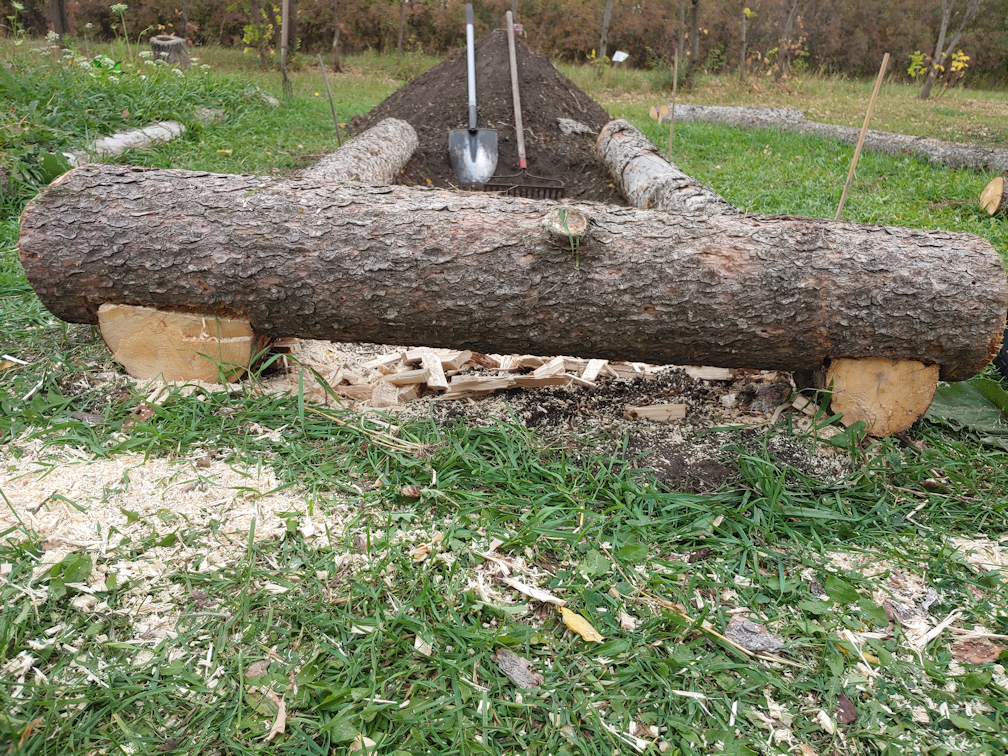
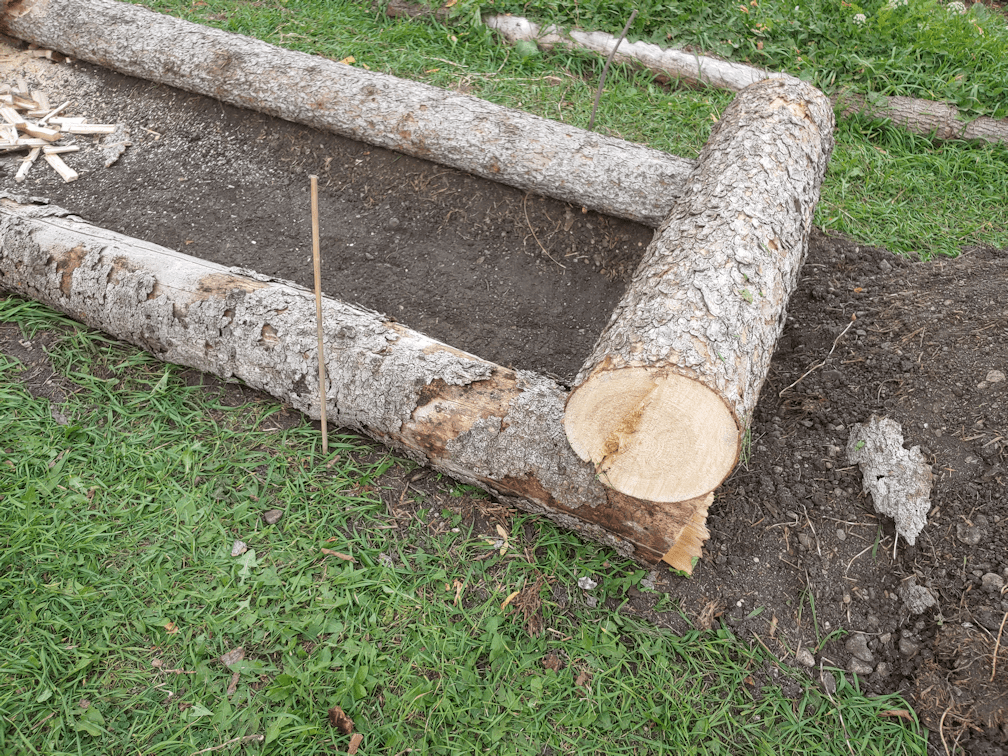
I used the baby chainsaw to cut the outer edges of the notch, then made a cut lengthwise. I then spent the next while using a hammer and chisel, sometimes a hatchet, to cut out excess wood, which you can see inside the bed. After most of the wood was chiselled out, I use the baby chainsaw to cut into the remaining excess wood, as you can see above.
Then I kept running it over the area to level it more. I wasn’t after perfection, here, and don’t have the tools to do a better job, so this was as good as it was going to get!
It didn’t take long for me to drain the battery on the baby chainsaw and have to switch to the second one
When I started working on the other end, I made plenty of cuts to make chiseling the excess out, easier!
I got it to this point with the chisel before going at it with the baby chainsaw to level it off some more.
Then I got a daughter to help me place it on the logs, so I could use it to mark were to cut wood out of the ends.
By the time I finished making cuts to depth, I drained the second battery. That’s okay. It was enough to get started, and since I was removing wood to the edge, it would be easier to take off the excess with a chisel than with the notches.
Right?
Ha! Of course not.
Both logs had knots in them. One of them had two.
Those were a real pain in the butt to work through with nothing but a chisel or a hatchet to cut through them!
On the plus side, working on this took enough time that the first battery was almost fully charged again, so I could use the baby chainsaw to finish off the area.
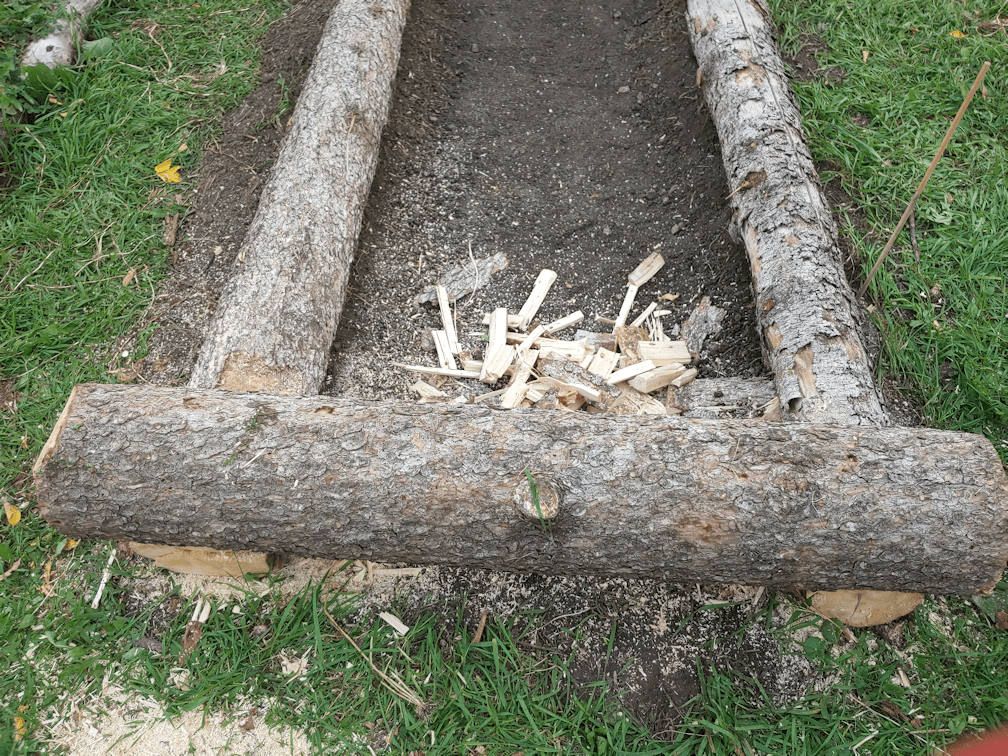
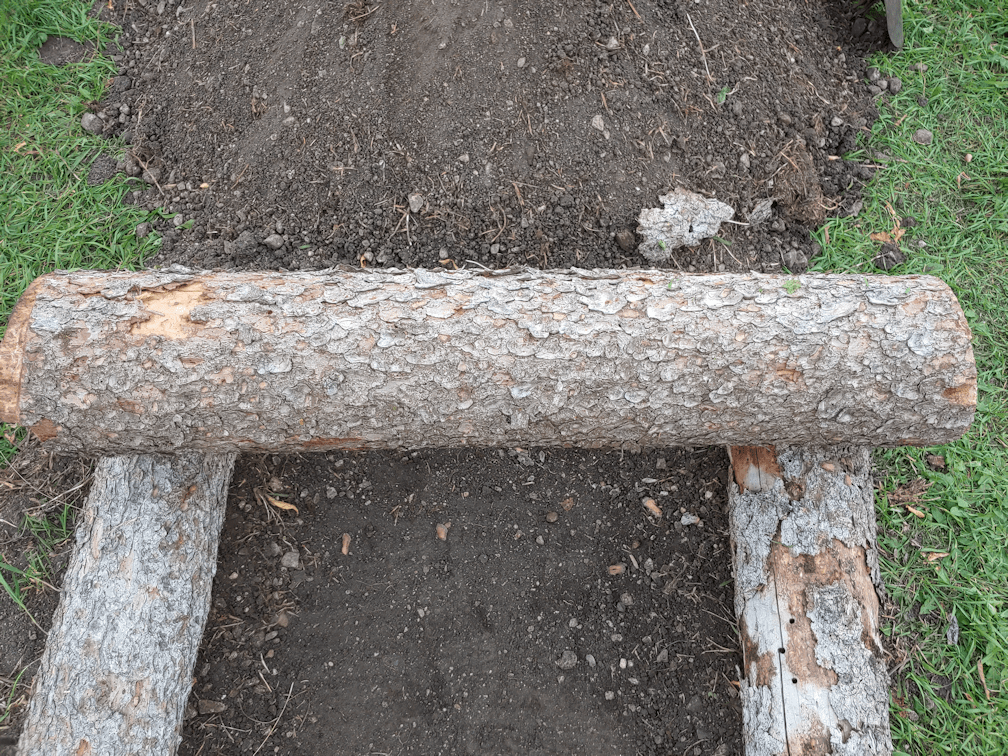
That done, the end piece could be set in place.
As you can see, there is quite a bit of a gap under the end piece. This is not a concern, as the bottom of the bed will be filled with logs. It will be an easy matter to find a piece that can be fit under that cross piece.
The good thing is, all those bits of wood I’m cutting out will not go to waste, as they will be buried with the old logs. We’ll have things decomposing at different rates, all of which will release their nutrients slowly over time while the wood will act like a sponge, reducing the need for watering.
By this time, we started to get a bit of rain, so I stopped for the day. The girls finished raking and headed in to make supper while I prepped to continue later.
I chose a second cross piece that was close in size to the one at the opposite end. As before, I will use the other logs to see where to make the cut outs. Hopefully, I’ll be able to continue on this tomorrow. It depends on whether or not my mother will need me to drive her around or not.
This would go a lot faster if I had a full sized chain saw. :-D Ah, well. We use the tools we have!
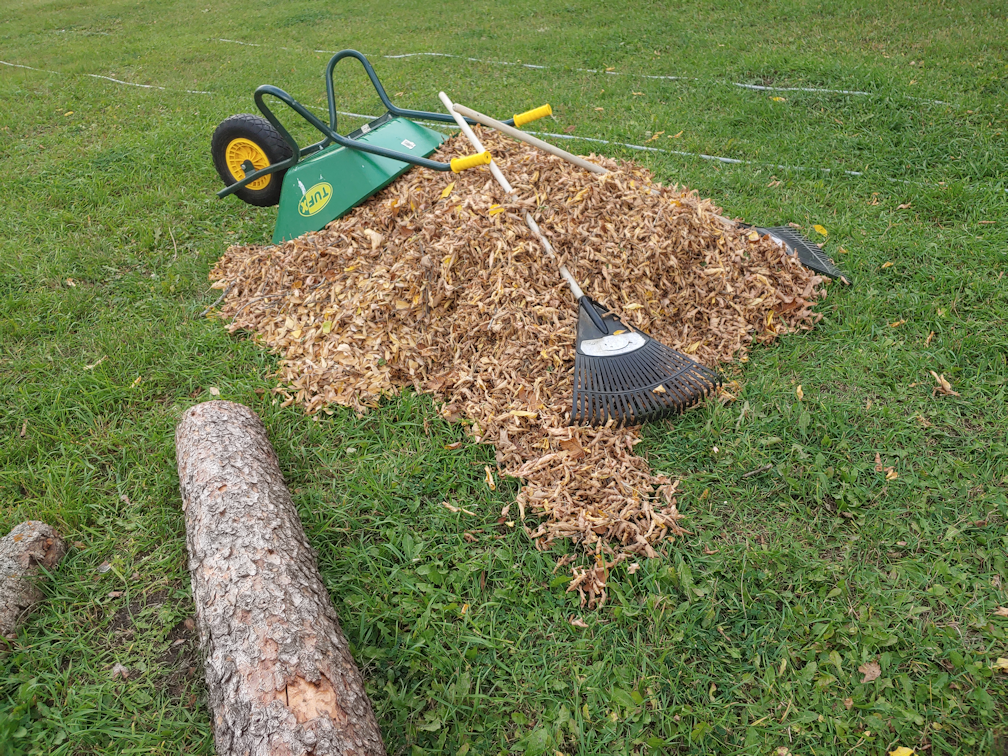
Meanwhile, I now have a nice pile of leaves to use when it’s time to start layering on top of the logs that will go on the bottom of the new raised bed! It’s been pretty windy, but hopefully they won’t blow away. ;-)
I’m glad we have found a way to make use of all those dead spruces we need to take down!
Before I headed out this morning, I took the time to pick tomatoes.
It’s October 7, and we still have tomatoes!
I probably could have picked more beans, too, but I didn’t have time before I had to head out.
Those little Spoon tomatoes are the most adorable things ever! They almost make me like tomatoes.
Well. No. Not really. I just like growing them. I don’t think that really counts. Thankfully, I have others in the household the household that like to eat tomatoes. :-D
Our glorious weather isn’t going to stick around, and we’ve got garlic ordered, so I wanted to make sure we had at least one prepared bed for them.
This is the empty bed that had yellow onion and shallot sets in it. It was also supposed to have purple kohlrabi, but that never grew. We were planning to rotate our garlic to a different location that did not have alliums in it, but this bed is going to be so drastically changed, it shouldn’t matter.
Also, in the foreground, in the right hand corner, is a single onion that got missed! :-D
The first order of business was to move out the bits and pieces of logs framing the bed.
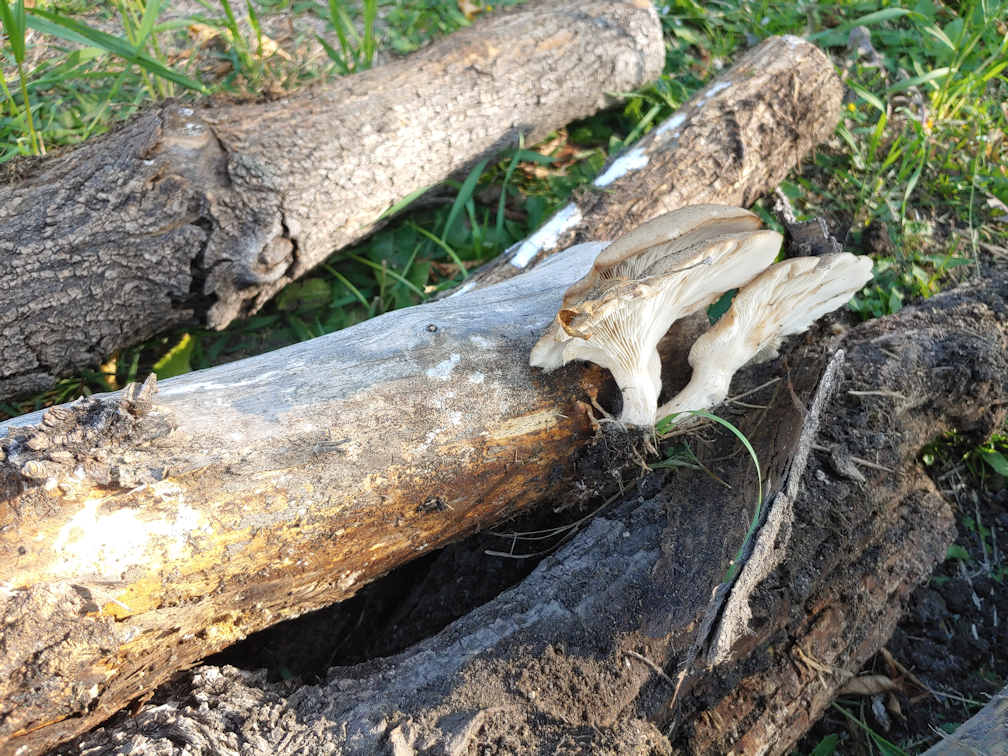
One of them had mushrooms attached! :-D
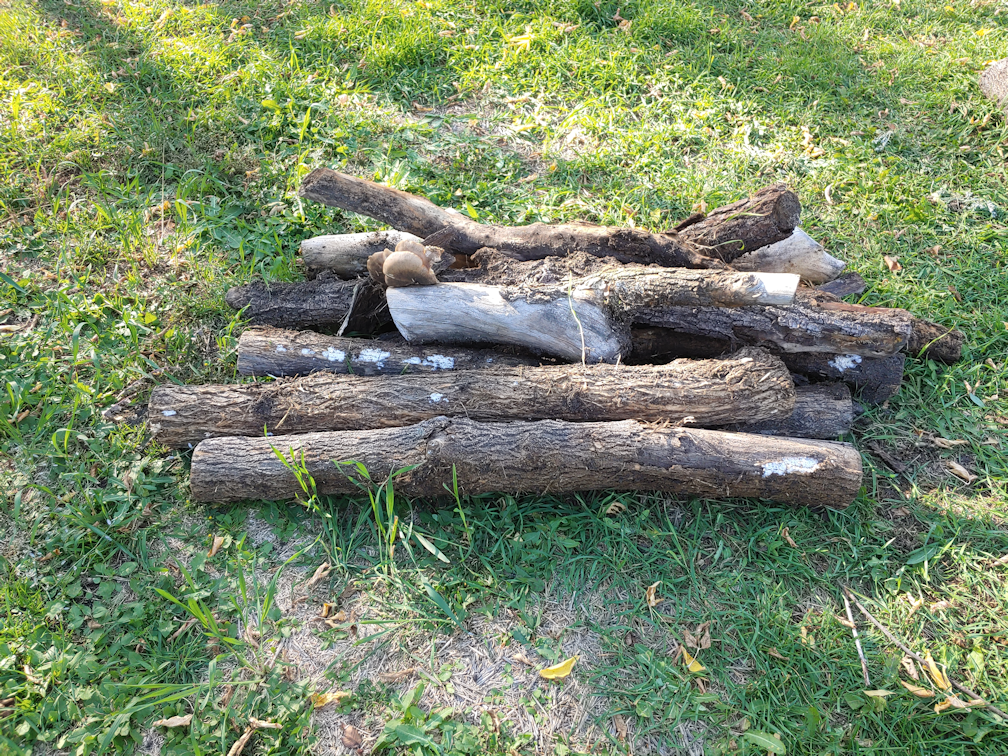
These are all the logs that were framing the bed. They will be buried at the bottom of the high raised bed. These are already starting to rot, which will be a good thing for our modified hügelkultur method of filling the bed.
Also, my spell check has hügelkultur in it!
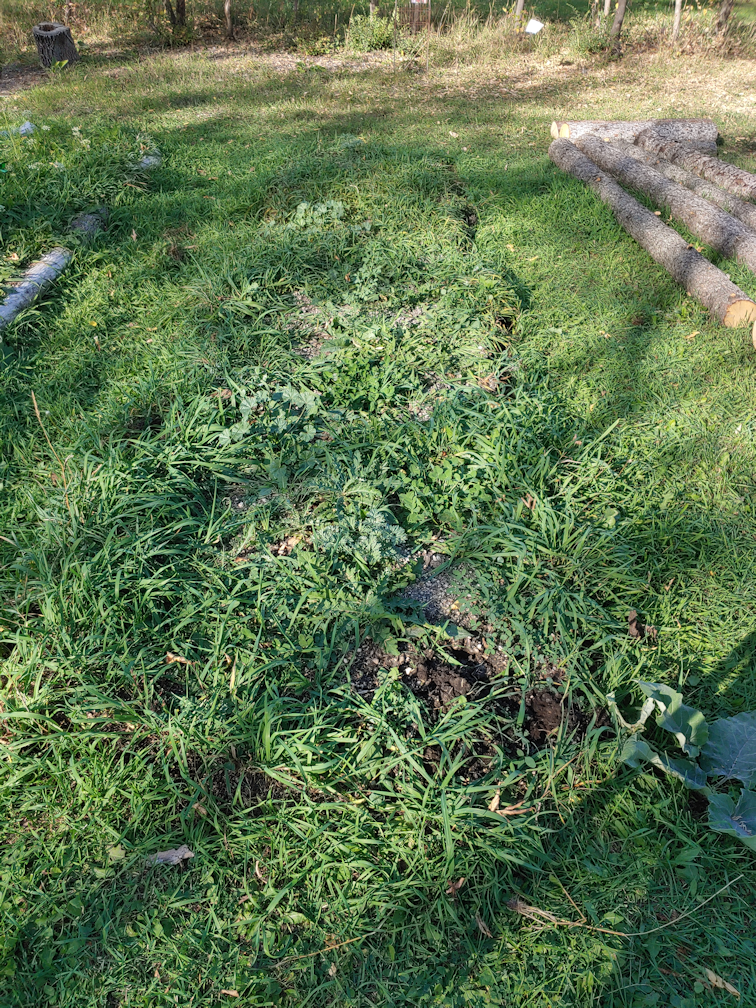
This bed is so overgrown, you can hardly tell all those logs were removed!
Next began the tedious process of loosening the soil and pulling all the crab grass and weeds out by the roots and rhizomes.
Mostly crab grass.
When we built this bed in the spring, we extended what had been a shorter potato bed, using the Ruth Stout method, the previous year. Basically, potatoes were laid out on the ground and buried under straw mulch. After the potatoes were harvested, the straw was worked into the soil a bit. For the added portion, we just laid down more straw over the grass, as well as the previous year’s bed, then topped it with new garden soil.
There’s a reason we did it that way.
This is as deep as I could get the garden fork into the soil. About half the length of the tines. After that, I was hitting rocks. I’d shift the fork a few inches, and hit more rocks. Shift, hit rocks. Shift, hit rocks. It was insane!
Along with the onion that got missed, I found a shallot, too!
They got set aside on the chicken wire cover over the chard to cure. :-D
I pulled as many weeds by the roots as I could, but there’s no way I got all of them. The wheelbarrow is mostly crab grass, so this is not something that will go into our compost pile. I dumped it by the edge of the spruce grove, instead.
The high raised beds will be 9 feet long, and this bed is about 14-15 feet long. Originally, I wanted to keep them long like this, but we also want to be able to cover them, and at that length, the covers are very unwieldy. By going shorter, we can potentially add a second row of beds. I had to decide. Should we build the high raised bed at the south end, leaving room for a second row on the north, or start it at the north end, with a potential second row on the south side?
In the end, I decided to build the bed on the south end. It was the shade that decided it for me. If we were to make a second row of beds further south, they would be more shaded by the trees between the garden and the house. If we add a second row on the north side, they will be closer to the short row of trees my mother allowed to self seed among what had been her raspberry patch, but I want to get rid of those trees, as they are causing problems. If nothing else, they won’t be shading any new beds that are closer to them.
That decided, it was time to start digging!
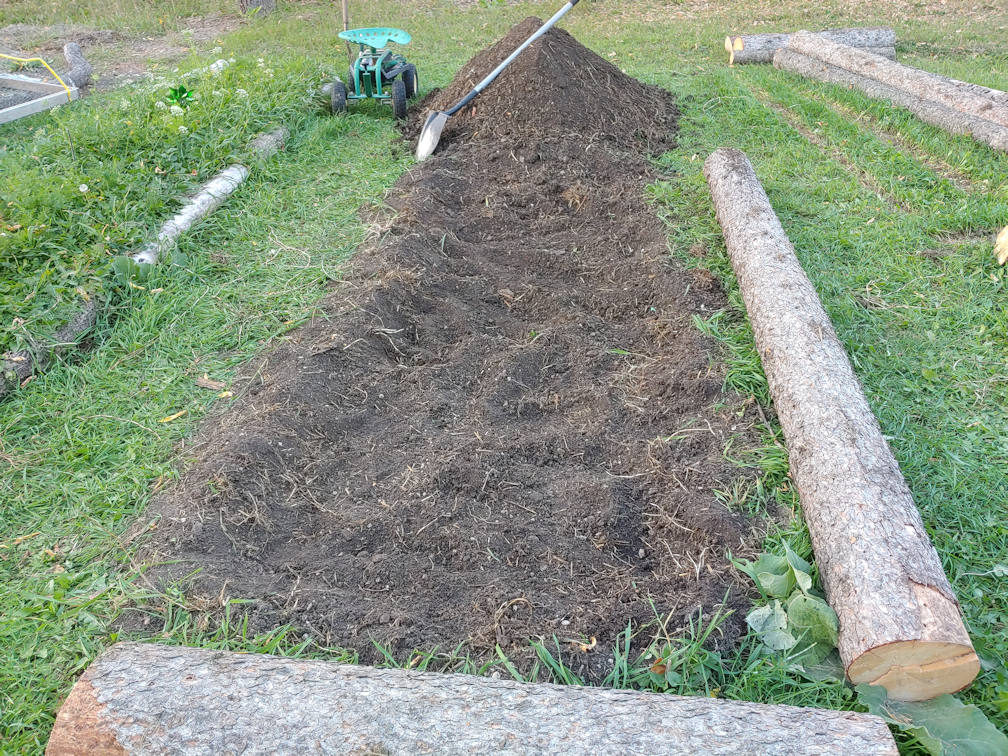
I dragged over a couple of logs to use as a guide, then started removing the loose soil and piling it on the end that will not be part of the bed, pausing to remove more roots and rocks every now and then. I was happy to see how much the straw had broken down – and by how many worms I was finding!
This is it for the day!
I dug down only as far as the rocks, so it’s not very deep. Mostly, I just removed the straw and soil layer we made in the spring, and maybe a couple of inches lower.
The next step will be to level this off and straighten the edges for the logs. I cut the logs a bit longer than 9′ and 4′, to give room to trim the ends straight, but I may not even bother with that. As long as the beds themselves measure no more than 4′ wide on the outside, we’re good. I don’t care if there are bits that stick out a bit further at the corners.
I want to get this bed at least 2 logs high before I start putting the layer of logs on the bottom down. They’re smaller and lighter, but it’ll be easier to put them into place while the walls are a bit lower. The other layers can be added when the bed it as its full height. When it is 3 logs high, I’ll decided if it needs to be higher or not. Then it’s a matter of filling it with layers and getting it ready to plant garlic in. We might be able to plant all three varieties on one bed.
As much as I enjoy the work, it does help me realise how necessary having high raised beds will be. I don’t know how much longer I will be able to continue doing stuff like this. Weeding the bed was the most difficult and painful part. Thankfully, I was able to sit on the scooter for some of it, which helped, but this old body is breaking down. I can still do big stuff, like cutting and breaking down trees and carrying logs, but I’m loosing my fine motor skills on my hands. I drop things a lot more often, the joints are almost always stiff and sore, and that one finger just doesn’t seem to be getting any better. Then there is the back pain from bending over to weed. I can’t bend at the knees, since my knees are already shot. Strange that I’m losing my ability to do small, easy things faster than doing heavy manual labour!
I can still crochet, though, so that’s good. I whipped up a couple of hats recently, and plan to work on other small projects. The only problem has been choosing what yarn I can work with. My hands are so rough right now, some types of yarn catch on my fingers while I work! LOL Working with my stash of metallic yarns is out of the question, as well as anything the least bit fuzzy. :-D
Hopefully, I will be able to continue working on this raised bed tomorrow, after I’ve headed out to do some errands. We hit 27C/81F today, but tomorrow should be a bit cooler, and we’re expected to get rain – possibly even a thunderstorm – over the next couple of days. Looking at the long term forecast, we’ve got another nice, warm week before things start to cool down, and overnight temperatures may result in frost. It’s not until the end of October that we’re looking at the possibility of snow. Of course, looking that far ahead, things are very likely to change, so we shall see what really happens! Until then, I’ll be taking advantage of the mild weather and doing as much work outside as I can!
This morning, I went through all the sweet corn blocks and harvested anything the looked like it might have a few kernels on it. :-D
I can’t remember which variety I’d planted in each block, but you can really tell the difference in them! I’d started with the southernmost block, which almost filled my giant colander. The husks with so much red in them are from the middle block. Most of that one had split husks with green or dried out kernels visible, so there were not a lot to pick. The teeniest cobs were the largest ones I found in the northernmost block.
These are the husked corn from that northernmost block. I’m honestly surprised by how many developed kernels there are on them. They are the tiniest of cobs, and yet they are still edible!
These are from the centre block. Their darker colour has more to do with that fact that these where the first to develop cobs and are past their peak eating stage. I actually enjoy corn at this stage; there is a toothiness to them that I like, and the flavour is more “corn” than “surgar”. A lot of the cobs had a whole side that did not get pollinated, so as the pollinated kernels formed, the cobs formed a curved shape.
The southernmost block where the last to mature, and these are actually at their peak. In fact, some of the cobs I picked turned out to still be way too under ripe, and went straight into the compost pile. Even as I shucked them, I had to be careful as the kernels were so tender and juicy, if I accidentally scraped a fingernail over them, they’d practically burst!
While I joke about this being such a sad little harvest, I’m actually really happy. They are tiny, poorly pollinated, and there are so few of them, but we actually have corn to pick! I honestly was not expecting any in these blocks. Thankfully, we have not had any frost yet, and our temperatures have remained mild, if not downright hot at times. If not for these weather conditions, we would have had none at all. I’d be pulling everything up for compost.
Instead, I had sweet, buttered corn for breakfast!
If you’re on Facebook, you know how they pop things into your news feed that you posted, X number of years ago today?
Yesterday, I saw one of those, with a photo I posted, three years ago.
After a snowfall.
Not only have we blown past our average first frost date of Sept. 10, but we are at a point where it is not at all unusual to have snow on the ground. Nothing that lasts, really, but usually at least one storm.
I am so loving our extended summer. Especially with how it’s giving our garden so much more time to recover from the extreme heat and drought conditions of the summer.
This morning, I found new Ozark Nest Egg flowers, both male and female! I hand pollinated some other ones, but it’s too early to tell if it works. I went ahead and hand pollinated the female flower here, too.
While looking through the Ozark Nest Egg plants, I found a single flower from the Thai Bottle Gourd that has made its way up the fence, mixed in with the Nest Egg gourds! I’ve only seen male flowers on this one, though.
Remember that carrot bed the groundhogs kept decimating, over and over? The one we finally gave up on, other than watering it now and again? Half of it, where the Kyoto Reds are planted, has carrots gone to see, pushing their way up through the weeds. The other variety, Napoli, have fronds visible among the weeds, but none are going to seed.
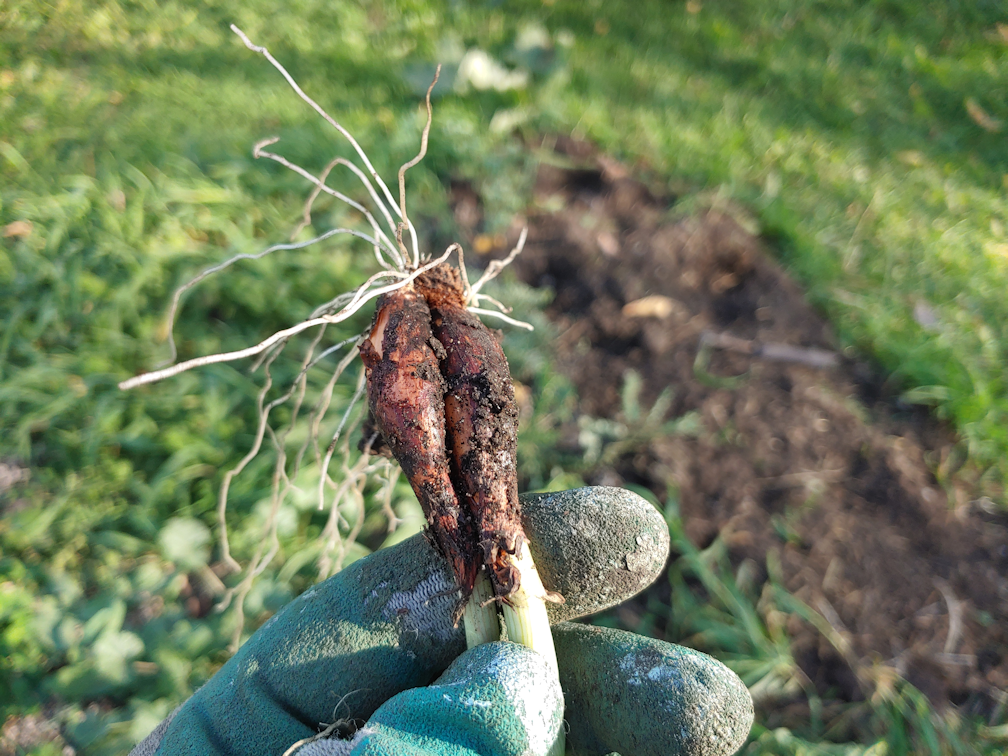
I watered the gardens this morning and, out of curiosity, pulled up some Napoli carrots. I was really surprised by how big they were! After having their greens eaten away several times, It’s amazing that there are any at all, never mind anything of a decent size! That had me looking around among the Kyoto Reds for carrots that had not gone to seed, and I found a surprisingly large one there, too!
The squash tunnel thermometer is definitely whack. We might be at 30C/86F as I write this, but it was only about 22C/72F at the time I took this photo.
While watering the peas among the corn, I couldn’t help but notice the corn block that is the furthest south.
We actually have corn. This block as lots of cobs developing!
They are very small – the husks make them look like there is more than there really is – and poorly pollinated, but we actually have corn. I went ahead and ate the one I picked, right after taking this photo, and it was tender, sweet and delicious. I will have to go back later today, with a container of some kind, and pick more!
Once back inside, I started up a big chili in the crock pot. It’s got our own onions, garlic, carrots and bush beans in it, as well as both ground beef and the ground pork we got from our neighbour. Oh, and I also tossed in some Spoon tomatoes we’d tucked into the freezer. In the future, I plan to grow beans for drying, so some day we will be making chili with our own dry beans, too, along with the paste tomatoes we plant to grow and can. :-)
With a goal of being as self sufficient as possible when it comes to growing our own food, this year has shown just how touch and go that can be. We had a very warm May that had all sorts of things starting to bloom, only to get a single cold night that killed all the flowers off. Because of that one night, we have no crab apples, no saskatoons, no chokecherries, and it killed off the (expensive!) mulberry bush we’d transplanted. Even the lilacs and roses got damaged by that one night. Then we had the drought conditions that had us watering every day, twice a day, for so long. And now we’ve got an extended summer, and instead of frost and snow, parts of our garden are able to recover and start or continue producing! It’s been a crazy gardening year, but as much as I shake my head over how extreme conditions have been, the reality is, this isn’t actually all that unusual. As every farmer, gardener or homesteader knows, you could have the best year of all, only to have all your hard work wiped out by a single storm, or one unusually cold night. Or you could get a terrible spring and summer, but then get a great fall and winter. Some years, you might not get any real summer at all, and in others, the winter will be as mild as any fall or spring. As fantastic as it can be, to be able to grow your own food and preserve it for use in the off season, I’m just as thankful that we have grocery stores and imported food. I think both are good! As my brother and his wife have both said, if they had to rely on their garden, they’d starve!
Yesterday evening, I was able to head out and finally work on the dead tree that’s stuck. While I was getting tools out of the sun room, I discovered I was being watched!
They were not only watching me, but they did NOT run away, and one of them looks almost relaxed!
I’ll take that as progress. :-D
Then it was time to get to work.
For the tree that’s stuck, the first thing that needed to be done was to brace it before I started cutting. Then I measured a little more than four feet from the bottom and cut it most of the way through. Then, just to be safe, I used a rope to pull out the brace from a distance, then used the rope again, to pull out the cut piece.
Now that this has been cut shorter, the tree can be pulled out with the van, once we have something we can use to safely haul it out. We do actually have chain handing around but 1) I won’t want to use chain, because if it breaks, the damage could be catastrophic and 2) the chain I’ve found is so big and long, I would have to use a wheelbarrow to bring it over! :-D At this stage, though, the tree can wait until we get some strong enough rope. It’s also now low enough that I could remove the rope that was wrapped around the trunk, from when I tried to get it to roll off the branches it’s stuck on.
The four foot length was moved to join the others by the main garden beds. Then I took down the third dead tree in this group.
This tree was a fair bit thinner than the other two, and was faster to cut down. When it fell, it landed on the stuck tree, which basically guided it away from the trees it’s stuck on, and down to the cherry trees.
All of those cherry trees will be cleared away, as they are not right for our climate zone, so the first order of business was to start clearing enough of those away that we could access the trunk. Dead branches were also cleared off the trunk. Then, while I continued to clear more of the cherry trees away, using loppers for the thinner ones, and the baby chainsaw for the few larger ones, my daughter started to measure off the trunk to cut the first four foot length.
We got two four foot lengths and a nine foot length before it got too dark to work, so I got these photos this morning.
As with the other two trees, the wood is nice and solid, with no sign of rot. That means, not only will the wood be used to build our high raised beds, but the stump will be used to support a seat or a table.
With so many dead trees to clear away, we’re going to have a lot of those by the time we’re done!
While cutting lengths from the trunk off, we were able to pull the rest of the tree out a bit, but at this point, it’s too hung up on the cherry trees that haven’t been cut away, yet. I had thought to be doing more of that today, but it might have to wait. Pain levels are high, which is no surprise, but as I write this, it is also 30C/86F right now!
One more nine foot length, and I’ll have enough wood to make a raised bed that’s 3 logs high. With how thick the trunks are, that might be high enough! :-)
One last garden update to post, interrupted by having to make a run to the post office to pick up a package before they closed! :-D
With the kittens mashing down the netting on two of the beds in the old kitchen garden, I finally gave in and removed the mesh completely.
With the beets along the retaining wall, there isn’t much we can do about them anymore. If the deer eat them, it’ll be no more of a loss than it already is. I’ll be cleaning that bed up for the winter soon, and if there are any beets to harvest in there, that’s just bonus. The L shaped beet bed, however, will remain covered. The kittens haven’t been going after that one, and they are doing well enough that we don’t want the deer to eat them.
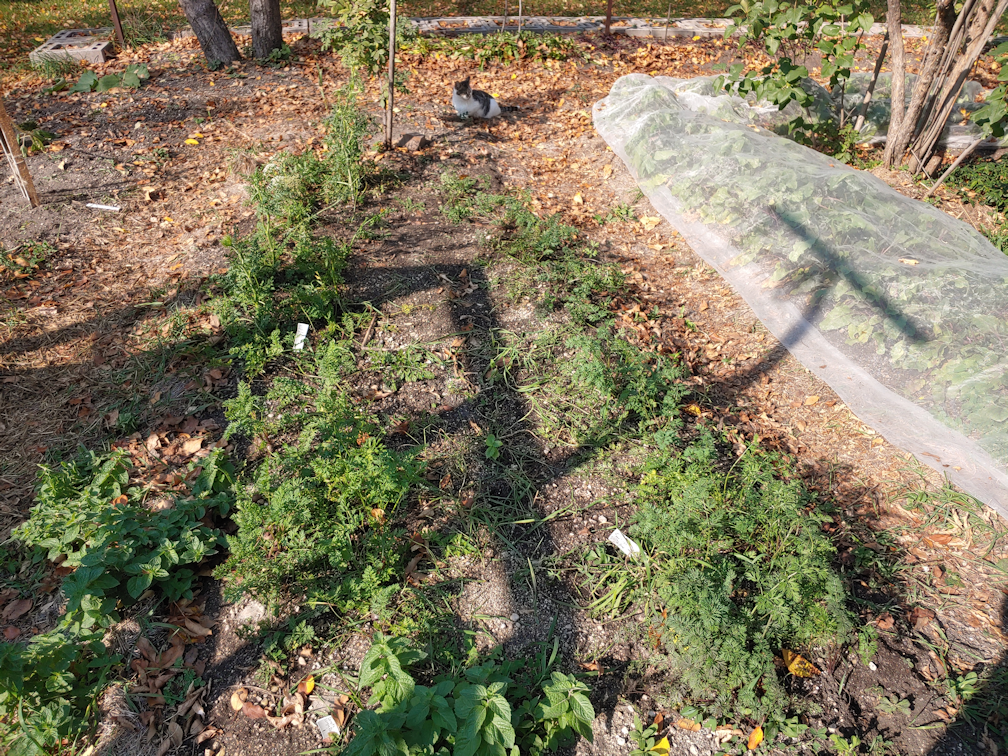
After removing the hoops and netting from the carrot bed, I found my first surprise. I did not plant this bed. My older daughter did. Two types of carrots, with kohlrabi down the middle.
Well, nothing came of the kohlrabi – I finally decided the big leafy plants that did show up were a weed of some kind, as I found them growing in other areas where kohlrabi has never been planted.
What I did notice is that there are three carrot labels, not two. Which I sort of noticed before, when I weeded the bed and added the hoops, but for some reason, never stopped to actually read the label. Along with the Deep Purple and Lounge Rouge Sang, there are Kyoto Red! If you look at the photo, towards the far end of the bed, you can see carrots that have gone to seed. Those are the Kyoto Red. Like the ones planted in the main garden bed, after the groundhogs ate the greens, they got tricked into acting as if they were in their second year and started to develop seed heads. The other two varieties didn’t.
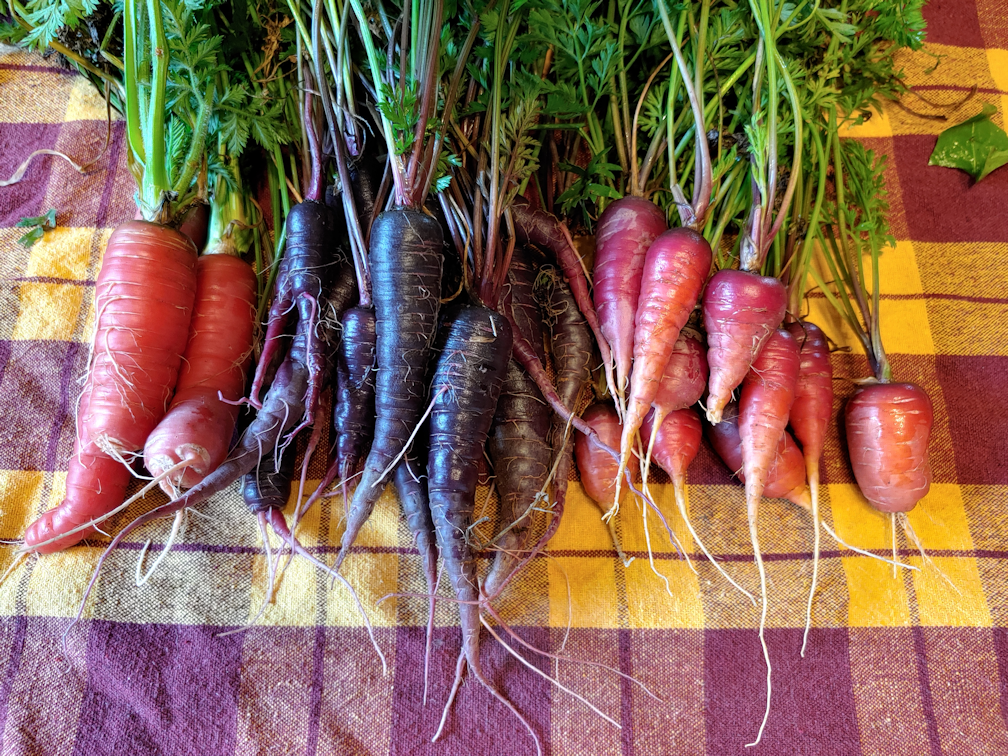
This morning, I decided to pick some, and ended up up quite a few. The ones on the far left are the Kyoto Reds. There were very few that haven’t gone to seed, so I only got a couple of them. The purple ones are obvious the Deep Purple variety, but when I’d picked from that bed before, they were not this dark purple, and I thought they were the Lounge Sang Rouge!! I hadn’t picked any from the other row, as they did not need any thinning.
Which means we got to try two new varieties of carrots today! My daughter decided to use up the summer squash we had in the fridge and make a soup, and she included a few carrots as well. After they were sliced up, we tried each of them. The Kyoto Red, unfortunately, was bitter. They may not have been going to seed, but tasted like they were ready to. The other two tasted fairly similar. We’ve had the Deep Purple before, and they tasted much the same as I remember from last year. The Lounge Sang Rouge seemed to be a bit sweeter.
When cut, the Kyoto Red was that deep reddish-orange colour, all the way through. The Deep Purple carrots were purple with a pale orange, almost yellow, ring inside. The Lounge Sang Rouge was a solid pale orange.
After picking the carrots, I used the rain barrel to water the old kitchen garden, then went on to water the loan beet bed that we made in the spring, next to where the fall garlic beds. This bed was planted with Merlin beets, only. That bed is covered with netting, too, tacked down on the long sides with tent pegs, and the excess netting on the ends rapped around boards to weigh them down. After watering it, I decided to lift the boards at the ends to see how the beets looked.
I ended up picking a couple from each end!
I should have held these differently; there was one quite large beet, but it’s underneath. It’s about the size of the other three, all together!
I’m rather pleased with these – and I know there are larger beets in the middle, from when I last tended it. I’d found a groundhog had managed to squeeze it’s way under the netting, when it was only weighted down with rocks and bricks.
We don’t plan to harvest the beets for a while; possibly not until after first frost. When we do, however, we should have enough to make it worth doing some canning!
Aside from the deer and the groundhogs wanting to eat them, beets have been among our most successful vegetables. We planted a LOT of beets this year, which we may not do next year, but I’m sure we will plant them again. We’ll just have to decide on what varieties we want, and if we want to try some new ones.
And that’s it for our fall garden update! The other parts of the garden were pretty much unchanged, so there’s nothing to really say about them. :-)
I am so incredibly grateful that our growing season has been extended this year, and am glad our drought and critter ravaged garden has had a chance to recover and continue to produce as much as it has!
The Crespo squash has turned out to be another one of our surprises. They are another of our “fun” choices; a Peruvian variety of pumpkin that gets large, green and warty.
I couldn’t resist.
They seemed to thrive in our climate (there was no zone information with the seeds), and were doing so well until they got repeatedly eaten! I thought for sure they were done for, and was already looking ahead to how we could protect them as we tried them again next year. I hadn’t planted many seeds, so we do still have some left over.
But now we have our mild October, and have had no frost at all, and the Crespo squash is recovering to an amazing extent!
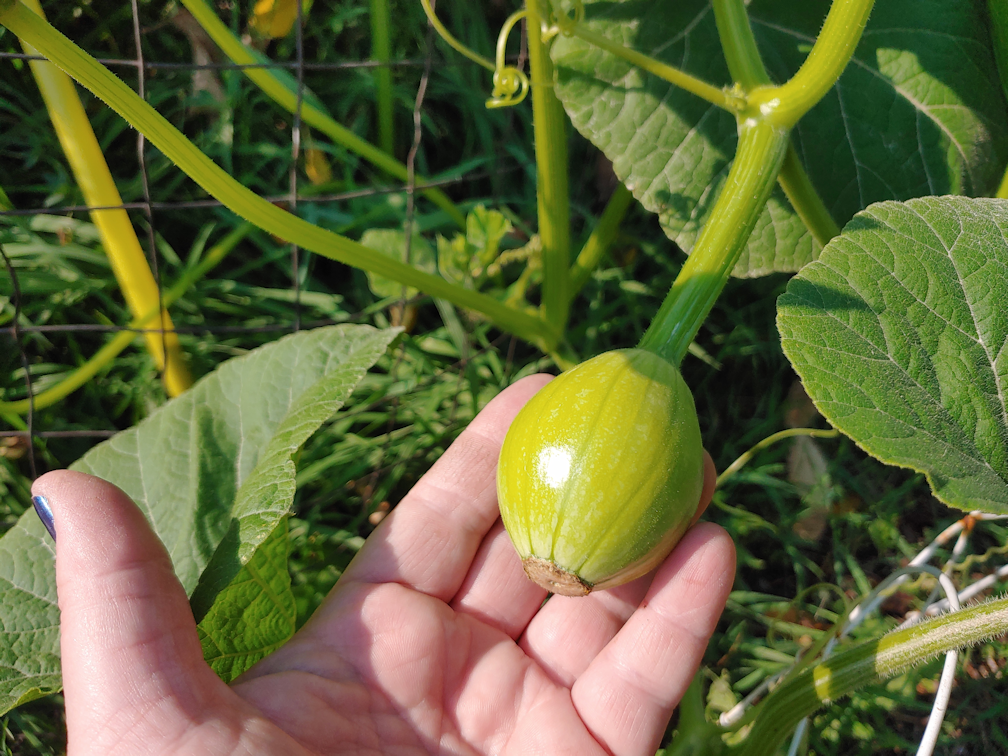
Some of the colder overnight temperatures have done a bit of damage to the leaves, but look at those flowers – both male and female!
I actually had to rescue the one in the foreground; the flower was half way through the mesh. :-D
There are little squashes like this, being held high on their vines, all over the place.
Hopefully, we have enough active pollinators, because with the barriers to keep the deer out, there is no way to be able to get in and try hand pollinating them.
Some newer squash are looking bigger, and appear to have been successfully pollinated.
The very first squash that we found, way in the middle of the two plants, did end up withering away and dropping off, but these two that developed next are getting bigger and look like they are going to make it.
At least until we do get our first frost.
These are supposed to get quite large, but I don’t know how fast the fruit will grow, once they get doing. Well they have enough time to fully mature?
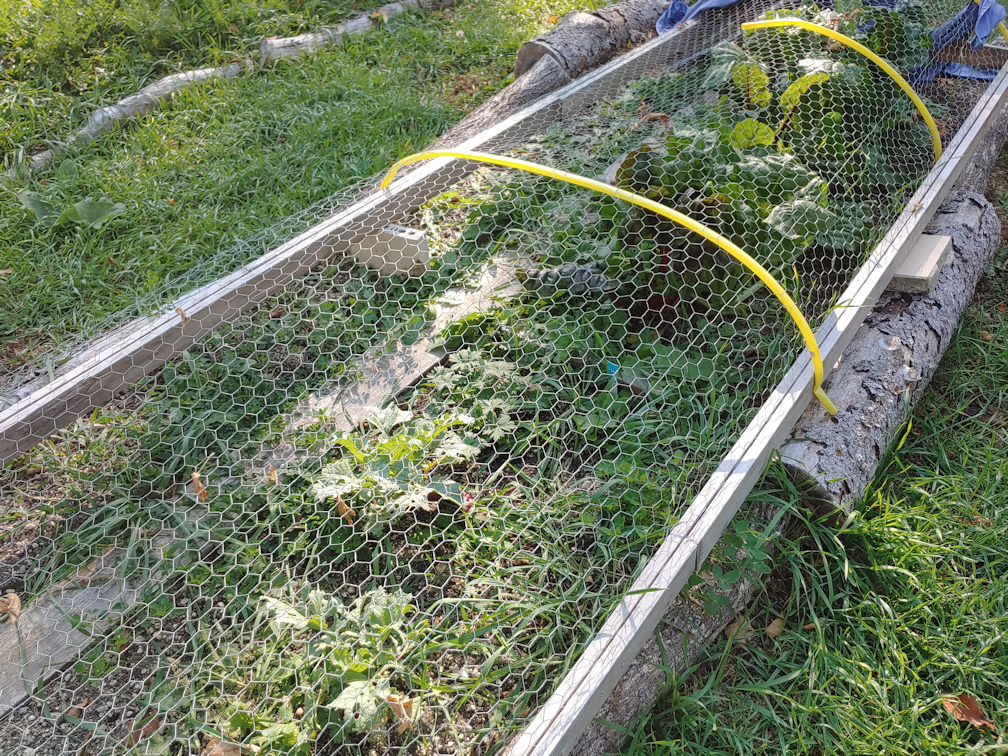
In the main garden area, which will be a permanent garden, we’ve still got the two beds covered with mesh to protect them from the deer. Unfortunately, that leaves them pretty neglected, due to the difficulty in moving such long frames.
Of the radishes we planted, there are two French Breakfast radishes that survived the grasshoppers, and they are actually now looking stronger and healthier than ever! They were so eaten up, I did not expect them to.
And just look at the big mutant radish bulb. :-D
Will they get to the pod stage they were planted for? I have no idea. Normally, I’d say it’s way too late for that, but then I look at the long range forecast and think… maybe they will?
The surviving chard, on the other hand, are just thriving! The problem is, we’re not really using them much. It’s not that we dislike them or anything. It’s just a pain to get at them.
The lettuce is also doing really well – as is that one tomato plant that showed up on its own!!
If I were not sure that deer are still passing through the garden areas, I would take the covers off completely. Then they could be tended and harvested more easily. Which won’t be much use if I come out one morning and find it all gone. Mind you, from what I’ve seen on how big radish plants get when they start to develop pods, we’re going to have to take the cover off at least that bed. And what will we do about this very strong, very healthy tomato plant that started itself so late in the season? I don’t even know what kind of tomato it is. Can tomatoes be transplanted into pots and grown indoors over the winter? I have no idea.
At least the groundhogs are no longer a problem. For them to go into hibernation so early, I would be thinking we’re in for an early and bitterly cold winter, and yet it’s supposed to continue to be warm throughout October, for as far ahead as the long range forecasts go. Plus, The Old Farmer’s Almanac is predicting a milder, wet winter for our region.
Once protected from critters and insects, we can at least say that the chard, lettuce and radishes were – eventually – a success. When we have our permanent, high raised beds, which will be only nine feet long, we will be making sure the covers we make for them will be easy to move aside as needed!