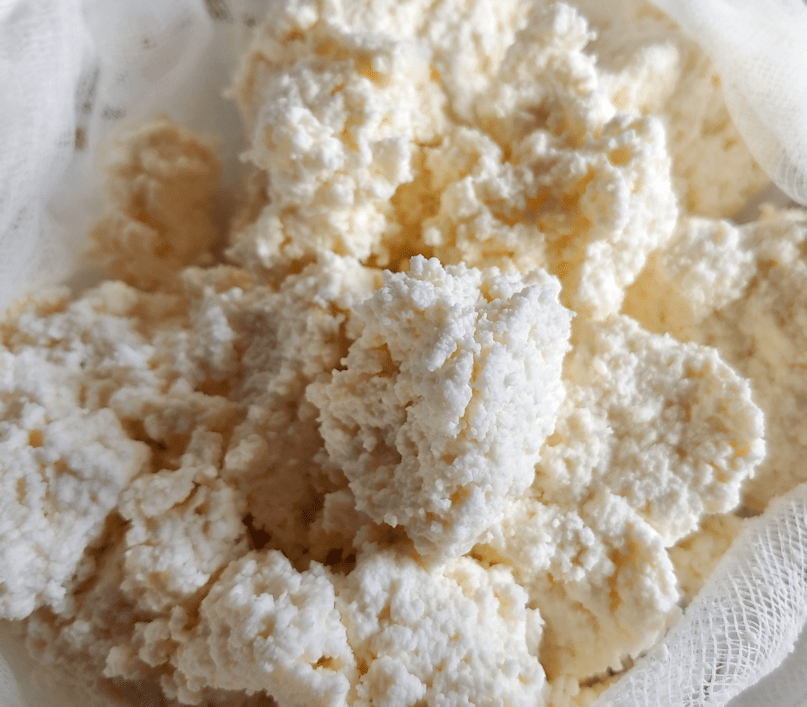
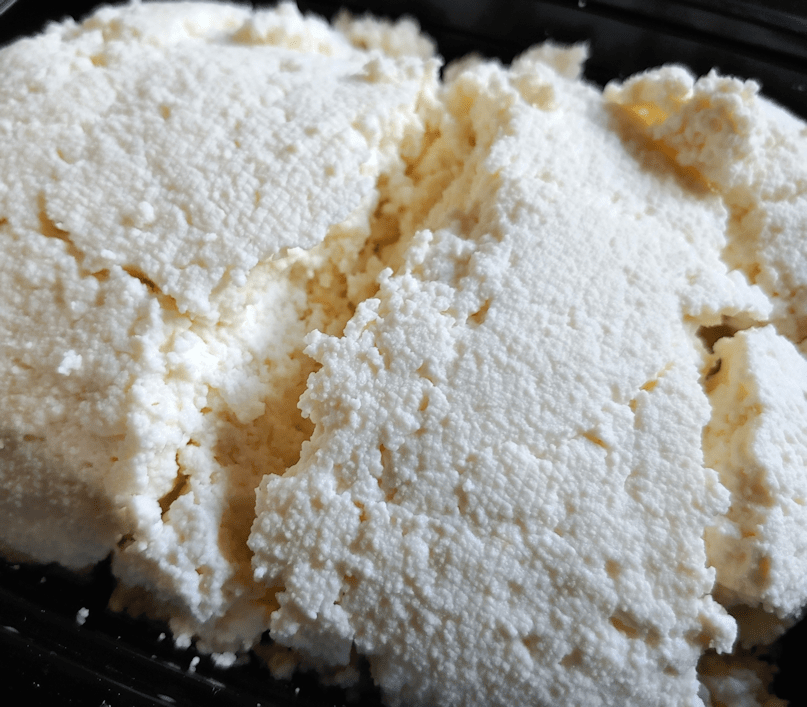
This photo was taken right after the bag was taken down from the hanging rig.
Of course, I gave it a taste.
It has very mild in flavour, as to be expected with a cheese like this. Lightly salty – I probably could have added maybe an extra half teaspoon, instead of the quarter teaspoon or so I added, to adjust for using 4L instead of 1 gallon. It has a light, almost creamy texture to it.
Because it’s so loose, I squeezed it together in the cheesecloth a bit, then put it back into the colander over the bowl, put a plate over it and weighed it down with my stone mortar. Just for a couple of minutes, to make it easier to transfer into a container.
Since it’s such a fresh cheese, it will need to be finished quickly.
I don’t think we’ll have a problem with that! :-D
Then, because I had a big bowl of still-warm whey handy, I made up a double batch of bread, using whey for the liquid. This works out really well. Yeast seems to really like whey. The dough has a softer feel to it while kneading, and the finished bread is lighter, with a delicate crumb and a lovely flavour.
We’ll be storing the rest of the whey in the fridge to use in other baking. It would be awesome in a sourdough bread!
I’m quite pleased with the end result of this cheese. Definitely something I will be making again, and maybe playing around with adding things, like fresh herbs, to it at the salting stage.
I’ve been planning to do this for a while, and finally had the chance today: making lemon cheese. I’m using a recipe I found here. Do check this site out. Especially if you’re interested in different ways of preserving food, though there is lots more there, too.
After sanitizing my equipment, I started heating the gallon of milk.
Well… not quite.
This is Canada, and our “gallon” of milk is actually 4L, as you can see on the very handy measurement inside the stock pot I am using. A litre is just a bit more than a quart. At 4L, the difference is enough to warrant adjusting the quantities of the other ingredients.
Which are lemon juice and salt (I used Kosher salt).
For a gallon, the recipe called for 8 Tbsp of lemon juice and 1 Tsp of salt and I adjusted those quantities up slightly when I measured them out.
After heating the milk to between 185F – 190F (I got to break in my new candy thermometer. :-D ), the milk is taken off the heat and the lemon juice is added. (I used 3% homogenized milk.)
It curdles immediately.
It then gets covered and left to sit for 15 minutes.
Which is when I dashed downstairs to do a quick build. The cheese would need to be hung to drain later, and we don’t have a good set up for that. We’ve made do with whatever we could come up with when making jelly or yogurt cheese, but we plan to be doing more of this sort of thing in the future, so having a rig to hang things to drain would be very useful.
Since we have also finished the basement and have some pieces of wood handy, I can actually do something about it!
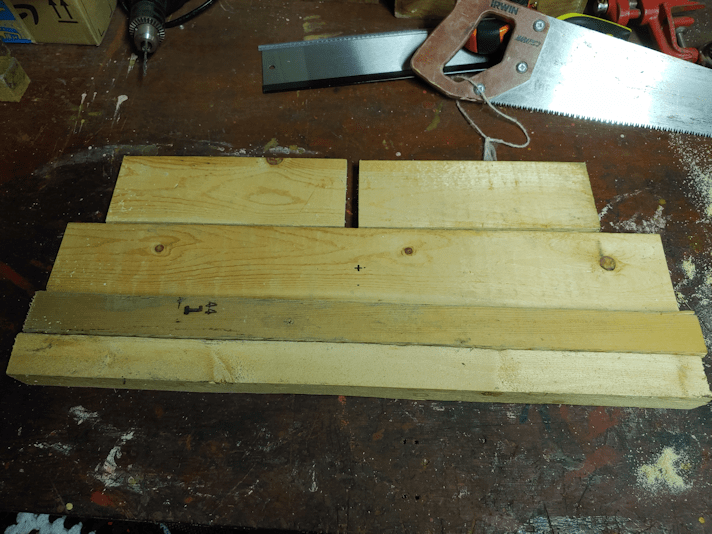
When my timer went off, I’d reached this point.
There was just enough of the wood we used to build a frame to block the entry into the old basement, to cut 2 ft long side pieces. One of them is missing a chunk at one end, but it’ll do. I then cut a matching 2 ft long cross piece for the top, and a pair of base pieces.
Then my timer went off and I headed upstairs. Thankfully, my daughter was handy, and she took over with putting the curds into a cheesecloth lined colander over a bowl, to drain for 10 minutes. That was just enough time for me to finish my rig.
I used what screws I had that were long enough, which were really way too long for the job, but whatever. I also added a cup hook to the centre of the cross piece to hang things from.
It is a pretty ugly rig right now. Normally, I would have sanded the pieces and used more appropriate screws. It’s kinda wobbly, but steady enough for the job.
By the time I took it upstairs to give it a good cleaning, it was time to add salt to the cheese curds.
Here they are, after salting.
This is basically cottage cheese, really. My daughter had given it a quick taste after salting it and says it tastes quite different from cottage cheese, but we’re not washing the curds or anything like that, either.
The recipe then says to hang it for 30 minutes for a spreadable cheese, or up to 2 hours for a dry and crumbly cheese.
We were using a fresh cheese cloth, without cutting it down to size, so I ended up tying the cheesecloth around the cross bar instead of using the hook.
We checked it after half an hour and decided to let it hand for the 2 hours. We’ll see how it looks, then!
When we’re done with all this, I will probably take the rig apart and finish it properly. Give the pieces a good sanding, then screw it back together, with some wood glue to make it more stable.
I am so loving having that space in the basement to be able to do projects like this!!!
Today, while the girls continued to work on the basement (I have yet to go down to see their progress!), I worked on baking our Easter bread.
Then, since I was baking anyway, I made some sourdough soda bread, and another double batch of what has become my usual standby, a basic bread recipe modified by the addition of rolls oats and various seeds. This recipe, plus chia seeds and minus the rye flour. Lately, I’ve also included hemp hearts as well, which adds a really nice flavour and texture. Thanks to my dear friend, I even had yeast to use for the non-sourdough recipes. :-)
In this photo, the braided loaf is for our Easter basket, and I made 4 mini loaves with the other half of the recipe. In the back, left, are the loaves of sourdough soda bread. Which did NOT want to rise today. The house was a bit too chilly today, even though it has been warming up again, outside.
In between batches and rising times, I also made a soup using one of my meals in a jar mixes with sausage. The mix had brown lentils, red lentils, orzo pasta, turmeric cous cous, dehydrated vegetables, dehydrated onions, mushroom ketchup powder, 1 cube of vegetable bouillon and 1 cube of chicken bouillon.
The seedy bread was shaped into mini-loaves that made excellent bread bowls.
This was soooo good to break my Good Friday fast (for health reasons, I do not do a total fast).
While doing my rounds this morning, I checked the ground near the power pole in the old garden, where there is horseradish planted. It was rock hard, but I hoped that things would have warmed enough to dig some up by this evening.
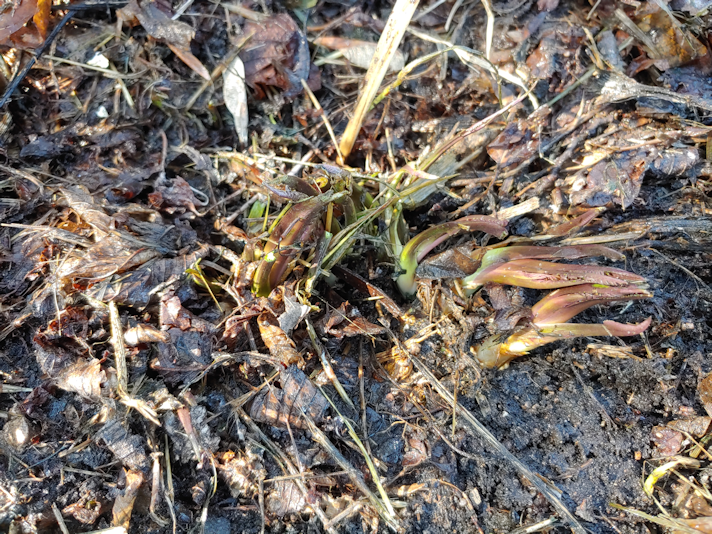
After scraping aside last year’s leaves, I found the horseradish has already been trying to grow.
The ground was certainly starting to thaw out by this time, but the soil here is so full of rocks, it didn’t make that much of a difference. I can’t understand why my mother planted these here. For a plant that is grown for its roots, rocky ground would have been something to avoid. The area has always been much rockier than the rest of the garden; so much so, my parents eventually stopped using it completely. The base of the power pole, however, has rocks and gravel packed around it, so it’s even worse than anywhere else.
I did manage to break off a couple of pieces, then decided to see what I could find in the other spot my mother had planted horseradish; at the base of a spruce tree near our feeding station. I had hoped that, between the wood chip mulch and possibly a bit more sunlight, the ground would be thawed out more.
The horseradish here isn’t as big or prolific, but I could see where it was starting to grow.
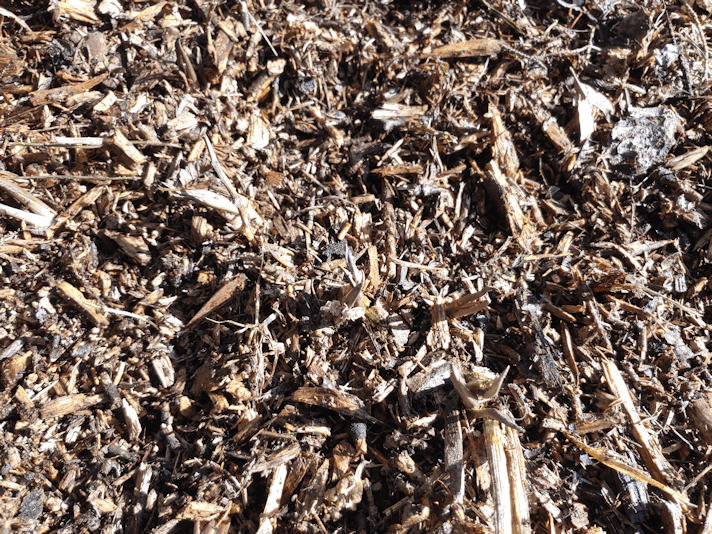
I did scrape away the wood chips, but it’s still pretty hard to see.
There isn’t as much growing here, and they’re much smaller, but the ground was indeed a bit softer, so I got a couple of decent chunks out. The ground isn’t rocky here, but of course, there’s plenty of tree roots. Again, I don’t understand why my mother chose this location.
After much washing, then scrubbing with an old tooth brush to get into the crevices, I now have several chunks to use.
That big piece with three sprouts? I could potentially plant each of those, and have three fresh plants.
I think the two little ones will be enough for my mother. If all goes to plan, I hope to swing by her place tomorrow with a care package for her. I’ll leave these as is, so she can prepare them as she wishes – or plant them in her own little garden plot outside her window. :-)
We only need a bit for our own basket. I have been thinking of planting horseradish in softer ground; perhaps in a raised bed or planter. Something that will allow a straighter root to develop. If I can think of a good spot for that, I might do that with the big piece. My mother always kept a piece of horseradish, with the green parts still attached, in the basket to be blessed with the rest of the food, specifically to share with friends to transplant, or to transplant herself. I’ve tried it myself a few times, but the only one that succeeded (and didn’t get dug up by squirrels) was the one I’d included with our Easter basket the last time we were able to visit with my father, 5 years ago. I took it back with us to plant when we got home, and it actually survived. It got left behind when we moved, of course.
Normally, we would finished putting all our basket contents together tonight, in preparation for taking it to church for the blessing tomorrow morning, but since there is no church blessing, we’ll finish arranging the basket tomorrow and do our own blessing whenever we’re ready. I still want to do onion skin dyed and tea dyed eggs, which will be the last things that require any cooking.
For now, I think I’ll head down into the basement and see how things are looking after all my daughters’ hard work! :-)
First, you may have noticed a change in the menu at the top. I now have a separate tab for sourdough. If you’re looking for information on making a sourdough starter, or trying some of the recipes we’ve been using, that’s where you’ll find quick links to all the relevant posts.
There’s a reason I’ve done this. :-D
We have long been the sort of family to keep a pantry stocked of basics and do a lot of “from scratch” cooking. Part of it was because that’s what we wanted to do, but there was many a time when finances left us with little choice.
Since we’ve been living on my husband’s long term disability income, which comes in once a month, we’ve also been in the practice of stocking up once a month, long before we found ourselves living out in the boonies.
Which means that many of the things people are being called to do, with the Wuhan virus lockdowns, are things we were already doing. Now, however, there are more people doing it, which means we’re suddenly having a harder time finding things that have never been an issue before.
Like yeast.
Now, to be honest, I did have troubles finding the type of yeast I wanted. It was far easier to find super quick acting or bread machine yeast, than the slower acting yeasts I preferred. But that’s just me being picky. :-D Right now, there just isn’t any type of yeast to be found, even as supplies of flour and sugar have been restocked in many places; at least in the cities.
I have given up Facebook for Lent, which is probably an extra blessing this year, as I’m missing out on all the social media crazy that I’m sure is going around right now. I still use their messenger, as I can use it on my phone without logging into Facebook, so I sometimes get people sending me information that way, but beyond that, I’m pretty much out of the social media loop.
With so many people suddenly stuck at home and having to learn how to cook and bake, plenty have turned to social media to discuss and share. Since I’ve mentioned to a few friends and family members about my inability to find yeast, I had someone message me with something they found.
It was instructions on how to “make your own yeast.”
Now, right off the bat, I knew things were off. That’s not how yeast works. You don’t “make” yeast. Yeast is a living thing, and wild yeast floats in the air around us all the time. Now, it could have meant instructions on how to make something like commercial yeast, but that’s not what was in the photo.
What it really was, was instructions on how to make a sourdough starter.
Which was great. As a recipe, it could have made a very nice sourdough.
The reason I say “could” instead of “would” is because how it turns out depends on the wild yeast that finds a home in the mixture and starts colonizing it. It’s entirely possible for a nasty strain to take hold, and instead of getting a nice, bubbly mixture that smells wonderful, you get something that’s black or red or otherwise nasty, and it needs to be thrown out. That’s why even some sourdough starter recipes include adding a bit of commercial yeast. This is to ensure that a strain of yeast that is known to be safe is established.
There are lots of reasons people so readily adopted commercial yeast.
Even if it was colonized by a lovely strain of yeast, sourdough starter is not something you can substitute 2:1 with commercial yeast. It doesn’t work that way. Starter is a living thing that needs to be tended and fed and stored properly if it’s not going to be used very often. It also behaves differently than commercial yeast, typically taking much longer to rise (unless your recipe calls for something like baking soda which triggers a chemical reaction… do feel free to visit the sourdough tab to learn more). That slow rise is one of the attractions of sourdough baking, as it allows all sorts of lovely flavours to develop.
Oh, and the Pinterest worthy photo of a mason jar full to the top with lovely, bubbly sourdough starter?
Don’t do it. It may not be as aesthetically pleasing, but this is what it should look like.
A starter needs lots of room to bubble and expand. Put it in a little mason jar, and you’re going to have a mess to clean up before long! Also, if you’re going to be doing any serious level of baking with sourdough, you’re going to need more than a tiny jar will give you. We keep ours in a giant plastic bowl (no metal!). Some of our recipes call for 4 cups of starter, so we keep a fairly large amount of starter bubbling away.
Having yeast is really handy. That’s why, even though we have a sourdough starter we’ve managed to keep alive for a year and a half now, I still like to have commercial yeast.
I recently spoke to my mother about not being able to find yeast. She told me how, in her younger years, no one used yeast. She’s shared memories of her childhood before, so I already knew that part. When bread baking, her mother would set aside a piece of the dough for the next baking day. I knew that part, too, as it was a common technique at the time, and my dad has also shared memories of his family doing the same. Her mother would bury the set aside piece of dough into the flour.
Wait… I didn’t know that part!
In fact, this was a method I’d never heard of before. My grandmother would bury the piece of dough in the flour. A dry crust would form on the outside, and it would need to be soaked before it could be used in the next batch of bread.
I think I might have to try that!
So what’s my point about all this?
Well, for those who are new to baking and wondering what to do about not having commercial yeast, you’ll be fine. You can make a sourdough starter. Just know that this is something that takes time to get established. Or you can make flatbread, with no leavening at all. There are options. The trick will be to sift through the misinformation that’s out there. It’s not as hard as some make it out to be, but it’s not as “easy” as others make it out to be, either.
I supposed it comes down to, if it sounds too good to be true, it probably isn’t!
We did make one change in the recipe. We didn’t have any extra virgin olive oil. We did, however, have avocado oil, so we used that, instead.
It worked very well!
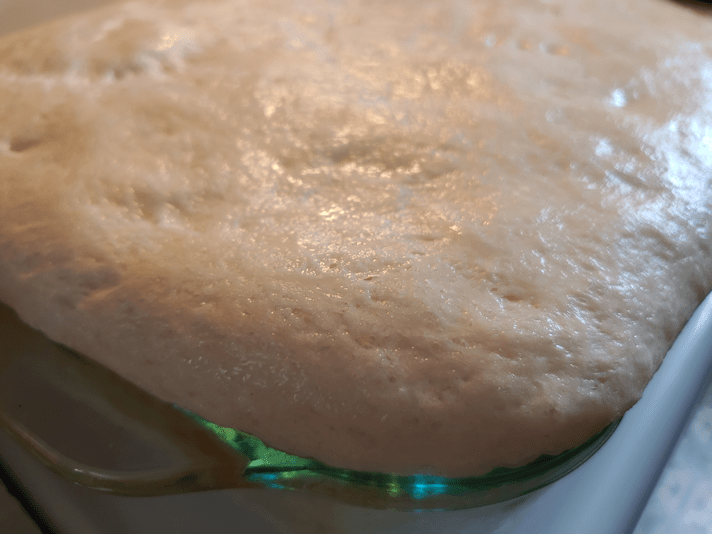
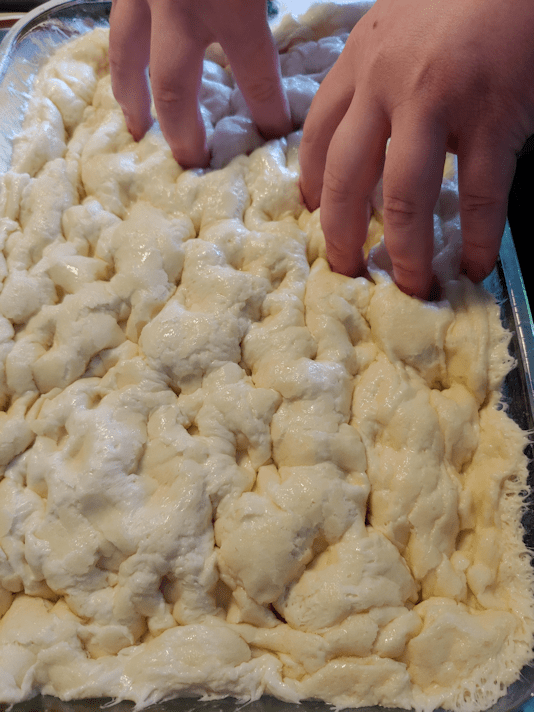
We also didn’t have the type of pan they recommended. We have 9×13 pans. Just not with high sides. So we used a slightly smaller glass pan. The dough has a second rising in the pan, and was very close to overflowing before it was vigorously poked at to deflate it.
For a recipe with no oil in the dough, it uses quite a lot of oil! And butter. The baking pan is buttered, first, then oil added, then the dough put in.
Just before putting it in the oven, more oil is drizzled over the top, and sprinkled with Kosher salt. After it’s baked, butter is melted with garlic, which is drizzled on top.
The end result is both beautiful and delicious. That salty, buttery, garlicky topping is sublime! The texture is moist and chewy, and there were some pretty large bubbles in there! Even the bottom crust has a very nice texture, thanks to the butter and oil combination.
I rather like avocado oil better than olive oil in a lot of things, but it’s frightfully expensive stuff. Costco has it at much better prices, at least.
This recipe is definitely worth trying out! It has rising instructions for both an overnight dough and a same day bread.
Now excuse me, while I go back to enjoying this Focaccia!!
I went into town today, driving my daughter to work. We got there at our usual 10-15 minutes early, but there were already several cars in the parking lot, and people standing by the doors. I’ve seen this before, but not with so many people. Weird.
Since I was in town anyhow, I made a quick run through the grocery store. My husband was running out of brown rice (he’s the only one who eats it) and the girls were running low on lactose free milk. There was plenty of milk, but almost no rice of any kind at all. Oddly, there were no potatoes, squash or onions. Entire sections of fresh produce were empty. I find myself thinking there are other reasons for the stuff to be gone, besides more panic buying. There was no shortage of bread or meat on the shelves, but they haven’t restocked in things like flour, sugar or yeast yet.
Still no toilet paper, either.
Thankfully, we are not in any need of these items.
Once at home, I did a couple of different breads. One was a sourdough soda bread from Alaska Sourdough, the cookbook that got me into sourdough many years ago, though I acquired my own copy much more recently.
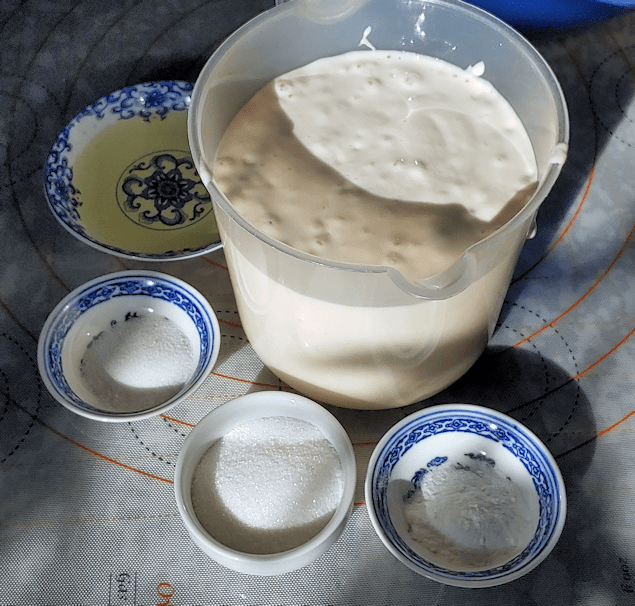
This recipe uses 4 cups of sourdough starter, along with oil, sugar, salt and baking soda. I tried to get a video of the chemical reaction when the baking soda (mixed into a “jigger glass” of warm water) is added, but it just couldn’t capture how the mixture just… foams. It’s really quite fun to watch!
The recipes in this cookbook are hand written, and in this one, the instructions forget to mention when to add the salt! I just add it with everything else, before the soda and flour are added.
The recipe also said to use 8 – 10 cups of flour.
Eight to 10??? What’s with all these recipes that use huge amounts of flour? I barely got 3 in. I’d wonder if my sourdough starter is too thick or something, but it’s the same with non-sourdough bread recipes, too. I know we’re really dry here, this time of year, but it shouldn’t make that much of a difference!
This recipe requires just one rising, so it got shaped into loaves right away and I left them in a warm oven to rise while I made another double batch of my seedy bread. I ended up making it into a bunch of mini-loaves this time, just for fun. By the time that bread had its two risings, and finished baking, the sourdough bread was ready to go into the oven.
They came out so pretty!
While I was working on that, my other daughter came down for a break and let me know her sister is now working in a tent.
A tent?
The cash desk now has a plastic curtain around it, to protect the cashiers from plague customers who won’t keep their distance. It hangs from the ceiling, and is Tuck Taped to the counter, with windows cut into it to reach products for scanning. The pharmacy counter has its own plastic wall, with a slit for the pharmacists to go in and out at one end, and a slit at the pick up counter. Customers, apparently, are still trying to stick their faces right up to the openings.
People suck, sometimes.
After I picked my daughter up at work, she needed to go to the grocery store, so we swung by on the way home. Some of the empty produce displays were no longer empty – there were onions again, though not many. Still no potatoes or squash. So very odd!
As we were going through the till, I couldn’t help but comment to the cashier about how nice it must be, to be able to clean the belt more often. She confirmed that, yes, it is! She was quite enjoying the cleanliness. Customers still try to shove things onto the belt, but at least now the cashiers are allowed to tell them to stop, so the belt can be cleaned. I remember only too well how difficult it was to keep things clean in between costumers, when I worked as a grocery store cashier!
They’re also back to single use plastic bags. This franchise had only recently made such a big deal about no longer having plastic bags and encouraging people to bring, or buy, reusable bags. Now, if people bring their own bags, they have to pack them themselves. It’s long been known that reusable bags are very unsanitary, but it took the Wuhan flu for that to finally be taken seriously. :-(
Well, we’ll be able to go back to staying home for the next few days. No plague people hiding among the deer that visit us. There is plenty to keep us busy! The only thing I’ll need to remember to go out for is to get the mail, since I’m expecting my seed order to come in soon. I look forward to starting some of them indoors.
Oh, I also broke down and ordered a bottle cutter. This is not something we can find locally. I chose a type that can cut square bottles, as well as round. I look forward to using it to help make bottle bricks! Since I already know we plan to make the walls on our cordwood practice building 8 inches think, we can get a head start on making these.
Also, my daughter found a really nice recipe for no-knead Focaccia that I think we’ll be trying out tomorrow.
Today my daughters did the baking, starting with a sourdough “batter” bread.
There’s a reason the word batter is in quotations…
The girls have been finding recipes they like and, after trying them out, adding them to a notebook with any modifications or adjustments they’ve come up with.
Sometimes, I think we really need to do bread baking more often.
Then I remember how much clean up is involved. :-D
No matter! We now have two kinds of freshly baked bread done.
Here’s how the seedy bread turned out.
This is how it looked after only 1 hour of rising time. The bowl it’s in is pretty huge – too big to fit in our kitchen sink (which makes washing it a bit of a challenge! :-D ) – with plenty of room for this 4 loaf recipe.
The timing of things works out really well. I use half the dough to make buns first, leaving them to rise while I shape a couple of loaves. Once those are done, I star to preheat the oven. By the time it’s heated up, the buns have risen enough to go straight in. Once they’re out, the loaves have had enough time for their second rising. When those are done, the overnight sourdough loaves are ready to go into the oven. No wasted time in between, making for more efficient use of a hot oven.
They came out quite beautifully, too! Such a tasty bread, with a really nice texture. I love the bit of crunch the seeds add to it.
The second rising for the sourdough loaves was probably about 4 – 4 1/2 hours. The first rising was probably about 11 or 12 hours.
This is how they looked, just before I put them in the oven. They definitely rose more than the first time I tried this recipe, so the modifications made quite a difference, but still not rising as high as variations that use added yeast.
Is it worth it?
I think so.
The actual working time to make this bread is low. It’s mixed at night, then kneaded for 10 minutes the next day. It really doesn’t need a lot of attention.
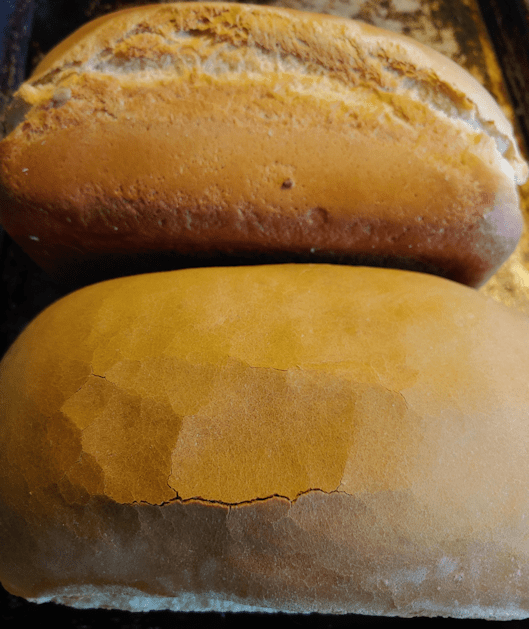
The loaves came out so smooth and gorgeous. None of the cracking you can get when using an added yeast bread, since there’s no sudden rise in height in the oven.
The bread itself has a slightly thicker, sturdier crust, while the crumb is incredibly soft, tender and fine in texture.
Reducing the amount of sugar was definitely a good move. The sourdough flavour was more dominant this time, whereas the last time I tried this recipe, the sweetness was more dominant. I think adding that little bit of baking soda helped with the rising, too.
I’d still prefer a more “sour” sourdough flavour, but that has more to do with our starter than with the recipe. We’ll be making more of this one, that’s for sure. I think I’m satisfied with it enough that, next time I bake it, I’ll post with the tweaked recipe.
Tomorrow is going to be another baking day, though this time for my daughters. I look forward to seeing what they’re planning to make. :-)
Yesterday was actually intended to be my bread baking day, but we just didn’t have the energy for it. It was a pretty bad fatigue and pain day for all of us. :-(
I did start a batch of overnight sourdough before bed, though. The last time we tried this recipe, it didn’t really rise at all by morning, so I tweaked the ingredients this time. I reduced the sugar to something adequate to feed the sourdough yeast, and not make the bread itself a sweeter bread. I also added just a touch of baking soda along with the flour. Last time, I left the dough to rise in a bowl on our dining room table, but the house it just too cold, so this time it went into a warm oven with the light left on to keep it warmer throughout the night.
I checked the dough before I headed out to do my rounds, and was quite pleased by what I saw.
It rose quite nicely! I’m very pleased.
After finishing my rounds, I kneaded the dough for 10 minutes, then set it up in loaf pans for a second rising.
With no yeast other than the sourdough in the recipe, it will still take a long time to rise. So I waited an hour before starting some non-sourdough bread.
My favourite additives to my basic bread recipe is thick cut oats, chia seeds, ground flax, sunflower seeds and pumpkin seeds. The sunflower and pumpkin seeds are roasted and salted, and this time I took more time to grind them in a mortar and pestle to break them up. The whole seeds and bigger pieces tend to fall out while the dough it being kneaded. I let it all soften in boiling water first, which makes a much nicer texture in the bread. I doubled the basic 2 loaf recipe again, too.
By the time I got this batch set aside to rise, it was about an hour and a half since setting the sourdough loaves to rise. A quick check showed very little change, so I expect to have the second batch baked before the sourdough is ready to put in the oven! :-D
Oh, and my timer has just gone off. Time to get back to it! :-)