Babcia’s Bread experiment, part 2; the beginning

Photo heavy post ahead. :-)

Okay, here it is! My very first attempt at slowly recreating my grandmother’s bread, with her use of “old dough” yeast that she kept stored in flour in between baking day. (Part 1: the story)

The first goal is to create the bread dough yeast starter, and for that, I need to make a yeast bread.

Here are the ingredients.

Water, yeast, salt and flour.

That’s it!

I used Kosher salt, as I figured that was more like what my grandmother had available to her.

For a 2 loaf recipe, I used 2 cups water, 2 tsp salt, about 2 tsp yeast, and between 5 and 6 cups of flour.

The yeast is my “cheat”. Back in the spring, when everyone started panic buying, yeast was among those things that became hard to find. One of our local grocery stores now not only stocks lots of the usual big name brand or two, but a wide variety of brands and types of yeast. When I spotted a “sourdough” yeast, I grabbed a packet, just to try it.

Since some of the dough from this batch will become the “mother” of future batched, I thought it was appropriate to use it.

The ingredients list is interesting. Both wheat and rye is used.

If you’re wondering about the sorbitan monpstearate, this is what I found:

“Sorbitan monostearate (abbreviation SMS), or Span 60, is an emulsifier esterified from sorbitol and stearic acid with the European food additive number E491. This ingredient is mostly used in baking yeast by improving the activity of instant dry yeast when the yeast is rehydrated before use. “

Speaking of rehydrating…

For the 2 cups of water, I boiled it first, because I have doubts about our well water. We really need to get the water tested, but a full test is really expensive, so… boiling it is.

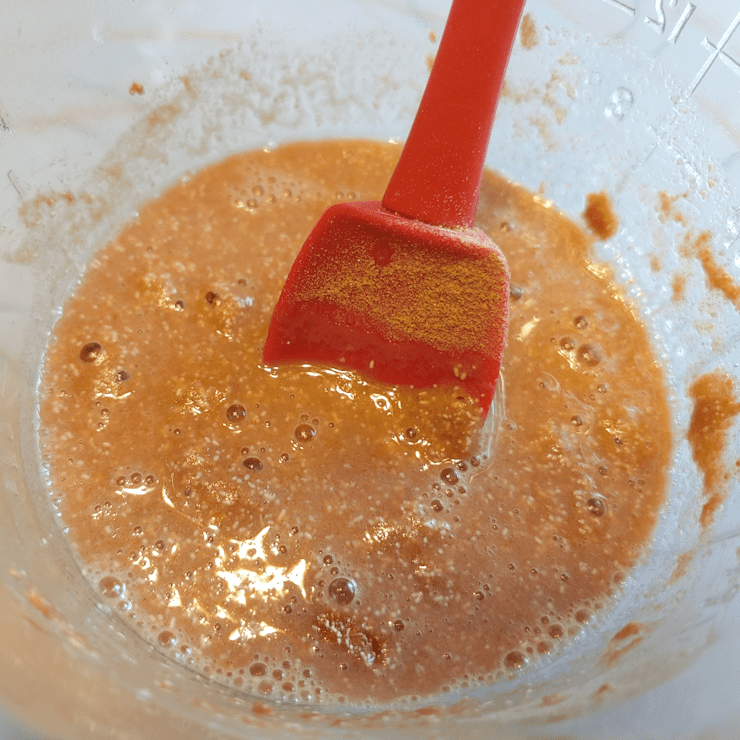
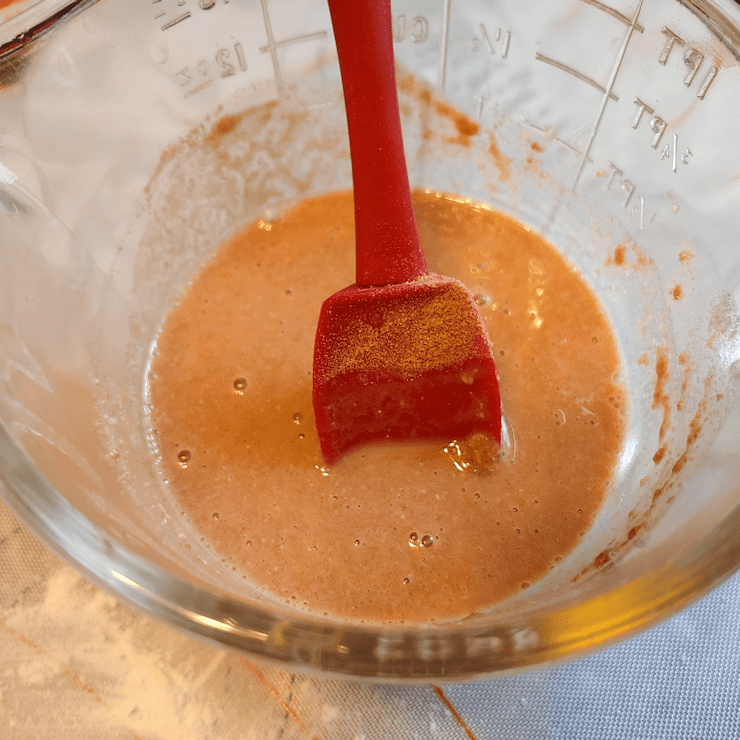
I measured out half a cup of water into another measuring cup to rehydrate the yeast. I could have done it in the full 2 cups, but the half cup cooled down to a safer temperature for the yeast faster.

The inclusion of rye in this really changes the colour!

I let it proof for 5 minutes. I don’t know if I should have proofed it longer – I have recipes that call for anything from 5 to 15 minutes. It’s bubbled up, though, so I decided to go ahead.

While it was proofing, I mixed the salt into about 2-3 cups of flour. Without a wood bread bowl, I decided not to use a plastic one, and tried “dump your liquids into a well in the flour” method.

That looks…

Unpleasant.

The next while was spent with very messy, sticky hands, incorporating the rest of the flour and water in.

Thankfully, my daughter came down to give me a hand, adding the flour and water as I kneaded it in.

Once it was all mixed in, I kneaded the dough for about 15 minutes.

I may have used too much flour. I’ll have to keep that in mind for next time.

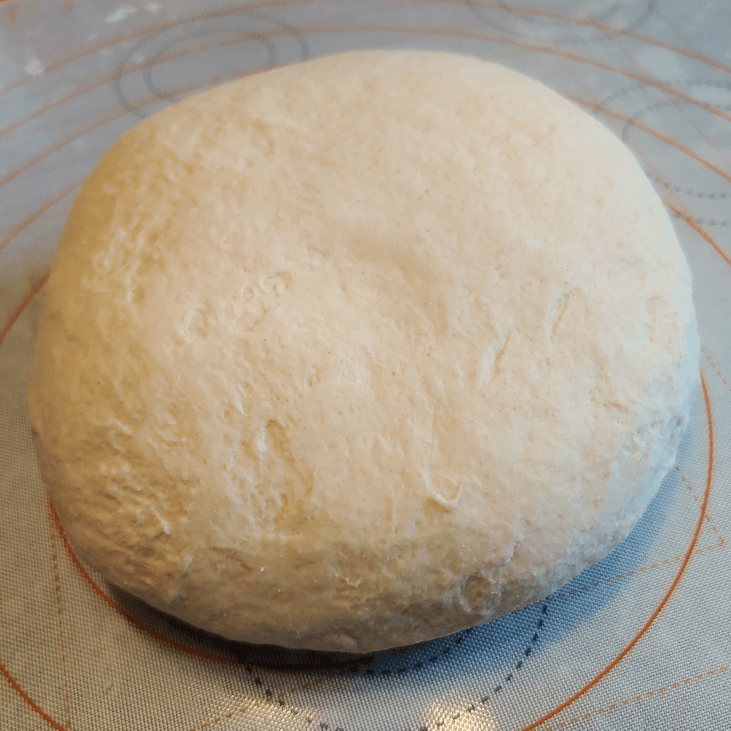
I did notice a difference in texture from my usual bread. Although I kneaded the dough until it felt smooth and satiny, it never looked smooth.

In fact, the longer I kneaded, the rougher it began to appear!

So I went by feel rather than appearances when it came time to set it aside for a first rising.

It went into an oiled plastic bowl, turning to coat all sides with oil. After covering the bowl with a tea towel, it went into a warm oven to rise.

Earlier in the day, I had prepped a baking stone and was curing it with oil in the oven. The oven was off but still warm; prefect for proofing the dough.

Once it was in the oven and rising, I set a timer to check it in an hour while my daughter started a batch of French bread. Checking it at an hour, I decided it needed more time, by my daughter’s bread was rising by the, too. So I took the bowl out and put my daughter’s dough in the warm warm oven, and set my timer for another hour.

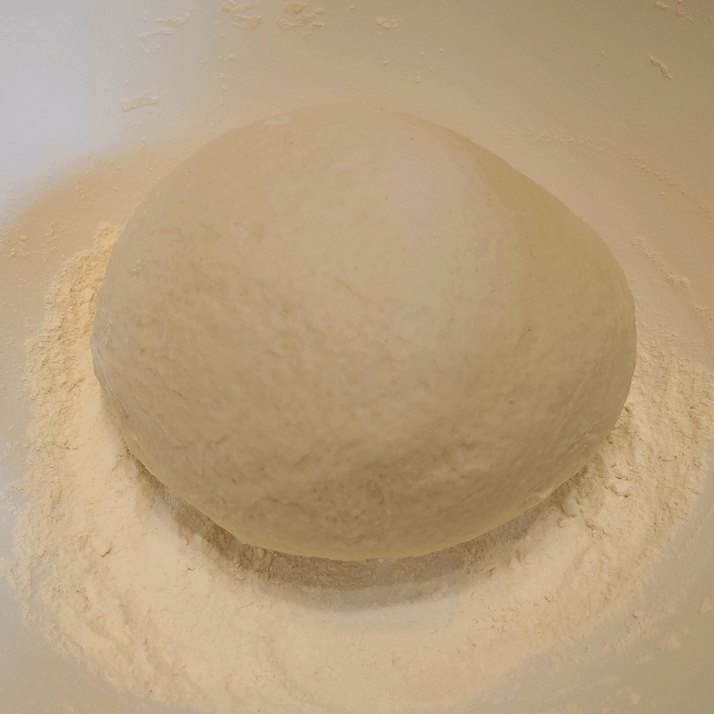
This is the dough, after 2 hours.

After turning the dough out to prepare the loaves, I had to make sure to do that most important part.

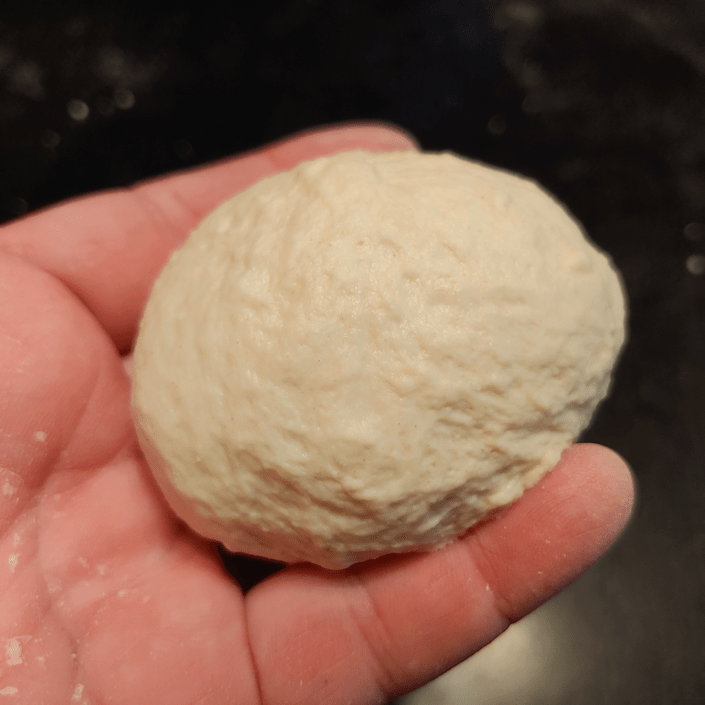
Collect a dough egg! :-D

This humble little lump of dough is what it’s all about.

Into our flour canister it went!

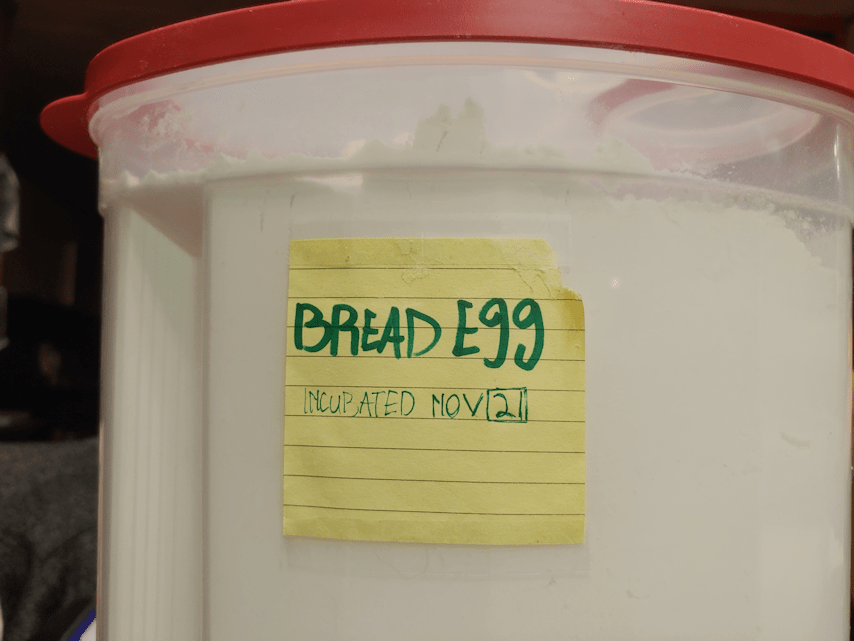
I almost forget to get a picture before burying it!

My other daughter labeled the container for me.

She is a hoot! :-D

The ball of dough will now dry out until the next time we bake this bread.

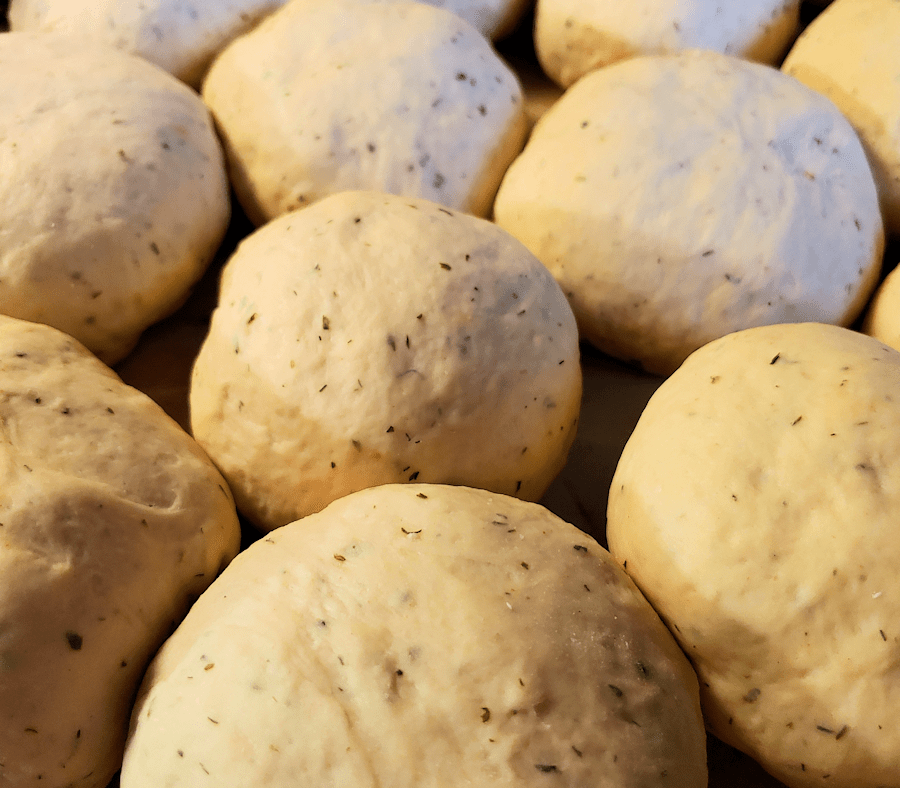
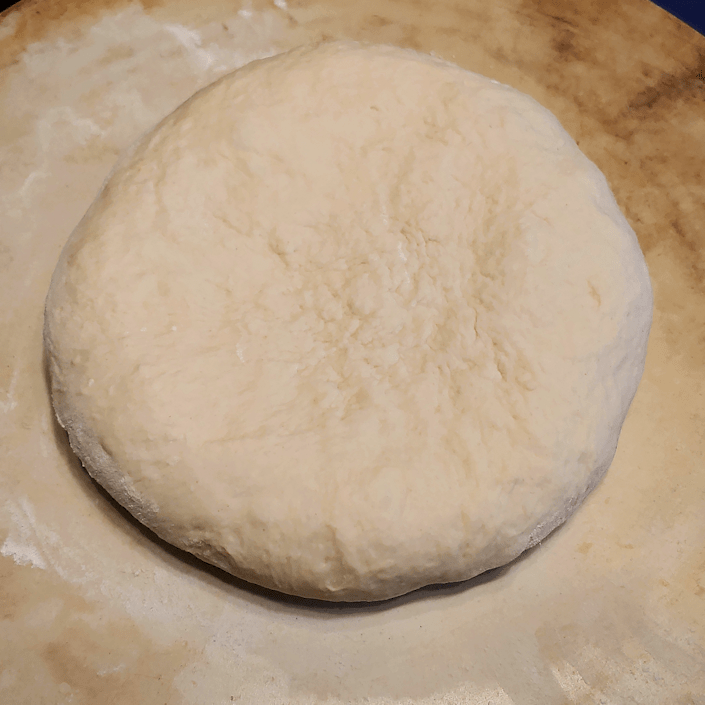
After dividing the dough, I decided to form it into round loaves.

By this time, my daughter’s loaves were in the oven.

Where she forgot to take out my curing baking stone.

So they got to have their second rise on a normal baking pa, instead.

In kneading and shaping the dough, once again, the dough got rougher rather than smoother! You can really tell in the one of the left.

I then left them to rise, checking them after about half an hour.

My daughter’s French bread was done well before my second rising was done!

The ended up needing another hour of rising time.

The baking stone had cooled down quite a bit by then, but was warm enough that I transferred the loaves over, and I think that residual warmth helped them rise even more. The above photo was taken just before they went into a 400F oven.

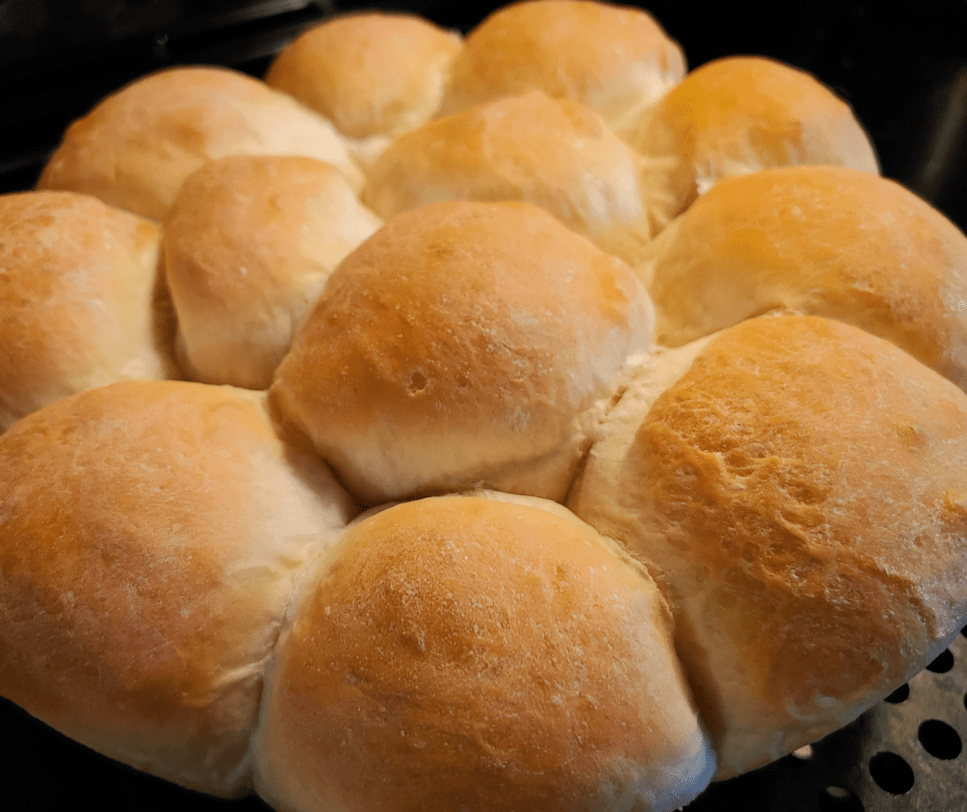
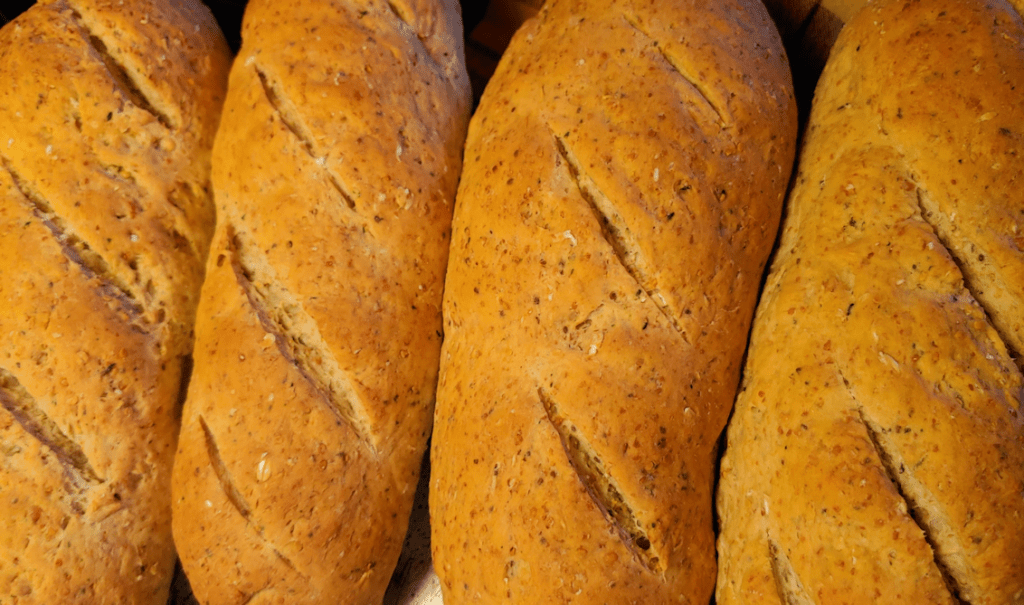
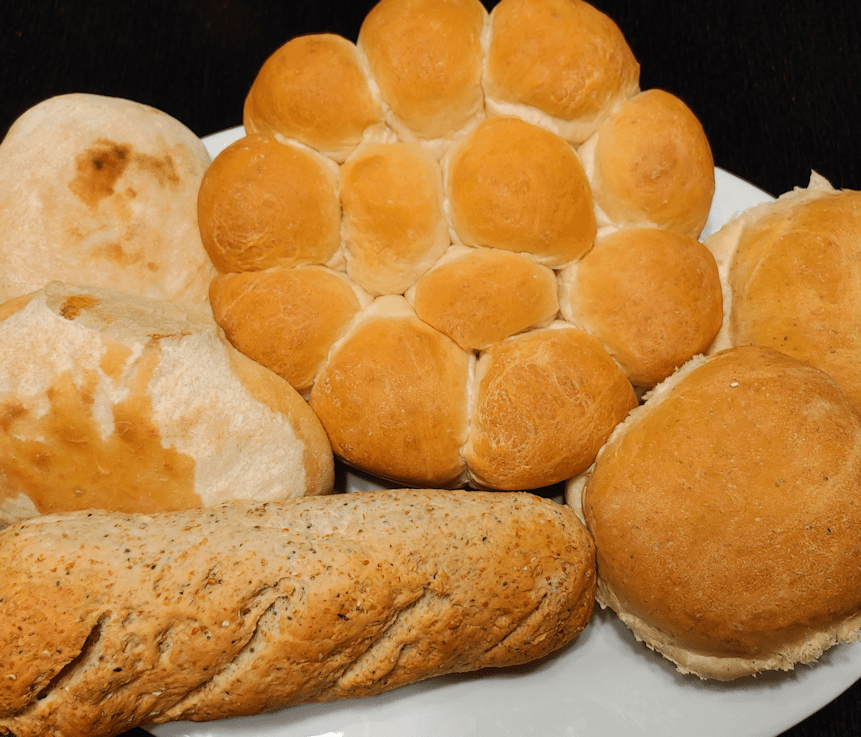
All done!

I am not sure how long they took to back. I set my timer for half and hour, then kept peaking and resetting the time for another 5 minutes, over and over. I think it took about an hour to bake.

I was quite impressed with how much the loaves rose in the process!

The next part was the hardest.

Waiting for the loaves to cool down!

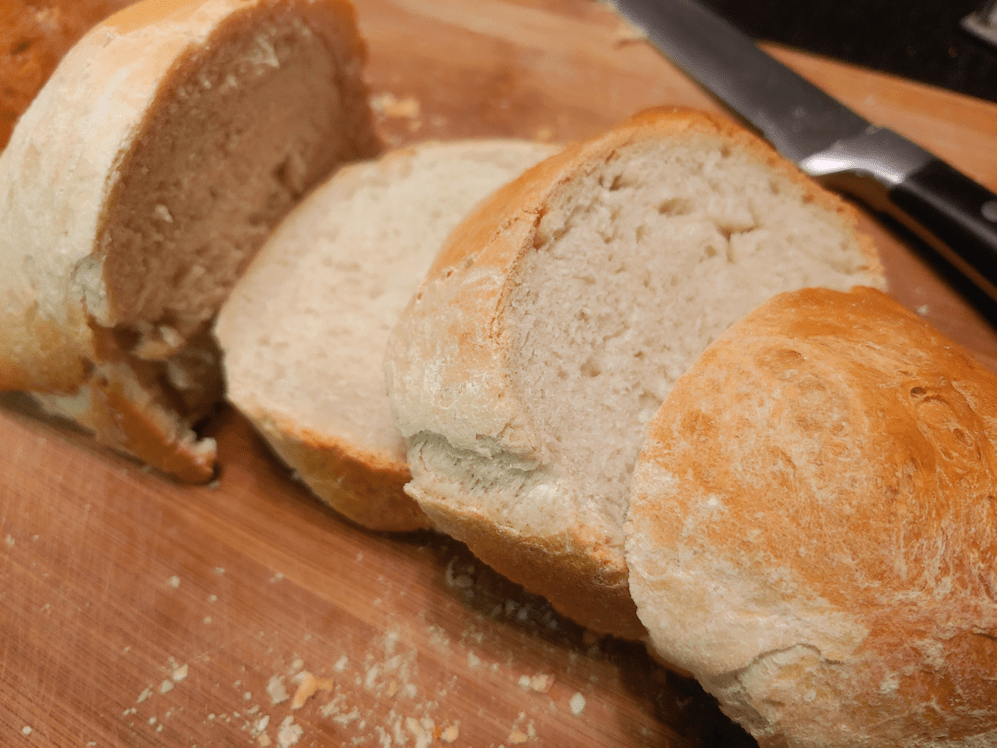
For all that the loaves rose so much in the oven, they still felt surprisingly dense. I was also a bit surprised by how fine a crumb there was.

I taste tested one piece plain, one with ordinary butter, and one with a garlic herb butter.

I’m having a hard time describing the flavour. It was certainly tastey, but I think I was picking up the rye flavour in the “sourdough” yeast. It did have a “sourdough” tang, but one that is quite different from any sourdough we’ve made ourselves.

The sponge was soft, yet toothsome. The crust was crusty enough to be a good chew, but not so crusty as to cut up the mouth (something I have issues with, when it comes to most “crusty” breads).

The plain slice was tasty, but the buttered slices definitely were better. With no fat in the bread itself, the butter really brought out the flavours that were more muted in the unbuttered slice.

All in all, this very plain, very basic bread was a success.

It is, however, just the first step in the process. It’s purpose was to provide us with some dough to reserve for the next batch. Every batch of bread we make using the bread egg now sitting in the flour canister will be another step closer to recreating my Babcia’s bread.

While my grandmother did her bread baking once a week, we will probably make our first batch using the bread egg in 3 or 4 days.

I am really curious to see how it will look when we fish it out of the flour, and how the overnight soak will turn out! For a first time use, I don’t expect the flavour will be much different, but who knows? I’ve never done this before! :-D

The Re-Farmer

Babcia’s Bread Experiment, part 1: the story

I may have mentioned in past posts, about my mother’s memories of bread baking in pre-WWII Poland. I was fascinated by what she could tell me. With no commercial yeast available, I had thought my Babcia (grandmother) had used a sort of sourdough. I know my father remembers this; a portion of the bread dough would be set aside to continue to ferment, and be used in the next batch of bread.

My grandmother did something different. She allowed her old dough to dry.

We lost our own sourdough starter, the Sourceror this past summer. It almost made it to 2 years, but we had a real problem with fruit flies this year. Somehow, they managed to get into the container and contaminated it.

Having a big bubbling bowl on the counter has been a bit of a problem for other reasons, so the more I heard about how my Babcia saved her dough, the more I wanted to try it.

My mother’s memories go back to the late 1930’s, early 1940’s. Then WWII happened and they eventually ended up in Canada, where commercial yeast was available. After questioning her about it, this is what I’ve been able to piece together.

Babcia would bake bread once a week. She would set aside some of the dough, adding in the scrapings from the wooden dough bowl, form it into a ball, then burying the ball in the flour. The night before she would be baking bread again, she would take out the dried ball of dough, break it up into pieces, and soak it in water overnight. In would get all bubbly, and that would be her yeast for her bread baking, with the cycle continuing each time.

My basic bread recipe includes things like oil, sugar, eggs, milk… all things that I just couldn’t see handling sitting in a bag of flour for a week without going off. On questioning my mother, I learned Babcia used none of these things. It simply wasn’t available. Her bread was flour, water, a bit of salt, and the reconstituted old dough. That’s it.

The flour would have been flour they milled themselves (at least they did until the Nazi’s caught them using an illicit hand mill and destroyed it), using grain they grew themselves. My mother says corn flour was also sometimes used, which they also would have grown themselves. The ingredients may have been few, but my mother remembers it as being the best bread; especially when corn flour was added. She remembers it was light and fluffy, too.

My mother was too young at the time to remember a lot of details, though, so I did some research. I know that bread can be as basic as flour and water, but if salt is used, would that be a problem? I know that sugar feeds yeast, while salt retards it. How would having salt in the dough affect the old dough yeast cake? Also, how much dough was set aside? My mother remembers a “ball”, but as young as she was, her sense of how large that was would be distorted.

In my research, I found quite a bit about “old dough” bread baking. This gave me a lot of the information I was looking for. For some types of old dough baking, dough is set aside before the salt was added, while others were taken out after. Both work. As for how much was taken out, I eventually found a general “about the size of an egg” description.

What I didn’t find was anyone who used old dough that was stored in flour. Nor did I find any that stored the dough for weekly baking. Most described setting the old dough aside in the fridge for 2 or 3 days, at most. In some forums I found, people described using it in their daily baking. Not a single person described using their old dough the way my mother remembers her mother did it. They all used wet dough. None used reconstituted dry dough.

I have decided, instead of getting a sourdough going again (for now), I will try and recreate my Babcia’s bread.

Of course, some things I will simply not be able to recreate; at least not now. We’ll be using plain old AP flour. I won’t be adding corn flour right away. I don’t have a big wooden dough bowl like my Babcia would have had (with a wooden dough bowl, yeast would have gotten into the wood itself, adding its own layer of flavours). I also don’t have a wood burning masonry stove (something similar to this, with a sleeping area on top) like my grandmother would have been baking in.

I found some proportions for ingredients for 2 loaves that I will start with, and I will probably experiment with making some a couple of times a week before I start adjusting quantities for larger batches.

One of the main differences in this experimental process is that I don’t have a yeast “mother.” My mother has no memory of where her mother got hers from. It was always just there. She may well have gotten her first old dough from the family members she was living with (my great grandparents having already gone to Canada to start a homestead, only to not be able to send for their children as they had planned, because of WWI). However, as they saw the warning signs leading to WWII, they abandoned their farm in Eastern Poland, taking nothing but the clothes on their backs and a goat they could milk for food, to settle in Western Poland. At that point, my grandmother likely got another old dough ball from one of their new neighbours.

It’s amazing how much history is intertwined in something so ordinary as how my grandmother leavened her bread!

So this is what I will be doing in my experiment that will possibly span years.

Today, I have started a first batch of plain bread; it’s rising as I write this, and I will post about it separately when it’s done.

I will be using a commercial “sourdough” yeast I happened to find, in this first batch.

After the dough is risen and before I shape it into loaves, I will break off some of the dough and store it in a container of flour, then bake the rest of the dough as usual.

In a few days, I’ll reconstitute what should be a mostly dried ball of dough overnight, make another 2 loaf batch, then continue repeating the process.

What should happen: the flavour of the bread should change and develop over time, just as with a sourdough.

What might happen: I’ll have sucky bread that doesn’t rise properly? The dough ball will start molding? The yeast will die off and I’ll have to start over? I have no idea.

For the first few months, at least, I will stick to the same basic mix of flour, water, salt and the old dough for yeast. Eventually, I will try adding corn flour. If I do decide to modify the recipe in other ways, it will be by doing things like kneading in herbs or shredded cheese or whatever, after the dough ball has been removed. I won’t be adding things to the base recipe, like sugar, milk, oil or eggs.

After I’ve done a few batches, and assuming this works, I plan to give some to my mother to taste. Hopefully, she will remember enough to be able to tell me if I’ve succeeded or not! :-D

The Re-Farmer

Recipe: Mushroom, Bacon Haluski

Today, I bring to you a variation of the traditional Polish dish called haluski. You can go here for a traditional recipe with some common variations. The link will open in a new tab, so you won’t lose your place. :-)

Oddly, though my parents were both born in Poland, and I grew up with a lot of traditional Polish foods, haluski was not one of them. Mind you, when I was a kid, I hated cabbage and probably wouldn’t have eaten it if my mother did make some! Even so, my parents also took us to Polish celebrations and events in the city, and I have no memory of this dish. I did not discover it existed until within the past year or so, while looking up things to do with cabbage!

Of the recipes I found, the most basic is onion, cabbage, noodles, and a lot of butter. Some include bacon, kielbasa or a variety of cured meats, like pancetta. I tried making it with bacon, and we liked it enough that it has since become a fairly regular dish in our household. My husband is not too keen on cabbage, though. ;-)

This time, I decided to experiment with the recipe, and I am very happy with the result. The plain egg noodles were replaced with mushroom egg noodles and, because I still had some left, I included dried mushrooms as well.

The dried mushrooms are a mix of white button mushrooms, crimini and shiitake mushrooms.

The next time we dry mushrooms, we need to do a whole lot more! :-D

The noodles I used are a brand that is easily found in our area, usually in its own little display. They are made with 2% porcini mushroom granules.

While preparing the noodles according to package instructions, I chopped the cabbage and onions, cut the bacon into small pieces, and set the dried mushrooms to reconstitute in boiling water. If I were using fresh mushrooms, I would have just sliced them.

Not pictured is the butter and seasonings. The seasonings can be just salt and pepper. As I still have some left, I used mushroom salt, as well as freshly ground pepper, garlic granules and paprika. Fresh garlic can be used instead of the granules, adding them in just before the cabbage.

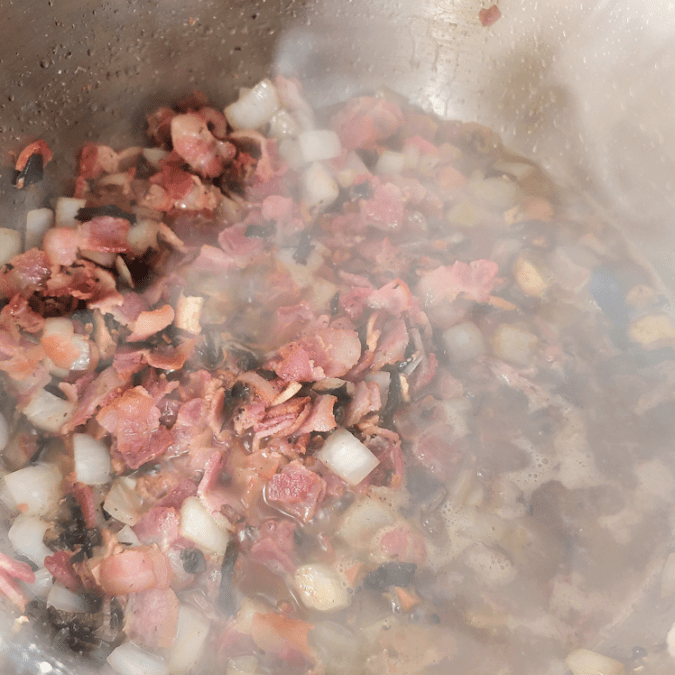
The bacon pieces were added to a large pot and fried until they started getting crispy. The bacon fat is used in place of butter at this point.

Then the onions were added and, after they had softened a bit, the reconstituted mushrooms were added. The liquid was included, too, which helped deglaze the pot. The seasonings were also added at this point.

Where I using fresh mushrooms, I would have added them to the bacon before the onions.

Next, the cabbage was added, along with a dollop of butter, and cooked until soft.

By the time the cabbage was ready, the noodles were cooked and drained.

The cooked noodles were then mixed in, along with another dollop of butter.

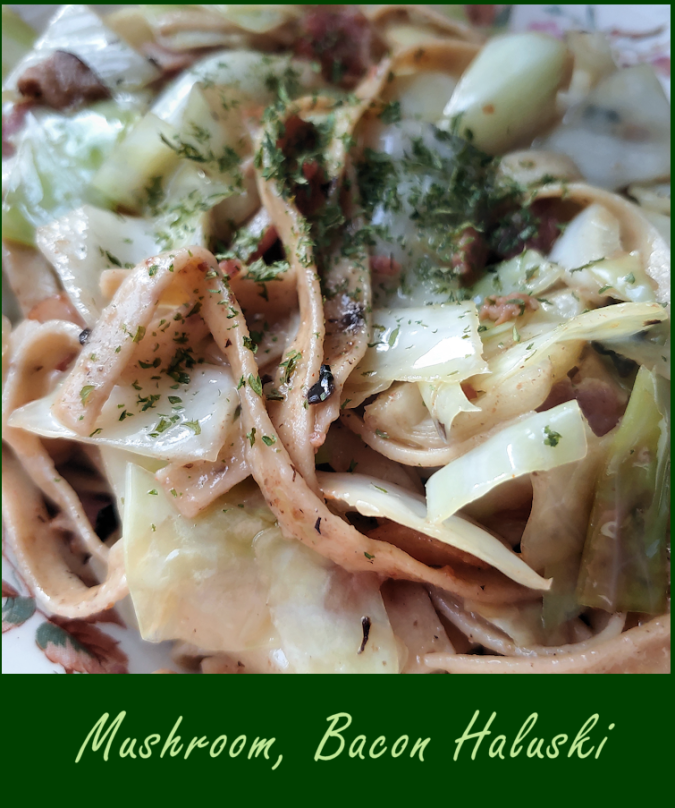
Here is the end result, sprinkled with dehydrated parsley from our garden.

The mushrooms and mushroom noodles were a very tasty modification to this traditional dish. The flavour they add is not overpowering, but there is a whole new layer of umami in the dish that works very well! I think it would have done nicely with a dollop of sour cream on top, too.

Here is the recipe! If you give it a try, I hope you come back to let me know how you like it. :-)

The Re-Farmer

Mushroom, Bacon Haluski
serves 4, generously

Ingredients:

1 medium cabbage
1 medium yellow cooking onion
1 package bacon slices, 500g
1 package mushroom egg noodles, 350g
1/3 cup dried mushrooms of choice
seasonings to taste (mushroom salt, pepper, paprika and garlic granules were used for this recipe)
butter, as needed

Directions:

  • remove outer leaves from cabbage, core and chop into pieces about the same size as the noodles
  • chop onion and slice bacon into roughly half-inch pieces
  • line a small bowl with a coffee filter. Add the dried mushrooms, breaking up any larger pieces, and cover with boiling water
  • cook noodles according to package directions
  • while the noodles are being prepared, place the bacon pieces into a large pot. Cook on medium high heat until desired crispness, stirring frequently
  • add chopped onion and cook until the onion begins to turn translucent, stirring frequently
  • add the reconstituted mushrooms (the coffee filter makes it easier to pick them up out of the liquid). Cook briefly, then add the liquid the mushrooms were soaking in. Stir to deglaze the bottom of the pot.
  • add seasonings. Continue cooking, stirring often, until onions are soft and the liquid is cooked down until almost gone
  • add the chopped cabbage, along with about 1/4 cup butter (adjust quantities of butter as needed). Combine well and continue cooking, stirring often, until cabbage is at desired tenderness
  • add cooked and drained noodles to the cabbage mixture, adding more butter as desired
  • combine well. Cook until the noodles are heated through.
  • serve while hot

Enjoy!

Drying mushrooms – sort of

At our last Costco trip, we picked up large packages of three different types of mushrooms. After using as much fresh mushrooms as we wanted, I planned to dehydrate the rest. I really like the mushroom salt we’d made, but wanted to have mushroom powder, without the salt, to use. The powder is an excellent flavour enhancer.

We had used a dry “gourmet mushroom blend” we’d picked up at Costco to make the salt, but it looks like they don’t carry it anymore. So I decided to just dry our own mushrooms.

I had used a coffee grinder to made the mushroom powder for the salt. The mushroom blend had some very large pieces – large enough that I cut them with scissors before I could put them in the coffee grinder. Even so, some of the thicker, more leathery pieces would jam the blade.

With that in mind, I very deliberately sliced the mushroom pieces quite thin, before laying them out on baking sheets to dry. I had enough button mushrooms to fill one sheet, while the other was filled with shitake and crimini mushrooms. The “warm” setting on our new oven is 175F, but I put it at the lowest temperature it would go: 145F. Then I left the trays in the oven overnight.

This morning…

Well… they did dry very thoroughly!

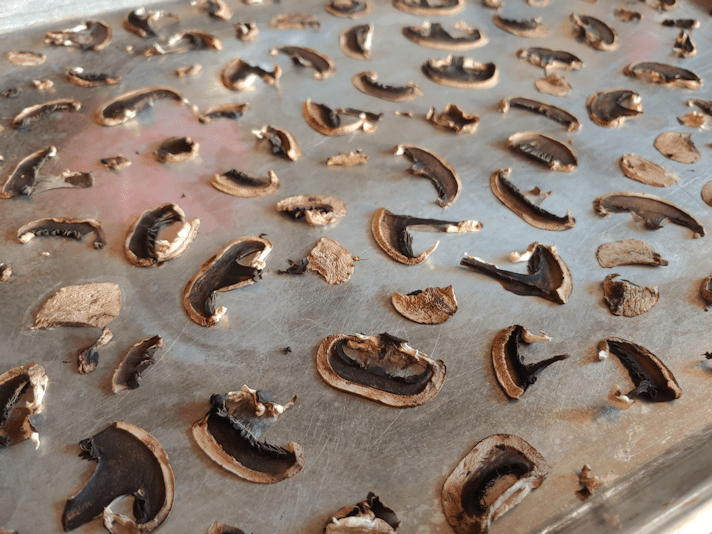
This is the sheet of white button mushrooms. They had been quite crowded together, and I could barely fit all the pieces in. They are now about 1/3 – 1/2 the size before drying.

They are also thoroughly stuck to the pan.

The shitake mushrooms didn’t shrink anywhere near as much, and were easy to loosen.

These are the crimini mushrooms, which are also very stuck to the pan! I have been using a spatula to try and scrape them off. We’ll keep working at it, little by little, as we are able, throughout the day.

Well, I wanted powdered mushroom, and I’m getting powdered mushroom!

Normally when I dehydrate in the oven on pans, I like to use a cake rack to allow air circulation under whatever I’m drying. Some things are just too small for that, which is why I didn’t use any this time. I was thinking that it might have been better if I’d had a drying screen, but looking at how the pieces have adhered to the pans, I’m thinking they would have done the same to a screen. At least with a pan, I can scrape them off and still use them. If they had stuck to a screen, there probably would have been no way to get them unstuck without damaging the screen.

So in the future, I’ll know to cut crimini and white button mushrooms thicker! I know we should be able to leave them whole, or just cut them in half, but I don’t want big pieces. I’ll have to find that balance.

We’ll just have to get more mushrooms and try again.

Not that we need an excuse to get more mushrooms! :-)

The Re-Farmer

Poor Man’s Hippocras: taste test

The girls and I had a lovely evening, sharing a charcuterie board to go with our version of hippocras.

We strained the spiced out using a jelly bag, and kept it warm until we were ready. Here is how it turned out.

The first thing to notice was how deep the colour had become. You can see in the photo that the glass even steamed up from the warmth. It had been kept on low heat, too!

So how did it turn out?

For my initial taste test, I could make out the predominant flavours of the cinnamon and cloves. The whole flavour profile could be described simply as “stronger”. Compared to making mulled wine in the past, I would prefer the mulled wine of this, even though there were many shared ingredients.

We did end up adding a bit of honey to the mix, which did improve the flavour. Though the hippocras was strained, some of the finer particles still got through, sinking towards the bottom of the pot but still fine enough to be floating. Which meant that when I tasted it again, after the honey was mixed in, more of these spices showed up in the glass. At that point, I was really tasting the pepper a lot more, and the spice flavour in general was stronger.

I was not able to finish the glass.

When we were done for the evening, we poured the remains into a 1L pitcher to go into the fridge. There was more than a litre left, but the last little bit was so full of spice “dust” that we didn’t keep it.

It should be interesting to see what a difference in flavour there is when drinking it chilled.

One of my daughters didn’t like it at all, but that was more about drinking wine that was warmed. She had unadulterated wine from the second jug, instead.

I think I will find ways to include the wine in our cooking, to help go through it faster, so we can use the 3L jug we bought it for! :-D

Would I make this recipe again? Probably not, however we weren’t actually true to the original recipe, not having access to the more expensive, rarer spices. If we were able to get those spices, then yes, I’d definitely want to try it again.

Until then, I think we’d just stick with our usual mulled wine combination – without pepper!

The Re-Farmer

Poor Man’s Hippocras: in progress

Yesterday, I wrote about picking up a whole lot of wine, so that we could use the 3L jugs as carboys for the second ferment on our hard crab apple cider.

The problem is, we now have to do something with the wine. We’re not really wine drinkers in general and, ironic as is seems for someone who is getting into making alcohol, I don’t really like alcohol in general. I had a couple of glasses of the wine last night and… well… it’s wine. I can’t even say if it’s particularly good wine. Just that it’s not bad wine. Going through 6L of wine between three of us, though, was probably going to take a while, and I really want those jugs to rack that hard cider.

We have, however, made spiced wine for special occasions in the past, and I did enjoy that. Since I’m also into modern recreations of historical recipes, my mind when to this video I’d found some time ago.

It turned out my daughters were thinking in the same direction, and were quite on board with trying a historical recipe. Of course, we’d want to be having something with the spiced wine, and we started talking charcuterie. So when I headed into town this morning to go to the hardware store, I also popped by the grocery store next door to pick up what we needed.

Now, the recipe for hippocras used in the video above includes ingredients that we just can’t get. I suppose I could order them online if I really wanted to, and try recreating it more exactly in the future, but frankly I can’t justify the cost. So spikenard, galangal, long pepper and grains of paradise are out!

After going through our spice cupboard, I only needed to pick up some marjoram, fresh ginger and cardamom.

Ah, the joys of small town inventories.

It took some searching before I found their last jar of marjoram. I did not expect that to be hard to find! However…

No cardamom.

At least not the whole seeds. I did finally find a single jar of ground cardamom, but it cost almost triple what the marjoram cost!

I didn’t buy it.

We did have some ground cardamom at home, but just a tiny bit. Better than none, I guess!

So this is our poor man’s version of hippocras.

Cinnamon sticks
fresh ginger
whole cloves
black peppercorns (substituting for long pepper)
nutmeg (ground)
marjoram
cardamom
ground cinnamon

Plus, to make up for the lack of sweet spices we’re skipping completely, some granulated sugar.

We eyeballed the quantities from the video for what was probably just over the equivalent of 2 bottles of wine. Except the cardamom. I just emptied what was left in the jar, which was probably less than a quarter teaspoon.

The cinnamon sticks were duly cracked, the ginger sliced, the remaining spices ground in a mortar and pestle (I love my mortar and pestle!), then everything mixed together in a pot with the wine.

The mixture is supposed to sit for a day or two before straining, then served warm.

We plan to drink it tonight, so to speed the process, we got it all set up and on the stove on low heat, where it will stay for the day.

It should be interesting to see how it turns out after we strain it this evening!

Of course, that still leaves us with another jug of wine. If this turns out okay, maybe we’ll make it again for Thanksgiving dinner, which we’ll be doing on Sunday.

The Re-Farmer

Trying out the beets

Many thanks to carolee of herbalbelssingblog for her suggestion on how to cook our little beets.

She wrote:

Even tiny beet thinnings are wonderfully tasty! Pulled whole and left intact, scrub the beet and root to remove any soil and give the green parts and stems a good rinse. Heat butter in a skillet and throw the entire beets in. Cover with a lid and let cook a couple minutes. Add a bit of chicken broth or water and cover again. Cook just until beet is barely tender and greens are wilted. Salt and pepper. (If beets are 1″ or more, I cut them off and cook them a couple of minutes by themselves before adding stalks and greens.) Enjoy!

Which sounds awesome!

Me being me, I had to modify things a bit. After scrubbing the beets, I found I did have to cut off the remaining greens and trim bits and pieces off, then cut them into similar sized pieces. I started them in butter, as suggested, but I didn’t have chicken broth.

I did, however, have leftover roasted ham still in its gel, so I cut off the last bits of meat from the bone, and used the gel as the liquid with the beets.

Because you can’t go wrong with pork, right?

There was quite a bit of the gel, and not a lot of beets, so I cooked the liquid down until it was basically a glaze.

My apologies for the following picture. :-D

This is the better of the pictures I took.

Those deep red beets make it all look like carnage happened! :-D

You can still make out the rings in the beets with alternating red and white rings, though the white is dyed pink now! The golden beets were so few and so small, you can’t really see them at all. There is one right on top. Honest!

But those deep red ones… wow!

So how did this crazy combination taste?

Really good! It had a salty, “meaty” flavour, but the sweetness of the beets still came through, and the flavours complimented each other surprisingly well. Some major umami happening in there!

In another pan, I browned the last of the ham bits, added cubed sunburst squash and green zucchini, with a bit of water to cover and steam them, before cooking away the liquid. Lastly, I covered it all with beaten eggs and covered the pan again, turning the egg mixture a couple of times to make sure it was cooked through.

And that was lunch. :-D

I’ll likely try beets cooked this way again, though with some other liquid. Maybe even the recommended chicken stock! :-D

Meanwhile, I picked more sunburst squash this morning and we’re getting to the point of having to start preserving them. I’ve looked at some recipes to do a quick pickle with them, but so far, none have really appealed to me. Plus, they all called for ingredients I don’t have.

With today looking to hit 30C, it’s going to be an inside day, so I’ll have plenty of opportunity to look up other ideas.

We will most likely just freeze them. :-D

The Re-Farmer
Not quite a recipe: three cheese scalloped potatoes with kielbasa and carrots

While making scalloped potatoes yesterday, I wanted to find a way to use the carrots from our garden I had picked that morning.

If they had been larger, I would have just sliced them thin and layered them with the potatoes, but these were on the small side.

So I got creative.

Here is how I ended up making the the scalloped potatoes.

For the cheese sauce, I used 1 medium onion, sliced thin, butter, flour, seasonings, whipping cream and cheese.

We already had old cheddar and grated Parmesan in the fridge. I also picked up a cheese that has recently showed up in local stores that is just awesome. BellaVitano Reserve. We’ve tried the three different varieties we have available, and I picked up Tennessee Whiskey this time. They have an Espresso one that it really good, too. I shredded this, plus the cheddar, and mixed it all together with some grated Parmesan. I used most of it in the sauce, saving some for later.

For the seasonings, I used mushroom salt, freshly ground pepper, garlic powder and paprika. For the liquid, I like to use whipping cream, but it can be made with milk or a lighter cream, though why anyone would want to, I don’t know. ;-)

To make the sauce, the onion first gets slowly cooked in about a tablespoon of butter until soft. Then, a couple more tablespoons of butter is added. When that’s melted and bubbling, the flour (about 2 tablespoons) is added and cooked, stirring constantly with a whisk, for maybe a minute. Then 2 cups of room temperature cream is added, little by little, with pauses to whisk it smooth. For the first while, the flour thickens the cream very quickly. After all the cream is added, the sauce is simmered, while constantly stirred with a whisk, until it is slightly thickened. Then the seasonings are mixed in. Finally, the heat is turned off, then the shredded cheese mixture is stirred in until melted. After tasting to see if the seasonings need adjusting, it is set aside.

For the rest of it, I had potatoes peeled and sliced thin and the carrots were peeled and shredded. I didn’t count how many potatoes I used. They were on the small side, so it was probably around a dozen. The shredded carrots made about 3 cups, loosely packed.

In a buttered baking dish, I put a layer of potato slices, topped it with 1/3rd of the shredded carrots, then added 1/4th of the onion and cheese sauce. This was repeated two more times, then the top layer was just potatoes and the last of the sauce.

It then went into a 350F oven for about 40 minutes.

Shortly before the time was up, I took a ring of Polish sausage and cut it into slices. The slices were then laid on the top of the potatoes.

I hadn’t originally planned to use the sausage, but I happened to have it, so why not? :-)

I did have some concerns at this point. We’re still getting used to the new stove, and haven’t used the oven much at all in this heat. When stabbing the potatoes with a fork before adding the sausage, they were still surprisingly hard. I had forgotten to cover it with foil at first, so that might be why.

I covered with foil at this point, but it really should have been added right from the start.

With the sausage on the top, I put them in for another 10 minutes. Most recipes for scalloped potatoes that I’ve seen say to bake for 40-50 minutes, and I was shooting for 50 minutes in total. After that, I added the rest of the cheese mixture on top.

Back in the oven it went, though without the foil. I didn’t want the cheese to stick to it. I then baked it until fork tender.

It ended up taking a lot longer to cook than I expected.

Also, handy hint. Put the pan on top of a baking sheet, in case the sauce bubbles over.

We’ll be testing out the oven’s self cleaning function, next…

:-D

When it was fork tender, I took it out and topped it with chopped parsley I’d picked from our garden that morning.

This was quite an experiment from how I usually make scalloped potatoes. They are usually just the potatoes and onion-cheese sauce, these days. I was very curious as to how the carrots worked.

They pretty much disappeared!

I used some of each type of carrot we have; white satin, rainbow (orange, pale yellow, and white), and deep purple. The purple carrots left colour on the potatoes, but with them being shredded, and such a long cooking time, they all pretty much disintegrated and disappeared into the sauce. I could taste a hint of their sweetness, but that was it.

I would definitely be up to including them again.

The addition of sausage… well, you can’t go wrong with adding kielbasa!

The cheese mixture worked really well, too. That Tennessee Whiskey cheese added to the flavour, but did not overpower.

All in all, this was quite a success!

The Re-Farmer

Fire pit mods, done!

We have been talking about using the fire pit to do an actual cookout tomorrow (weather willing!). That will require a trip into town to pick up things we want to cook over a fire, so I cleaned out and modified the fire pit today.

The first thing to do was empty out the ashes. I have done that once before, in our first year here, but not as thoroughly as I wanted before adding modifications to the pit.

I filled our large wheelbarrow twice! The first load was pretty much all ashes, while the second was a mix of soil and composted ashes.

I dug down far enough that I was starting to fight with root mats. Then I started hitting a… mat?

I pulled out the buried remains of… whatever this is.

It’s some sort of woven material that looks similar to a tarp, but… not.

When I pulled it away, I had another surprise under it.

Do you see those whitish specks among the roots?

Those are ants eggs!

Ants have somehow managed to survive in the fire pit! Considering how hot it would have gotten, just last night, I’m amazed. They weren’t just under the sheet, either. I found more around the edges, elsewhere.

Well, I hope they move on to someplace else because, now that the ashes and dirt are gone, they’ve lost what protection from the heat they had!

Clearly, this fire pit has been used to burn garbage, too. Along with the green mat I pulled out, I found broken glass and old nails, along with more expected things, like chunks of wood and rocks.

Once the pit was cleaned out and raked even, it was time for the concrete blocks.

We have a few of them around, but most of them are where they are, for a purpose. Like the ones around the storage house, that are holding various panels to cover what used to be the top of the basement. I haven’t moved them to try and see what they are covering yet, so I’m leaving them be for now.

I did have one available that wasn’t being used, and there was another in the middle of the tire planter, that had been buried in the middle to support the bird bath, which is now set up in a different location. So I dug that out and hosed out the dirt that had filled the openings.

I then had to decide how to orient things.

I decided to orient it with the nearby gate. That gap where the wind usually comes from, and I wanted some air flow over the fire. The openings in the blocks will allow for some air flow from the sides, too. I used one of the oven racks to determine how far apart to put the blocks.

I wanted to have the option of using both racks, so I also brought over the 1 half-block we have.

It’s shorter than the full blocks, so I added a couple of bricks under it, to make it level with the others.

Then I hosed everything down.

We now have several options.

If we want to do a simple wiener roast, we can leave the racks off, and the blocks can be used to support our roasting sticks.

Once we’ve built up the coals, we can place both racks on, like in the picture, for a large cooking area. If we need to, we can still easily feed the fire from one end.

Or we can use one rack across the middle, supported by the two large blocks.

Or, we can have one rack towards the end, supported by all three blocks. We’d be able to keep a fire going at the open end, and push hot coals under the cooking area as needed.

We can also fill the half block with coals for anything that needs high heat, like setting a pot or kettle of water to boil, and have the one rack covering it as it is in the photo, for air flow. To do this, though, we’ll need to get a long handled, metal scoop, like are used to clean fireplaces. Mind you, it’s entirely possible we already have one, hiding in one of the sheds. LOL

Now that the set up is complete, we can keep it in mind when we go into town tomorrow. We still might go for an ordinary wiener roast, but who knows what we might find to inspire us, instead. :-)

I’m really looking forward to it! I hope the weather co-operates. :-)

The Re-Farmer

Historical cooking: chickpea soup with fried bread

One of my Recommended posts was for the Historical Italian Cooking YouTube channel. Recently, they put out a new video for a super simple dish made with ingredients we typically have on hand. Today, I was able to give it a try!

Here is the video.

You can also visit this link for the written recipe.

This is an ancient Roman dish; chickpea and leek soup, with a fried flatbread called lagana.

About the only thing we had to go out of our way to get for this recipe was the white wine.

There was one ingredient we couldn’t find, though. Durum wheat flour. Any type of flour is just now becoming easier to find, but there’s no chance of finding any out of the ordinary flours. All Purpose flour, which is what we have, is made with a blend of hard and soft red wheat. Here in North America, durum wheat tends to be used in pastas. It’s the sort of thing we’d have to go to specialty stores to find. I’m sure I could find it in the city, but certainly not locally.

So I substituted AP, since that’s what I had.

First, the soup ingredients.

Another substitute I made was to use canned chickpeas instead of soaking dried chickpeas overnight. The recipe called for 2 leeks, but has almost no other quantities given. I had 2 leeks, but they were pretty massive, so I used 2 cans of chickpeas to balance out the quantities. There’s also the white wine, some olive oil, and caraway seeds ground with a mortar and pestle. I eyeballed most of the quantities based on watching the video. :-)

The soup was started by boiling everything but the leeks in salted water for 10 minutes. Then, the leeks are added and cooking continues for another half hour.

While that’s being done, the flat bread is made.

The flour was the other thing with a quantity given: 300 grams.

Unfortunately, my kitchen scale disappeared. So we had to use a converter. I used a little under 2 1/2 cups of flour. Salt is added, then a dough is formed with some warm water. That’s it, that’s all!

After the dough is kneaded until smooth, the recipe said to divide it into 10 pieces. There are 4 of us in this household, so I divided it into 12 pieces, instead.

The pieces of dough are then rolled out into rough circles.

The recipe calls for olive oil to be used to fry the bread. Olive oil has a low smoke point, so I modified the recipe a bit more. I added a bit of vegetable oil to increase the smoke point a bit. I was just frying in a pot on the stove, so this was more of a safety issue.

Once the oil was hot, the rolled out dough was fried, one at a time.

The dough bubbled up a bit in the video, but not into big dough pillows like this! :-D This could be because of the different type of flour, or even because of the oil blend.

Not that I’m complaining! :-D

These fried up very quickly. Maybe half a minute on each side, to get them to a golden brown, before placing them on paper towel to drain. The bubbles cracked on a couple of them, allowing oil to get into the pockets. That took a fair bit of draining! The bread was finished well before the soup itself was.

They look absolutely amazing!

Taste test time!

The soup itself was very mild tasting. Possibly because I used more water than in the recipe. I couldn’t distinguish individual flavours of the caraway or the wine, for example. No one ingredient overpowered the other.

The lagana bread had a surprising amount of flavour for something that is just flour, salt and water! The outside was crispy, while the inside was chewy. It went incredibly well in the soup. A real balance of flavours. Making one without the other would not be as good as the two together.

This is a remarkably easy soup to make. The lack of quantities in the recipe made it a bit more interesting to work out, but that just gives room to adjust to one’s one preferences!

I can definitely see us making this recipe again!

The Re-Farmer