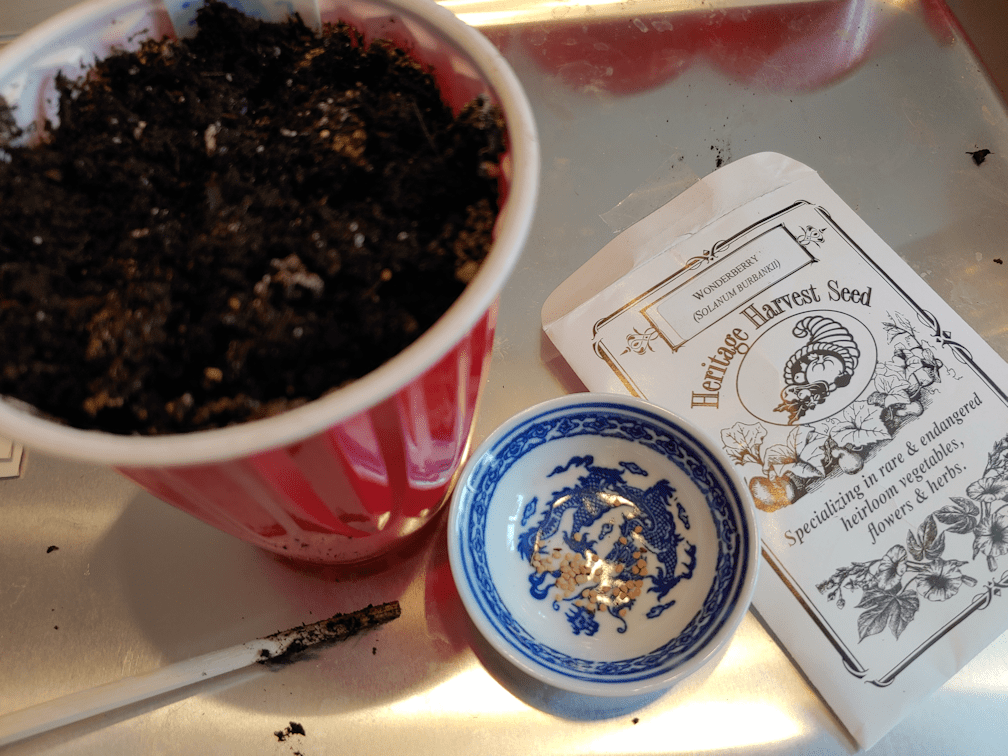
Today is 10 weeks from our average last day of frost, and we had a few seeds to start.
But first, we needed to make space. These would be going into the big aquarium greenhouse, on the heat mat, which meant the Sophie’s Choice tomatoes had to be moved. All the pots have seeds germinating in them, so it’s okay to take them off the heat mat now.
Space was made for them to fit onto the tray in the small aquarium greenhouse, which is where we have a few rescues. At the bottom left is the only luffa we’ve got so far. The seed leaves have wilted away, but the true leaves are still holding out. In the top left corner is the rescued Canteen gourd. It had seemed to be doing well, then suddenly it started wilting and the seed leaves started wilting away, but it has actually perked up again. If it can manage to develop some true leaves, there’s hope for it. With the Canteen gourd, however, the replacement seeds we planted are doing much better. The two plants with the largest leaves in the photo are Canteen gourds, as are the not quite as robust pair in between the luffa and the original Canteen gourd.
There’s also one surviving tomato plant in there; I can’t remember which type is it. There are a few others in the mini-greenhouse, too.
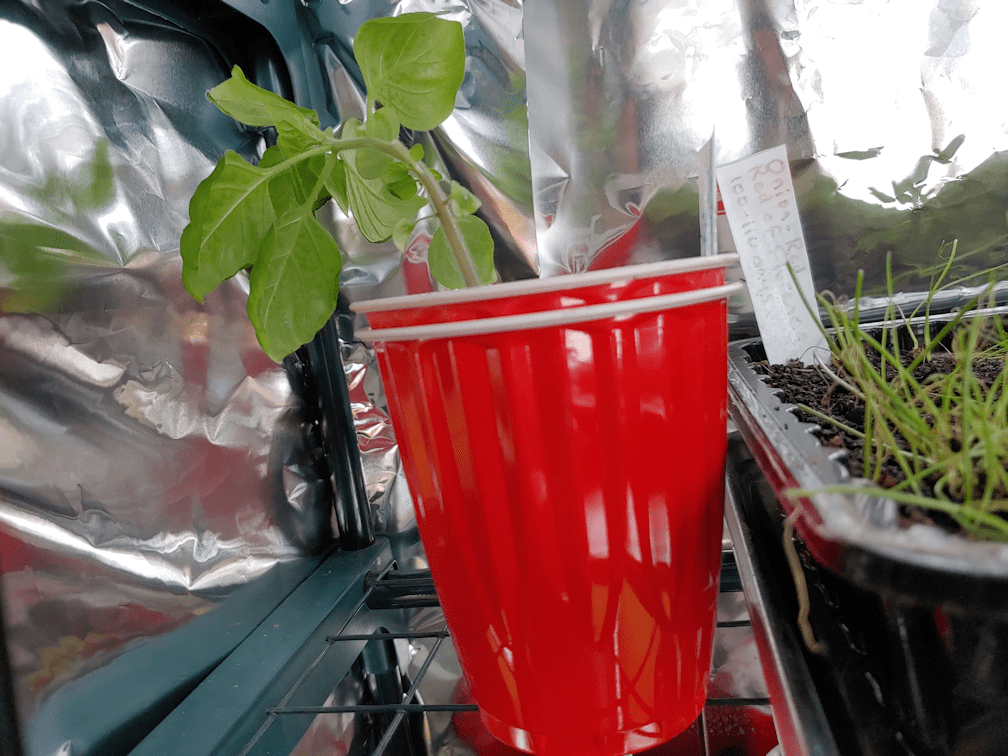
The one Wonderberry that sprouted from the first planting has gotten big enough that it was too tall for the lower shelves in the mini-greenhouse, so I couldn’t put it in one of the trays with other pots. So it got double cupped and tucked in with the bulb onions at the very top, where the mini-greenhouse has a peak. It didn’t like my attempt to put it in a lower shelf, but it should be standing tall again, soon.
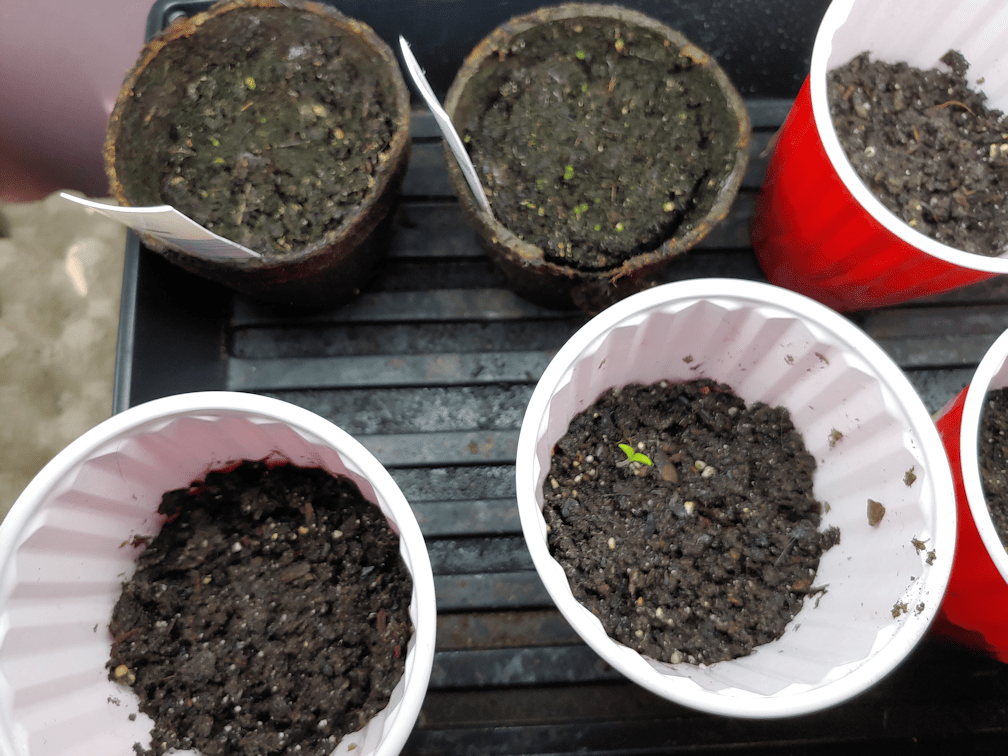
Here we have the pots that my daughter and I started today, joining the luffa pots that we planted a couple of weeks ago. Still no sprouts. :-(
Everything got two pots each. Two types of gourds got started today; the Tennessee Dancing Gourd, and the Ozark Nest Egg gourd. Both did surprisingly well last year, in spite of the drought.
The Crespo Squash was also started. Then, we decided to plant extra eggplants and peppers. We do have surviving ones from the first planting that seem to be recovering all right from being flattened by a cat, but we’ve decided to play it safe and plant extra. The last of the Little Finger eggplant seed were planted, but we still have a few left of the Purple Beauty pepper.
The next batch of seeds should be started about 2 weeks from now. Hopefully, we’ll be able to move at least the onions to the sun room. They can handle cool weather better than anything else we’ve got started right now.
When finishing the toilet tube seed pots we made yesterday, we had to put the lids on the bins, to keep the cats out, so it took quite a while for them to dry.
They still weren’t totally dry, but I figured it was good enough! After all, we’re just going to be bottom watering these, anyhow, so they’re going to get soaked, soon.
I started with the tubes intended for the paw paw seeds. After filling them 3/4s of the way with pre-moistened seed starting soil, I started carefully finding the paw paw seeds in their baggies, while my daughter continued to fill the tubes intended for the tulip tree seeds.
After placing a seed into a pot, soil from the baggie was used to top up the pots. In the above photo, the two on the left have seeds in them.
None of the paw paw seeds showed signs of roots, though they did look more… filled out, shall we say. More rounded. Which is to be expected, considering they’ve been in damp soil all this time.
Once filled, they tucked into the bin a bit more tightly than while empty, which is what I want. It’ll keep them from falling over, and keep the toilet rolls from unraveling when they get wet.
After putting the filled pots back in the bin, they got watered, and any that showed the soil settling quite a bit, got topped up with more soil. Then water was added to the bottom of the bin.
The tulip tree seeds also did not show any signs of roots. In fact, they still looked almost exactly like they did when we first got them, except a bit darker from being in damp soil.
They got watered from above, topped up with more soil as needed, then water added to the bottom of the bin, as well.
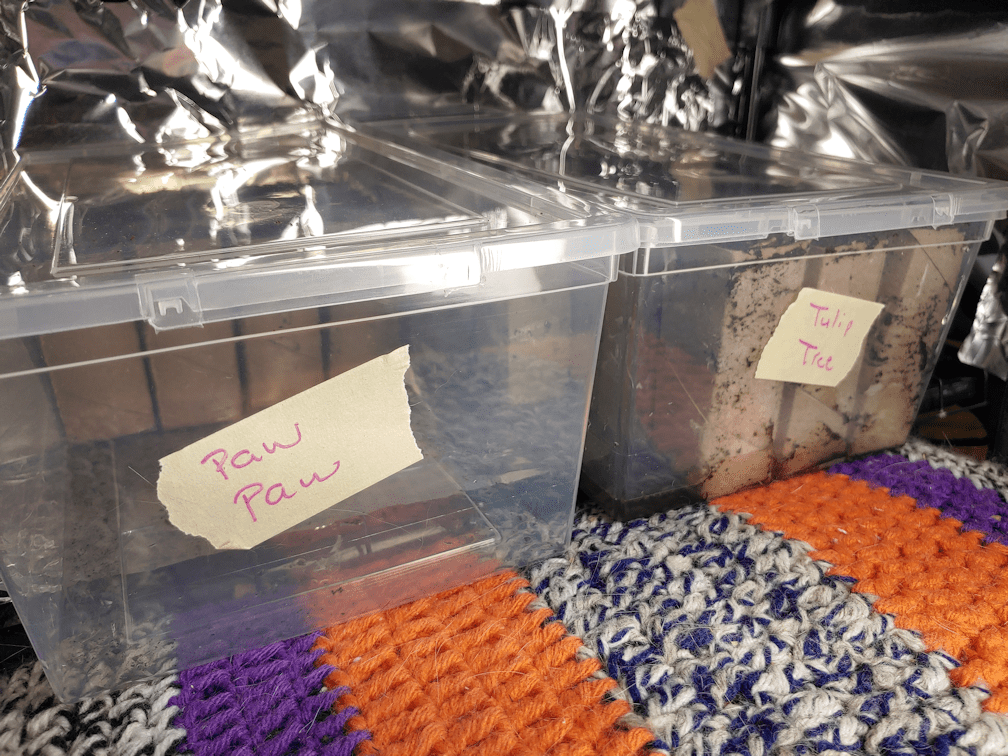
They then got lidded and labelled, ready to go into the mini-greenhouse.
The lids will be left on, loosely, to help keep the moisture levels even.
A bit of re-arranging of the other seedlings and trays, and I was able to put these on the two bottom shelves where, even if the cats manage to get in, they will be safe.
Now there’s another reason to use these bins for seed starting. Cat protection!
The instructions they came with said that these take a very long time to germinate, and that the roots will be growing long before the leaves start to show. So we will just keep these moist and otherwise leave them alone. Not having them in the baggies anymore means we won’t get to see those roots, but I think it will be better for them to be in these little pots instead of the baggies. Less chance of the roots getting damaged, I think. It will also be much easier to move them around in these bins, than in the tray that was holding the baggies. Those black trays may fit the shelves in the mini-greenhouse just right, but they are awfully wimpy things, and hard to move around. A couple of them have already started to crack on their edges, from bending in the middle when picked up.
So this is now done. The tree seeds are in little pots and, perhaps in a month or two, we might see sprouts emerge. I have no idea what to expect from these, and am just hoping for the best!
While I have purchased pots that can be planted directly into the soil when it’s time to transplant seedlings, the sheer number of such pots we will need makes buying enough for all of them bad for the budget. In particular, I want to start the kulli corn in biodegradable pots, for as little root disturbance as possible.
After last year’s attempt to use toilet paper tubes failed dramatically, largely due to using peat as a growing medium (it simply would not absorb moisture all the way through!), we’re going to try things a bit different this time.
There are a lot of web pages and videos on how to make pots from toilet paper tubes. This one is the best one I’ve seen so far. There’s the added bonus of it showing the pots made into squares, which was what I was thinking of doing already.
It’s pretty basic, really.
We knew we’d need a lot of tubes, so we’ve been saving them for many months. Last year, I had a fairly large box that we would drop the tubes in, and when we ran out of room I’d transfer them to a storage bin, to make more space.
Which was really silly, now that I think about it. It only matters if you want to keep the tubes round, and there is no need for that at all.
This little box has two layers of tubes in it. After flattening a tube, I’d drag it across the edge of the bathroom counter, to crease the fold even more.
It’s amazing how many tubes can be fit into such a small box this way!
Today, I snagged some of them to make pots for the tree seeds. I don’t know if there are any roots starting to show in the little baggies of soil. I am thinking it would be much less disruptive on the roots to “transplant” them now – when there may not even be any roots yet – into little pots, compared to trying to move them out of the baggies when the roots are actually visible.
So I grabbed a dozen tubes for the paw paw seeds, first. The different brands all have different tubes. The ones I grabbed were the tallest, with the thickest carboard.
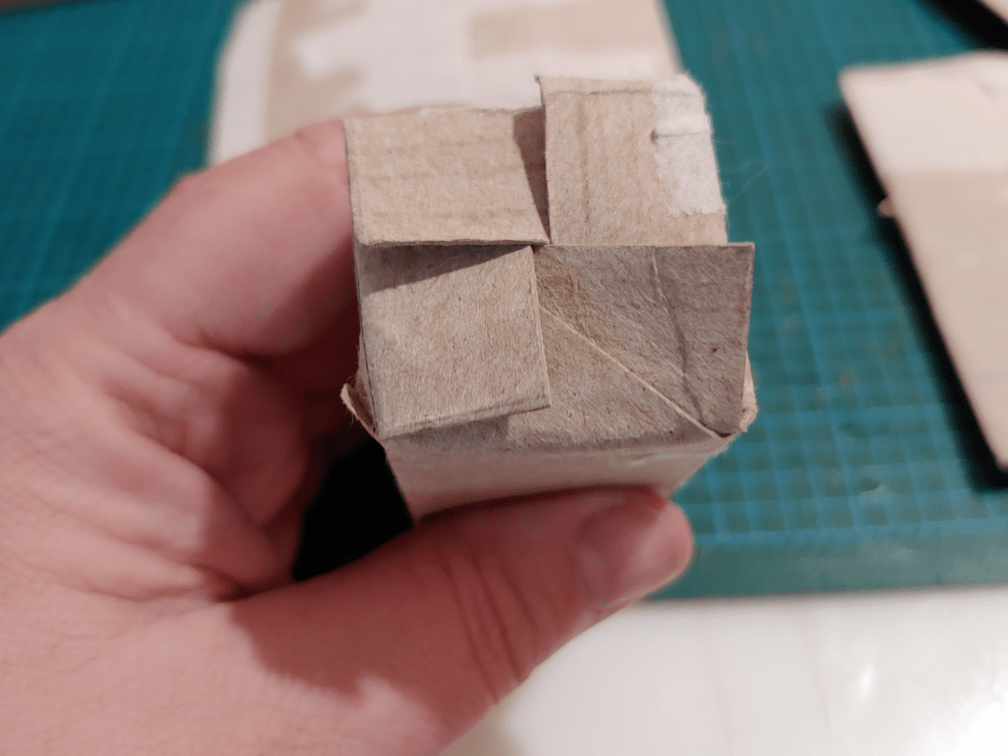
This first batch was done like in the video.
The first thing that needed to be done was give them all a second crease for the square, keeping the sides even by lining up the first creases with each other. The carboard was way too thick to fold them like he does in the video.
Then, just because I prefer sharp creases, I ran the tubes over the edge of the desk I was working on. You can tell the difference it made in the photo above. The tube I am holding is not being squeezed in any way. For the other one, I’d laid the tube flat on the desk and pulled my metal ruler over it to sharpen the crease. Which it did, but not as much as using the edge of the desk.
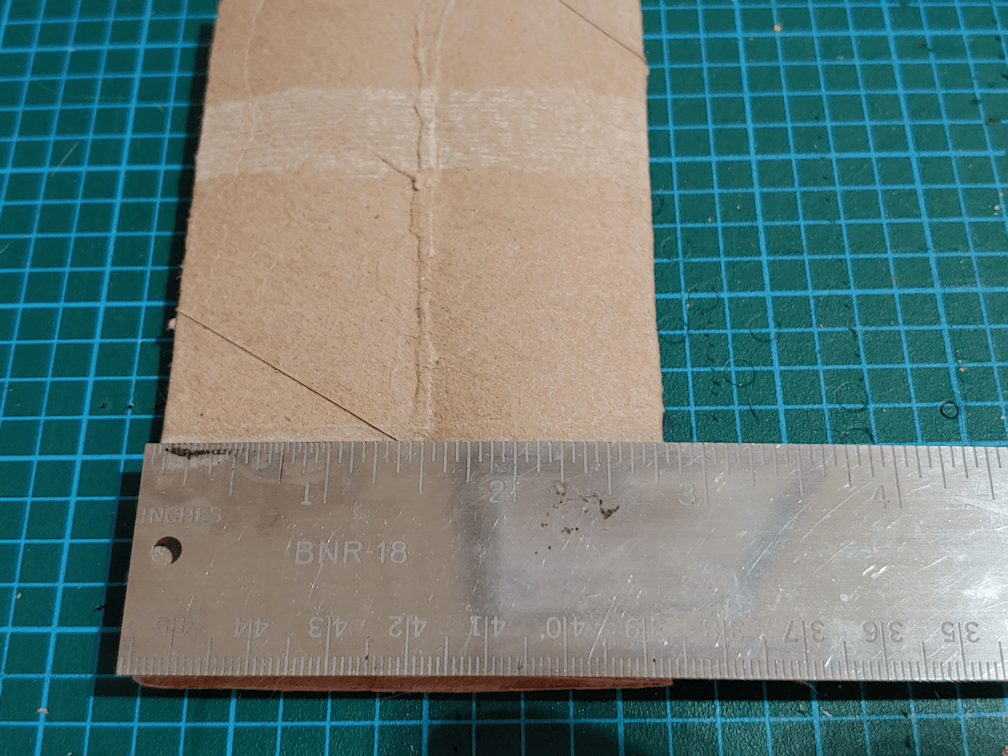
The creases were about 1 1/2 inches apart, so that is the distance than needed to be marked from the edge.
Since I had the cutting mat and a metal ruler, I only needed to mark one tube out of six. After lining them up along the bottom edge of the cutting mat, I could line the end of the ruler up to the side edge and the long edge with the mark on the first tube, across all the tubes.
Using the ruler to hold the tubes in place, I could mark them all at once, then repeat for the next batch. This way, it only took two lines to mark all 12 tubes.
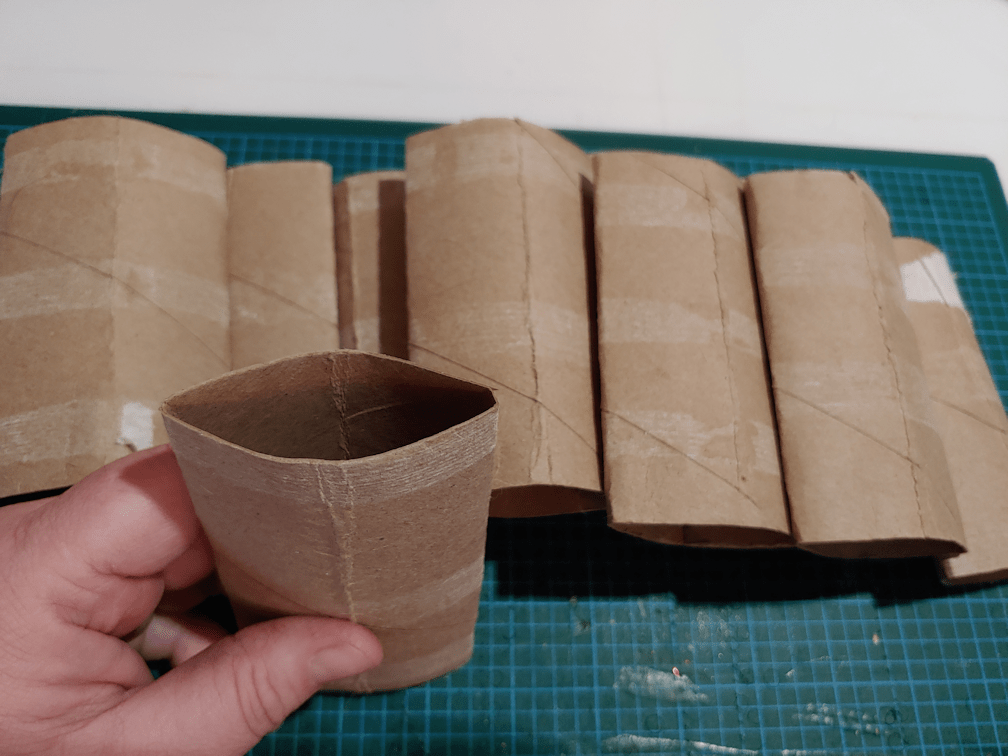
The next step was to cut slits at the creases, up to the marked line, to create flaps.
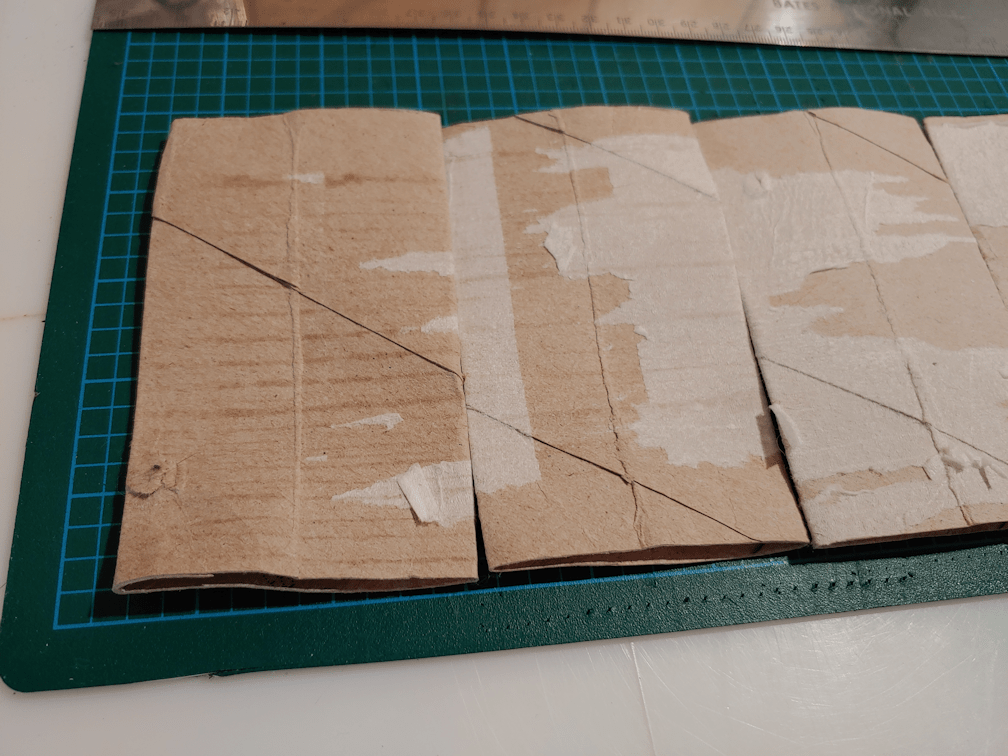
Then the flaps were all folded inwards to create a bottom.
Once they were all folded under, I set up the storage container I got for them, and some water.
All the bottoms got dipped in water, then tucked into the storage box.
With these tubes, four of them fit snugly across a short side, so they’re not going to flop around. This was an important consideration when I went looking for bins to use for this. When we used the toilet paper tubes last year, the tubes came apart completely once they got wet, even as the peat in the middles remained bone dry. I wanted straight sided bins that were fairly small, to hold them all tightly. If the tubes were still round, they would have taken up more space, but there would be gaps between them, and I didn’t want those gaps, either.
These now will be left to dry, and we’ll fill them tomorrow.
For the next batch, more tubes were needed. We have 26 tulip tree seeds to transfer.
After grabbing a bunch of tubes, I found a couple of shorter ones. There is a surprising amount of variance between brands! I switched out the shorter ones for taller ones.
Height is why I wanted to change how the bottoms were done for this batch. With how the first ones were done, each flap completely covers the bottom, making a 4 layer thick base. There’s no need for that.
So for these ones, instead of cutting flaps that were half the width of each side, I went for a quarter of the width.
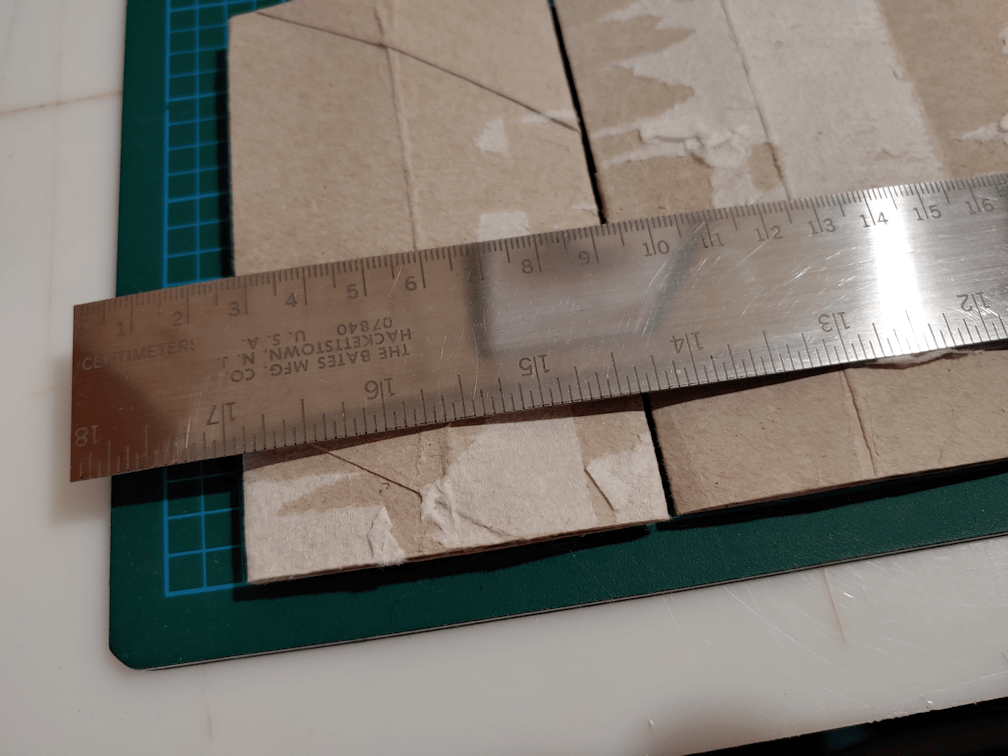
That worked out to be 3/4s of an inch. Each square in the grid on the cutting mat is 1/4 inch, so the tubes were all lined up to the base line of the grid…
…then the ruler was lined up with the 3/4 inch line, on each side of the row of tubes.
Which was a bit of a pain, when it came to using the ruler to hold the tubes in place while marking the line, since there was a space under the ruler.
It was much easier to do it from the middle instead of the ends. :-D
Then the tubes all got slits cut along the creases, up to the line.
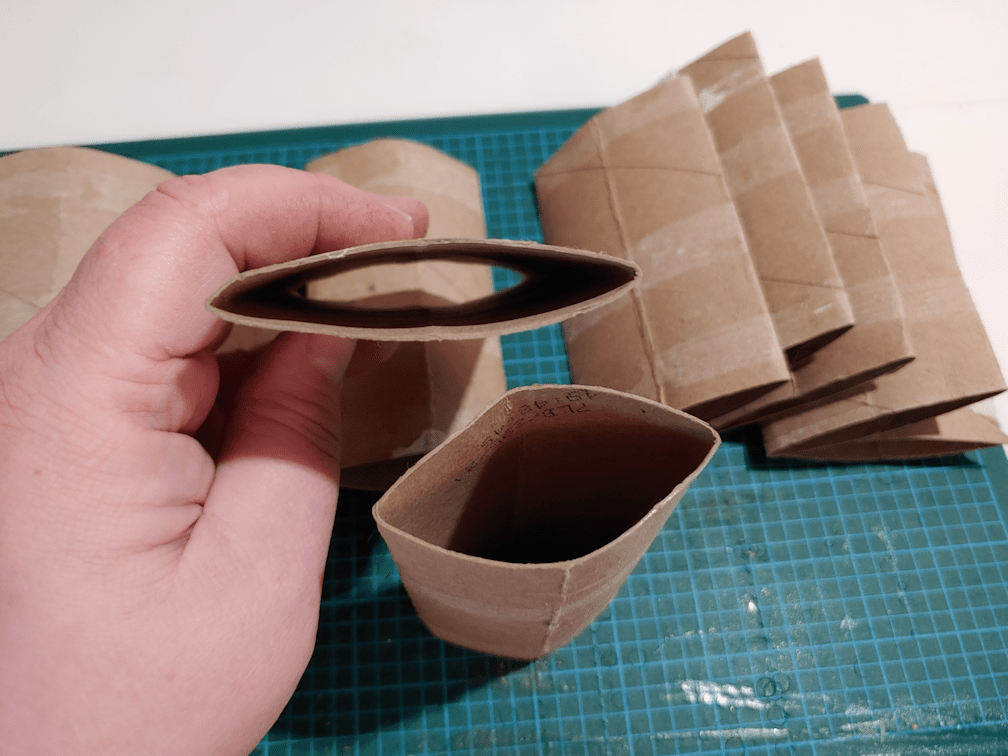
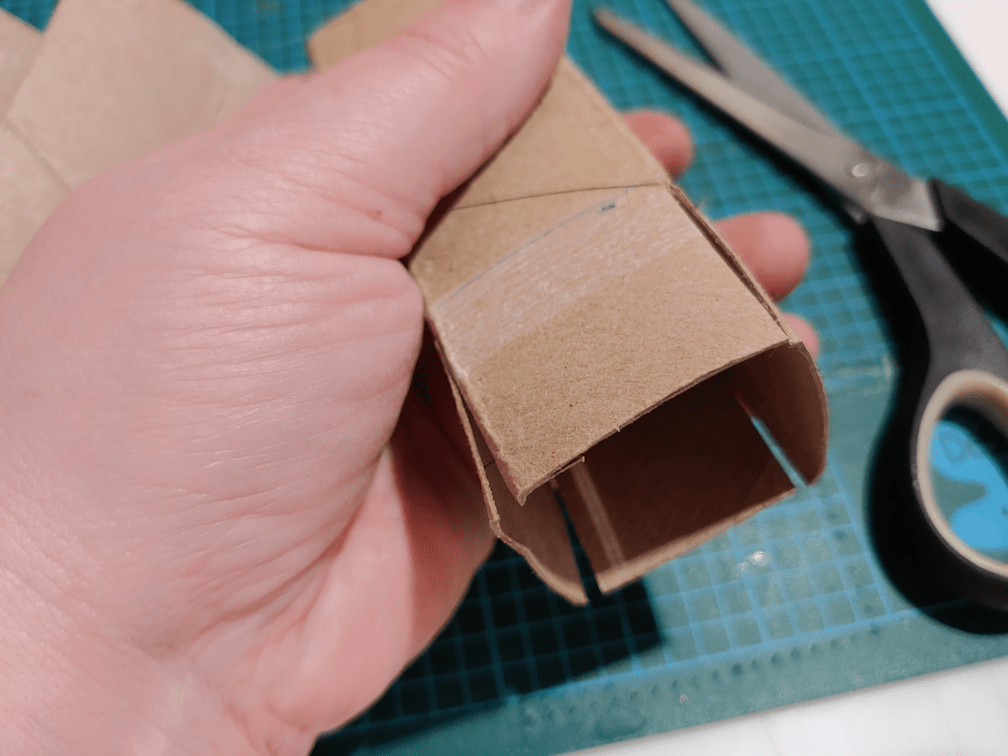
When folded in, this allowed for them to overlap and be locked into position.
These tubes were slightly shorter than the ones used in the previous batch, but by doing it this way, the pots ended up taller, as you can see in the comparison above.
Since the flaps could hold themselves in place, I could have skipped the water part if I wanted to, but I chose not to. They got dipped.
This brand’s tubes were not only a different length, but also a slightly different width. Just enough that they did not fit snugly across the short side. However, 8 tubes did fit snugly along the long side.
Tomorrow, these two sets of pots will be filled and planted with tree seeds. The tree seedlings will remain in pots for 2 years before being transplanted to their permanent locations outdoors. Starting them in these will allow us to “pot up” the seedlings into large pots as they get bigger, without disturbing the long tap roots they are expected to develop.
After these are done, we’ll start prepping tubes for the kulli corn. As with the tree seeds, it will be one seed per tube, so we will need 100 of these. I was able to find slightly larger versions of these bins, and one should be able to fit all 100 of these pots. The bins also have lids of the same transparency as the bins, which will allow us to use them as cat-proof greenhouses, if necessary.
I think I might have to pick up more of them. They’ll make moving seedlings outside to harden off much easier, too! They also happen to be pretty inexpensive, too. After much searching when doing shopping trips in the city, I found them at a local Red Apple store, which was just an added bonus. I’d actually found some at the local dollar store I was going to settle for, but the sides weren’t quite as straight, and the lids were opaque. I’m glad I decided at the last minute, to try another store.
The dollar store bins will instead be used to hold the little odd balls of yarn and small crochet projects on the go by my desktop, that the cats keep managing to steal away, so matter how diligently I bag them up!
I noticed some of my favourite gardening channels were posting videos showing first-day-of-spring tours of their gardens. This one in particular inspired me.
I was so inspired, I just had to get out there and take some video of our own first-day-of-spring garden.
It’s a quick and dirty video, but I had fun making it. I hope you like it, too!
As you’ll see, we’ve … uhm… got quite a bumper crop going right now… ;-)
Yesterday morning, I spotted a Cup of Moldova seedling starting to break the surface. By the end of the day, it was up, and another had emerged. This morning, I found several more. They are tiny and barely visible in the above photo, but they’re there!
The Cup of Moldova are set up lower from the lights than the other tray, and no extra heat source.
This morning, single Sophie’s Choice showed up, too!
This tray is on a heat mat and slightly higher. With the heat mat, the water in the tray dried out a lot faster than the metal tray. At the moment, both need a top up, but the pots are still quite moist and could do with a little bit of drying out. The new luffa seeds still show no signs of germination. They are the ones that need the heat mat the most.
The seedlings in the corner pot are Wonderberry. They actually showed up really fast. After only 3 days, if I remember correctly. Much, much faster than our first seeding. I planted 5 seeds in that pot, so we’re looking at a 20% germination rate on the second seeding.
I keep forgetting to take photos of the onions in the small tank. They have stagnated. I think I will find a way to move them into the mini-greenhouse to see if that helps.
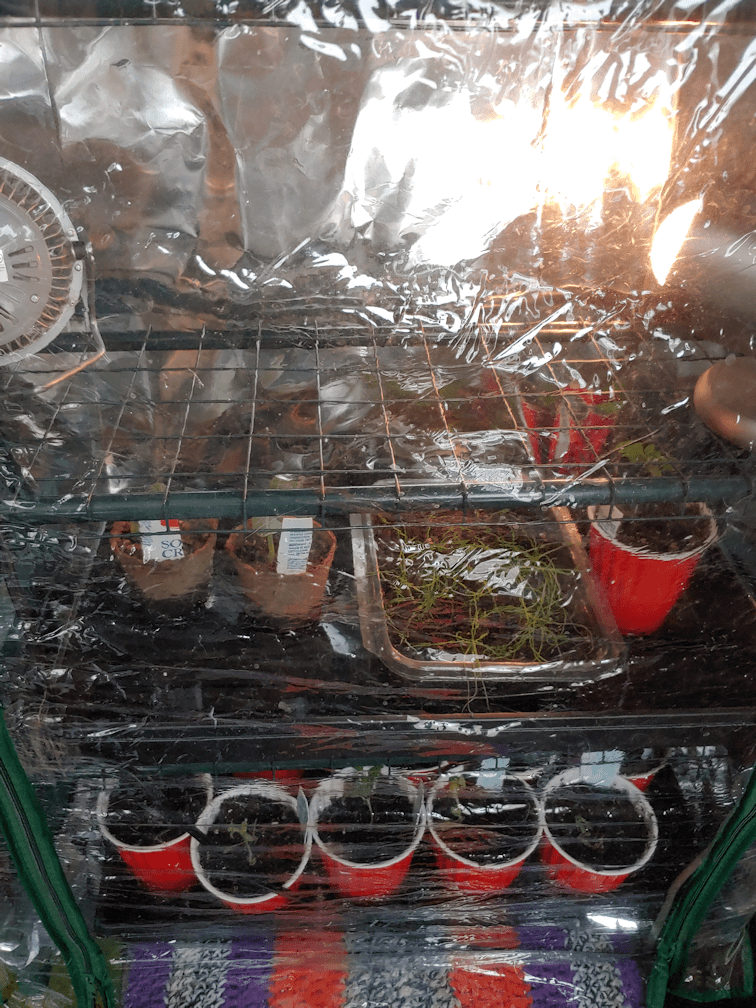
As for what’s in the mini-greenhouse…
As for the seedling that survive the Great Cat Crush, they are still struggling. A few pots that had been in the corner look like they got eaten, even though we had a screen in front of the open mini-greenhouse cover. We do still have a few surviving peppers and eggplant, and even a few tomatoes, but not very many. We didn’t plant many peppers or eggplant to begin with, so I’m thinking it might be a good idea to plant more when we start our next batch of seeds. Hopefully, the new tomato starts will survive the cats. While we’ve got a few Sophie’s Choice seeds left, plus a couple other varieties that will be started next, we have no Cup of Moldova seeds left, and those are the paste tomatoes I wanted to have a lot of.
The luffa and Canteen gourd in this tray are struggling, too.
The new Canteen gourds are doing much better. The first Wonderberry is managing well, too. There had been a second on in there, but I thinned it out, as it was so tiny.
The shallots seem to be doing better than the onions in the small aquarium greenhouse – except that it looks like the tray got dug into in one corner by a cat.
Also, absolutely everything is covered in cat hair. *sigh*
I think we’ve finally got things worked out to keep the cats out while increasing air circulation in the mini-greenhouse. We really should at least be leaving the front open completely, if not removing the cover entirely, but we’d lose everything to the cats if we did that.
It will be good when we can finally transfer them to the sun room. Overnight temperatures are still too low, though; the thermometer in there read just below freezing when I headed out this morning. We could make use of the ceramic heat bulb in the corner the plants will be in to help, if necessary. I’m also thinking of making use of some of the larger sheets of rigid insulation we’ve got left, cover some pieces with foil, and set them up to reflect light for the seedlings. We’d still need to rotate the trays, but it would help keep them from getting too leggy, plus actually provide some warmth and insulation overnight. We’ll see if we can figure out a set up that will work.
As mild as things are right now, we are expecting things to dip a bit over the next few days, and there’s usually at least one more blizzard around our anniversary in April, before winter finally breaks. For parts of the province, that might actually happen today. It looks like we’ll be mostly clear where we are, but the south of the province is getting predictions of both rain and heavy snow.
Today may be the first day of spring, but winter isn’t ready to let go, quite yet!
Today was originally forecast to be only 0C/32F. Then the predictions were for us to be “5 degrees colder than yesterday’s high” – apparently we reached 8C/46F at some point!
Even as I was reading that on my app, we’d already surpassed that adjusted forecast, and as I write this, we have continued to warm up and are now at 6C/42F.
It’s awesome out there!
The outside cats are loving it.
I think the heated water bowl is working again. The metal bowls had iced over, though they weren’t frozen solid. The hole formed around the heated water bowl, however, was a pool was water. I’d chipped the ice and snow away from part of the cord so I could see if there was any damage (I couldn’t see any), so I had enough slack to move the bowl to a new location, out of the water. It had no ice in it at all.
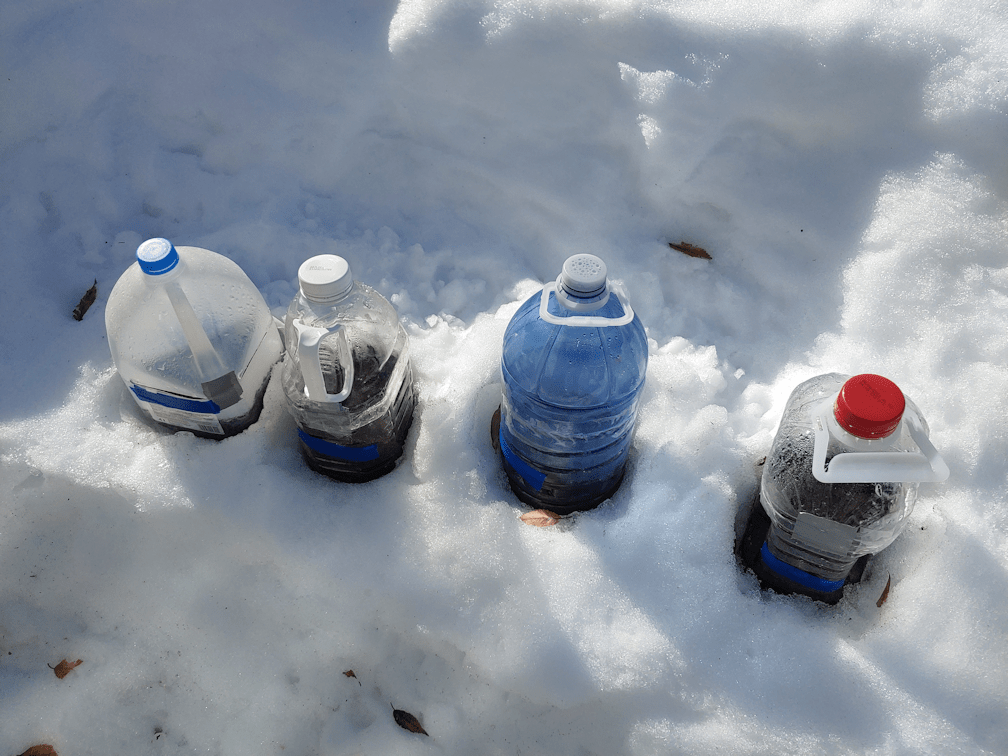
We’ve been clearing snow off the winter sowing experiment as best we could. They all have holes in the tops for air circulation, but I did put snow inside them every now and then. That has completely melted away.
In comparing the 4 different types of containers, so far I like the milk just style (it’s actually a water jug) the least. The plastic is a lot softer, so if feels less stable, and the packing tape I used to hold the top and bottom halves no longer sticks to it. Other than that, they all seem to be responding to the light and temperatures the same, as far as I can tell. We’ll have a better idea of which type of container works best once the seeds start to germinate.
If the seeds start to germinate, I suppose!
Today is Saturday, which means the dump is open longer hours. Between the weather and vehicle troubles, we were way overdue for a dump run, and finally got it done today. The van was backed up closer to the people gate in the chain link fence for loading, but the packed snow of the driveway had softened so much, we almost got stuck trying to leave!
The part of the drive that bothered me the most, however, as the lane to the dump itself. I’m particularly paranoid when it times to tires. Between the vans we’ve had and my mother’s car, we’ve dealt with quite a few tire problems. I’ve had tires blow out on me on the highway. I’ve had to drive on a rim for blocks before finding a safe place to pull over. I’ve had tires suddenly and unexpectedly go flat on me (only one of which I could reasonably say was not vandalism). I’m far too familiar with how it feels to drive on a flat.
Driving down that lane was so rough, it felt like driving on 4 flat tires.
I was never so relieved to get back onto a muddy, pothole ridden gravel road than after we were done at the dump! :-D
Once at home, my daughter was sweet enough to take the time to clean the windows and lights on the van. They needed it!
I took advantage of the warmth and started digging out another new path. This time, towards the fire pit. In past winters, we were able to maintain paths around the entire house, a path to the fire pit, the area around the fire pit itself, and of course, a path to the wood pile.
This winter, even if we’d managed to start some of those paths, we couldn’t have maintained them. Maybe if the big snow blower was working, it would have been possible, but certainly not with little Spewie. There was just too much snow for that little electric machine.
One of the main reasons I want to clear a path to the fire pit is because the BBQ my brother gave us is there. We had a gazebo tent over it, but then a storm broke a tree branch on top of it, and the whole thing collapsed. It was still covering the BBQ and the picnic table, so we left it for the winter. My brother, however, bought us a new cover for it that is the right size; the one that was on it when they brought it over was for a smaller BBQ, and while we could get it to cover the important parts, the wind ended up tearing it to shreds, which is why I had it under the tent. So along with clearing the fire pit out, I want to be able to put the new cover on the BBQ, too.
This is going to be a multi-day job, though. For now, I just got a path about 2/3rds of the way to the fire pit. The warm weather is supposed to continue through into April, with the exception of 1 day that’s supposed to dip below freezing, so we’ll have plenty of good days to work on it.
The sun room, meanwhile, has been reaching almost 20C/68F during the day! The overnight temperatures are still a bit too chilly, but it’s going to be time to stop letting the outside cats have access to the room, now that their water outside is no longer freezing, and start prepping space for the seedling trays, and work out how to set up the new shop light.
I am so looking forward to being able to get more seeds started!
This afternoon, I went to the post office, where I was able to get a money order made out and mail it off, along with an improved printout photo of myself, to the RCMP for my PAL application. Hopefully, that means I’ll have my PAL certificate soon.
Since I was there, I took the opportunity to pick up a few things and…
I couldn’t help it.
I got sucked in.
There was a new seeds display.
We don’t need more seeds.
I got some, anyhow.
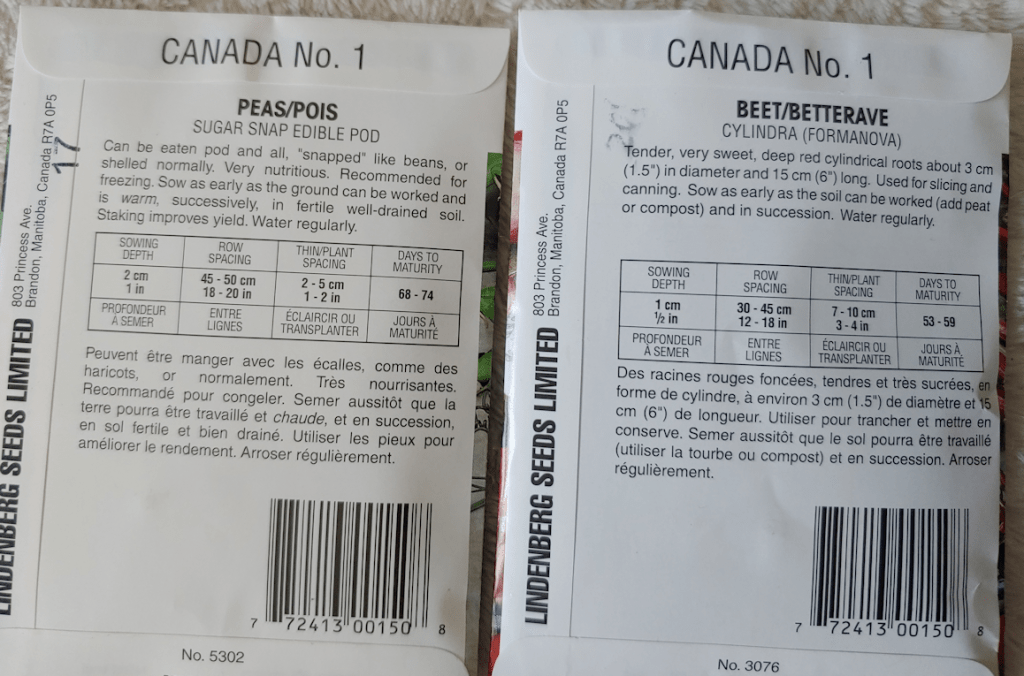
The peas we have now are shelling peas. Which would have been enough, but I do like snap peas, so I went ahead and got some. We also have a variety of beets already, but I decided to try the cylindra variety, too. The elongated shape is apparently much easier for getting consistently sized pieces for canning.
At least they aren’t something that need to be started indoors!
I think this is the first time I’ve picked up seeds from Lindenberg. Unlike a lot of other seed companies, they don’t have all their products viewable at their website, but had a downloadable catalog you can scroll through, instead.
Oh, dear.
I might just have to spend a bit of time ogling their selections now.
Well, today, I finally got it done. My daughter and I made it to Costco in the city and survived. ;-)
It wasn’t too bad, actually, though I did have some concerns when we first headed out.
Of course, the critters got fed before we left – and Ghost Baby made an appearance, too! As you can see, it was snowing again.
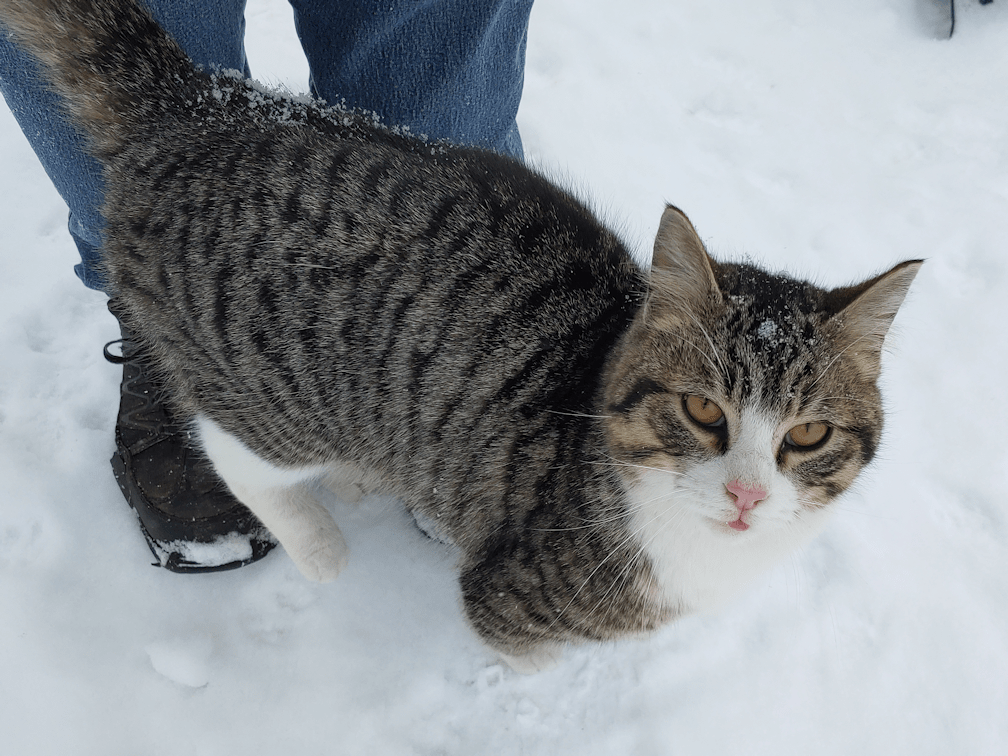
Chadiccus is not impressed with more snow.
It was coming down heavier by the time we left; enough to make visibility a bit of a concern. Especially when passing oncoming trucks, and all the snow they were kicking up. The main concern was more about deer than traffic – and I counted at least three dead deer on the side of the road, just between our place and the town my mother lives in. By the time we picked up a bit of gas and breakfast, it was starting to clear up, though, so that was good. We did see several deer crossing the highway on the way home, though. Thankfully, visibility was just fine at the time, and all the traffic could see them and slow down!
One of the changes in today’s plans had to be about my glasses. I don’t know how much they will cost, but I did have an idea of what our shopping list would cost, and I knew we probably couldn’t do both. I still thought I might be able to get an eye test, though, which our insurance covers 100%, once every 2 years. While standing at the counter, being ignored, I noticed their sign on the eye exam door making a big deal about masks, due to close proximity. All restrictions are supposed to be lifted in our province tomorrow, but I’ve been able to go without even my Mingle Mask (which I shouldn’t be wearing, either), without any problems lately. This Costco location has been particularly good, except for the odd harassment from customers, though I’ve heard of others getting abuse from staff. I think it can depend on who’s on shift at any given moment, and how much they are into power tripping. Either way, after reading the sign, I decided it wasn’t worth the hassle and left. I’ll see if I can get a eye exam somewhere, later, and hopefully will not have to deal with medical discrimination any more.
There were a couple of things I found at Costco that I decided was worth getting, even though they were not on our list. One was a large bag of soil for seed starting. I’d been getting smaller bags until now, because that’s all that was in stock. With this one, we now have enough for all the seed starting we need to do, and probably have some left over, all at a significantly lower cost.
The other thing I got was a shop light that was remarkably affordable.
Last year, we rigged up the long aquarium light fixtures that are currently being used on the big aquarium greenhouse that they were designed for. This is brighter, and much less fragile! If I can avoid moving those more than I have to, that’ll be a good thing.
While it’s intended for the sun room, once we start transferring our seedlings there, I have it rigged up in front of the mini-greenhouse right now. For an overcast day like today, it’ll be much more efficient than the little lights I’ve been making do with right now. I’ve actually got it hanging from one end from a plant hook in the ceiling of the living room, in front of the mini-greenhouse. It’s braced in place, but I do have some concerns a cat will knock it aside. If that happens, at worst, it’ll just be dangling from the ceiling and not lighting up inside the mini-greenhouse. We are still relying on the aluminum foil lining the back and sides to reflect the light. At some point, we might be able to get smaller lights that will fit under the shelves of the mini-greenhouse but, honestly, by the time we’re ready to invest in those types of lights, we’ll be using larger, sturdier shelving to start seeds in, so it’ll be a moot point.
This light can be linked to others, so if it works out in the sun room, we might pick up more. If they’re still available by the time we can test it out, of course.
The remote control is an interesting thing to have. It means that we’ll be able to control the light from inside the house, if we want to. Most likely from the bathroom window, which overlooks the run room.
We’ll see how it works out and adjust accordingly.
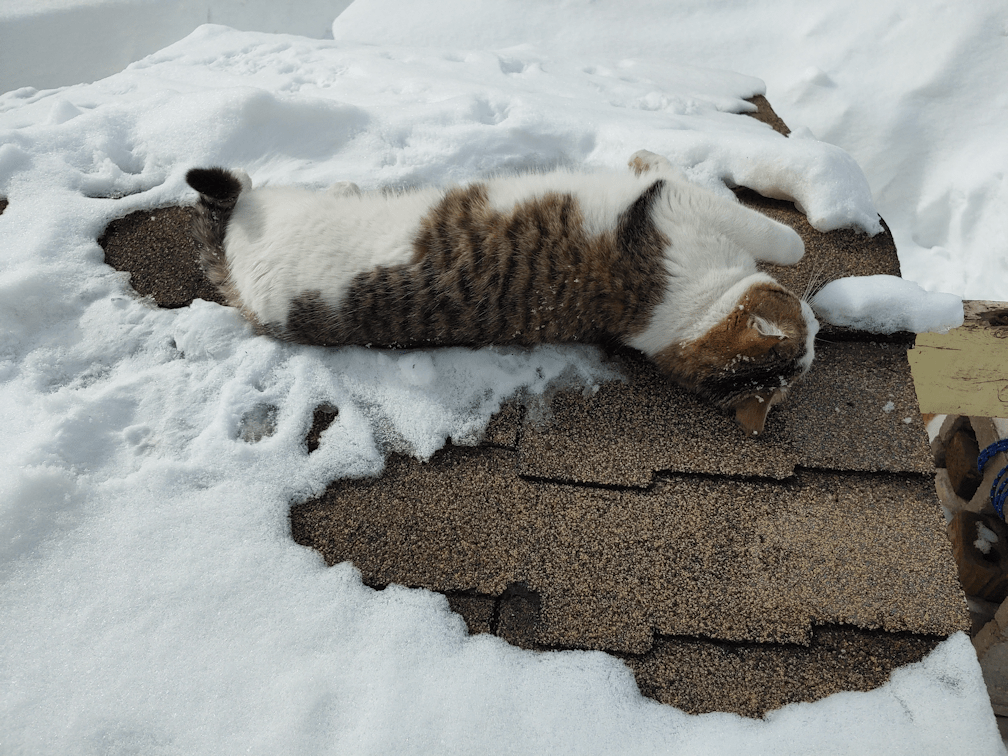
While we were unloading the van, I spotted an Agnoos. He was having so much fun rolling around on the cat house roof, he almost rolled himself right off of it! :-D Silly boy!
So we finally did the big shopping trip we normally would have done at the end of last month, and are all stocked up again. We now also have all we need for starting the remaining seeds, and even an extra light. About the only thing we’re short on is a storage bin of the appropriate size and shape for when we start the kulli corn. We’ve been saving our toilet paper tubes to use again, with some modifications after things didn’t work out as planned, last year. We got 100 kulli corn seeds in total which, if we can find the right size and shape storage bin, we should be able to fit into one bin. We still have the under-bed storage bin we used last year, but that will be too long for just the corn. Last year, it fit both corn and sunflowers. It worked, but I’d like something less awkward to move around, and we’re not starting sunflowers indoors this year.
Oh, there was something else that has progressed. Or should I say, has actually stalled. We hit the mail before heading into the city, and I found a letter from the RCMP. My PAL application went through, but my “credit card” didn’t work. They can’t do debit Visa. I don’t have a credit card. The letter included a form for new credit card information, but I’ll have to phone them tomorrow and see if I can mail them a check, or if I have to go to the bank and get a cashier’s check. There is also a letter saying the quality of the photo I sent them was not good enough, and they want another one. I could probably use the same photo; the problem would have been with my printer. I’ve printed other photos since then, and the quality has been much better, so I’ll try again.
Anyhow. We got some good progress during what has turned out to be a very dreary day. Not as warm as was predicted (no surprise there). We’re also getting predictions of above freezing temperatures tomorrow, but still overcast, so… we’ll see what actually happens!
Tomorrow, however, is pizza night. One of my daughters has a birthday this month, so she’s treating the whole family to pizza. The place she wants to order from is a 45 minute drive away, but what birthday girl wants, birthday girl gets. ;-)
Quite a few seedlings, pots and trays got moved around today. The only things that didn’t need to be moved where the onion seedlings, inside the small aquarium greenhouse. That tank doesn’t fit a lot, so they get to be undisturbed for now.
They are still struggling, but it looks like most of them will make it.
Also, the second seed in the cup with the Canteen gourd sprouted! That makes for a 100% germination rate on those!
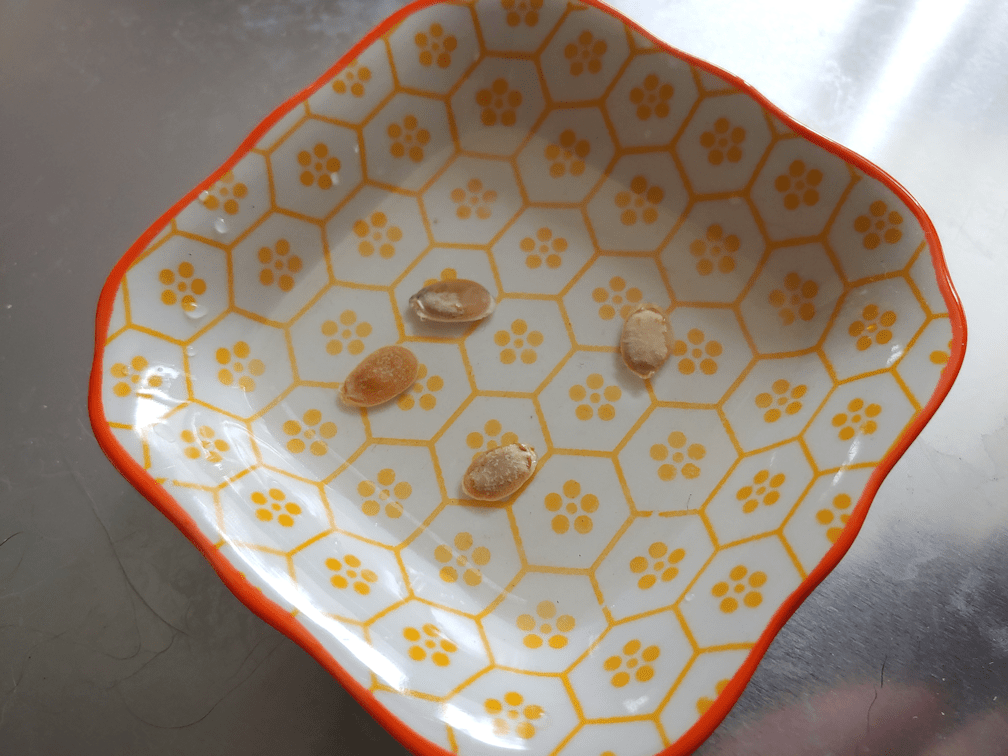
As for the luffa, there were two peat pots, with nothing coming up, so more luffa seeds were set to soak, this morning.
Last time, the seed coats were scarified by carefully snipping them with nail clippers. In the off chance that they were damaged by this, I used sandpaper on an edge of each seed, instead.
When it was time to plant them, I used the tip of a chopstick to loosen the seed starting soil – and see if I could find the old seeds. I found only one (there should have been 2 in each pot), and it was just the shell, completely empty.
Hopefully, we will have better luck with the new seeds.
I also decided to do more Wonderberry. We started seeds in two Red Solo cups, and one of them now has a second seedling in it. The other, nothing. So a few more seeds were used to try again. We do still have some left over.
Sophie’s Choice remainsCup of Moldova remains
Next to do were the Sophie’s Choice and Cup of Moldova tomatoes. There were barely even stems left with the Sophie’s Choice, and all the leaves on the Cup of Moldova were withered away. These were the ones we transplanted to thin out of the original pots. While a cat destroyed the Sophie’s Choice seedlings, I still don’t know what happened with the Cup of Moldova seedlings. They had been doing so very well, after transplant. :-(
We reseeded the Sophie’s Choice minimally, and still have some seeds left. I managed to get a couple of seeds into each Cup of Moldova pot (though I noticed some seeds were stuck together, so a few have more), and finished off the packet. If these don’t work, then all we’ll have is anything that survived the Great Cat Crush.
The newly planted seeds went into the big aquarium greenhouse. My daughter has hung her orchids in front of the window, and I found a place for our aloe that will hopefully dissuade the cats from digging in their dirt. That allowed me to set up a surface for a second tray.
The Sophie’s Choice, luffa and Wonderberry are on the heat mat, and there was space enough for a metal tray to hold the Cup of Moldova on the other side. The Red Solo cups don’t fit in the black trays as well. If they weren’t the exact size for the mini-greenhouse, I’d be using nothing but those baking trays!
Speaking of the mini-greenhouse…
We emptied that out, removed the plastic cover, then lined the back and sides with heavy duty aluminum foil. The whole set up is now closer to the window for more natural light.
The remaining seedlings went back into the mini-greenhouse. The shallots are now in here, along with the two other Canteen gourds that sprouted while in the big aquarium greenhouse, as is the sprouted Wonderberry. The new location should mean more natural sunlight – especially first thing in the morning – and the aluminum should help reduce any stretching towards the light from the seedlings. They’ll still be checked and turned as needed, of course. Eventually, it’ll be moved even closer to the window, but it’s still too cold for that.
I had hoped to be able to block the front opening of the cover with the window screen we used to use on top of the small aquarium greenhouse, but it’s not big enough to keep the cats out. So, we have the little fan inside again. Since today is quite overcast, I’ve also added the light fixture that also provides a bit of heat. There’s another lamp we use, but it doesn’t fit inside the mini-greenhouse, and will sit in front, instead.
The tray with the baggies of paw paw and tulip tree seeds is back on the top shelf, where it has the least amount of light, but is also the warmest. It should still be a while before we start seeing anything happening with those.
You know, all of this would be a lot easier, if we didn’t have to protect everything from cats! :-D One or two shelves in the living room window, and we’d be done.
Ah, well. It is what it is!
Hopefully, the newly planted seeds and the new set up for the mini-greenhouse will work out.
Well, that “blowing snow advisory” has certainly been valid.
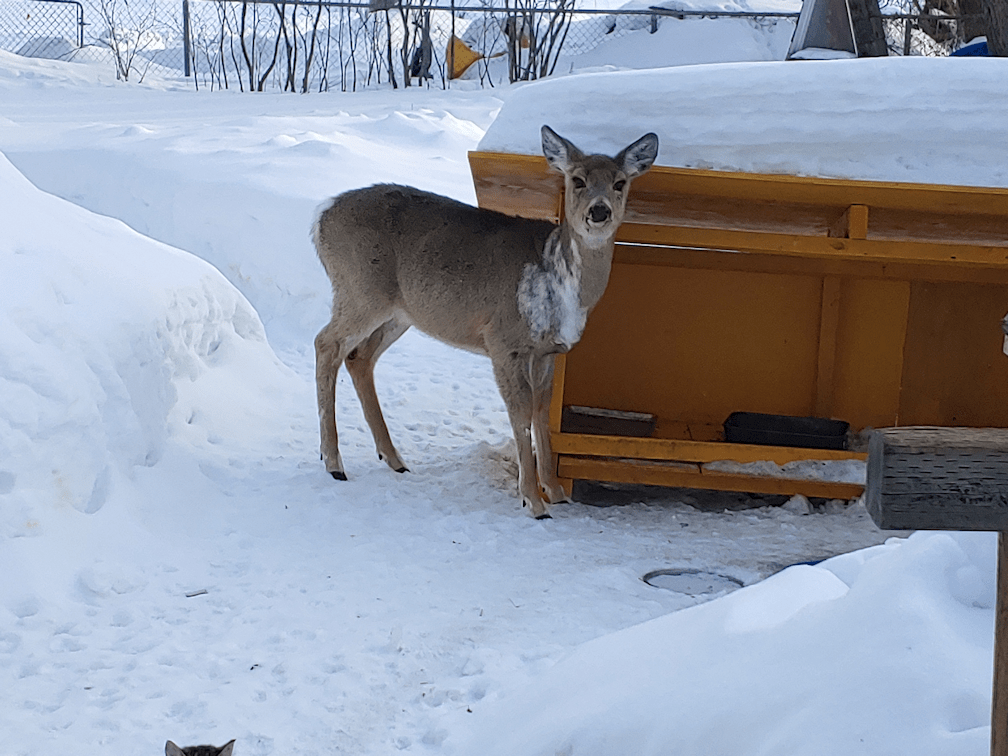
My husband noticed the piebald deer heading for the kibble house again, so I figured that was a good time to empty the kitchen compost bucket – and get her away from the kibble. When I opened the door from the sunroom, pausing to take this photo, she just stared at me until she saw me moving outside.
I don’t think she appreciated the interruption of her snack!
I topped up the kibble for the cats, while I was out.
Since it was a quick run to the compost pile, I hadn’t bothered putting on a coat. It was only -12C/10F, after all!
Of course, that didn’t take the wind chill into account. I don’t know what it was at the time, but we’re at -13C/9F right now, and the wind chill is -23C/-9F. Brrrr!!!!
But I’m thinking of spring as we tend the seedlings. I’d mentioned in my last post that the seedlings in the mini-greenhouse were not looking well, so I decided to get some photos to show what I meant.
At which point I discovered I’d forgotten to drop and zip closed the front of the plastic cover.
Much to my surprise, the cats have made no attempt to go into it! Perhaps they’ve satisfied their curiosity already. I decided to leave it open, for now.
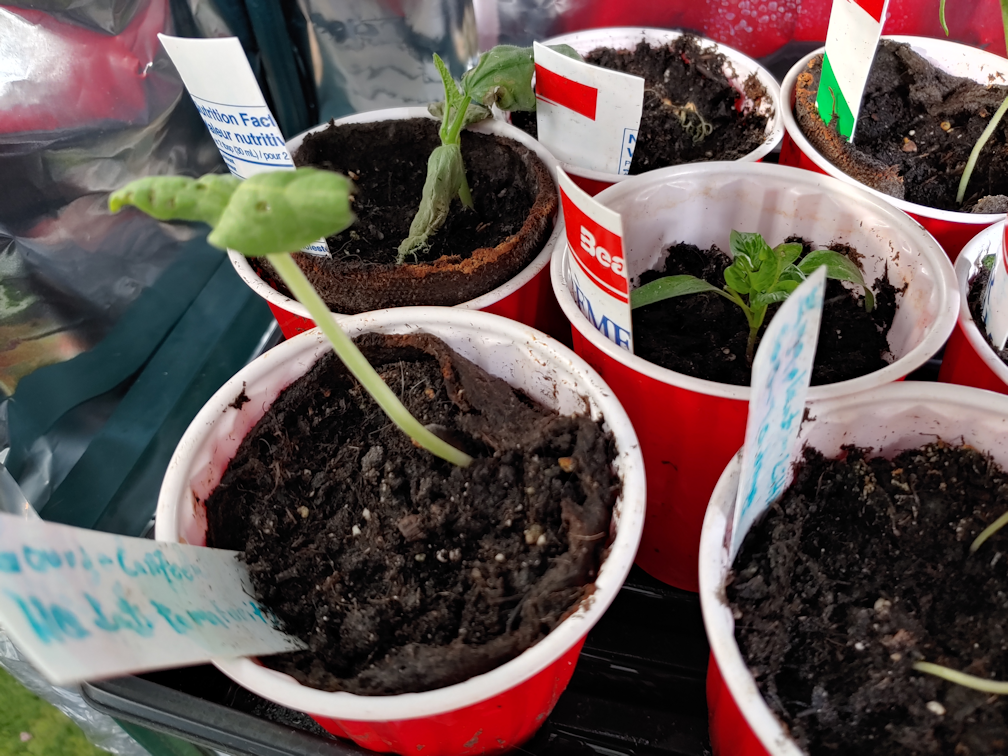
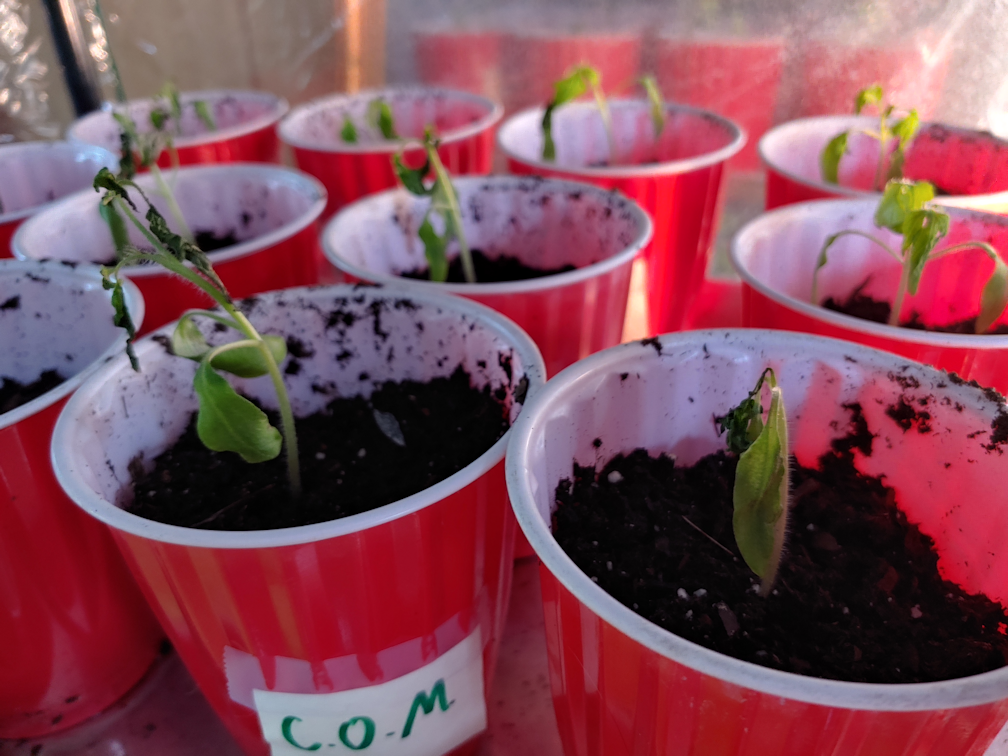
These are the Cup of Moldova seedlings that got potted up as we thinned them out. They are actually looking worse now than this morning, and I don’t know why. They had been doing quite well after being transplanted, then suddenly… this.
Were they over watered? Too hot in the mini-greenhouse? Not enough light? Not enough air circulation? Any or all of the above? I have no idea. I’m hoping that leaving the front of the cover open will be helpful.
The Sophie’s Choice that got eaten are… well, the two that were down to just stems are dead, but the ones that still have leaves on them… I don’t know. They might still survive.
These are the ones that got repotted after a cat lay on and crushed the original pots they were in. They actually are doing better than anything else in the mini-greenhouse. The damage done to them is more visible now. Surprisingly, the peppers and eggplants that got the most shmooshed are doing pretty good! The remaining tomatoes are showing damaged leaves, but beyond that, they look like they will recover.
I guess we’ll see over the next few days, how many are complete losses, and how many will survive.