After sitting in water, with some molasses and a touch of salt, for a couple of days, our Giant Puffball spores were ready to be used to inoculate an area.
The instructions just said to pour over grass, but I did do two things to prepare the area we decided on. First, I pulled up the tall grass. There was barely any, and I didn’t try to pull them up by the roots or anything. Mostly, I figured I wanted the spores to be on the ground, not on tall blades of grass! :-D Then, I wet the area down with a hose. I wet down the morel bed, too, since the hose was handy.
When pouring the slurry out, I just swung the jug back and forth while walking backwards, paying more attention to spreading it evenly than to how large of an area I covered. It ended up being just enough to cover from end to end between the trees, from the morel box, down.
The temperatures have been just lovely, and we’re even getting passing showers, fairly regularly.
It’s been mild enough that, even with the first Ozark Nest Egg gourds withering away from last of pollination, new gourds are forming!
Looking at the long range forecast, I am just amazed.
We’re supposed to hit 28C/82F in a few days! With a humidex of 32C/90F! I thought we already seen our last days of temperatures this high. It’s the warm overnight temperatures that make the big difference, though. The app on my phone has long range forecasts to 24 days. Of course, the farther out they predict, the less accurate they can be, but even so, there are no frost nights predicted! It’s like we’re getting the weather we normally would have got, earlier in the year, instead of the drought. In fact, even with the few showers we’ve had, it looks like we still need to water the garden! We will still be getting beans and summer squash, more and more of the late sown peas are growing pods, more sunflowers are opening their seed heads, and even the Tennessee Dancing Gourd is producing more flowers and gourds. Of course, the beets and carrots are still growing. I was planning to leave those until around first frost, and it’s looking like they’ll have plenty of time to keep developing. The tomatoes are dying back, but still prolific, and the lettuce and surviving chard are thriving. I’m almost tempted to plant some more lettuces!
Almost.
This does mean we won’t be broadcasting the wildflower seed mixes we have for quite some time; they aren’t going to go out until there is no chance of germination.
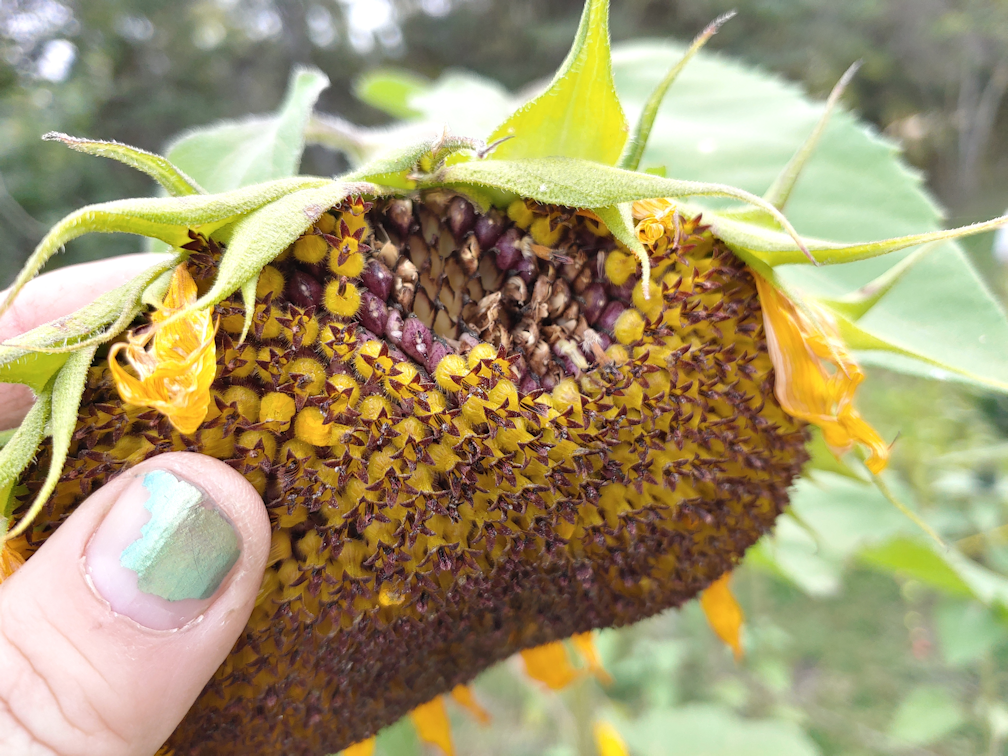
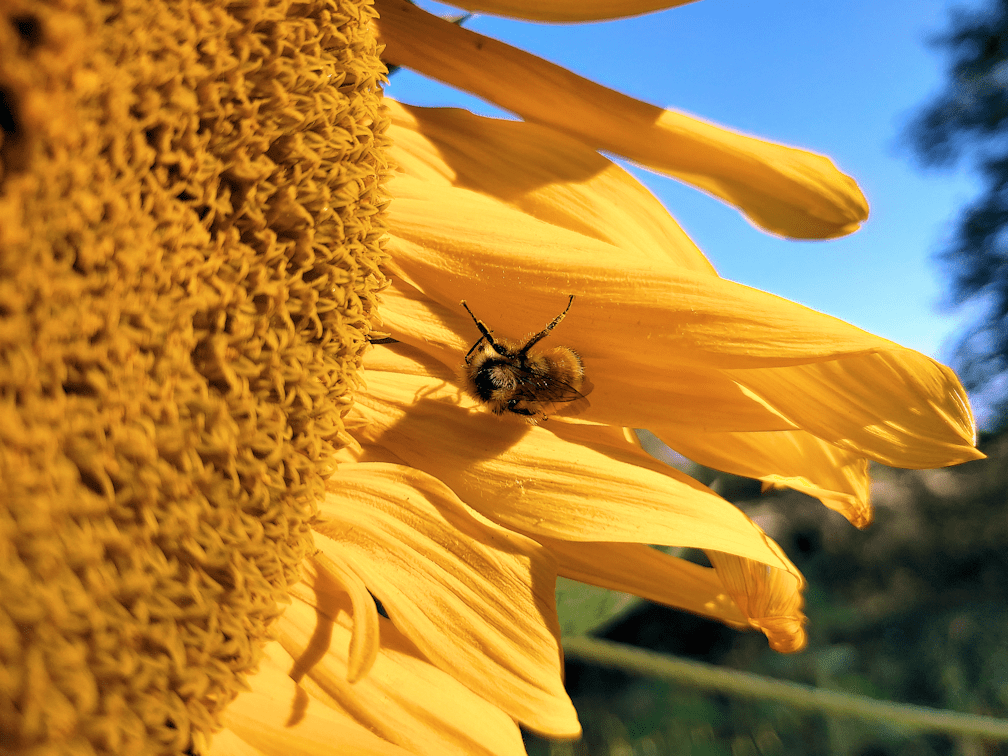
This is the Hopi Black Dye sunflower that has the one seed head that I think will have time to fully mature – and it has four more bright and cheerful seed heads opening!
I don’t know why my phone’s camera blew out this shot, but you can still see what a deep, dark purple is developing as the seeds mature.
When my mother found out I was planting sunflowers, she immediately mocked me, telling me that the birds would eat them all. This is the first sign of birds eating them I’ve seen this year. :-D
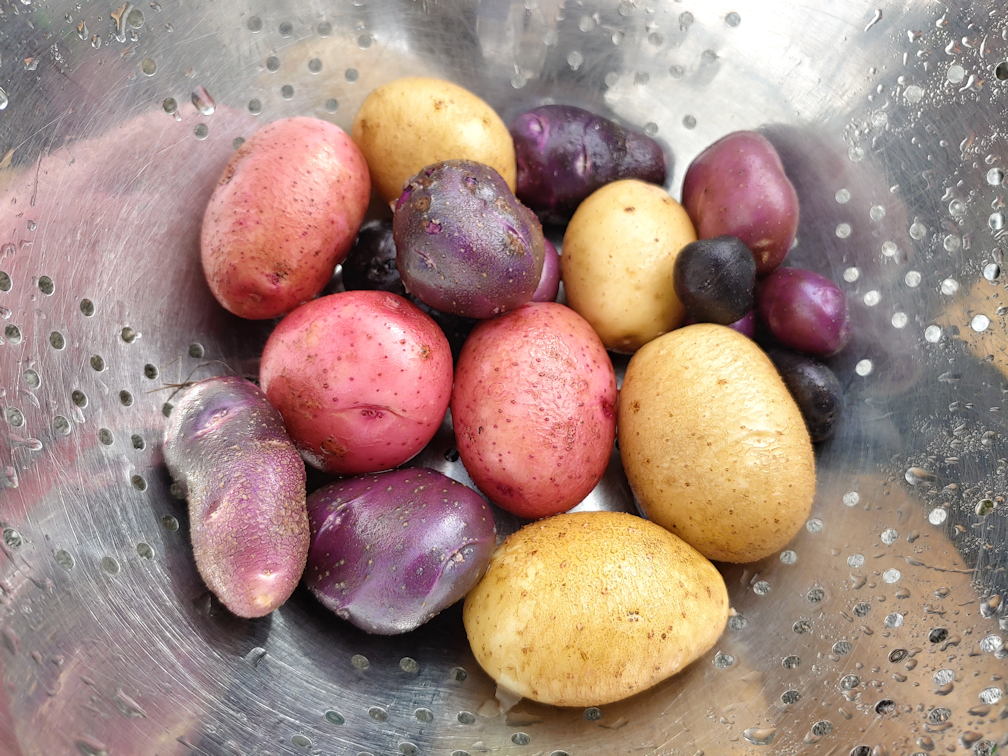
Not too long ago, while working on supper, I decided to dig into the potato bags and see what I could find.
The Norland (red skin, white flesh) and Yukon Gem (light brown skin, yellow flesh), we have picked before, but this is the first time I tried to find any of the fingerling potatoes, Purple Chief (purple skin, white flesh) and Purple Peruvian (purple skin, purple flesh). I did not find a lot, but I’m hoping it’s because I just wasn’t digging around in the right places.
I currently have them roasting in the oven with our own onions, both red and yellow, three types of summer squash, and purple beans. The only thing in there we didn’t grow ourselves was celery. Oh, and the dill we got from my brother. :-) I’ve got three chickens roasting, too, so we shouldn’t need to cook for the next couple of days! :-D
This is an “almost” first for me. I’ve made a few little videos now and then, with minimal editing, to post here on the blog. Years ago, I used to make videos on DVDs of photos for my parents, set to music and with chapters, etc. Since we were so far away, I thought it would be a fun way to share lots of photos of their grandchildren with them in a way that would be easier for their declining mobility. When I found out they never watched any of them (and in cleaning out their possessions in the house, I never found them), I stopped.
Yesterday, instead of making another long, photo heavy post, I would try doing a narrated, fall garden tour video. I have very little equipment; I recorded the audio using a headset with a microphone, and the video software I used is the same old one I used back when I was making DVDs for my parents! It took a long time to make, and a long time to upload. Thankfully, we didn’t loose our internet in the process. :-D Anyhow, in the wee hours of the morning, I finally got it done!
It is WAY longer than I would have normally done a video. Usually, I try to stay under 5 minutes, but this ended up being just over 47 minutes. I did try to explain some of the how’s and why’s of things, and I hope I did all right with that.
So please feel free to grab a cuppa, settle in, give it a watch, and please leave some feedback. I’d like to know how you liked it, if you found it informative and useful in any way, and if you would like to see more (I would NOT be making such long videos on a regular basis, but I might make some little 5 minute ones). I’d love to hear your questions, suggestions and anything else you’d like to share.
Okay, I should have done this yesterday, or at least earlier today, but too many other things kept distracting me away. So now I finally have it started.
Puffball slurry.
The spores in the packet are done the same way as the morels were; as little grains.
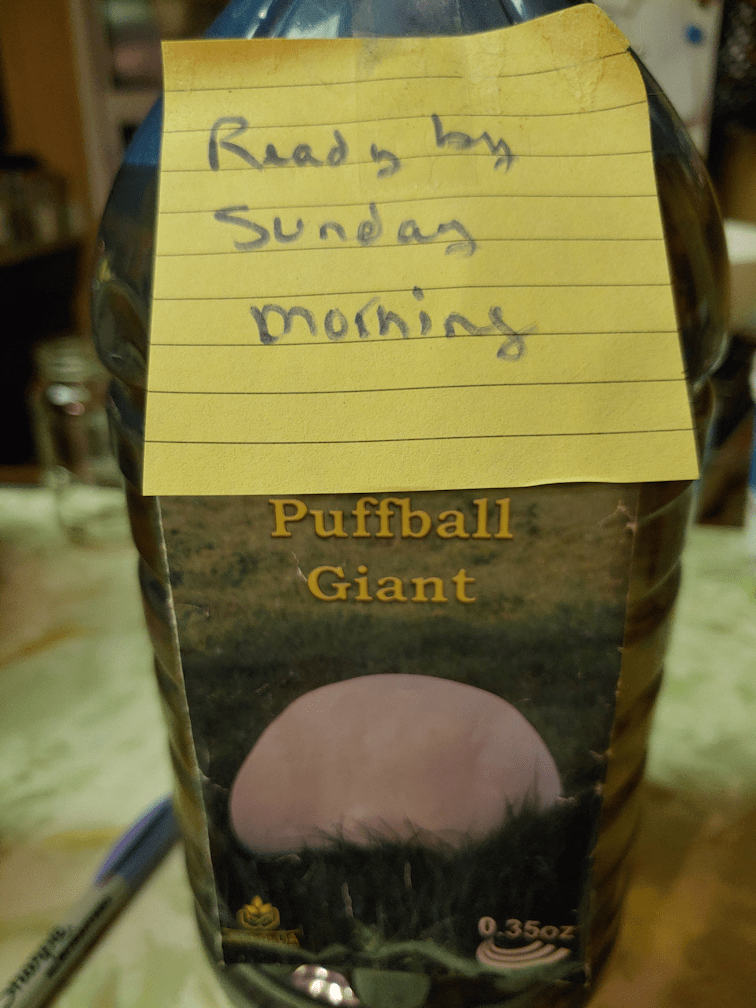
The package instructions said to put water in a gallon glass jar. I don’t have a gallon sized glass jar available, so I ended up using one of the gallon sized jugs from the distilled water we get for my husband’s CPAP humidifier. It’s food grade plastic, so that should be fine.
The instructions called for distilled or any other non-chlorinated water, so well water it was. Then they called for a pinch of salt (?!?!) and a small spoonful of molasses, which was then to be mixed with a clean wooden spoon until the salt was dissolved.
Such a strange mix of precise and imprecise instructions! :-D
Well, there was no way to use a spoon in the jug I was using, so after adding a bit of salt and a pouring in a blob of molasses, I put the cap back on and shook it until the molasses was dissolved. The salt dissolved pretty much right away, so that wasn’t an issue.
The instructions then said to “brush” the spores in, but since the spores were in those handy pellets, I just dumped them in. Now it is supposed to sit, undisturbed, for two days.
Actually, the instructions said to place the slurry “… where it will be disturbed…” :-D I suspect translation issues!
Anyhow.
Two days would actually be Saturday night, but since I’m not going to go pouring puffball slurry around in the dark, Sunday morning it is!
Like the morels, it could be a couple of years before these fruit, and it’s entirely possible they won’t take at all. No loss in trying, though, and if it works, we could find ourselves with puffballs big enough to cut into steaks! :-D Much easier than the little ones we normally get around here. :-)
Meanwhile, I have taken today as a break from heavier manual labour to give my body a chance to recover a bit. My husband, darling that he is, has been treating my hands with his zapper (needle-less acupuncture). One hand is pretty much back to normal now, but the ring finger on my right hand is still a problem. I may have actually injured it, somehow, aside from the usual arthritis. Whatever I did to it, I can at least say with confidence that nothing is broken, and I can at least still type. It’s a good thing I’m left handed in most things, too.
Aside from running some errands, we’ve been working on processing that big bag of dill my brother and his wife gave us. Our entire dining table is covered with towels, and my younger daughter and I have been working it in batches, as we’ve had the chance. There are a lot of mature seeds in there, and we’ve been talking about what to do with them. We want to basically set aside an area for the dill where they can self-seed to their heart’s content, and we don’t have to worry about them popping up when we’re trying to grow something else. We seem to have settled on the area next to the low raised beds that are being set up. It has been partially cleaned up, and because of various old tree stumps and roots, as well as spreading roots from those cherry trees that are not right for our climate, it’s not like we’re ever going to expand garden beds further in. If, for some reason, that spot doesn’t work out, I can think of another area where it might work to have a dill jungle. :-)
I am hoping to get back to taking down more dead trees and breaking them down for the high raised beds we will be building over the next while. I also want to do a thorough weeding of the empty beds, and letting them sit to allow any missed weeds to start growing, so I can pull them when it’s time to actually move the top soil and build the beds. We don’t have a lot of material left to use when refilling the bottom layers of the beds, but we will soon be able to start raking leaves, which will be good to use. Plus, we should be able to get another lawn mowing in before the end of the season, and have fresh grass clippings as well. So for now, the more dead trees we can cut and process, the better.
Well, so much for trying to support the sunflower in the old kitchen garden.
We had high winds again this morning, and the last of the three flower stalks on the remaining sunflower in the old kitchen garden finally broke. It was actually still upright when I came out this morning, but by the time I came back to the house, it was lying on the ground.
Sadness.
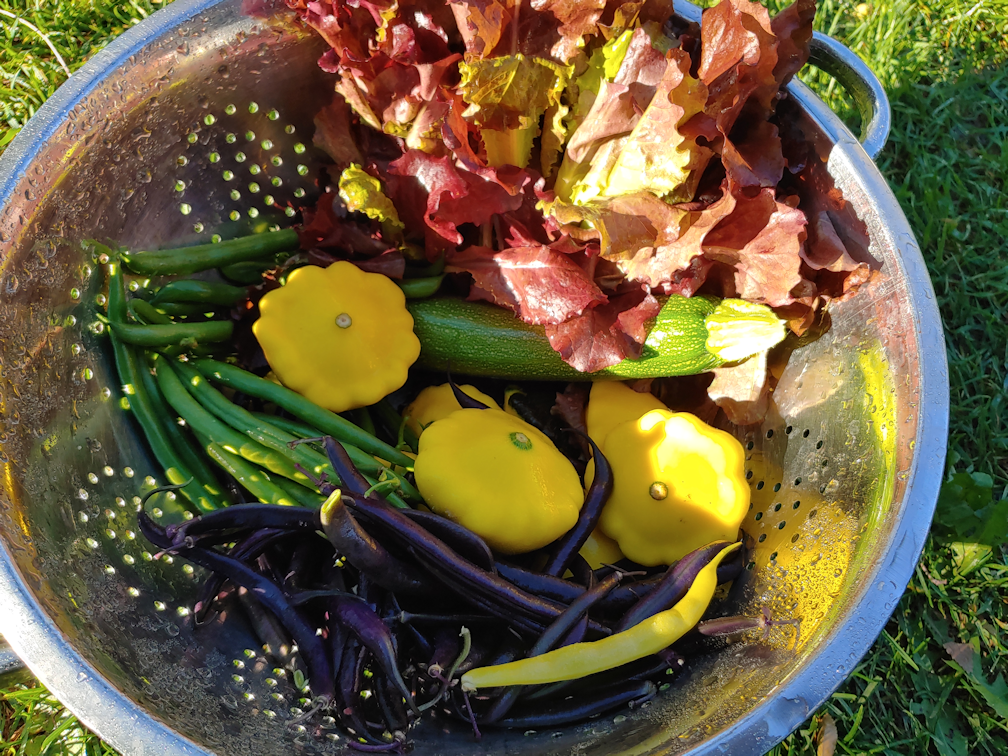
While checking the garden beds, I did get a little bit of a harvest this morning.
It all could fit in my pocket! :-D
This is the largest I’ve ever let a pattypan squash get. Any bigger, and they start developing their seeds. One of these days, I should try letting some fully mature. At that point, when the seeds are removed, they leave a cavity that can be stuffed for roasting, which I do want to try. We just really like them at this stage, though. :-) For next year, I plan to try other varieties of pattypan squash, and hope to grow some to save seeds, too. Since I accidentally bought three summer squash collections for this year, instead of one, we don’t actually need to buy more squash seeds, but I like to try new varieties.
That is definitely one of the biggest benefits of having a garden. There are so many varieties that are just never in the stores!
After working on the low raised bed yesterday, I was not physically up to working on another one today, so I figured I would do a project that was less physically taxing.
In other words, I’m a bit of an idiot. :-D
It’s gotten to be that time of year to do something with the mushroom spores my awesome husband got me for Christmas. Today, I started with the morels.
The package doesn’t have a lot of information about how to inoculate an area with them. One thing it did recommend was several different types of trees to inoculate under. The only one we have around here is elm.
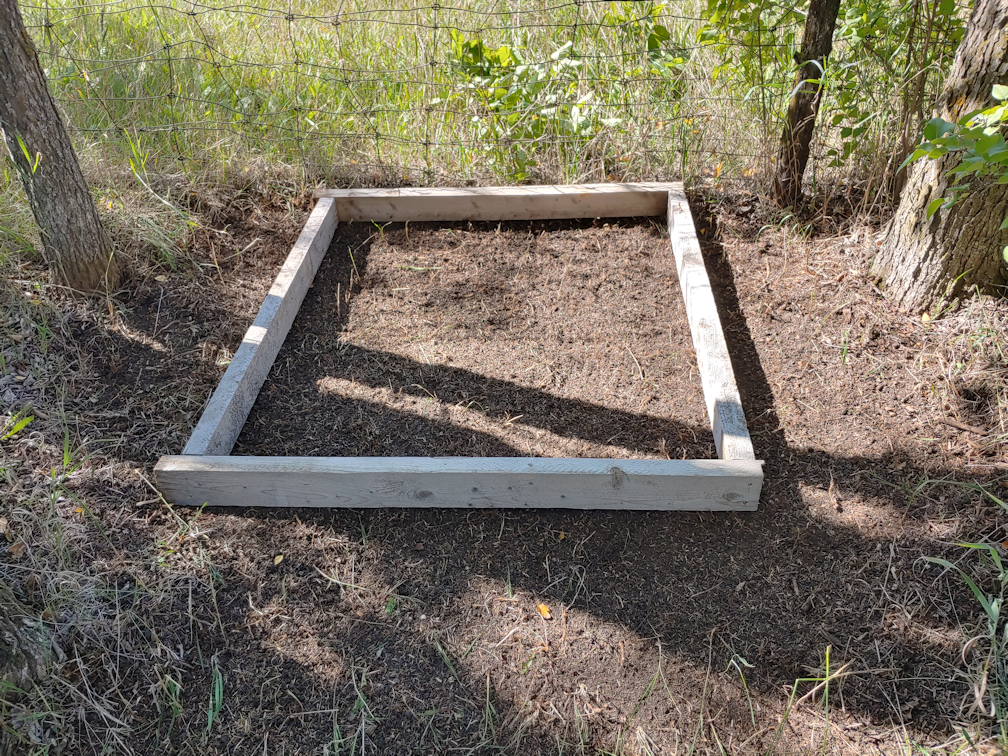
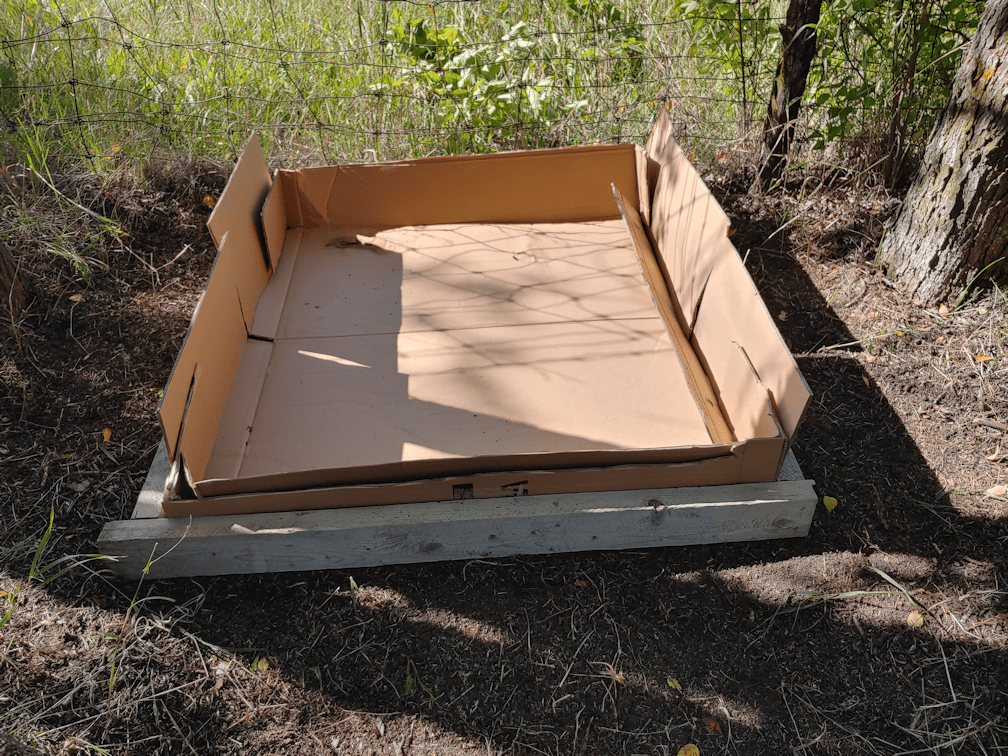
I spent some time online, seeing what other people did, and came up with a plan of action. I used one of the remaining sections of the old goat catcher we made, a couple of summers ago, and made it into a box frame.
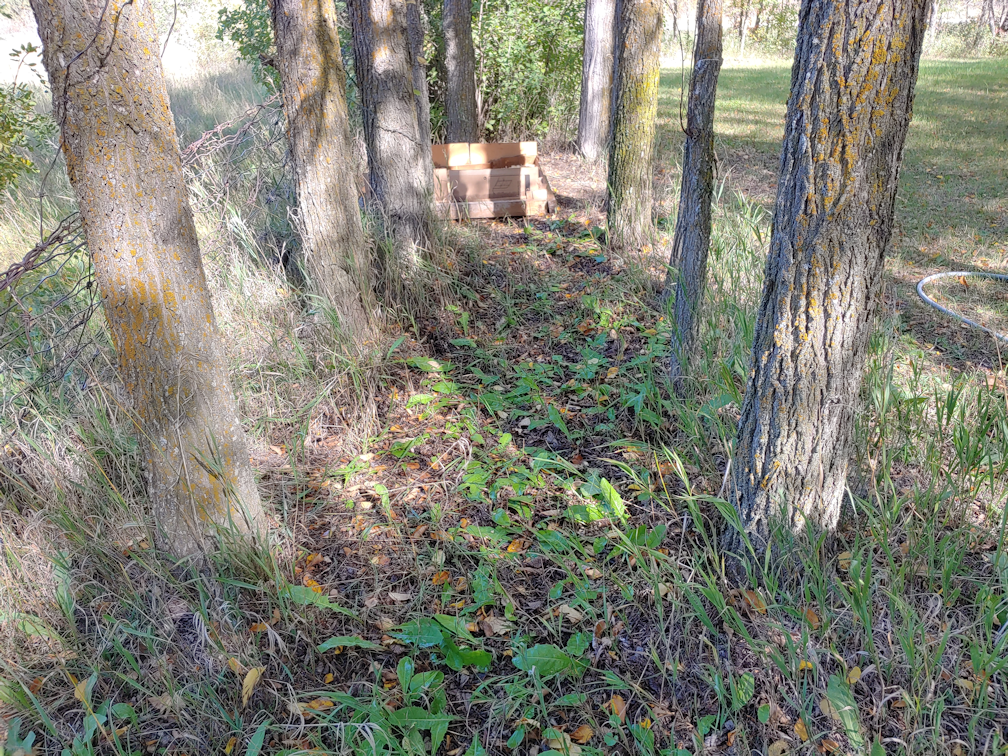
Then it was time to work on the location we finally settled on.
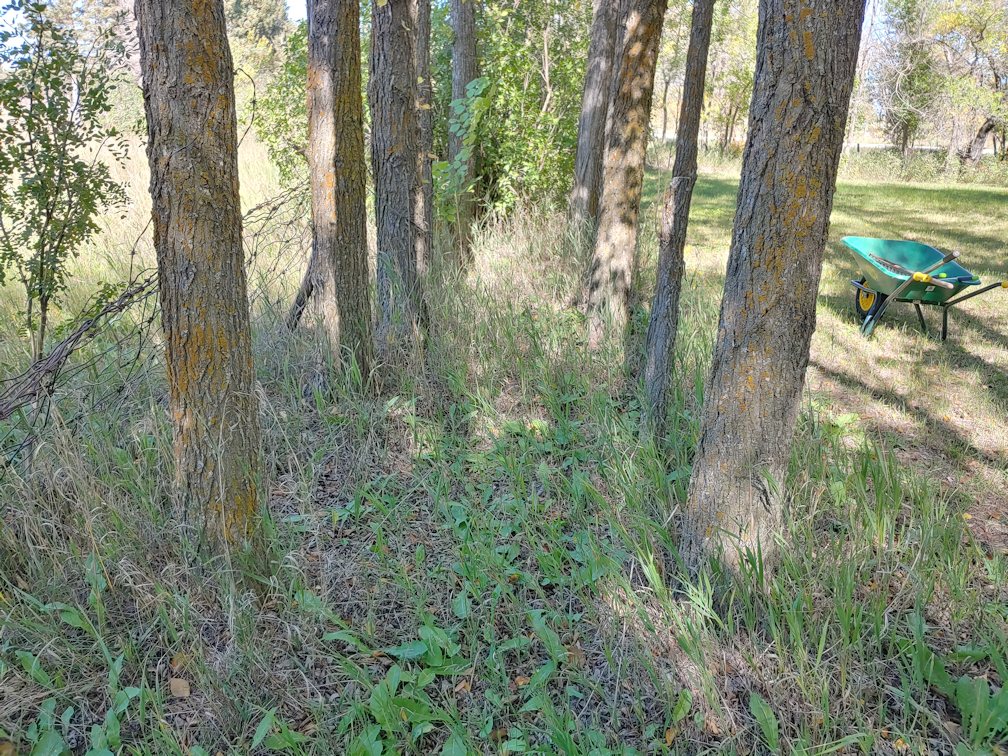
This double row of elms in one area is too narrow and lumpy to mow well, and far enough away that I really don’t want to bother with the weed trimmer. So both the morels and the giant puff balls will be going here.
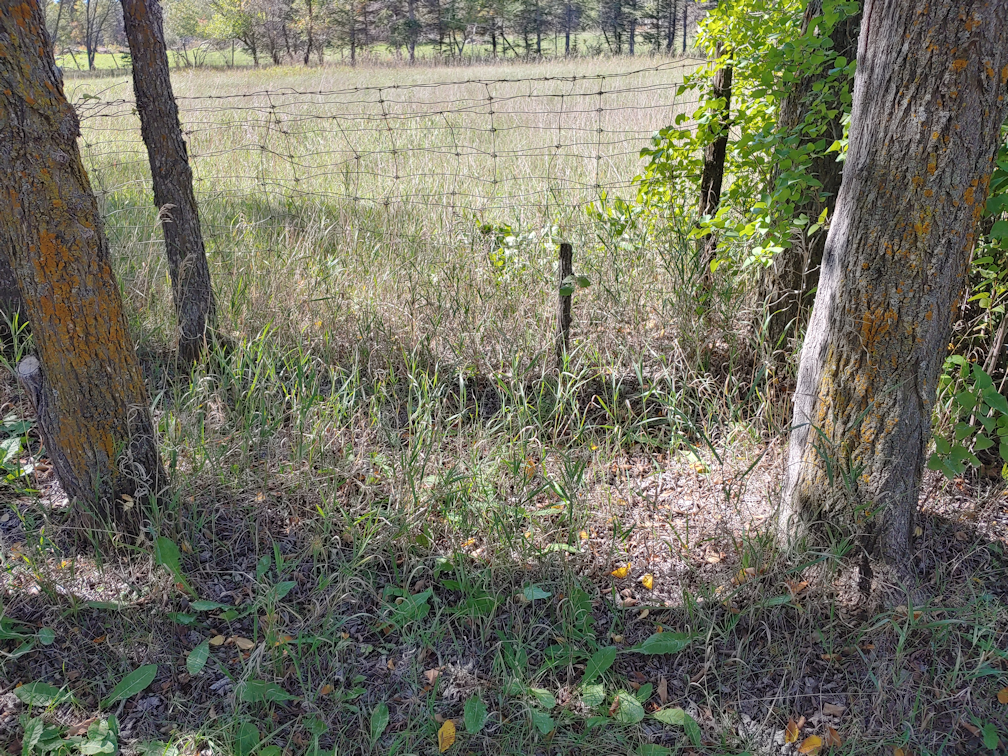
Since the morels will be going into a framed bed, they were going into the widest, most open part of the area.
First, it needed to be cleaned up. The stump of a dead little elm tree got trimmed flat to the ground, and a thatching rake was used to remove leaf litter and other debris. The remaining quack grass was so sparse, I ended up going over the area and pulling them up by hand, getting quite a bit of the rhizomes out in the process. Then I went over the area again with the thatching rake, loosening things up even more and getting a bit more debris out.
Next, the frame was brought over and placed in the most level spot that could be managed here. I wasn’t too worried about being perfectly level, since the next step would make that a non-issue.
We had kept the box the new washing machine came in, with its wonderfully thick cardboard. I was able to cut it in half, and use it to line the framed space in two layers. This should not only keep the crab grass from coming through, but ensure that little elm stump won’t start sending out suckers, either.
The next step was to give the cardboard a thorough soaking. As it is two very thick layers, I just left the hose running while I prepared for the next step. Morels like wood ashes; there is always a bumper crop after a forest fire. In the time it took me to get wood ashes from the fire pit and mix it with some of our purchased garden soil, there was a bit of a pool inside the cardboard! :-D
The wood ashes and soil combination made only a thin later on the bottom, and that’s okay. From what I was finding online, this could have been filled with straight wood pellets or shavings, and no soil at all.
Speaking of which.
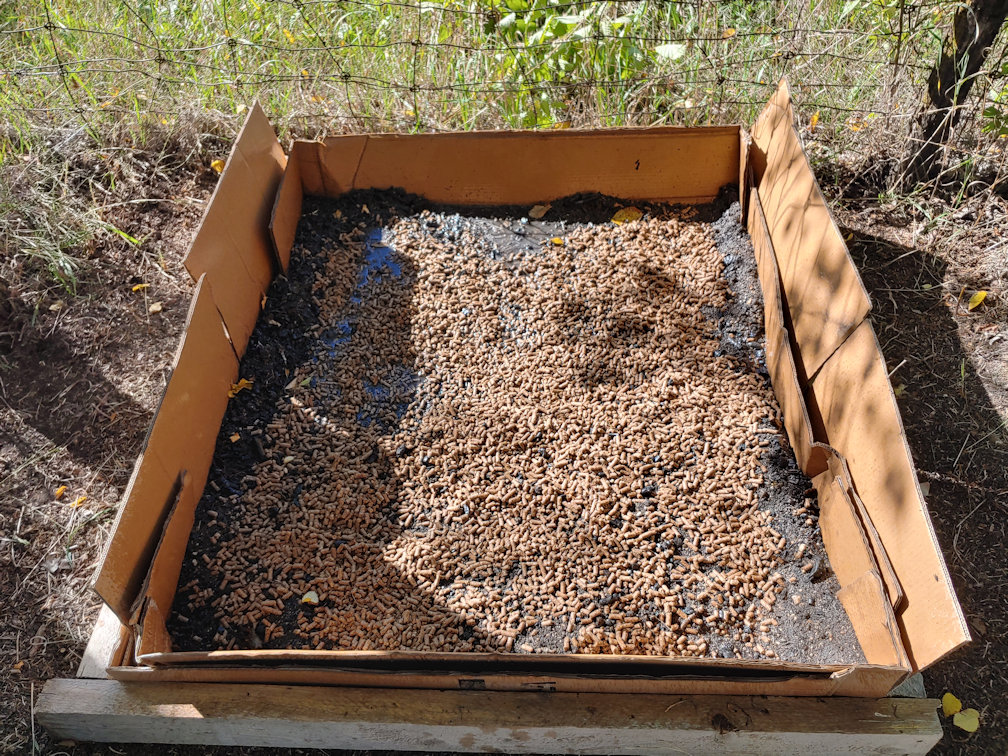
After thoroughly soaking the ash/soil mixture, I used the remaining half of the 40 pound bag of wood pellets I’d used in the low raised bed I made yesterday. Once those were spread out, they got a thorough soaking as well.
Then, while the pellets absorbed the moisture and began to break apart, I opened up a bag of wood shavings. Our general store/post office has them, probably for chicken coops. It’s the same sort of stuff you can get at pet stores for animal cages, except in a bigger bale.
A very thin layer of the wood shavings was added, more to cover the ash/soil mixture, and it got yet another soak with the hose.
Time to inoculate!
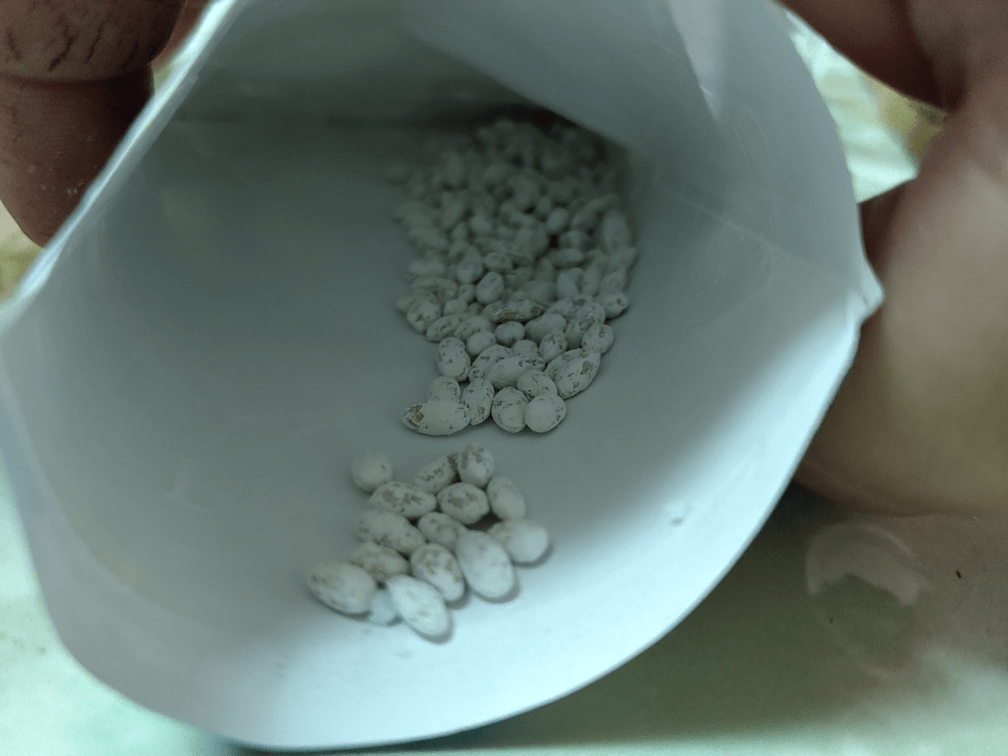
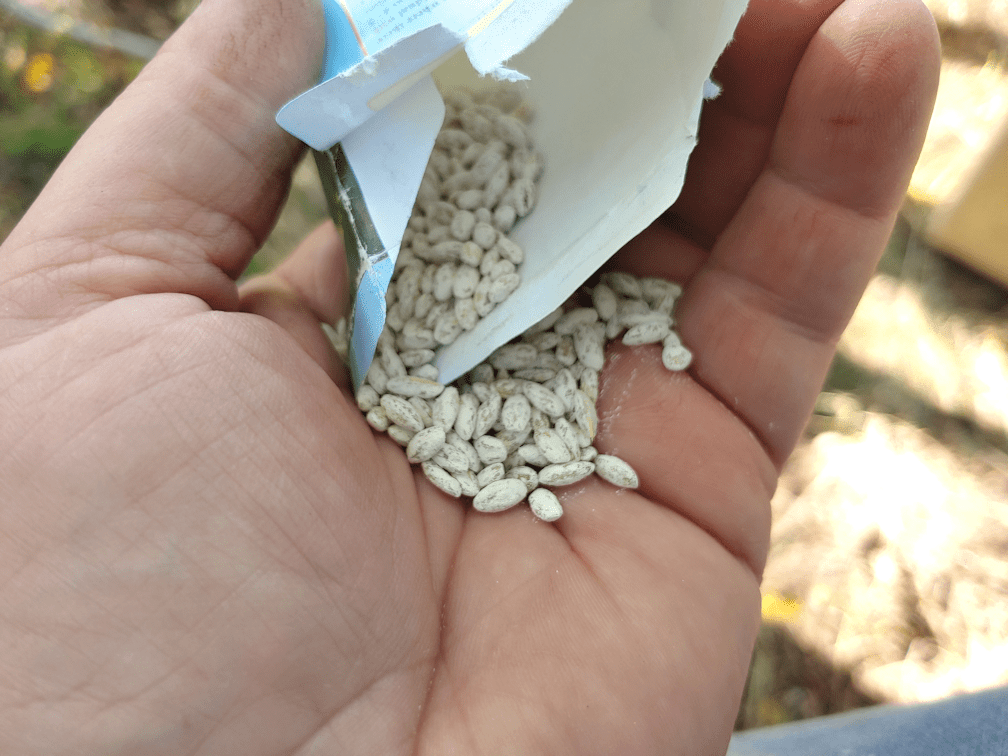
The packet the spores were in was the same sort of packet most garden seeds come in. Usually, mushroom spores come in blocks that get broken apart, so I was very curious as to what I would find when I opened the packet.
Huh. Interesting! These are about the size and shape of Orzo pasta, or some types of rice.
They got scattered over the shavings and wood pellets as evenly as I could. Can you spot them in the picture?
Those wood pellets have really expanded and broken apart. Perfect!
Once the morel spores were scattered, the bed got a light misting, more to make sure nothing would blow away.
Finally, a thick layer of the wood shavings was laid down and gently raked out evenly. Most of the bag of shavings got used up for this part. Once it was spread out, the whole thing got one final, very thorough, soak with the house.
And that’s it! It’s done! Now, we just wait and see. Hopefully, we will see morels in here around May next year, though it may take a year or two for anything to show up. That’s one thing that the package did say; it can take years for the spores to actually fruit. Or, nothing may show up at all. It’s hard to know.
As for the giant puff balls, those did come with more instructions, and need to be soaked in a water and molasses solution for a couple of days. After that, it just gets poured over grass. No advance preparation of the soil needed. If I can find a suitable container the cat’s won’t knock over, I’ll get those started tonight.
Meanwhile, now that I’ve had a delicious supper my daughters prepared, I think it’s time to pain killer up! This may have been less physically demanding than digging out a garden bed, but I probably should have given my broken old body a day to recover, first! :-D Actually, it’s not to bad. The thing that’s bothering me the most is the arthritis in my finger joints, which is more of a problem while typing than while shoveling. :-D
My darling daughter was able to do a patch job last night, beside the low raised bed I finished yesterday.
That pile of salvaged boards is coming in very handy! We are getting it down to a point where we are starting to reach wood that isn’t rotted out or weather damaged, too. We might actually be able to start using some of it to build things!
There is a much smaller gap on the other side of the box. That one just got a bunch of rocks that had been pulled out of the soil.
I look forward to when we can top the paths with gravel.
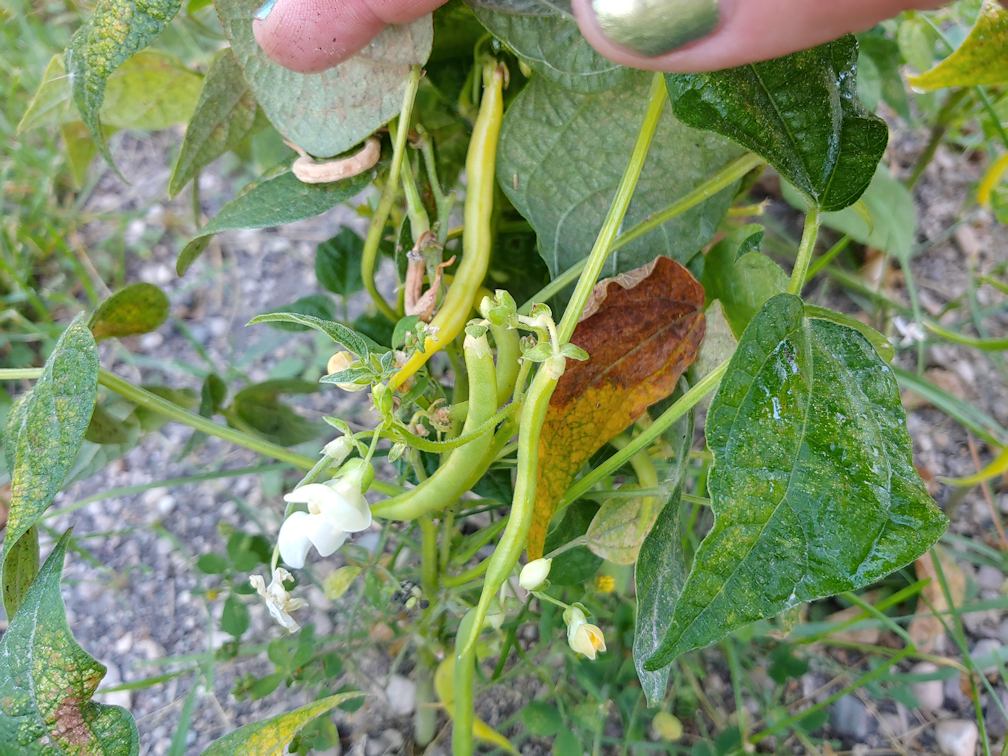
I am just amazed that we still have beans to pick, this late in the season! Even a single yellow bean. :-D
If the mild temperatures continue, we will be getting more yellow beans, too. There are new beans growing, all over the row! From what I could see while picking the green and purple beans, we will have more to pick for at least a couple of weeks, unless a frost hits, first.
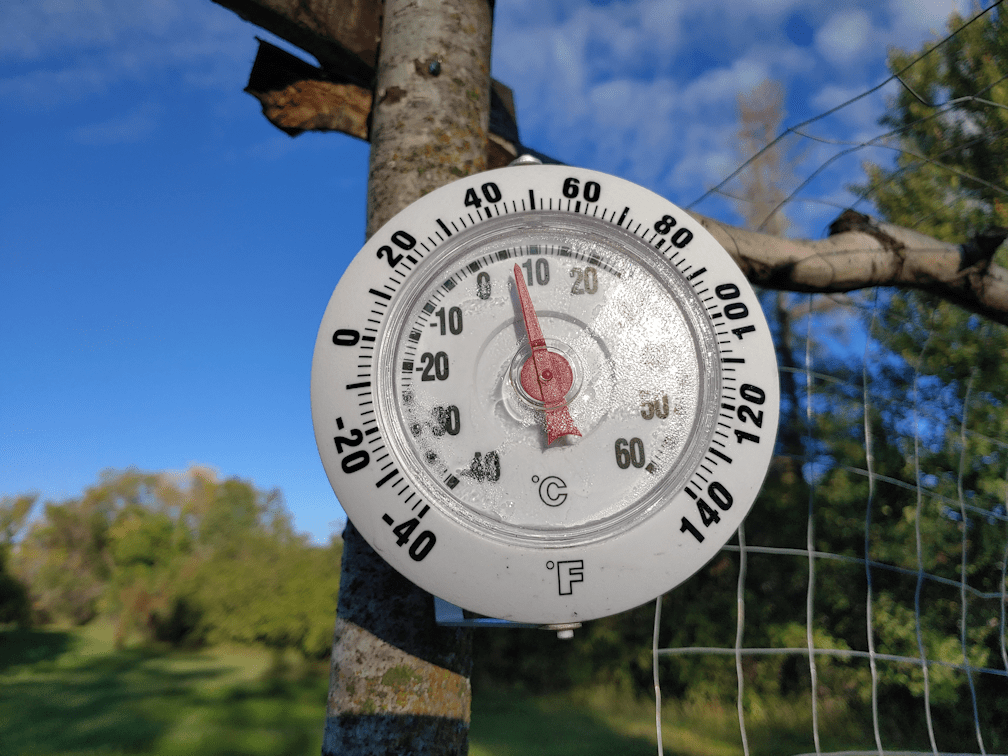
After seeing that insanely high reading on this thermometer a few days ago, I’ve been making a point of checking it more often. This time, it seems to be reading low. It was chilly this morning, but not that chilly!
Ah, well. It’s a Dollar Store thermometer. As long as it’s close, it’ll be useful.
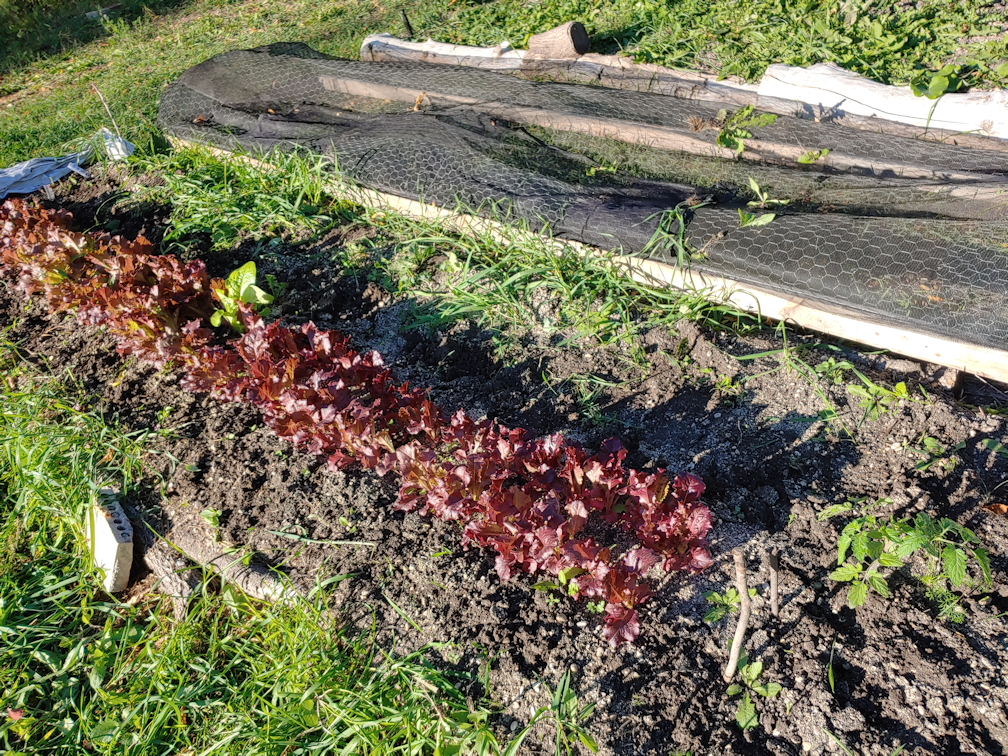
This morning was the first time I uncovered the lettuce to weed and thin them. The cover may keep the critters out, but it’s so long, it’s awkward to move on and off, unless there are two people.
These seeds had been from the bottom of a baggie they had spilled into, so I was expecting a mix. It looks like they are almost all the same type, with the exception of two Buttercrunch. Today is the first time we have been able to harvest lettuce this year! The first time we planted them in the spring, the groundhog got to them before we could. The lettuce is just loving these cooler temperatures.
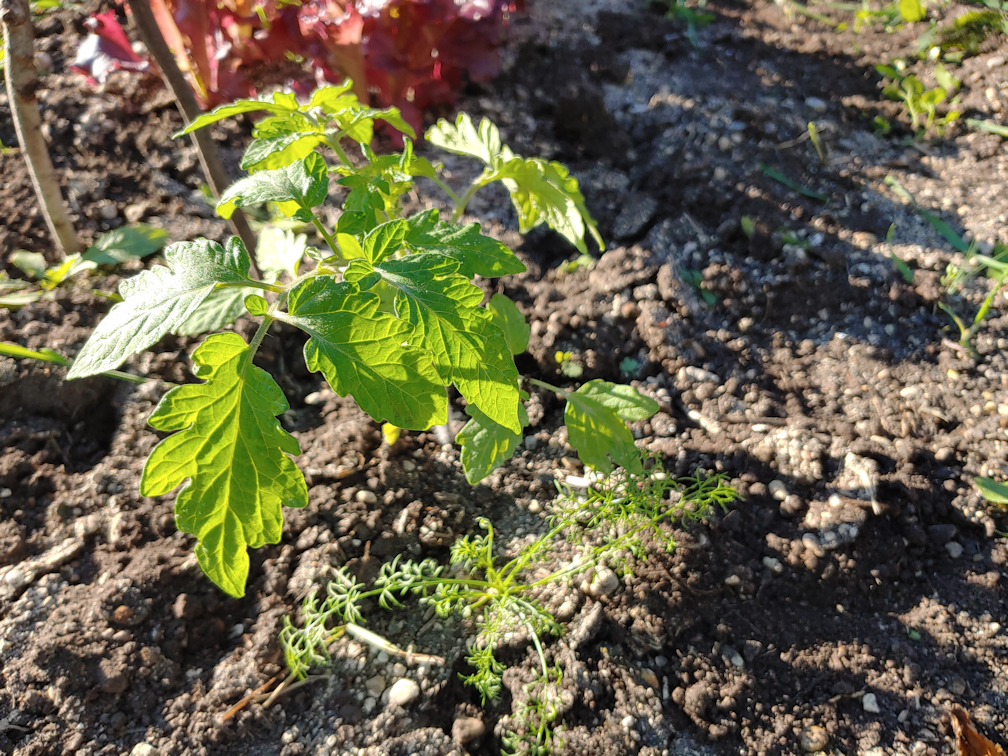
What I am most curious about is this…
There is a tomato plant growing here! It’s looking very strong and healthy, too. I think that’s a dill growing beside it. Dill self seeds easily, but a tomato? Where did that come from? And why did it sprout so late in the season? This bed had spinach in it, first, and this tomato is growing past the sticks marking the ends of the rows I sowed the lettuce in. No additional soil had been added. Very strange!
While weeding this bed, I was on the lookout for the radishes we’d planted in the other half. I found a couple, but they were really tiny. I have no idea what happened to them.
The Bright Lights chard is doing well. We’ve harvested leaves a couple of times from these. They are liking these cooler temperatures.
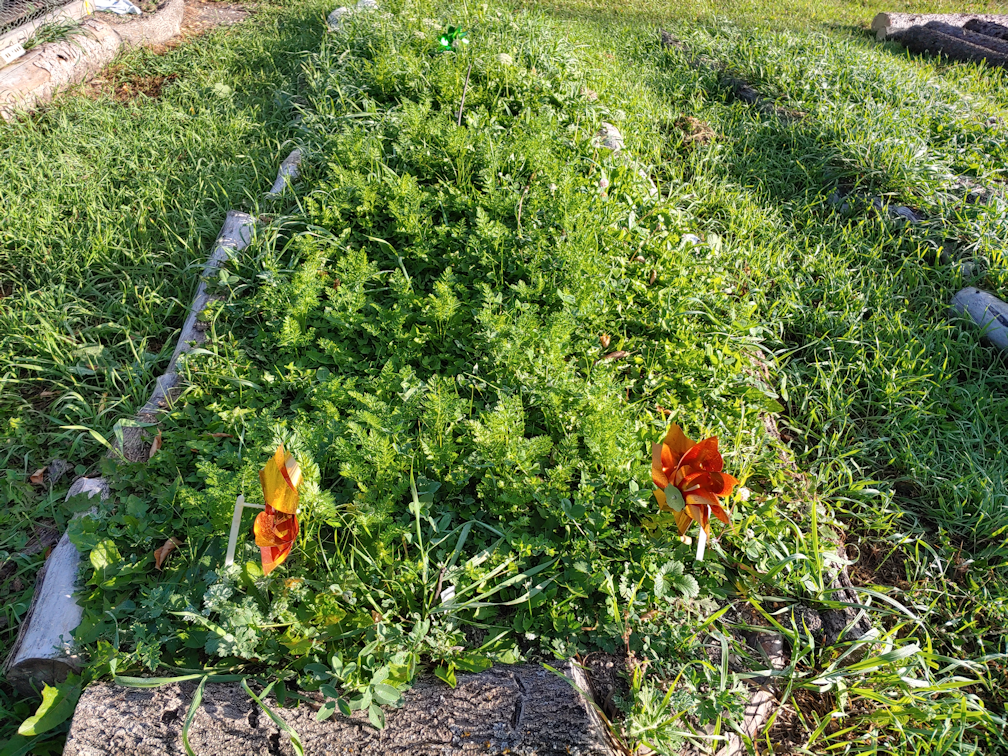
We have completely abandoned the carrot bed the woodchucks had decimated repeatedly. I’d tried to at least keep weeding it a bit, but it was just too much. And yet, you can see carrot fronds among the weeds! It should be interesting to see what we have, when this bed gets cleaned up for next year.
The Hopi Black Dye sunflower in the old kitchen garden had three stalks with flowers on it. In our recent winds, one of them broke, so I added the supports for the plant to try and save the rest. This morning, I found a second stalk, broken on the ground.
We didn’t really have a lot of wind last night.
I suspect kittens.
I’ve been catching them playing in this garden, right on top of the netting over the carrot bed and the beets by the retaining wall. The carrots are on the edges of the bed, and the kittens have been playing in the middle, so those aren’t as affected, but the beets are being flattened. That bed was already struggling to recover from being et by grogs, and not doing well, so I guess it’s not really a loss, but I find it interesting that the kittens seem to really like playing on top of the netting, instead of on the ground or paths beside it!
Thinking ahead to next year, I believe we have enough salvaged boards in the barn that can be used to make low raised beds here. It would be a good place to make contained areas, such as with square foot gardening, as we turn this into a kitchen garden, and we start to plant more herbs that may have a spreading tendancy. If we have actual frames on the beds, that will make it easier to set up sturdy covers to protect from voracious critters and insects – and playful kittens!
I think we should dig up the rhubarb and transplant them somewhere else. They are not doing well here, likely because they are right under the ornamental crab apple trees.
As difficult and sometimes disappointing as things have been with gardening this year, particularly with the drought, it has showed us a lot about what works, and we can do to improve things for the future.
When I did my morning rounds, I didn’t harvest anything, as there didn’t seem to be any need, yet. Then I did my evening rounds, and found that a lot can change by the end of the day!
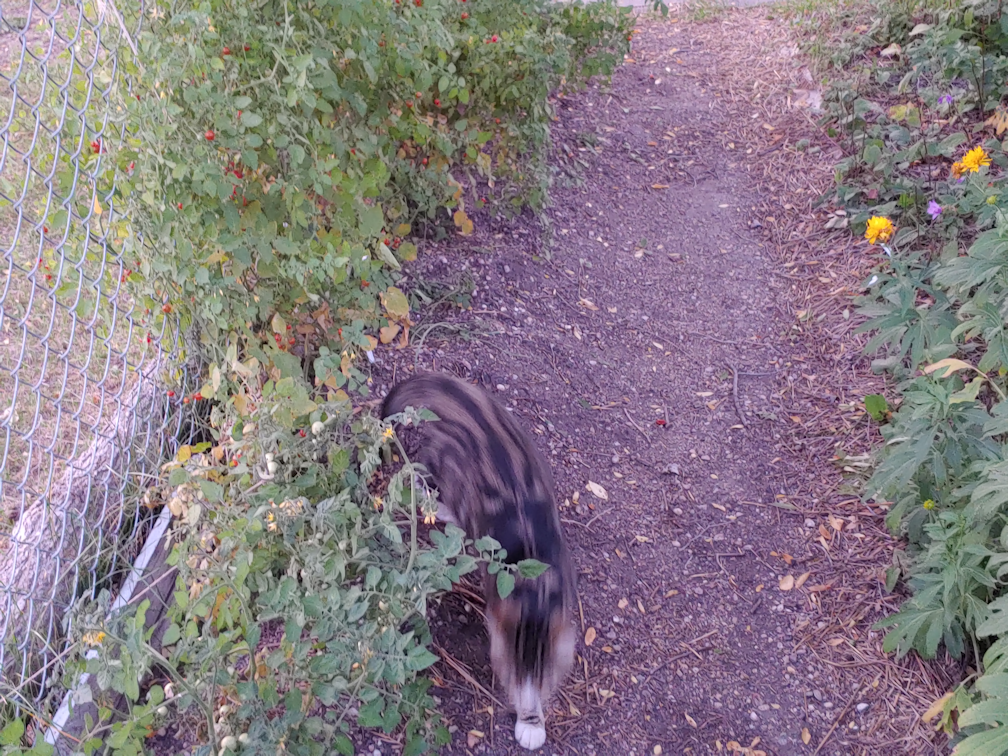
Spoon Tomatoes (and Potato Beetle)
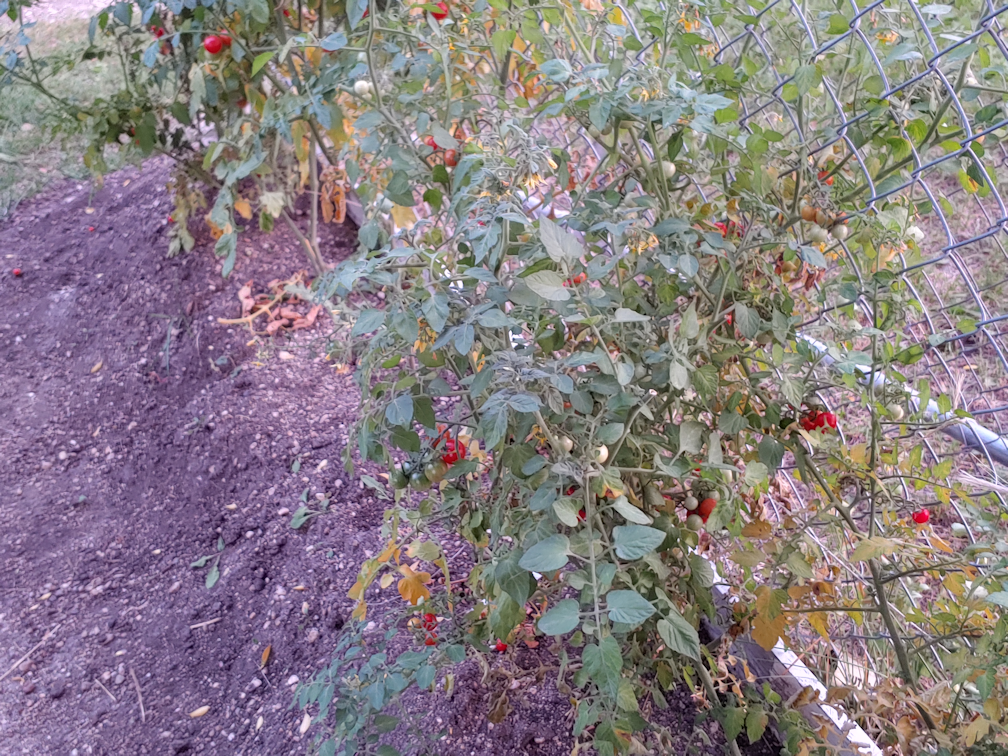
Mosaic Medley tomatoes
As you can see, the tomato plants are dying back, and yet there are so many tomatoes! In the photo with the Spoon tomatoes, I had already picked the ripe ones, so all the red you see are ones that are still not quite ready.
One of my daughters joined me, and we ended up filling two red Solo cups, almost to the top – our biggest haul of these tiny tomatoes, yet!
I was really surprised when we checked the summer squash, and I saw the Madga squash. It was noticeably bigger than when I checked it this morning! Same with the zucchini. We won’t get much more zucchini this season, but there are so many little pattypan squash. It was starting to get dark fast, though, so I’ll see what we can pick tomorrow morning. I think there are even beans to pick, too!