Our 2021 garden: soil protection

We are quite pleased with the new garden beds at the chain link fence. They are working out very much as we intended, and the chain link is providing support for the plants, just as planned.

There is just one real problem.

Erosion.

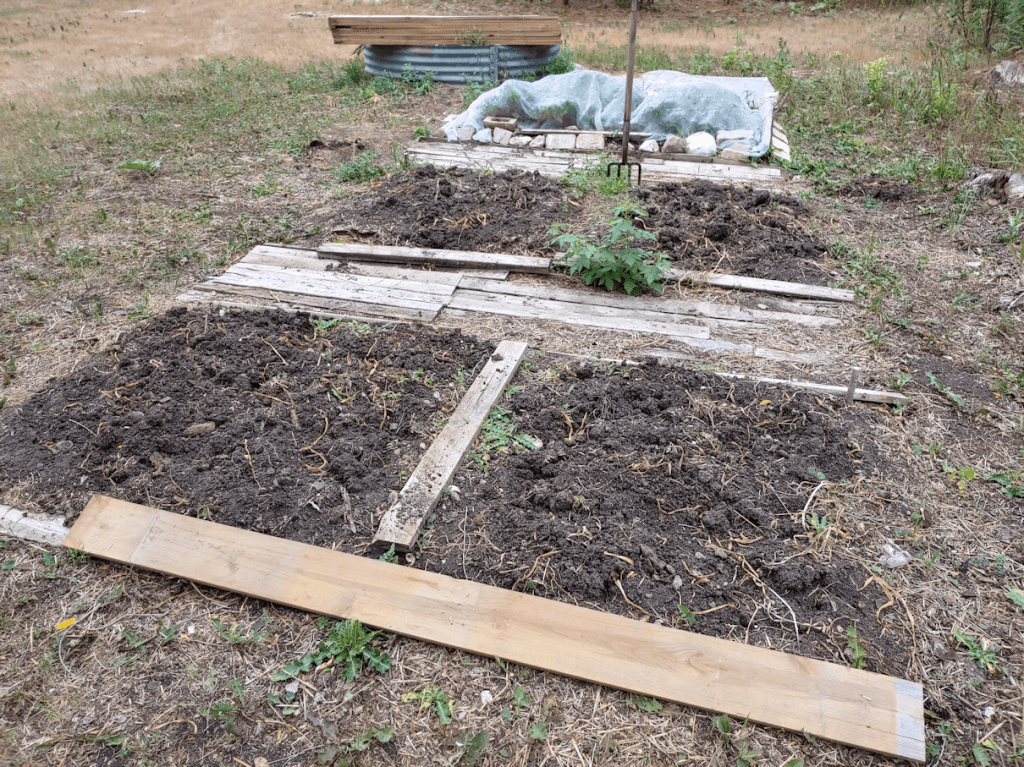
While scavenging for wood I could use to make raised bed boxes for where the garlic was harvested, I noticed some other old wood in the barn. Today, I decided to grab a few boards and use them to help keep the soil where it belongs.

This is where the cucamelons and some gourds are planted. The ground slopes a bit here, so the bottom of the chain link fence has more of a gap under it. When we lay cardboard down first, we put flaps up against the chain link, but once the soil was added and things were being watered, the cardboard slid under the fence and the soil started to erode away.

It had been intended to place more of the chimney blocks along this section, to use them as planters like the ones we’re using as a retaining wall in the old kitchen garden. We still haven’t taken the last of those blocks out of the old basement (hauling those up the stairs and through the house is going to be difficult enough on its own, never mind no top of having to keep the cats out of that basement). We still intend to do it, though, and once they are in place, this will no longer be a problem. All that’s needed right now is to keep the soil from washing away under the fence, and taking the plants with it.
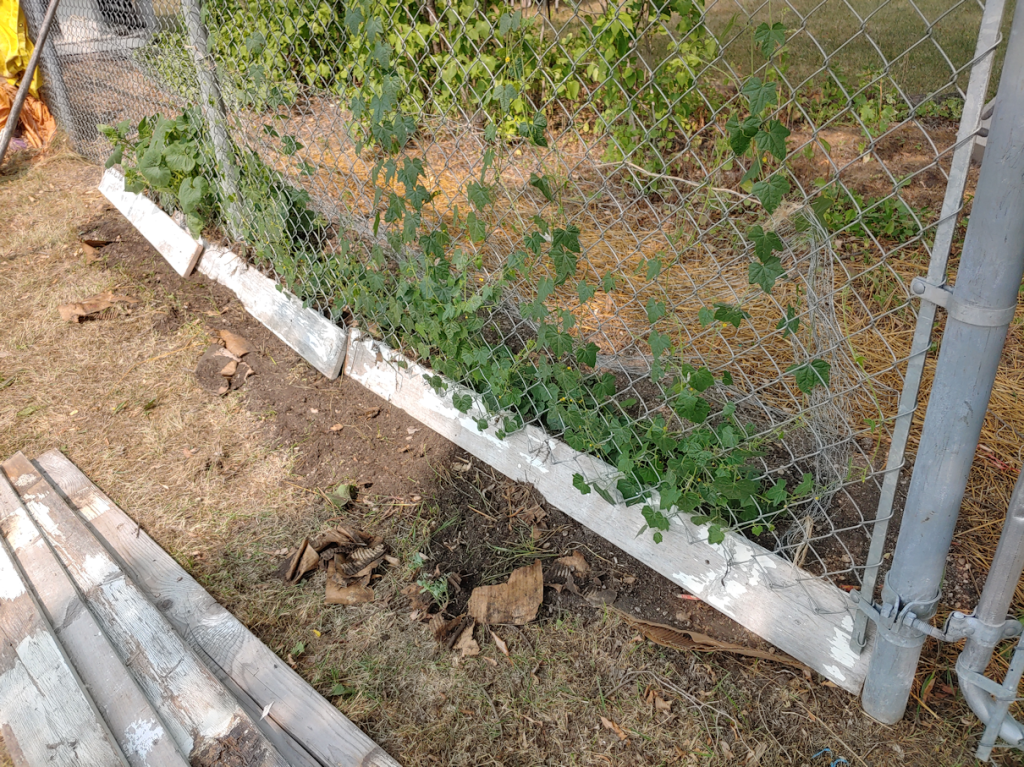
So for here, I just used a hoe to move enough soil to level things, then pushed boards under the bottom of the chain link from the outside. After that, I just tried to return some of the soil through the bottom of the fence, to hold the boards against the chain link. Otherwise, they would just lean inwards.

The boards were placed as far as the chicken wire critter barrier at the far end, making for a bit of overlap. It only needs to last until the end of the growing season, so as long as the boards keep the soil where it belongs, it’s doing its job.

More boards where then slid between the tomato plants and the chain link fence, though I did need to go back to the barn for another board. Erosion was not as much of a problem, here. There is much less of a gap between the bottom of the fence and the ground, so the cardboard flaps are still holding the soil in place. However, I wanted to add more soil under the tomatoes, and I didn’t want to be losing that.
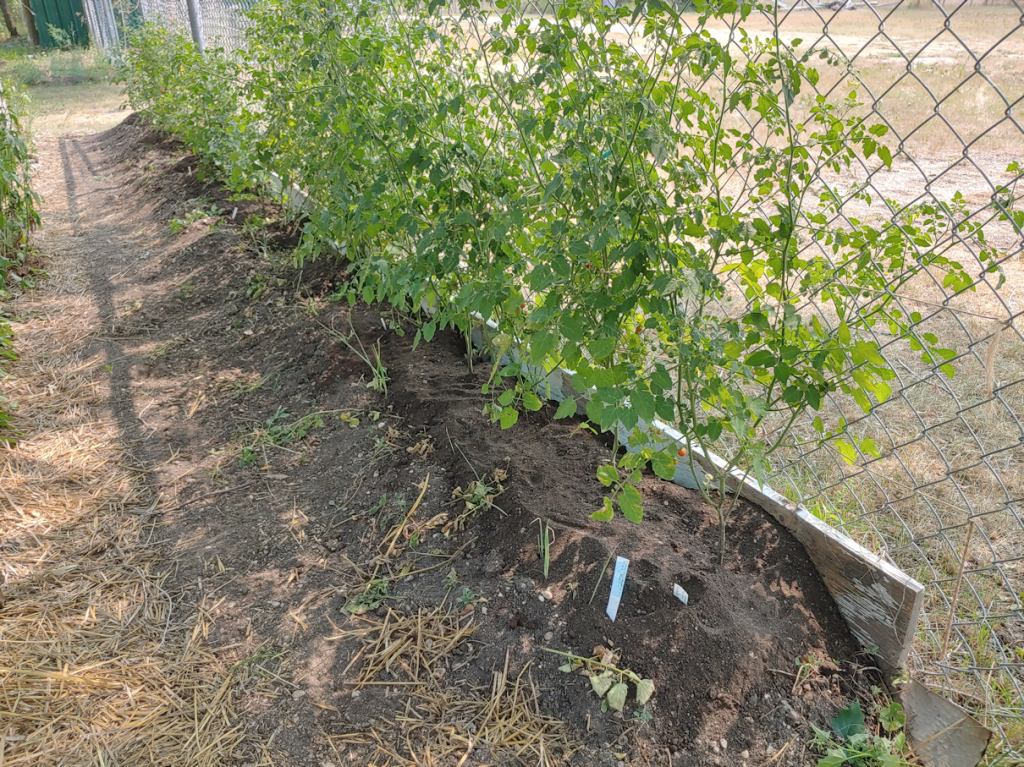
Once the boards were in place, I was able to add quite a bit of soil, without having to worry about it sliding through the fence.

In time, this bed will get some sort of frame as well. What it will be made of will depend on what materials we end up acquiring. I’m leaning towards brick, partly because we are looking to use paving stones or something similar on the paths along both new beds.

The boards are just a stop gap measure for this season. Like most of the other wood I’m finding in the sheds and barn, it was reclaimed from somewhere, and has various levels of damage. They’re solid enough to do the job for the rest of the season, though, and I’m glad to have it!

The Re-Farmer

Corny curiosity

While doing my rounds this morning and checking for deer damage in the garden beds, I noticed something odd about our sweet corn.

The middle corn block is the one that’s growing the tallest and developing the most tassels.

But there is only one corn cob developing.

Once it sunk in what I was seeing – and not seeing – I walked around through the corn block, looking for developing cobs, and there just aren’t any. Not a sign. Usually, I can at least tell where cobs are going to start growing, but there is nothing.

How very curious.

The Re-Farmer

Our 2021 garden: harvest firsts

This evening, I went over our beans and made our first real harvest!

We’ve picked a couple of beans, here and there, before, but this is the first substantial amount we have been able to gather. The yellow beans, for all that they are the smallest plants, are maturing the fastest.

A few purple beans, at the very end of the row, look to be newly nibbled on, but of the entire row, I could only find these few that looked mature enough to pick. As for the green beans, there are lots of them, but I don’t think they’re quite ready for picking. With the yellow beans, it’s at least easy to tell when they are ready. They turn from green to yellow. The green beans just stay the same green! :-D

After picking these, I stopped to look over other parts of the garden, including the Dorinny corn. These are the ones that were planted before last frost, and are the most mature. With the weather, they have had a hard time, but some of the cobs did seem to be ready to pick.

A whole four of them, including one that had its tip nibbled on by a deer a while back!

Generally speaking, they seem to have had good pollination; just the one cob that got its silks nibbled away has fewer kernels, which makes sense.

I had moved the garden cam to face the Dorinny corn and one side of the squash tunnel, in hopes of seeing what is eating the winter squash. One of the things I’ve done, after the last time a deer got into the Dorinny corn, and the one row of transplanted sunflowers, was move some of the distractions by the tulips, over to these garden beds. Two of those distractions were long strings of twine with jingle bells on them. I took our last couple of bamboo stakes and set them up along the side of the Dorinny corn block, with the bells strung between them.

I didn’t catch anything on the garden cam going after the winter squash, but I did catch a deer on several video files. It was nibbling at the ground in front of the string of bells, but never tried to go past it.

That was encouraging, at least.

Meanwhile, I currently have the corn in the over, wrapped in foil with some butter, salt and pepper, and am looking forward to tasting one! The beans will be enjoyed tomorrow. :-)

The Re-Farmer

Our 2022 garden: first raised bed box

With the garlic all harvested, we’ve got two empty beds that need to be readied for next year’s garden.

With these beds, we had dug into the soft soil we found under the wood pile, mounding soil into beds and making paths in between. This worked out quite well, but there were a couple of issues. One was, for such low raised beds, I found them too wide. They were about 4 feet wide, which would be fine for a high raised bed, but awkward to reach the middles on a low bed. That was partly solved by putting a board across the middle, which served to both mark where the different varieties of garlic were, and to give something to step on while trying to reach into the middle.

What can I say. I’m short.

The other issue was that the soil along the edges would end up in the paths, either from watering or from when the birds were digging around the garlic, early in the season.

The solution to both issues was to build a narrower box frame.

After scavenging in one of the sheds, I found some boards that would serve the purpose.

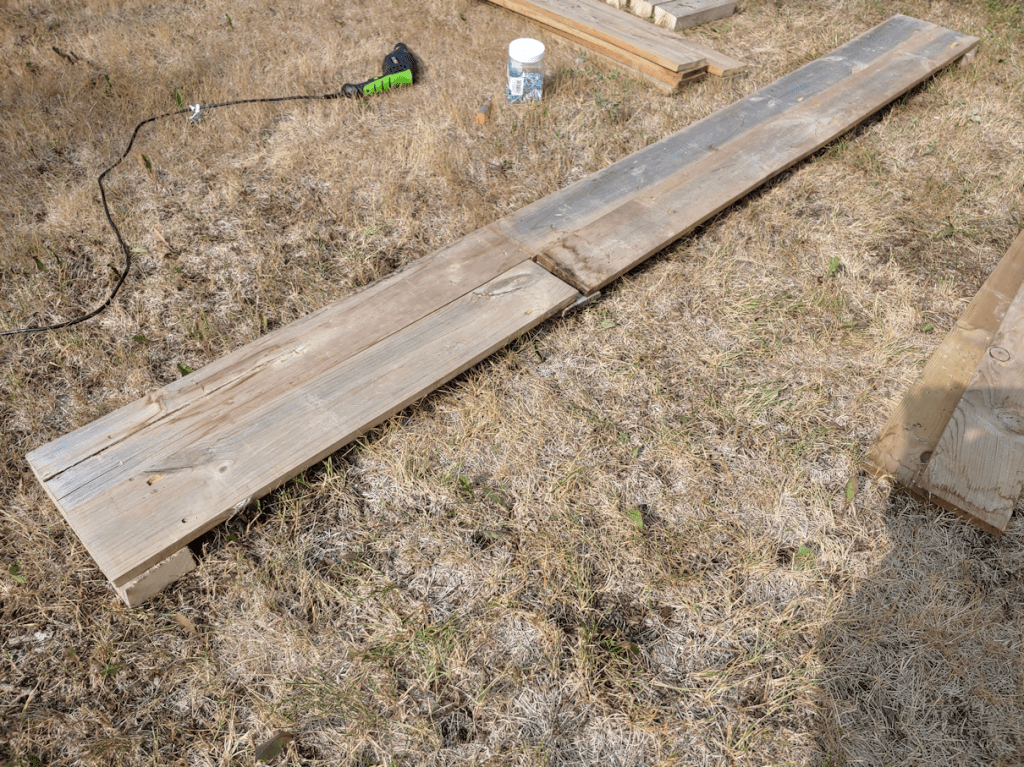
I dragged them all over to the beds. Here you can see one of them laid at the first bed I want to frame.

In total, I had 17 boards like the one in the foreground, plus 4 more that were the same length and thickness, about about an inch wider.

I decided to keep things simple.

I left four boards as is, then cut another four in half. The boards were all 6′ 1/2″ long and 5 1/4″ wide. Some of the half pieces would be used to increase the length, while the rest would be for the ends of the bed. I cut support pieces for the corners and to join the lengths together from some wood leftover from another project. Those were cut to match the width of two boards together.

The long sides were made by screwing the boards to the support pieces. The boards all have damage to them, ranging from old water damage and some rot, to splitting and cracking from being so very dry. Which is fine. They will do the job, and will last a few years, at least.

What wasn’t fine was flipping a board and almost catching my hand on these!!! They look like the screws were broken off on the other side, so there is no way to unscrew them from the wood. I have to think about the best way to get rid of these, using what tools we have, but for now, we’ll just have to watch out for them!

Once the side pieces were screwed together, making sure they matched in length, I brought over a couple of the wider boards to give a flatter, more even, surface to work on while putting on the end pieces.

Then I quickly tacked it together with just a single screw at each corner, to hold everything together while I worked.

Oddly, one piece was almost an inch longer than the others! Which is okay; the excess can be sawed off, later.

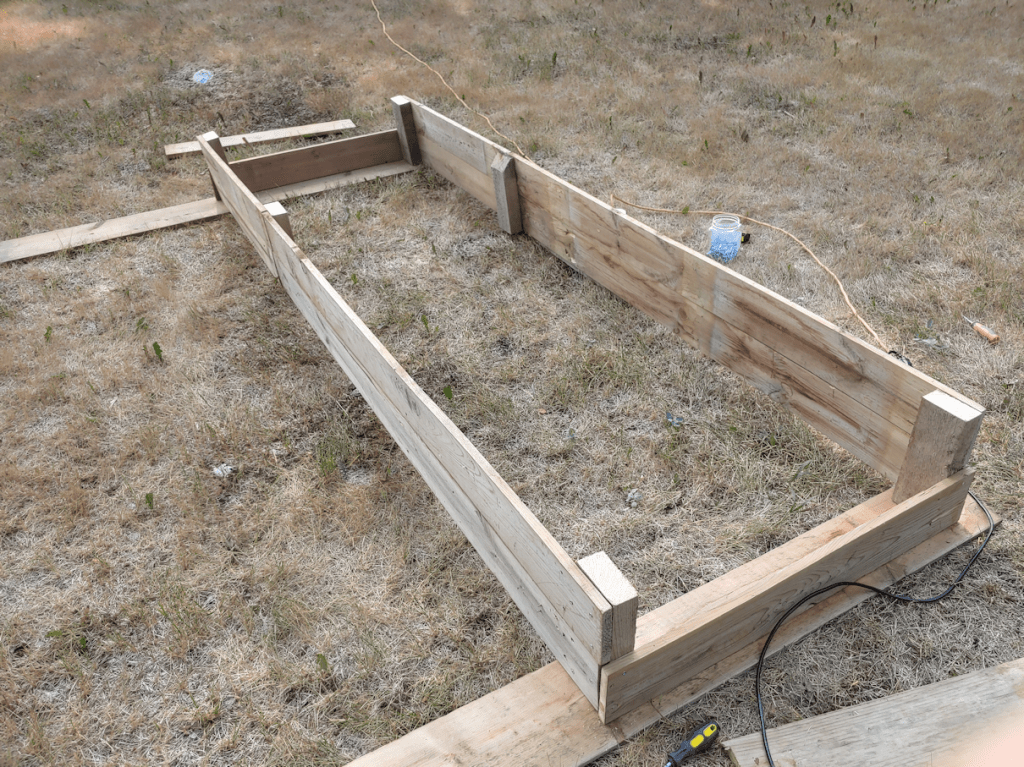
Here we have it! The finished box, next to the bed it will be placed at.

Here, you can see the difference in the dimensions quite clearly.

The box is about 9 feet long by 3 feet wide, and about 11 inches high.

In preparing these beds before planting the garlic, we dug out the soil and buried layers of straw and compost material at the bottom. Since the dimensions are being changed so much, I plan to dig out the beds again, then once the box frame is in position, will start filling it, hugelkulture style, by burying some of the branches we’ve been pruning for the past few years at the bottom, then layering the contents of our compost pile on top of that. Straw decomposes slowly, so I expect to find it when digging the bed out. If I do, I’ll be keeping it separate from the soil, so it can be layered back on again. As for the top layer of soil, I’ll take advantage of the situation to get rid of the weeds by their roots, then mix in some of the garden soil we purchased this year, before returning it to the bed. This soil tested healthier than anywhere else we took samples from, but it was still low in nitrogen, so adding the fresh soil will be a benefit. Once we have the materials again, the top will get layers of mulch to protect the soil.

I have enough wood to make a second box frame just like this one. I plan to build the second box before I start digging out soil. With the wider boards, there is enough to make a third frame for the bed that still has the beets in it, though it will be only one board high.

When this area is done, there will be three longer, narrower, framed beds with wider paths in between. This will make them much more accessible, even at their relatively low height.

Hopefully, I will be able to continue working on this tomorrow, but we’ll see how the day goes. I’ve got our rescheduled court date for the restraining order against our vandal in the morning. Hopefully, it’ll actually happen this time – and if the security guards try to tell me to leave and come back later, I will stay close this time.

The Re-Farmer

Our 2021 garden: more brightness

The predicted rain never came today, but then, neither did the predicted high of the day, so I went ahead and watered the gardens in the late afternoon.

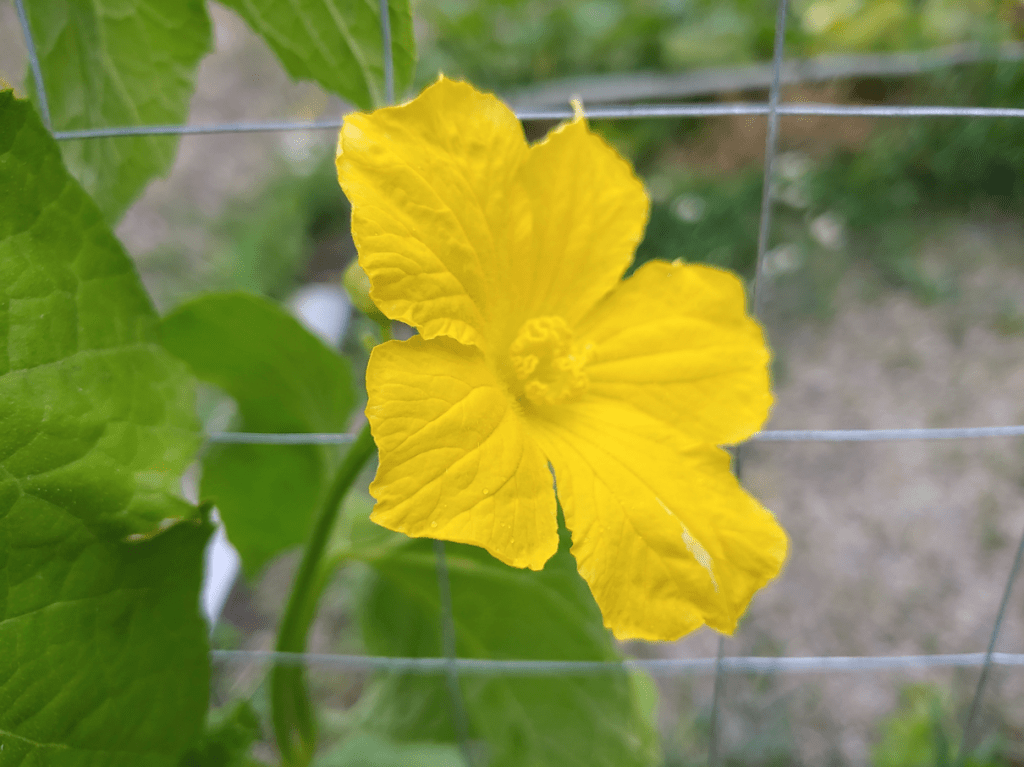
Having mentioned the Ozark Nest Egg gourds in my previous post, I just had to get a picture when I found this.

A single Ozark Nest Egg flower blooming. Still no gourds, though; all the buds appear to be male flowers, so far. There is nothing on the nearby Thai Bottle Gourd at all. If there are any flower buds, I can’t see them. The down side of having to add the mesh over these is that we can’t reach under it to handle the plants with undoing part of it!

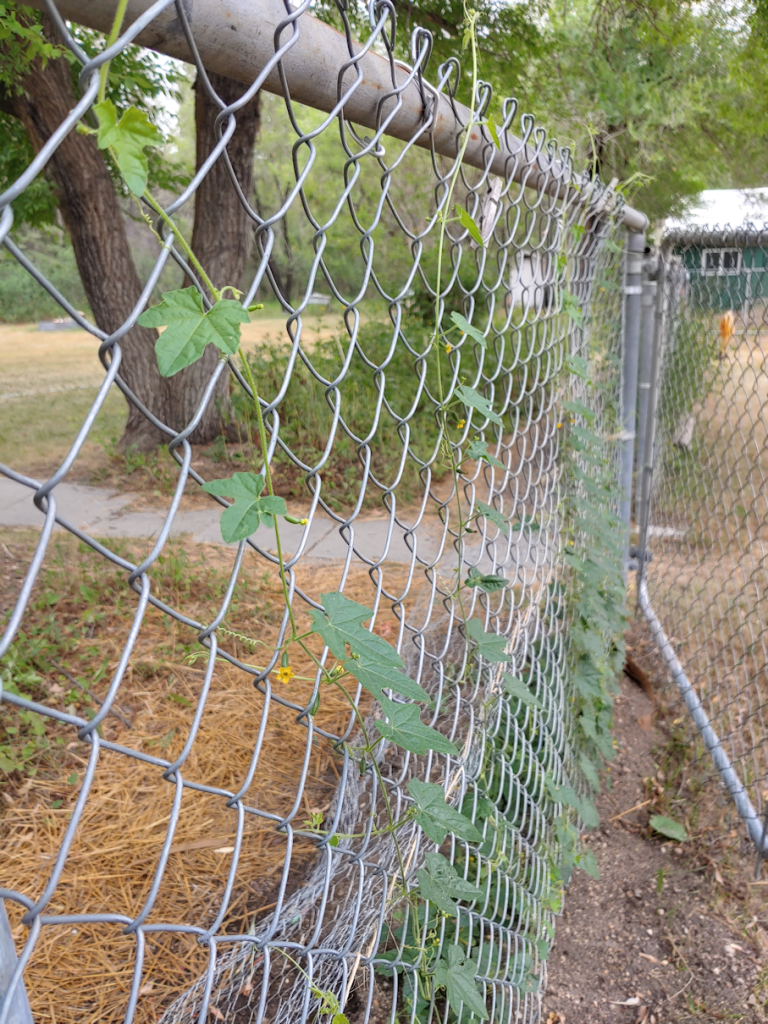
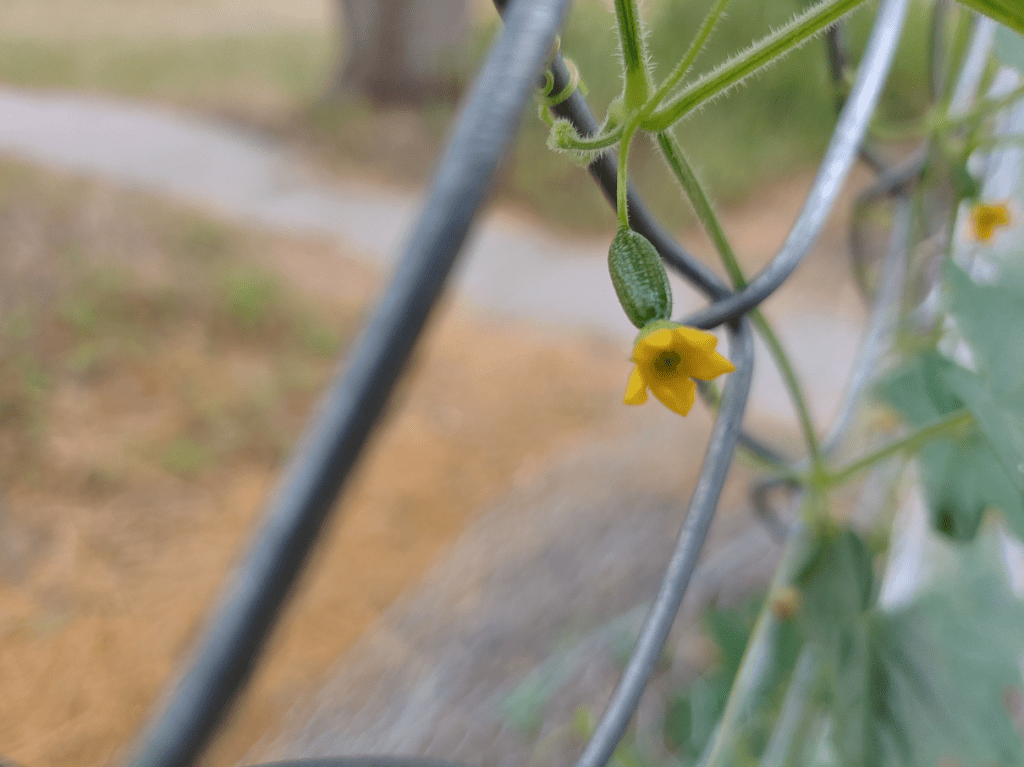
While the Ozark gourds are still just starting to reach a point where we can train them up the fence, the nearby cucamelons have shot their way to the top of the fence and are looking for more height! They are such fine, delicate vines, and you can barely see many tiny little yellow flowers all over them.

Many of the flowers have teeny little cucamelons under them. :-) They are such prolific plants!

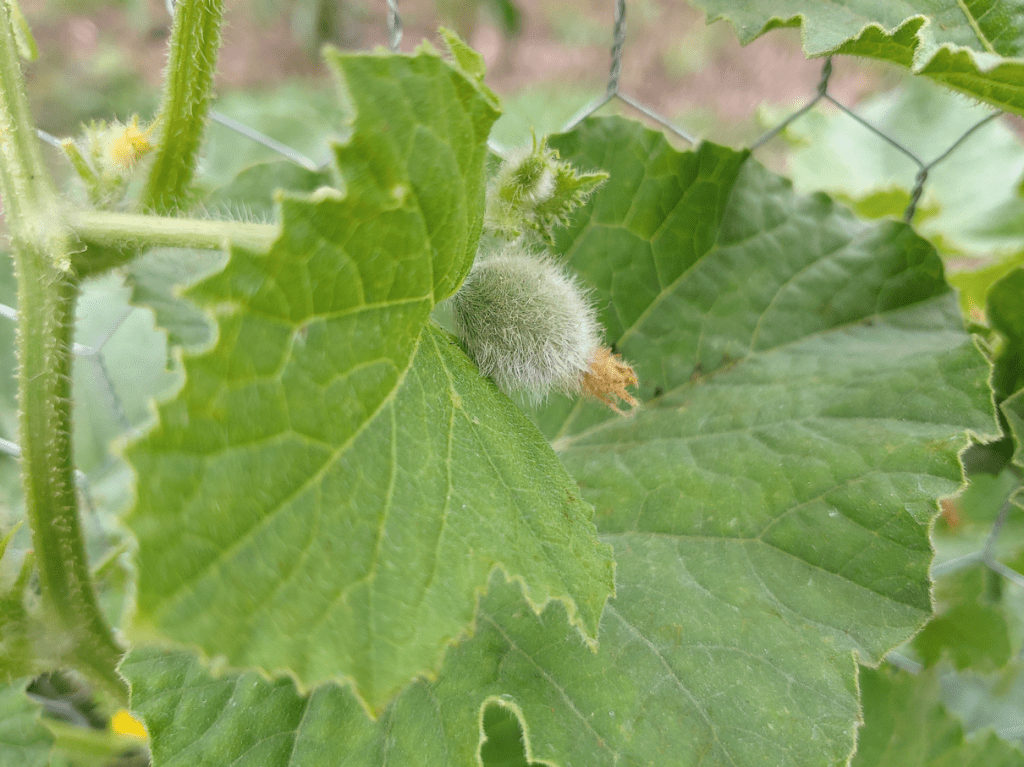
Speaking of prolific, the melons are certainly attracting a lot of pollinators to their many flowers! This is one of the Halona melons.

I love how incredibly fuzzy the baby melons are!

I decided to count what melons I could see. Not the little ones like this, but the larger ones, at least the size of a golf ball. I counted a dozen Halona melons, and another nine Pixies! If they keep up with their blooming, and their ratio of male to female flowers, we could potentially have a lot more than that, if they have enough growing season to fully mature.

There’s always that “if” factor, when it comes to gardening, isn’t there? :-D

The Re-Farmer

Brightness through the haze

Today is turning out to be cooler than predicted – as I write this, we are at 16C/61F, instead of the hourly forecast temperature of 22C/72F we’re supposed to be getting.

I’ll take the cooler temperatures. Especially since the predicted rain has not happened. Oh, we’re getting the odd spittle from the sky, but that’s about it. Meanwhile, the humidity level is at 94%! We kept holding off because of the predicted rain, but once I’m done with this post, I’m going to have to go out and do some watering in the gardens.

Unfortunately, it has also been an incredibly smoky day. Thick enough that I can see the haze in the garden when I look out my window. There has been no reprieve for the wildfires all over the province. Most of them are to the north of us, and they’re getting even less rain than we are. :-(

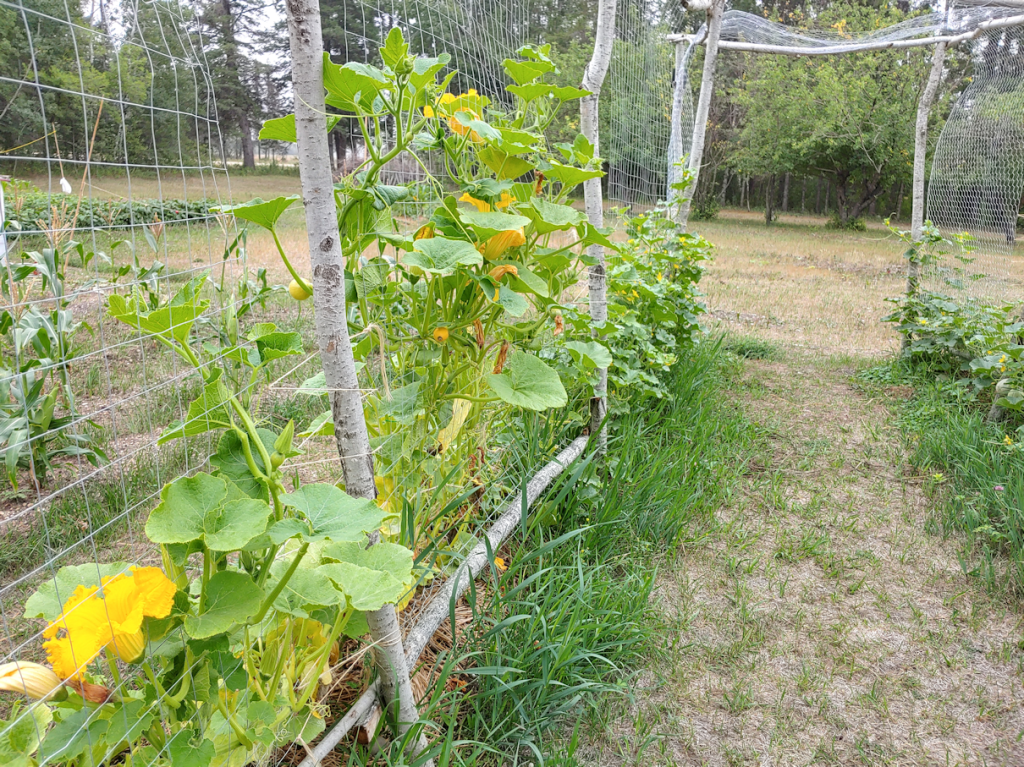
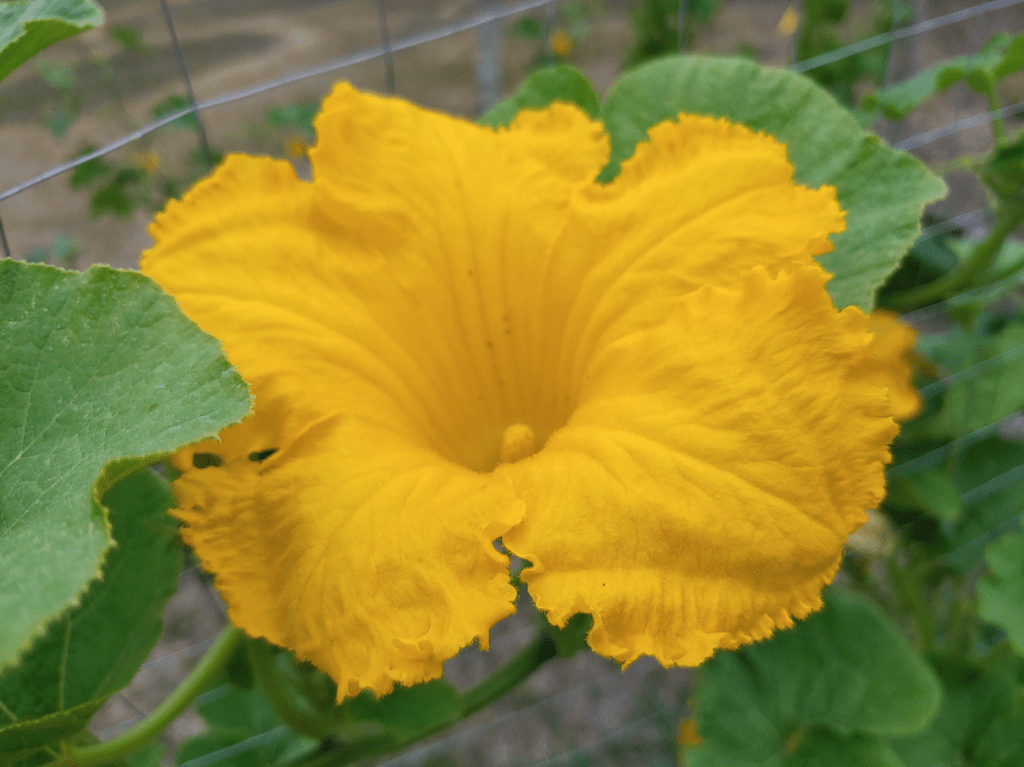
When doing my rounds this morning, however, there was some bright “sunshine” through the haze. The summer squash and everything at the squash tunnel are blooming like crazy, with flowers so bright and yellow, they practically glow in the distance.

The luffa is blooming fairly consistently, though no gourds have started to form yet.

The vines, however, are enthusiastically climbing the squash tunnel, and have even reached the very top. It looks like they grew almost six inches, overnight!

The nearby Tennessee Dancing gourds are also enthusiastically growing and blooming. Unlike the luffa, there are many gourds forming here!

I am somewhat amused that these have such big flowers, yet such tiny gourds!

Then there are the melons, which have such tiny flowers, followed by such hefty fruit – and these are small varieties of melons!

The Little Gem winter squash are also kicking into high gear as they climb the trellis, with many flowers and quite a few squash developing. The plants themselves actually don’t look all that healthy; the bottom leaves in particular are yellowing, with some dying off, but they are still doing really well.

The Teddy squash, however, are not. The plants themselves are looking strong and healthy, but it looks like there has been more nibbles. These are at the very end of the tunnel, and it’s almost as if they are being nibbled in passing, but nothing is showing up in the garden cam. If it were a smaller critter, like a woodchuck or a raccoon, that would make sense, though I would have expected the damage to be more spread out among other things, not just in those two plants. Whatever it is, it seems to have a preference for the flowers. The leaves aren’t showing as much damage. I might have to set the camera up, right on that spot, to find out what’s going on.

The flowers on the Little Gem winter squash have such dramatic, frilly edges to their petals.

While the summer squash are also blooming heavily right now, the Crespo squash, out by the purple corn, has not been. It does not seem to be recovering well from all the critter damage, even though there is no new damage since we added that third layer of protection around them. Thankfully, we still have most of the seeds in the package, so we can try again next year.

The gourds in the south yard, at the chain link fence, haven’t kicked in yet. There are lots of flower buds, though – at least, on the Ozark Nest Egg gourds – so I expect to see plenty, soon. The cucamelons planted next to them are covered with the tiniest flowers, and we are seeing lots of teeny little cucamelons forming. If things go well, we should have lots of them, soon.

All these bright yellow flowers are a cheerful sight to see, through the gloom. While walking outside, yesterday evening, my daughter noticed something about their window fan on the second floor. We’ve got several 20″x20″ box fans set up in various windows. That happens to be the size of our furnace filters, so when the girls noticed their box fan seemed to be pulling tiny insects right through the screen, they put a filter on the back of it. From outside, we could see the filter – and how brown it was, from the smoke!

Today, I finally added a filter to the back of my window fan, too. Usually, when it gets hot outside, I flip it to blow air out instead of in, but with a cooler day like today, I actually want to keep it drawing air in, but that smoke it starting to really affect my chronic cough!

Not that it’s going to be much help while I’m working outside…

Ah, well. It is what it is.

The Re-Farmer

We have cows!!

The skies have been teasing us with the possibility of rain, all day today! The weather app says we’re at 26C/79F, with the humidex at 30C/86F, but we’ve been getting some wonderful breezes that are making it feel cooler.

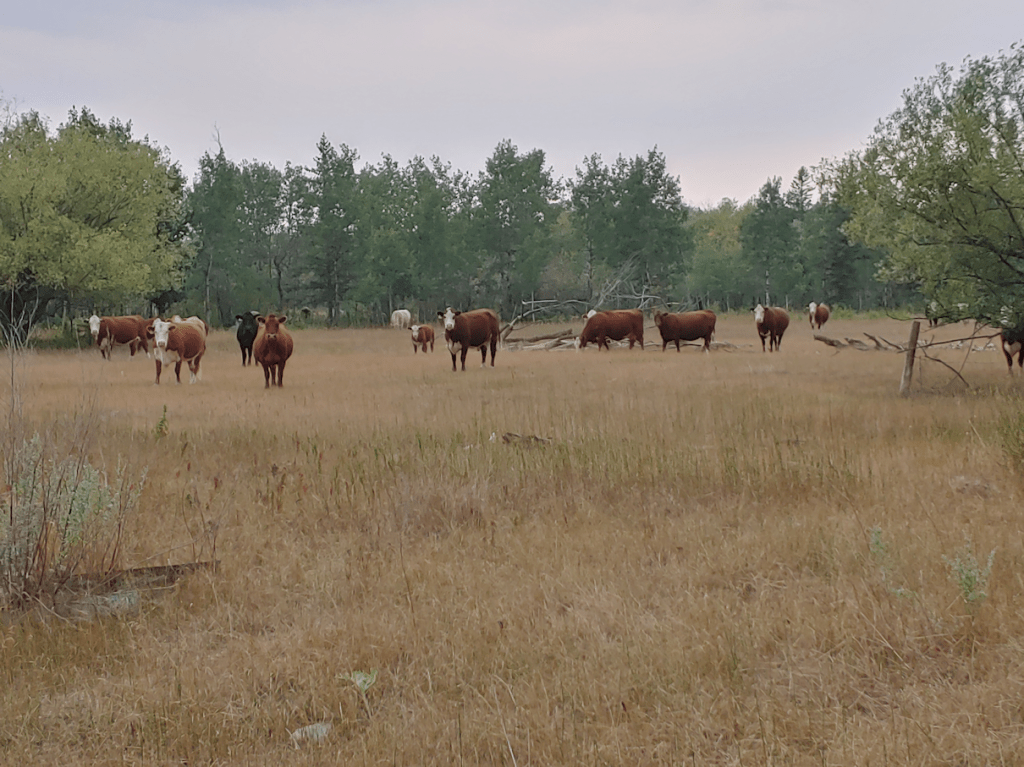
It was while we were outside, enjoying the breeze, that I noticed we were being watched.

The renter rotated his cows to the home quarter today! I am so happy to see them. :-)

While we were out, we even got a few spatters of rain and could hear thunder in the distance. I really hope we get a decent rainfall! Particularly since we’ve decided not to water the garden beds this evening.

While heading over to the furthest beds, we ended up chasing a woodchuck out of one of the corn blocks. He seemed to be just passing through, and wasn’t eating anything. In looking at the developing head on this Mongolian Giant sunflower, I can see something has been eating it. This would be the grasshoppers. Thankfully, those seem to be fewer, though compared to the clouds of them we had not long ago, that might not be saying much.

The sweet corn in the middle block seems to be developing the fastest. It’s interesting to see how a few stalks just shot up (relatively speaking!) while the others are staying small.

I don’t know how much corn we’ll actually get from these, given this year’s conditions, but it does look like we’ll at least have some for fresh eating, if not for freezing or canning.

Dang. Looking out my window, it seems the clouds have moved on. I think I’ll pop outside and enjoy the breeze a bit longer, while there is still light. :-)

The Re-Farmer

Our 2021 garden: first bulb onions

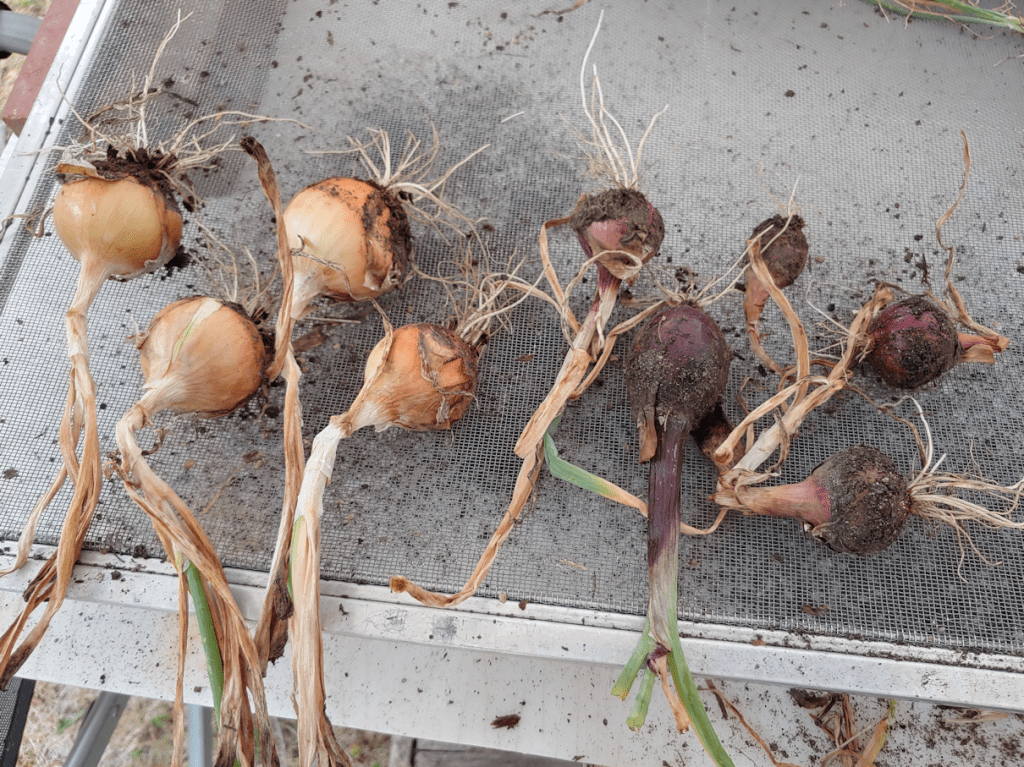
This morning, I decided to go through our onions and harvest the ones I was sure were done for the season. Here are the first ones I picked.

These are the yellow onions we planted from sets that I picked up at Canadian Tire, and planted in the same bed as the shallots. This is about a quarter, maybe a third, of what was in the bed. There were also a few that I pulled and left behind, as they had no roots and were starting to rot.

These ones are mostly pretty small, as they died off too early, I think.

There were enough of them that space on the drying screen was an issue, but they had enough stems left for braiding, so now they are hung up to cure under the canopy.

Then I went back to check the other onion bed.

Very few of these were ready to pick. On the left are the surviving yellow onions we grew from seed, and they are looking the best of all the onions. The ones on the right are the red onion sets we ordered from Veseys.

These have been left outside to dry for a while, but they will be for immediate use in the kitchen! :-)

I’ve been looking up how to tell if onions are ready to pick and finding conflicting information. Some say they are ready after their tops have fallen over, which I think is way too early. Others says after the dry outer skin has developed. Still others say once the youngest leaves – the ones in the very middle of the stalks – are dry, they are ready to pick. That one seems too late!

So the ones I picked were ones that had died off the most, and I could be sure they would not be growing any bigger. I’m also on the lookout for those with roots that have died off, and pull up easily. Those tend to already be going soft, and often have what looks like mold growing in them. From what I’ve read, that’s a sign of fungal infection, so they need to be taken right out.

It should be interesting to see the differences in flavour. I probably won’t be able to tell the difference, and the medications my husband is on has changed his ability to taste things, but the girls should be able to taste differences. I’ll have to trust them to tell me which varieties are worth growing again! :-D

After the issues we had with cats destroying so many of the onions we started indoors, I’m just happy to have any onions at all right now! :-D

The Re-Farmer

Our 2021 garden; fall planting, and shallot surprise

Now that it’s “cooled off” again to 32C/90F (feels like 34C/93F), I headed back to the garden to remove the shade clothes and get those photos I promised.

Our surviving (barely) French Breakfast radishes, and rainbow chard.

Now that one of the beds has a window screen mesh covering it, I decided to take a chance.

I planted lettuces.

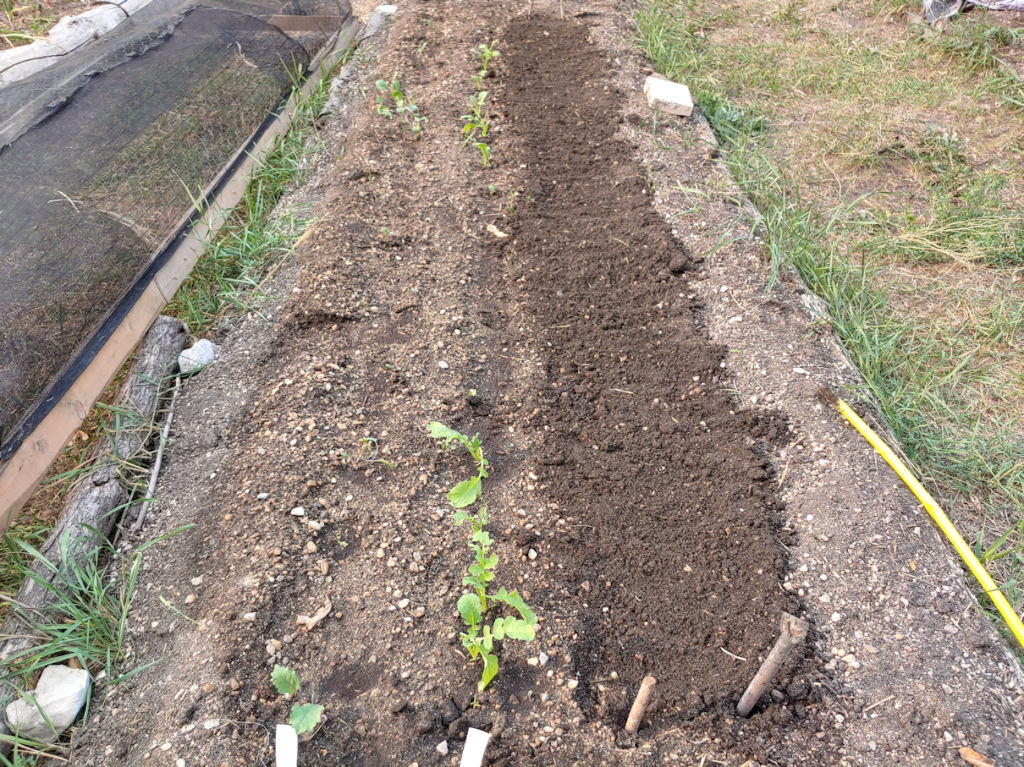
On the far left are the surviving purple kohlrabi, and in the middle are radishes. I forget which variety at the moment.

I had our four varieties of lettuce together in a slide lock bag, and they spilled a bit, so I planted the mixed up seeds at the bottom of the bag. So we are going to have lettuce surprise when they start to sprout!

Moving the cover on and off is still a two person job. The length of the cover makes it a bit too wobbly. We definitely need to make the permanent beds shorter, just for that!

A nice thing about the window screen mesh is that it slows down and breaks up the water, so it lands more gently. We don’t have the hose nozzle set on anything high pressure, but these surviving seedlings are still spindly and weak from being under those water bottle covers to protect them from insects and critters. With the mesh covering the ends, I have at least some hope that these lettuces will have a chance to survive. At this point, it’s the grasshoppers, more than the critters, that are an issue.

Once this was done, I decided to harvest the shallots. I’d been weeding the bed while watering this morning and accidentally pulled one up. I didn’t think they were doing well; many of the green parts had withered away completely, and I could no longer see where they were, while others just looked like they were struggling. The one I accidentally pulled up looked surprisingly large, so I left it there, to collect with the others this evening.

I was very pleasantly surprised!

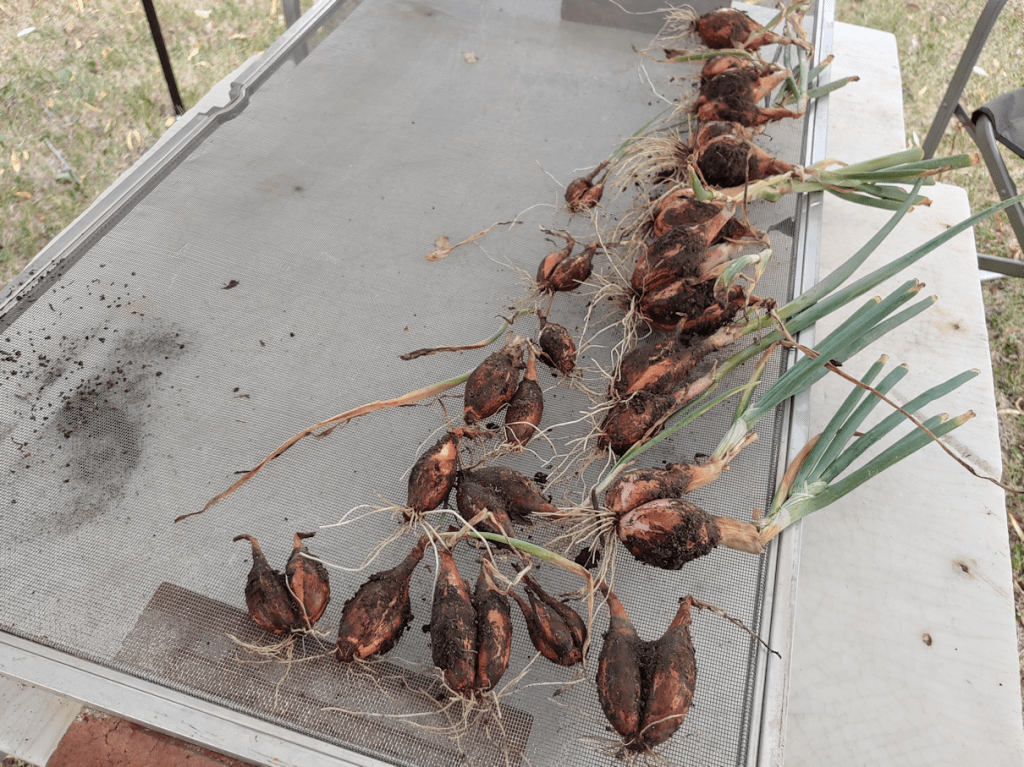
As I started digging them up, I found they were much larger than expected. The one way at the far end in the photo is almost as big as an onion!

Then I accidentally dug up a shallot there there was no sign of any growing there anymore, and it was far larger than I expected, too. So I went back over the row and dug into each spot I knew I’d planted a shallot, and found several more! They are the smaller ones with no, or almost no, stems.

For now, they sit on a window screen, raised up on bricks for air circulation, to cure for a while. I’m quite pleased with what we got. Our original shallots, started from seed, were destroyed by the cats, so these ones are from sets I bought at the grocery store. There was only a dozen sets per bag, so I got two bags. A far cry from how many we would have had, if the ones from seed had survived, but way better than nothing at all! This is just awesome!

Tomorrow morning, I think I will start harvesting some of the onions. They are not all ready, but some of them definitely are. We have quite a lot of them, so I don’t mind harvesting and curing them in batches!

Being able to harvest things already, and even plant things for a fall harvest, kinda makes up for all the problems we’ve been having with the drought, critters and insects! We may not have as much as we hoped to in the spring, but we will still have food to harvest, and that’s the important part!

The Re-Farmer

Row cover modification

While in the city for our monthly shop, I picked up four short, slightly flexible, lengths of PVC pipe. Today, I finally made use of them.
Since we covered various beds with the mosquito netting as floating row covers, they have not been eaten by critters. In the old kitchen garden, that means our carrots are actually recovering. The bed they are in is wider than the nearby beet beds, though, so they don’t have as much slack in the netting. What I’m still not sure is kohlrabi or not is getting pretty big, and the leaves are being bent over. Even the carrot tops were showing yellow, where they touched the fabric along the edges, where it’s weighed down with rocks and whatever else we could find.

I got the pipe to hold the netting up, but was stuck on what to use to hold the pipe in place that could handle the tension caused by curving the pipe. We’d done something like this with the hula hoops, but those are a lot thinner than the PVC pipe.

Normally, I would have used something strong and inflexible, like steel rods or rebar. I went looking around in the garage for something, without luck.

What I did find, though, was a bag full of cheap tent pegs.

That would be useful!

I also found one of the small flags we had at the fence line near the gate. The flags are getting quite torn up and need to be replaced, but I haven’t found the same time of flag this year. The doweling the flag is attached to fits perfectly in the pipe. All the flags still on the fence are torn up by the wind and needed to come down, as did the strings of Christmas lights we had running along the fence. The strings of lights need to be replaced. So I headed out to take down the lights and the flags, then used the wooden doweling from the flags as supports for the pipe.

Metal would have been preferred; I couple of them cracked while I was bending the lengths of pipe to fit over them. Still, they are holding! And the pipe is strong enough to stay in place.

The mosquito netting just barely fits across the bed, but those tent pegs I found were put to good use, taking the edges down. Wood and rocks that were used to weight down the edges before we put back, so help hold down any gaps between the beds.

I’m really happy with how this turned out. It a lot more solid than our first experiment with this. And now my carrots have room to grow!

The Re-Farmer