I checked on the kitties this morning, of course, as part of my a.m. routine.
Of all the possible nests they could have chosen, they went back to their original nesting box, now shoved under the platform bed frame. The frame itself has something under it, so it’s not directly on the concrete, and there are several boxes with soft, comfy things to lie on, on top of it. But noooo… They go for this crowded space, instead! Even Beep Beep squeezes her way into it!
I was pleased to find that the fan did its job. There is only a tiny bit of wet in the very corner left.
Also, we have our first trees blooming! The plum trees. This variety of plums are very small and more pit than flesh, so not particularly good to eat, but if we get a lot of them this year, we can use them to make some sort of condiment, or even a wine, if we wanted to go that route. We shall see.
It’s turning out to be a lovely day to get some work done outside, though already very hot. As I write this, 23C/73F, with a “real feel” of 25C/77F. We’re supposed to hit 27C/80F, and feeling like 30C/86F for a high this afternoon, with a potential thunderstorm this evening. The forecasts are constantly changing, though, so it’s hard to say. Either way, I’ll be heading outside as soon as I can, to continue working on the sunflower plantings before it gets too hot out there!
The winds finally died down today, and we were able to prep for the giant sunflowers we will be planting.
To recap, these are being planted for several reasons. One is to have seeds for the birds over the winter (and for ourselves, if we want). Another is to create a wind break and privacy screen at the far end of the old garden area. A potential bonus is that sunflowers are supposed to be good for improving soil, and the area can use all the improvement it can get!
Normally, like anything else grown from seed, the sunflowers would be planted closer together, then thinned out after they germinate. For these giant varieties, they would be thinned out to 2 feet apart.
We’re not going to do that.
I counted the seeds in the packets, and they each have exactly 25 seeds in them.
We will be planting one seed every two feet. If they don’t all germinate and we end up with gaps… well… we’ll just end up with gaps.
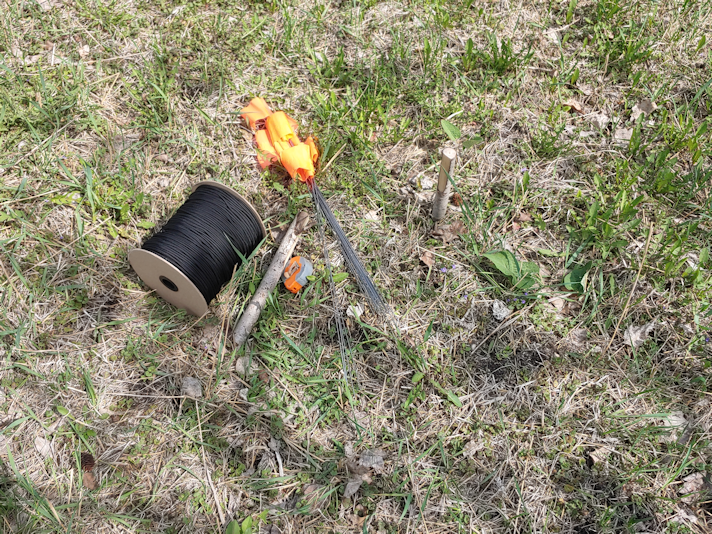
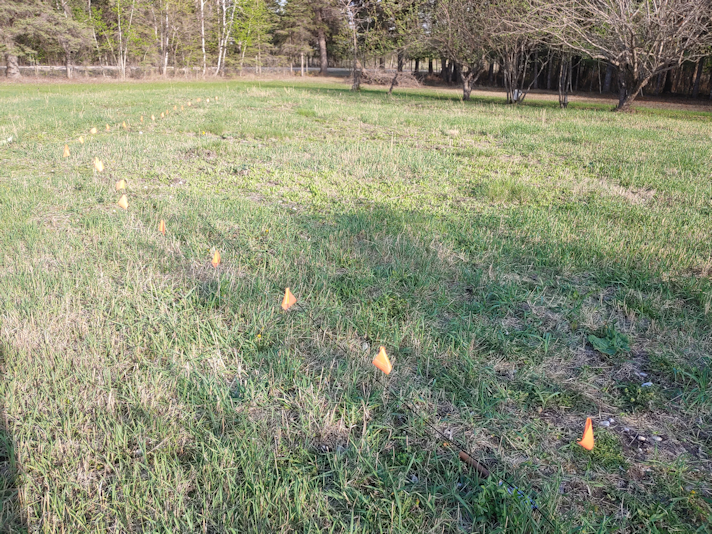
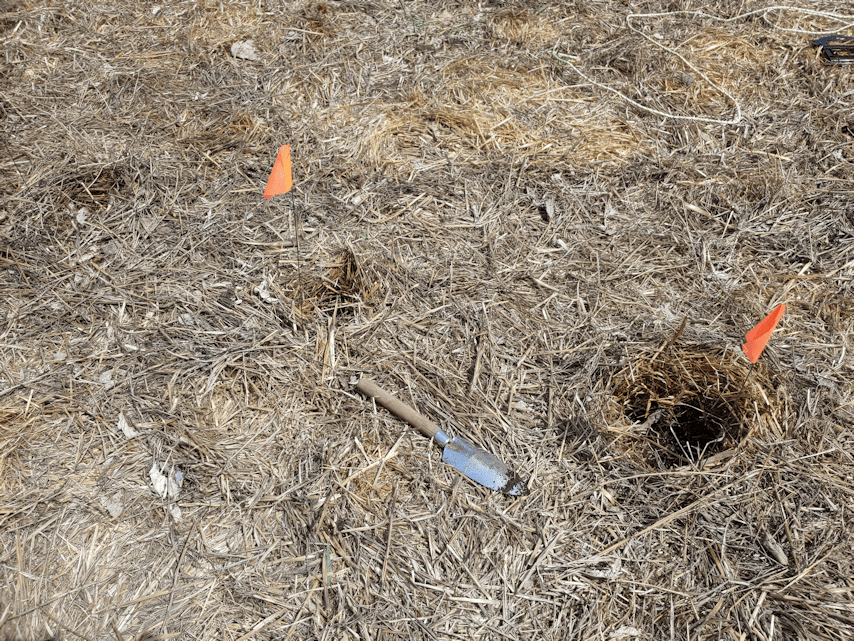
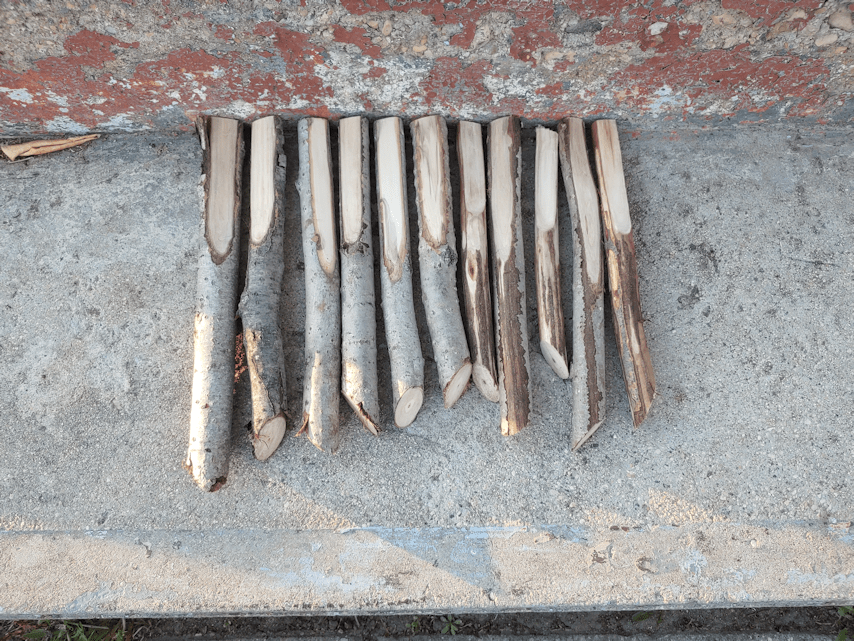
I also decided to plant them in a gradual curve rather than in straight lines. To do that, I used these.
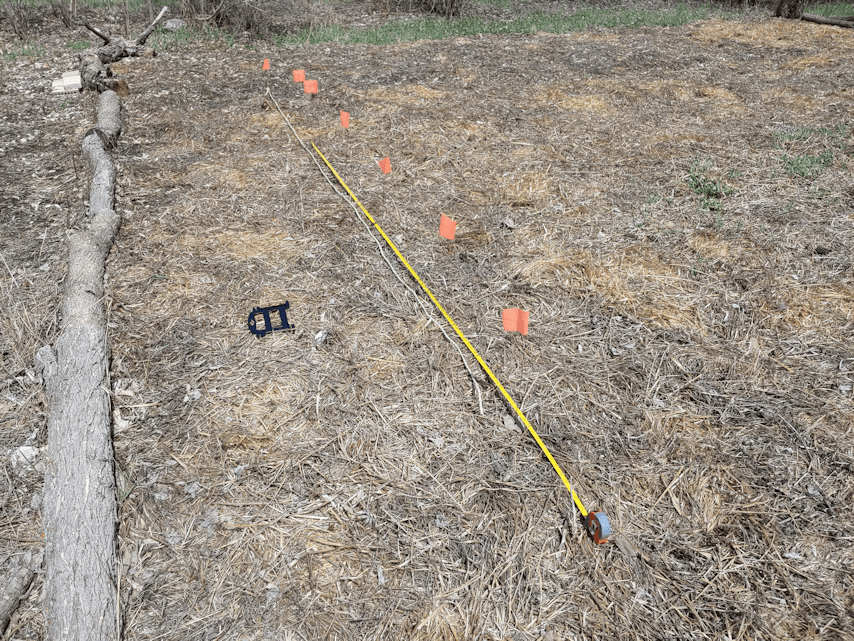
The bundle of flags I picked up had 25 in it, so that worked out perfectly. I decided on where I wanted to have the ends and pounded a stake into the ground, with another stake to help guide the paracord, (which my husband had ordered a spool of that just happened to come in the mail today) and a tape measure to place a flag every two feet.
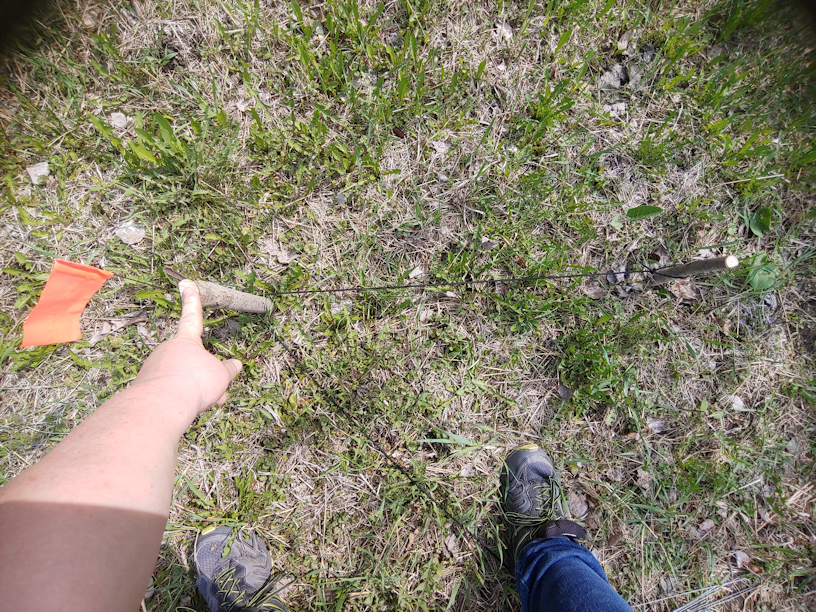
I attached the paracord to the two stakes in the ground, with about 3 feet of slack.
For the first flag, I eye-balled where I wanted it to be in relation to the first stake. The extra stake was used to hold the paracord taut.
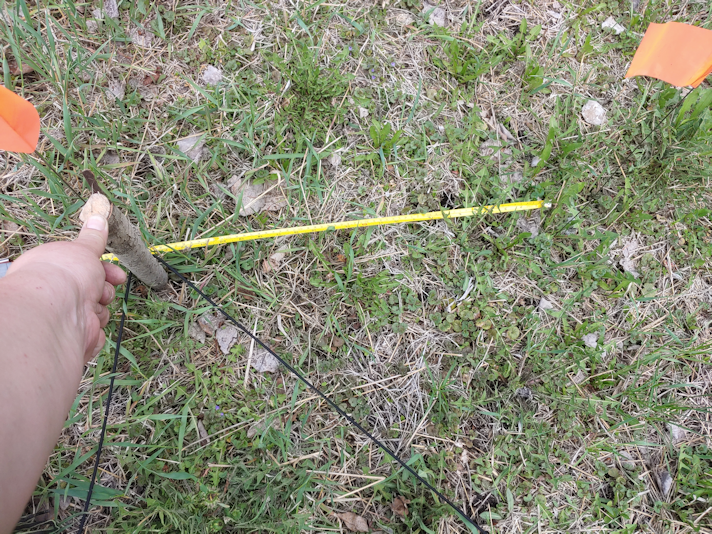
I then slid the stake along the cord and used the tape measure to determine where to put the next flag. I continued to do this for each flag.
The hard part was making sure the cord wasn’t getting hung up on grass and weeds, which would mess up the arc! :-D
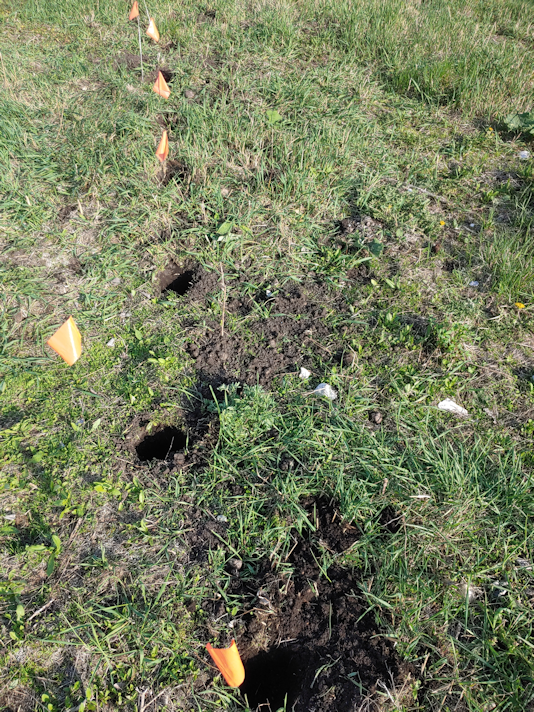
The end result was a long, gentle curve.
One of the things I realized as I was placing the flags was, there was no way I was going to be able to use my new soil auger. I kept hitting rocks, and even bent the wire of one of the flags!
My daughters were sweet enough to take over and dig the holes while I had to do something else. Then after supper, I got back at it. The first thing was to move the stakes in the ground over about 2 feet. For the second row, I started at the opposite end.
This will give us two overlapping rows that will stretch across the entire end of the old garden area.
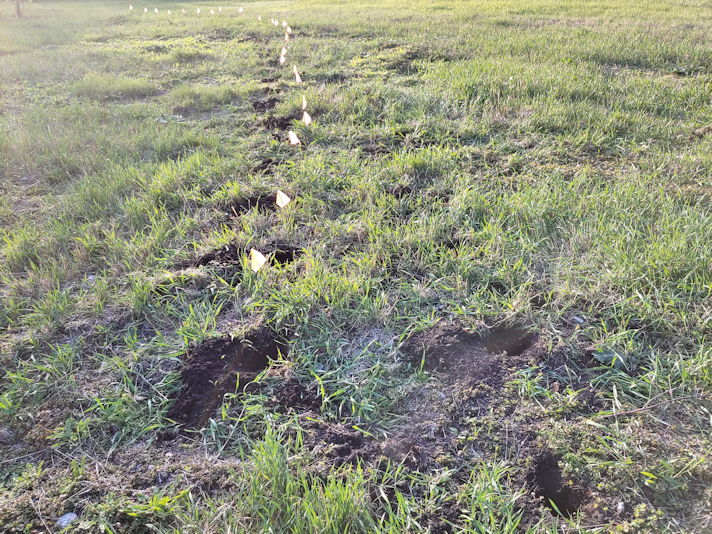
Digging the wholes was certainly a challenge. Not using the soil auger was definitely the right decision.
This is an example of how many little rocks we had to deal with, at each flag, just on the surface. The holes ended up being somewhat varying in widths and depths, from having to dig out more rocks, as well as pulling out rhizomes. The riding seat we found in the basement and brought out last summer came in very handy, though the terrain was rather rough to roll around on, thanks to whomever botched the plow job however many years before we moved out here. Still better than bending and stretching!
Digging out the holes was made extra interesting by another battle.
Squadrons of mosquitoes were dive bombing me the whole time. Mosquitoes that seemed to treat bug repellent as nothing more than a condiment that was tasty and delicious!
The two rows overlapped for 10 holes, at about 2 feet apart.
Tomorrow, weather willing, we will add a very damp soil mix into each hole, and get those sunflowers planted. :-)
Since the kitty pool didn’t work out, I’m thinking of taking it outside and using it to mix the bags of soil, compost and peat together. It’s big enough to fit all the bags we’ve got, and it will be much easier to mix it all together at once, than doing it in batches in a wheelbarrow. We should have enough left over to use elsewhere, too.
I’m really hoping planting the sunflowers like this works. We’re basically breaking all the “rules” doing it like this. :-D But then, pretty much everything we’re doing for gardening this year is an experiment.
As for the kitties, they are now settled with Mom in the basement. Lots of places were set up for them to cozy up into, and the girls were diligent in making sure everything set up for them was either elevated a bit, or at least not directly touching the concrete.
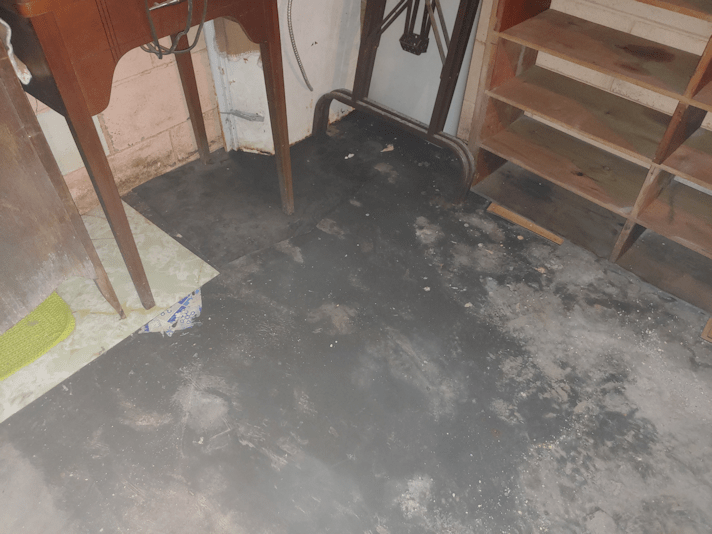
This would be why.
This was the corner my older brother found full of water and starting to mold, the summer before we moved here. A rain barrel outside this corner had been allowed to overflow right against the basement wall, through most of a very wet summer. He cleaned it up and bleached it (then we bleached it again a couple of months ago), and for our past two summers here, it was so dry, we never had an issue. Now, for the first time, water is starting to seep through the concrete – and we’ve had very little rain! Which means it is as we feared; the weeping tile is probably filled with soil and no longer doing their job, thanks to the overflowing rain barrel.
*sigh*
Another thing that will be a big, expensive, fix.
As for the corner, we already made sure the things we put there were raised off the floor. The only exceptions were the pieces of light figures, and the legs for a folding table. The plastic light cover is not a problem, but the metal piece is now raised off the floor, and the metal table legs were move out completely.
This would explain why, when we did a temperature and humidity check in the root cellar yesterday, the humidity was almost up to 80%! The temperature had gone up to about 13C. With a potential cheese cave in mind, the humidity would be good, but the temperature is now a bit too warm. It should be interesting to see if it gets any higher over the summer.
Meanwhile, we’ve now got a fan on the corner to help try it out. The old part basement already has had the blower for a while, to try and keep things drier there, too. We still need to rebuild the mesh cover for the window on that side, so we can open it up for the summer and not have to worry about critters getting in.
Little by little, it’ll get done. :-)
At least we were finally able to get prepping for the sunflowers checked off the to-do list!
After giving the new squash bed a thorough watering with the sprinkler yesterday evening, I made sure to check them out this morning.
I’m happy to see that they are looking strong and healthy. A few were looking a bit haggard after transplanting and adding the straw mulch, but they have all perked up.
The not so good is that my plans to at least start on getting the sunflowers plants are still out. It’s just too flippin’ windy out there! The sunflowers are to be planted at the far end of where the old garden used to end. There, they will serve as both a wind break (one variety can potentially grow to 10 – 12 feet in height, the other 8 – 10 feet), but also as a privacy screen. Too many people slowing down to peer into our yard/garden area. Which I can understand, when there’s a herd of deer passing through, but with our past having included things like a paid union goon stalker, a crazy dude threatening us, nosy, gossipy neighbours that were diligently working to drive us away from the housing co-op we lived in, and now our vandal, we’re a little more sensitive to the creep factor of that than most!
That far from the house, though, means no shelter from these winds, and they just don’t seem to be dying down.
I really hope it calms down in the next day or two. The predicted thunderstorms have been pushed back a couple of days, and I’d really like to get the sunflowers planted before then. Plus, there are still the cucamelons and remaining squash that need to be transplanted.
Ultimately, though, I’ll be happy as long as I get them in by the start of June.
Today, it was time to transplant some of the squashes we started from seed indoors.
I am really hoping we’re not jumping the gun, here, but many were outgrowing their Jiffy Pellets and really needed to get in the ground. In the future, for things that need to be started so early indoors, I am thinking it would be better to go straight into 4 inch pots, instead. That would give a more flexible timeline for getting them in the ground.
In going through the seedlings to see which ones had their true leaves and were ready to transplant, I counted out 16 in total, so I decided to do two rows of 8. I think most of them – at least the largest ones – are from the zucchini surprise mix, but after the trays got knocked over yesterday, they are all going to be a surprise! :-D
I used flags I picked up at the hardware store to mark the first row at 2 feet apart.
Though we mulched the area last summer, and the soil has improved quite noticeably, we are still dealing with lots of rocks and a soil in need of amendments. Several times, when placing the flags, I hit rocks and had to poke around to find somewhere I could push the wire in. We needed to figure out a way to get around that, and this is what I’ve come up with.
The first step was to open a hole in the mulch to the surface of the soil (removing any rocks I found in the process.
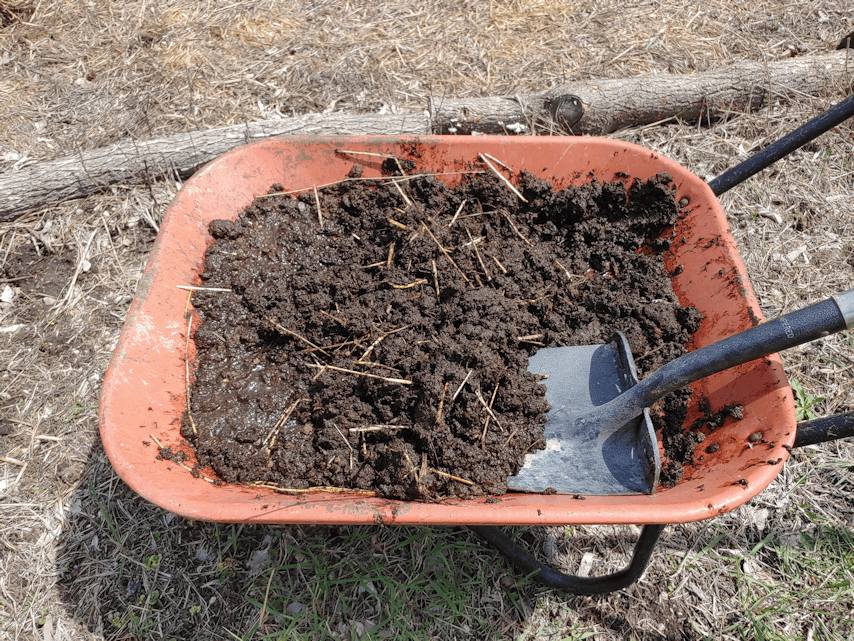
I also prepared a soil mix.
The wheelbarrow still had some straw on the bottom that I didn’t bother taking out when I dumped in a bag of garden soil I also picked up at the hardware store (only because they were on sale! *L*) and a couple of spade fulls of peat. This got mixed together with plenty of water. The dry peat was actually being blown away by the wind while I mixed! It took a while to get it wet enough for the next step.
Into each opening I made in the mulch, I added a spade full of the soil mixture. Then a hole was made in the middle of each one for the transplants, with more water added as well.
Each squash was then transplanted and secured in their own little “hill” of soil mix.
Then I mixed some more soil and peat and repeated the process for the next row, which was made about 2 feet away from the first.
Which was when I discovered I had 2 extra seedlings! LOL So I added them to the ends of the rows, taking a little bit of the soil mixture from each of the other plants, to transplant the extras into. So we now have a total of 18 surprise squashes transplanted.
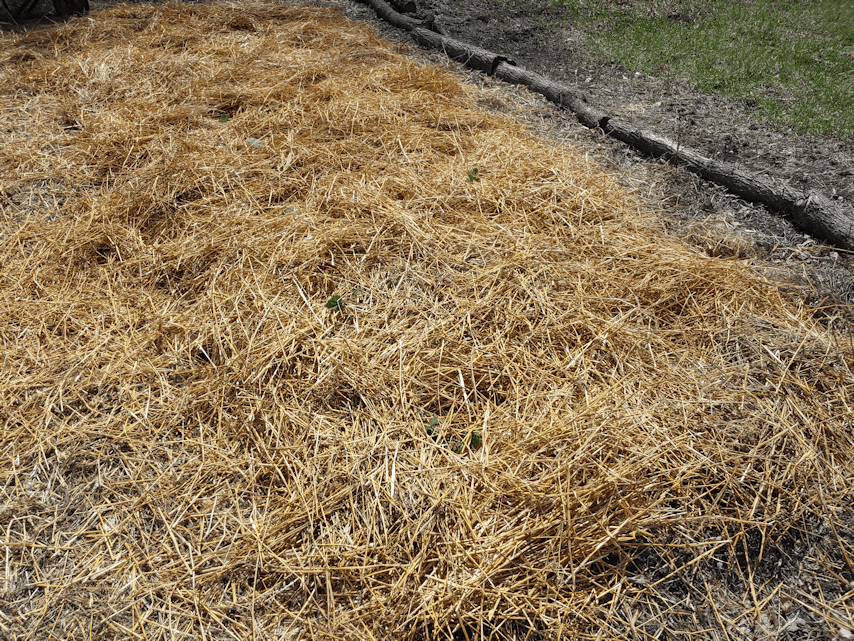
Once both rows were planted, they were mulched with more straw. When we add a trellis, it will go between the two rows.
After the straw was placed – with the wind trying to take much of it away! – I gave the bed a fairly thorough soaking, to dampen the straw. Not too much, as I didn’t want to shock the transplants with cold water in this heat! I will set up a sprinkler over it this evening. Unless the predicted showers make it to our area. It’s been quite a hot day, and the rain will be most welcome.
When I was done and inside the house, I checked the weather. My phone app said it was 18C, (“feels like 18C”) (46F).
They lie.
I checked the app on my desktop and it said we were at 26C, with a “feels like” of 28C (79 and 82F). That was certainly the more accurate one!
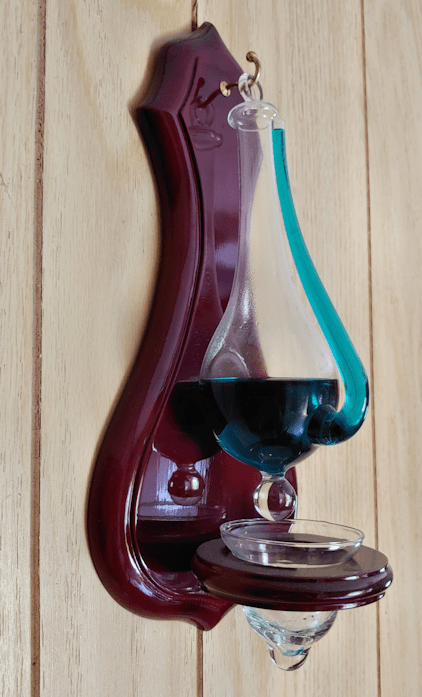
Our barometer agrees.
Since we cleaned this out and refilled it, I have never seen it this high!
We had thunderstorms predicted for the next couple of days, but now those have been pushed back to Sunday. Whether the storms reach us is always touch and go, but I’d like to find some way to cover the transplants, if we do. The straw will protect them, but only so much.
Meanwhile, we’ll be keeping watch on what’s left in the seed trays. We won’t be transplanting as much as we hoped, but right now the only thing I’d say is a total loss is the fennel. I still have hopes for the gourds to emerge! Not that I’d be able to tell which ones they are at this point. :-D
Still, I hope we’ll have a couple more rows of squash in this garden bed by the end of the month. Tomorrow, however, the plan is to get the sunflower seeds in. :-)
We shall see if planting them in their own little islands of soft, stone-less soil will work!
We’re having another wild and windy day! Still, stuff needs to get planted. I made a quick trip into town and my errands included stopping at the hardware store. Their garden centre was open, so I checked it out.
I couldn’t resist.
I bought some muskmelon transplants. Muskmelon is a type of cantaloupe that I remember we grew here when I was a kid. I absolutely loved them. I only got 2 plants, and we shall see how they do.
In preparation for today, my daughter and I made a bunch of markers to label our plantings.
We made one for each variety of seeds or transplants we have, plus an extra. The cucamelon don’t need one, since they are going to be completely separate from everything else.
We… won’t need to use all of them anymore.
I’ve been hardening off our seedlings. Because of the high winds, I’ve been leaving the trays inside the mini-greenhouse with the flap completely open – that way, they’d get some wind, but still be protected from the worst of it. I also put the mini-greenhouse in front of the old basement window, where it is more sheltered from the wind, and still gets full sun. When I brought home the new melon transplants, I tucked them into an empty shelf in the mini-greenhouse.
When it was time to start planting in the garden, I came out and found this.
My initial thought was that the wind had done this, but now that I think about it, I have changed my mind. If there were a wind enough to knock those trays – and their shelves – down, the whole thing would have been blown over.
I am now thinking a cat decided to go exploring.
Unfortunately, the squash seedlings are now all mixed up. The gourds still haven’t emerged, so at least we can guess that if there is no seedling, it’s a gourd, but there were still some other squash that hadn’t germinated.
I think the few fennel seeds that germinated and promptly bolted are a lost cause. :-(
Most disappointing.
Still, I’ll transplant what I can, tomorrow. One of the seed packets I got was a “surprise” mix. Now, they’re all going to be a surprise! :-D
This is where we focused on today.
Even though this area is turning out to be pretty well sheltered from the wind, there is still enough to really dry out the soil. I watered it earlier in the day, then watered it again before planting.
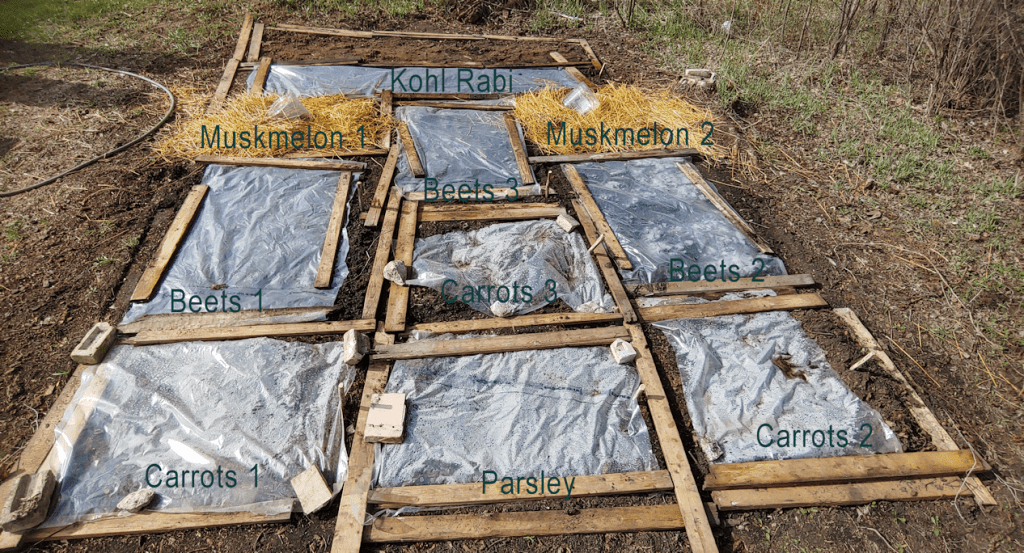
I also re-arranged the pieces of wood to make different sized beds, taking into account that I now have kohl rabi seeds and muskmelon transplants.
This is how it looks after the girls and I finished.
We still have seeds from the 3 varieties of beets, and kohl rabi left.
One of the things I’ve been doing is keeping the large plastic containers from some treats we sometimes get at Costco; cheese balls and pork rinds. I took two old cheese ball containers, drilled holes all around the sides near the bottom, then cut off the tops. I have a wood burning kit that includes a knife, and I used that to cut the tops off. Much better than hacking away at it with a utility knife or scissors! :-D These are now being used as cloches for the melons, which are surrounded by a mulch of straw. The cloches are tipped a bit sideways right now, but I will put them down for the night, when I do my evening rounds. In the morning, I will tip them over again.
Before the melons grow much bigger, I plan to add a trellis of some kind for them to climb.
Once the seedlings emerge, we’ll remove the plastic and the boards. The seeds were planted with square foot gardening in mind, and after the boards are removed, I will most likely add straw in between the beds for foot paths. An odd problem to have here, is that the soil is so soft, we sink when we walk on it. Our usual problem is the opposite. :-D
Here’s a bit more about square foot gardening.
When we do get do building raised beds, they will be quite a bit taller than the ones made in the video, for accessibility requirements. For those, we plan to use materials to fill the beds that turn out to have a name. Hugelkultur.
Or maybe more like this…
Basically, we’ll use whatever we’ve got to fill the bases, then topping with a soil mix. It might be a few years before we reach this point, though.
There is still one section of the new garden plot with nothing planted, and that may just stay empty. Tonight, I’ll be prepping the area in the old garden, where we will be planting our squashes, so we can start transplanting tomorrow. Then we’ll focus on the sunflowers next. Depending on how things go, we might plant some of our leftover seeds from the beets and kohl rabi, elsewhere. There is still the old kitchen garden area available, so we’ll see how things turn out.
While doing my rounds yesterday evening, I spotted a stinky visitor crossing the barn yard. He caught up with me some time later.
He moves pretty fast! :-D
I often see signs of where they have been digging up grubs during the night. Last night, I could hear their odd screeching noises out in the old garden – soon followed by some distinctive whiffs! – so I made a point of checking the area out when doing my rounds this morning. As long as they aren’t digging up our potatoes, I’m happy.
The potatoes beds are looking untouched. :-)
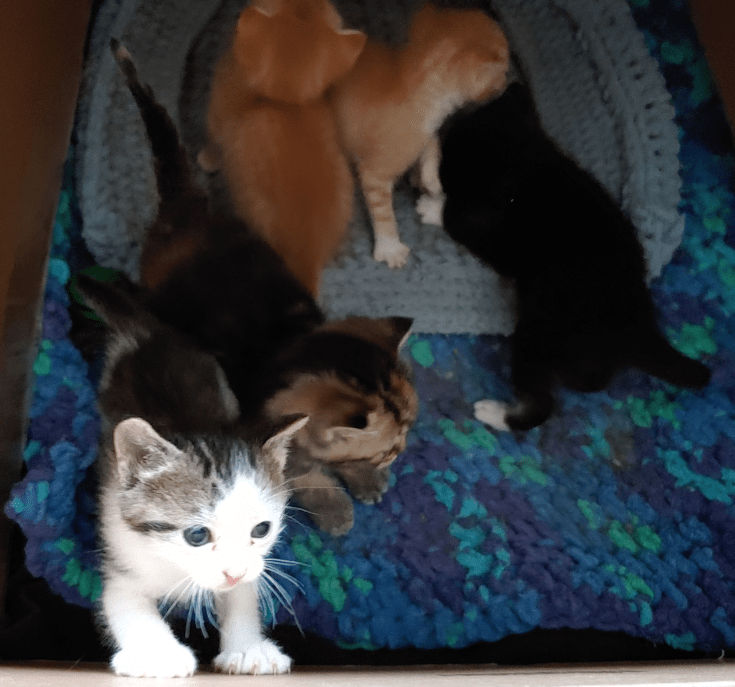
The kittens, meanwhile, are getting so much more active! And Beep Beep has been leaving them alone more often, even if it’s just to lounge nearby.
The kittens are also getting increasingly curious about that big world out there!
Leyendecker (the tuxedo) came very close to scrabbling his way out!
They may want to climb out, but if we actually take them out, they can’t wait to get back into their nest! :-D
Hard to believe they’re almost a month old, now.
With their increased activity, we’re going to have to find some way to set them up in the basement again. It is much safer for them down there.
Today, I’m hoping to get some more planting done, but at the moment, it’s amazingly windy out there! I was happy to find that our new garden bed, where we planted carrots and parsley so far, is quite sheltered from winds. Meanwhile, I’ve set up the trays of transplants in the open mini-greenhouse, next to the open door. I want to expose them to some wind as they harden off, but not too much! It’s a bit difficult to harden off the larger seedlings, when there are still new seedlings emerging in other ares of the trays.
Still no gourds, though.
Oh, my goodness! Looking out my window as I write this, I can see that the winds have increased again. Those maple branches are really swinging!
Hopefully, it will settle down a bit and I’ll be able to get some more planting done. Until then, I’ll use the time to head down to the basement workshop and help my daughter make some more plant markers. :-)
This morning, when checking the soaking carrot seeds, I FINALLY spotted some roots!
For those who are new to following this blog (welcome!), this video shows the technique I am trying.
The first thing I needed to do was make the conrstarch gel. I noticed in the comments that people found the ratio in the video made too thick a gel, so I used 2tsp cornstarch to 1 cup of water. I made more than I needed, since I figured if it worked well for the carrots, I would use it for other things with very small seeds.
It took a while to cook the mixture down to gel state, and I think if I do it again, I would increase the cornstarch a little bit more.
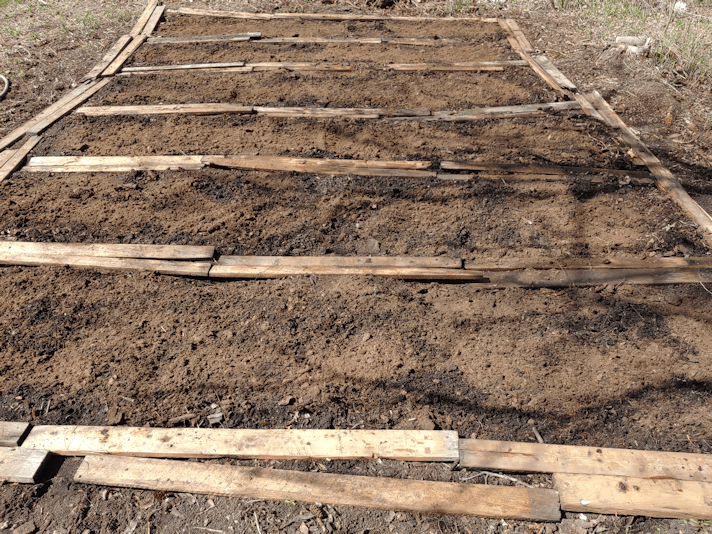
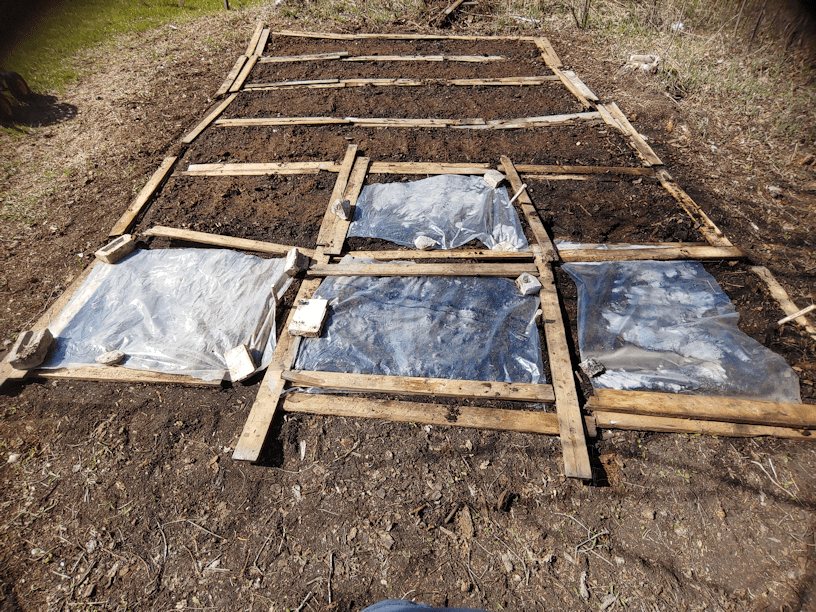
Once the gel was cooked and cooling down, we started getting the new garden bed ready.
I had already raked the soil to even it out, and we gave it a thorough soaking. Then I added a bit of peat to each section and raked it out evenly. After the above photo was taken, it was given another thorough watering.
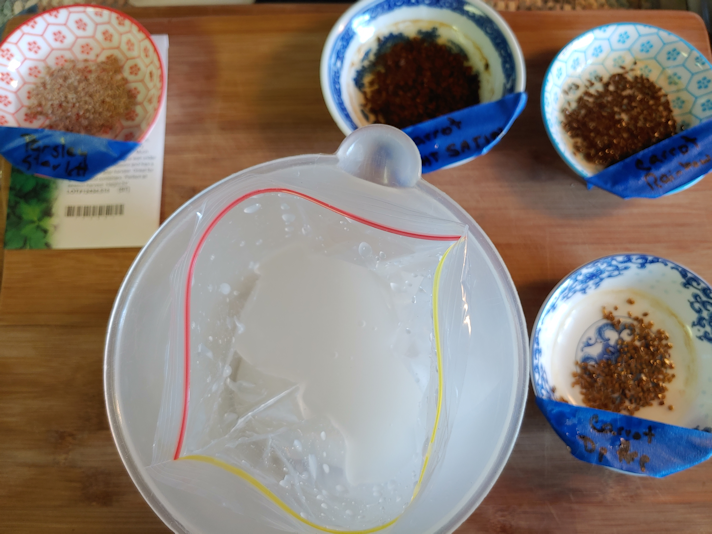
The gel took a while to cool down so, in between getting things ready outside, I put some of the gel into slide lock bags to cool down after. Then put them in the fridge, and finally putting them in the freezer. They didn’t have to get cold, but they at least had to be cool enough not to harm the seeds.
I prepped 4 bags. One for each variety of carrots, plus one for the parsley.
The instructions for the parsley said to let the seeds soak for a half hour, so that was done while I worked on the carrots. I used a measuring cup to hold the bag of gel up.
Also, the cats somehow managed to knock one of the dishes of carrot seeds upside down. :-( It was the deep purple variety. I was able to salvage most of the seeds, but there was a fair bit of seed loss, too. :-(
Once the seeds were added, I squeezed out as much air as I could, then smooshed the package around to evenly distribute the seeds in the gel.
When it came time to plant the seeds, a corner was snipped off, to make like an icing bag, and the seeds were squeezed into the prepared soil in short rows. By the time that was all ready, the parsley had soaked long enough and those were planted, too.
I’m using a combination of techniques, and one of them is based on square foot gardening. Rather than long rows, they’re being planted in squares. I’ve got the carrots planted in alternating sections, and the parsley is in the middle of the group of three.
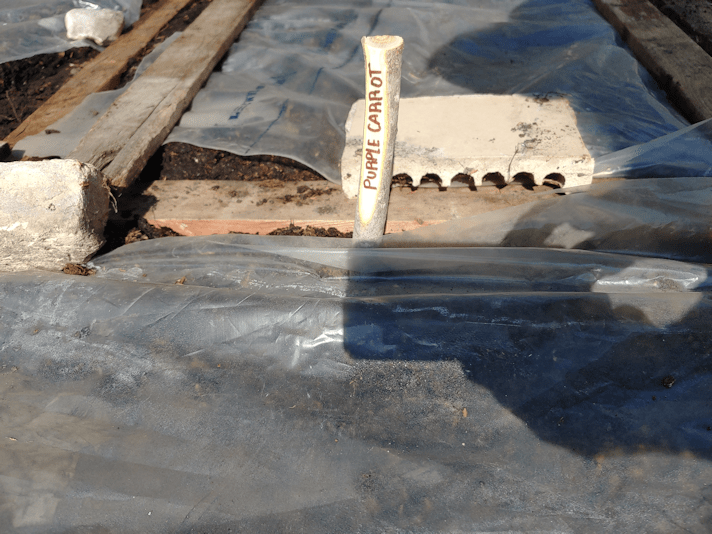
I found a roll of plastic in the basement (I think it’s for roofing), so we used some of that to cover and protect the seeds. Those will be removed as soon as sprouts can be seen.
The squares seem very close together, but there really is a fair bit of space in between the plantings.
Also, my daughter is a sweetheart.
She trimmed some branches and made labels for me. :-)
The way things are looking, and using the square foot gardening method, we might be able to plant more here than originally planned. The three varieties of beets will go here, plus I ended up buying some kohl rabi. I don’t know if we’ll have much success with the fennel transplants; there really isn’t much improvement there. What few have sprouted can fit here. The parsley and fennel was originally going to be planted in the old kitchen garden, but I think we’ll continue to build up the soil in there and save that for next year.
Today turned out to be surprisingly hot, so we didn’t stay out for too long. We were forecast to hit 22C (71F) this afternoon, but we ended up reading 26C (78F). We will continue planting tomorrow. I think it is safe for us to start planting things that are supposed to wait until after the frost date. Looking at the long range forecast, we seem to have passed that point early.
Which reminds me. I was hoping to use the fire pit and burn barrel in the next while, so I checked the municipal website to see what the burn bad status was at. We are now on a total burn ban, which means no fire pits or burn barrels, either. That sure didn’t take long! And we still have standing water in the ditches and ponds. Ah, well.
The next few days are going to be very busy ones, as we get more things out into the gardens! I’m looking forward to using that soil auger to prep where we will be planting our giant sunflowers. :-) My mother also gave us some pumpkin seeds that were being given away for free at her local grocery store. They had tiny little envelopes, each with 3 seeds in them, and I had grabbed one, not realizing my mother had already included 2 packets in with a bag of stuff she’d prepared for me to take home. I don’t know what variety they are, but my mom tells me her town has annual pumpkin growing contests, so these might be a giant variety.
I think we’ll just plant them and see what we get! :-D
It should be interesting to see how our first year of gardening since we moved here will turn out. :-)
We got some gardening done today, and in the process I made a point of seeing how the haskap bushes are doing.
The male haskap is leafing out very enthusiastically! It’s looking very healthy.
The female…
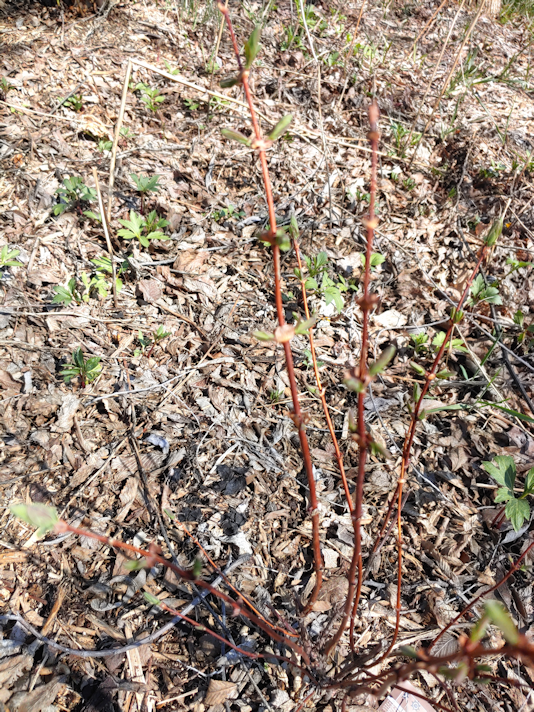
… is struggling. I couldn’t even get the camera to focus on those skinny little branches. It is still alive and leafing out, though, which is so much more than we expected, after seeing its condition last fall.
(The greenery popping out of the mulch in the background are flowers my mother had planted here; they grow quite tall and have bright yellow flowers. I have no idea what they are called.)
Normally, based on what I’ve read, the haskap would start producing in their second year, which would be this year. I doubt we will get any berries this year at all, though, as the female recovers from whatever almost killed it off last year. It had been doing so well, too!
If I get a chance, I will pick up another female this year. We can get up to 2 more, before we have to pick up another male, based on what I’ve read.
All part of our gradual plan to have lots of food bearing trees and bushes, that can survive our Zone 3 climate. :-)
Yes! Finally! The weather is cooperating, and I was able to get our potatoes in!
From a previous post, this is what I was starting with.
The frames are just there to mark out where the beds will be. As you can see, there’s a fair bit of grass and weeds. It has been a while since this area had any sort of gardening done in it.
While the no-till, no-dig method we’re using is something that can be done directly on the grass, I wanted to add at least some amendments, first.
I used a wheelbarrow to mix 1 bag of manure with a slightly larger volume of peat.
After spreading it out on one of the beds with a rake, I used another bag of manure mixed with peat on the second bed. I then topped them with a thin layer of straw, making sure to use the damp straw from the bottom of the bale, where it was starting to decompose already.
I had hoped to use some material from our own compost pile, but as I dug around, I did not find any usable material. I had tried to clean out some of the older compost, from before we moved here, but as I dug around, I found more stuff I missed. Twigs and branches are one thing. It looks like people had stared to use it for garbage, and I found pieces of wood that were probably used as support stakes, plastic trays from transplants, and even a piece of fabric. There was some well composted material, but it was so full of sticks, it was unusable.
I’m thinking we will need to start a completely new compost pile somewhere else. This one is looking like a write off. :-(
So, no compost of our own for the potato beds.
Once both beds were spread with the manure and peat mixture, I gave them a very thorough watering. Even though we’ve had rain for the past couple of days, the soil was still pretty dry.
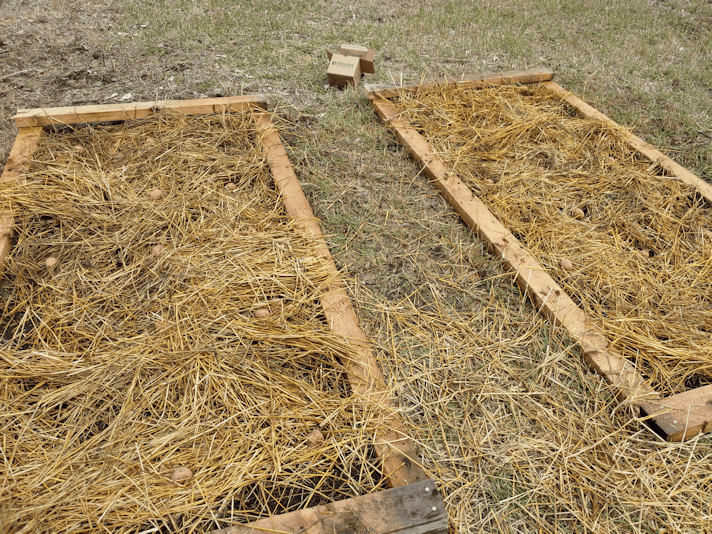
After soaking the beds, I added the potatoes. Each box was 3 pounds of seed potatoes. That worked out to 3 rows of 6 potatoes (plus 1 extra, so I put 2 small ones together) in one bed, and 3 rows of 5 potatoes in the other.
After spreading the potatoes out, I went back to evenly space them and push them gently down to have contact with the ground. With one potato, I went to pick it up, but it wouldn’t move.
???
I tried again, but it was stuck to the ground.
Amazingly, in the space of a couple of minutes, this one potato that had direct contact with the ground and shot out a 3 or 4 inch root, with capillaries! I wish I’d made the effort to take off my muddy gloves to take a photo, but instead, I dug a quick hole in the ground where I wanted it to be and “transplanted” it. I still can’t believe a potato could grow a root so deep, so fast, even after seeing it with my own eyes!
The next step was to cover the potatoes with a deep layer of straw. Again, I used straw from the bottom of the bale, where more of it was already damp and some was starting to decompose already. I made a layer roughly a foot deep.
I then scattered more peat across the top, then tamped it all down with the back of the spade. This peat is as much to add some weight to prevent flyaway straw as it is to amend the soil.
After the above photo was taken, I spent the next while thoroughly soaking the straw.
With this method, I saw recommendations of putting a layer of hay (which I don’t have, so I’m using straw) 2 feet deep. This is definitely not 2 feet deep. Over the next day or two, I plan to soak the straw some more, add another layer, then soak it again. After that, I should not need to water it much, if at all, for the rest of the growing season. I’ve heard people using this method say that no watering is needed at all, because the mulch maintains moisture as it breaks down, but I expect to need to water it at some point. It all depends on whether we have another drought this summer.
After the straw has started to settle and pack itself down, I will remove the frames to be used elsewhere.
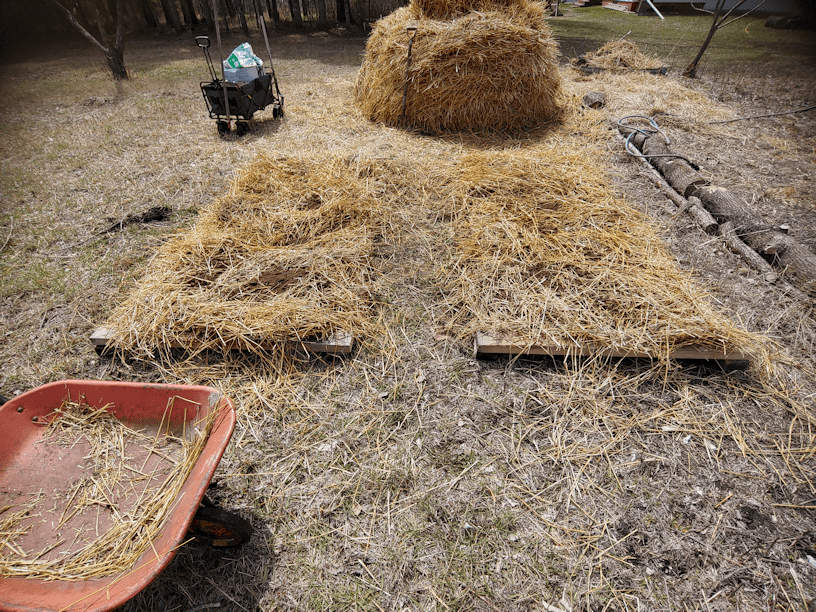
Once this was done, I checked out the area we are planning to transplant our squash seedlings. We had covered this area last year with straw, then covered with tarps, to amend the soil and try to kill off the grass and weeds. We still ended up having to use Round Up. Even covered with tarps, weeds where pushing their way through the straw and lifting the pegged down tarps off the ground!
This is how the area looks now.
The black tarps in the back are there to warm up the mulched soil on that side a bit faster.
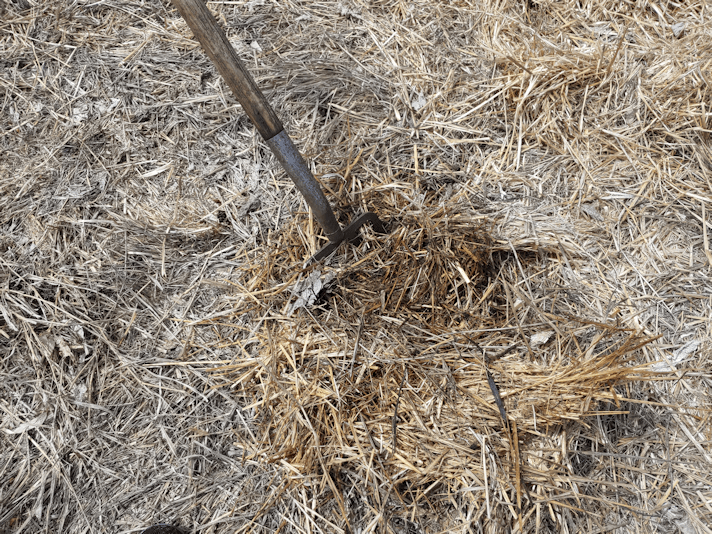
I could not do this here, last year. In fact, the soil was so hard, we were bending tent pegs while fastening down the tarps. While working on the potato beds next to this area, I would sometimes shove the fork or the spade into the ground to set it aside while I did the next thing, and ended up leaning them on the bale or wagon most of the time, because the ground is just so hard. Yet here, I could sink the fork’s tines their entire length down!
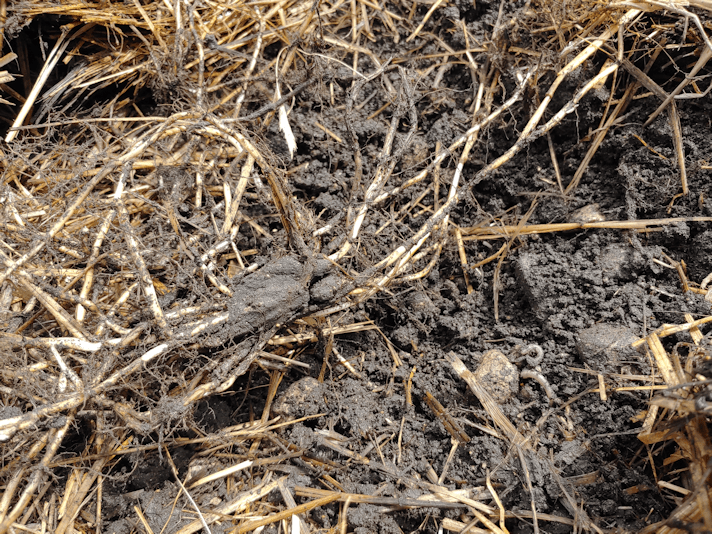
I pushed aside some of the mulch and dug around a bit. There are still a LOT of quack grass roots in there. I pulled some up, and you can see the bundle of roots in the above photo. The soil is quite “sticky”. The exciting thing was uncovering a worm. A very good sign!
Which means our efforts last year are paying off. The soil is already improving. When it’s time to transplant into the area, we will still be dealing with rocks and root systems, but the ground is now workable.
It’s amazing, what a mulch can do to improve soil conditions!
The orange ones now have names. The bigger one is Turmeric. The tiny one is Saffron. :-D
As I write this, Beep Beep is curled up with them, but things were not so peaceful, a little while ago. I heard some strange squealing and looked over in time to see her jump out of the nest, with Nicco in her mouth, then dash over to a corner under my crafting table. There is shelf under there that’s empty, since it’s unreachable, and she was starting to move him into it. I had to move some storage bins to be able to reach Nicco and bring him out, but she tried again, later. I’m hoping I’ve dissuaded her from moving the kittens into there. Aside from this being a hard, colder, smaller space, they would eventually damage the wood of the shelf, and the carpet in front of it, as they get bigger and start pooping and peeing all over.
I now have storage bins all over my bed. With the area uncovered, it’s less tempting of a potential nest!
Meanwhile…
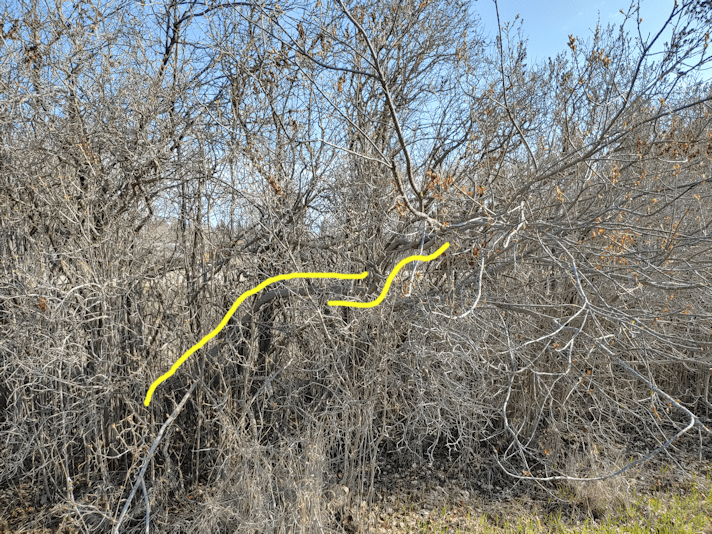
While doing my rounds this morning, I paused to take another look at one of the chokecherry trees among the lilacs, and consider some possibilities. Here is how the tree is growing.
It’s hard to see among the lilacs, so I put in the lines to show how the main trunk is leaning.
Here is a closer look of the base.
While I was not planning to work on the lilac hedge for some time, I am debating with myself on whether I should just go ahead and clear out around this tree. It is pretty choked out by the lilacs, so on the one hand, it would make for a healthier tree and higher yields of berries as quickly as this summer. Now would be a good time to clear it out, before the leaves are in. On the other hand, this tree is leaning so far over, I think the lilacs may be the only thing holding it upright. Whenever I do clear it, I would add a support of some kind, and start training it to grow straight again.
What do you think? Should I do it now, or stick to my original plan of doing it when we work on the lilacs a year or two from now?