Oh, it was so nice to see how the driveway looked in daylight!
There is more than enough room to back out of the garage and turn around – and even room for other cars to pull in and park. So awesome!
Though we do still have a bit of clearing to do in front of the garage. It’s just a small job, now!
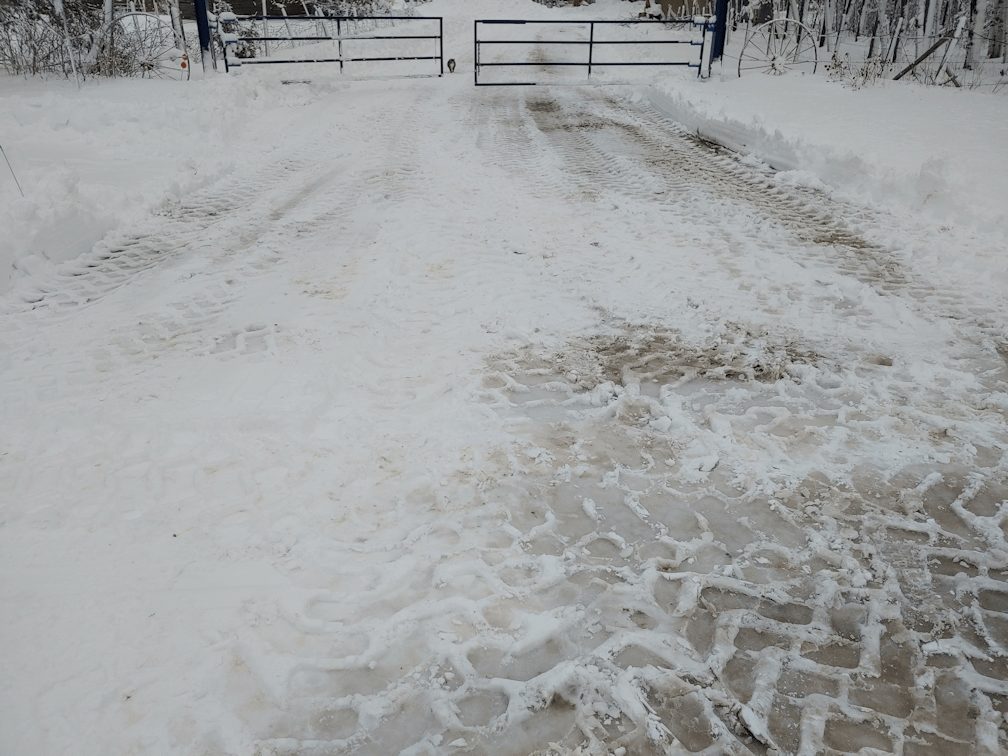
This picture is taken from the road. Even the cats are loving the lovely, snow free driveway!
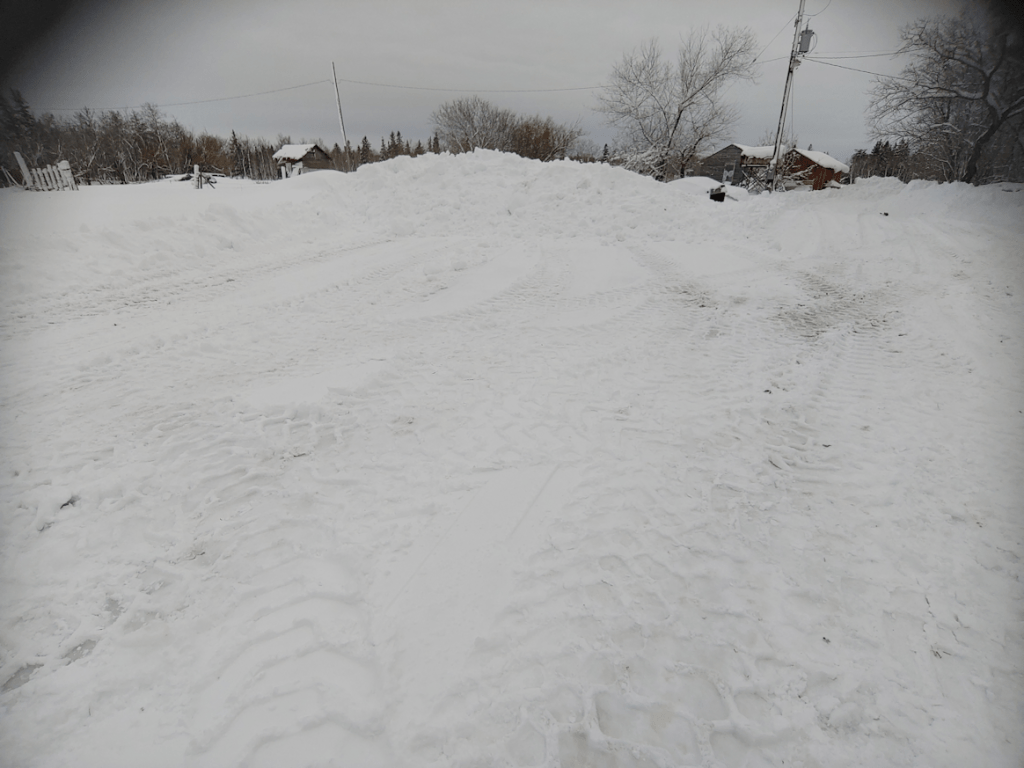
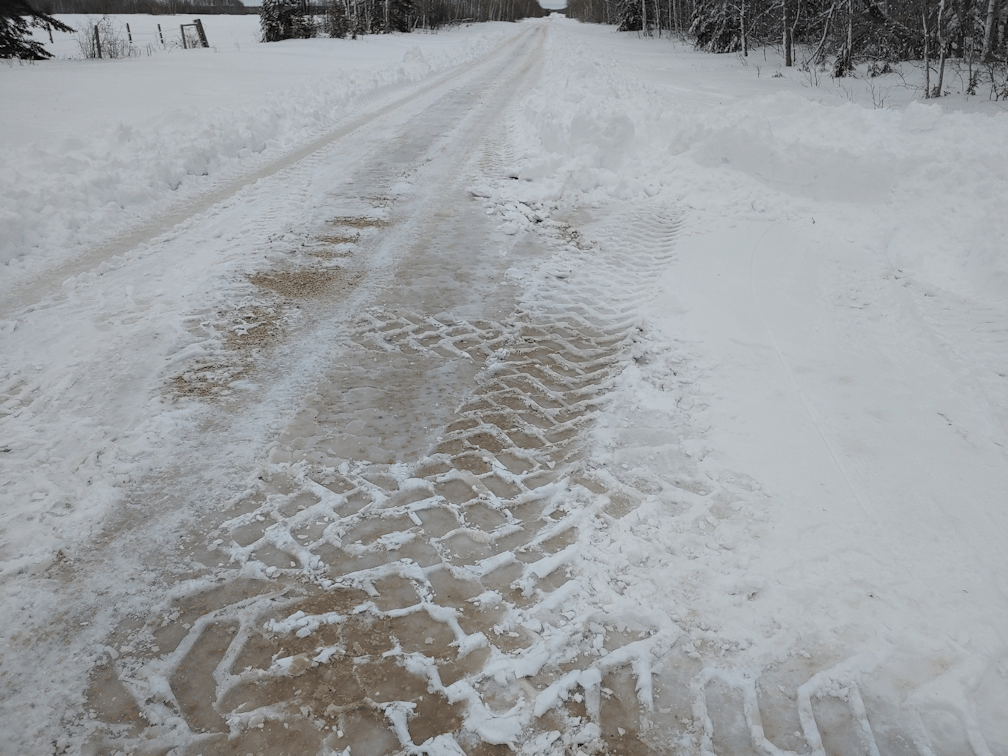
The road has been partially plowed. It looks like someone went through with a plow attachment on their truck or something similar. When the municipal plows come through, the clear from ditch to ditch, and there’s room enough for 2 vehicles to pass each other.
Notice the pole of snow pushed into the ditch? Because he cleared so far on that side of the driveway, when the plow does go by, we won’t have a ridge running across the end of our driveway!
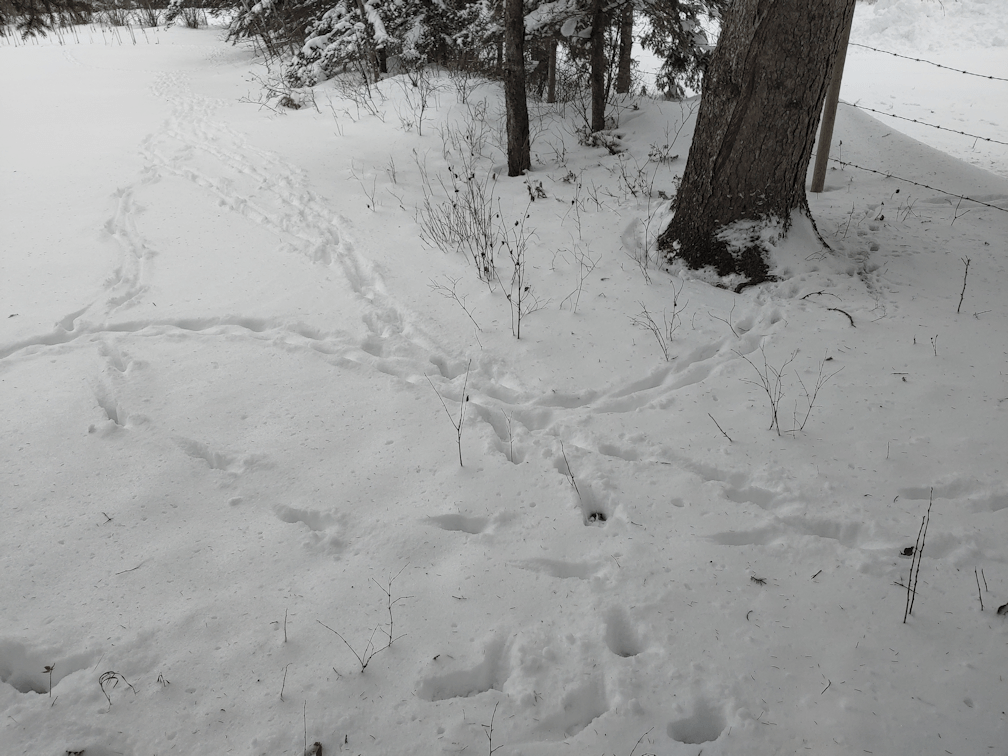
I was able to make my way to this fallen branch. You can see where it broke off, above. I was not able to move it. Not only is it really heavy, but it’s frozen to the ground!
While making my way to switch out memory cards on the trail cams, I cold see where the deer are passing through, too.
As expected, there wasn’t much on the trail cams. It was funny to see some of the files from the camera by the new sign. The snow covered the camera lens before the motion sensor covered it, so they were basically just out of focus snow.
Though there is more shoveling to do, especially in the inner yard, I think I’m going to have to leave it to the girls today. My body is definitely telling me I need to take a break! Time to pain killer up and go for a nap!
Okay, they’re actually my brother’s renters, but you know what I mean.
I messaged them asking if I could hire someone to clear our driveway some time this weekend.
Someone came over, tonight!
Isn’t that a thing of beauty?
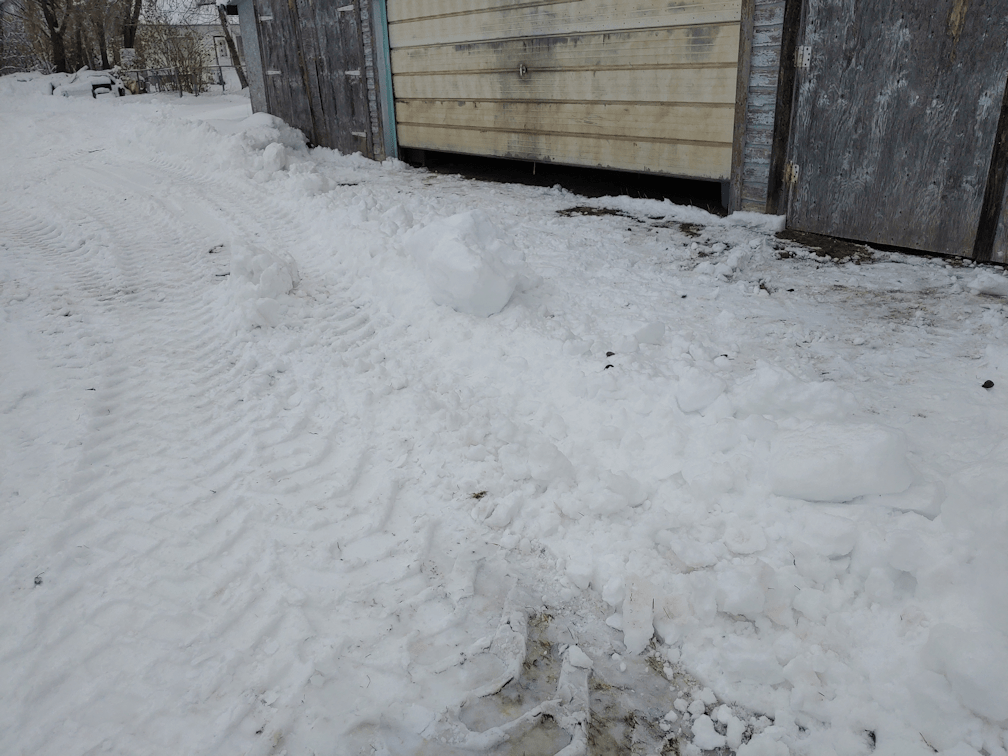
There was so much snow, he actually had to push some of it almost past the pump shack.
Would you just look at that? Wide enough for two vehicles! And room enough to back out of the garage and turn. I tried to get some more photos, but they didn’t work out. It’ll have to wait until daylight. I don’t think the road has been plowed yet, either.
Tractors are wonderful things. Especially tractors with front end loaders!
Afterwards, I sent another message to ask how much was owed, but she didn’t know. Her husband had gone to bed without saying anything about it.
What makes this even more awesome is that they lost power during the blizzard, and didn’t get it back again until shortly before I first messaged about the driveway. They went 36 hours without power! Yes, they have generators, thankfully. I can’t imagine running an operation as big as theirs on generators for very long!
They are so awesome!!! With just one pass, he did more than I was able to do in hours! I’m just thrilled.
Oh, I remembered to bring that lock from the gate in to take a closer look. I couldn’t see what I saw before, so I got the key and tried it.
It went in just fine.
Either I goofed completely and the lock was just frozen or something, or whatever was in it fell out while I was carrying it.
Today, we started digging out from yesterday’s blizzard.
We didn’t finish, but progress was made.
My husband was a sweetheart and did the cats’ food and water this morning. He shouldn’t have, but did have to dig his way to the kibble house and uncover a couple of water bowls. He slogged his way to the kibble tray under the shrine.
Knowing him, he was probably wearing his sandals while he was out there! LOL
There is a set of stairs to the main entry over under that snow. Good thing we are using the sun room doors! The cat path is pretty funny.
I shovelled my way to the stairs before I stopped, then slogged my way around the corner to grab the 100 ft extension cords, then went to the garage.
I am not standing in a drift, here. The snow is up to my knees.
I shoveled in front of the garage enough to open the doors to where little Spewie is stored.
This little thing is not made for a job as big as this! The expeller was barely higher than the snow!
Seeing the photo, I am noticing the knob at the end of the handle to rotate the expeller. I wish I’d noticed it earlier. The bottom of my parka kept getting caught on it, and the knob end fell right off! I did eventually get a chance to look closer, and it just needed to be screwed back on.
At this point, I paused to add the second 100 ft extension cord.
As you can see, there is a lot of water under that snow! As light as little Spewie is, the wet made it very difficult to push it forward, and my footing was precarious.
Here, the snow was above my knees.
You can see in this photo, that the knob end had fallen off by this time.
Guess who finally reached the gate, only to discover they’d forgotten the key? LOL
At least the walk back would be much easier!
Along the way, I also paused to knock the snow and ice off the trail cam, though I didn’t switch out the memory cards, yet. I haven’t even tried to reach the one by the new sign – a sign, and camera, I’m sure is now plastered with a layer of snow and ice, too!
Once I got the key, I discovered another problem.
I couldn’t get it into the lock.
No, it was not because of ice.
There seems to be a piece of metal jammed in there!
Off hand, I’d think it was our vandal, but there were no tracks in the snow. The last time we opened the lock was Wednesday morning, 2 days ago. We did get a prescription delivery early that evening. My daughter met the driver at the gate, since I was up to my elbows in flour, but never had to unlock the gate.
Well, maybe we’ll see something in our trail cam, before it got covered with snow, when I switch the memory cards out tomorrow.
I had to cut the lock off to open the gate, and continue on to the road.
Once that first pass was made as far as the road, the rest went a bit easier. Going back and forth, I could only clear a few inches wider each time, because of how deep it was.
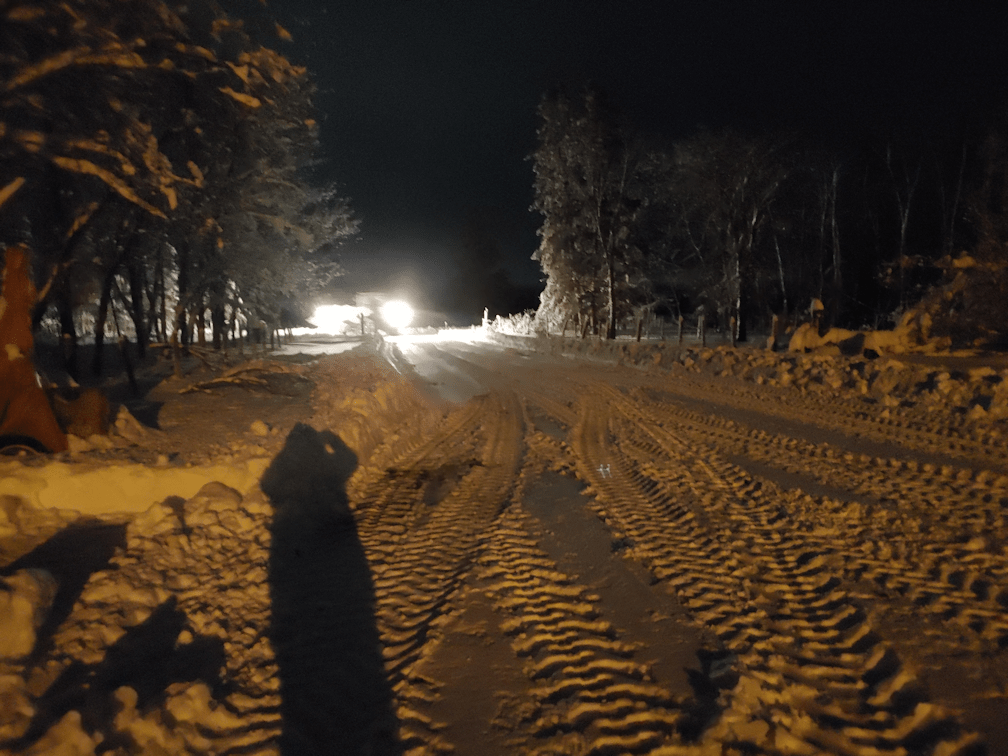
The road has not been plowed yet. Which means we’re going to have a ridge of snow across the end, soon! LOL
I cleared it just wide enough to drive though. Barely.
But I wasn’t able to finish in front of the garage. We can’t back the van out, yet, and where my mother’s car is, we can’t even open the doors, yet.
In one of the photos, you can see the path my daughters shoveled. They also shoveled paths to the burn barrel, the meter on the power pole, and even to the pump shack. There was concern that a cat was in the pump shack and was snowed in. We kept hearing plaintive meowing, but couldn’t really tell where it was coming from. There is a hole in the bottom of the pump shack door that smaller cats go in and out of that they cleared, just in case.
They also shoveled the sidewalk, around the kibble house, and to the kibble tray under the shrine. You can see that snow even got into the kibble house! A garden hoe turned out to be the perfect tool to clear that out. It was remarkably hard packed.
After they did the shoveling, they made supper and, by the time I came in, there was food and a fresh pot of hot tea waiting for me!
I really needed it, by then. While it was almost too warm for how bundled up I was, I was very wet. My boots were soaked and, even though I had a pair of those foot warmer things, my toes were starting to feel frozen. Plus, while clearing beyond the gate, the wind was blowing the snow all over me, so even my parka was wet by the time I was done. Of course, my double layer of pants were wet to my knees, too. We will have to finish tomorrow.
One of the last things the girls did before heading in was go around to some of the lilacs and knock off the snow, so they wouldn’t break under the weight. Some things, however, were already broken.
One large branch along the south fence line near the driveway was visible from the garage security camera, so I was expecting that one. It turned out to be the top of a dead tree. Another large piece of dead tree fell right on the barbed wire, but we haven’t been able to get at it, yet.
Nor have we been able to get at the large branch that fell in front of the outhouse. I’m sure there are other fallen branches around, but we haven’t even tried to make our way through the snow to check, yet.
Tomorrow, we will need to get back at it. At the very least, we need to clear enough to be able to back the van out of the garage and turn towards the road. We also need to clear enough of the yard that we have room to drive up to the house, with room to turn around.
This is one of those days were I really wish our vandal had returned the Bobcat, as my mother repeatedly requested. This could all have been finished, including the yard, in less than an hour with that thing. I was out there for more than three hours. I’m seriously considering contacting our renter and seeing if we can hire them to come over with their tractor! I’m sure we could find somewhere to squeeze that our of our budget.
Our forecast has changed, of course. We are no longer supposed to get snow tomorrow (Saturday). Sunday is supposed to be colder, but also without snow. Monday, however, it now says there will be “isolated flurries”, with rain and possibly another 5-10cm of snow.
Monday is when I have to drive into the city for Case Management about our restraining order.
*sigh*
At least I can be confident the roads will be plowed by then. When I first started working on our driveway, I could hear the reverse alarm of heavy equipment in the distance, so I think the main road may already be done.
For now, I’m going to have another giant mug of tea!
Posting might be sparse for a while. Our internet went down last night, and has not come back, yet. Likely due to Blizzard conditions to the south of us.
We are in pretty good condition here. Maybe 5 or 6 inches of very wet snow. A few branches fallen from the weight. Our gazebo tent collapsed under the weight. But we are fine, and so are the outside cats. :-)
I am getting just enough data signal on my phone, that I can make a text post. Hopefully. If you are reading this, it worked.
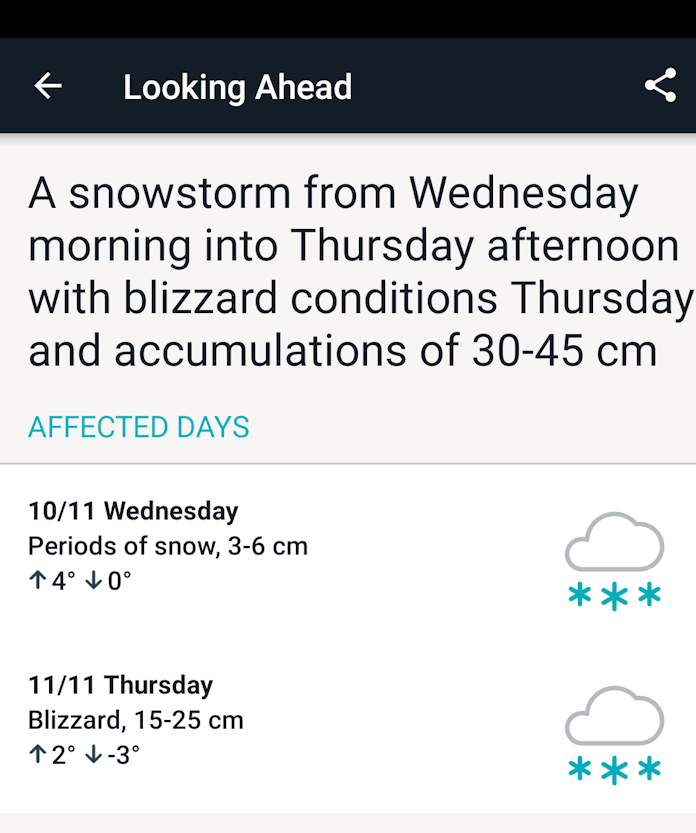
As if I weren’t feeling ticked off enough for the wasted day, with so much work to do outside, I look at the forecast and find this.
Granted, only the app on my phone says we’re going to have an actual blizzard, whereas my desktop weather app says we’re only supposed to get less than half a centimeter on Wednesday, then possibly 5-10cm of snow on Thursday, but sheesh.
That means we have only tomorrow to get the work done, and what doesn’t get done before the snow arrives will not get done until spring.
Here’s hoping this is another one of those times where the predicted weather passes right by us again.
He came over this morning, his truck loaded for bear, to install the sign I made to replace the one that was stolen. And, wow, did he ever go all out!
Once we decided where to put the sign, he used the little legs on the back of it to mark how far apart to set the posts, in the ground.
He started working from the outside of the fence, clearing away some brush growing at the fence line, using the soil auger bit on his drill to make post holes, then using the metal bar to widen the holes. He hit rocks, of course, but was able to either break right through them, or move them. He did have to cut away a section of spruce root, though.
While he worked on the outside of the fence, I worked on the inside.
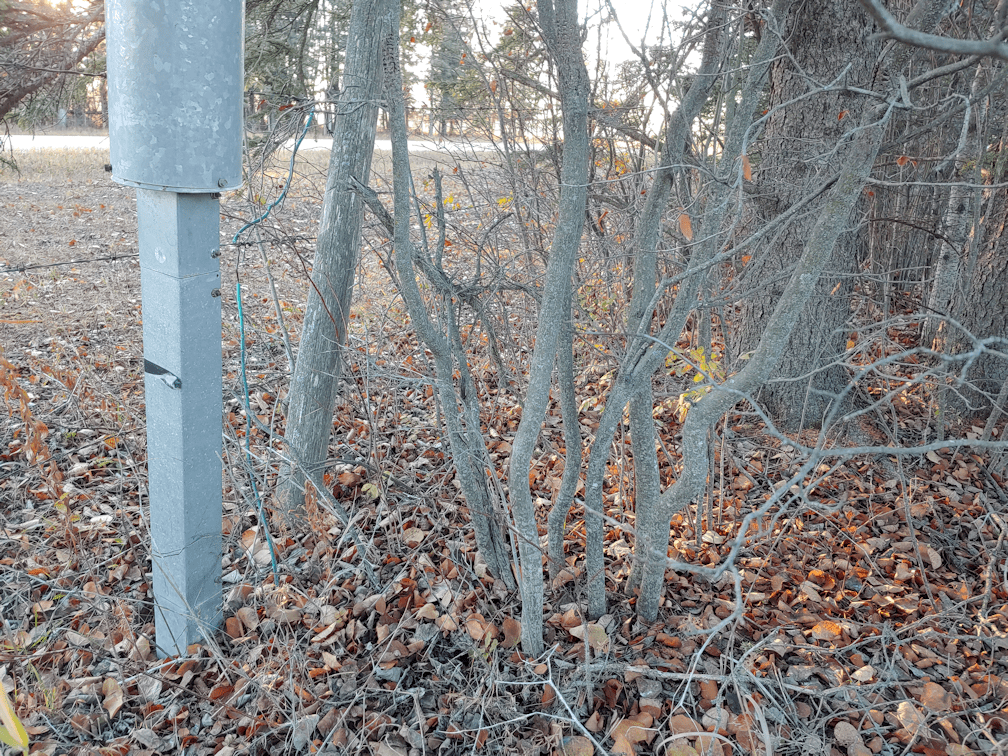
The area was pretty overgrown, and I worked on cleaning it up so we could access things. This also gave us a chance to take a good look at the corner post, which turned out to be quite solid. It’s just tilting. You can even see how one of the support boards has broken from the pressure!
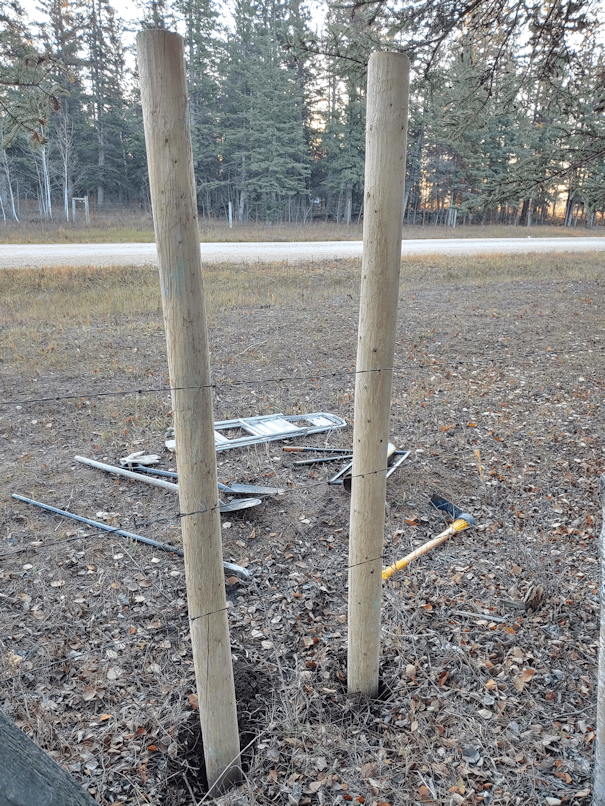
He ended up setting the 8′ fence posts slightly more than 2′ deep. He brought his post pounder and a level, and had to do a bit of back and forth-ing between them, to get them level at the top.
While he worked on that, I continued clearing undergrowth.
I continued clearing into this area, wanting to have access to the telephone company’s post. My brother confirmed that the green wire is a ground wire.
When planning for tree planting, we need to make sure not to plant over the buried phone wire. In our brother’s property across the road, there is an open alley through the trees. I had figured we just needed to line up with that and we’d be good. However, this post it not at all lined up with the alley.
My brother remembers when the phone lines were buried, and was able to tell me why. My father had asked them to move where they were laying the wire down in the quarter section across the road, so as not to take down the large, mature spruces they would have gone right through. They agreed. Once they crossed to the home quarter, they shifted back to being closer to the north property line. There is another one of these posts near our second gate, right at the north fence line, and my brother says the line was laid from this post to the other.
Which means it continues to shift diagonally, northward, along the way.
It also means the lone chokecherry tree that was allowed to grow in the open grass along the lilac hedge, it directly over the buried phone lines.
*sigh*
I am so thankful that my brother is able to tell me this stuff. He’s the only living person left who knows it! This will help us in working out where to plant trees and bushes.
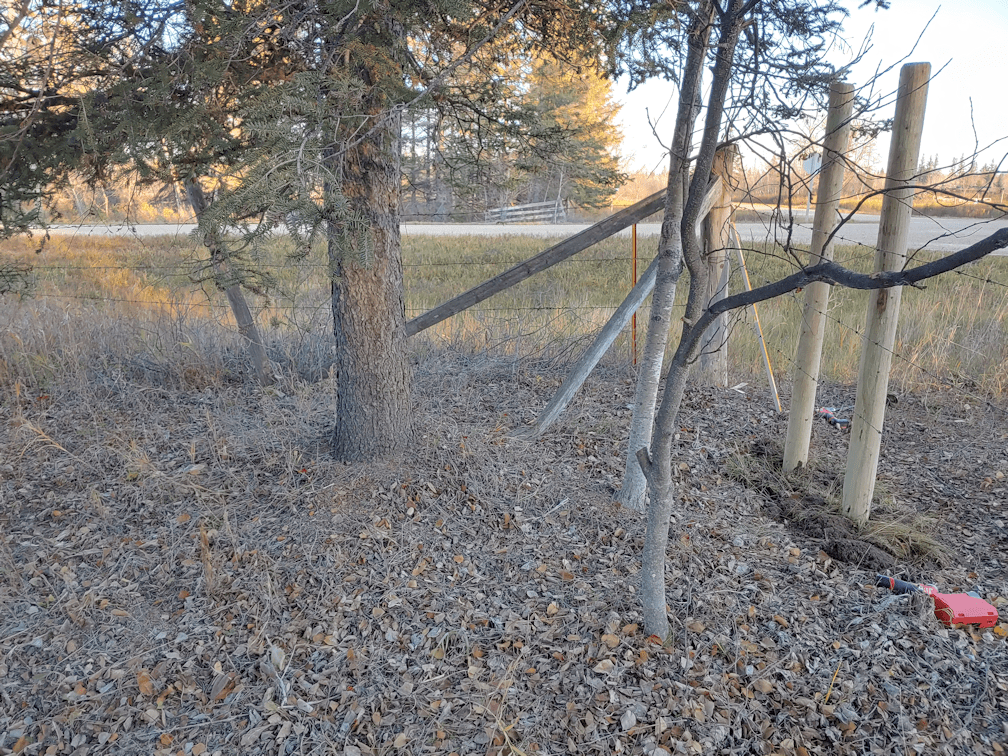
Here is the corner, all cleared of underbrush. Even the trees that were left to grow got a bit of a necessary trim.
Gosh, it look so much better!
As for the posts, my brother took soil from the ditch to put around the posts. In the process, he cleared the ditch a bit, so that any water in there would not be as obstructed.
We then used his pounder to pack down the soil, with him doing the outside while I did the inside.
What an awesome tool!!! I want one!
I also want one of those steel bars (there was one here, but it got disappeared before we moved here) and a post pounder. :-)
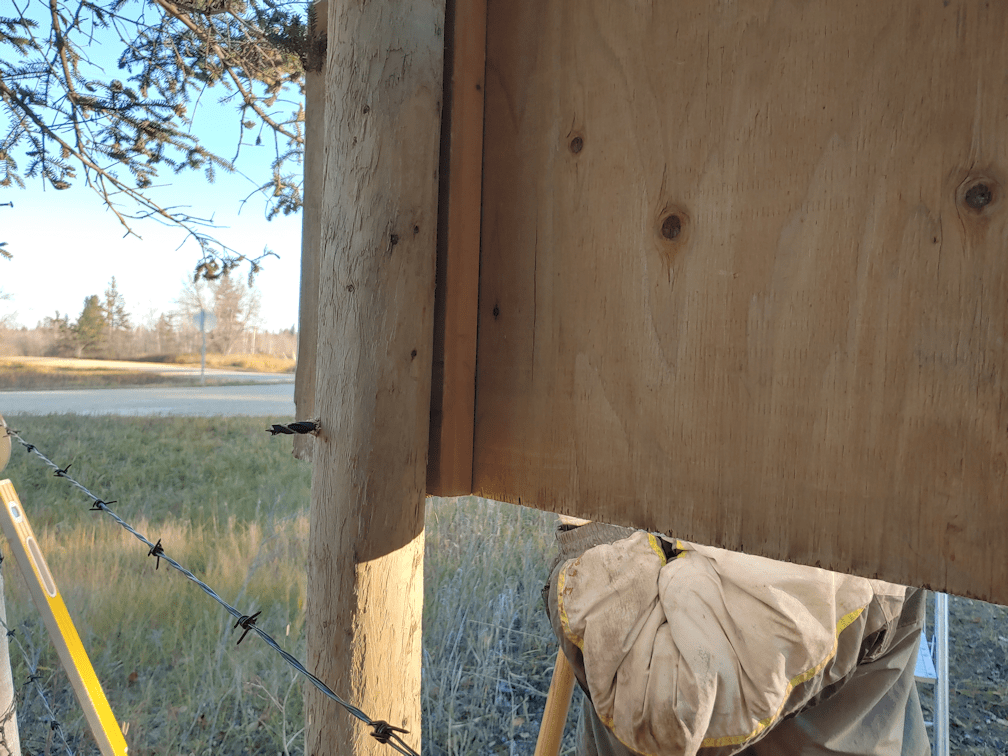
Then it was time to attach the sign. The legs were trimmed off, but the wood attached to the back was left. Between us, we worked out exactly where it would sit, so that the the remains of the legs on the back lined up with the roundest part of the post. While I held it in place from the inside, he marked the based and drilled a couple of screws at the line, to support the weight of the sign. Then he screwed the sign to the posts at the top, using deck screws, right where he would later add the carriage bolts. Once it was secure, and I didn’t need to hold it up anymore, he drilled pilot holes at the bottom, then enlarged them to the size needed for the bolts.
A perfect fit!
After helping put the washers and nuts on the bolts, I continued cleaning up the undergrowth while he finished attaching the sign.
This is the “after” by the telephone company’s post. I didn’t want to clear out all the small trees, as we do want what little privacy they can give us. Several dead branches from the pair of spruce trees got trimmed off, too.It’s remarkable how big the pile gets, and how quickly!
Then, while I hauled the branch pile away, adding it to the one that’s out by the spruce grove, my brother added some final touches to the back of the sign.
A board was added for extra strength and stability.
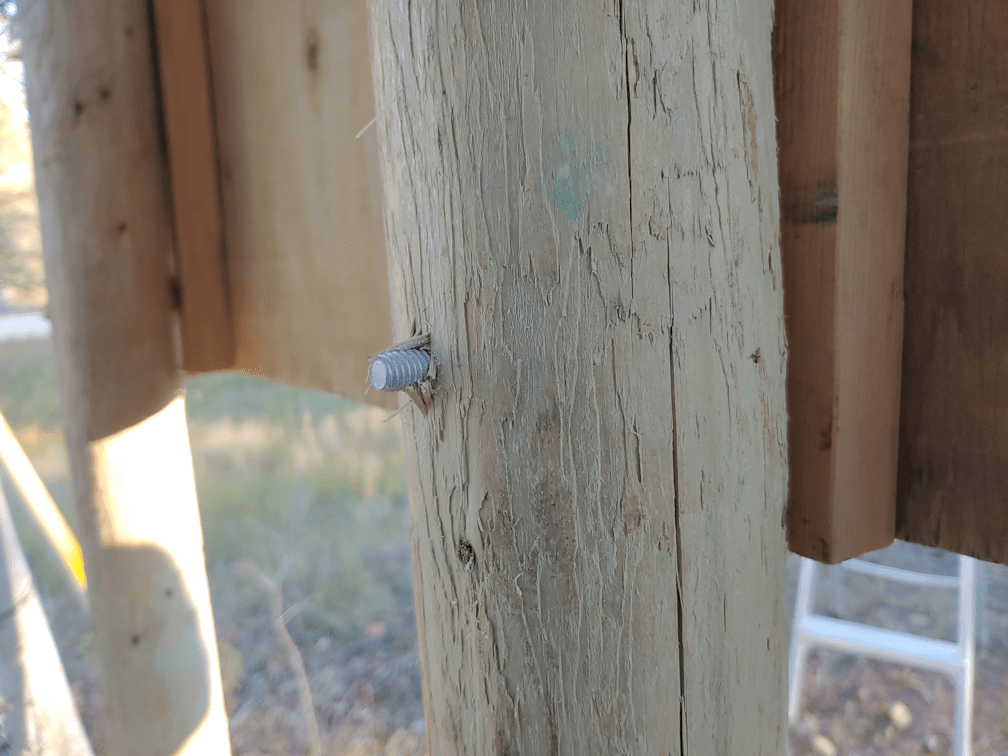
We’re just assuming our vandal is going to try and do something to it, so he also added extra locking washers to the back of the carriage bolts, and other things. They cannot be taken off now!
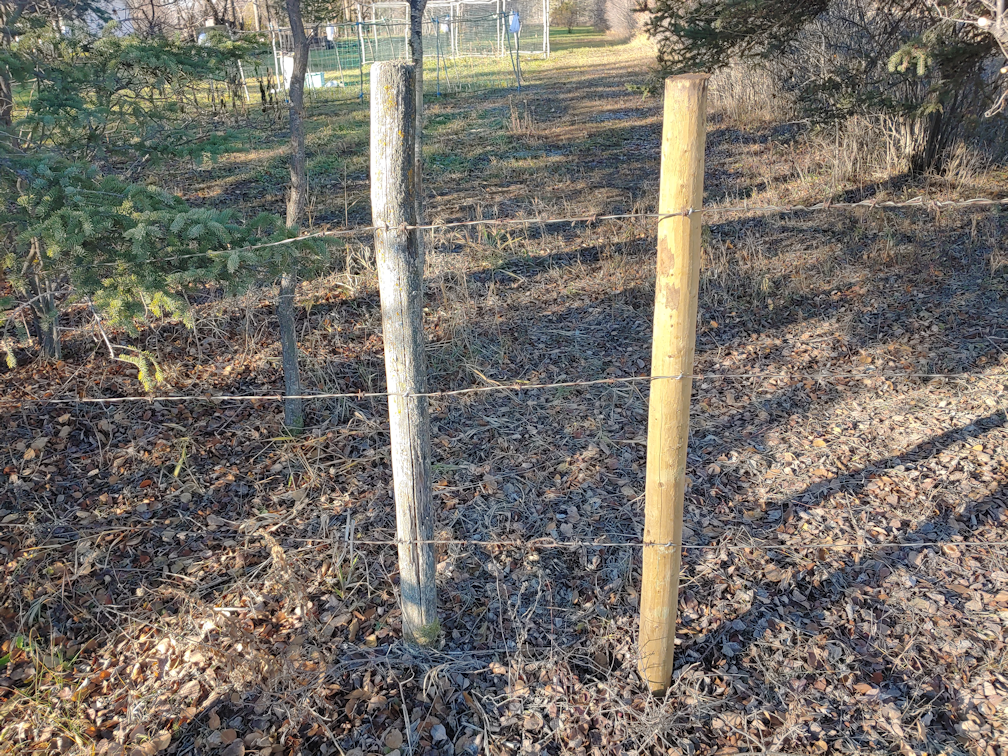
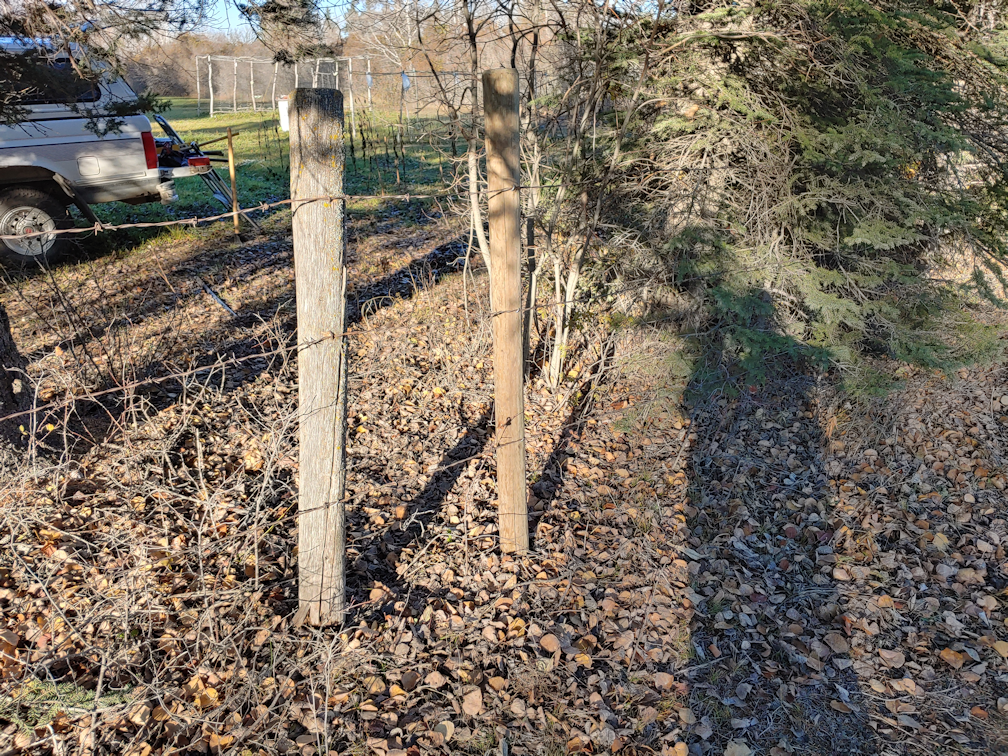
He also attached the barbed wire to the post and…
… in what seemed like the space of a heartbeat, installed a new fence post. The old one beside it is free floating; completely detached from the ground.
He even added a second one.
In this spot, the fence was so unsupported, my brother was able to lay the barbed wire on the ground, so it would be easy for us to cross the fence. After we were done and he was straightening things up, he installed another post. This time, I was able to provide the post, from the collection of fence posts I’ve been finding as we clean up. Just a couple of new posts, with the old posts keeping the barbed wire properly spaced, the fence is surprisingly more secured, and the wire was taught enough to actually make it difficult to slip between them as we crossed in and out!
Speaking of secure…
For some reason, there was an old post lying loose on the ground, not attached to anything. So we used that to add support to the corner post. My brother brought out a post maul – yet another of his many tools that he brought, just in case! – and was even able to straighten the corner post, just a little bit. Then he added some screws to the support post we added, as well as the one that was already there, to secure them even more. The last thing that was done, was installing the mounting hardware for the newer security camera. It took a while to find a good place for it. I wanted to make sure it covered the area in front of the sign, but also not face the main road. There is enough traffic around there that we’d ended up draining batteries like crazy, from the motion sensor being triggered so often. The mounting hardware also allowed me to adjust the camera even more, to make sure it was aimed exactly where I wanted. Of course, it also has to be set up so it can be reached easily, to switch the memory card and change the batteries.
If our vandal does decide to do something to the sign, we’ll have it on file. The camera isn’t exactly hidden, and may act as a deterrent, too. Unless our vandal is drunk again, at which point, he wouldn’t care if he was being recorded. I’m just hoping that if he does decide to do something to the sign, he’ll see the camera and stop.
Since the sign has our name an address on it, obviously I’m not going to post a picture of it here, but my brother is very happy with how it looks, and I’m very happy to have it up, so much sooner than I expected!
In all, it took us about 3 hours in total, to install the sign, a couple extra fence post, the trail cam, and clean up. Then my brother headed straight home, because he had so much to do at his place this afternoon, too!
Have I mentioned I have the best brother?
It deserves repeating.
Later on, when it’s dark out, I want to go back out and take a photo of the sign with flash, to see how the reflective paint shows up behind the lettering. I know my brother will want to see how it looks, too!
I am so happy this is done and – as a bonus – that corner got cleaned up. It looks so much better. We’re not cleaning up the rest of the fence line until we have planted the berry bushes we intend as a privacy screen.
It’s starting to look really nice out in that corner!
When it was time to feed the ginger bug, I decided it was time to start our first batch of fermented pop (aka: soda).
In looking for recipes and instructions on how to actually use the ginger bug, I found myself with some issues. One was the ratios of ginger bug to liquid, which tended to be for only a quart of liquid. Which seems a ridiculously small amount. Mind you, there’s four of us that will be drinking it, so that might have something to do with my perception. ;-) The most useful I found was to use 1/2 cup of ginger bug to 7 1/2 cups of sweet liquid. Pretty basic.
It was the fermentation container that seemed to be all over the place. Some sights said to ferment the ginger bug in a jar covered with cheese cloth or coffee filter. Others said to put it in a sealed jar and open it up every day, to release gasses. Some said to put it in a container with an airlock. All of these then said to bottle the finished beverage, usually recommending swing top bottles, but sometimes plastic bottles. Then there were those that said to pour the mixed liquid straight into swing top bottles for the fermentation period.
In the end, I decided to use one of my husband’s distilled water containers. We get distilled water for his CPAP humidifier, and I’ve started keeping the empty bottles to use in the garden.
We’re accumulating quite a few of them.
So this gives me a food safe container in a gallon size that has a sealable cap.
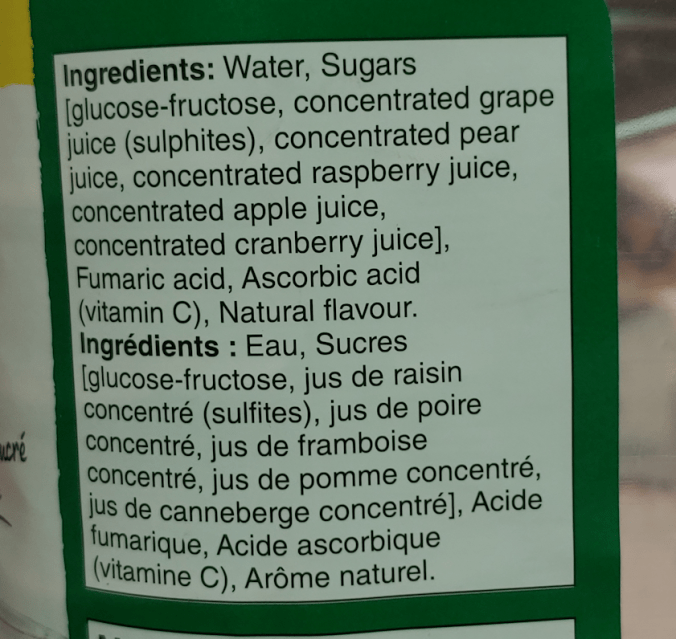
We started by measuring out 7 1/2 cups of the Cranberry Raspberry Cocktail I got for the purpose and pouring it into the jug, to judge if we would be doubling the recipe or not. We decided to go ahead and do another 7 1/2 cups, for 15 cups in total.
This is the ingredients list for the Cranberry Raspberry Cocktail. Which also has juices from grapes, pears and apples. The important part is that it has sugar in it, which means I did not have to add any sugar to feed the yeast during fermentation.
Pouring and straining the ginger bug out of the 750ml canning jar we are using would be messy, but we happen to have a ladle small enough to fit into the wide mouth jar, so we used that to ladle the liquid into a measuring cup through a strainer. Very few ginger pieces got caught in the process, so that worked out very well.
I found the amount in the juice bottle odd. 3.78L? A gallon is 4.5L, isn’t it?
Then I remembered; US gallons and Imperial gallons are not that same. LOL That is 1US gallon of juice. The distilled water bottle, however, gets referred to as a “gallon”, but is actually 4L.
Whatever. The end result is, a decent amount of headspace at the top of the water bottle, even after adding a cup of ginger bug liquid.
There was still some juice left behind, so the daughter that was assisting me, chugged it. It may be “cranberry raspberry” cocktail, but she tasted mostly apple!
No matter. It should still make an interesting carbonated drink!
We then replaced the cup of liquid removed from the ginger bug with our drinking water – the stuff we buy, rather than our well water – and fed it with some more ginger and sugar before putting it back in the cupboard, safe from the cats.
Then the fermentation bottle got labeled and dated. I figure we can wait a few days and, if the ginger bug is nice and bubbly after being used, we’ll start another batch.
For now, this bottle will stay out at room temperature. Every day, we’ll give it a squeeze. As long as it has give to it, it’ll stay out, but once it feels hard, that means it’s fermented enough and will be transferred to the fridge, so it doesn’t explode. From what I’ve read, this can take anywhere from 4 to 10 days. The house is fairly cool, so I predict it will be closer to 10 days.
Once in the fridge, it will need to be drunk within a few weeks, or it will lose its carbonation.
If it tastes any good, it’s unlikely to last that long. Not between four people!
I’m looking forward to seeing how this works! If it does work well, we will experiment with other liquids to ferment and keep track of which ones we like. :-)
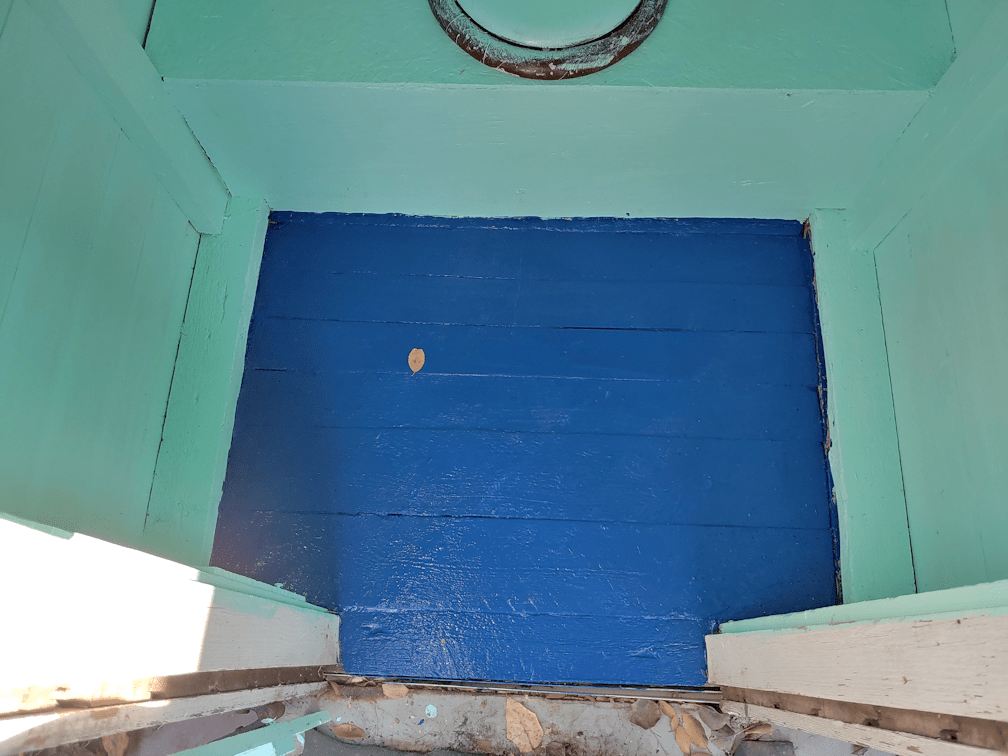
As our day warmed up in the afternoon, I took advantage of it to get some stuff done outside. Now that the sign’s lettering is done, I used the paint, which I chose for its durability, to get the floor of the outhouse painted, first thing.
The first thing to do was remove the remarkably heavy piece of … whatever the stuff is called … out, then sweep and scrub the floor as best I could. Unfortunately, there are cramped spaces on either side of the door frame that I just can’t get into. At least not without making efforts I’m just not willing to make for an outhouse! LOL
I just painted over the crud. I figure, if it’s stuck to the point I can’t get it out with a brush, it can stay there.
Of course, in the time it took for me to turn around and set the paint can and brush down, a leaf blew onto the wet paint!!
I was able to reach it without getting into the wet paint myself, though. :-D Then I quickly closed the door before more leaves blew in!
I don’t think I’ll bother with a second coat. If you look really hard, you can see some of the mint paint through the blue a bit, but most of this will be covered with the mat. I just wanted to protect the wood, really, and I think this will be just fine. If it isn’t, we can always add another coat next year, when we get more of the mint paint. The girls want to give it a final coat in semi-gloss.
It doesn’t look like we’ll be able to redo the roof before winter, so I’ll probably cover it with plastic before the weather turns, though at the state it’s in, it probably won’t make much difference if we don’t.
Which means that, once the paint is dry and the mat is returned, our emergency bathroom is now done for the year! :-)
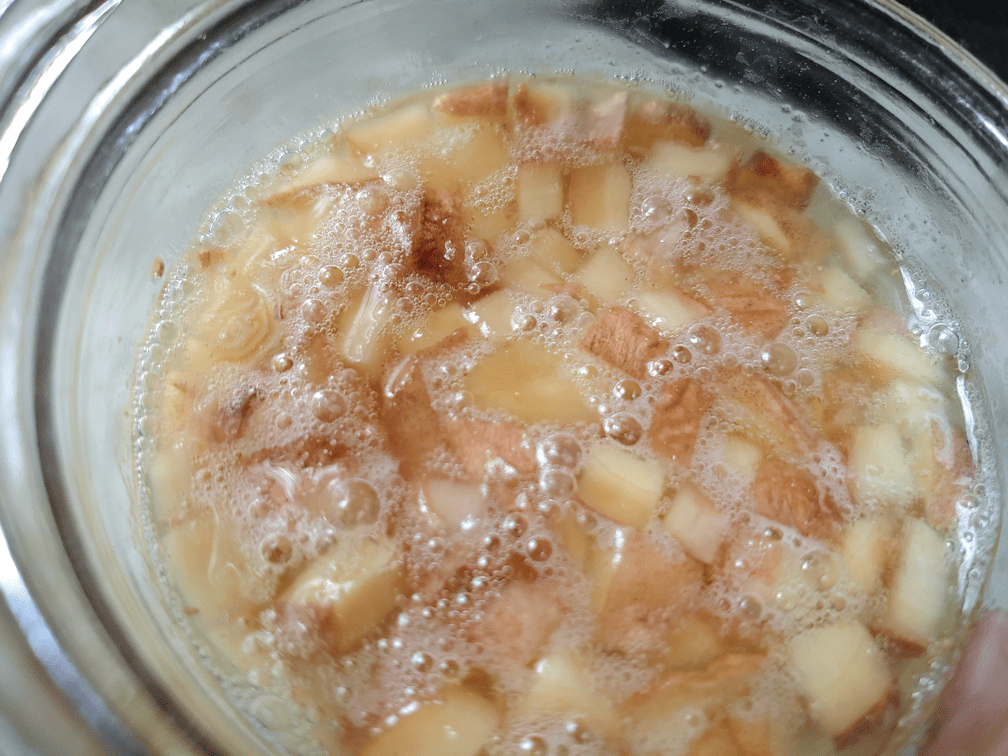
Well, we are into our third day of starting our ginger bug. It got its third feeding last night, and third morning stir today.
Look at those bubbles!
While researching how to make this, I saw sites that said it could be used after three days. Others said to wait four to ten days. All seemed to agree that it could be used once it starts bubbling.
Which means we should be able to start fermenting some pop, any time now!
I picked up some cranberry-raspberry juice to try first. There should be enough for at least two or three 8 cup batches. The recipes I’ve been reading said to use 7 1/2 cups juice to 1/2 cup ginger bug. Eight cups is not a lot, though.
Time to go back over the various instructions I’ve found and confirm the next steps we need to take. Then I have to decide on what container to use. Depending on what we go with, we might do a double recipe. We shall see!
This morning, I finally started on the lettering for the new sign I’m making, to replace the one that was stolen.
My brother had mentioned what I was doing while visiting my mother and winterizing her new air conditioner (and he even found the right size screws to replace the ones that were missing from the seat of her walker). Yesterday, she called and asked me about the sign my brother said I had ordered. Of course, my brother told her I was making it, but somehow, she decided as was… paying someone else to make it? I’m not sure. I’d even told her I planned to make one, when I told her the one with my dad’s name on it had disappeared, but I guess she forgot. As we spoke, I mentioned that I wasn’t in a hurry to finish it, since I wasn’t sure what I would do to put it up. I don’t want to dig post holes, and the fence posts are all falling down, but we do need something permanent that can’t be stolen. I also mentioned that we would probably need to put a camera on it, too, and we don’t have a spare right now.
Well, I found myself chatting with my SIL later on, and it turns out my brother wants to come out here with his post pounder and put in a couple of fence posts before the ground freezes! He even offered to pick up a couple of 7′ fence posts, and the sign could be screwed on later.
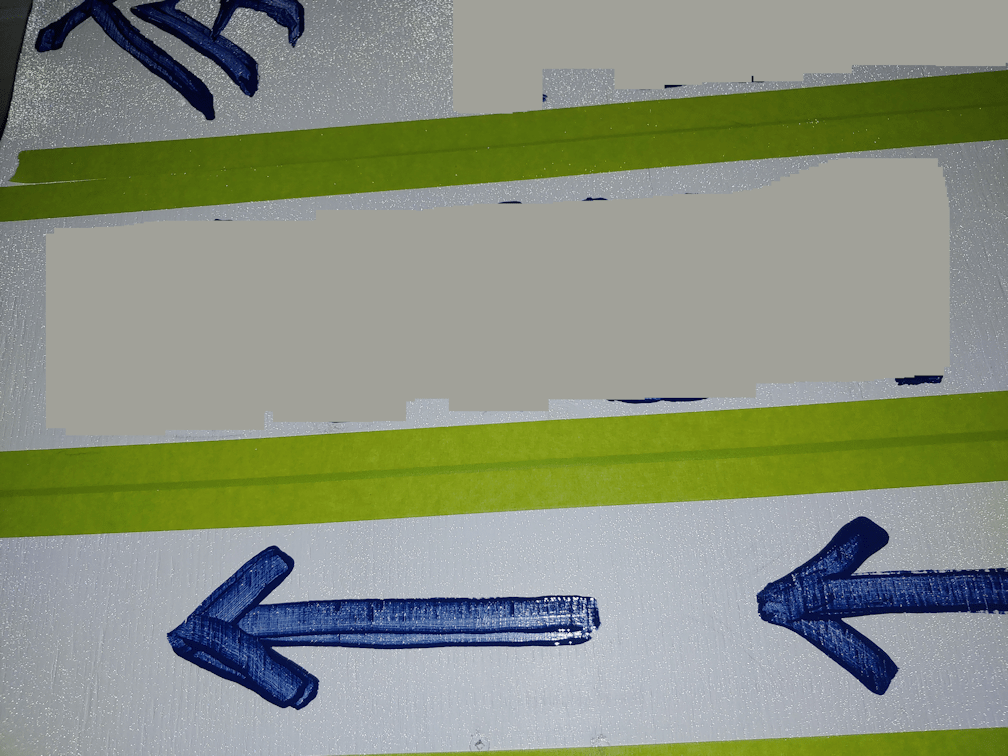
At which point, this morning I decided I may as well get the lettering finished. I used painter’s tape to divide the sign into sections, then a pencil to draw in the letters and numbers as a guide, then added the first, base layer of the blue paint.
I removed the identifying features, but here is how it looked, with and without flash.
There was a bit too much light in the room, but you can still see the sparkle from the reflective paint in the photo where flash was used.
I picked up a set of really cheap craft brushes to use for this. After this first layer of paint is dry, I’ll do a second coat with the same size paint brush I used for the first coat, and then will use smaller brushes to tidy up the edges, the serifs, and maybe add a few decorative flourishes to the uppercase letters. Once that’s done, I’ll be able to see if it needs a third coat.
I’m debating whether or not to outline in a contrasting colour. I have paint markers in silver and gold that can leave fine lines, and should be able to withstand being outside. That might be too much, though. I just hope the letters will be easy to read from the road. I find myself thinking they may be too small, but then I remember that the old sign’s letters were much smaller, and it could be read from the road, so this should be fine.
I think it will look really nice, once it’s installed!