We spotted this adorable scene this evening.

Uncle Doom Guy has been fully accepted by the kittens! :-D
We spotted this adorable scene this evening.
Uncle Doom Guy has been fully accepted by the kittens! :-D
Today has been a day to stay inside, where it’s cooler – and to allow my body to recover from yesterday a bit more.
Which means I’m feeling decidedly unproductive.
I did manage to finally clean the windows on the outside, around the house, and on the inside in the sun room.
The kittens didn’t know what to make of that!!
I tried to get some pictures of bees, too. The problem is, with the bright sunshine, I can’t tell if my phone is focusing where I want it to, or not!
I did manage a good one, though.

This is a smaller variety of our native bumble bees. So pretty. :-)
One of the things I tried to do today was remove those bottom hinge pins on the gate posts. We’ve been spraying them with penetrating lubricant regularly, in hopes that would help.

It didn’t. The hinges themselves can rotate freely, but those nuts are just not moving. My older brother had managed to get a few turns on this one, and that was as far as it would go.
I suspect they will need to be cut off.
The next thing to consider is how to clean these in preparation for painting. I’m hoping the detergent we got to wash the gates I’ve been painting will be enough to remove the lubricant.
As for the gates, they’ve been flipped in preparation to do the other sides, but if I am able to do it at all today, it will be after things start to cool down!
Looking at the forecast, it looks like we’ve finally reached that time of year where the only productive work outside will have to be done in the early hours, or the evenings, to avoid heat stroke.
The Re-Farmer
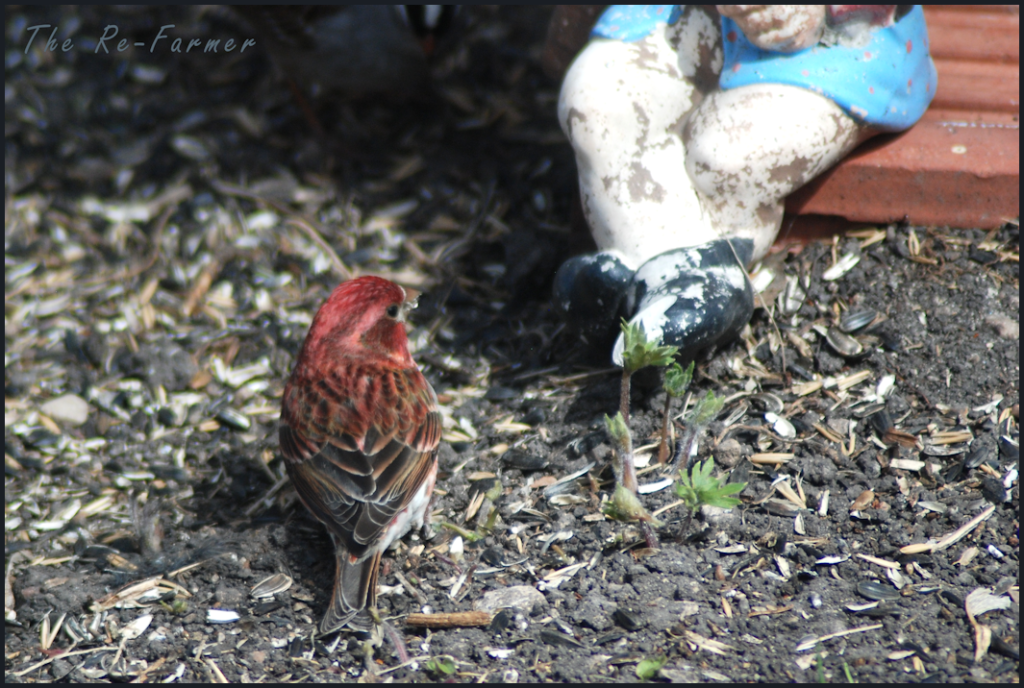
In reading up about how best to feed birds, and how some types will eat at feeders, others prefer raised platforms, while still others prefer to eat at ground level, we made sure to have all three covered.
I have since discovered something.

It makes no difference. They all eat anywhere.
I headed out with my daughter to drop her off for work earlier than usual. She was very kind enough to be willing to be stuck outside until someone with a key showed up (which, thankfully, did not turn out to be long) so that I could head over to another town almost an hour’s drive from her work. It was a court date for our vandal, this time in a town closer to us – though not with the extra driving this morning! *L*
Continue readingIt’s interesting how, unlike to many other birds, the female American goldfinches are just a darker gold than the males.


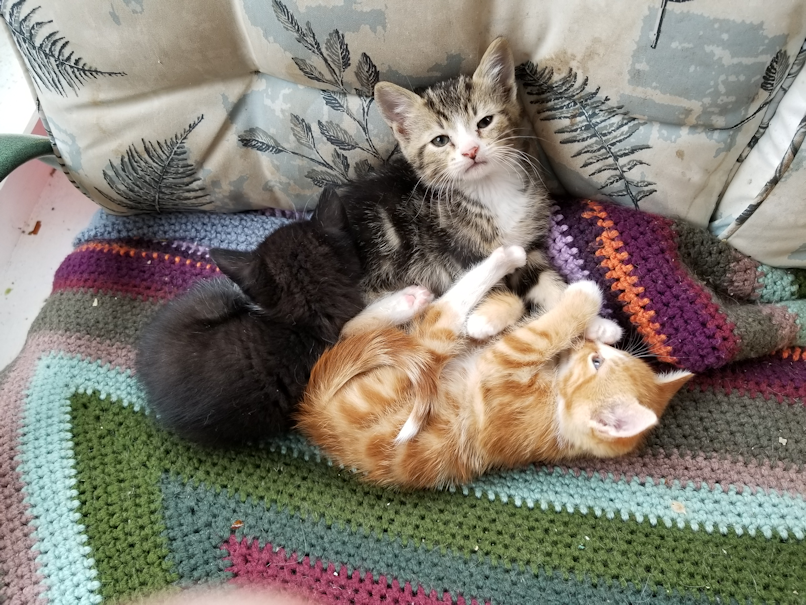
I just had to share some adorable kitten pictures I got today, while doing a head count to make sure they were all there.
They are all snoozy in these pictures, but they were wild beasts, this morning! LOL I tried to go into the sun room quickly, so as not to let any kittens into the old kitchen, but Beep Beep got in my way, slowing me down enough that one kitten snuck through while I was closing the door. I had to open it again to grab, but three more dashed in.
I gave up at that point.
Once in the old kitchen, they went nuts, climbing and running and jumping.
They look so calm and peaceful in the pictures below.
The pictures lie! LOL
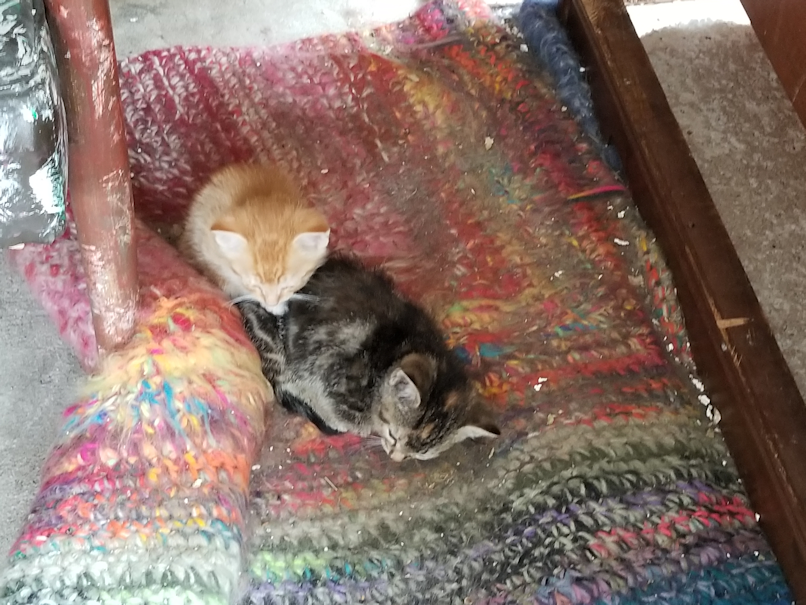
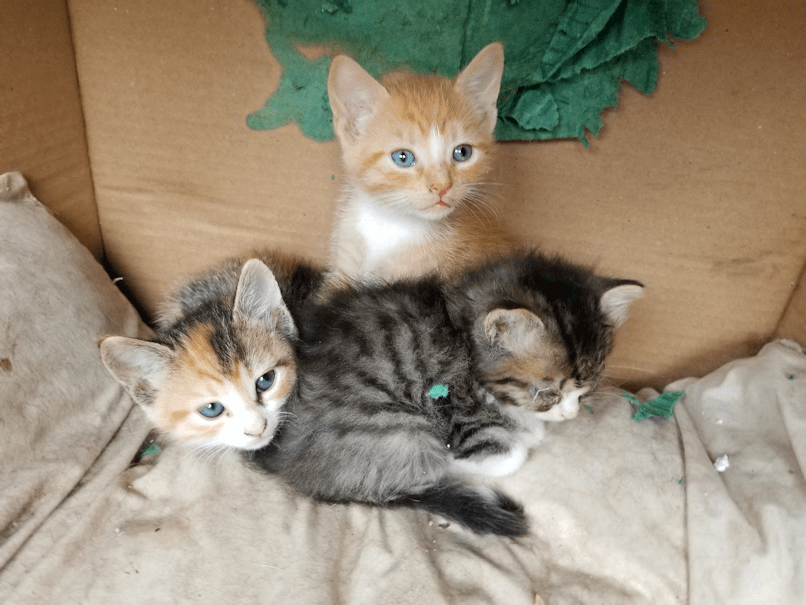
Click on the pictures to see them full size.
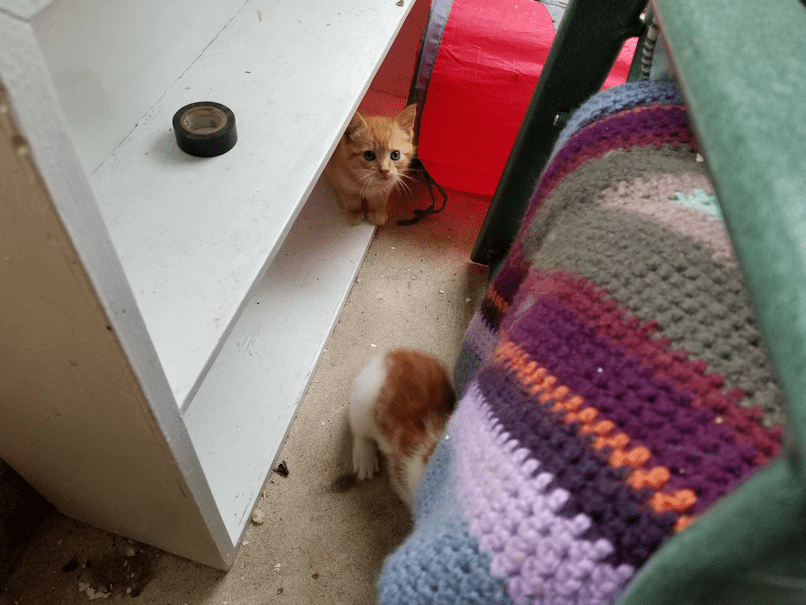
While taking the pictures, I noticed the 2 kittens eyes were stuck shut again. :-( I thought they were doing better for a while, but they’re still all leaky. So I came back with the supplies to wash them. I’d done it this morning, and found the top of our freezer is the perfect height to work on their eyes, so with the help of my daughter, we got Dave into the old kitchen to wash his eyes. Then I went to put Dave with his cousins and get Keith, but had to quickly hand him through the door to my daughter to take care of, because I was trapped by kittens already.
Especially Dave. Who wanted cuddles.
How could I say no to those sad, leaky, eyes surrounded by water flattened fur?
Dave is growing on us. Big time!
Beyond our kitten fix, it was a quiet Father’s Day, which we celebrated after my daughter got home from work. My daughter had a short shift, so I stayed in town. It’s a good time for me to recharge and relax, though depending on the weather, that often means parking different places, sitting in my van and playing Pokemon Go, under the watchful eyes of my turts.

I used to spend a lot of time in our van, before the move. In our previous van, I was able to cover most of the dash with self-adhesive pearls and beads, glow in the dark “rocks”, and lots and lots of little critters, held in place with Fun Tack. At Christmas, I added tiny trees with itsy bitsy LED lights in them. It was one of those things where people would do double takes and start smiling – or take photos as they drove past. :-D I figured, if I was going to spend so much time in my van, it may as well be my happy place!
When we got this van, I tried to do the same, but the vinyl is different, and the adhesive wouldn’t stick as well. So I have a much smaller display.
I just love that bobble headed turtle, with the wiggly, wiggly legs.
The Re-Farmer
Today, I finally had both the time and the weather conditions to work on the south fence line of the spruce grove (there there aren’t actually any spruces left…).
So, while waiting for the freshly washed gates to dry, I brought out the weed trimmer, my new reciprocating saw, and a whole lot of extension cord!
Here is my first progress shot.
Continue readingSo today has been an odd mix of productive and not so productive.
First up, we set up the wifi booster in the garage. There was some doubt as to whether it would work, as the outlets are against a metal clad wall.
Continue readingThis picture reminds me of the children’s book I used to read to my daughters, long ago, in which a lost little bird kept asking different things if they were its mother.