There were four harvestable squash out of the three vines, though the first one to develop sort of stagnated early on, stayed dark green and never got very big. In the photo above, you can see it in the front row, third from the left.
The largest squash with the damage visible is the big Crespo squash we wanted to make sure to cook first. However, with losing our hot water and having to constantly heat water for washing anything, we didn’t get to it until now.
It was remarkably easy to cut into! I expected to have a harder time of it.
The colour is not only quite a deep orangey-yellow, it actually stained my hands a bit, by the time I finished scooping out the insides and removing the seeds. Which suggests to me that this squash has quite a bit of beta carotene in it.
I cut it into quarters, then cut out the stem, which you can see in the next image, before putting it in the oven. Aside from adding a bit of water to the bottom of the pan, nothing else was done to it. I want to be able to give it a taste without any seasonings, first.
In the last image, you can see the seeds, washed and draining. There were very few seeds that got rejected. I supposed we could roast some for eating, but I don’t actually have any interest in doing that. Later, these seeds will be laid out on a parchment paper lined tray to dry out.
I set the oven for 350F for about an hour before stabbing the pieces with a fork, then adding another 45 minutes. As I write this, they are soft and appear to be cooked through. I’ve shut off the oven and left them in there, just in case there were some undercooked parts I couldn’t reach.
Today, I was actually planning to get some stuff done outside but, while it is warmer than yesterday, it has turned out to be a rainy day.
Sort of.
It’s been raining off and on since last night. It’s supposed to start raining for real at about 7pm and continue raining through to about 10am tomorrow morning. Since some of what I hoped to get done today involved power tools, I decided to postpone it!
There is a bit of concern about the winter sown garden beds. When the seeds were sown, the beds were completely dry and did not get any watering. It’s cool enough that it’s unlikely they will germinate, but if they get wet and don’t germinate, the seeds may rot. If they get wet and do germinate, they may freeze. The heavy leaf mulch, however, should protect them from both possibilities.
I hope.
So today I’m focusing on indoor stuff, but still garden related. We had a box of San Marzano tomatoes in the living room that were fully ripe. Those are now soaking in vinegar water. Later on, I’ll remove the tops and tails, and get them in the crock pot for the night to make tomato sauce. There might be room enough to use some of the whole tomatoes we have in the freezer right now.
Once the oven is free, we have lots of peppers that have ripened and are starting to dehydrate in the living room. Those will get set onto trays to dehydrate fully and faster in the oven. Except, maybe, the hot peppers. There are so many of them. We might instead string them up and hang them above a heat vent, instead.
There was also a large colander in the old kitchen, full of tomatoes that were further along in ripening. Every now and then, I go through the bins and pull out the ones that are blushing and set them in the colander until it’s full. I went through those, setting more San Marzano, and a few mystery compost tomatoes, into a bin for the living room to continue ripening. The cherry tomatoes went into a small colander for general use and snacking in the kitchen. These are the Chocolate and Black Cherry tomatoes in there, a lot of which still need more time to ripen, plus a couple of little red tomatoes from the mystery plant that self seeded among the Red Thumb potatoes. When we harvested the tomatoes before our first frost, that plant had many small tomatoes on it, all still very green. I’m glad to see that they are actually ripening now. Judging from the colour and the size, I am guessing it is from the Mosaic Medley mix we grew in that bed a few years ago. That was a mix of cherry and grape tomatoes. These are so small, though, and with how the clusters were formed, I’m tempted to think they might be Spoon tomatoes. They’re big for Spoon tomatoes, but as something that has self seeded, it’s possible they reached a size they might not reach when grown as transplants.
Well, whatever they are, they are a tomato, and my family likes tomatoes, whatever the variety!
Aside from all of this, I hope to take advantage of today being an indoor day and start editing a couple of videos, including the October garden tour video using footage I recorded on Nov. 1. 😄
But first, lunch – and maybe a taste of that Crespo squash!
While my daughter continued her deep cleaning into the kitchen, I got the truck loaded up for a much delayed trip to the dump. Each day the dump was open, I found myself at my mother’s place with the truck, so it had to wait.
After that lovely rain we had, the gravel roads were a mess and so were the grounds near the pit. I don’t like driving up to the pit. Not only am I always paranoid about backing up too close to the edge, on days like today, the edge is full of garbage people didn’t make the effort to throw further in, which means there’s all sorts of stuff where tires would go. Like the big shard of glass I found as I went around to open the tailgate!
Garbage and recycling properly disposed off, it was too to town and the pharmacy. My husband’s new painkillers at his new dose were already waiting, and I got my own prescription refilled, since I was there.
Then it was a quick trip to the grocery store for a couple of things – plus I was able to take advantage of a couple of good sales – then home. I pulled the truck into the yard and got a daughter to grab the stuff and put them away, while I took a hose to the truck to take off the caked on clay and mud! The main road to our place is really bad in patches, after all that rain. This road is designed for heavier and more traffic than a lot of the other gravel roads, many of which are in even worse condition. I know of at least one person in our municipality’s FB group that is hesitant to take her car through, for fear of getting stuck – and she’s got an infant! Unfortunately, no one in the group could give her any idea of when her road will be worked on. We’ve had a new council since the last election (I forgot it was election day, so we missed the chance to vote), and things have been crazy. Several municipal staff quit, the By Law Officer quit, then just a little while ago, most of the council members also quit. There are no longer enough council members for quorum, so no decisions can be made. The province has had to step in and take over until another election can be arranged, but they haven’t sent anyone over, yet.
As bad as the road we use has gotten, we’ve actually got it pretty good. I don’t even try to take the roads in other directions, knowing they’d be much worse. I’d rather go the long way around – and am thankful I have that option! Having to hose off the truck is a small problem, in comparison.
My daughter, sweetheart that she is, was just finishing cleaning the oven when I was done. Just in time for me to do some baking!
I wanted to do baking, but hadn’t decided what I wanted to bake, so I went through some of my old cookbooks for really basic recipes. I was going through the one we all got given to us in Home Ec class – still one of my favourites – and spotted a recipe for cream puffs, which I haven’t made since I was a teenager, so I decided to go for it.
The cooked part of the cream puff batter, which whips up incredibly quickly, has to cool before the eggs can be added, so while it was cooling, I tried an oatmeal cookie recipe from the same cookbook that I hadn’t baked in years. I couldn’t remember liking them or not, but I’d highlighted there title at some point, so I figured that meant they were good! 😄
The recipe said it would yield 5 dozen cookies. !! I think that was a typo. I got 2 dozen, plus one giant cooking I baked in a small cast iron pan. They spread out really flat. Not the best oatmeal cookies I’ve ever had, but certainly tasty. They were probably meant to be made with quick oats, not the thicksome ones I was using. 😉
Once they were done, I increased the heat for the cream puffs while I beat the eggs into the batter. They bake at 450F for 15 minutes, then at 325F for another 25 minutes.
I had made them smaller before, but the recipe said it yielded 8 large puffs, so today, I made 8 large puffs! Later on, we’ll make some whipped cream to go in them.
Once those were out of the oven, my daughter and I took a late lunch break. Later, I plan to make some basic cupcakes. Last of all, I plan to mix up an overnight no-knead bread dough and set that to rise in the safety of the oven, where the cats can’t get at it. I might make another batch in the bread machine at the same time and leave that to rise overnight, too.
Things outside will probably need another day for the mud to become less of an issue, and I’ll be getting back at working on the garden beds. It’s been a long time since I’ve done baking – my younger daughter is usually the one that does the baking – so I’m taking advantage of the break from outside stuff.
I’m happy to say, they are recovering nicely. You’d never know they’d all just undergone surgery!
In this photo, you’re being looked at by Shadow in the Dark. The boys definitely seemed to get more energetic faster, which makes sense, since they didn’t have open surgery like the ladies.
The other kitten is Pom Pom, who is just getting big enough to be done. He’s quite a bit bigger than his siblings, The Beast and Soot Sprite! Hard to believe they’re from the same litter.
Also, he is getting some very distinctive white fur on his sides. I’ve noticed that in some of the outside kittens, too. Pointy Baby was the first cat we’d see to develop that pattern, which suggests there’s some paternal genetic connection between them.
Anyhow. All is good with the post-op kitties, and they are so very happy to be allowed out of the room again!
Today, I had a chance to experiment with cornbread again. Last time, I did a strawberry version. This time, I did the exact same thing, except with bananas.
It’s still cooling as I write this and oh, my, does it look good! I can’t wait to try it! This time, we have enough extra that if it goes over well, we can make another one.
Next time I experiment, I think I’ll try apple.
On a completely different note, as we come up to our 6 year anniversary of all 4 of us finally together again, here at the farm, I went looking at some of my posts from back then.
Oh, my.
My husband and younger daughter were already here, and today was the last day my older daughter and I had to get things done, before the movers arrived in the morning.
We had no idea just how bad that would turn out.
Reading over those old posts again makes me shudder.
I know at some point, my husband and I will likely have to move somewhere that is more accessible for limited mobility, but at this point, I’m still thinking, I never want to move again!!!!
Thank God my brother now owns the property. If my mother were still our “landlord”, we probably would have thrown in the towel and found a way to move out, years ago.
It’s been a long time since I posted anything recipe and cooking related!
Not long ago, I took advantage of an excellent sale, and picked up a whole bunch of fresh strawberries. A couple of clamshells needed to be used up quickly, as they were starting to get past their prime, so I decided to experiment.
I took our basic cast iron skillet corn bread recipe and modified it to make an upside down strawberry cornbread.
It turned out rather well!
First, I’ll give our basic recipe, then explain the modifications. We rarely make it without some sort of modification, so I’ll include those as well.
Basic Cast Iron Skillet Corn Bread
Ingredients:
3/4 cup cornmeal
1 cup flour
1/3 cup sugar
1Tbsp baking powder
1 1/4 cup milk
4 Tbsp butter, melted, plus extra for the pan
Optional:
add seasonings to the dry ingredients, such as paprika, garlic granules or whatever herbs you feel like, to taste.
there is no salt in this recipe, but I sometimes like to add a small amount of course or rock salt that would normally go into our salt grinder, which leaves some nice little crunchy chunks to discover while eating it!
add savoury ingredients like a semi-soft or semi-hard cheese (mozza, cheddar, gouda, havarti, feta, etc.) cut into small cubes (shredded cheese will just disappear), or leftover ham cut into cubes, to the dry ingredients.
instead of butter, you can use oil or melted ghee. We like using ghee quite a bit!
substitute part of the milk for an equal amount of cream, sour cream or yoghurt. You could also try using buttermilk instead of milk, or even use reconstituted powdered milk.
Instructions:
preheat oven to 425F
place cast iron pan with some butter in it into the oven until the butter is melted. Spread the melted butter evenly around the pan, including the sides.
combine dry ingredients into a medium bowl, including any optional ingredients
add the wet ingredients and mix until just combined.
pour the batter into the pan
bake for 20 minutes or until golden brown and pulling away from the sides, or a toothpick stuck into the middle comes out clean
flip onto a rack to cool. Can be served warm with melted butter.
Modification: We start the oven preheating, prepare the cast iron pan, mix the batter, pour it into the pan, place it into the still preheating oven, then set the timer for 25-30 minutes. Basically, it’s because it takes a long time for our oven to preheat to 425F and we’re impatient. It has always worked just fine.
Upside Down Strawberry Corn Bread modifications
Extra Ingredients:
fresh strawberries, cleaned and hulled
butter
brown sugar
Place the clean cast iron pan on the stove and melt a generous amount of butter into it. I used a couple of tablespoons, maybe a bit more, for our 10 inch pan.
After the butter is melted, use some to oil the sides of the pan
Add enough brown sugar to cover the bottom of the pan evenly
Cut the strawberries into enough slices to cover the bottom of the pan; lay them on top of the brown sugar
Chop more strawberries into small cubes and add them to the dry ingredients of the corn bread batter.
Once the batter is ready, gently pour it over the strawberry slices, so as not to disturb them. If there is a chance that the butter and brown sugar might bubble up the sides of your pan, place it on a baking sheet in the oven, or have a baking sheet on the rack below.
Bake for 25-30 minutes, or until the cornbread is golden brown and starting to pull away from the sides
When done, turn off the oven and let it rest in the oven for a few minutes, then remove and cool, still in the pan, outside the oven for a few minutes more. The heat from the cast iron pan will continue to crisp up the edges and caramelize the brown sugar base.
slide a knife around the edges of the pan to make sure it’s not sticking. Take a plate larger than the top of your pan and put it upside down over the cornbread. Carefully flip the pan upside down and remove the pan.
can be served served warm with a touch of cream poured over the top, or completely cooled – if you’re willing to wait that long!
As I wrote this post, my daughters made another batch. It’s out of the oven now, and I can’t wait to have some!
Well, it’s certainly snowing and blowing enthusiastically, out there!
That hasn’t stopped the birds from enjoying the suet feeder.
The driveway is so white right now, it’s messing with the camera’s ability to “see” it, making for some interesting rings of colours on there.
I took this screencap of the weather app on my desktop, just minutes ago. According to this, the worst is still yet to come. It is still conflicting with what’s showing on the weather radar.
Well, it will be what it will be. My main concern is with the high winds, of course. When this is over, we’ll have to do a walk-about to see if any more dead trees have come down, or what branches have fallen.
From the looks of the weather radar, the most severe conditions are hitting the US, as the system sweeps across the Eastern states. I hope those of you living in those states are keeping safe!
While it’s snowing and blowing, we got some bread baking done.
A two-loaf recipe was divided into four small loaves. The prettiest one will be for our Easter basket.
Since I was baking bread anyhow, I made a batch of oatmeal bread, also divided into four small loaves instead of two regular loaves. That way, we get a loaf each. :-D
I’m looking forward to having one of them with a big bowl of chili, once it cools down enough. :-)
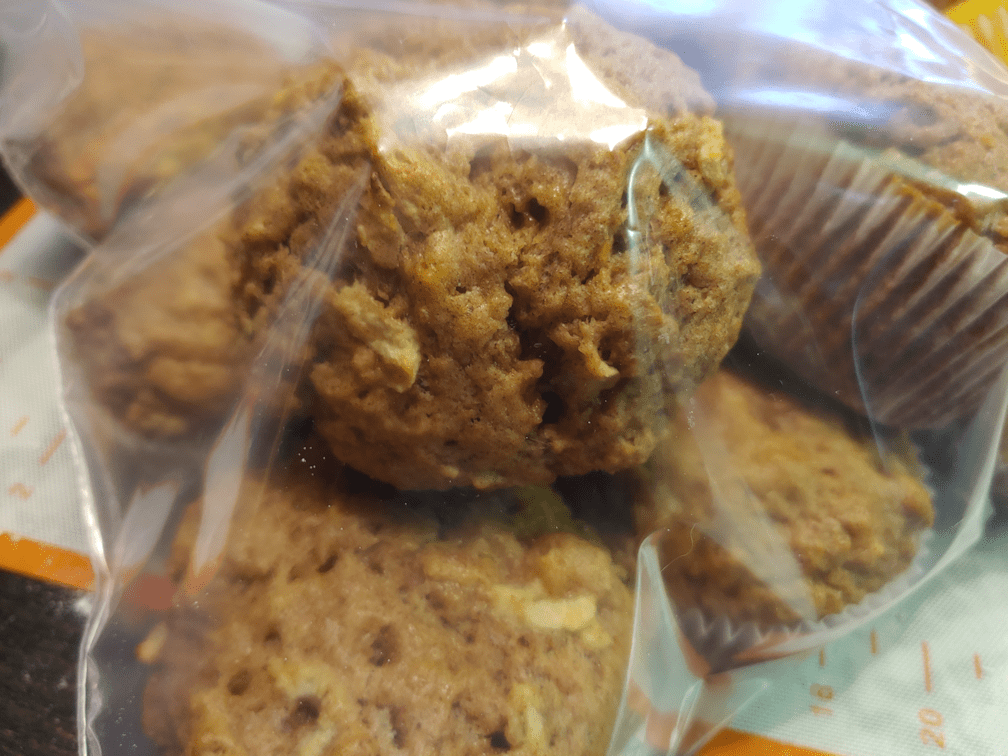
Aw, man, it’s all I can do not to go all Cookie Monster on the muffins I just finished baking!
I ended up making a dozen each of three kinds.
The cornmeal muffins were a basic recipe, though I added a bit of sour cream to the milk, for extra flavour.
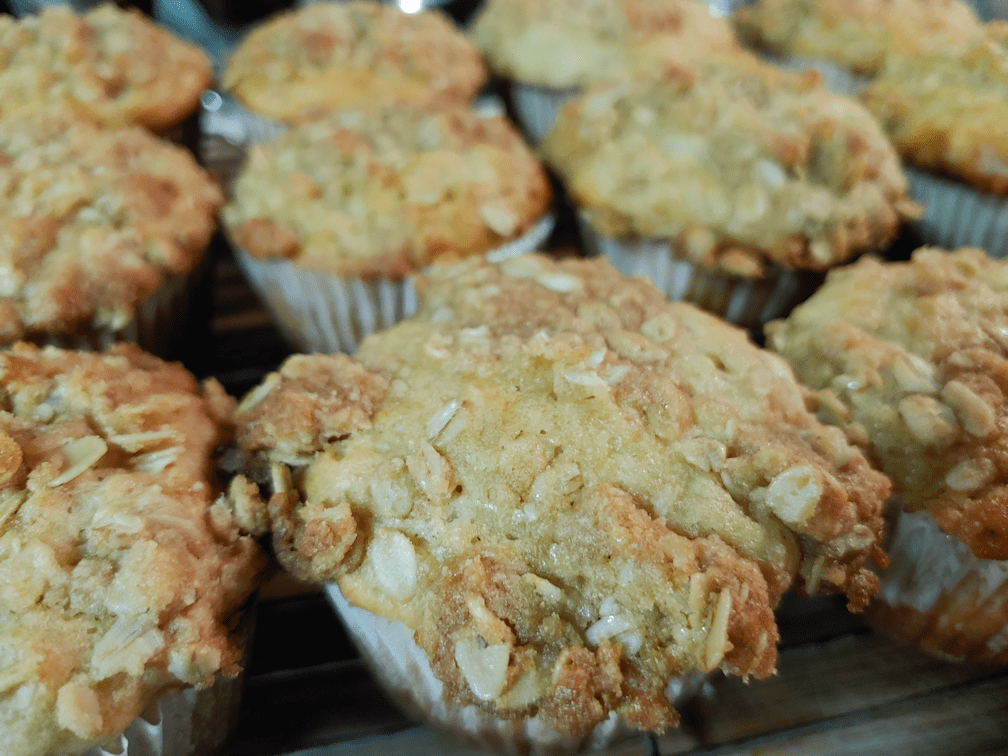
Oatmeal muffins with a streusel topping, from the simplest recipe I found online.
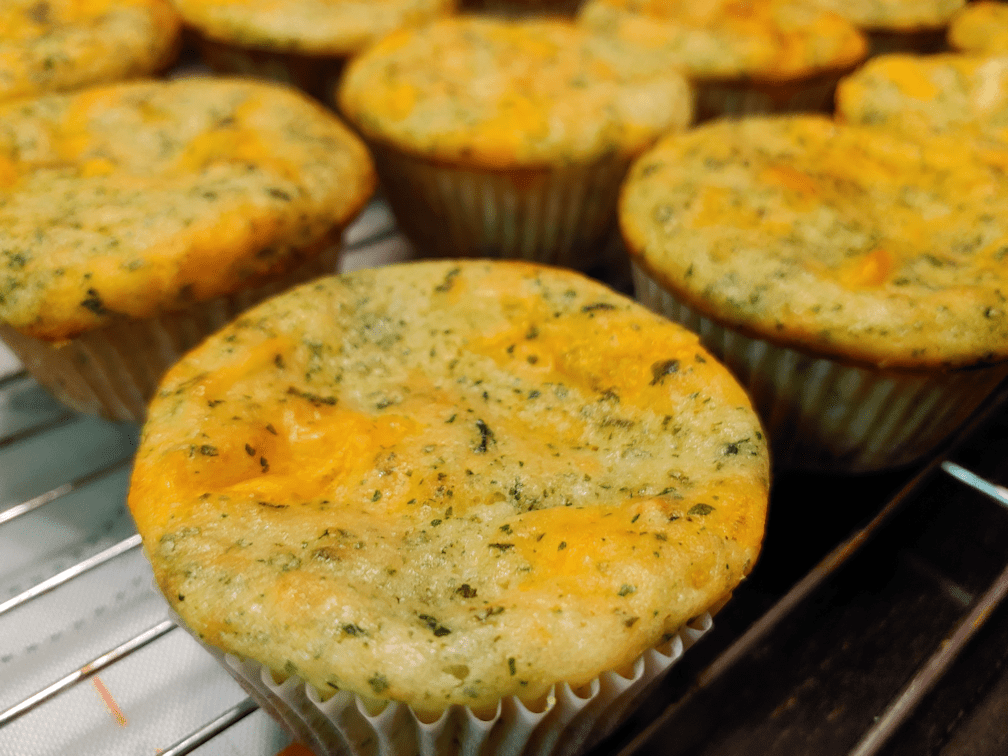
Spinach and cheese muffins! I spotted a recipe online, but it used frozen spinach, which we don’t have. So I just used a basic muffin recipe, adding some of our dried spinach to the liquid mixture to reconstitute for a while, and added shredded cheese to the dry ingredients. We had some small pieces of Havarti and Old cheddar left over, so I finished off both.
The girls made supper while these were cooling, so I’m being good and waiting until after I have a meal before having any muffins.
But it is soooo tempting to have “dessert” first! :-D
The Re-Farmer
Update: Taste test is done!
Spinach and cheese: I think I didn’t have enough flour or over mixed these. They were almost like a quiche in texture! Still very tasty.
Oatmeal with struedel topping: not as sweet as I expected! Nice, but of the three, these were my least favorite.
Corn meal: these were awesome. The touch of sour cream gave a surprisingly big flavour boost. Corn meal muffins are my favorite, so no surprise I liked these best!
The link should open in a new tab, so you won’t lose your place here. :-) Also, the photo at the link is completely different from what the recipe results in!
Of course, I had to do some modifications, so here, I will talk about what I changed.
In the ingredients:
It called for 1 cup of dark honey. I didn’t have dark honey. In fact, I didn’t even have a cup of liquid honey. What I had was some of my cousin’s creamed honey. I have no doubt using it will change a few things, from the colour to the moisture to the flavour, but I don’t expect them to be a big deal, and considering how my cousin makes his creamed honey, with a hint of maple syrup, I expect tasty results.
The next change was the 8oz, or 2 sticks, of unsalted butter.
I honestly don’t get the “sticks” of butter thing. I mean, yeah, I do see them in the stores, but my goodness, it costs more to buy butter in sticks than in pounds.
One stick equals a quarter pound of butter, or half a cup, so the recipe is calling for a cup of unsalted butter.
I don’t have unsalted butter. Just salted butter.
Usually, when I see a recipe that calls for unsalted butter, and I use salted butter, I would reduce the amount of salt elsewhere in the recipe.
This recipe doesn’t call for salt at all.
I’m not concerned. A touch of salt can wake up sweet things, and for the amount of salt in the batter, with no other salt in the recipe, we’re not going to have a salty cake or anything.
We were pretty much out of ground cloves, so for the 1 tsp in the recipe, about 3/4 of it was from whole cloves I ground in a coffee grinder.
The recipe also called for dark brown sugar. We have just plain brown sugar, or “golden” sugar.
The instructions mentioned beating mixtures at low speed, so it assumed an electric mixer would be used, but I didn’t want to fuss with it and did it by hand.
The instructions said to pour the batter into prepared loaf pans and bake at 350F for 45-55 minutes, or until a toothpick comes out pretty much clean. All ovens are different, so I set the timer to 50 minutes, then checked it with a steel chopstick. Because of course, I don’t have toothpicks.
It came out with batter stuck to it, so I added 10 minutes, then tested again.
Then I added another 10 minutes and tested again.
Then I added another 5 minutes and tested again!
Finally, the chopstick came out clean!
I don’t know why this took so much longer to bake than the recipe stated. Going from 45-50 minutes to 75 minutes can’t be completely put to differences in ovens. Whatever the reason, if you try this recipe, make sure to do the toothpick test (or chopstick, as the case may be) to ensure it’s done!
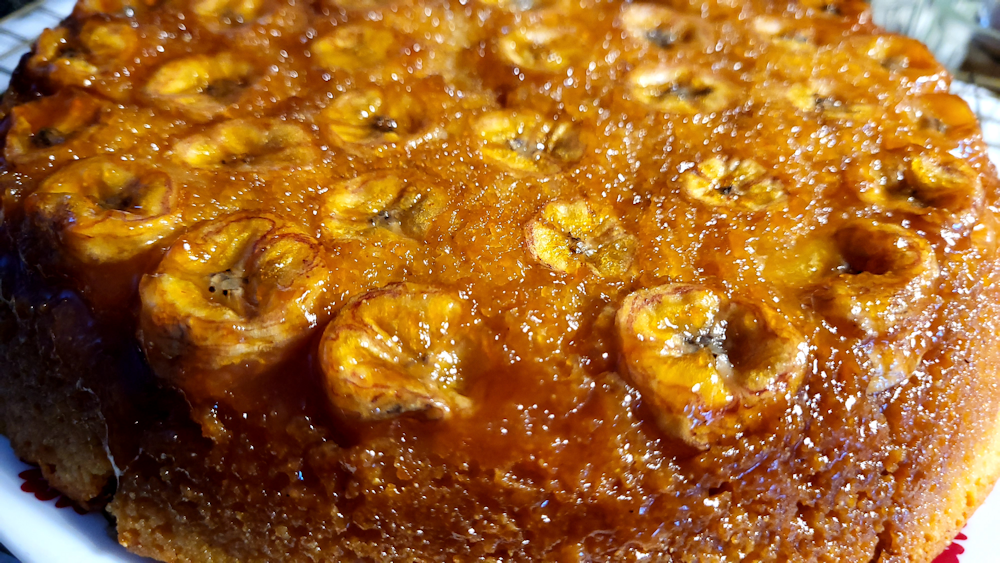
Doesn’t that look pretty? And the smell while baking was wonderful.
After letting it cool, I just had to taste test it for this post. :-D
As far as texture goes, it’s more “banana bread” than “cake”. It has a slightly crisp crust outside, with a lightly dense, spongey inside. The combination did make it a bit harder to cut! :-D
While sweet, is it nowhere near as sweet as I expected it to be! Not with so much sugar and honey in it. Using the salted butter was fine; there was no noticeable salty taste. I also don’t really notice a coffee taste, either, even though there was quite a bit of strong coffee in there. All the flavours blended together quite nicely, and no one flavour stands out more than the others. I found spreading a little bit of butter on my slice brought out the flavours, more.
It’s also drier than I would expect either a cake or most quick breads to be, though it is definitely moist.
From what I’ve read in other recipes, they can become moister with time.
I don’t expect these to last long enough for us to find out. :-D
It was a lovely morning, as I did my rounds, with nothing at all to suggest we were going to be hit by a storm, later today!
As is now usual, I had a whole crowd of kitties waiting outside the door for breakfast. :-D
I counted 19, but it’s possible I missed one of the ‘icouses. They were milling about so much! I did get to pet a few furry butts, including several of the kittens that normally would have run off already, plus our newcomer.
Creamsicle Baby was battling it out with Agnoos for special attention. :-D
Butterscotch followed me while I was doing my rounds. She really likes that I now go to the corner of the property to check if the new sign has been vandalized yet, and switch out the memory card on the camera. She has taken advantage of the set up and uses the various posts to climb up and jump onto me, making it very hard to switch out the memory card!
While going through the yard, I spotted a few summer yard tools we missed putting things away, and brought a couple of our snow shovels closer to the sun room door. They are normally kept by the main entry, but we are avoiding using that door until we can get the door and frame replace; something we’d hoped to get done before this winter, but the budget for it just didn’t happen. I wasn’t even able to get the estimate done; I was going to call the same company that did the windows here, before we moved in, but I can’t find them! I do hope they haven’t gone out of business, like so many others have done in the past year and a half. :-(
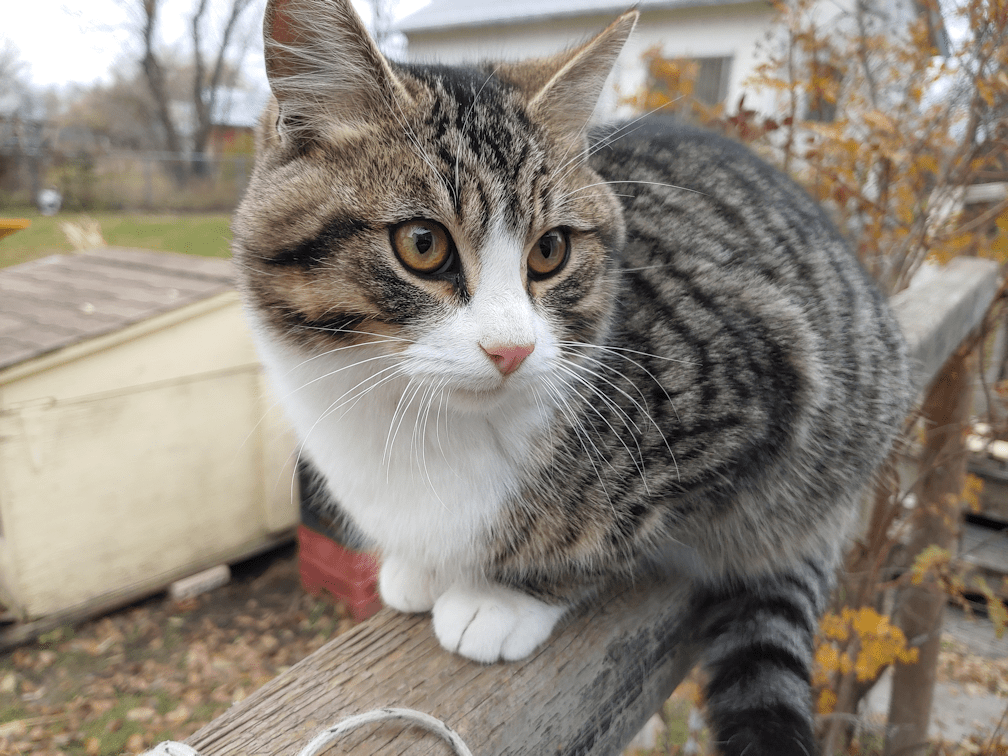
When I was ready to come inside, I found this handsome fella waiting for me.
He even let me pet him and scritch his ears!
I think this one is Chadicous, but I’m not sure.
I love that pink little nose!
The general store the post office is in closes at noon on Wednesdays, so I headed out shortly after they opened. I wanted to get the battery we needed for the cat’s house smoke detector that I forgot to pick up yesterday. While there, I picked up another bag of flour, just in case.
I had a few general things planned for baking today. One of them was muffins, but I hadn’t settled on any recipes. After doing some searching, I found a couple of savory recipes I wanted to try.
The whole day of baking was about timing! The first thing I did was cook a package of bacon in the oven, until dry and crumbly, for one of the muffin recipes. Once that was cool and crumbled, I started a double batch of bread. I didn’t use our dough baby, because I forgot to set it to soak overnight. Instead, I used our basic bread recipe, which gets modified with whatever we have on hand. This time, it included oatmeal and chia seeds, with molasses for the sweetener.
While that was sitting for its first rise, I had time to make a double batch of apple bacon muffins.
Half of them were for the freezer, and half to have on hand. This recipe as a surprising amount of cinnamon in it, which accounts for the darker colour.
There is an entire package of bacon and two Granny Smiths in that double batch! The recipe sounded amazing, but it didn’t live up to expectations. Don’t get me wrong; they were quite tasty. However, I really expected to at least taste all that bacon! The predominant flavour was the apple. I’d definitely make them again, even if they didn’t life up to their hype. ;-)
When the muffins where done and cooling, the girls quickly took over the kitchen to make lunch for everyone. That gave me a chance to take a break – and see that the snow had finally arrived!
It has just changed from rain to snow when I took this photo. They’re hard to see, but there is at least one chickadee going for the sunflowers as they disappeared under the snow!
By the time we finished lunch, the bread was ready to be shaped into loaves and left for a second rising, which gave me time to make another double batch of muffins.
This time, they were cheddar cheese muffins. They were supposed to be smoked cheddar, but what we had on hand was sharp cheddar. The recipe included cornmeal and cayenne pepper. For a double batch, it would have been 1/2 to 1 tsp of cayenne, but there was no way I could use that much. I enjoy the flavour of spice, but have no tolerance for the heat. Still, I did add some. These turned out very nice. Better than the apple bacon, I’d say. Another keeper. Especially for the next time we get smoked cheddar. :-)
Once these were done, the bread loaves were ready to go into the oven. While they were baking, I started another double batch of bread. This one had oatmeal in it, too, (more specifically, rolled oats, softened in boiling water for a few minutes) and some hemp hearts I had left.
Also, I’m glad I got that extra bag of flour. We had just started a new bag, and I’ve already gone through half of it!
These are the oatmeal, molasses and chia seed loaves. I’m rather pleased with how they turned out! I’m a terrible one for using too much flour, and taking them out of the oven too soon, but I’ve gotten better. ;-)
Then, while the second batch of bread was rising, I made a batch of double chocolate cookies. Double as in, it has two kinds of chocolate (cocoa and chocolate chips), not a double recipe. A single recipe was enough to fill four baking trays. For so many, I had to get a daughter to tend the oven, as they baked very quickly, while I had to start shaping the bread for their second rising. This time, I made them into large buns instead of loaves. The timing turned out perfect. By the time the last cookies were coming out of the oven, the buns had risen enough to go into the oven.
I didn’t bother taking photos of the second batch of bread, nor the cookies. The cookie batter was the kind you drop onto an ungreased pan by spoonfuls, then they spread flat while in the oven. I ended up having to increase the cooking time, and they also turned out to be very fragile. Which is okay. Broken cookies taste just as good as not broken one! They just don’t look pretty. ;-) As for the buns, even with the oatmeal and hemp hearts, they just look like white bread. :-D Those were the ones we started on tonight. While two of the loaves of the first batch went to the freezer, along with half the muffins, I decided not to bother freezing any of the buns. Those are going to disappear very quickly!
In the middle of all this baking, I got a call from my mother. She was wanting to know if we had snow, too. By this time, it was coming down pretty heavily. She sounded so excited, and started going on about what a good thing it was we got her shopping done when we did. I agreed, mentioning that unfortunately, we didn’t get all the things we wanted to get done finished. She was completely oblivious. Instead, she started saying that, as long as the septic was covered, it was fine. She had seen the insulated tarp we had ready to cover it, the day she came out here, so she started giving me instructions on making sure it was weighted down so it wouldn’t blow away. I told her it was pegged to the ground. Apparently, she didn’t know that tarps have grommets on them, than can be used to fasten them down. She kept on going, telling me about how important it was to cover the septic tank. I ended up asking her, how long have we been living here? She thought three years. I said four, and we’ve been covering the septic every year we’ve been here. I know my mother thinks I’m stupid, but you’d think she would have noticed that the winterizing has been getting done, every year.
What I find strange, though, it that she was also talking about covering the well. In fact, she was talking about the septic tank and the well interchangeably, and then saying that if the well freezes, we’d have no water, and how terrible that would be. This was something she brought up last year. She insisted that the well cap had been covered with straw, every year, just like the septic tank. Which has never been done. Not only was it never covered with straw, but I know that even the accumulated snow was removed, likely with the Bobcat our vandal stole, as evidenced by the chips in the concrete, and one of the handles on the cover being broken right off, while the remaining one has been bent flat. Hidden by snow, it’s been hit and run over. Plus, the well cap is at least 12 feet down. It’s never been a problem in the almost 50 years since it’s been dug. She also had nothing to do with any of this sort of maintenance, so I don’t know where she is coming from on this.
It was a short phone call. I mentioned I was in the middle of baking, and she happily let me go. She just wanted to talk to me about the snow. It felt so weird. She’d been so nasty to me when she was here two days ago, and she has no awareness at all about it. I’d talked to my brother last night. My mother had just called him. I had filled my siblings in on how things went when she came out here, so he was in the loop. When my mother started talking about coming to see the sign, she was going on and on about how great it looked, how great everything looked here at the farm, and what a great visit it was. To which he said, no it wasn’t! He spent time time trying to encourage her to be kind and build people up instead of always tearing them down, to which she replied, “I’m not going to lie.” Apparently, the opposite of being cruel is to lie? She had said something about not saying that everything looked beautiful. Which isn’t what anyone is expecting and has nothing to do with simply treating people nicely. I’m grateful my brother stuck up for me, but we are both left rather perplexed by her inability to understand what it means to treat people kindly.
We may not have caught up completely, yesterday, but we did get the essentials necessary for winter, at least. This is our first real snowfall of the year, and while we will continue to be relatively mild, this is a snowfall that will stay. It is still coming down, and now the forecast says the snow will continue to fall through to Saturday, too. Our temperatures remain above freezing, so sleet is a major concern on the highways right now. We’re expected to get 10-15 cm of snow today (4-6 inches), with another 10-15 cm tomorrow, though the weather alerts say that our area might actually get more, due to the lake effect. It’s past 9pm as I write this, and we haven’t reached anywhere near the predicted levels, so who knows what will actually happen.
The forecasts do still say that today’s storm will become tomorrow’s blizzard. I was just looking at our weather history, and the record high for today was 13C/55F, in 2016, while our record low was -20C/4F, in 1991 – but our average high is 0C/32F and average low is -7C/19F, so the temperatures we’re having right now are not at all unusual. It just feels like it! Funny how that works.
Either way, it turned out to be the perfect day to stay inside and do a whole bunch of baking!
Thanks to my wonderful daughter taking over for me, yesterday, we had a couple of fresh loaves of bread to try this morning.
I’d started by having the dough baby soak overnight, then added flour to make a sponge. After several hours, this is what the sponge looked like.
My daughter set aside half of this, then used the remaining sponge to make our basic bread. Instead of using loaf pans, she made two big, flat loaves on a baking tray. Here is what I used for breakfast, this morning! :-)
The bread had a very mild sourdough flavour. For all the months the dough baby sat in the flour, it did not get any stronger in flavour. It was mild enough that I could put them with slices of brie under the broiler, and the flavour of the bread did not overpower the flavour of the cheese. The bread had a very nice texture to it, too.
As for the sponge that had been set aside; my daughter had used the flour from the dough baby’s canister in the bread, but there was still some left. I kneaded some into the sponge to make a stiffer dough, then refilled the canister half way with fresh flour, added the bough baby, then topped it with more flour. The canister is semi-transparent, so when I checked on it an hour or so later, I could see the dough baby had risen enough to work its way through the flour, so I gave the canister enough of a shake to cover it up again. With our temperatures slowly cooling (though I saw a 30C day in the forecast!!), we’ll be using this more often, which should further develop the flavour.
As someone who has never managed to keep a sourdough going for more than a couple of years, I really appreciate how low maintenance the old dough method is. If we can’t going to bake as often, it’ll just stay in its flour bed and dry up. It doesn’t need to be constantly used, fed, stirred, or kept warm. I think this will work out really well for us!
With how hot it’s been all summer, we’ve done no baking at all. It was simply too hot in the house to do baking and heat it up even more! Only recently did my daughter finally start baking some bread again.
Which means that our dough baby has been sitting in its flour, unused, for several months. That’s one beauty of using this type of dough starter; it doesn’t need to be regularly used and fed, the way a wet sourdough starter needs to be, and will just go dormant.
Last night, I woke it up! :-D
It really doesn’t look any different, once it was dug out of the flour.
The flour it was in, however, did look a bit different.
The dough baby has its own canister of flour, which had started to form a sort of shell around the dough. When I opened it, I could really get that sourdough smell, and it was as much in the flour as from the dough baby. I will be using this flour when doing the bread baking, as it is probably infused with yeast, too.
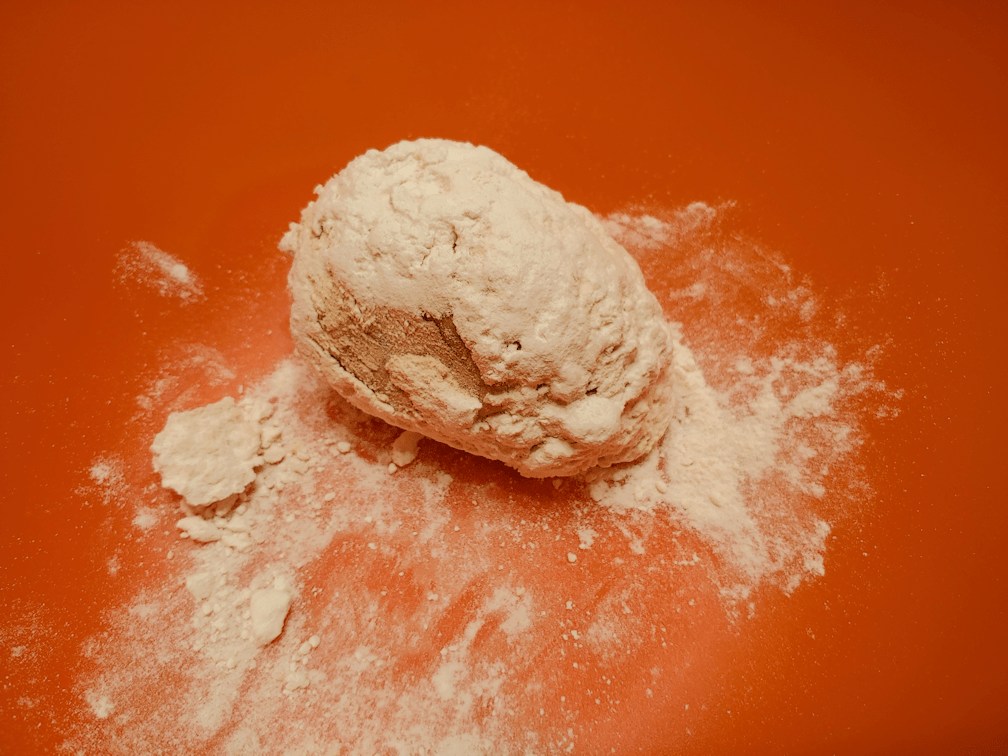
As dry as it was, the dough baby had lots of air pockets in it, making it easy to crumble apart.
I stirred in 2 cups of very warm water, then set it in a warm oven overnight, lightly covered. After a few hours, I checked it and decided to go ahead and cheat by sprinkling a bit of traditional yeast (not the fast acting type) and a bit of sugar into it as well, then swirling it about.
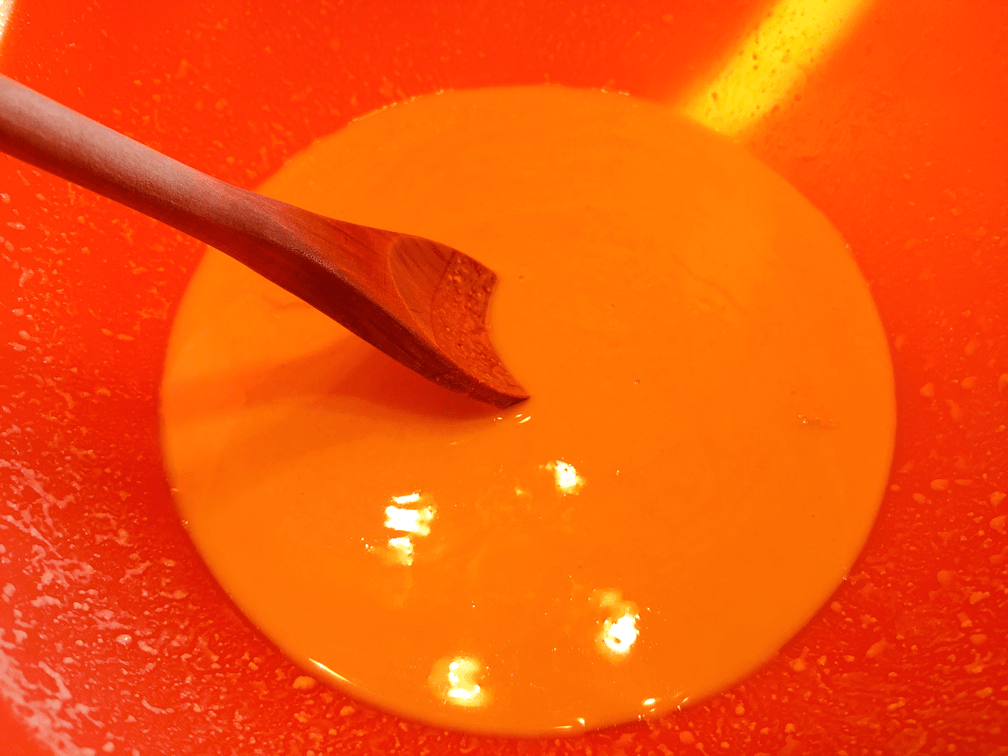
This is how it looked in the morning, after being stirred again.
That orange bowl really messed with the colour!
Anyhow, it was lightly bubbly by morning. After stirring it down, I added some of the flour from the dough baby canister.
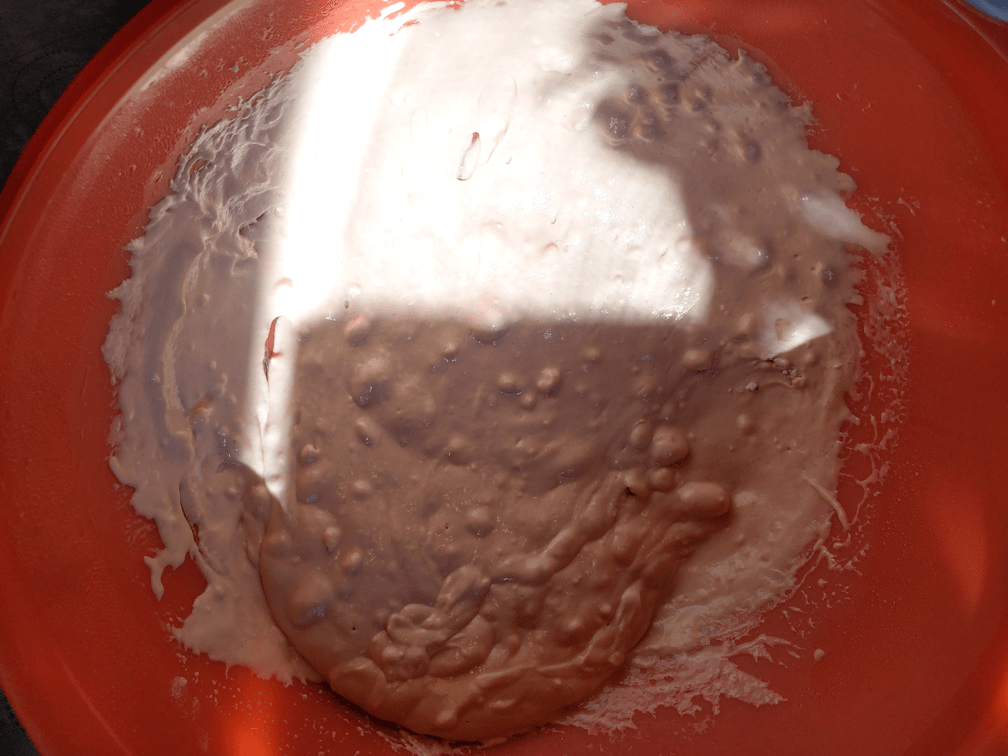
I tried to get some natural light on there, so you can see the proper colour!
I broke up the flour as much as I could, but I’m not too worried about the lumps at this point. I added maybe a cup and a half of flour to get it to the consistency of a thick batter. It then went back into the warm oven for the sponge to develop.
It will take a long time for the sponge to develop without adding more commercial yeast, so bread baking with it is going to be an all day process, today! It’ll be checked regularly, but for this sponge stage, I figure it will take a few hours before I continue with the bread baking. :-)