This evening, I remembered to grab a box of screws so I could get the newly painted bird feeder back up.
I did have an unexpected problem, though!
The feeder had been moved to the top of the picnic table, so that wire frame it was on could be used to hold the screen window from the basement for painting.
Either the feeder or the picnic table were not quite cured yet. The feeder was stuck!
In the photo below, you can actually see where some of the paint came off.
It’s the underside, though, so it doesn’t matter.
Meanwhile, the post mount now has 6 of the same type of screw holding it in place, instead of the two very different screws next to each other, like it was before! :-D
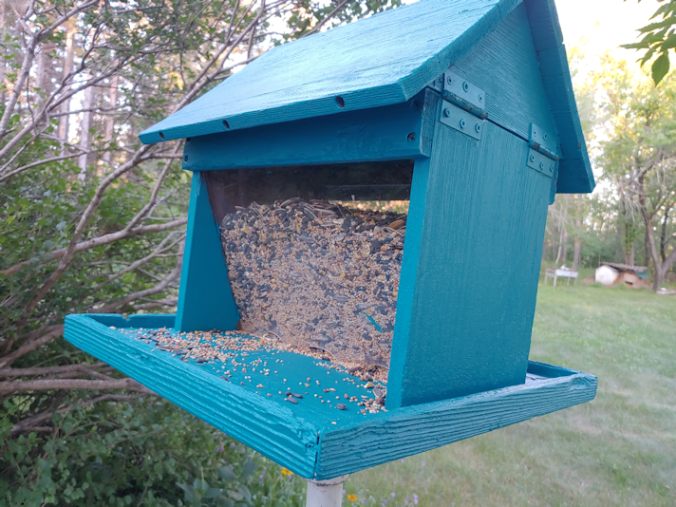
It’s up!
The post is actually narrower than the opening in the mount by a fair bit. Plus, I noticed the post, which is basically a steel pipe, is slightly squished. Which means the feeder wobbles. I’ll have to find something I can put around the top of the post to make up for that.
I did have to move one of the lilac branches and tuck it behind another one, to get it out of the feeder, as well as angle it to keep the one side clear. It holds a surprising amount of seed; I’m going to have to pick up more, if I want to keep adding bird seed to the other end of this flower bed, where the platform feeder and bird bath are.
I look forward to seeing how quickly the birds find it. :-)
When I got back from the city with our new washing machine, I just had to go around back to see how the painting went for the girls.
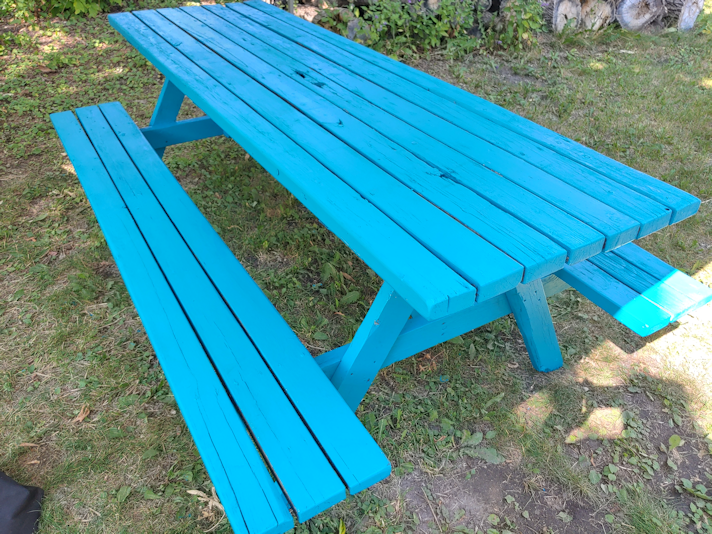
The first coat of paint is done!
You know, when I first picked up this shade, I was afraid that once it was on large surfaces like this, it would be too much. I’m happy to say that, now that I see it, I’m loving it even more!
The bird feeder had also been started.
Since these photos were taken, the girls were able to go back and do another coat on the picnic table, then flip the bird feeder to finish the rest of the top side and give the roof a second coat.
I might have to get another can of this paint! The window frame for the basement screened window didn’t get done, but that’s okay. There is no rush on that. We’re also going to wait for the paint to fully cure before we add the spray on rubber stuff for the bottoms of the picnic table legs. Since they’ve already been painted, there’s no rush on that, either.
These are going to look great, once they’re done and set up in the yard!
When we first moved here, three winters ago, there was a bird feeder mounted on a metal post at the opposite end of the flower garden where we currently have the platform feeder.
One of the first things I noticed about it was that there was a rock sitting on one corner of the base. I quickly discovered why it was there, when I lifted the top to add birdseed.
The whole thing tipped over to one side.
The rock was a counterweight, so it wouldn’t tip when birds landed on it, or in the wind.
Eventually, I took a look and discovered that the feeder had a metal mounting that fit over the post, so it could easily be lifted off.
Also, there were only 2 screws on one side, holding it in place, and that’s why the feeder kept tipping. Rather than add more screws. someone just put on the rock.
I’d set it aside for cleaning and painting, and for the past two years, it’s been sitting upside down on the bench near the main entry. I just kept forgetting about it.
This evening, my daughter wanted to add a second coat of paint to the bottoms of the picnic table legs, so I went out with her. We’d made a dump run, and I needed to hose out the plastic bin we put the cat litter bags into until we do. As I was putting the cleaned bin back next to the bench, I saw the feeder and realized this was the perfect time to prep it for painting. I just needed to take the two screws out and remove the post mount, first.
Of course, they were two completely different types of screws, that needed different screwdrivers.
One of them was actually bent.
That would be from the bird feeder tipping! I’m surprised they weren’t both bent.
Here is the feeder, after hosing it down to get rid of debris.
And spider webs.
I don’t know how much the birds would have used it, considering it was basically surrounded by the lilac, plus the maple tree that was growing through the middle of the lilac at the time. I’ve since removed the maple and pruned the lilac, so the post is now clear enough that I think the birds will use it, once we put it back again.
I suspect being engulfed in greenery had a lot to do with the feeder being so covered in lichen.
I scrubbed it as best I could, though there are still some crevices the brush I was using couldn’t fit into.
Which is fine. We’ll just paint over it.
I noticed there were holes drilled into the base to allow water to drain off. Considering much much water collected from the hose while I scrubbed, I don’t think they’re enough. I might drill a few more before we paint it.
If I remember… ;-)
I then flipped it upside down to scrub the bottom, then let it dry.
I see absolutely no sign that this was ever painted.
Yeah, the wood is definitely showing signs of rot.
It’s still pretty solid, though. Once it’s painted and the mount is properly secured, it will probably last for many more years.
The plan for tomorrow will be to head into the city for the rest of our monthly shop. Only one of my daughters will be coming along. I believe my other daughter is planning to do the first coat on the top of the picnic table while we are gone, when she takes a break from work. There should be plenty of paint to do the bird feeder, too.
I am also planning on painting the frame of the screened window I made for the old basement.
With the wind knocking over the bird feeder so often, the hanging feeders were getting pretty damaged. So the last time it happened, I decided it was a good time to get a suet feeder for the winter.
I think it’s going over rather well, with the chickadees!