Crushed

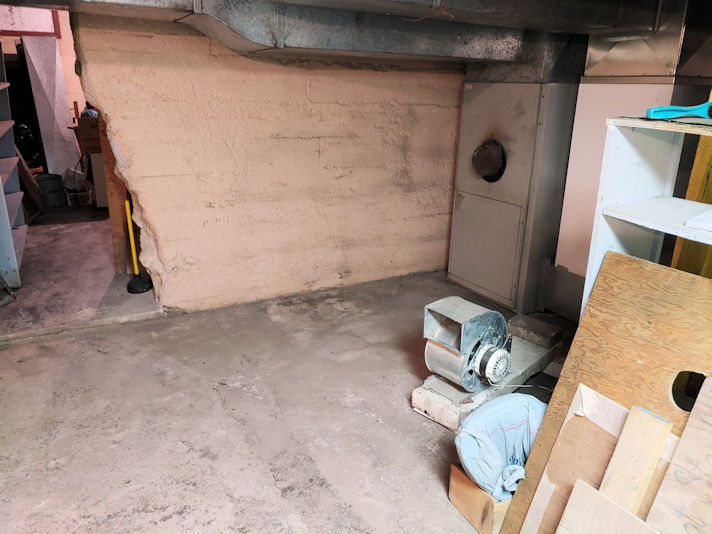
I wanted to get some progress in the basements today, but before I continued with cleaning up the old part basement, I wanted to clear things out of the new part basement. I’d been putting garbage bags near the bottom of the stairs, and things were getting pretty cluttered.

It wasn’t just the garbage I’ve been cleaning up from the old basement, though.

Shortly after we moved in, one of the things we’d done was set up wire frame bag holders to hold bags for recycling.

This was back when we still thought recycling was worth doing out here. I’m not so sure anymore.

At the landfill, the only general household recycling they want sorted out is the glass. Everything else is supposed to go into the general bins, which then get shipped to the city for sorting. At first, we would take our paper products to the burn barrel, but with the fire bans in the past two summers, that stopped. Even starting up again in the winter didn’t work out, due to weather. So that all goes to the dump now, instead.

One thing that took some getting used to after the move, is that this province does not have bottle depots. You know all those things you pay an enviro fee on when you buy them at the grocery store? We used to be able to take them in and get that fee back. Here, we just pay the fee and it goes… somewhere.

However, I knew that aluminum could be taken in and sold by weight. It’s one of those things organizations do for charity drives; they collect people’s aluminum, then sell it by weight to raise money. Pop tabs are collected separately, as they are pure aluminum and get a higher price per pound. Pop tab collections are sometimes done to raise money for wheelchairs.

So we’ve been collecting our aluminum for close to 2 1/2 years now.

For a while, we had a wire bag holder for aluminum, another for paper and plastic, and a small bin for glass.

At some point, we needed to make space for company, so it all went into the basement, but never made it back up again.

Since then, we continued to bag the aluminum separately into smaller bags, all of which got tossed into the basement as smaller bags were filled. (Except the tabs from pop cans and food tins. We keep a small jar for those and when it’s full, I run a magnet through them to catch any that aren’t pure aluminum, then transfer them to a 1 gallon jar. We have yet to fill that jar.)

Then we got a can crusher, which allowed us to fit more into the little bags before they got tossed into the basement.

As you can imagine, things were starting to get ridiculous down there.

Today, I fixed that.

Most of this involved combining the contents of little bags into larger ones, but I found 3 recycling bags full of stuff from before getting the can crusher.

I just spent a whole lot of quality time with the crusher.

This is what I got out of the basement.

Six bags of crushed cans. Not everything could be crushed; some of the cans were too big even for our extra tall can crusher, and things like cat food tins don’t get crushed at all. Even taking that into account, each one of those bags is the equivalent of 3 bags of uncrushed cans.

So this is the equivalent of 18 bags of cans, crushed to fit into 6.

I honestly don’t know if this is enough to be worth taking to a scarp yard. They go by the pound, and aluminum is really light.

At least they’re out of the basement.

They are now taking up space in the garage, instead. :-D

I also got out a large bag of regular recycling, plus another 4 garbage bags from the old basement clean up.

Things are looking a whole lot better down there, just by getting this stuff out!

At some point, we will even be able to start using the new part basement as a workshop again!

I’m really looking forward to that. Even if stairs are my nemesis. :-D

The Re-Farmer

Clean Up: old basement progress, and finding things

I was able to get a bit more progress in the old part basement yesterday, and it’s the sort of progress that actually feels like things are finally moving forward!

Stuff got put back for a change!

Okay, so it’s really all temporary, but still…

The first thing I wanted to work on was getting the now dry shelves back against the wall. My plan was to put both on one side of the centre pillar, instead of one on each side, like it was before.

It didn’t quite work out that way.

Continue reading

Clean Up: old part basement. Mopping and scrubbing

Today, I was finally able to continue working on cleaning up the old part basement.

For those who are new to visiting this blog (Welcome! Thanks for popping by!), click here to read about what happened, and you can see the clean up progress here, here, here and here. (All links will open new tabs, so you won’t lose your place! :-) )

I’ve really been kinda dreading what I need to work on next, which is to start putting back some of the things I had to move out during cleanup, and try and figure out what to keep, what to store elsewhere, and what needs to be disposed of. Hopefully, I won’t be finding any more hidden “poison for tree” containers hidden somewhere!

The first thing I did today was move the blower fan to a different area, so I could do a bit more clean up in the last section I had worked on.

The photo on the left is how it looked when I last worked in this section. There was still a lot of dust and dirt in the area, but trying to sweep it did more to kick the dust into the air than get rid of it.

In the process, I discovered a light fixture hidden between two furnace ducts! I had to have seen it before, but simply forgot it existed. It’s very well hidden! (As an aside, I had my phone on one of the ducts near where I was working, held in place by the magnetic case, playing music. I later found out the girls could hear my music on the second floor, through the vents!)

There are so many odd little lights around this old basement. This half of the basement alone has one of two lights that turn on with the switch at the top of the stairs, one that has its own switch at the side closer to the new part basement, and one above the septic pump that has no switch. It is screwed in and out to turn it on and off. Now I find the light with the pull chain between the ducts, so that’s 4 lights on this side of the stairs. On the other side of the stairs is the other light that’s turned on by the switch at the top of the stairs, a light with a pull chain above the sump and well pumps, and another with its own light switch closer to the furnaces.

That’s a total of 7 lights in one little basement!

Anyhow. Where was I? Oh, yes. Cleaning.

I was even able to wash this section of wall a bit. The other walls were too crumbly, and the best I could do was sweep them gently, but this wall is solid. Since this wall is part of the original basement, but became an internal wall after the new part was added, it tells me that the crumbing of the exterior basement walls is probably due to all sorts of moisture from the soil around it.

Waterproof sealants probably didn’t exist when this basement was built.

As for the clean up today, this time I didn’t even try to use the mop bucket, and just set up in the laundry sink. That water got so black! Even after changing the water several time and rinsing the floor several times, it was still really filthy.

We’re not going to be able to use this mop anywhere else in the house anymore. :-D No amount of washing and rinsing of the mop will get it clean enough!

Once the floor was washed and rinsed as best I could, I set up the blower, then turned my attention to the two shelves we will be able to reuse.

I started by washing and scrubbing the shorter one.

I gave it a good scrubbing – after first removing the nails that were used to attach it to the pillar it was next to, originally – then flipped it upside down to do the bottoms of the shelves. You can see the water damage on the “legs” of the shelf, even though it was raised off the floor by bricks.

When this shelf was scrubbed and rinsed (and I took advantage of all that soapy water to mop that section of floor again), I dragged out the taller shelf.

It needed some nails removed before I could start cleaning it, too.

This one has less water damage on its bottom, but was a lot dirtier. The section of wall it was next to is crumbling a lot more than where the shorter shelf was set up. At least this shelf is a lot sturdier, which made it easier to scrub.

Once they were done, I set them up where the blower is aimed, on bricks to keep the air circulating.

Though we will be using these shelves, because we need to, it will be temporary. When we are able to, we’ll pick up some plastic utility shelves to use instead. No wood. No metal. Not for this area!

Once we figure out what goes where of the stuff that got moved out of the shelves, we plan to use them to store bottles. We’ve got a stack of bottles from hard apple cider that we’ve been accumulating over the past two years that will be used as bottle bricks when we do our cordwood practise building. There are also lots of other bottles and jars all over the place, and as we clean those up, we will set aside the one we want to use at bottle bricks as well, so we’ll have other colours as well as ones with no colour at all. The outdoor bathroom we’re planning to make as our first practice building is not going to have any windows in it. Bottle bricks will be used, instead, so all light while maintaining privacy. Whichever wall ends up facing south the most, will have the most bottle bricks with no colour in them for maximum sunlight.

Storing these in the old basement will also mean we’ll have access to water, and the old laundry sink that has turned out to be so very handy. The bottles and jars will need to be cleaned and sterilized before they can be made into bricks.

Little by little, it’s getting organized!

All of this took only about an hour, and it feels like I should have done more, but everything needs to dry before I can continue. Hopefully, I’ll get a bit more progress in tomorrow.

Now, before I forget again, I’m going to go back into the basement and get the dehumidifier that’s down there running.

The Re-Farmer

Clean Up: old basement. The things we find!

There were so many things I found while clearing the corner of the basement that, though I didn’t even get pictures of all of them, I had to give them their own post!

I really, really wonder about some of the stuff I uncovered!

Let’s get started!

Continue reading

Clean up: old basement. It begins!

Photo heavy post ahead! :-)

Today, I started cleaning up in the old part basement. Since I would have to move things to clean under them anyhow, I decided it was time to finally do the proper clean up I was intending to do, later in the year.

I started in the half of the basement near the septic pump, since that’s where the biggest mess was. Slowly, I’ll work my way over to the other half, where the tanks, well- and sump-pumps are, as well as the space that used to hold firewood. There are now two broken hot water tanks stored on that side, so while there’s less there to clean up, it’s got the big stuff.

Continue reading

Storm clean up: unexpected damage

While working around the willow tree, I noticed something out by the north fence and took a closer look.

That’s when I found we had more trees and branches come down there, too. I hadn’t seen it before, simply because I hadn’t bothered going that far through the snow. The main priority was checking close to the house.

I’m really glad I was able to mow in this area, because that made clean up a lot easier!

Continue reading

Storm clean up: the old willow

I’d posted a video I took after this job was done, previously. I am honestly surprised more of this tree did not come down in the storm. I hope it survives many more storms, because it’s such a beautiful old tree!

The first thing I had to do was assess the fallen branch more closely.

The branch was long enough to reach the double row of elms heading towards the garden gate.

As I started cutting away sections, I was able to see that the whole thing had been kept from hitting the ground by the skinny little top of the branch that landed on an elm!

Amazing, that that was all it took to keep such a big, heavy, branch from falling all the way to the ground!

After clearing away enough branches that I could reach the main part with the extended pruning saw, I just start pulling.

Eventually, the top came down, and I was able to start breaking it down from the end.

The main branch ended up being held up by another branch I’d already cut away part of. While I continued cutting away smaller sections, it looked like I would have issues with where it cracked at the trunk. How would I even reach it? I had expect this to be the easy part of the job, but it took a lot more work just to cut away pieces, so I could reach where I needed to go!

Plus, I had to get the weight off the branch that was still holding the whole thing up, so I grabbed a branch and started dragging it off to the side. It all twisted at the cracked trunk.

Hmmm…

Little by little, I cut sections away until I reached the cracked trunk.

This part of the trunk was too high for me to reach, and I couldn’t see how I could cut it away. It would be too dangerous to use the step ladder and a buck saw.

However, it was really quite rotten, and it twisted quite a bit when I was manhandling it to get those sections cut away. What would happen if I pulled on the cut ends?

I found the whole thing easily twisted around, and pieces of the trunk started to fall off.

What I thought would be the hardest part of the job turned out to be the easiest part – it just pulled right down!

The pile at the base of the tree is all from that one branch that broke.

I’m leaving it there until spring, when I plan to take down the rest of the rotten trunk. I’d already added lots of other downed branches to the pile by the fire pit.

So that is done for now!

When I started working on this area, though, I spotted more storm damage that I’d missed, because I simply hadn’t slogged my way far enough through the snow.

That will be my next post. :-)

The Re-Farmer

Storm clean up: the kitchen elm

The first area I focused on when cleaning up the storm damage was the tree closest to our main entry.

I’d already had to cut away a few parts of the branch earlier. While we could push our way through the branches when walking by, I needed to back the van up to the house, so we could load it up for a trip to the dump.

It had been my intention to cut pieces away, little by little, until I could get the cracked main branch down completely. The first few, I was able to reach with the extended pruning saw from the ground, but as weight was removed, the whole thing started to rebound, higher and higher. I had to bring out the step ladder to be able to reach the main part of the branch. I expected to cut it away in at least three sections.

Things didn’t quite work out that way.

Once the piece in the photo above came free, it came twisting down – towards me on the step ladder, of course! – while the rest of the branch, released of the weight, flung itself upward about 5 feet.

After looking it over, I decided to just leave it. Without the weight of this section, there is no longer a danger of it cracking more. It should probably still be taken down eventually, but there is no risk to leaving it alone for now. Especially since we plan to have the entire tree taken down at some point.

This pile is the broken down pieces of just that one section from the above photo!

This is all of what came down from this one tree. The two bigger pieces went to the wood pile for the fire pit, while the rest went into the big pile for eventual chipping.

The cats LOVED playing in all the branches I’ve been cleaning up!

It’s really remarkable, what a difference there is in the yard. Two large branches of this tree came down, and it all feels so much more open and lighter under there!

This job ended up taking less time than I expected. It was time to move on to the big willow tree.

That job ended up taking more time than expected!

More on that in my next post. :-)

The Re-Farmer