Our 2022 garden: starting seeds and potting up

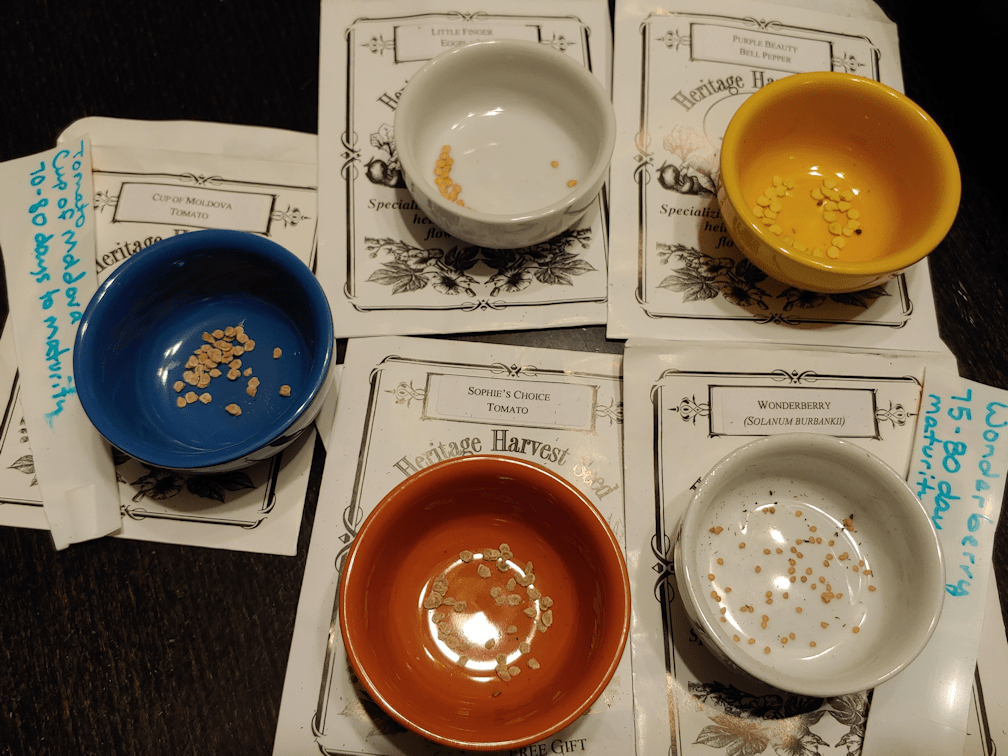
With our average last frost date of June 2, today works out to be 8 weeks for seed starts. In addition to starting new seeds, our replanted Cup of Moldova seedlings were ready to be thinned and potted up.

We also needed to make space.

While the sun room’s daytime temperature neared 20C/68F, while the outside temperature reached a high of 4C/39F, the overnight temperatures dropped to just above freezing.

We decided to take the chance, and move the onions and shallots to the sun room. I’m not very encouraged by how they seem to be doing, and I figure we’re going to need to buy sets later on, anyhow. More on that, later.

We also had to pot up the Wonderberry. The only one that survived from the first planting is large enough that it can only fit into the top of the mini-greenhouse, where the frame comes to a peak. The second planting had two that were getting pretty big, so they got separated and repotted, too. There was also a whole lot of removing of pots where the seedlings did not survive, and re-arranging the big aquarium greenhouse so that the new seed starts could go on over the heat mat.

Eventually, we were able to start the new seeds!

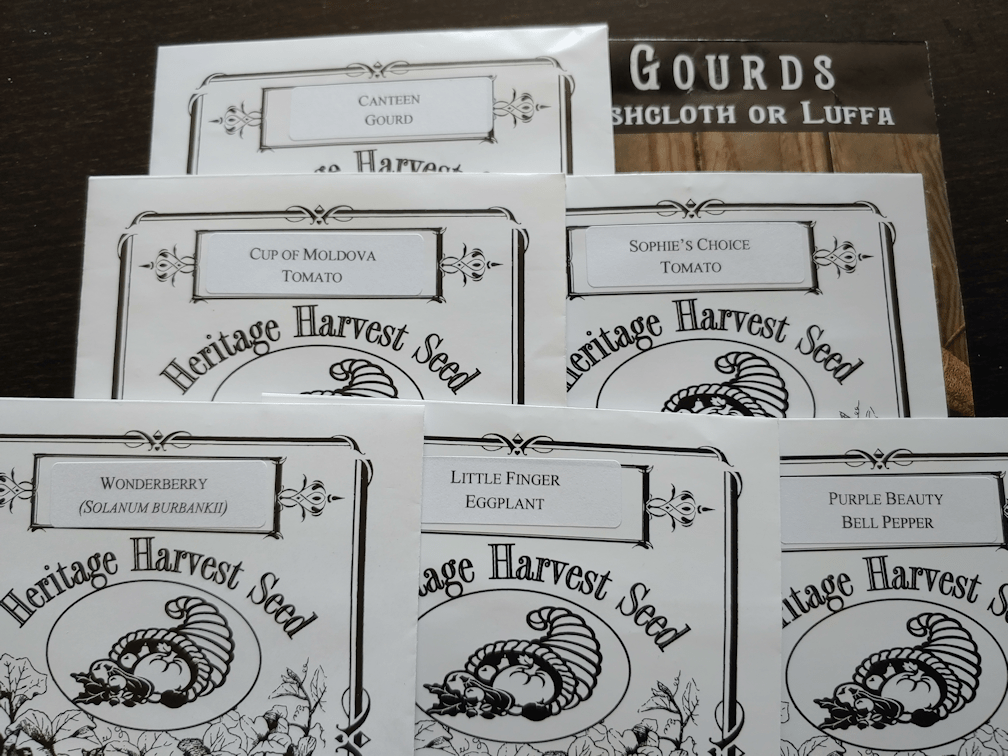
There were only two things that needed to be started, as the others on the list were for 8-10 weeks, and we’d already started them at 10 weeks.

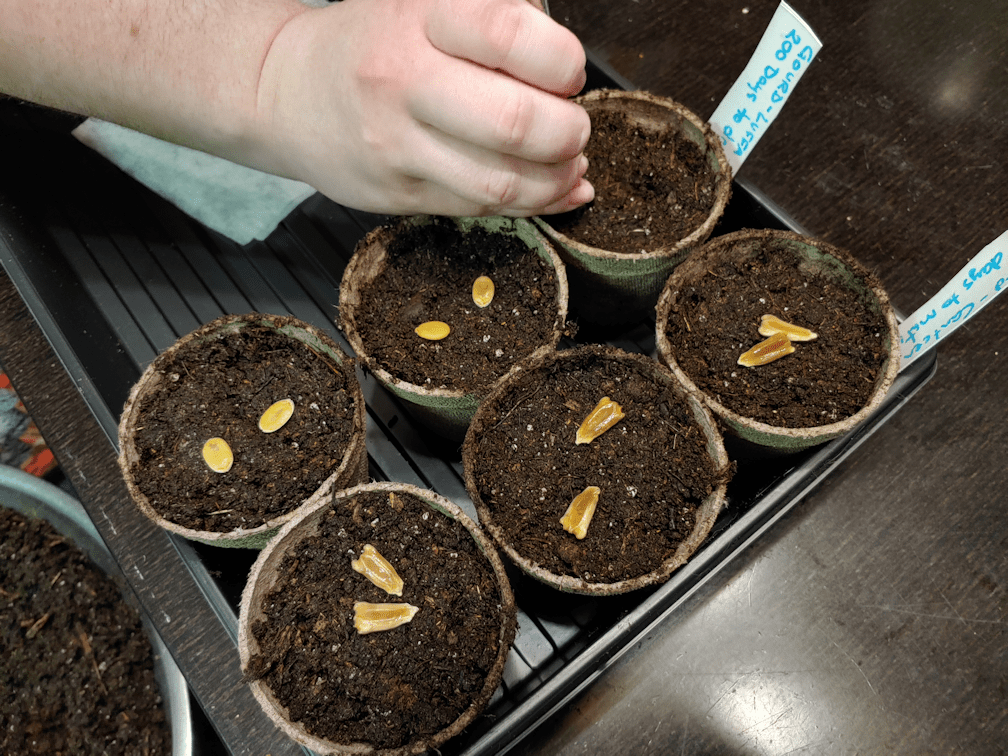
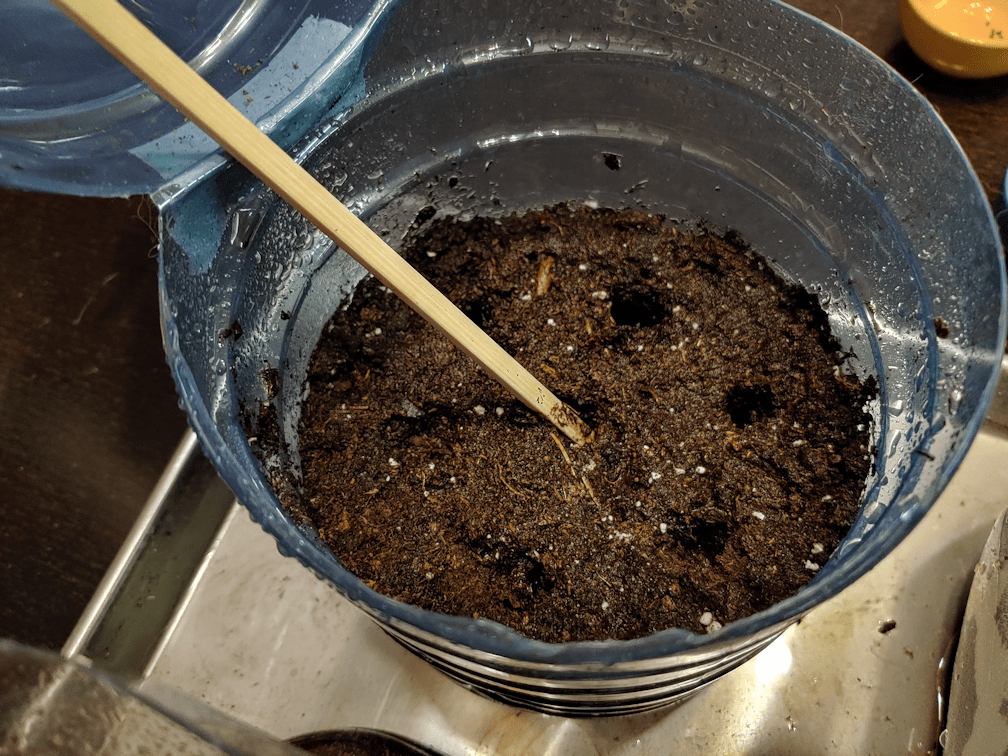
One was Aunt Molly’s Ground Cherry. The seeds are so small and few, they came in a separate envelope in the packet. Still, my daughter divided them up, and planted 6 pots with them.

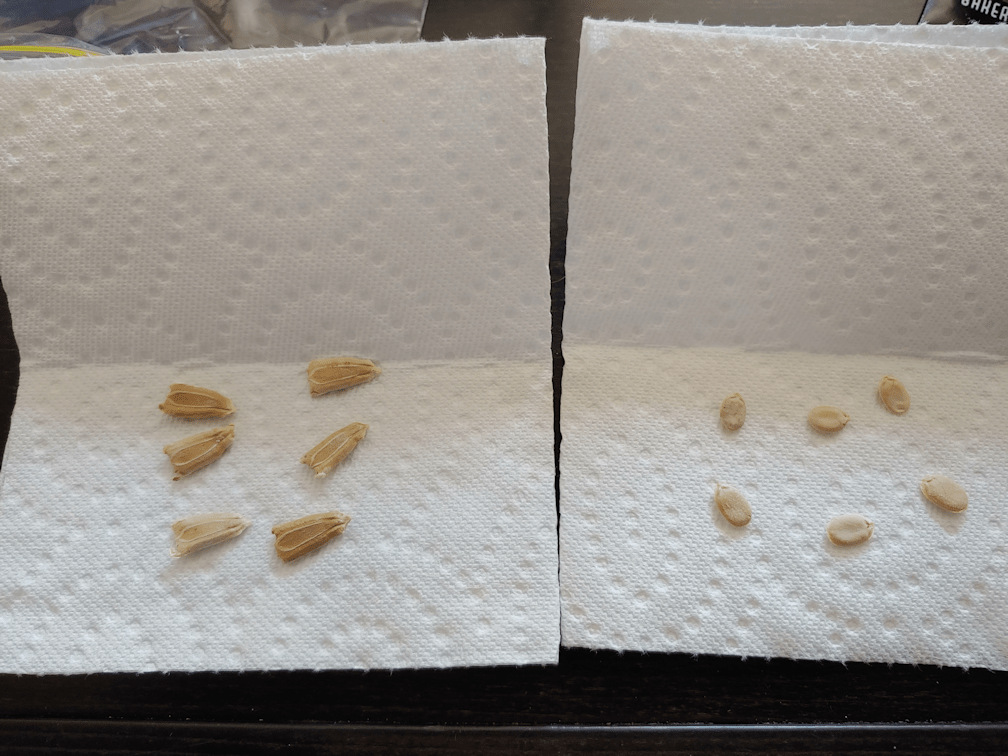
While she worked on those, I started on the Red Baron bunching onions.

They have such pretty seeds!

These were densely planted in a repurposed grocery store salad container.

These are now on the heat mat.

The pots that had been on the heat mat got shifted over, but are still in the big aquarium.

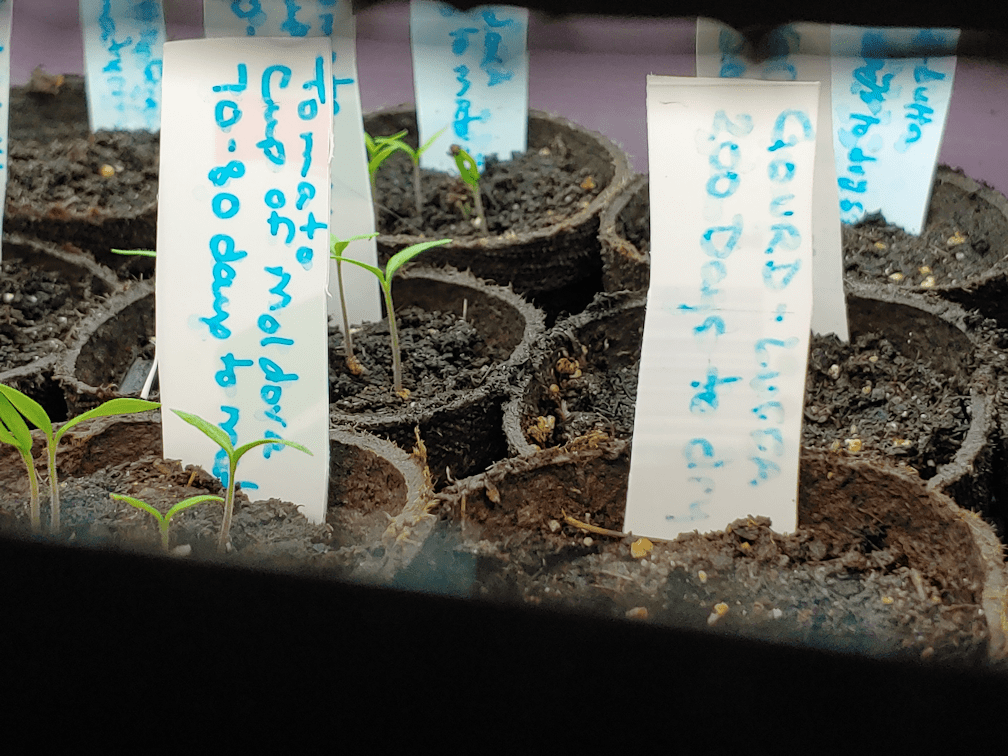
Here we have our squash and gourds, and the second planting of eggplants and purple peppers. There are a few survivors of the first planting, but the way things are going, I figure extras will always be a good idea!

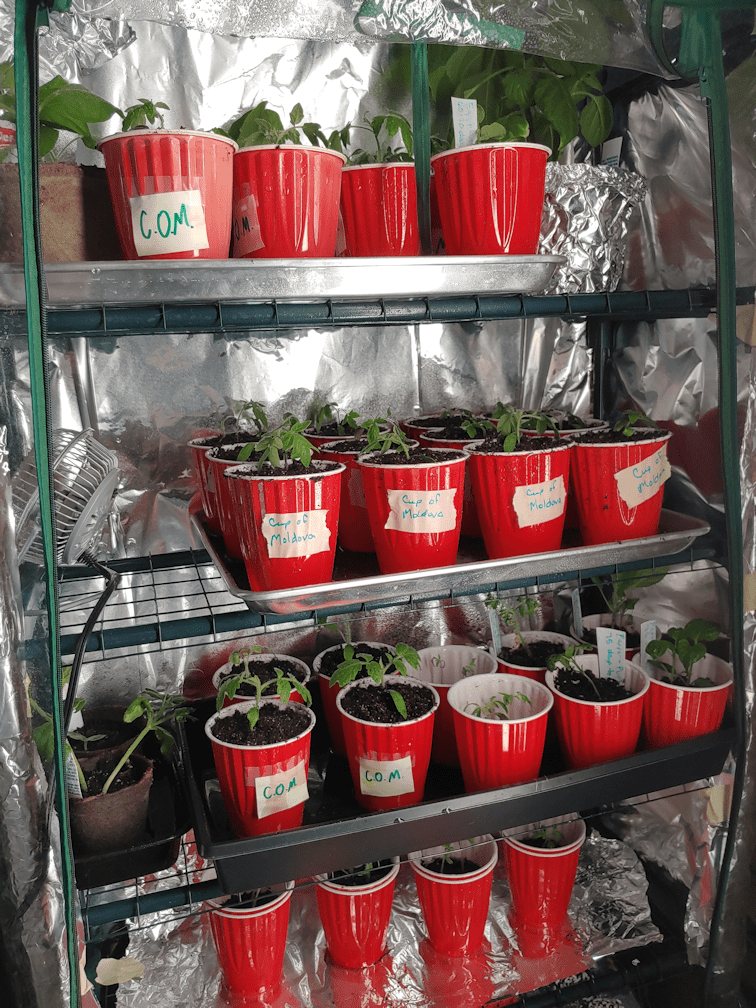
This tray had the second planting of the Cup of Moldova paste tomatoes, planted in Red Solo cups. A couple of them had only one seedling in them. For the rest, I gently removed all but one from each cup. The cups were only half full of seed starting soil, so my daughter potted them up by simply adding more to fill the cup. While she worked on that, I filled more cups and transplanted the tomatoes that had been removed, burying the stems until they were much like the others. I ended up doing a dozen cups, on top of what my daughter filled.

Hopefully, most of these will survive to be transplanted!

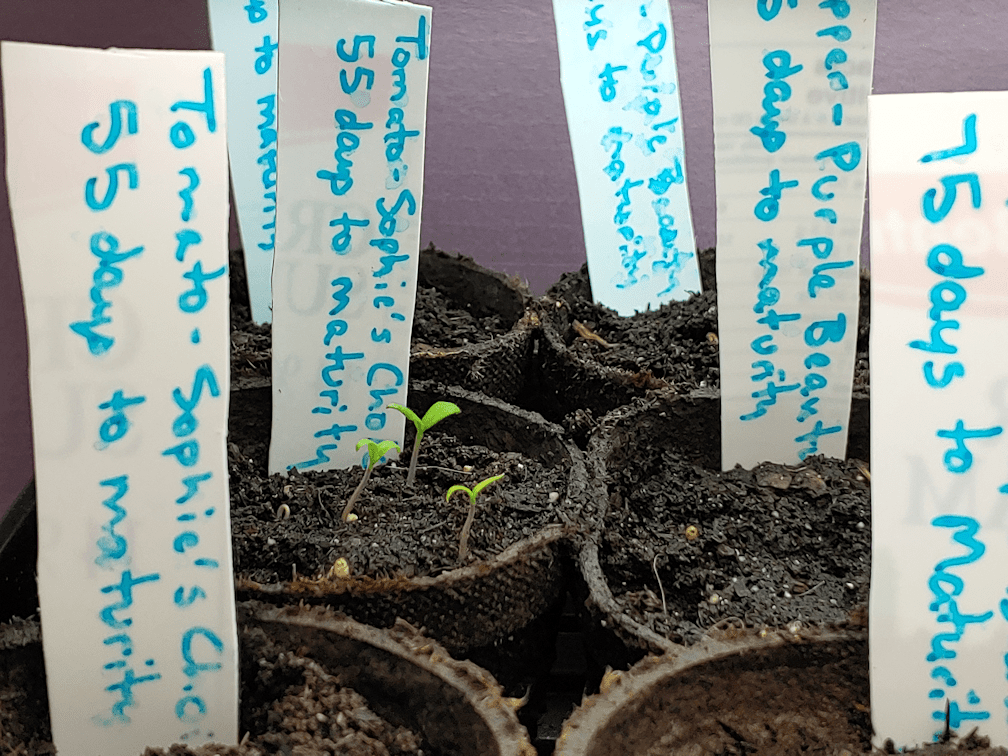
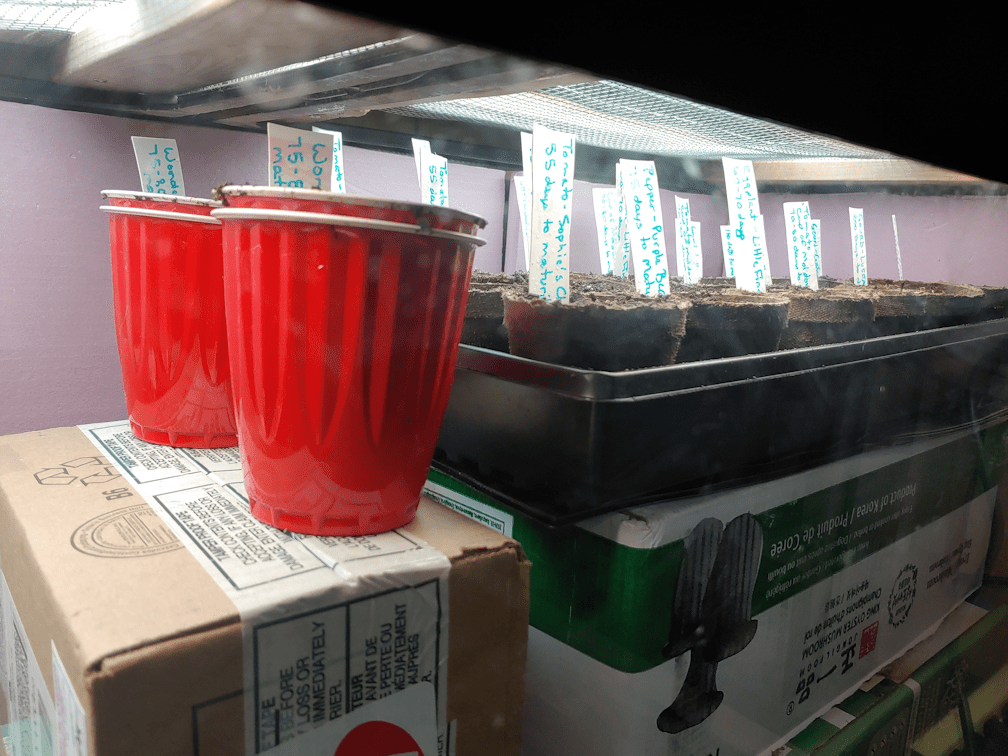
We were able to fit them all into the mini-greenhouse, though a bit more re-arranging needed to be done. The Sophie’s Choice tomatoes are much smaller, and not ready to be thinned or potted up, yet.

The largest Wonderberry is now in one of those Jiffy pots that can be buried directly into the ground, as are the two smaller Wonderberry. The smaller ones are in the tray, where they can be watered from below, but the big one was on its own. To allow for watering and not making a mess, my daughter wrapped the pot with aluminum foil.

Since we have to keep the mini-greenhouse enclosed, I have the mini fan set up to blow are up one side, so it can circulate under the cover without blowing directly onto any plants. A salvaged window screen gets set across the bottom, then the flap is brought down, its bottom tucked under the screen, and the zippers pulled down as far as the screen, so hold it in place. It’s the best we can do to keep it from getting too hot in there and to allow fresh air in. For seedlings this big, the cover would be removed completely, but certain cats would simply destroy everything.

It will be good when all the plants can finally go into the sun room! These are, however, much more fragile than the onions.

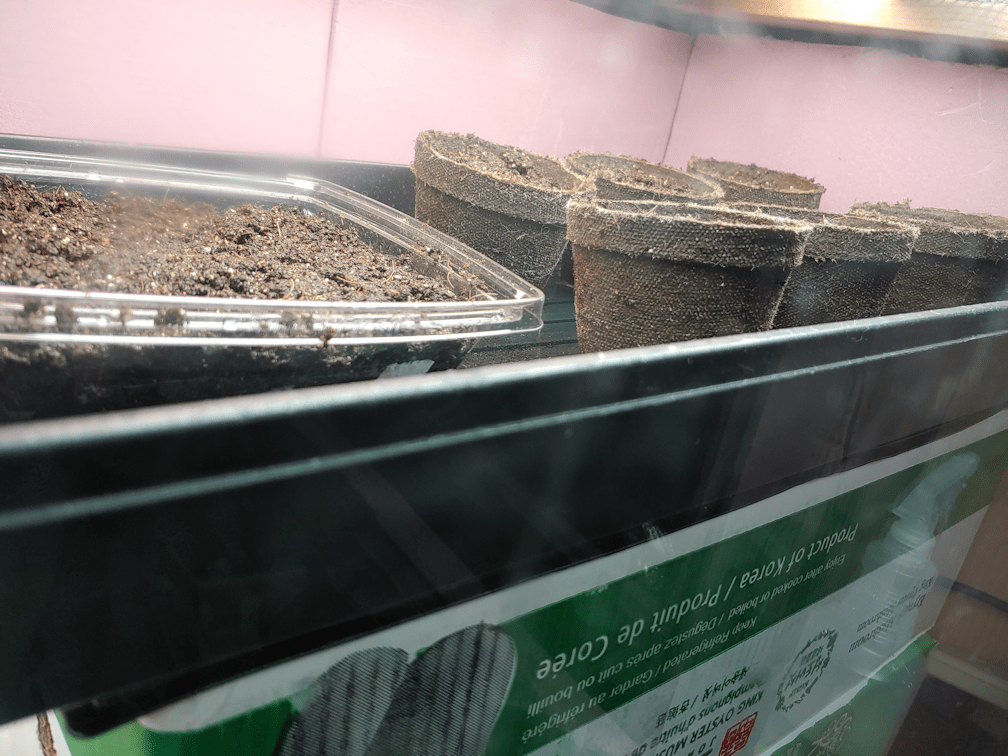
I had a couple of spare oven liner trays that I picked up for inside the small aquarium greenhouse. We’re not using that right now, as anything that goes into it seems to struggle. That’s where these onions had started out. They should be quite a bit bigger, and there should be more of them.

That one tray that looks the sparsest is the shallots. The soil even looks dug into. I suspect one of the cats actually managed to reach through a gap in the cover flap over the screen we put in front of the mini-greenhouse.

Concerned for the overnight temperature drop, I remembered a small light that we’ve used in the sun room before. It has an incandescent, full spectrum bulb in it.

It also gets quite warm, and we’ve made use of that heat for everything from keeping plants warm, to keeping recovering cats warm!

So that got set up on the empty shelf under the onions. The shelves all have scrap pieces of rigid insulation on them. Most of the inside of the shelf is covered by the reflector we made using a larger piece of rigid insulation. So the space should hold warmth a fair bit. The light fixture would help, plus even the LED shop light does warm up, just a bit. Between all that, I’m hoping the shelf itself will hold a pocket of warm compared to the rest of the room.

We’ll see what difference it makes.

So this is where we are at, 8 weeks before last frost. We have a few more seeds to start at the 6 week mark, but it’s the 4 week mark that is going to be a doozy. The fast majority of our seeds, both in variety and in quantity, are supposed to be started by 4 weeks. This includes the winter and summer squash, pumpkins, remaining gourds, melons, watermelons, and the last of the tomato varieties. We don’t plan to start many of the tomatoes, but we do intend to plant quite a lot of the various squash and melons.

Finding the space for everything is going to be quite the challenge. It’ll be May by then, though, which means the overnight temperatures in the sun room should be warm enough that we could even start some seeds in there, and not just in the large aquarium greenhouse. Some of what we’ve started will be ready for hardening off, too.

Looking at the long range forecast, we’re going to have a rather chilly Easter weekend, and things aren’t going to warm up very much after, either. I’ve been looking at the 30 year averages, though, and these temperatures are pretty much bang on for the average.

It just feels like winter keeps dragging on.

And on and on and on.

The Re-Farmer

Our 2022 garden: new sprroooottttsss!

Checking our seed starts this morning brought as a cheerful surprise!

The Cup of Moldova tomatoes are enthusiastically sprouting in all three pots. My daughter had tried to plant only 4 or 5 seeds in each pot, but some of them were stuck together. Now that they’re sprouting, a lot more are coming up than she expected!

I didn’t try to take off the cover to get photos, so this is my trying to get pictures through the narrow gap between the cat proof covers, and the top of the tank. :-D

Now, we even have Sophie’s Choice tomatoes coming up! Considering they weren’t there last night, they grew with incredible speed in less than 12 hours!

With one type of tomato already starting, I was kind of expecting the second type to sprout soon, but we had one more surprise waiting for us.

There are now Little Finger eggplants starting to show!

I notice that all the first sprouts are coming up in the middle row of pots in this tray. I have no doubt that the warming mat under the tray is making a big difference in helping seeds to germinate. I suspect that the inner cups are also slightly warmer than the cups that are closer to the glass. Even with the insulation against the back, there is going to be a temperature difference. It may only be a degree or two, but that would be enough to affect which seeds germinate fastest.

From the looks of things so far, we also have a very excellent germination rate.

I am curious to see what the germination rate will be for the luffa and canteen gourds. The luffa are seeds from last year, and each pot got only 2 seeds. They were scarified and pre-soaked, so that should help, but they are much slower and more temperature dependant than the tomatoes, eggplants and peppers.

So exciting to see green things!

The Re-Farmer

Our 2022 garden: first seeds started

Though it is very early in the year, we have our first seeds started indoors today. A lot of people in our zone have already got seedlings, while still others are saying, it’s way too early.

So which is it?

I happened on a video today, talking about planting peppers and eggplants, which we are doing for the first time this year. Both are plants we never grew when I was a kid, so I have zero familiarity with them.

This particular video mentioned something I’ve never heard before, yet had wondered about.

When reading the seed packets, they say things like “start indoors 4-6 weeks before last frost date”.

Last year, we had a lot of issues with some things not germinating. Some took forever to germinate. Others never did at all. This was particularly true of various squash, plus all the Hope Black Dye sunflowers – with did finally all germinate, when I started taking the trays outside, while hardening off other seedlings.

What got mentioned in this video, is that when they say “4-6 weeks before last frost,” it’s actually from germination, not from planting the seeds. So if you have something that needs to be started, say, 6 weeks before last frost, but the packet says the seeds take 7-10 days to terminated, then the time to start them indoors is 6 weeks, plus 7-10 days.

That actually makes so much more sense to me.

I’d already made a list of which seeds needed to be started when, and these were the ones that needed at least 8 weeks.

The gourds were started first, as they needed extra steps. Among the things recommended that I wanted to try was scarification and pre-soaking.

So that’s what I started this morning.

Of the gourds we will be trying to grow this year, I chose the Canteen gourd to start early, as the gourds are supposed to get quite large. The other gourds I want to grow are smaller at full maturity.

Which lead me to another thing. With the luffa, we’re not after “days to maturity”, which is 110 days, if I remember correctly. We’re after the sponges, so we need for those mature gourds to dry out. That puts them at 200 days. Even starting now, we might not have that long for them. It will depend on whether or not we get another really long summer again. Of course, in the end, everything depends on the weather.

I chose 6 of the plumpest, healthiest looking seeds from each, then carefully snipped their outer shells with a nail clipper, before putting them inside the folds of a paper towel.

Then they went into sandwich baggies, and the insides were sprayed with water, before being sealed and left to sit. Most places recommended leaving them overnight, but I left them “overday” instead. ;-)

Then they went into planting pots filled with pre-moistened seed starting soil. My daughter used a chopstick to push them the inch into the soil they needed to go. Once covered, the tops of the soil got sprayed with water.

Then it was time to take a look at the rest of the seeds and see what we had to work with. None of the packets have a lot of seeds in them, but we are not after a lot of individual plants.

The Sophie’s Choice tomato was a conundrum for me. Everything I read about them said they needed to be started very early; a couple of weeks earlier than other tomatoes. Yet they are an early tomato, with only 55 days to maturity. At only 55 days, we could start them outdoors and they’d have plenty of time to mature. Odd.

For all but the Wonderberry, we decided to plant about 5 seeds per pot, and three pots each. With the gourds, that filled an entire tray.

The Wonderberry got planted using the double cup method. I reused some of the Red Solo cups we used last year, with the inner cups having drainage holes in the bottom, so they can be watered from below, using the outer cup.

We still had seeds left over, even with how little was in each packet, so that’s nice.

We used more boxes to bring the tray and cups closer to the lights, inside the big aquarium greenhouse. The heat mat fits under the tray. I’m hoping that just being near the mat as well as close to the light fixtures, one of which does warm up, will be good enough to adequately warm the Wonderberry in their cups.

The double cups got water in their bottoms before they were put in place, and water was added to the tray once it was settled on the heat mat. We do still have a little fan blowing into the tank, though it’s over the orchids and aloe in the other corner. We won’t be able to cover these with a plastic dome, as typically recommended, so I’ll be making sure to use a spray bottle to keep the tops moistened, since the smaller seeds are so much closer to the surface. There’s quite a bit of water in the tray so, with the heat mat, that should help increase the humidity levels, with the fan hopefully keeping things from starting to mold.

The heat mat doesn’t have a thermometer, nor do we have a soil thermometer, so we’ll have to monitor these fairly closely. Everything is plugged into a power bar, which gets shut off every night, so there will at least be that break. If it seems to be getting too warm – unlikely, for what we’ve got planted in there – we can put something under the tray to elevate it. Once the seeds germinate, we can probably take the mat out entirely.

The next things we’ll be starting are the onions, which won’t need the heat mat, but when it comes time to start the rest of the tomatoes, and all the squash, we’ll need both the heat mat and space – and space is going to be harder to come by! We do have a mini greenhouse, the frame of which we are currently using in the sun room to hold the heater bulb for Butterscotch and Nosencratnz, as they recover. We did try to use it in the living room last year, as it does have a zippered cover, but the cats still managed to get into it. If we could find some way to keep the cats out of it, it would go a long way to helping with our space issues!

We’ll figure something out.

The main thing is, we’ve got stuff started that need that extra time indoors.

Yay!!

The Re-Farmer

Our 2022 garden: winter sowing experiment

I was inspired by WolfSong to try something new – and help with that urge to be planting something already! Winter sowing.

Today, I finally got some seeds started.

We’ve been keeping a variety of plastic bottles and jugs for potential garden use. We’ve got mostly the blue water bottles. The distilled water we get for my husband’s CPAP used to come in the same type of jug as milk does, but suddenly all the brands seemed to switch to those blue bottles, all at once. Which was a problem, at first, because many of them no longer had handles of any kind. It made it very awkward for my husband to fill his CPAP humidifier, as the sides would collapse inwards as he poured. He ended up transferring the water to an empty jug with a handle, to keep from splashing water all over his CPAP!

People must have complained, because the next time I had to buy distilled water, the bottles had handles attached to their tops.

We have 4 different types of jugs, including two styles of juice bottles. I decided to try one of each.

I’ve been cutting plastic containers to use in the garden for some time, and it’s a real pain, so today, I took the easy route.

My wood burning kit includes a knife tip. The heated tip makes it SO much easier!

I started by cutting drainage holes in the bottoms, and air circulation holes at the tops, by inserting the knife through the plastic, then giving it a bit of a twist to widen the hole.

Then the jugs were cut most of the way around. With each jug having a different design, they each were cut at different spots.

How much was left uncut to create a hinge depended on how much of a flat area there was. Which, in the case of the blue jug, meant none at all, but that plastic was soft enough that it could still work. The juice jugs are a heavy plastic, making them the most difficult to cut, while the water jug that is the same as milk jugs is such a soft plastic, the melted plastic of the cut edges actually stuck together again in places, and they had to be recut!

I’m hoping the blue bottles work the best, because we’re going to have so many of them.

Just to be on the safe side, the hinges were reinforced with strips of duct tape. For the jugs with distinct handles, the hinge was placed just under them, while the one with indentations to create a handle had the hinge placed above, so the container wouldn’t squish into itself if grabbed by the handle.

The handle of the blue jug is at the cap, so it didn’t matter on that one. I just followed one of the lines, just above the middle.

That done, it was time to put some soil in them.

They all fit in one of the baking trays we got last year, to make it easier to carry seedlings around. Especially the ones in the red Solo cups. Those have come in very handy. I plan to get more They are very inexpensive at Costco.

I had the seedling mix potting soil recently picked up to use for this. Once the soil was in, it all got thoroughly watered.

The water almost immediately all drained into the tray.

I watered them more, drained the water out of the tray and used it to water the soil again. After doing that a few times, I used a spray bottle on the soil surface, while leaving the bottoms to sit in water.

Even then, only the surface became moist. The soil mix was still bone try below.

I spent a bit of time, working on moistening the soil before leaving it to sit while preparing the seeds.

I had already decided to try starting kohl rabi indoors, as our attempts to direct sow them outdoors last spring failed completely. It was the same with the kale. All I can think is that something ate the sprouts as soon as they emerged. It was the second year I’d tried kohl rabi, and the first year’s attempt also failed, with only a few plants surviving, only to be decimated by cabbage moths and flea beetles.

So this time, we’ll go with transplants and, if it works, we’ll be making sure to protect them from both critters and creepy crawlies!

Bahahahahahaha!!!!

Okay, I do remember, while going through our seed inventory, looking into the packet for Early White Vienna kohl rabi, seeing a few seeds, and deciding to keep them. Until today, I didn’t realize where was only five seeds left!

Once the seeds and their labels (strips of masking tape) were ready, I used a chopstick to make evenly spaced holes in the soil for the seeds.

Then I used the spray bottle to water into the holes, because it was still so dry under the top layer!

Because of the different shapes, they each fit a different number of holes in the soil for seeds. The jug with the indented sides for a handle meant it had space for only five holes, so that’s where I planted those five, lonely White Vienna Kohl rabi seeds. Being 2 years old, we may well have none at all germinate, but who knows? The white jug had room for the most seed holes, so that’s where the Russian Red kale went. The last two got the Early Purple kohl rabi seeds.

Once the seeds were in, covered, watered with a spray bottle, labels affixed, it was time to close the containers.

I used packing tape to close up the jubs. The tape is enough to hold them together while the jugs are being carried, but to also be easy to remove, later on.

At least I hope they’ll be easy to remove!

The tray was drained again, then it was time to take them outside.

There we have it. Four different jugs, sown with kale and kohl rabi.

I’m leaving the caps on, since they have air circulation holes, but if the holes turn out to be too small, I might still take them off. We shall see.

I had originally planned to leave the jugs somewhere else, but decided that first spot was not visible enough. I had to consider things like cat and deer traffic, as well as where we shovel the snow from the paths. Hopefully, this spot will be easy to monitor, and they won’t get knocked about by critters. They will also get lots of sunlight, too.

Not that you can tell in the above photos. It wasn’t even 6pm yet, but it was full dark when I set these out!

I still have kale and purple kohl rabi seeds left. I might try starting some indoors, when we start other seeds, then direct sowing the last of seeds. That would give us a chance to compare all three methods.

It should be interesting to see how these do!

The Re-Farmer

Our 2022 garden: Eagle Creek Seed Potatoes order placed!

I wasn’t going to be able to place another order for our garden until next month’s budget, but thanks to my daughter, we now have our potatoes ordered!

While I was very happy with the potatoes we ordered from Vesey’s, we went with a new company this time – one that I have added to our Cold Climate Seed Sources list.

Eagle Creek Seed Potatoes is in Red Deer County, Alberta, so we can be pretty sure that anything we order from there will grow in our Zone 3 area. It was a company recommended in one of the cold climate gardening groups I’m on, and I really wish I’d discovered them earlier! Not only to they provide a lot of information on each variety of potato they carry, they even have a container and tower pack. That would have been very handy, for when we grew potatoes in feed bags, before we knew that potatoes came in determinate and indeterminate varieties!

This year, however, we are going to use our potato plantings to reclaim more garden space, and will be using the Ruth Stout method again.

These are the potatoes we ordered, to be delivered in May (they let you choose your delivery date range), since our last frost date is early June. They can be ordered as 4 packs, 1 kg or 5 kg sizes (1 kg = 2.2 pounds), and some are available in 14 kg bags.

All images belong to Eagle Creek. All links will open in new tabs.

Caribe.

This is an early maturing variety, though it’s said that they can get quite large if left until late in the season. We ordered these in a smaller, 1kg (2.2 pound) package, to stay under budget. They are listed as having excellent winter storage, and described as making the fluffiest mashed potatoes ever! :-D

Bridget.

This is a medium maturing variety (though the description also lists it as early maturing) with good yields in most soil types, good winter storage and good disease resistance. They are noted as being particularly good for making French fries, though that’s not something we normally do. They are also a good baking or mashing potato. We ordered this in the 5kg size.

All Blue.

Well, we just had to include a purple potato!!! This is a late maturing variety with great winter storage, and is good with pretty much any cooking method. We ordered this in the 5kg size.

Last year, we ordered 4 varieties in 6 pound packs, for 24 pounds of seed potatoes. We got a pretty good return on them, though nowhere near enough to store any for winter. This time, we’re getting about the same weight in 3 varieties.

As we are planning to use the Ruth Stout method again, we’ll have to be pro-active in combating snails. Our first year growing potatoes left us with soil that was much more workable when we converted the space into beds for onions and carrots. We pretty much doubled the length of the beds, and when we were harvesting and preparing the beds for the fall, we could really tell the difference in the soil between the two halves! Where the potatoes were grown previously, the garden fork easily sunk deep into the soil, but in the extended portion, once the fork got through the new soil we added on top of the beds, it was like hitting a hard floor beneath.

When we grew potatoes that first year, the only thing we had available for mulch was straw. It’s what we can get, so that’s what we will be using again this year. This time we can run the straw through the shredder chute on our wood chipper, first, so it will cover better and break down faster.

As far as quantities go, unless these all turn out to have amazingly high yields, this is not going to be enough to last us into the winter. Which is okay, because these are new varieties we are trying out. Over time, once we’ve worked out what grows best here, and which ones we like the most, we will get larger quantities of seed potatoes and, hopefully, be able to have enough to plant our own potatoes every year, instead of having to buy seed potatoes. At least, that’s the long term goal for the bulk of our potato growing. I suspect we will continue to try new and different varieties regularly, simply because we like trying new things!

One more item for our 2022 garden to check off our list!

The Re-Farmer

On growing garlic

This year, I joined a number of gardening groups on social media. Either local groups or cold climate/zone 3 gardening groups. It’s pretty cool to see how many first time gardeners have been joining the groups and asking all sorts of questions.

This is the time of year for planting hard neck garlic, as we did yesterday, and there is a LOT of discussion on these groups right now, and people are sharing some really good links.

One really good video I saw shared was uploaded just yesterday, and it give a lot of good information. I think you’ll enjoy it, too.

He talks about hard neck garlic, soft neck garlic, seed garlic and even using store bought garlic, too.

I didn’t realize Elephant garlic isn’t actually garlic!

He talks about lots more, including harvesting “wet garlic”, which was something I wondered about when checking our own garlic last year.

Among the most discussed things I’ve been seeing in the gardening groups has been how deep to plant the cloves. There is a LOT of differing, even conflicting, advice. The thing is, the conflicting advice isn’t necessarily wrong. There can be quite a bit of variance, based on climate zones. For those in zone three, like myself, this was an excellent link that was shared. I also found this video, specific to planting garlic in zone 3.

I found it interesting that he says to leave the curing garlic out in the rain!

For those who aren’t necessarily in colder climates, here’s a video from MI Gardener (published September, 2018)

A lot of gardeners on my groups get seeds from MI Gardener, too, and are very happy with what they get.

There is a lot of information and advice out there, but if you can’t follow all of it, you know what? You can still get good garlic! We didn’t plant our cloves as deep as recommended for out zone, yet they survived the Polar Vortex just fine. We don’t have compost or manure to add, and we still got decent sized bulbs. That’s one of the beauties of gardening. You can do all sorts of things “wrong”, and chances are, you’ll still get decent results. What works in your own specific garden may also be quite different from what works in other places, too, so it will always be a learning experience.

Which is half the fun of the whole thing!

For those reading, do you have other things you plant in the fall? I’ve read about a number of vegetables that can be seeded in the fall, and plan to try it in the future, as we get our garden more established. If you plant garlic, do you plant hard or soft neck varieties? What works for you?

The Re-Farmer

Our 2021 garden: two kinds of potatoes

I wasn’t going to harvest our potatoes yet, since they can stay in the ground until after we get frost. It is, however, Thanksgiving weekend here in Canada, and dangit, I want to have some of our own potatoes! :-D

The fingerling potatoes are still growing, but the Yukon Gem and Norland potato plants are completely died back, so those were my target for today.

Using old feed bags as grow bags was an experiment for us, and it was interesting to see that roots had made their way through the bottoms of the bags. These will definitely not see another year of use, and they were also weathered enough to start tearing a bit while I moved them, but that’s still pretty good, considering they would have been thrown out, otherwise.

That kiddie pool is, once again, the handiest thing ever! So are those old window screens I found on the barn. :-D The bags got dumped into the pool, where I could go through the soil to find the potatoes and set them aside on the screen.

This is the contents of the very first bag I emptied!

Each variety was planted in five feed bags. We did gather some potatoes earlier, and I tried to take out just a couple from each bag, so there was originally a few more than what you can see here.

I had assistance from a Nosencrantz, ferociously hunting leafs!

By the time I was working on the Yukon Gem potatoes, the kiddie pool was too full, so I moved aside the remaining bags and started to return some of the soil to create a new bed for planting. For the amount of soil, the new bed will extend along the fence further than the rows of bags are, as I don’t want to to be too wide or too deep. Unless I change my mind at the last minute or something, we will be transplanting some perennial flowers that need to be divided.

One of the nice things I noticed while picking through the soil to find the potatoes, was how many nice, big fat worms I found! They managed to make their way through the bottoms of the bags. I could even see worm holes in the soil under the bags, too.

Here they are! All of the red and yellow potatoes we got.

Such a small harvest, but not too shabby, considering this year’s growing conditions. These will sit outside on the screens for a bit, but with so few potatoes, there’s no need to properly cure them. We’ll be eating them pretty quickly. In fact, quite a lot of these will be used up this weekend, with Thanksgiving dinner. :-)

It should be interesting to see what we get with the fingerling potatoes!

As for how the grow bags did compared to doing the Ruth Stout, heavy mulching method we did last year, I would say these did better. I didn’t know about indeterminate and determinate potatoes before this. If I’d known, I would have specifically looked up indeterminate varieties for these bags, and would have kept filling them with soil and mulch over the summer. That would have resulted in a higher yield. It just happened that all the varieties we chose were determinate, so they grew all on one level. The main thing was that there was no sign of any slug or insect damage on the potatoes. With the Ruth Stout method, I found a lot of slugs as I dug up the potatoes, and quite a few holes in the spuds.

For next year, I am thinking we definitely want to look into doing something like this again; maybe grow bags again, or some other way of doing a potato tower. I think it will depend on what kind of varieties we go with next year, and if I can find indeterminate varieties. I was looking at different websites last night, including some that specialized in only potatoes, and just about everything is marked as sold out. I’m hoping that’s because of the time of year, and that they will come available again after harvesting and curing is done for the winter. I’d like to try sun chokes and sweet potatoes, too – there is one place I’ve found that sells sweet potatoes that can grow in our climate. I think I’m the only one in the family that actually likes sweet potatoes, though (the rest of the household just sort of tolerates them), so I wouldn’t have to grow many. I’ve never found sun chokes to buy and taste, so that will be something to try just to find out if we like them or not!

We’ll have to find a new place to grow potatoes next year, though, since this spot will become a flower bed. We’ll have to think about that! Especially since I hope to increase the quantity we plant. Over time, we’ll need to grow a LOT more potatoes to have enough for four people, to store over the winter, but we’ll get there little by little.

The Re-Farmer

Our 2021 garden: morning in the garden

Well, it is getting decidedly cooler when I do my morning rounds! Fall is just around the corner, but things are still holding out in the garden.

Here are the gourds growing on the south facing chain link fence. The yellow flowers that you see are the Ozark Nest Egg flowers.

If you look at the bottom right, you’ll see a white flower!

This is a Thai Bottle Gourd flower. The Ozark Nest Egg plants are going so well, they sort of hide that there is another type of gourd growing here. The Thai Bottle Gourd has leaves that are more rounded, while the Ozark Nest Egg leaves have points on them.

These gourds are not the only thing bursting into bloom.

This is the Crespo squash, recovered from critter damage and growing enthusiastically! I was not able to get all of it in this photo. All those arrows are pointing to flower buds, some of which are starting to open this morning. There are probably another dozen or so on the rest of the plant off the left side of the photo.

Hidden away in the middle, I found the first female flower!

I couldn’t get any closer because of the critter barriers, but that flower bud the arrow is pointing to has a baby squash at its base. Hopefully, it will get pollinated and not die off. Under the current conditions, I would hand pollinate, but that would require moving the critter barriers. Mind you, there’s no way any fruit that develop will reach maturity.

More on that, later.

There are only a few Halona melons left on the vines, but there are probably a dozen Pixie melons that have not yet ripened.

This is the largest of them. Since it has a hammock, I check it in the mornings by lifting it at the stem, to see if it is starting to separate, but it’s still hanging on tight!

The rest are more like these two.

I’ll have to double check, but I thought the Pixies had a shorter growing season than the Halonas. They are taking much longer than the Halona to fully ripen. I’m sure the drought conditions over the summer have something to do with that, but since we’ve started having rain fairly regularly now, I would have expected them to mature faster. Ah, well. We’ll see how they do!

This is the largest of the developing Teddy winter squash. This is roughly half of what it’s mature size is supposed to be, so they may still have time.

Our weird mutant Red Kuri is noticeably bigger! It makes me smile, every time I see it.

We’ve got a couple more that are getting bigger, too. This is what the mottled green one should be looking like, which is why I suspect it was cross pollinated with the Teddy squash.

Here’s something that is NOT getting bigger!

The one luffa gourd is just… stalled. The plants are still blooming, but also starting to die off for the season. I started these quite a bit earlier, indoors, and they should have had enough time to develop gourds and reach maturity, but this summer was so rough on everything, I think we’re lucky to have even this.

We even had something to harvest! Not every morning, but at least every few days. We even still had a few beans left to pick. In the photo, I’m holding one of the mutant green sunburst squash. :-D I’ve been trying to let the sunburst squash have more time for the fruit to get bigger, but they seem to be developing more slowly than they did last year.

I just had to get a picture of the sunflower in the old kitchen garden. We can see it from the bathroom window, through the sun room, and it makes me smile, every time. :-)

As the season winds down, I’ve been keeping a close eye on the long term forecasts. Yesterday was our first frost date for the area, but it continues to look like we are not going to have any frost here, for a while. Of course, the forecast constantly fluctuates, and different sources have different forecasts. My Weather Network app has a 14 day forecast, and with today being the 11th, that puts the 14 day trend between the 12th and the 25th. The lowest overnight temperatures I’m seeing is for the 25th, at 6C/43F, with variable cloudiness.

My Accuweather app, however, is very different. The long range forecast on that one goes up to October 5. Up until this morning, all the overnight lows were above freezing, but this morning, there is now a single night – the 25th – where it says we will hit -2C/28F. It is also predicting thunder showers scattered about the province in that day.

If that is accurate, we have only two weeks before frost hits (which is 2 weeks longer than average, so I’m not complaining!). If we do get a frost, that will be it for the tomatoes, squash, gourds and melons. We have no way to cover any of these beds, so if we get any frost warnings, we’ll just have to pick as much as we can the day before. We should get plenty of sunburst squash, but I’m really hoping the Pixie melons and winter squash ripen before then. The gourd and Crespo squash just don’t have enough time left. Except the Tennessee Dancing gourds. They are so small, we should have quite a few to gather before the frost hits. We may be lucky, though. Aside from that one night that one app is predicting will go below freezing, overnight temperatures are supposed to stay mild into October.

The sunflowers will be a lost cause, though. There is no way the seed heads will be able to mature in so short a time. So many haven’t even opened, yet. Starting some of them indoors would have made the difference (well… except for being eaten by deer), had they been under better conditions. Not just with the weather, but the soil quality where they are growing. Had our only reason for planting them been for the seeds, they would be a failure, but they were planted there partly for a privacy screen, partly for wind break, and mostly as part of our long term plans to prepare the area for when we plant food trees there. Which means we had a success with 3 out of the 4 reasons we planted them. I do want to get more of these seeds to try them again, elsewhere.

For now, every night we have without frost is a help.

The Re-Farmer

Our 2021 garden; a modest morning

Thankfully, I did not find much critter damage in the garden at all today.

Sadly, this Magda squash got chewed on overnight. I had been really looking forward to picking it when it got bigger!

After doing the manual watering, then setting up the sprinkler on the corn, I pruned the bottom leaves on the summer squash. With growing them vertically, the idea is to not have any leaves touching the ground, thus reducing the chances of fungal infections. Ours are not tall enough for all of them to be at that point, but we’re close. I left the pruned leaves under the plants they were cut from, to add to the mulch, and maybe even discourage critters from coming too close and stepping on spiky stems.

Not that it helped the Magda squash, any!

More of the Mosaic Medley mix of tomatoes are starting to ripen. I didn’t pick any this morning, but I think we’ll have a fair number to pick by this evening!

We don’t know what varieties are in the Mosaic Medley mix and, so far, we’re only seeing red ones. In the photo on the site, there were some “chocolate” ones shown. I’m still holding out hope that some of these will ripen to colours other than red! :-) Not that it makes a difference to me. I don’t particularly like tomatoes. They’re one of the few things that are doing well, and NOT being eaten by something, so I’m pretty excited about them, anyhow. :-D

Today is supposed to get quite hot (we’re at 32C/90F as I write this, and we’re supposed to still get warmer), so I made sure to put the shade cloth over the fall crops. I neglected to take a photo, but I was very surprised to see bulbs forming in the row of French Breakfast radishes! I’ll be leaving them alone. We didn’t plant many, as they are for their pods, not their bulbs, and I’m amazed they survived the grasshoppers at all. Even the chard in that bed is recovering. I’ll have to get some photos when we uncover them when we do the evening watering.

One thing about all the struggles we are having with our garden this year is, we are learning a lot that we can use next year, to improve things. Some of them were things we already intended to do, and the only change is in priority.

With having such far flung beds, we knew that watering would be a challenge. Especially since we knew the furthest beds were in the hottest, driest part of the yard. The excessive heat and drought conditions certainly didn’t help, either! One of our ultimate goals is to have a garden that requires little to no watering. I was able to watch the Back to Eden documentary (free on Tubi), and it’s very much what I had in mind, when it comes to the heavy mulching. We have all these branch piles everywhere, just waiting to be chipped, that would have been so incredibly useful this year! Even with the modified hugelkultur method we plan to use with our permanent high raised beds, we intend to use a lot of mulch. Though we plan to work out some sort of irrigation system to make our watering as efficient as possible, if we do our beds right, we should rarely have to water them, even during drought years.

Which will be a huge improvement over having to water once or twice, every day!

The Re-Farmer

Our 2021 garden: first garlic done

Yesterday evening was so lovely out, I spent as much time outside as I could! I took advantage of this to finished up the garlic we harvested some time ago. They have been hanging from the rafters under our gazebo tent to cure. It was not ideal conditions. They should be somewhere cool and dry. What we had available was outside, where it was hot and dry, or in the basement, where it was cool and humid.

I figured hot and dry was better than cool and moist!

The stalks and roots were trimmed, the soil brushed off, then they were tied up in twine.

They are not as cured as well as they should – some of the stems are still showing a bit of green – so these will need to be eaten fairly quickly. Which is sssuuuccchhh a hardship… Ha! I look forward to using them. They are currently hanging from the ceiling in the kitchen.

I think garlic soup would go over very well! It’s usually made at the end of winter, as a sort of spring tonic, but I think it’s good, at any time! I use an entire bulb of garlic to make it, but these are so small, I might just use up a whole bunch of the littlest bulbs. :-)

While these were dying back way too early and had to be harvested, the rest of the garlic is now looking ready to harvest, too. It’s still early, and I don’t expect very large bulbs, but that’s okay. We’ll be buying more to plant for next year, rather than try and save bulbs from this year’s garden.

The Re-Farmer