I was inspired by WolfSong to try something new – and help with that urge to be planting something already! Winter sowing.
Today, I finally got some seeds started.
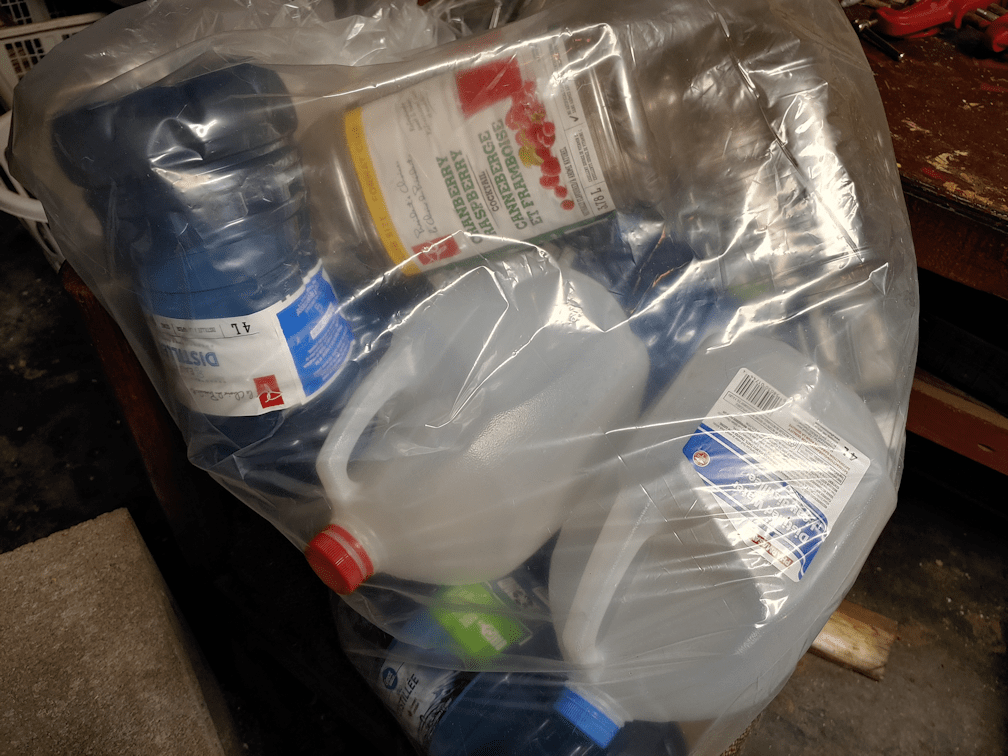
We’ve been keeping a variety of plastic bottles and jugs for potential garden use. We’ve got mostly the blue water bottles. The distilled water we get for my husband’s CPAP used to come in the same type of jug as milk does, but suddenly all the brands seemed to switch to those blue bottles, all at once. Which was a problem, at first, because many of them no longer had handles of any kind. It made it very awkward for my husband to fill his CPAP humidifier, as the sides would collapse inwards as he poured. He ended up transferring the water to an empty jug with a handle, to keep from splashing water all over his CPAP!
People must have complained, because the next time I had to buy distilled water, the bottles had handles attached to their tops.
We have 4 different types of jugs, including two styles of juice bottles. I decided to try one of each.
I’ve been cutting plastic containers to use in the garden for some time, and it’s a real pain, so today, I took the easy route.

My wood burning kit includes a knife tip. The heated tip makes it SO much easier!

I started by cutting drainage holes in the bottoms, and air circulation holes at the tops, by inserting the knife through the plastic, then giving it a bit of a twist to widen the hole.

Then the jugs were cut most of the way around. With each jug having a different design, they each were cut at different spots.

How much was left uncut to create a hinge depended on how much of a flat area there was. Which, in the case of the blue jug, meant none at all, but that plastic was soft enough that it could still work. The juice jugs are a heavy plastic, making them the most difficult to cut, while the water jug that is the same as milk jugs is such a soft plastic, the melted plastic of the cut edges actually stuck together again in places, and they had to be recut!
I’m hoping the blue bottles work the best, because we’re going to have so many of them.

Just to be on the safe side, the hinges were reinforced with strips of duct tape. For the jugs with distinct handles, the hinge was placed just under them, while the one with indentations to create a handle had the hinge placed above, so the container wouldn’t squish into itself if grabbed by the handle.
The handle of the blue jug is at the cap, so it didn’t matter on that one. I just followed one of the lines, just above the middle.
That done, it was time to put some soil in them.

They all fit in one of the baking trays we got last year, to make it easier to carry seedlings around. Especially the ones in the red Solo cups. Those have come in very handy. I plan to get more They are very inexpensive at Costco.
I had the seedling mix potting soil recently picked up to use for this. Once the soil was in, it all got thoroughly watered.
The water almost immediately all drained into the tray.
I watered them more, drained the water out of the tray and used it to water the soil again. After doing that a few times, I used a spray bottle on the soil surface, while leaving the bottoms to sit in water.

Even then, only the surface became moist. The soil mix was still bone try below.
I spent a bit of time, working on moistening the soil before leaving it to sit while preparing the seeds.
I had already decided to try starting kohl rabi indoors, as our attempts to direct sow them outdoors last spring failed completely. It was the same with the kale. All I can think is that something ate the sprouts as soon as they emerged. It was the second year I’d tried kohl rabi, and the first year’s attempt also failed, with only a few plants surviving, only to be decimated by cabbage moths and flea beetles.
So this time, we’ll go with transplants and, if it works, we’ll be making sure to protect them from both critters and creepy crawlies!

Bahahahahahaha!!!!
Okay, I do remember, while going through our seed inventory, looking into the packet for Early White Vienna kohl rabi, seeing a few seeds, and deciding to keep them. Until today, I didn’t realize where was only five seeds left!
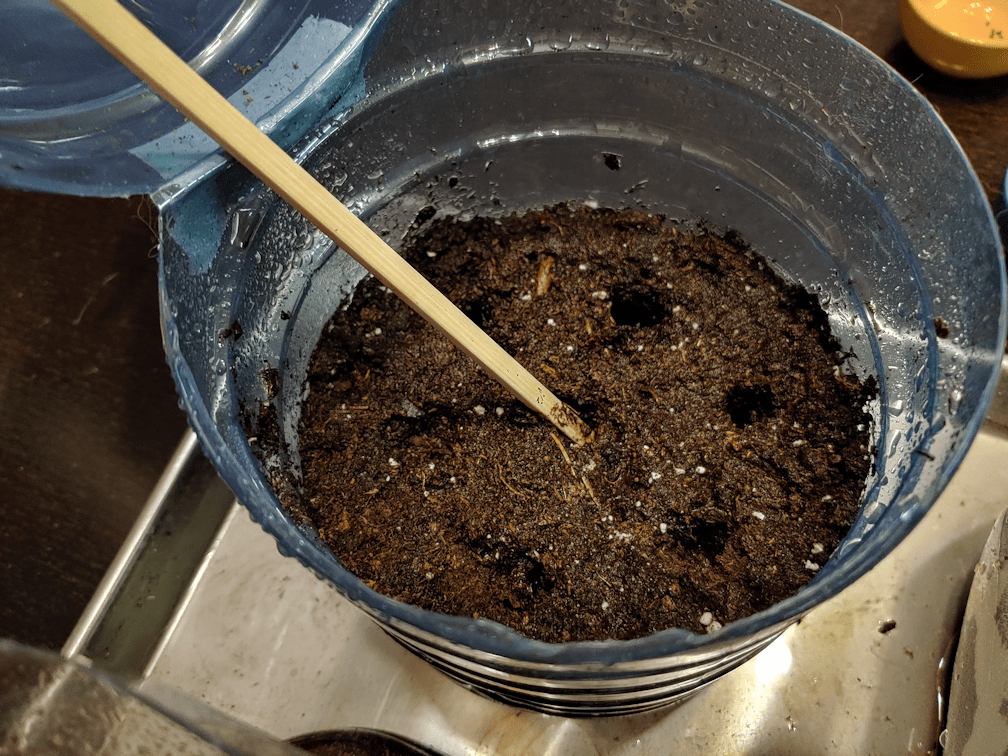
Once the seeds and their labels (strips of masking tape) were ready, I used a chopstick to make evenly spaced holes in the soil for the seeds.
Then I used the spray bottle to water into the holes, because it was still so dry under the top layer!
Because of the different shapes, they each fit a different number of holes in the soil for seeds. The jug with the indented sides for a handle meant it had space for only five holes, so that’s where I planted those five, lonely White Vienna Kohl rabi seeds. Being 2 years old, we may well have none at all germinate, but who knows? The white jug had room for the most seed holes, so that’s where the Russian Red kale went. The last two got the Early Purple kohl rabi seeds.
Once the seeds were in, covered, watered with a spray bottle, labels affixed, it was time to close the containers.

I used packing tape to close up the jubs. The tape is enough to hold them together while the jugs are being carried, but to also be easy to remove, later on.
At least I hope they’ll be easy to remove!
The tray was drained again, then it was time to take them outside.

There we have it. Four different jugs, sown with kale and kohl rabi.
I’m leaving the caps on, since they have air circulation holes, but if the holes turn out to be too small, I might still take them off. We shall see.
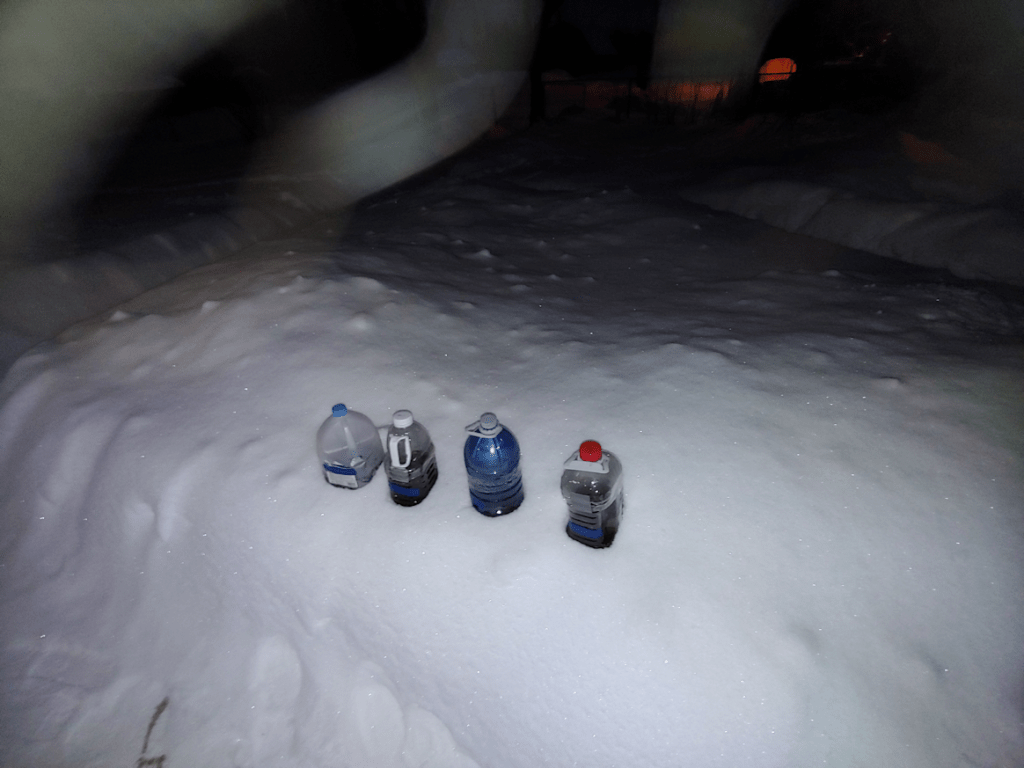
I had originally planned to leave the jugs somewhere else, but decided that first spot was not visible enough. I had to consider things like cat and deer traffic, as well as where we shovel the snow from the paths. Hopefully, this spot will be easy to monitor, and they won’t get knocked about by critters. They will also get lots of sunlight, too.
Not that you can tell in the above photos. It wasn’t even 6pm yet, but it was full dark when I set these out!
I still have kale and purple kohl rabi seeds left. I might try starting some indoors, when we start other seeds, then direct sowing the last of seeds. That would give us a chance to compare all three methods.
It should be interesting to see how these do!
The Re-Farmer


Completely unrelated, I have a bed of leeks and recently discovered that they can take up to 40 weeks to grow. It has become a love hate relationship with leeks now.
LikeLiked by 1 person
😄😄. Good to know! Leeks are something we plan to include, hopefully next year. There must be varieties that mature faster!!
LikeLike
I bloody hope so!
LikeLike
Pingback: Our 2022 garden: winter sowing, and transplants organized | The Re-Farmer