Flame Roasted Potatoes

I roasted potatoes in yesterday’s cookout, and I thought I’d share. :-D

To make these, you will need;

20180604.fire.roasted.potatoes1

  • Large potatoes (1 per person)
  • Butter and seasonings
  • heavy duty aluminum foil, pieces sized to wrap each potato in a double layer
  • fire

Start by thoroughly scrubbing the unpeeled potatoes, then stabbing them all over with a fork.

For the butter and seasoning, you can use plain butter, then add coarse salt (how we usually do it), or you can make a flavored butter using whatever 20180604.fire.roasted.potatoes2seasonings you like.  This time, I added paprika, fresh ground pink Himalayan salt and fresh ground pepper, dill and garlic powder.

Generously cover the potatoes with the butter and seasonings.  Tightly wrap each potato in a double thickness of heavy duty aluminum foil.

Don’t skimp on the foil.  ;-)

Time to go outside!

Prep a small fire and let it burn down.  When you have a layer of coals, place the foil wrapped potatoes directly on top of the hot coals.

Build the fire up again on top of the potatoes.

Enjoy your fire for about an hour, letting it burn down to coals. Gently move the foil wrapped potatoes out of the coals and remove to a container that can handle high temperatures.

The time is completely a judgement call.  A lot depends on the size of the potatoes and how hot the fire gets.  You might want to try for 45 minutes the first time you do it, and adjust for the next cookout.

Because there will be another cookout! :-D

20180604.fire.roasted.potatoes7

Carefully unwrap the foil (I used two forks) and cut a potato in half.

As you can see, this potato was VERY well done!  Which I’m okay with, as the skin serves as a bowl.

While the potato is cooling, roast some wieners over the fire.

20180604.fire.roasted.potatoes8

Add flavorings to taste.  I had some of the flavored butter used on the outside of the potatoes left, so I put some of that on one half, and sour cream on the other.  Then I used a fork to mix in the flavorings, in the skin “bowl”.

I think, the next time we do this, I’ll roast 2 potatoes per person instead of one!  It was SO good!

These can also be left to cool and eaten later.  Just unwrap and reheat in the microwave, or chop into cubes to use to make hash browns, or to make a potato salad.

Enjoy!  And please remember to exercise fire safety precautions, at all times.

The Re-Farmer

First Wiener Roast of the year!

Last night, we decided to take advantage of the lovely evening, and have our first wiener 20180603.wierner.roast.fire3
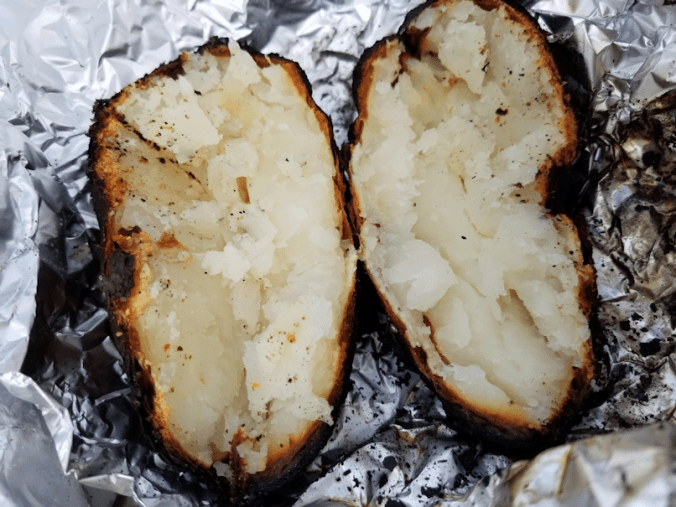
roast of the year! :-D

When I was a kid, we used to have these quite often.  I would go into the bush with a machete-type knife (we even found it while packing away my parents’ stuff!) and cut dogwood branches for roasting sticks.  They were perfect for it, naturally growing long, straight and supple.  Sometimes, I could get ones with a perfect Y shape.  The bark came off easily, and I would strip off the top several inches, then sharpen them to points.

At the end of the day, we’d get a fire going, roast wieners and stuff our faces with hot dogs, then finish off with marshmallows.  When we were done eating, it would be quite dark, and we would start burning our roasting sticks until the tips were glowing, then wave them around in the dark, using the red tips to create shapes of light in the air.

Sometimes, my parents hosted parties, and their friends from the city would come out with their kids, and there would be dozens of people all over.  Most of the time, though, it was just us kids.  We had a blast!

20180603.wierner.roast.tableThanks to the burning my daughter and I did earlier, when I cleared the yard to mow the lawn, I had a nice pile of sticks ready to set up for a fire.  We brought the hose (of course) and chairs.  We were thinking of moving the picnic table over, but it’s in serious need of cleaning, so the girls brought out one of our small folding tables, instead.

We’re going to have to invest in metal roasting forks soon.  I picked up a package of wooden roasting sticks along with the S’mores kit, and they are a bit too flammable and bouncy! :-D

I had hoped my husband could join us, even if just to sit on his walker while we roasted wieners for him, but he had to lie down for the night, before we even started. :-(

It got to watch a beautiful sunset while we set up and got the fire going.


I’m going to have to get out there with the weed trimmer. *L*

20180603.wierner.roast.cat.company

The outside cats were all over the place, checking out what we were doing!  Rolando Moon staked out a spot on the log pile to watch us.  The hose sprays water at where two hoses join, and at the nozzle, and the cats played with the spray!

At one point, while I was sitting and eating, Rolando Moon actually jumped up onto my knee!  That’s a first.  Even the friendliest ones are still quite stand offish, so this is a big step in at least Rolando Moon’s comfort levels with us.

20180603.wierner.roast.fire2

Ah… perfect for toasting those wieners!

20180603.wierner.roast.fire4

We made some S’mores – that’s something we never did when I was a kid.  I didn’t even hear of them until after I had my own kids.

I find I really enjoy toasting marshmallows, and getting that perfect state of golden brown on the outside, and all melty on the inside.

Problem with that is, I don’t actually enjoy eating them.  Too sweet!

None of us are all that big on sweets, so while the hot dogs disappeared quickly, there’s still lots of S’more making supplies! :-D

Best part was, the entire night, we only saw one mosquito!

There is at least that one benefit to the dry spring we had!

20180603.wierner.roast.fire5

After a while, we just hung out to watch the fire die down.

I hope we will be able to do this often.  Even if we don’t have wiener roasts, to at least get a fire going and enjoy the evening.  We have a lot of wood we need to use up, and will be adding more as the clean up continues, so why not? :-D

It was a fantastic evening!

The Re-Farmer

Black Olive and Chickpea Salad

This is one of my favourites; a hearty salad that I will sometimes have as a meal.

Today, it was made extra special, thanks to a care package a dear friend sent me – who knows me oh, so well!  It has been AGES since I’ve had truffle salt or truffle oil!  Not that I couldn’t find them; they’re just normally incredibly expensive.

20180430.care.package

Every now and then, though, they show up at Winners at affordable prices and, apparently, they had quite a variety of truffle products available!

And yes.  It’s always time for tea.

I have the best friends!

A few dashes of truffle oil and a sprinkle of truffle salt to my salad brought it to a whole new level!  It’s still delicious with just olive oil and regular salt, though. :-)

Black Olive and Chickpea Salad with FetaBlack Olive and Chickpea salad

Ingredients

1 can chickpeas, drained, rinsed
1 can black olives, whole or sliced
about 1/2 cup feta, cubed or crumbled
about 1/4 tsp dried dillweed or 1/2 tsp fresh
extra virgin olive oil
salt and pepper


  1. After draining and rinsing the chickpeas, shake off as much water as possible, or let them sit to drain more moisture out for a while.
  2. Combine chickpeas, black olives and feta into bowl medium bowl.
  3. Add dillweed, salt and pepper to taste, and enough olive oil to moisten.
  4. Stir or toss to combine thoroughly and serve.

Optional: use different types of salt (smoked salt is great!) or flavoured oil.

This can be made ahead and chilled in the refrigerator before serving.  I have no idea how long it’ll last in the fridge, because it disappears so quickly!

Garlic Soup

Well, I’ve gone from having an irritating cough to a full blown spring cold.

Ugh.

As I was sitting with my lemon tea, feeling awful, it occurred to me that I had all the ingredients to make garlic soup.

This is a recipe that my late mother-in-law shared with me, many years ago.  She told me that it was an old pioneer recipe that was especially made in the late winter/early spring, when everyone was getting low on energy.  This was a time of year when people’s stores of preserved food was probably starting to get low, too, so between the long winters, lack of sunlight, lack of vitamins, and nary a fresh vegetable to be seen, people were getting worn down.  This soup would be made and apparently resulted in a big boost of health and energy.

Oh, how blessed we are to be able to get fresh fruits and vegetables, any time of year!

I don’t know about it being a boost to energy, but garlic has long been known to help fight off colds and boost the immune system.

Plus, it’s easy and tasty.  What more can you ask?

Quantities are pretty loosey-goosey, so this is more general instructions than a recipe.  You will need:

garlic.soup.1

garlic cloves; about 5 per person (I used a whole head, just for myself)
butter (enough to brown the garlic)
milk (about a cup or two per person; I used 2 cups this time)
bread (1 slice per person – I used a thick slice of sourdough bread)
shredded cheese (cheddar or whatever kind you like; about 1/2 – 3/4 cup per person)
seasoning to taste (this time around, I used onion salt, pepper and a dash of paprika)

  1. Peel and prep the garlic.  It can be whole, crushed, chopped, minced or whatever you wish.  I like to pass it through a garlic press.  Then scrap all the bits stuck to the press into the pot, too.  Big pieces are not a problem, here! :-D
  2. Melt the butter on the bottom of a saucepan on medium heat.  Add the garlic and cook gently until transparent.
  3. Add the milk and heat until scalding.  Do not boil!garlic.soup.2
  4. Season as desired.
  5. Place a slice of bread on the bottom of a bowl.  Top with shredded cheese.garlic.soup.3
  6. Pour the hot soup over the bread and cheese.  garlic.soup.4
  7. Eat while as hot as you can handle it.

You can also give the bread time to soak up some soup, then break it apart and add more shredded cheese to the top.  I had to do that, just to be able to fit all the soup into the bowl. :-D

garlic.soup.text

Now that I’ve had my bowl of soup, I think I’m going to go back to bed.

The Re-Farmer

Overnight Sourdough Rye Bread

overnight.sourdough.rye.fresh.baked

Fresh out of the oven!

This is a bread that needs a LOT of time!  The finished result, with its tangy sourdough flavour, is well worth it.

Begin by preparing the starter the evening before.  We used our rye starter, The Rye of SourOn, but a regular starter can be used as well.

Overnight Sourdough Rye Bread

Overnight starter:
1 cup sourdough starter
2 cups warm water
2 1/2 cups rye flour

  1. Mix the ingredients in a large bowl.  Cover and let stand overnight in a warm place, such as the oven with the light on.overnight.sourdough.rye.sliced

Ingredients:

Overnight starter
1 cup milk
3 Tbsp butter
3 Tbsp sugar
2 tsp salt
1 Tbsp active dry yeast
1/4 cup warm water
3 cups rye flour, or 2 1/2 cups rye flour, 1/2 cup flax meal
3 – 5 cups all purpose flour
1/8 cup crushed sunflower seeds, to coat top of loaves (optional)
(place roasted, salted sunflower seeds into a slide lock freezer bag and crush with a rolling pin)

The night before: prepare overnight starter

The next morning:

  1. Pour the milk into a saucepan and scald.  Add the butter to melt, then stir in salt and sugar. Set aside to cool for about 10 minutes.
  2. Sprinkle yeast over warm water and let stand for about 5 minutes.
  3. Stir yeast and cooled milk mixture into the overnight starter.  Stir well.
  4. Mix in optional flax meal and rye flour.  Beat thoroughly until batter is smooth.
  5. Cover lightly and set in a warm, draft free place to rise until almost doubled in size; about 30-40 minutes.

    overnight.sourdough.rye.risen.loaves

    Shaped loaves after rising.

  6. Stir down dough.  Add all purpose flour, a little at a time, until a medium stiff dough begins to form.  Turn onto a floured surface and knead in more flour, as needed.  Continue kneading for another 8-10 minutes, or until soft and elastic.
  7. Divide dough in half, cover lightly and let rest for 10 minutes.
  8. Prepare baking sheet or loaf pans.
  9. Shape the dough into loaves.  Place crushed sunflower seeds onto kneading surface and press tops of the loaves into the seeds before placing on the baking sheet/into loaf pans.
  10. Cover lightly and let rise for about 1 hour in a warm, draft free place.
  11. Preheat oven to 375F.  Bake for about 45 minutes.  Note: if the bread is a golden brown at 30 minutes, tend with foil to prevent further browning.
  12. Place baked loaves on cooling racks.

overnight.sourdough.rye.sliced.title


Blessing of the Baskets

My younger daughter and I took our basket into town for blessing.  After a bit of shifting things around, this is what our basket looked like.

2018-Easter.basket

The prosciutto roses were added at the very end, because they dry out so quickly – though they did double duty in holding some of the eggs in place!  I ended up fitting 8 of each type of egg into the basket, so there were some of the tea dyed and onion skin dyed eggs left over.

The embroidered table cloth is one of a couple of antique embroidered linens I’ve managed to acquire many, many years ago.  It has 8 little matching napkins.

Normally, I would have ironed it first, but neither of our two irons made it with the movers.

Which reminds me.  I have come to realize something.

We are now completely finished unpacking!

I had unpacked a box of books in the office some time ago.  I still have a number of bins, but aside from one that’s still got stuff in it because I have to find the right spot of them, they don’t need to be unpacked.  The stuff in them belongs in the bins.

On the one hand, Yay!  We’re unpacked!

On the other… there is now no possibility of finding the missing stuff jammed into an unpacked box somewhere.  That stuff is lost.

Including my two irons.

*sigh*

But I digress!

I snagged a quick photo in the church…

2018-Easter.basket.blessing

Another half dozen or so baskets were added after this photo was taken.

I’m taken aback by the lit candles inside people’s baskets.  I’m reading “fire hazard” all over the place!  :-D  My daughter remembers the last time we brought our baskets here for blessing, several Easters ago.  We had come out for a visit and stayed with my father, in the very house we live in now.  We had included a candle in our basket.  Someone lit it for us!

A couple of the baskets that came after this photo was taken were just huge!  You can kind of tell whose baskets are for larger families. :-D There was one that had the most interesting wire holder for the eggs, that kept them well above the rest of the food.  I love all the different styles of baskets and how they are decorated, too.

If you look towards the back of the photo, on the riser above the baskets at the foot of the alter, is a small basket that doesn’t have any food in it.  That’s a donation basket for the priest, for doing the blessing.  I remember helping my mother bring baskets for blessing, and she would set up the little donation basket, and a second one, where she added some food items from our own baskets.  Other people followed her lead and added more, so that by the end of it, the priest also had a basket full of food!

For the blessing ceremony, a prayer and blessing was said, then the priest sprinkled all the baskets with holy water.  Then he went down the aisle and sprinkled us, too.  We finished with a rousing hymn of blessing, with the priest grinning from ear to ear as he sang, his arms waving to the rhythm.  Clearly, this is a ceremony much enjoyed by the priest, as well!

Then, after we retrieved our basket, I saw him standing there with his iPhone out, taking video of us all, getting our baskets, still with that huge, joyful smile on his face.

It was awesome.

The Re-Farmer

Eggs, three ways!

Today, we did the final preparations for our Easter basket.  Which required an extra trip into town to get more eggs!

We eat a lot of eggs.

I see chickens in our future.

We tend to do eggs at least 2 ways.  This year, with the pickled pink eggs, we have 3 varieties.

First up, here is how the pickled pink eggs turned out.

Pickled pink eggs

Pickled Pink eggs, after 3 days in the pickling liquid.

Of the 12 eggs we pickled, I went over them and picked the 8 best, leaving 4 for us to taste test.

They are quite delicious.  The pickling gives the eggs a very solid, dense feel, and the tang after 3 days in the pickling liquid is just right.

We then got two pots of 18 eggs each going.  One included the onion skins I’d been setting aside for the past few months, along with a splash of vinegar and a dash of turmeric, for extra colour, in the water.  Onion skin dyed eggs for the Easter basket are called kraszanki (kra-SHAN-kee) in Polish.  The turmeric is my own addition.  The eggs are hard boiled until they reach the desired colour; these were boiled for probably 45 minutes.

Onion skin dyed eggs

Always cook extra, in case of breakage!

Of the 18 eggs, 6 broke, leaving an even dozen for the basket.  It’s unlikely we’ll be able to fit all of them in.

The other batch of eggs were boiled for 10 minutes.  The hot water was replaced with cold until they reached a temperature where they could be handled.  Using the back of a spoon, the shells were cracked all over.  After that, they were returned to the stove to boil again, this time with 3 Tbsp black tea leaves, 1 tsp sugar, a tsp of five spice mix (or, as we did today, the equivalent spices I had on hand) and 1/2 cup soy sauce.  They were then cooked for another 45 minutes or so – again, it’s until the desired colour is reached.  The original recipe I’d found for these said to cook them for 3 hours!  We’ve never cooked them that long.

Here is what they looked like, after being drained and rinsed.

Tea dyed eggs

Once they were cooled down, it was time to peel them.

Out of the 18, 7 got damaged while being peeled.

And that is why we cook so many extra eggs! :-D

Peeled, tea dyed eggs

In all the years we have done these eggs, including years when we’d cooked them for much longer, the coloured parts have never looked this intense!

I wonder if our well water has something to do with it?

Meanwhile, I dug out some of my collection of little bowls (I adore little bowls, so I’ve got quite a few) and other pretty dishes to hold the other basket ingredients.  Some of the vinegar and olive oil were transferred to small pitchers with liquid tight stoppers.  For the butter, we whipped some with parsley and fresh garlic.  The salt we’re using this year is Himalayan sea salt.  We are including a mustard this year, too.

Each item in the basket has symbolic meaning.

The bread symbolizes Jesus, who is the “bread of life.” Eggs symbolize the resurrection and new life.  Kielbasa (sausage) represents God’s favour and generosity.  Ham is a symbol of joy and abundance.  Bacon (which we don’t usually include, though sometimes we include prosciutto, instead) represents God’s mercy, as well as generosity.  Butter is a reminder of the good will we should have to all.  The butter is traditionally shaped into a lamb, but we usually have plain or herbed butter decorated with a cross made of cloves.  Some years, we’ve had a lamb made out of marzipan.  The lamb, of course, symbolizes Jesus.

Horseradish, with its strong, bitter flavour, reminds us of the Passion of Christ.  When made into a spread sweetened with beet juice, it represents both the pain of Christ’s crucifixion and the sweet joy of resurrection.  Salt is a reminder for us to be the “salt of the earth” and symbolizes prosperity and justice.  Cheese symbolizes moderation.

We’ve included olives and olive oil in our baskets, symbolizing peace, wisdom and hope.  Vinegar is there to remind us of the crucifixion, when Jesus was given vinegar (also translated as sour wine) on a sponge to drink.  We sometimes include mustard – preferably a type in which the seeds are still visible – to represent faith.

A candle can also be included, to symbolize Christ as the Light of the World.  The baskets can be decorated with spring flowers, greenery and ribbons to represent new life and the resurrection.  A bottle of red wine is also appropriate to include, to symbolize the blood of Christ.  Then the whole thing is covered with a fine embroidered or lace cloth.

The blessing of the baskets, called Święconka (shvye-CHONE-ka is a rough approximation of how it’s pronounced) in Polish, happens on Holy Saturday.  The blessing of the baskets is one of my fondest childhood memories.  Some years, I would have my own tiny little basket to carry (okay; tiny is a relative statement in our family…) for the blessing.  They would all be laid out at the front of the church, on the steps leading up to the altar.  I loved looking at all the different ways people did their baskets, and the different things they would include.  There is plenty of room for variety in this tradition!  I saw all kinds of breads, fruit, and eggs decorated in all sorts of ways.  With so many baskets, the church was soon smelling so good!  There was such a sense of anticipation – so very appropriate, as we anticipated celebrating the resurrection of Christ.

Whatever traditions you have for Easter, I hope that it brings you much joy and peace.

The Re-Farmer

Basic Sourdough Rye Bread

The following is the Rogers Basic Rye Bread recipe, modified into a sourdough version.

We have never used lemon juice in bread baking before, but the packaging for our rye flour recommends it as a conditioner for no-additive flour.  In fact, the packaging is very enthusiastic about the use of lemon juice in bread baking! :-D

We did not use the optional caraway seeds.

This time around, I decided to use our pizza stone.  It’s been ages since I used it, and I wanted to see how it worked for bread baking.  The stone cannot be oiled, so the surface is dusted with only corn meal to prevent sticking.

Basic Sourdough Rye Breadsourdough.rye.prep

1/2 cup warm water
1 tsp molasses
1 Tbsp Yeast

  1. Dissolve yeast and honey in warm water and let stand for 10 minutes.

2 Tbsp molasses
1/4 cup vegetable oil
1 Tbsp salt
1 cup water
1 cup rye sourdough starter
1 Tbsp lemon juice
3 cups rye flour
2 1/2 – 3 1/2 cups all purpose flour

Optional: 1 Tbsp caraway seeds
Optional: egg wash (1 egg beaten in about 1 Tbsp water)

Note: honey can be used in place of molasses

  1. In a large bowl, mix molasses, oil, salt, optional seeds, warm water, lemon juice and starter.  Add the yeast mixture and mix well.
  2. Add the rye flour and beat with an electric mixer on low for 2 minutes, or by hand for about 200 strokes.
  3. Add all purpose flour by the half cup full until a stiff dough is formed.
  4. Turn the dough onto a floured surface and knead thoroughly, adding more flour as needed.  Knead for about 5 minutes, or until dough is smooth and elastic.
  5. Form the dough into a ball and place into a greased bowl, turning the dough to coat all sides with oil.  Cover and place in a warm spot to rise until doubled; about 1 – 2 hours.
  6. Punch down the dough and divide into two pieces for regular sized loves, or four pieces for mini loaves.
  7. Lightly knead and shape the pieces into loaves and place onto prepared baking pans.  Cover and let rise for about 20 minutes.  Score the loaves with a sharp knife.  Add optional egg wash.
  8. Place in centre rack of oven preheated to 350F.  Bake for about 40 – 45 minutes for regular sized loaves or about 25-30 minutes for mini-loaves.
  9. Allow finished loaves to cool on rack.

sourdough.rye.baked

Braided Egg Bread

Today, we made our bread for our traditional Polish Easter basket.  Though paska is usually associated with Easter, this lovely bread is also traditional.

One of the things that’s important for this bread is for the eggs to be at room temperature.

dried blood orange zest

Zest of 2 blood oranges.

This year, we added a new ingredient; dried orange zest.  I like to dry my own zest, and this time I had some from blood oranges.  I deliberately chose the reddest ones to get a much darker coloured zest.

If you have a zester, it makes it really easy to quickly zest your fruit over a paper towel.  Spread the zest thinly and leave to dry.  When dry, store in an air tight container.

Easter Bread

Easter bread ingredients

Not pictured: flour

2 cups milk
1/4 cup butter
2 tsp salt
2-3 Tbsp sugar
3 Tbsp yeast
saffron; a few threads
optional: orange zest
2 eggs
5-6 cups all purpose flour


  1. Proof the yeast in warm water (about 1/2 – 2/3 cups) in a large bowl for about 10 minutes.
  2. Soften the saffron threads in a small amount of very warm water.
  3. Scald the milk, then add in the butter, sugar and salt.  Stir until butter is melted.
  4. Allow the milk mixture to cool before adding it to the yeast mixture.  While it’s cooling, stir in the saffron and optional orange zest, then add the milk mixture to the proofed yeast.
  5. Stir thoroughly, then mix in the eggs (if the mixture seems too warm still, the eggs can be added after the first cup or two of flour).
  6. Add 3 cups of flour and beat thoroughly with an electric mixer for 2 minutes, or by hand for about 200 strokes.
  7. Add more flour by the half cup-full until a stiff dough begins to form.  Turn dough onto a floured surface and knead thoroughly, adding more flour as needed.  If kneading by hand, knead for at least 5 minutes.
  8. Clean and oil the large bowl.  Add the kneaded dough to the bowl, turning it to coat all sides with oil.
  9. Cover loosely and place in a warm place to rise until doubled in size.
  10. Once the dough is doubled in size, turn it onto onto a lightly floured surface and knead gently a few times.  Divide the dough in half, and return one half to the bowl.
    Braided egg bread

    Braided loaves, ready for the oven!

    Braided loaves, after rising and ready for the oven!

  11. To form a braid, divide the remaining half into 3 equal pieces.  Knead each piece a few times, then form into a rope about 12-18 inches.  Join the three lengths together at one end, then braid the dough.  Tuck under the ends to hide them, then transfer the braided loaf onto a well oiled baking sheet.
  12. Repeat with the second half of the dough, or use it to create other shapes.
  13. Cover and allow to rise again for about half an hour.  Preheat oven to 350F.
  14. Optional: glaze the loaves with an egg wash (2 egg beaten with about a tablespoon of water) to get a nicely browned surface.
  15. After the loaves have risen, place into the centre of the preheated oven and bake for about 30 minutes.
  16. When done, allow the bread to cool slightly before carefully removing from the pan to a cooling rack.

Egg.Bread.baked