Our 2021 garden: asparagus is in!

Well, it hasn’t really cooled down all that much, but I wanted to at least get the asparagus planted.

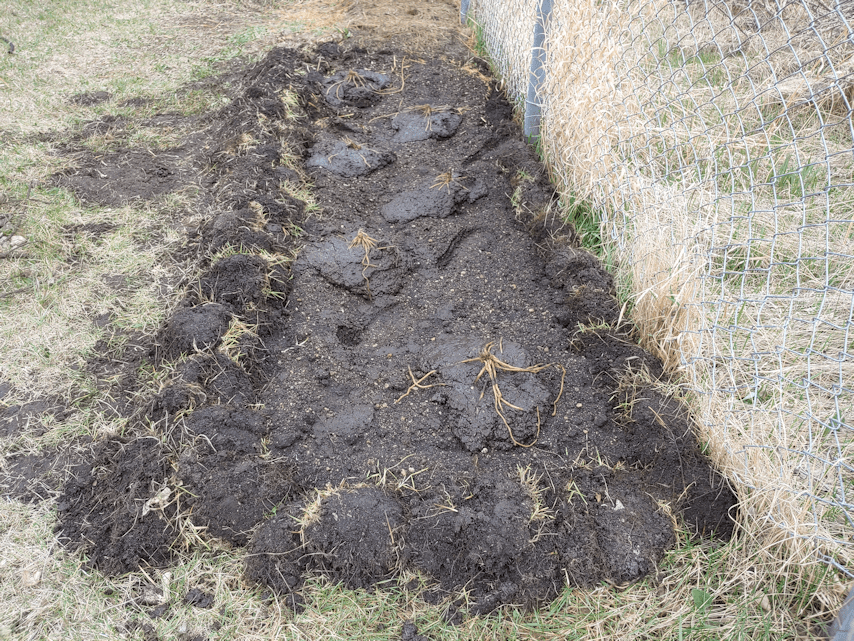
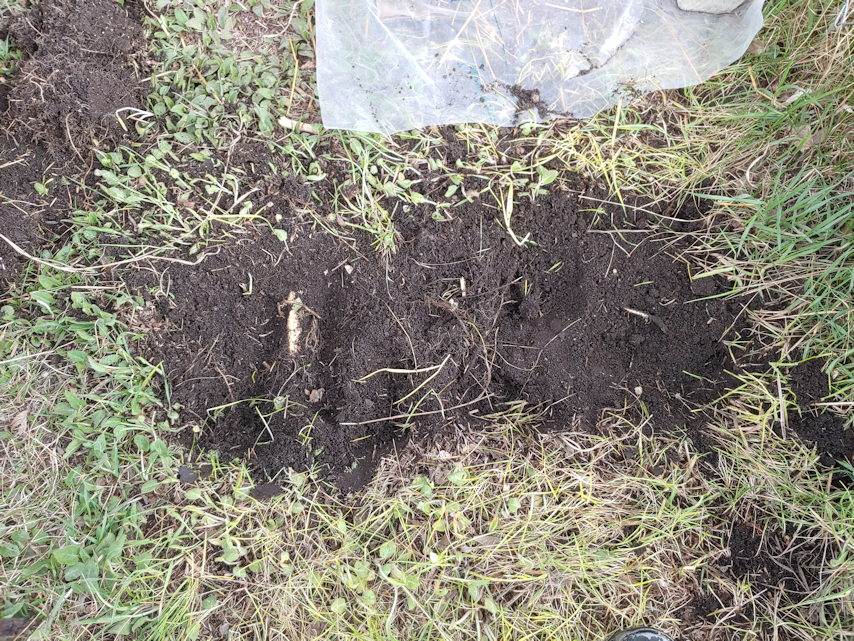
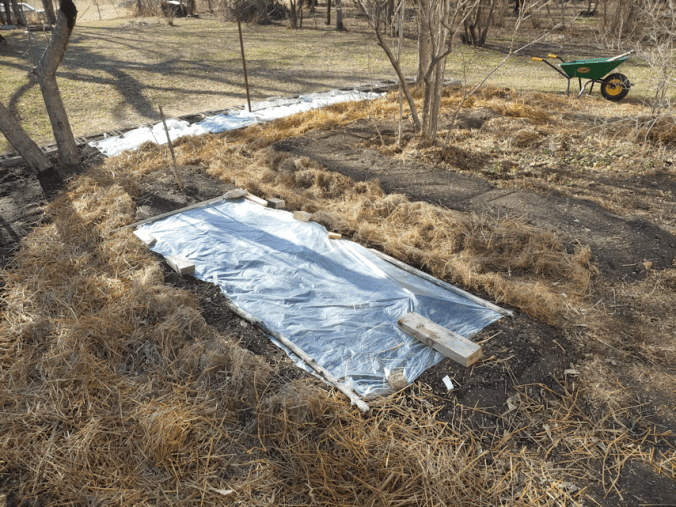
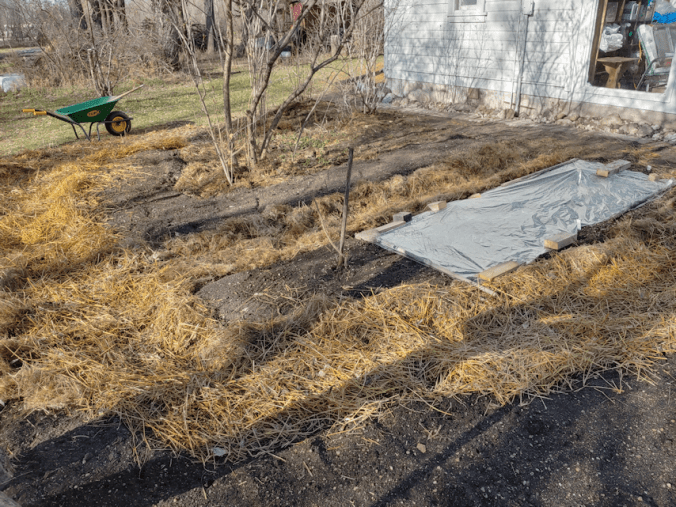
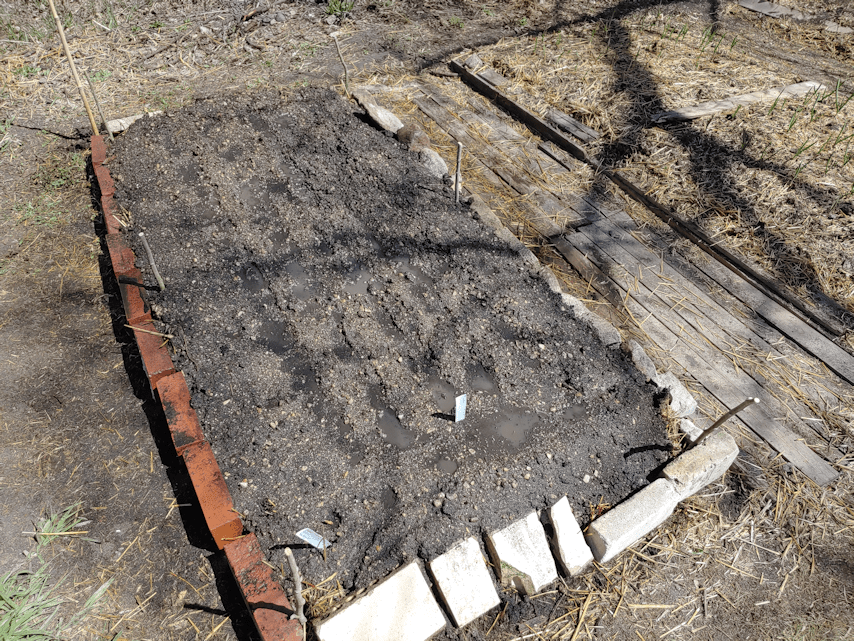
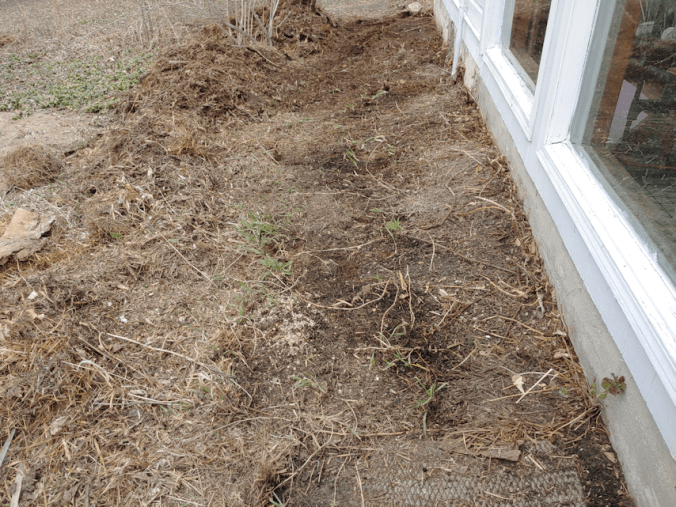
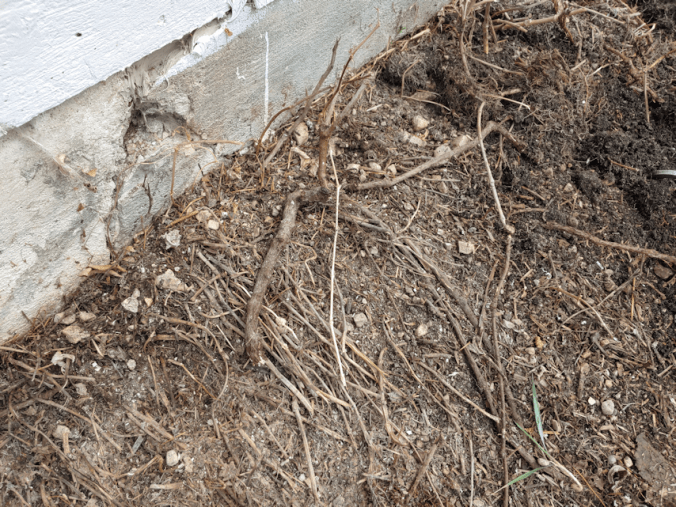
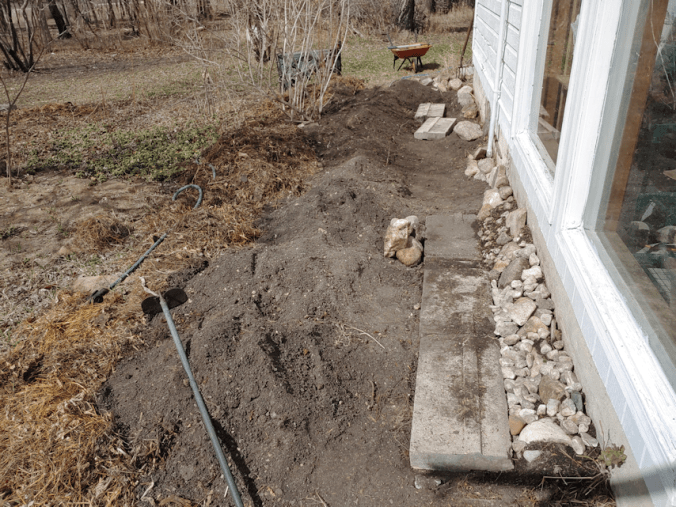
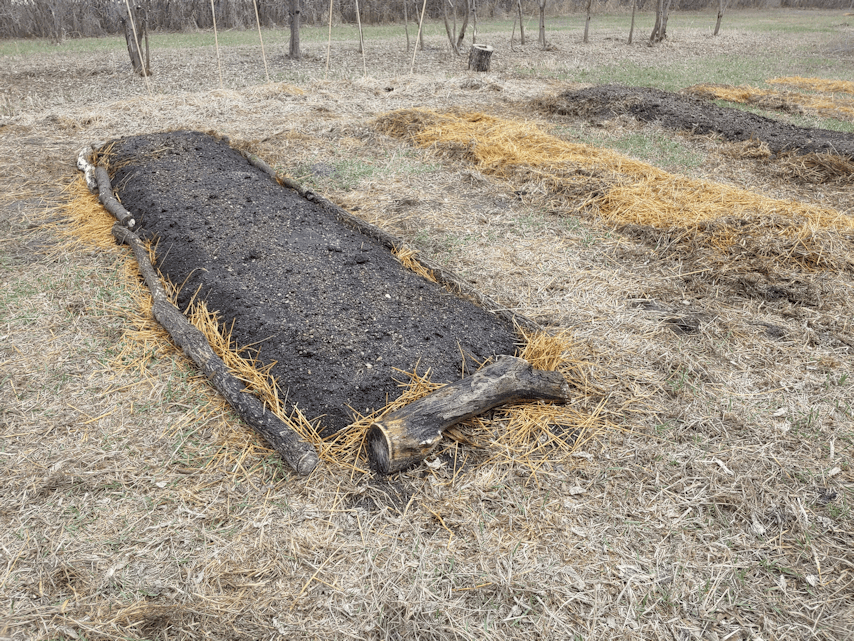
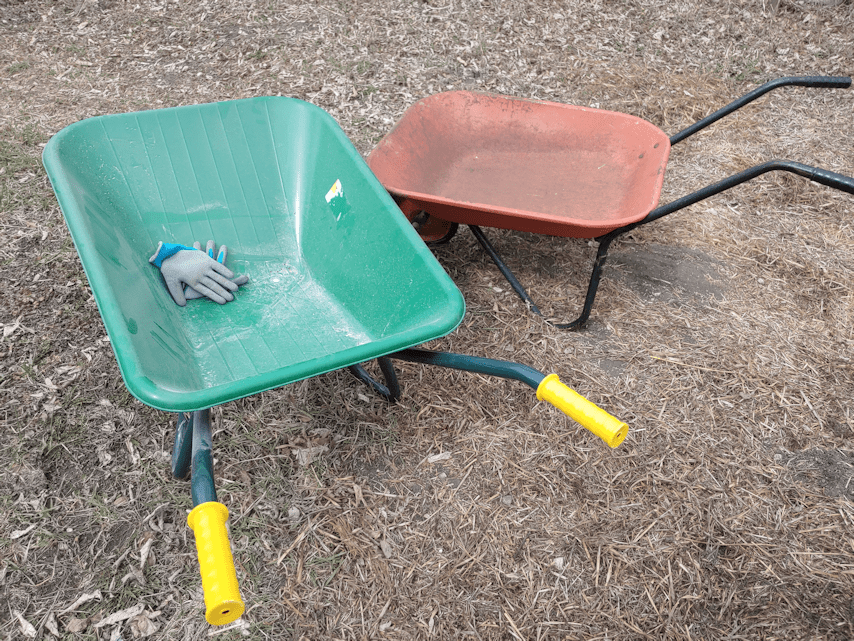
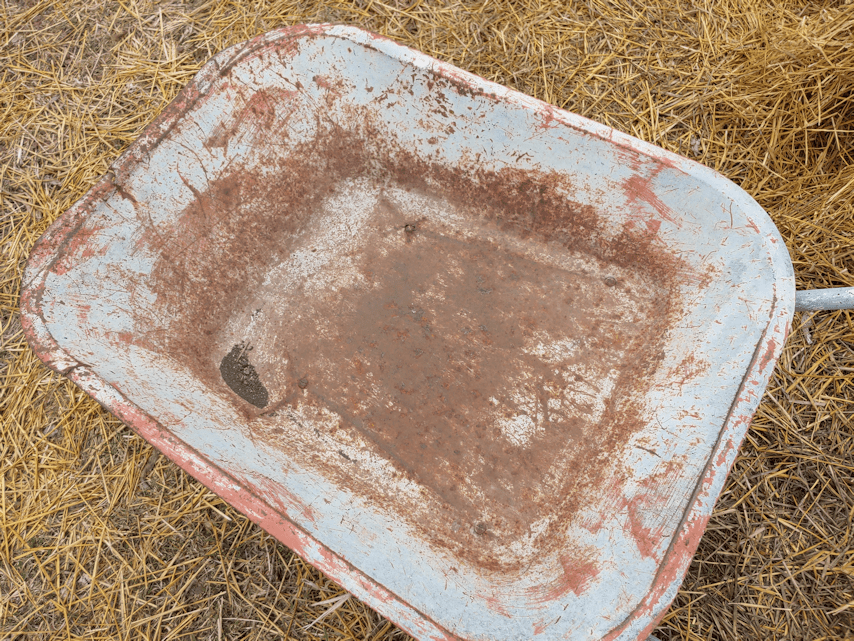
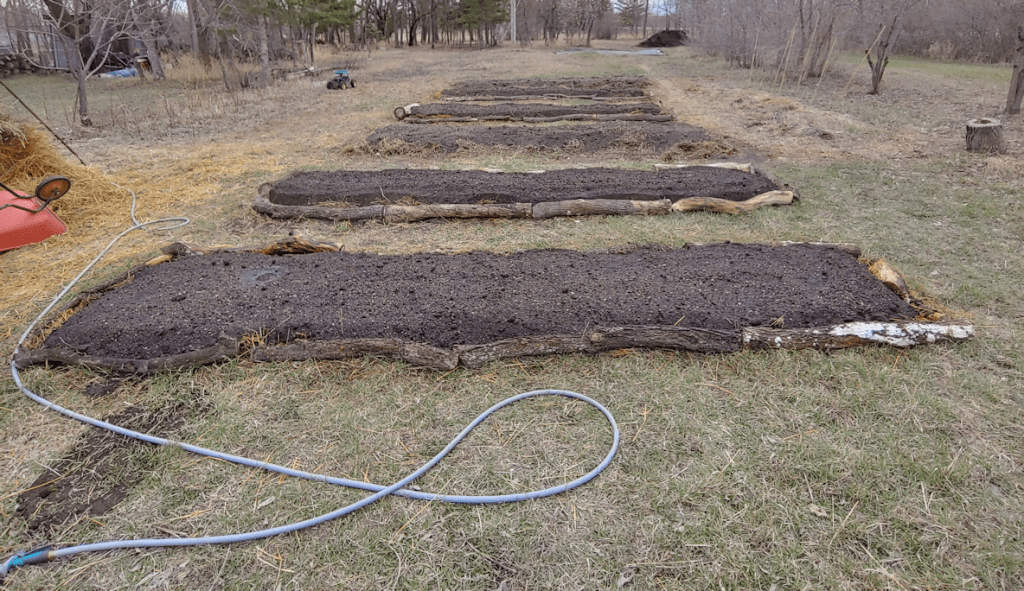
The first thing was set the crowns to soak in water before covering the cardboard with a layer of soil, and laying out the sod around the edges to make a sort of wall to support the height of the bed. The base got a very thorough watering. Then we mixed a load of soil with peat, thoroughly soaking it in the wheelbarrow while mixing it with a spade.

That took a while. :-D

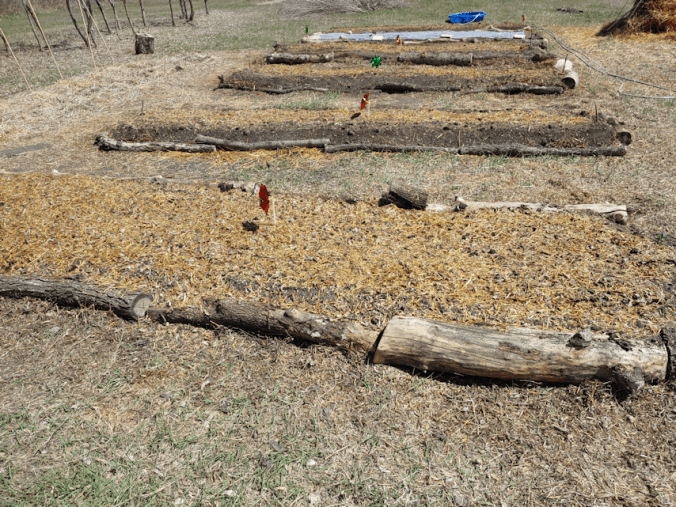
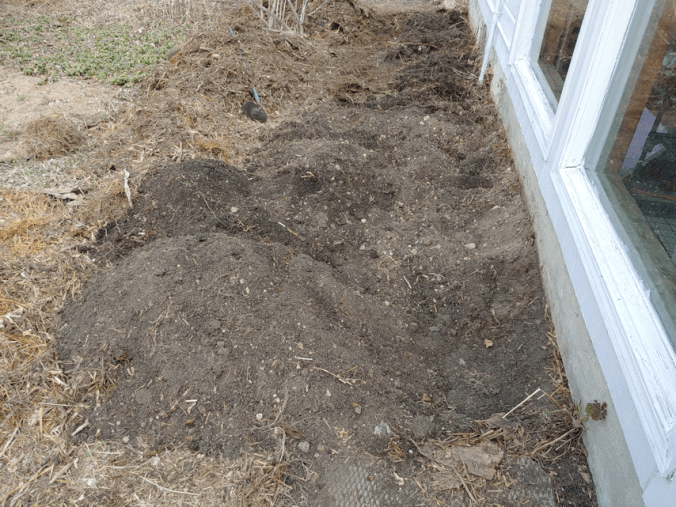
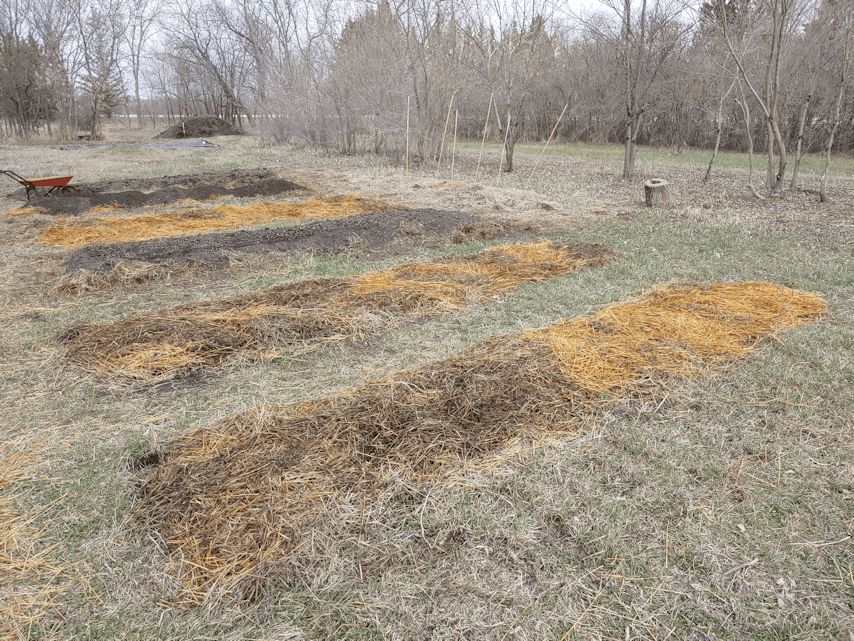
The wet peat mixture was used to create the hills for the crowns. They’re supposed to be planted 2 feet apart. With the bed being longer than 6 feet, they were staggered a bit.

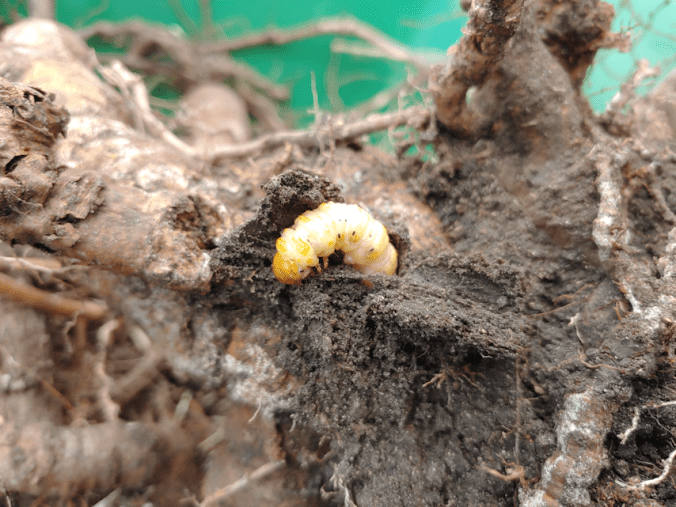
They look a bit like facehuggers. :-D

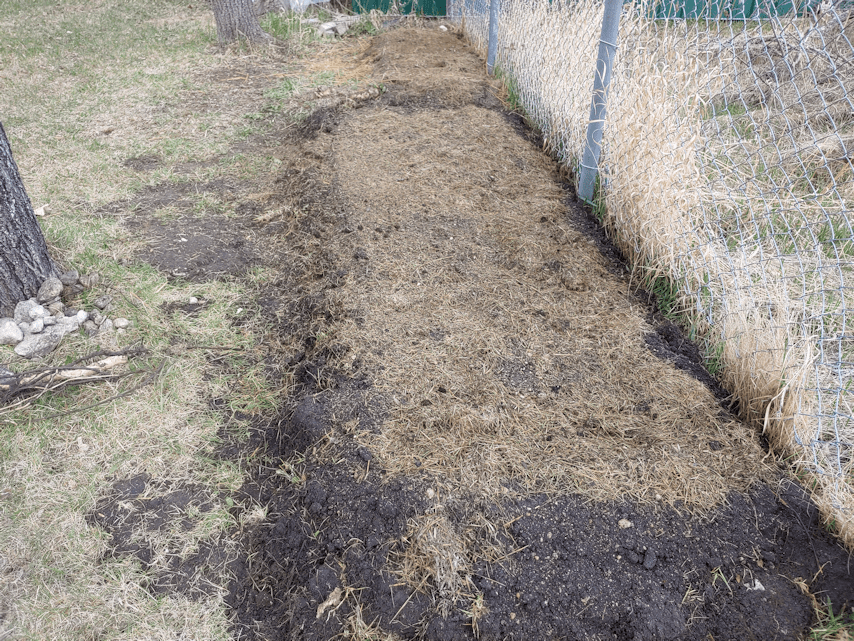
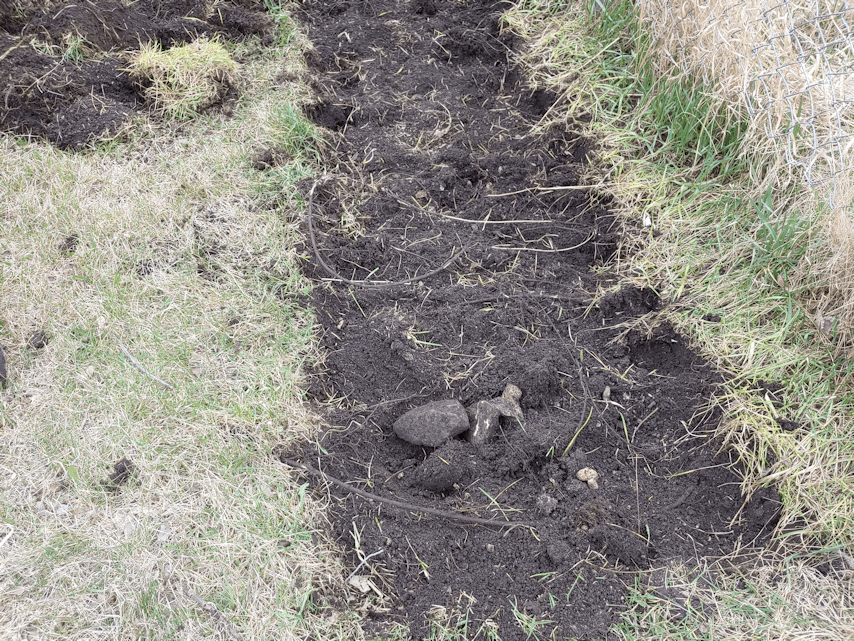
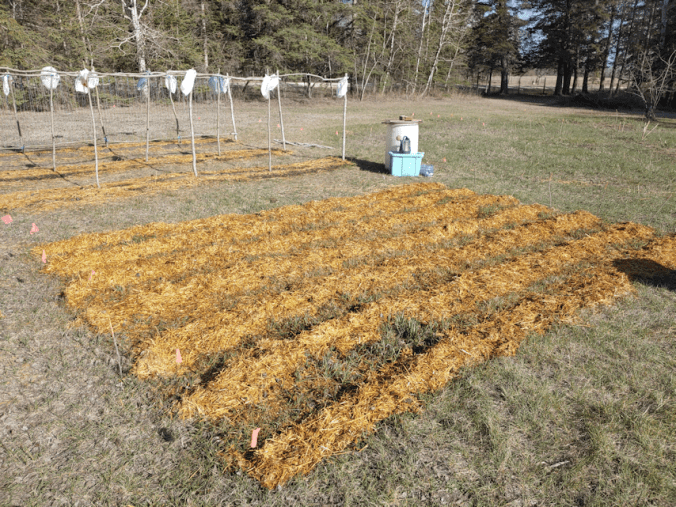
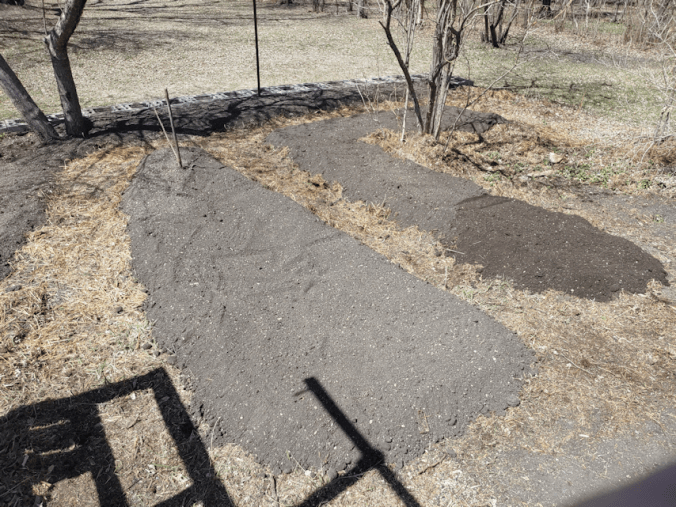
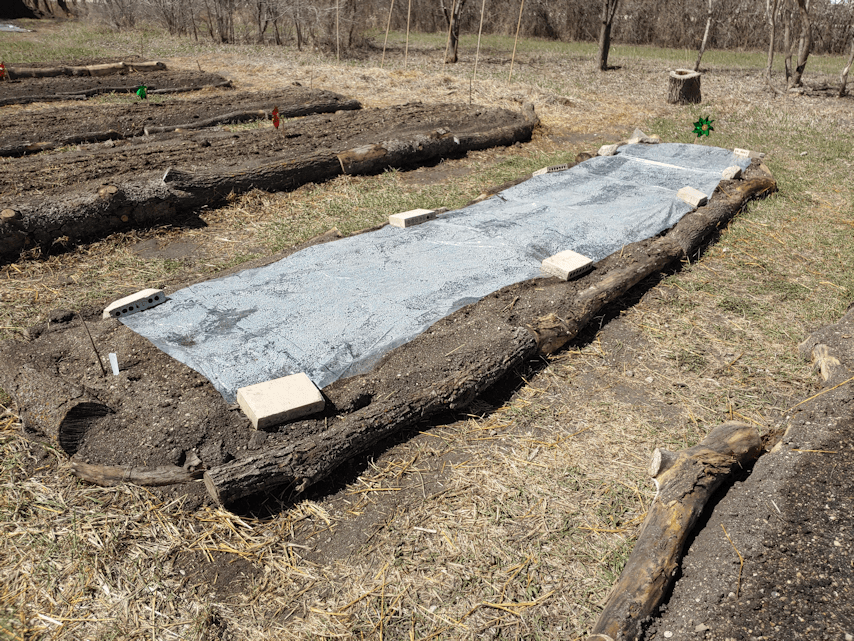
The crowns were then covered with a rather deep layer of soil, and a light layer of mulch. From what I’ve read, they may need more soil added later.

We will have to make a point of watering it deeply over the next while, just to get the top layer wet through to the crowns. Wetting it in layers should help prevent them from drying out until that’s accomplished.

It’s past 8pm as I write this, and we are finally starting to cool down again. I’m going to see if I can get to bed before 3am for a change. I tried to do that yesterday, and ended up still wide awake at 4am. *sigh* Anyhow, I’d like to get out earlier in the day to continue working on the block for the corn.

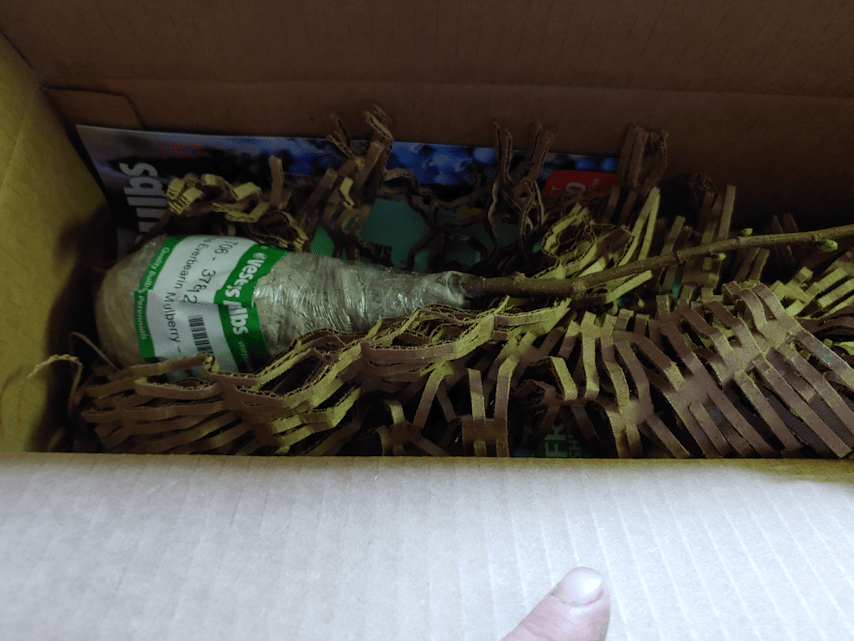
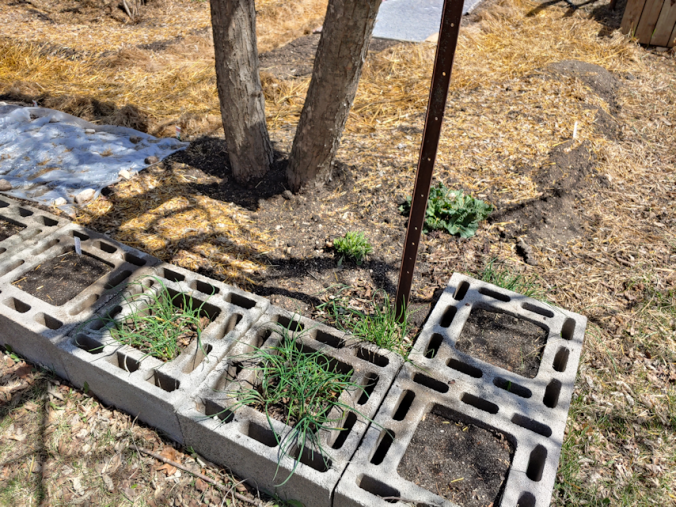
Meanwhile, the girls and I have been talking about finding a different permanent spot for the mulberry. One of the best suggestions was to plant it along the north side of the big garden; we intend to plant fruit and nut trees in most of this area anyhow, so why not start now? Then I remembered that the location we were talking about has buried telephone wires somewhere in there. I had tried contacting the phone company about the location and was given the contact information for the Call Before You Dig organization. I ended up sending them an email with our longitude and latitude.

I’ve discovered why people have such a hard time finding our place in the process.

I tried several different map sites to pinpoint our location, but our physical address would not work. I finally just found us manually, and discovered that the road that goes past our place is not labelled. At all. This road has two names; one is the numerical grid number, and the other is my family name. Neither are on the maps.

All but one of the stop signs along our road with the name on them have disappeared. There had been one on one of the stop signs at the intersection near our garden, but not long after we moved here, someone broke the stop sign and the street sign on it disappeared. I am pretty sure this was no accident, since this happened after our first falling out with our vandal, but whatever. The road number was on the other stop sign, so it’s still there. I’d asked about having the road signs with the name replaced at all the intersections that are missing, but I think the councilor I spoke to (who also happens to be the guy renting most of this property) forgot about it. Anyhow. Now that I know that the road that runs past our driveway is unlabelled on any of the maps, I’ll have to find out how to get that fixed.

Meanwhile, I’ve not heard back from the Call Before You Dig people.

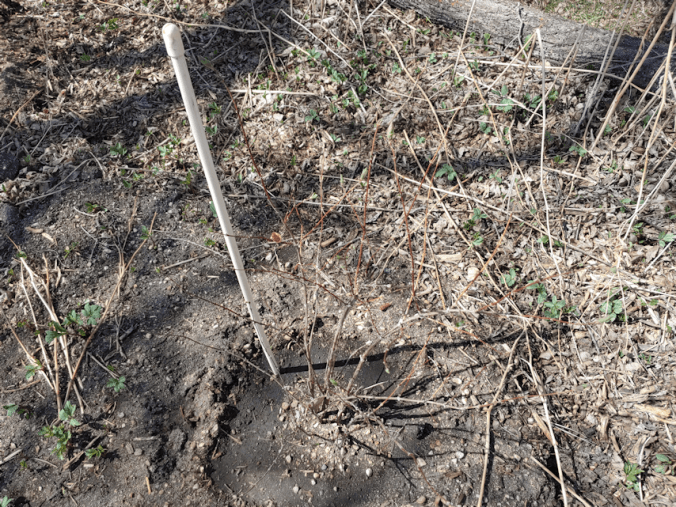
Until we do, we’ll avoid planting trees along that strip. There’s already a self sown chokecherry tree there. Those don’t get very big, so we should be able to leave it. The mulberry, however, gets much bigger, so we’ll have to think again about where to put it. It needs to go into the ground right away, so we can’t dilly dally about the decision!!

The Re-Farmer

Our 2021 garden: order in, and digging trenches!

Our Veseys order arrived in the mail a day early!! We are so thrilled!

One of the boxes was the Purple Passion Asparagus (6 crowns), and Black Form Iris.

The other box was our Illinois Everbearing Mulberry.

It even has leaf buds!!

We still need to take down a whole lot of dead trees in the area we want to plant this, and we’re thinking that for this year, we’ll plant it in one of the grow bags we made for the potatoes, then maybe keep it in the sun room over the winter. Either that, or find another place for what will become a fairly large tree that needs full sun, and zone 4 protection to survive in a zone 3.

The asparagus, at least, are decided on. While the girls did the evening watering, I started on trenching.

We’ve been keeping this space near the Strawberry Spinach bed covered with cardboard and regularly soaking it. The grass below was dying off quite nicely, and the ground was good and soft to dig in.

Well. Except for the big roots.

And all the rocks.

After the girls finished the watering and uncovering the sprouted beds, they came over to give me a hand. Most of the roots we could cut out with the loppers.

As with the other beds, this is going to be built up, so all I really wanted to do was take off the sod and get rid of the bigger roots and rocks.

Except for that really big root running across the trench, near the middle. Once we realized how big it was, we just left it.

One of my daughters took on stacking the rocks.

In a nice little display! :-D

There were too many to balance on the stump, so she stacked the rest nearby.

All these rocks, just from removing the top 3 or 4 inches. We could have pulled out many more!

Tomorrow, we start bringing in the new garden soil and plant the asparagus. The sod that was removed will be laid upside down along the sides to stabilize it. When we’re done, it should match the Strawberry Spinach bed in depth.

In two years, we should be harvesting our first purple asparagus! Before then, I expect to get more for planting elsewhere. My husband doesn’t care for asparagus, but the girls and I all like them, so that is reason enough to plant more than just these ones. :-)

Since none of what came in today will be planted until tomorrow, they are all sitting in the cool of the old kitchen.

I need to think about that mulberry. This is what it says on the Veseys page about planting them.

Planting:

Unless you have heavy clay soil, there isn’t much to do in terms of soil preparation. You can add amendments such as compost or peat moss to the soil and/or a layer of mulch over the root area after planting will help retain moisture, especially during the first year. While it may be tempting to add fertilizer or manure to your freshly dug hole before planting your new tree, PLEASE resist! Fertilizer or manure in close contact with the root system could chemically burn the roots and potentially kill the tree.

Mulberry trees can grow quite large, up to 15-20 feet tall. Avoid planting near walkways and driveways as the fruit will drop and create stains. Mulberries are self-fertile and require full sunlight. 

https://www.veseys.com/ca/illinois-everbearing-mulberry-37812.html

Our new garden soil has three types of manure and compost in it, but it is thoroughly broken down. Would it still be too much to plant it in? That’s what we would be using in a grow bag, if we did it that way for the first year. Maybe it would be better to just find a different spot and plant it permanently. I can think of a good area that would work; the only downside is that it would be more difficult to get water to it.

Whatever we decide to do, it’ll have to be done quickly!

The Re-Farmer

Our 2021 garden: haskap and corn plot status

The girls were able to come out and give me a hand this afternoon, so things got done a lot faster. Especially for me, when they booted me out of the garden and into the house. Apparently, I was looking pretty sun burned! Not feeling it, though. ;-)

In my focus on watering, I’ve been eyeballing the haskap bushes. The male is doing quite well.

It’s even beginning to show flower buds!

We planted these two summers ago, so this year should have been a year with good production.

That’s not going to happen.

I wish I knew what was going on with this poor female haskap! The only leaf buds are on the very tips of branches, and not even all of them. I’d expected to get more of them by now, but I haven’t seen any yet. We might have to order more online for next year, instead. We shall see.

With all the watering they’re getting, my mother’s yellow flowers in this bed are already starting to come up strongly in places. We’re not watering the entire bed as thoroughly; just the haskaps and the lilac bush. I expect the lilac to do better this year, now that the maple tree that was shading it has been cut down.

Meanwhile…

My daughters and I marked out a block for the corn we will be planting soon. This block is to the West of the peas, so it can actually be reached with the hose. One of my daughters worked on soaking the area while the other helped me with chopping up straw with the lawn mower to lay down in the block.

The rows are two feet apart, and the corn needs to be planted 1 ft apart. We just have one packet of these seeds, so this should be more than large enough. The variety being grown here is called Dorinny. While I found them at Baker Creek, apparently they had largely disappeared for decades, until they were rediscovered and reintroduced by Wood Prairie Farm. They are a Canadian heritage breed, can handle cold soil, and matures in only 75 days. I’m quite looking forward to them! These are a type that I hope to save seeds from.

One of the bonuses of these being planted earlier and maturing so quickly is that the chances of cross pollination with the Montana Morado we’ll be planting at the other end of the garden will be greatly reduced, even with our winds. They will mature at completely different times.

We know this area is low in nutrients, especially nitrogen, which corn needs a lot of, so we’ll have to take extra steps to ensure they have enough. The fresh, nutrient filled garden soil mix will be the first boost. We picked up a water soluble vegetable fertilizer that has higher nitrogen levels, but in cleaning out the old kitchen, we found a water soluble fertilizer that’s even higher in nitrogen. We also found a pump sprayer, still in its box, so we’ll be able to use it to feed the corn, even in the furthest plots, where the hose doesn’t reach. We do plan to pick up more hose but, for now, the rain barrel and watering can are working out just fine.

The chopped straw was also added to the rows of peas as mulch. Being able to run the lawn mower over the straw a couple of times really makes a big difference. I find myself thinking that I wished we’d thought of it earlier, but then I remember that when we were using the straw previously, we were having problems with the push mower that was here. I did use the new push mower to do it last fall, but that’s when it stopped working completely. I’d chopped up just enough to mulch the garlic for the winter.

One thing’s for sure: we’ve made a huge dent in that straw bale! We’ll need to get another one by the end of the season, for sure. :-)

The girls went on to thoroughly water everything for the evening. Tomorrow, we start hauling soil again… after soaking the ground some more, and stomping down the chopped straw. I do wish we had enough cardboard to lay over the grass, but there isn’t enough in our recycling to cover even a single row. I supposed that’s a down side of our bulk-buying, low packaging shopping habits!

Once this block is planted, we can move on to preparing the beds for everything to be planted or transplanted out here, after June 2. After the girls kicked me out of the garden so they could finish, I checked how things were growing in the sun room, and am very happy to see more summer squash and melons have germinated. It doesn’t look like any of the winter squash or pumpkins have started yet. Still nothing on the rest of the gourds, either. :-( I’ll be keeping a close eye on the climbers over the next couple of weeks. How many germinate will tell me how big of a squash arch we will be building.

The day after tomorrow, we should be getting our first batches of items in the mail from Veseys, including the mulberry tree. I am thinking of planting it in a grow bag this summer, though. There are too many dead trees in the area it will be going in permanently that need to come down. I’m hoping they are solid enough that we can use them for building materials.

Next week, the potatoes will be arriving, and we’ll set up the grow bags we made from feed bags for those. We settled on having them along the chain link fence near the storage house, where they’ll be out of the way, yet easy to access and tend to. Plus, full sunlight. Hopefully, using the grow bags will alleviate the slug problem I found we had, last year.

It feels so good to be getting so many things into the ground! Now we just have to wait and see how many will actually grow! ;-)

The Re-Farmer

Our 2021 garden: last beets, and mulching

I’m taking a bit of a break from working outside, to avoid the hottest part of the day. We’ve reached 22C/71F, and our high is supposed to be 23C/74F.

One of the things I’ve been trying to do early in the day is water all the beds that we’ve planted. I’ve been concerned about them, since we are so incredibly dry right now. It’s hard to give the beds even a shallow watering, never mind the deep watering they need. The problem is that the surface dries out so quickly. What we need is a mulch. The only thing we have for mulch right now is straw. Which is fine if I’m mulching around larger plants, like when we transplant our squashes, etc. Not so good for things like greens.

What I do have, however, is a lawn mower.

So after I planted the last of our beet seeds – three types all mixed up – in the L shaped bed in the old kitchen garden, I brought out the mower.

We already had some chopped up straw that had been on top of the garlic beds; we’d removed most of it and it’s been sitting in the kiddie pool, waiting for use. I chopped all that up a couple more times with the mower, then filled the wheelbarrow with more straw and chopped it up several times, too.

The finished mulch, which now included leaf litter that was on top of the lawn, went back into the kiddie pool, which made it very easy to drag around to where it was needed.

The mulch is so light, I could let the wind distribute most of it for me!

The L shaped bed is all beets. I had thought to put some carrots along the edge of the bed, but there was no room! In fact, I ended up broadcasting the last of the seeds in another little spot.

The patch of mulched soil near the plastic and the tree is where the last of the seeds went. Almost all of these beets are last year’s seed, so who knows how many will germinated.

I then scattered mulch onto the poppy bed, too.

After thoroughly watering everything, I moved on to the big garden.

Once again, I could let the wind lightly cover the beds for me. The beds at each end, with the onions, got fully covered. The spinach beds have their first sowing in the middles only, so I just focused on that area. When we sow more in another week, we can add more mulch then.

Everything got another thorough watering. All the beds will be watered again this evening, when it starts to cool down.

Until then, my next job is to mark off and start preparing the block to direct sow the one variety of corn we have that needs to be planted before last frost. That’s going to be out by the peas, and that’s where we’ll be working on for the next while, as we prepare beds for the beans, corn and radishes, sunflowers, squash and gourds. Then, last of all, the block at the opposite end of the garden, where the Montana Morado corn will be transplanted. None of the sunflowers or corn starts have germinated yet, but it hasn’t been very long yet. I’m just impatient! :-D

We will also use the lawnmower to chop up more straw for more light surface mulch. That, at least, I’ll be able to work on in the shade this time! :-)

The Re-Farmer

Our 2021 garden: more beets and carrots

So my darling daughters did some planting, while I fell asleep in a bed full of cats. :-D

The plastic covered bed in the foreground is two types of carrots, plus the kohlrabi seeds from last year.

The plastic covered bed in the background is the beets, including seeds from last year, so there are 4 types of beets in there, all planted in short rows. They also planted the purple kohlrabi in between the yellow onions and shallots. I’m quite excited about those!

While the girls finished up watering the seeds and covering them, I filled the paths with the old flax straw and, when that ran out, the wheat straw we still hadn’t moved off the septic tank, right around the corner or the old kitchen. I tried to pile it more against the sides of the beds than the middles, for erosion control. I think it’ll do the job for this year.

The L shaped bed has nothing in it!

There are still beet seeds from last year. I think maybe I’ll mix them up and scatter them, and we’ll have beet surprise! My daughter didn’t want to plant beets in there because she’s thinking the deer will get at them. We can protect the ones by the retaining wall more easily, but I’m sure I can come up with something to help protect them from hungry deer. Especially right in the middle of the garden like that. We still have pelleted carrot seeds left. The deer don’t like carrots, so interplanting the two might help as well.

Hhmm. We even still have some Merlin beet seeds left over from planting by the garlic beds. I could mix those in, too. I know the girls really like beets, so having lots will not be a problem. :-)

Speaking of the Merlin beets.

The plastic was blowing loose from the hoops over the Merlin beets, so we fixed those up a bit.

We cut about 1/3rd of the hoops off, then put them back on their sticks. The excess plastic on the sides were then wrapped around a couple of boards from the junk pile, to keep them from blowing around. Much better than the small rocks I was using before. It meant not needing the lengths of hose on the centre hoop, so those got added to secure the ends more.

This plastic is really, really thin – not at all the kind of plastic one would normally use as row covers – but it seems to be holding out okay. We’re even reusing pieces from last year, plus we still have quite a bit on the two rolls we found while cleaning up, if we need more.

After this, we prep a block for the corn that gets planted early, then I should be able to take a day or two off from hauling loads of soil. :-D

The Re-Farmer

Our 2021 garden: old kitchen garden, ready for planting!

It’s finally done!!

The old kitchen garden beds are done and ready for planting.

These beds were made fairly deep, as they will have root vegetables planted in them.

The only problem is that the soil is going to fall into the paths without something to support the sides. For now, the flax straw I’d taken out and was going to chop smaller with the lawn mower is going to be laid down in the paths, along with straw, until we can get pavers or something to make more permanent paths.

After these photos were taken, I watered everything, including the poppies that were sown last night, and the lilacs, honeysuckle and roses. I do hope that little pink rose survives!

For now, the beds are sitting and warming up in the sun. Later on, the girls will do the planting. There’s a second type of beet, plus two types of carrots, to go in here. I also dug out the seeds left over from last year, which includes beet seeds left over from the variety pack we got last year. There was even some green kohlrabi left. So the girls will plant those, too. The purple kohlrabi is going to get planted in between the shallots and the yellow onions (I almost forgot about those!), which they will take care of today, as well.

Next, a block needs to be marked out and prepared for the one type of corn we have that needs to be planted before last frost.

Absolutely nothing we’ve planted outside so far has started to emerge. I know it’s too early, but I still can’t help but wonder if we did something to kill them off or something! :-D At least I’m finally seeing some summer squash and melon seedling starting to emerge in their cups in the sun room. Not very many, still, but at least I can be sure we’ll have a couple of varieties to transplant and a few weeks!!

My entire body aches from hauling all that soil and spreading it (yes, the girls helped – and they’re feeling it, too!!), but I’m so happy with how things are looking so far!

The Re-Farmer

Our 2021 garden: getting things planted, and trying things out

This morning, I wanted to get that half-bed planted with carrots. I was happy to discover that the Kyoto Red carrots I’d ordered were pelleted seeds (I’m sure I knew that when I’d ordered them, but completely forgot!), so they could go in right away. Before I did, though, I cooked up some cornstarch gel, and set the other two varieties of carrot seeds to soak. Last year, we used the technique described in the video below to plant carrot seeds, and it worked very well, so I wanted to do it again.

Those will wait until tomorrow, though. For now, the carrot bed in the old garden area is fully planted, and I covered them with plastic after watering them.

They’ll be checked often, and as soon as green can be seen, the plastic comes off.

The next job was the new garden bed beside the garlic.

Before topping it with fresh garden soil, I found what I could to shore up the sides, so things wouldn’t erode. This is a pretty small bed, so it only took two loads of soil to cover it.

Then began my experiment.

After planting the middle with Merlin beets, then surrounding it with the last of the yellow onion sets, I cut small lengths of poplar that were fairly thin. I’d opened up the three dollar store hula hoops I’d bought and removed the bits of what looks like decorative rocks that were inside, to make a rattling noise. The sticks were of a size to fit snugly into the openings of the plastic. I also cut lengths of old garden hose and split them lengthwise and grabbed some plastic that was used to cover one of the garlic beds over the winter.

I suppose I could have cut the plastic tubes from the hula hoops shorter, but I really didn’t want to fuss with it. I was able to fit the ends over the sticks and push them down quite far, even though some of the sticks were nubbly from twigs I’d cut off.

I used the pieces of hose to hold the plastic sheet to the hula hoops. Then I used packing tape to gather up the loose pieces at the end and pull things taught. I ended up getting a couple more piece of hose and used them to attach the plastic to the sides of the center hoops as well.

This thing is going to blow away in our next stiff wind! :-D It is by no means durable! This is more about keeping the deer away than anything else.

One of the wind socks we got to help deter critters ended up being spun so much in the wind, the twine I used to tie it to a tree broke. It’s in the shape of a spiral, so I hooked it to the top of a bamboo stake, then wrapped the spiral around the bamboo. It won’t get blown around as violently anymore, but still moves around the stake, so it should still help startle critters away.

So that bed is now done and planted!

In between watering the new bed, I made sure to water the strawberry spinach bed, and covered that with plastic, too. Though we’ve been diligent about watering, these are almost surface sown, and the surface dries out very quickly. I’m hoping it’s not too late to put the plastic over them. :-/ We shall see!

So that worked out rather well. Tomorrow morning, I’ll see if the hoop cover is still there, of it it blew away during the night. :-D

The next job was much larger! But that will in in my next post.

The Re-Farmer

Our 2021 garden: outdoor planting – eventually. Also, we have flowers!

Today was the day to start planting our onions. I wanted to get the transplants out, to make room for the squash in the sun room, and get the onion sets in.

The plan was to have onions on either side of the kale that has already been direst sown, in the bed on one side, then plant the rest of the onions in the bed at the opposite end, with kohlrabi in the middle (those don’t get planted for another week). Deer don’t like onions, so we’re hoping that between those, and the flashy windmills, they will stay away from the things they do like, such as the spinach.

This is one of the beds we made last year, that we simply topped up with new garden soil. I realized that the soil was starting to wash away on the sides, so I brought over more logs to act as walls.

Thankfully, these logs have been sitting out for 2 years, so they’re quite dry and light.

I didn’t have any short enough to use as end caps, though. We’ll have to take care of that later.

Once the logs were in place, I brought over more soil to fill in the sides, so I’d have room to plant into, without anything collapsing down into the logs.

My younger daughter joined me when I was just finishing up the first bed, so she continued to bring soil to add to the sides of all the beds, while I brought more logs to shore up the other bed from last year, that didn’t have any yet.

We’d used up the smaller logs when we first starting building the new beds, so the more logs I brought over, the bigger they were getting! Which is good, I suppose, since these are deeper beds than the new ones.

My daughter continued adding soil to the beds while I started transplanting the Nostar onions we started from seeds. There were three very different sizes! The ones that were in peat pellets ended up being the largest ones, while the ones in the K-cups had started out larger, but did not retain moisture as well, until I moved them onto their own tray, where they could be watered thoroughly without drowning the onions in the pellets. Then there were the ones that were started some weeks later. There are still some seedlings in the cups they were sown in; I only took the biggest ones to finish off the row.

On the other side of the kale, my daughter and I planted a three row grid of the Red Karmen onion sets that arrived in the mail yesterday.

By this time, we were done for the day!!

This bed is where the rest of the onions and the shallots will be planted, with the kohlrabi to go in the middle. The bed to the left is the one that’s half-planted with carrots. A second variety will go in the other half as soon as possible.

Oh, I almost forgot. When I was doing my rounds this morning, I took another look at some of the old corrals and other things around the barn and outer yard, hoping to find something we could salvage and build raised beds out of. There was nothing! Everything out there is just too rotted out. There’s possibly usable material that was stacked in an old shed, but the shed has collapsed on top of it, so we’d have to remove an awful lot of stuff, just to see one way or the other. It’s such a mess, just getting into there to move stuff has a high risk of injury. It’s unfortunate, but there’s pretty much nothing to salvage at all, never mind to build accessible raised beds with. Ah, well. It was worth a look!

After putting things away, my daughter stayed out to tend other things while I transferred the squash to the sun room and set up the lights as best I could. They are long aquarium lights, so I can only set them up vertically along the shelf. It will be good when we can invest in some grow lights, that we can hand over each shelf. At least the sun room does get a lot of natural light through much of the day.

While I was working on that, my daughter made an exciting discovery.

The crocuses have started to bloom!

They are so tiny!!!

I wasn’t able to get a photo of the third type, which are purple and white.

I will have to make sure to check these tomorrow morning, so see how much they open!

My daughters are just thrilled to see them. I don’t think either of them expected them to survive February’s Polar Vortex, having been planted just this past fall. So they are really excited right now!

An excellent note to end the day on. :-)

The Re-Farmer

Our 2021 garden: old kitchen garden, part one

A change in plans.

Today, I wanted to get started on the old kitchen garden, where we intend to plant the poppies.

This is how it looked at the start.

The hose is from the sump pump in the old basement.

It has not turned on in ages. It’s simply been too dry.

You can see a path has started to form, a couple of feet from the wall. This is mostly from the cats crossing the garden, though we sometimes walk through there, too. The plan was to add new soil against the wall, to plant the poppies, and put in a stepping stone sort of path where one naturally formed. We found some concrete blocks out near the barn that we decided to use for the paths.

But first, it needed to be cleared.

Our first summer here, we did a major clean up of this old garden, removing a fence, cleaning it out as best we could, laying down cardboard, then covering it with straw, grass clippings, kitchen waste, and any soil from various places that we could get it. You can read about the clean up we did here, here, here and here. Yeah. It took a while! (all links will open in new tabs)

My mother had flowers growing here, and quite a few of them made their way through the layers. So did the crab grass and a vine we’ve been fighting continually since moving here. So the first thing I had to do was rake away the mulch, down to what was left of the cardboard layer. You can see lots of roots that were uncovered!!

Most of the biggest ones were from that invasive vine. It used to cover the entire wall until my brother and his wife pulled it down while painting the house, the summer before we arrived. They were causing damage, so we don’t want them growing back.

Speaking of damage, that crack is in the foundation under the old kitchen, which was tacked on to the log cabin portion of the house at some point. There’s a crawl space under there.

My brother told me about fixing the broken attic window above the old kitchen. It never occurred to me that the glass would still be on the ground! We’d laid cardboard over it, and never new it!

Finding glass from a broken window, I can understand. But this?

Why a spoon?

At this point, I was breaking up the soil with the fork and pulling out lots of roots.

Lots of roots.

So many roots.

Which created a problem I did not expect.

I was pulling roots out from under the old kitchen foundation, and the concrete floor of the sun room. In the process, soil started falling out from underneath.

No wonder the windows in the sun room are cracking as it shifts!!!

This required a change in plans. There was no way I was going to turn this into a garden bed, where watering it might continue to undermine the concrete. I needed to get those roots out, then shore up the sides.

It’s a good thing we have a nice big rock pile over by the power pole. We also had piles of smaller rocks we’d gathered from the garden, though not very many.

Large rocks were placed against the wall, soil put back to fill gaps and support the rocks, smaller rocks are added on top, and the concrete blocks were placed to begin the path.

We brought those blocks over in the wagon, which is rated to 300 pounds. I don’t know how much they weight, but with three blocks, the wagon didn’t want to roll. My daughter pushed while I pulled. After that, I only put in two blocks at a time.

The wagon was used to bring rocks over, too.

After a while, it started to get hard to find smaller rocks. There is decades of detritus that has decomposed on them, with a very strong layer of crab grass rhizomes!

As we worked our way down, still clearing away roots, we got hung up by an old rose bush. It took a while, but I finally got it out!

That is one weird looking root clump!!

My daughter was just coming back from a break (we were very careful not to overdo it; the last thing we need is to injure ourselves!!) as I put it in the wheelbarrow with all the other roots. She was checking it out when she suddenly dropped it in alarm.

This thing had been exposed and wriggled at her!!

I don’t know what this grub is, but considering it was burrowing in the rose roots, I’d say it’s not a beneficial creature to have in the garden. :-/

This is where we stopped for a longer break. Sustenance was needed!

There are enough larger rocks to line the wall. My daughter used some to make a little wall around the power cables that run under the old kitchen. We also found a cable running along the wall to the corner, which is going to be carefully covered with rocks.

There are two more of those blocks in the wagon. They will be spaced out from one end to the other, and the gaps filled with soil and rocks.

As for the poppies, they will now be planted on the other side of the path!

Meanwhile, as I’ve been working on this post, the girls have gone back outside and are planting the Strawberry Spinach. :-)

The Re-Farmer

Our 2021 garden: got them done, thanks to a new “toy”

I was going to have to head into town this afternoon, so I made sure to get out and continue working on the garden beds as early as I could.

I didn’t think to take a picture until after I’d hauled loads of soil onto one of the beds. Before I started on the soil, I made sure to soak down all the straw again.

Note the pile of soil in the background for later. ;-)

After leveling the soil and wetting it down, I decided to go through the piles of wood from when we had the power lines and roof cleared and lay the thinner pieces I could find around the bed. We weren’t going to do that originally, but we paid for that soil; I didn’t want to end up walking on it, and it was starting to run down the sides with the watering.

Filling this bed took at least a dozen wheelbarrow loads of soil, and it took me all morning. Which is when I threw in the towel. There was no way we could keep this up. We would just have to bite the bullet, go through the budget, and see what we could afford for a new wheelbarrow. I checked online and a local hardware store had two options in our budget in stock. So one of my daughters and I headed into town and made our first stop at the hardware store.

When I came in, I went straight to a clerk. When I told them I’d looked online and found something it said they had in stock, the clerks just started shaking their heads, saying that didn’t mean they actually did! LOL I had the link on my phone and read off about the one I hoped to get. Again, I just got head shaking! They had no wheelbarrows at all. Then they suggested I go to the place were I got my baby chainsaw. The two businesses are linked. The hardware store’s building is just too small to have much inventory, so for a lot of the bigger things, it’s all at this other place.

So we went there, and they had only 3 wheelbarrows in stock, in 2 sizes! I got the bigger one, at 5 cubic feet. It was smaller than the one I hoped to get, but it was still bigger than what we had, and 2/3rds the price of what I had in mind, so I wasn’t going to complain!

Here’s our new toy, next to the little wheelbarrow we’ve been using the most.

When we moved here, we found two wheelbarrows kicking around. This is the problem with the little red one we’ve been using the most.

It looks like someone jerry rigged a wheel that’s the wrong size. The axle is bent. It continually loosens, but if it’s tightened too much, it doesn’t turn as well because of the bent axle. Basically, it makes hauling the soil much, much more strenuous than it should be!

It’s been used so much, the bottoms of the legs are worn away!

It’s still sound, overall, so I’m thinking we could probably replace the wheel assembly and get more use out of it.

The other, larger wheelbarrow is not worth fixing.

The barrow has holes in the bottom, and the end is bent up. The metal is very thin, too. Though larger, it can’t handle as much soil as the little one.

You can see one of the holes in this picture, too! :-D I haven’t been able to tighten this wheel, as it’s too rusted. I have a spray I can use to loosen it up, but it’s really not worthy the time and effort. Structurally, the frame on this one is a lot weaker, too. It’s fine if we want to use it to haul straw or something, but using it to haul soil was really pushing it’s capabilities!

In starting the next bed, I put logs around the sides before I started hauling soil. It made it more awkward to dump the soil, but it worked out better. Here is how it looked when done, but before being wet down.

I was having a hard time finding shorter logs for the ends, and ended up using the comically large piece of maple. :-D

Finishing this bed went SO much faster than the one next to it! What a difference it made to have a wheelbarrow with a good wheel on it! :-D Though I didn’t fill it completely with each load, it still took fewer trips to fill the bed.

That done, we put logs around the last two beds that needed soil. By then, we were rifling through 3 different piles of logs, trying to find suitable pieces. Most were cut to about the same length, but we were running out of the thinner ones. Finding short ones for the ends took a bit of creativity. We do actually have a whole stack of shorter ones, but they are all way too big around.

Once we managed to find enough logs to frame the beds, we started adding the soil.

And they’re done!!! Six beds, ready for planting!

We’ll probably add logs around the first two, at some point.

Notice the pile of soil in the background?

We haven’t used half the pile yet, but we’re pretty close! I’m rather please with how much is left!

Now that these beds are done, there are no others that need to have such a deep layer of soil added over such a wide area. I did measure the beds, and they are roughly 3 – 3 1/2 ft wide by about 15 ft long. (About 1m x 4.5m) Plus the width of the logs, which is variable. When we build our high raised beds, Hugelkultur style, those logs will be on the bottom of the beds. :-) With the dimensions we have now, the permanent beds will be pretty much exactly where the current beds are.

The weather forecasts have been changing pretty much every day, with the predicted warm days being pushed further and further back. We should still be able to plant something in these beds right away, though.

Our onion starts are still in the process of hardening off.

I found a way to keep them away from the cats. We still have the broken frame of my daughter’s market tent (if we could replace the piece that broke, I would be very happy, as it was a very excellent tent), so I used that to hold the puck board cut to cover the old basement window over the winter. The outside cats have shown no interest in the set up.

Those are the last of the onions we grew from seed; I’m hoping we’ll still have some salvageable red bunching onions. While in town today, I noticed onion sets and checked them out, and was very happy to find sets for shallots! It’s only a dozen per pack (I got 2 packs), but that’s okay.

Along with the transplants, we now have sets for the shallots and yellow onions, with sets for red onions to arrive in the mail this week. Once they’re in, the transplants should be hardened off enough, and we can plant all our onions.

Now that these beds are done, the only area we need to work on for things that need to be planted right away is the old kitchen garden. We’ll be using the soil from the other pile. While the one in the old garden area is closer, it would require going over the roughest part of the crappy plow job, and through the maple grove. The distance to the other pile is all nice and flat, with only a gate to go through. I’ll take a longer, smooth trip over a shorter, bumpy one, any day!

But that is a job for tomorrow!

The Re-Farmer