Filling the high raised bed.

Today worked out to be a longer day than planned. I had intended to do a Costco trip to the city tomorrow but decided that 1) I didn’t want to deal with weekend crowds and 2) Halloween is around the corner, and I didn’t want to deal with even bigger crowds because of it! So I headed into the city this morning. After this, we’ll need to go over what’s left that we need to pick up, then make one more trip – after Halloween!

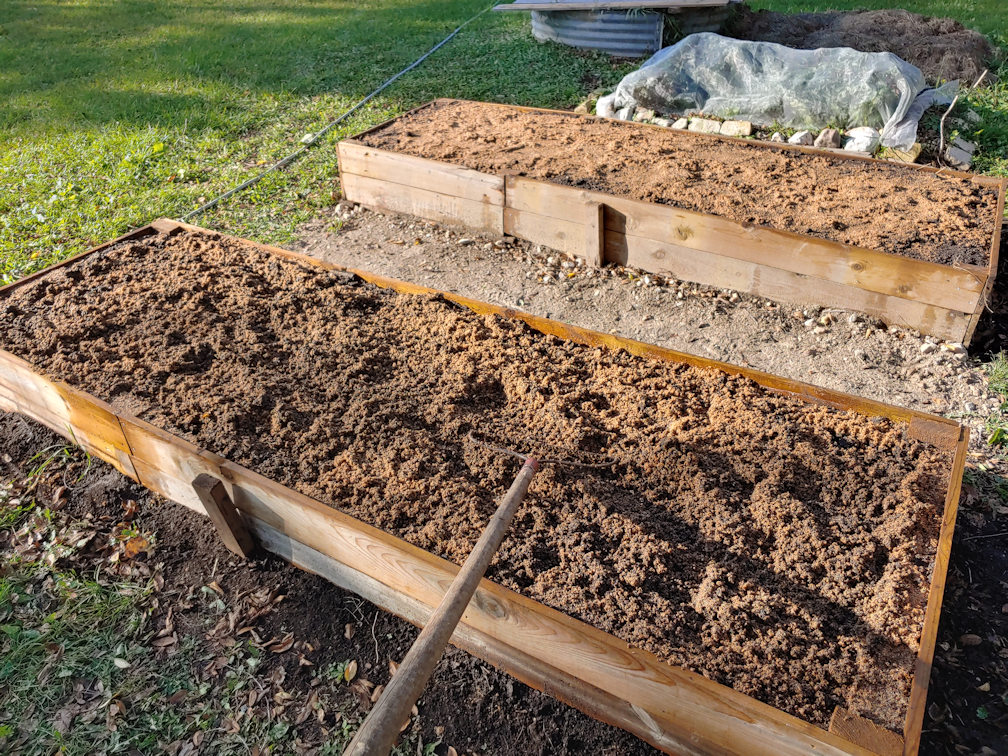
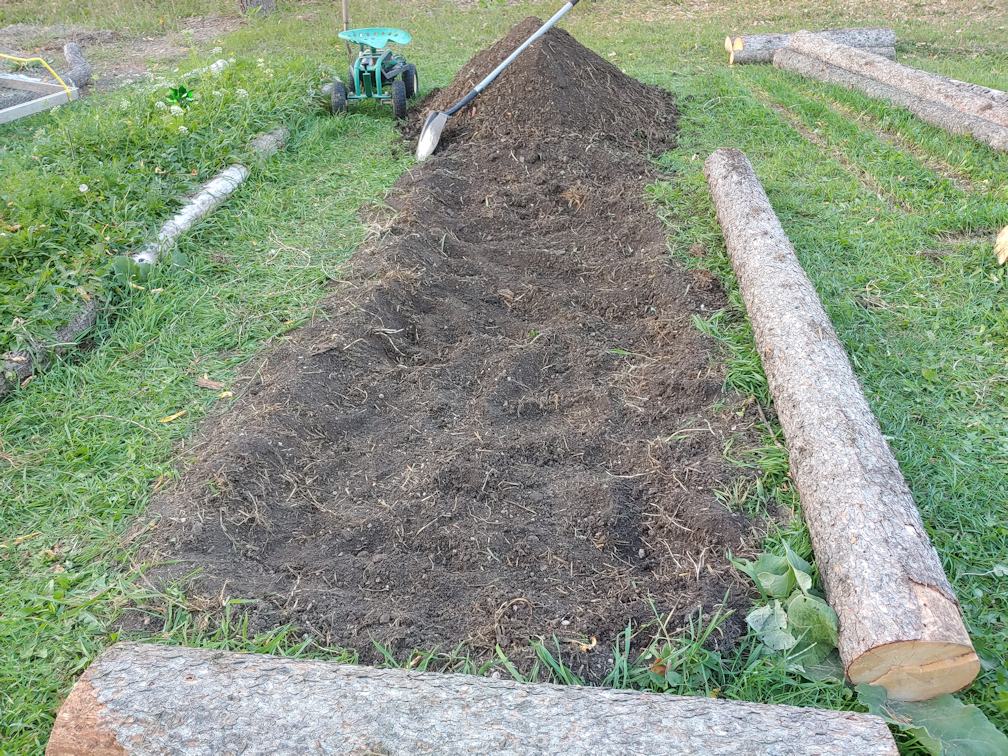
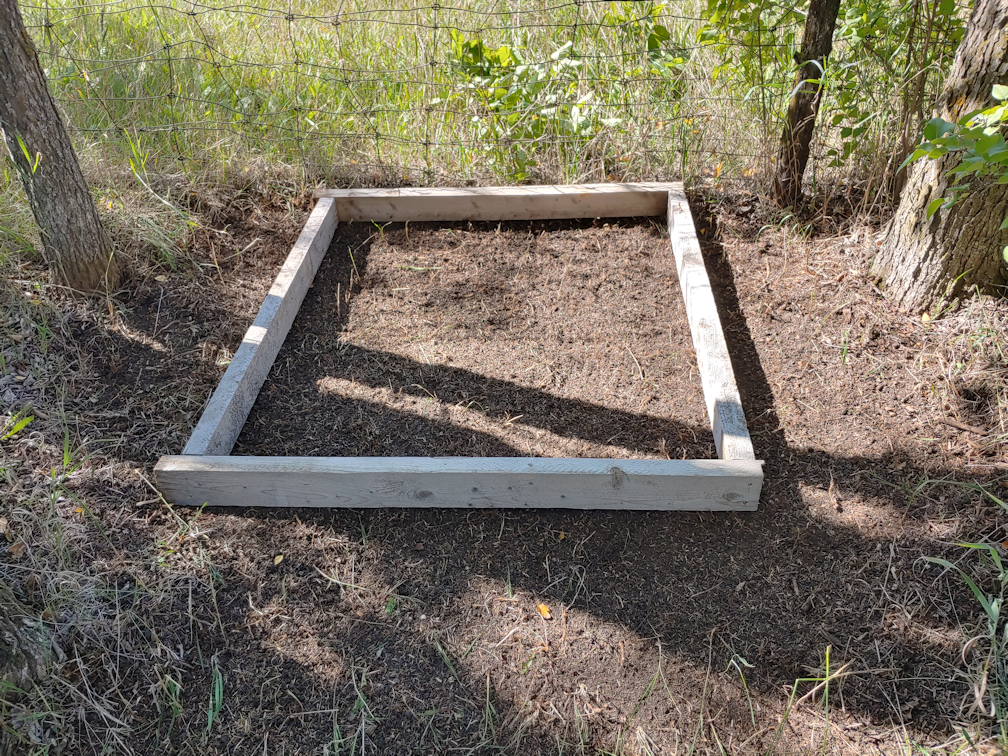
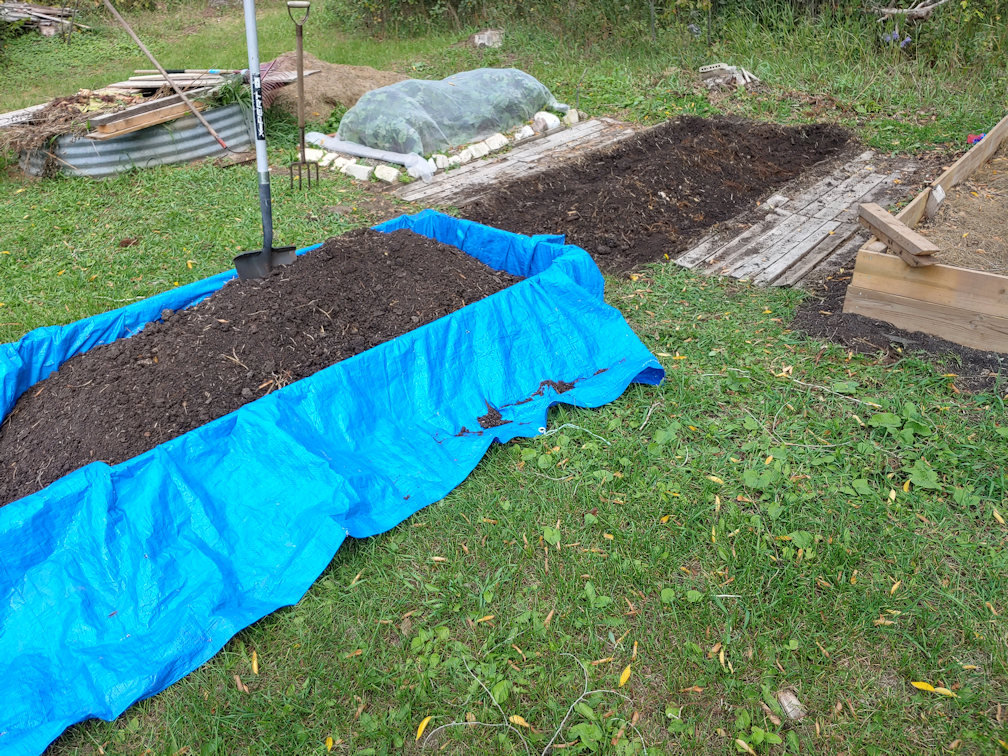
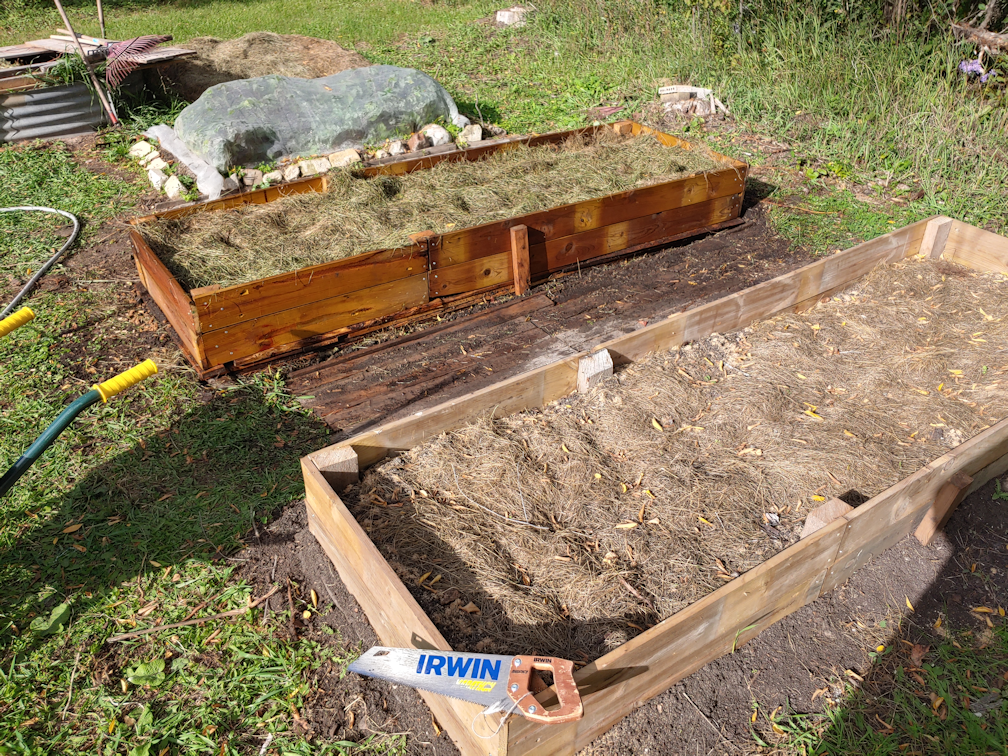
Once that was done and everything was put away, I headed to the finished high raised bed, to start filling it, modified hügelkultur style.

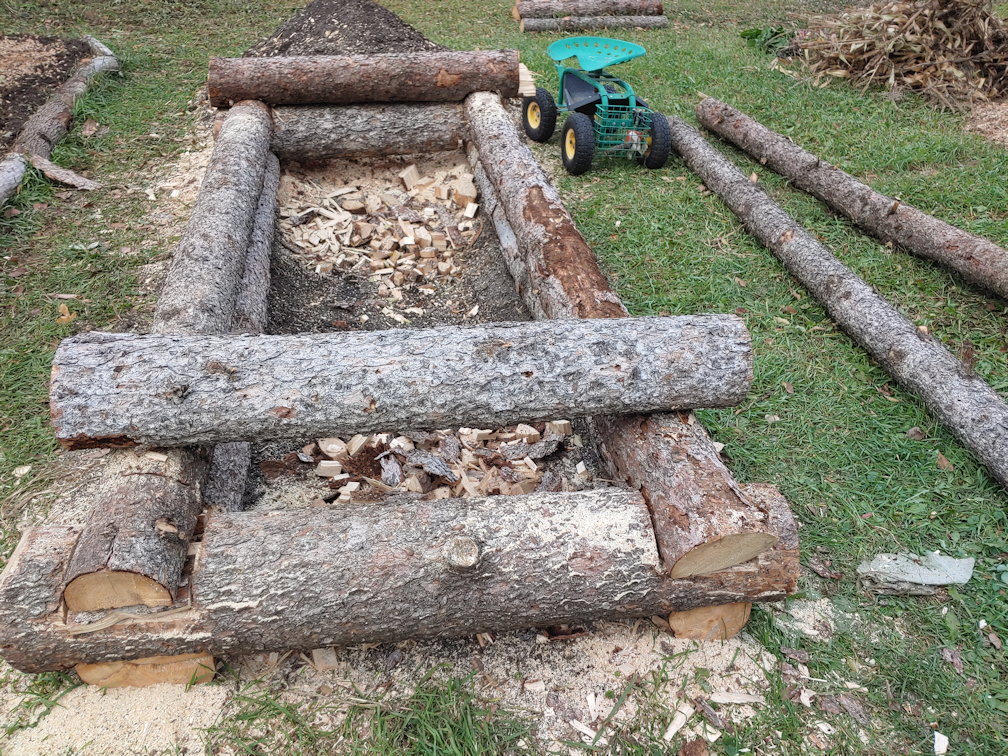
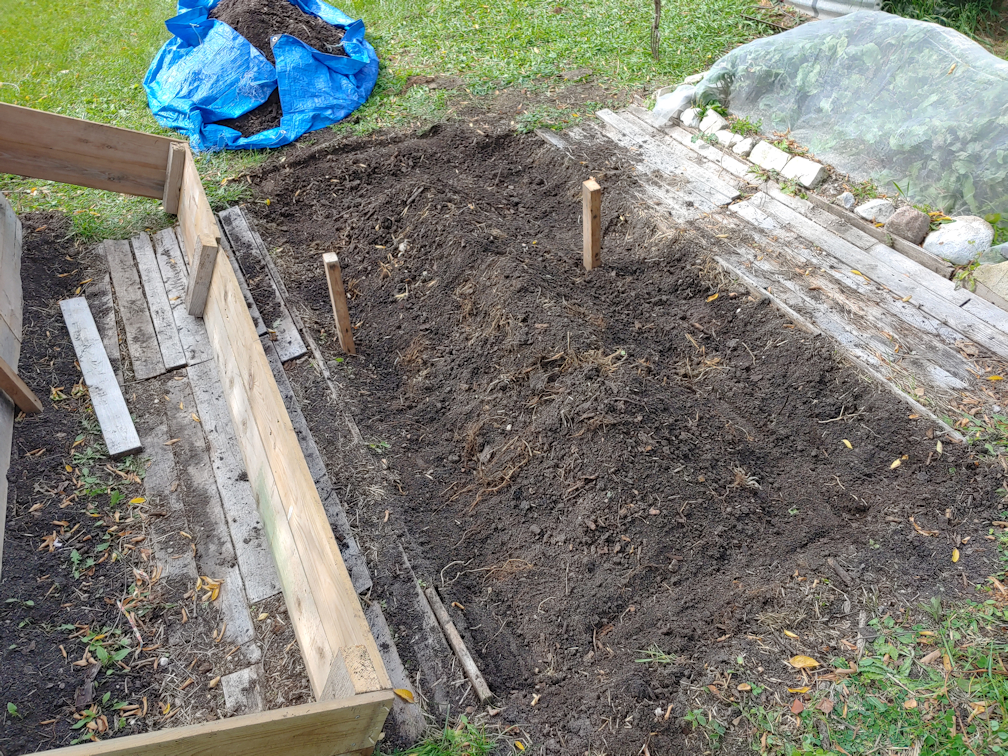
While making the bed, I tried to put all the scrap bits of wood inside, so the first order of business was to spread those out more evenly. Then the short logs that had been used to frame this bed over the summer were added to the bottom. There weren’t a lot of those, but we have plenty of piles of wood to raid. I tried to put the bigger pieces on the bottom, then smaller pieces on top, using them to fill gaps as best I could. Then I started adding bark to fill gaps, too. Ideally, there would be no gaps, but with so many odd shaped pieces of wood, that wasn’t really an option.

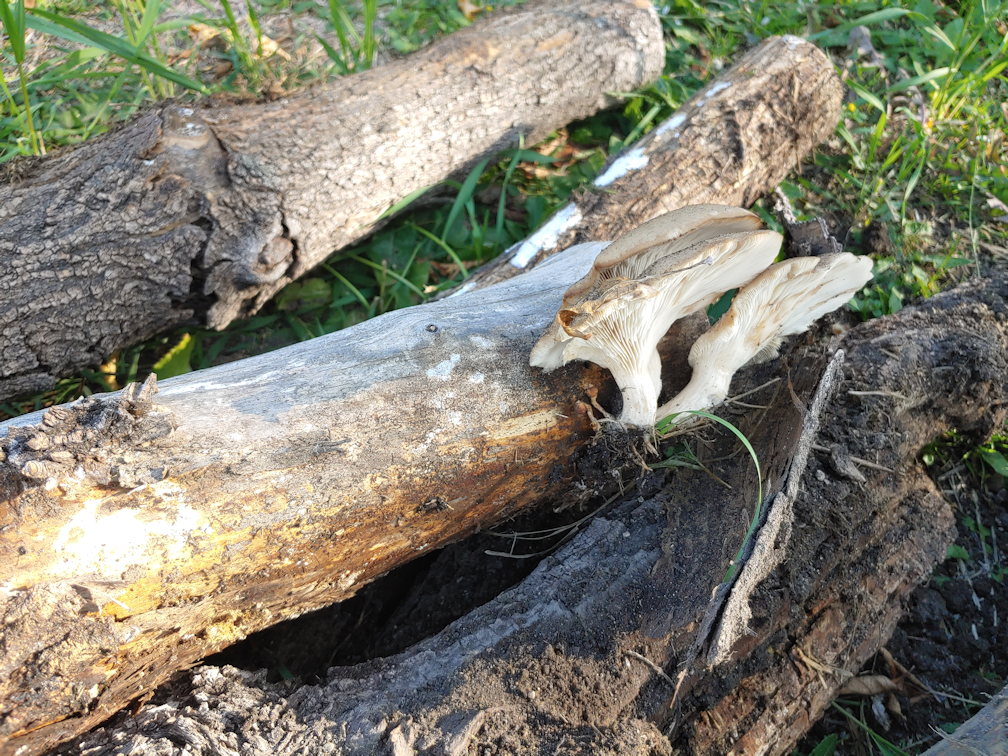
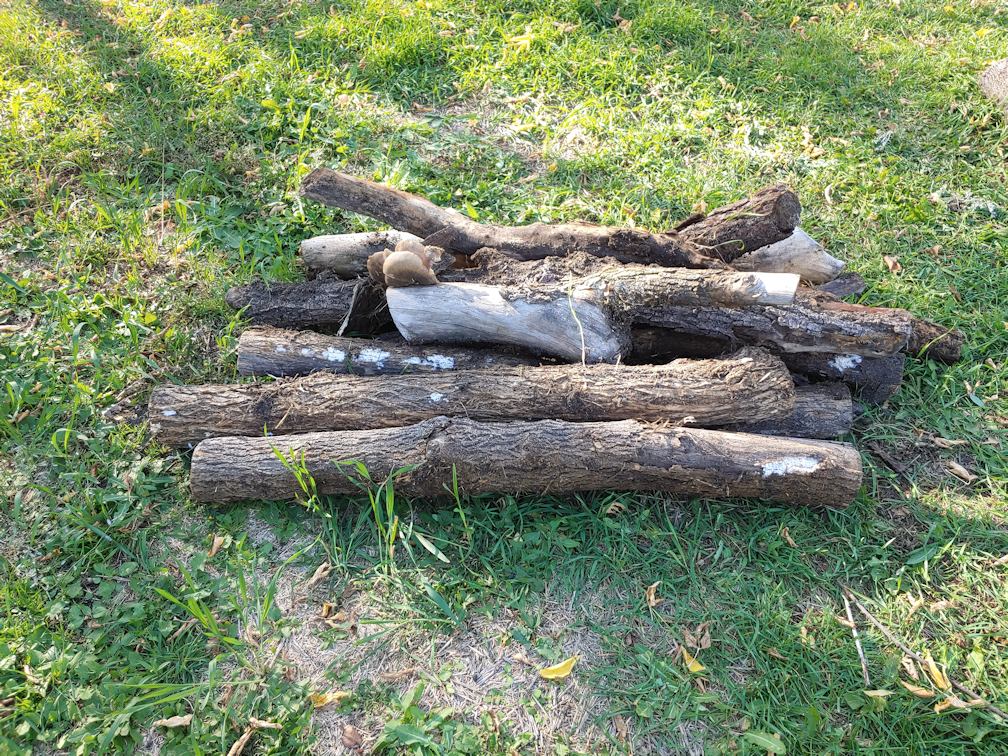
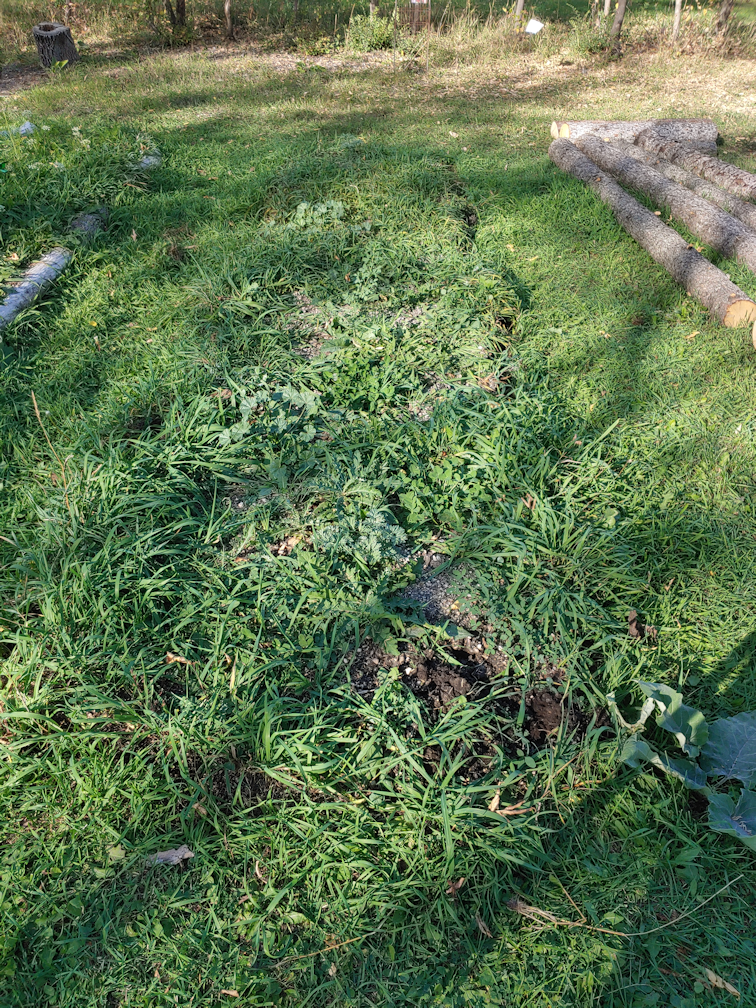
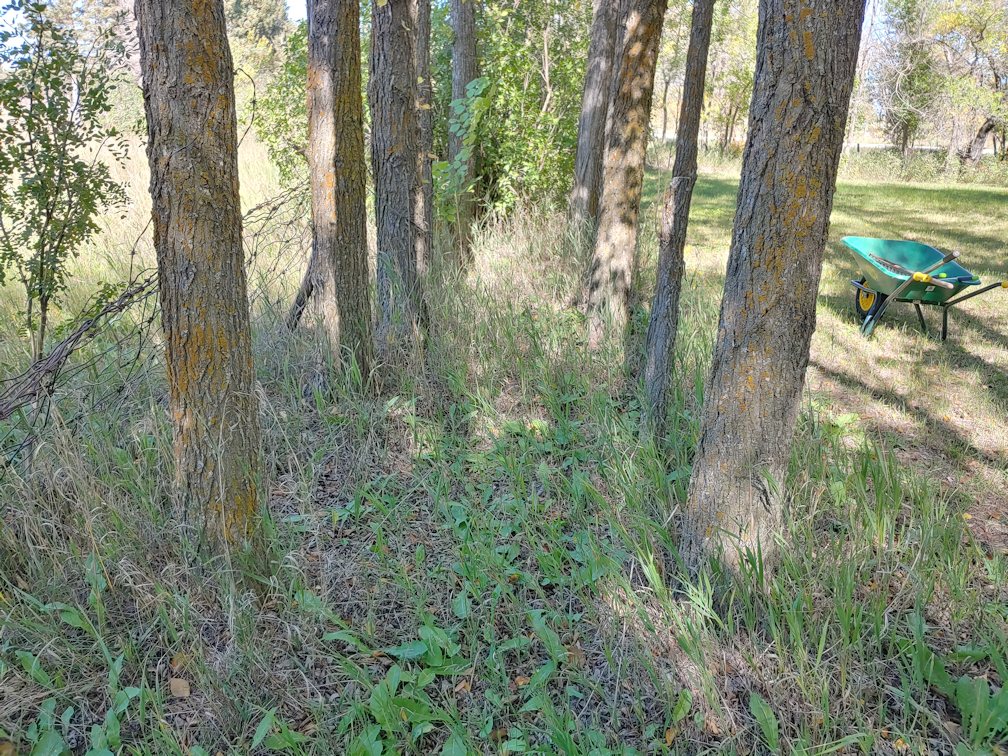
Thankfully, we have lots of bark debris. This spot used to have a pile of logs between the two spruces. There is just one long one with a weirdly shaped end left. It needs to be cut up before we can use it.

The nice thing is, along with the partially decomposed bark, I was able to pick up quite a bit of spruce needles. Not enough to increase the acidity of our very alkaline soil, but every little bit helps!

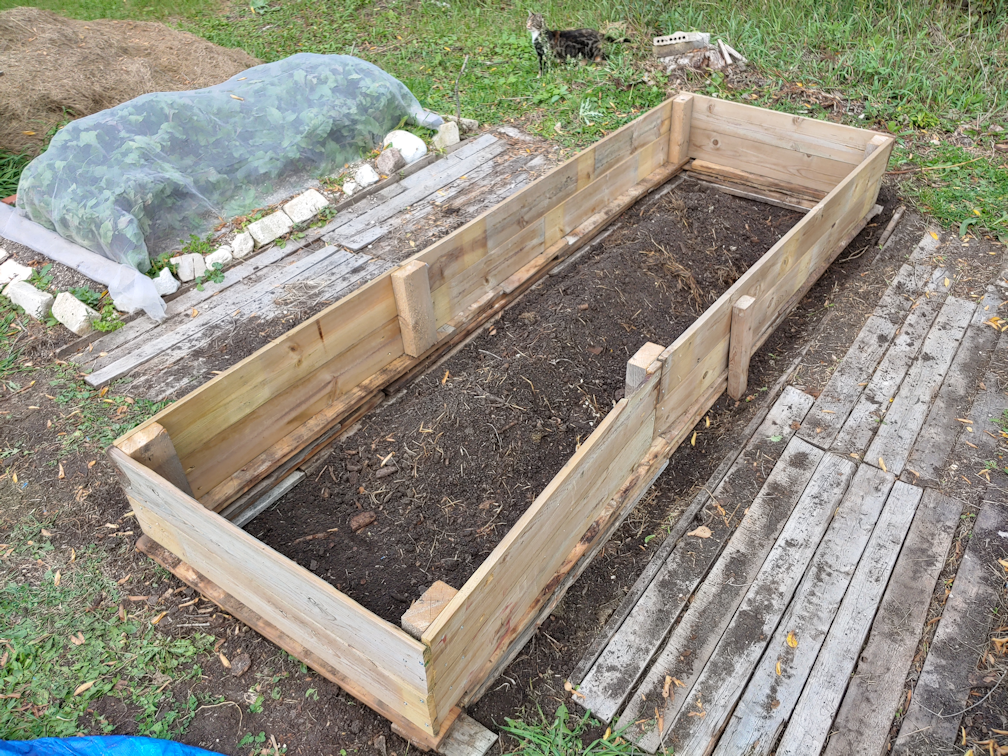
I added a couple of wheelbarrow loads of bark into here, and even went around the bed to pick up little bits of wood and handfuls of sawdust to toss in. I wanted to fill the gaps as much as I possibly could.

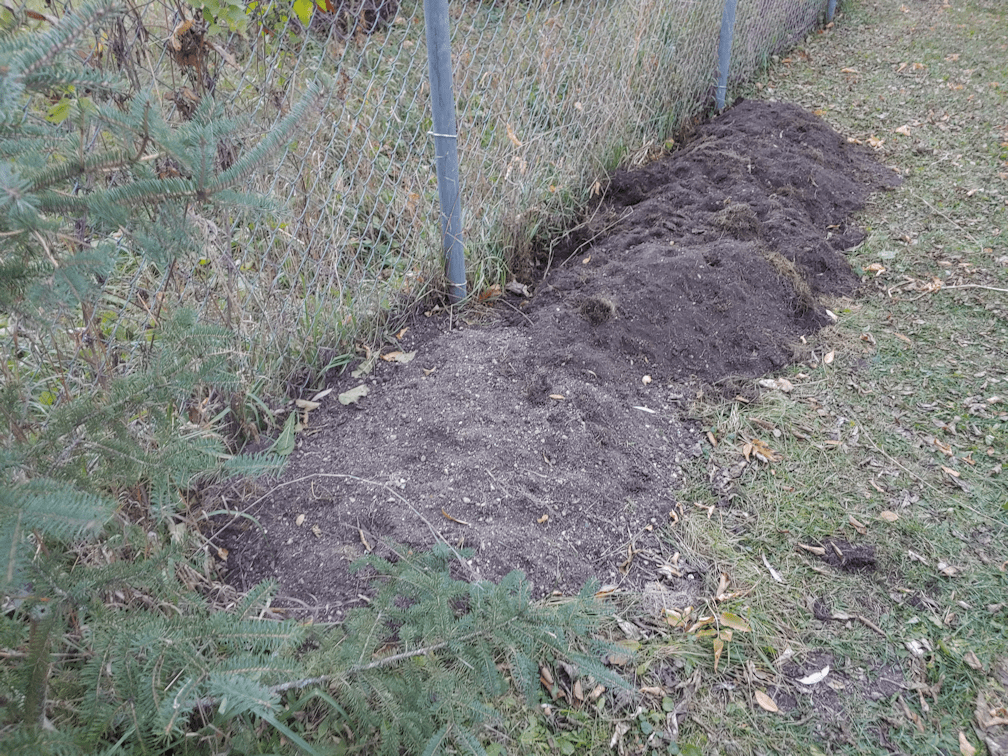
Next, a few shovels full of soil was added. This is the soil that had been dug out of this bed before the high raised bed was built. Just a very thin layer was added to fill in the gaps a bit more, and give the breakdown of the wood a bit of a boost of soil microorganisms.

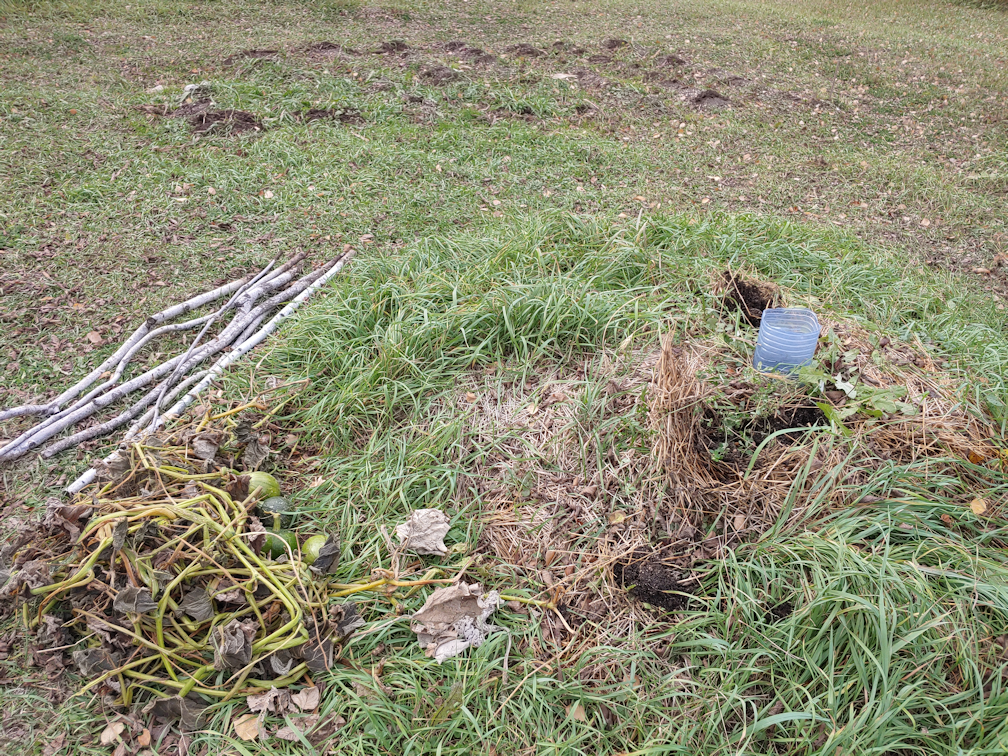
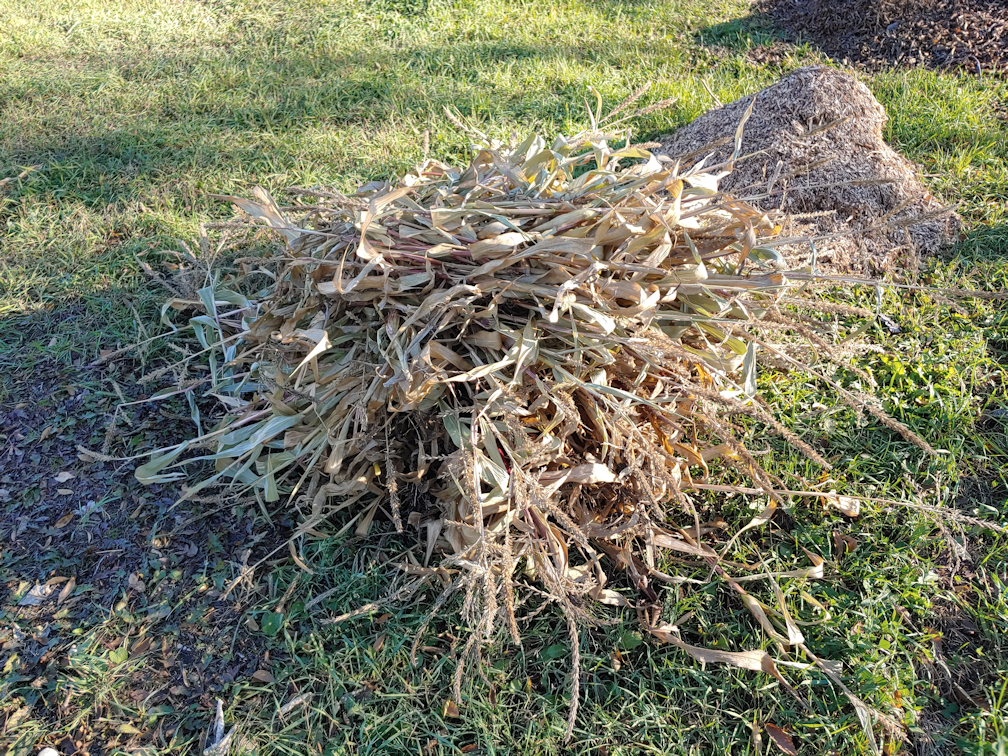
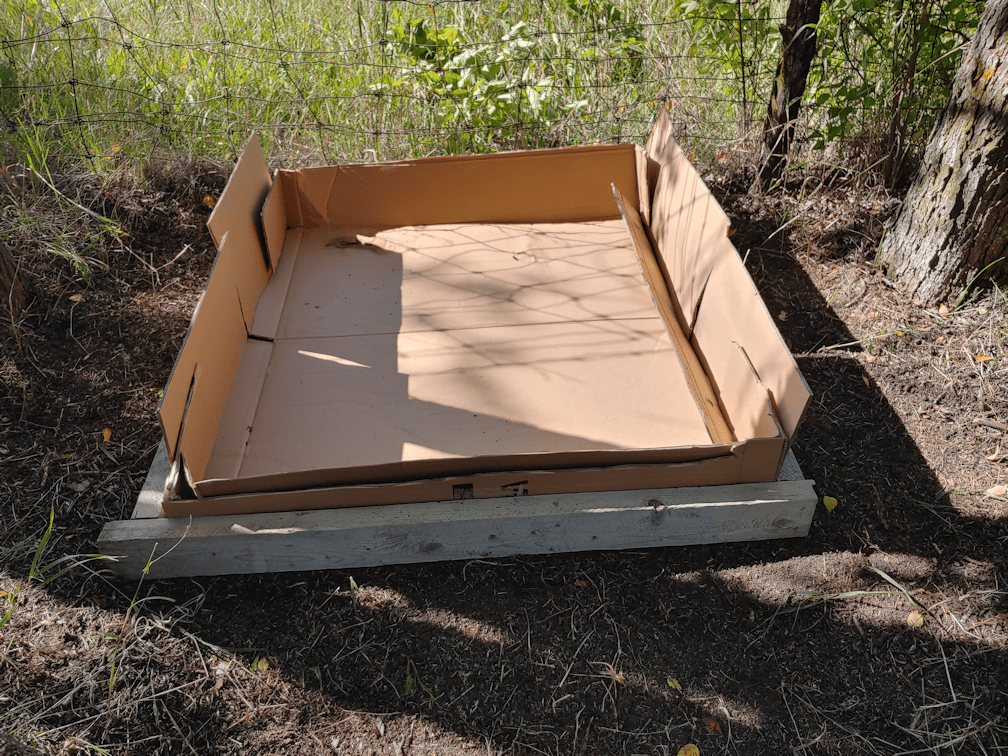
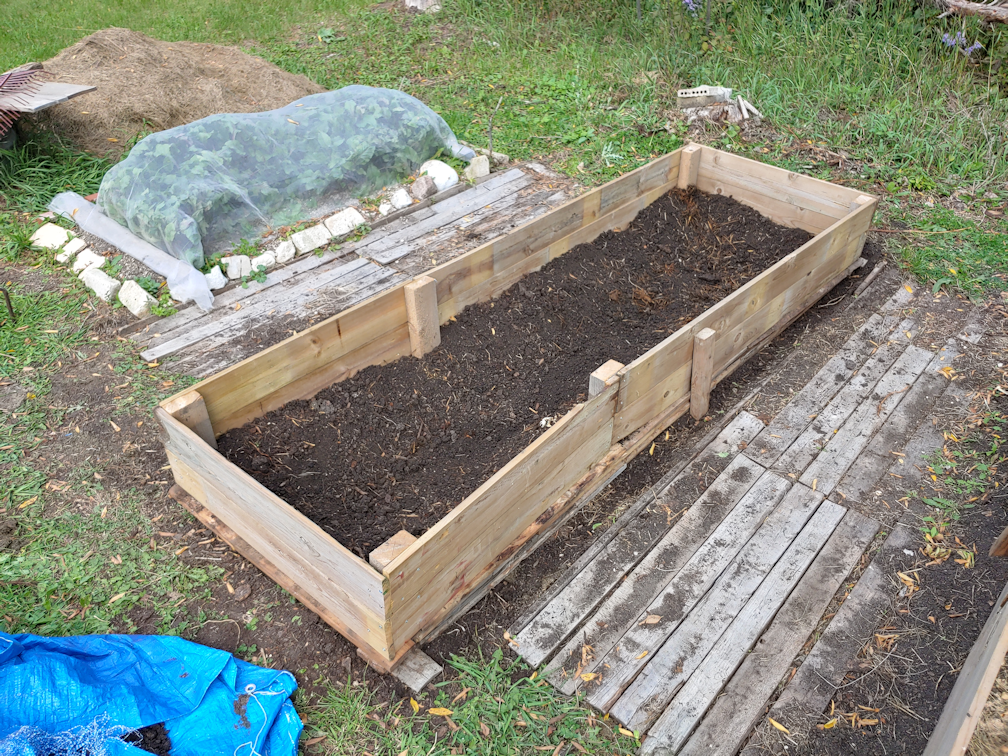
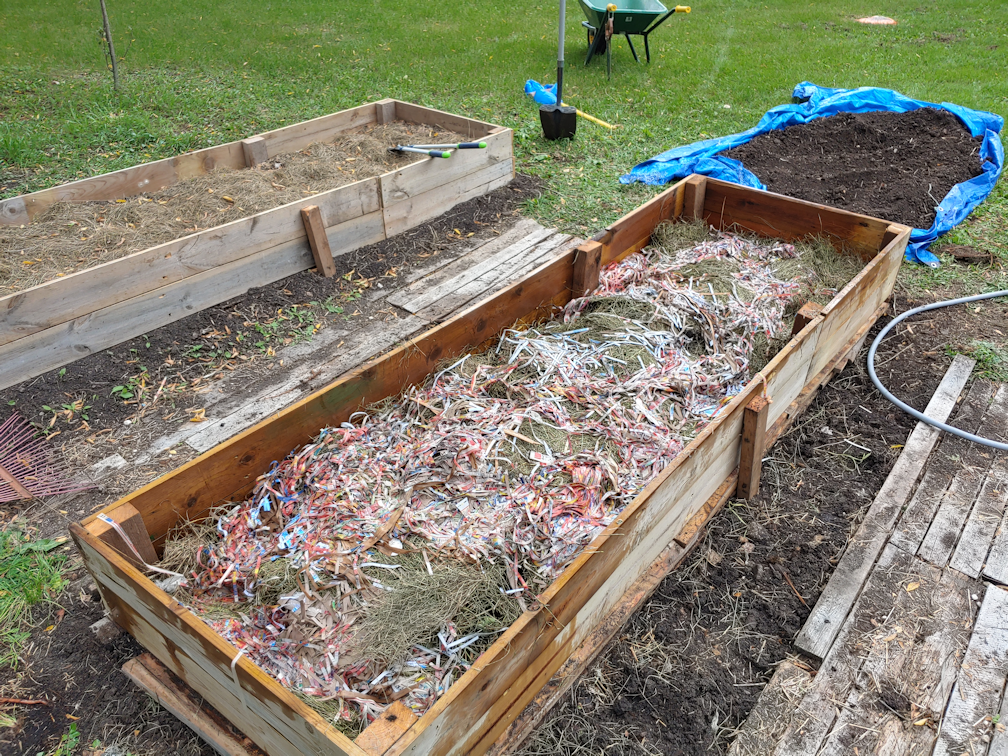
Next came a nice thick layer of corn stalks that we saved, just for this! If we did not have the corn stalks, this layer would have been straw, because straw takes longer to decompose than the other things that will be added.

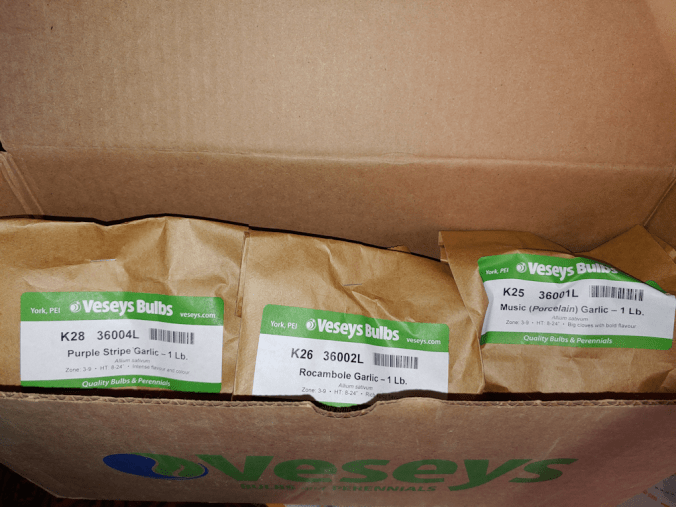
Yes, we have straw, now!

This got delivered while I was working on the corn stalk layer.

I broke that baby open almost right away!

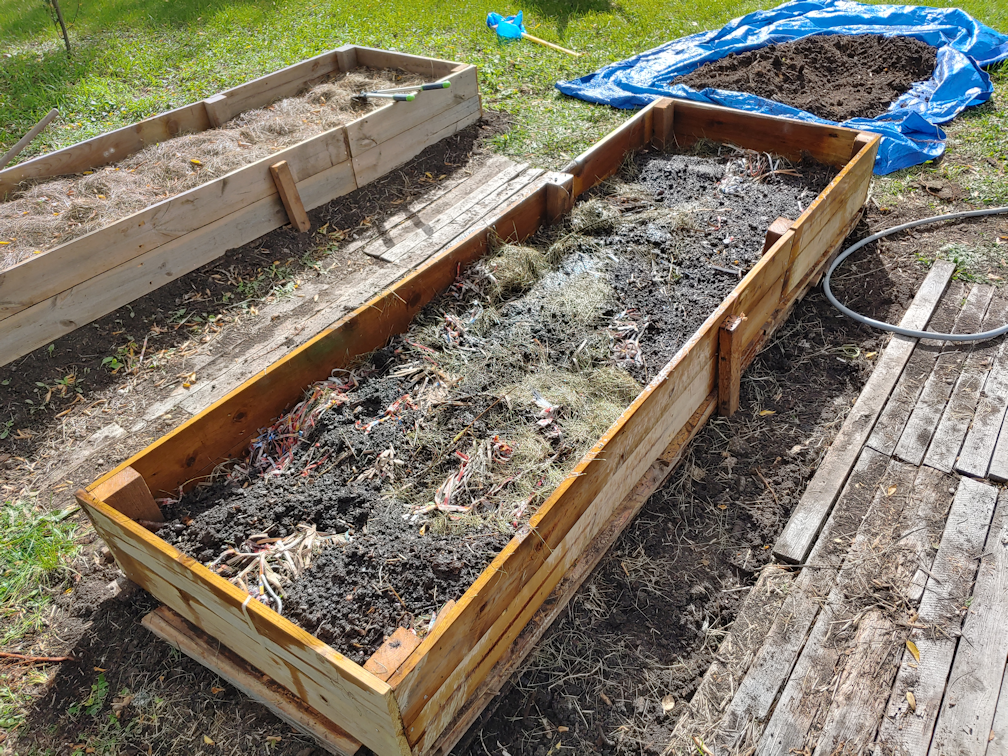
With the layers, I was alternating between “brown” and “green” layers. The corn stalks were a brown layer, so the next layer (after a bit more soil) was grass clippings, which are considered a “green” element.

I stole the grass clippings from the nearby garlic bed, replacing it with straw. I was concerned the grass clippings might smother the garlic. Later, we will replace the grass clipping mulch on the other two beds with straw as well.

But not today.

With each additional layer of soil, I added a bit more than the previous soil layer. The layers were still pretty thin, comparatively speaking, but I could already notice the weight of it was causing the looser layers below to settle and sink. If I had any, I would have been using compost or manure to layer instead of, or in addition to, the soil.

The next brown layer was leaves.

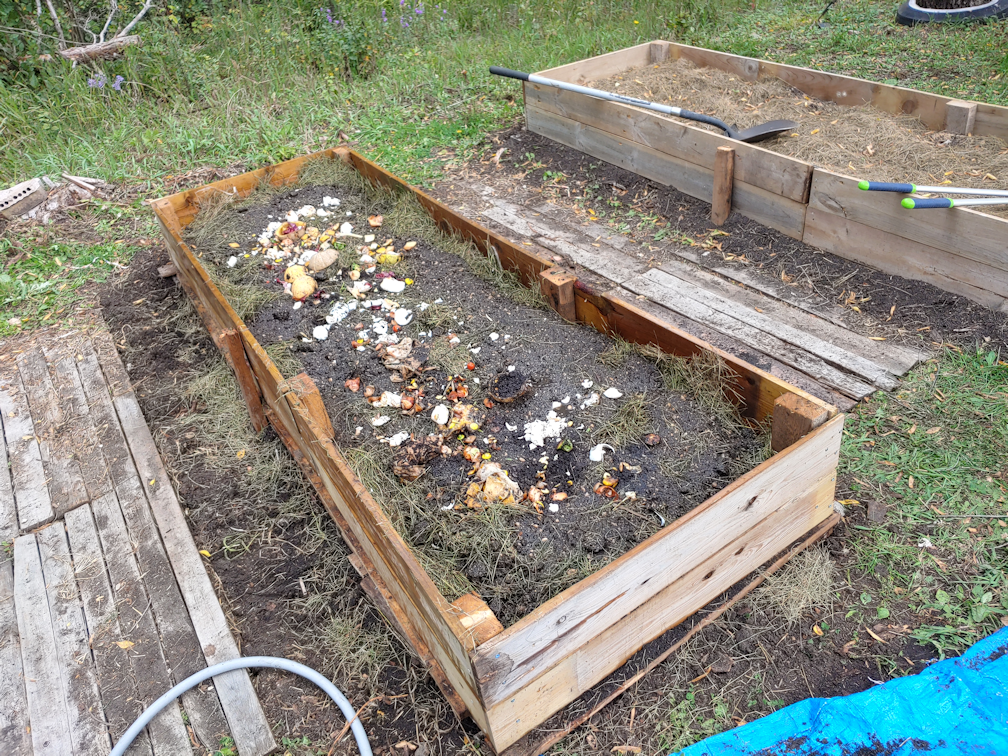
The final green layer got all the bitter lettuce and frozen chard that had been pulled from the other beds. The kitchen compost buckets got added as well, so there’s also things like egg shells and coffee grounds in there.

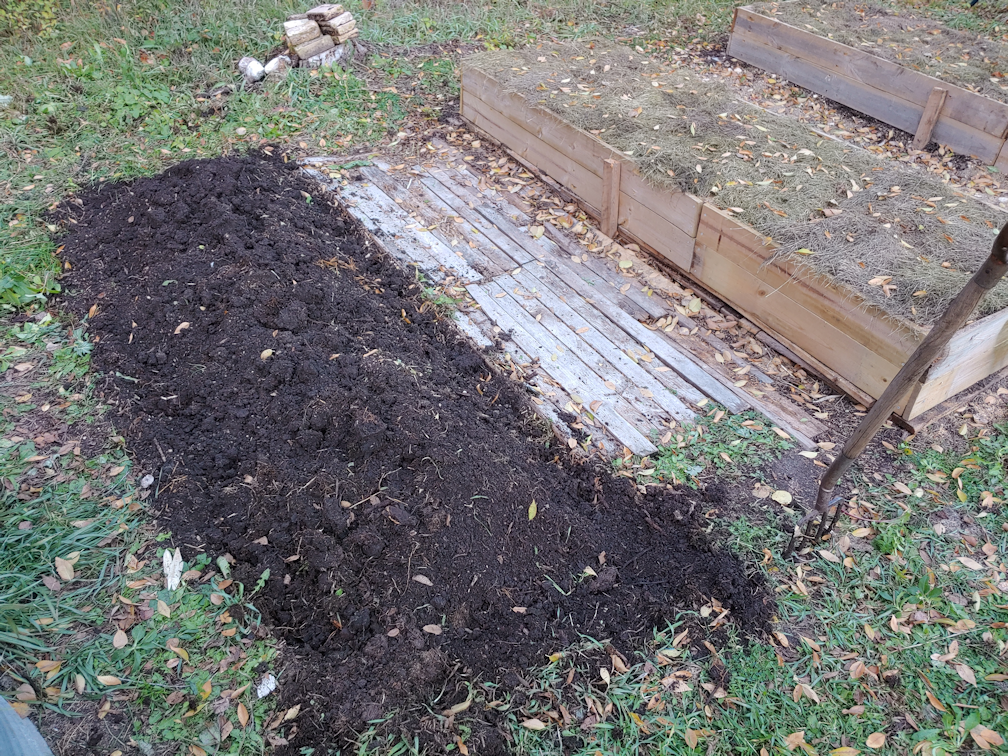
Now, it was time to add the rest of the soil. This job actually took the longest, because I frequently stopped to spread it out, pull out the roots and rocks, break up clumps, and make sure any worms that hitched a ride were gently and safely buried.

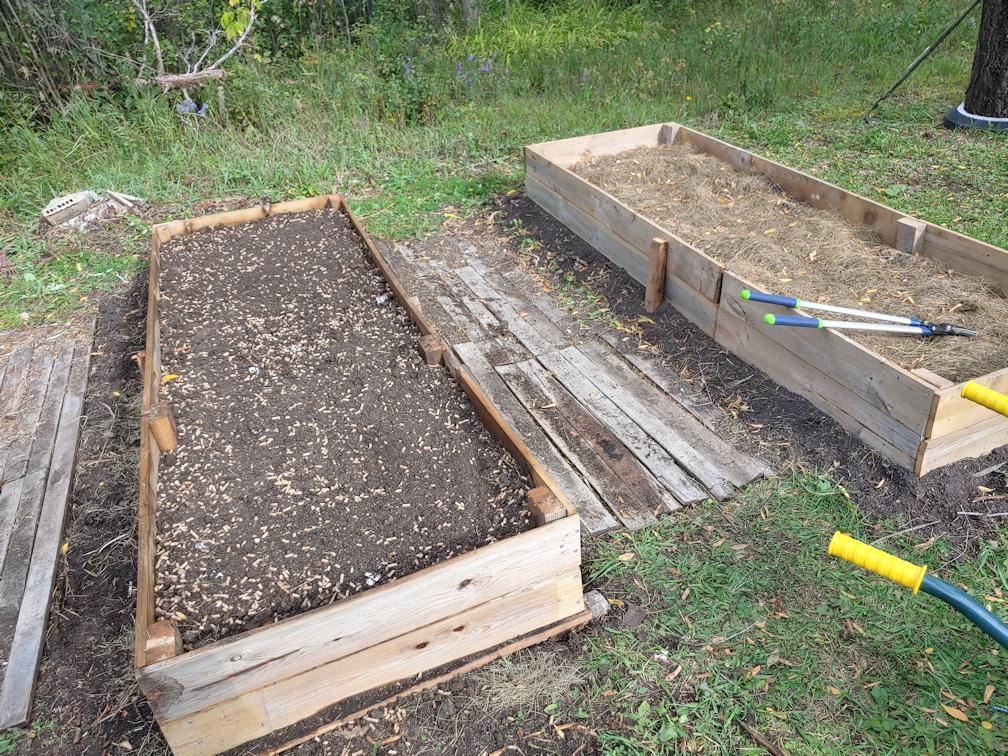
I stopped adding soil when I was getting too many crab grass rhizomes and rocks to make it worthwhile anymore, and the last of it got raked out evenly, as did the soil in the raised bed.

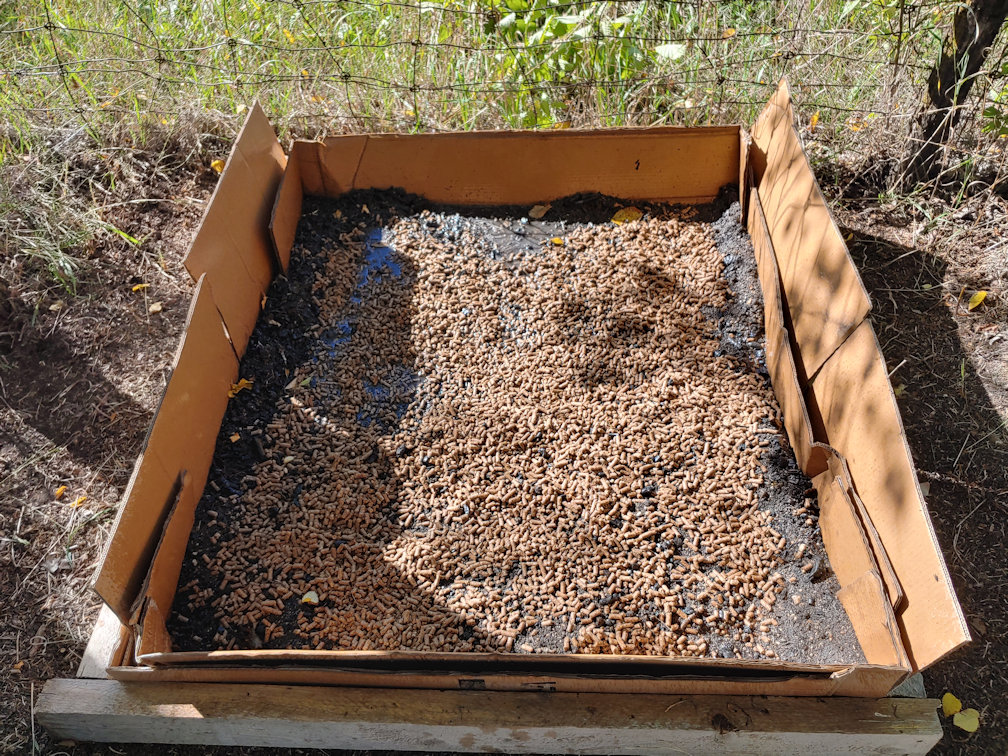
The very last layer was a mulch of wood chips. Thanks to my mother’s generosity in getting us the wood chipper, we had enough to add a couple of inches to the top.

I expect the contents to settle and sink over the next while. We’ll probably be down a few inches, by spring. Which is okay. We will continue to add more organic matter to build it up.

I must say, I am so thrilled with the height of this. It is SO much easier on the back to work at this height! I don’t even have a back injury. I’m just old. ;-) It might be a bit low for my husband, if he ever wanted to do a bit of gardening, but he would be able to reach while sitting in his walker just fine.

One down, five more to go!

Eventually. :-D

Temperatures are expected to continue to be mild over the next couple of weeks; a few degrees above freezing during the say, and just barely below freezing overnight. We’re expecting some rain tomorrow, then possible rain and snow over the next couple of days. Which means we can still continue preparing garden beds for next year. I might even be able to start cutting down more dead trees before things start getting too cold. It would be good to have the lengths pre-cut to build more beds, even if building them ended up waiting until next fall. Mind you, there’s nothing stopping us from adding more beds to the main garden area, other than possibly running out of material to layer with. My only hesitation is that we intend to expend our garden area into the outer yard, where there is better sun exposure, and those will all be high raised beds. Perhaps by the time we’re ready to build those, we’ll be able to use materials other than salvaged dead spruce trees!

Gosh, I’m having so much fun with all this!

The Re-Farmer

Our 2021 garden cleanup: progress and plans for the day

I worked on some of the garden beds yesterday, until it got too dark to keep it up. Here is what I managed to get done.

The first bed I worked on was the beet bed by the garlic, as this one will be getting a box frame soon. I started by removing the bricks and rocks around the edges, some of which you can see in the background.

I had to come back this morning to get a picture of this area. The beet bed had a row of red bricks along one side, which I moved over by the tomato bed. Then I went around the house and yard to pick up all the red bricks I could find and brought them over. When this bed gets cleaned up, we’ll re-do the boards along the fence, so that they fit better between the fence posts and line the entire length of the fence, to keep soil from washing through the chain link. The rest of the bed will be framed with these bricks, to keep the soil from washing into the path.

Amazingly, even though the vines are quite dead, there are still tomatoes ripening. I did not expect that, with the temperatures we’ve been having!

The beet bed then got weeded, and lengthened to match the garlic beds. I also moved the soil more towards the middle. I will not be digging out the soil to do the layering like I did with the others on this one. We only have wood enough to make a box frame one board high, so even though the boards I found are wider than the ones used in the other beds, it still won’t make a bed as deep as the others. This bed also got layers of material buried in it as it was made this spring, and quite a lot of the new garden soil was added, so it won’t need as much material to fill it. Once the box is built, it’ll pretty much just be laid over the existing bed. About the most I’ll do is make a “foundation” of old boards, like I did with the other two beds. Once that’s in place, I will make a trench in the middle of the soil and bury more organic material from the compost pile, but that’s about it.

The next area I worked on was a quick job. I just had to spread out and level the soil from the potato bags (and even found a few missed potatoes!). Nothing fancy is happening here. There are some lilies that need to be broken up, and they will be transplanted here.

The last spot I worked on before it started getting too dark was where the poppies had been. One of the things my daughters and I observed over the summer is that we needed to make areas to walk through, without stepping on plants. So at one end, by the rhubarb, I used the flat stones I found under the old wine barrel planter along the spruce grove as stepping stones. The rhubarb covered the poppies that had been planted near it, so I’m considering transplanting those somewhere else completely, but that won’t be done until the spring. We have only three interlocking bricks, so I used them as stepping stones at the end nearer the laundry platform.

The poppies that were here would have self seeded, which my loosening of the soil would have disturbed, but that’s okay. I did harvest a few little pods. I will broadcast more seeds some time over the next few days, then do it again in the spring. Once they have established themselves, this should end up being a permanent bed for Giant Rattle Breadseed Poppy. I do plan to get another variety of edible poppies I found from a Canadian source, but those will be planted in a completely different area.

So that’s as far as I got, yesterday evening. Today, I won’t be working on the garden clean up at all. My daughters will be working on that, later today. It’s supposed to warm up a bit more, but I’m really hoping the winds will die down. They made things quite bitter while I did my rounds this morning!

I’ve asked them to take before and after pictures for me. :-D

As for me, I have decided that I will can some of our beets. After going over my recipes, we do have enough to pickle. My daughter has been doing refrigerator pickles with the summer squash, which is great, but they take up a lot of room in the fridge, so I want to do water bath canning, so they will be shelf stable. I should at least get a half dozen 500ml jars.

I’d better get started!

The Re-Farmer

Our 2021 garden: cleanup up and high raised bed progress

While I was working on the garlic, my daughter did a whole bunch of clean up!

She pulled the Dorinny corn stalks that were next to the squash tunnel, then pulled all the squash, gourds and melon. Aside from the sunflowers, which we will be leaving for the deer to nibble on in the winter, we just need to weed and prep the beds that will be used next year, and put away things like the bin we keep tools and supplies in, empty the rain barrel and put it away for the winter, and take down the last of the critter barriers.

Then she pulled all the purple corn stalks, removed the three layers of barriers we had around the Crespo squash, and pulled those, too. I’m not sure what I’ll be doing with the corn block. There’s some very good soil there. It would be good to plant some sort of legume there, next year, to replace the nitrogen the corn used up. As for the squash hill, that’s something else I’m not sure what do do with. When we plant squash again next year, I want it to all be on the other side of the main beds, where they get more hours of sunlight.

What a sad sight. The Crespo squash had recovered so well from the critter damage! I definitely will be trying these again – with critter barriers, right from the start!

Once I finished with the last garlic bed, I pulled the frozen chard and the remaining radishes we’d hope to grow for pods.

All those radishes we planted, and these are the only ones that survived the grasshoppers!

It’s a shame we don’t have chickens. They would have loved all the greens we pulled today! Not that they will go to waste. They will get buried in the beds as we prepare them for next year. There are still four more beds in the main garden area, including the one with lettuce still in it, to clean up. The lettuce is handling the overnight cold very well, but they have become very bitter tasting, so they will be pulled. Of course, there is still the high raised bed to work on.

I had company while I worked on the garlic. The cats do like the high raised bed. I’m sure the wood is much warmer on their toes than the ground. :-)

My daughter was able to help with the high raised bed this time. She finished making the notches on the next end piece, in the background, while I cut another 9′ side piece from the last tree we cut down. She does not like using the baby chainsaw, and much prefers a hammer and chisel, so I started on the notches on the end piece in the foreground, until the second battery on the baby chainsaw ran out. By then, it was starting to get dark, so my daughter finished up the end piece she was working on and we called it a day. You can’t see the cuts I made on the end piece in the foreground, as I rolled the log onto them. They make it less likely to roll around, should the cats decide to climb all over it again.

The side pieces that are waiting are from higher up in the tree trunk, and quite a bit thinner than the other logs. Almost too thin. Since we will probably make this bed four logs high, I am thinking I should wait until I have thicker logs to use, and save the narrower ones for the top row. The tree that’s still stuck on the branches would give me logs that are just the right size – if we could get it the rest of the way down! :-D It’s either that, or find another dead tree to cut down. The problem with that is, most of the trees that need to be cut down are all really huge. They might be too big!

As glad as I am to have so many dead trees available that are still solid enough for this project, I’m a bit sorry to be using them. These are the trees we intended to use for the walls of the cordwood shed we plan to build as an outdoor bathroom. It’s possible, however, that we will be able to get a load of cast-off electricity poles. These are the remains of poles that broke in storms or had to be replaced for some reason, and we’re on the mailing list with the electric company. They don’t come available often, and not always in our area, but these are cedar poles and would be much better to use for cordwood walls than spruce. So maybe it’s for the better, that the dead spruces are being used to build high raised bed gardens!

The Re-Farmer

Guess what I’ll be doing today!

I made a trip to the post office today and had a lovely surprise.

Our garlic is in!

According to the Canada Post tracker, it wasn’t supposed to arrive for another four days.

We have our garlic, but we still don’t have a straw bale to mulch the bed, so I messaged our renter about it. When we bought from them before, they usually had a bale over right away, so I was wondering.

Sadly, my suspicions were correct. They are having to buy all their hay and straw bales themselves this year. They haven’t got their shipment yet, and don’t even know what to charge me until they pay for it themselves. Yet they’re still willing to part with one for me!

We ended up chatting a bit, and it’s been a very rough year from them. Almost everything is a write off this year. The corn they harvested from the field by our place was chopped up and will be made into silage, at least. Even their garden was decimated by the grasshoppers, on top of the drought.

So it may be a while before we get a straw bale. Now that I know this, I will cover the garlic beds with plastic and maybe some grass clippings until the straw comes in.

Since the garlic will be going into the low raised beds we built this year, I’m thinking it might be worth dismantling the long covers we made for the main garden beds and use the materials to make covers for the low raised beds. We shall see. That’s something that can wait until spring. Cleaning up and preparing the beds for planting in the spring is the priority right now.

But first, I will go start breaking apart garlic bulbs to get them ready for planting!

The Re-Farmer

Our 2021 garden: clean up, little harvests and high raised bed progress

It was a chilly day for it, but we got quite a bit done cleaning up in the garden today.

My focus was on finishing with the abandoned carrot bed that was half done yesterday.

This is how it was left lat night. The second half had the Kyoto Red carrots planted, and after the groundhogs got at them, most had gone to seed when they grew back among the weeds.

Yet we still managed to have some carrots of an edible size!

There were a lot more twisted ones than with the Napoli carrots. This bed had been built on top of one of the potato beds we’d planted the year before, then basically doubled the length. The half the Kyoto Red were on was on top of non-amended ground, and you could see in some of the longer carrots, where they had hit rocks or harder soil, and twisted their way around. Even using the garden fork to loosen the soil and pull up the carrots was harder than the first half.

What a difference with the carrots that had gone to see!

It doesn’t look like we’ll be collecting any; if there are any mature seeds on some of these, I can’t tell.

Once I pulled as much as I could, I started working on cleaning out the weeds and roots. One of my daughter came out after I started that part, and she started working on the sweet corn blocks.

She stacked those next the high raised bed, as I’ll be using some of them in the layers of material used to fill it.

The sunflowers were left for now, but all three blocks of sweet corn were cleared.

She also pulled the summer squash and beans. These beds will be used again next year, so I got her to leave the plants there for now. The beds still need to be weeded and prepped for next year, and I might be able to make use of the plants to improve the soil more.

My daughter also moved the sprinkler hoses, but they were pretty cold and brittle, so they’ve been laid out in the sun for now. It’s supposed to start warming up over the next while, so I’ll wait for a nice warm day before rolling them up for storage.

By the time she got all that done, I was just finishing cleaning the carrot bed. Thankfully, none of the other beds will need as much work to clean them, and will go a lot faster!

My daughter did the final leveling and raking of the bed while I got the tools to continue working on the high raised bed.

I’m finally starting to get a bit of a method down. Between that and the narrower logs, I’m getting the notches cut faster. The logs on the ends are so huge, if I were making this bed only two logs high, I could leave the ends as they are now! As it is, when I add the end pieces for the next level, the narrower side logs means I should only need to cut notches on the cross pieces.

When I got to the point where the second battery on my baby chainsaw needed to sit for a bit before I could squeeze in a few more cuts, I took the time to cut some of the sunflowers. Checking them this morning, I was seeing a lot more losses to birds, so I figured we should get them inside while we still had seeds. :-D

One pile has the Mongolian Giants and the other has the Hopi Black Dye. I don’t know that all the seed heads I collected will give us finished seeds, but we shall see. I cut the stalks pretty long, which meant some of them included the little baby sunflowers that were branching out, too. Those will, for sure, not have any mature seeds on them, but that’s okay.

At this point, we would be hanging them someplace warm and dry. The best place right now is the sun room, and we have no way to hang anything in there just yet, so I made do.

They should still get good circulation around them on these shelves as they dry. I am very curious as to what we will get out of them!

There is a lot more clean up to do, but thankfully we are expected to continue to get mild weather. So much so, that I am still holding off in broadcasting the wildflower seeds for a while longer. Doing this in the fall will only work if there is no chance of germination, so I would rather wait a bit longer. I think one more week will do it, just to be on the safe side.

The Re-Farmer

Today’s progress: high raised bed and half a carrot bed. Plus, a robocall with a difference!

One of the things about living our here is that phone calls are pretty rare things.

We like it that way.

Every now and then, we’ll get a robocall. Sometimes, from political parties, for conference call town hall meetings, or urgent messages telling us that we are about to be arrested by Canada Revenue for some reason or another, if we don’t call them immediately – and give them our personal information, of course. You know. The usual.

I was just preparing to write this post when we got a robocall with a difference. It was for our municipality, but from the RCMP. It was a warning that there was possibly an armed and dangerous suspect in our area! And by “our area”, they meant the two nearest cities, plus our region. Not municipality. Region. Which is huge.

The alert came with a name, but no description of the person. We did get a description and license plate of their truck, as if that means anything.

After the call, I settled back at my compute to continue with this post. I am happy to say I finally got some progress on the high raised bed that’s worth blogging about. Of course, I’m keeping a close eye on the weather. One of the handy things is that I have a little icon from The Weather Network in the corner of my task bar with the temperature on it and, when warranted, it flashes red with a white lightning bolt as a weather warning. We used to get those whenever there was a frost warning, but I have not seen that, even after last night’s heavy frost. It was flashing when I sat down, though, so I figured we were finally getting a frost warning.

Nope.

My weather app was giving a public safety alert, and it took me to the exact same message from the RCMP that I got from the robocall!

There is no other information about this guy, but they sure to want us to know he’s dangerous and might be in the area!

Or hours away from us, considering how large of an area they are including!

None of us are particularly concerned, but the warnings are appreciated.

Anyhow. To the topic at hand!

Progress on the high raised bed has been frustratingly slow. My tools are the baby chain saw, a hatchet (our other axes are too big for the job), a hammer and a chisel. Basically, I use the baby chain saw until both batteries are drained, with the other tools used to remove material in stages.

Today, I also worked on the carrot bed next to the high raised bed, which meant the first battery actually had time to charge, giving me a chance to get more done than usual.

Which means I FINALLY got the second log in place on one side of the bed.

That took ridiculously long to do! But, it’s now in place, and I’ve started on the other side.

I used the second log to mark where I needed to cut the notches on the side log and end logs. The logs at the end are the thickest, so I started removing material from there, first.

I think part of why I’m so frustrated is, I’ve got three chain saws. The gas powered one broke when I tried to start it, simply because the plastic shell was so old and brittle. The electric one I found was checked out, and they found nothing wrong with it and just sharpened the chain for me, but I discovered it leaked chain oil when I found it in a puddle after the first time I used it, which was for just a single cut before I switched to the baby chainsaw. The next time I used it, I found it would simply stop cutting after just a few seconds. I still have the little, electric, convertible pole chain saw with a 10 inch blade my husband got for me a couple of years ago. It would be enough to do the job, but something went wrong with it the first summer we got it. I checked it out again today, and it basically just screams when I try to make a cut, and the chain stops turning. I’ve got that in the van now, for the next time I go into town and can leave it at the small engine shop to see if they can fix it. I can’t even try using the reciprocating saw. It runs, but no longer shuts off. It needs to be unplugged to turn it off, and it even starts trying to run when it’s plugged back in, making and it quite unsafe to use.

If even one of those chainsaws worked, this thing would be done by now!

*sigh*

Ah, well. It is what it is. Hopefully, I will still be able to complete the high raised bed, and fill it, before the snow flies.

One of the things I found with the baby chainsaw is that, when it first seems to run out of juice, and the red light starts blinking on the battery meter, I can set it aside for a little bit and it will actually “recover” and run again for a while. That usually gives me time to chop or chisel away excess wood. I can usually do this a few times before the battery is finally completely dead. This also gave me time to pull carrots while waiting on the battery life.

I just dug up the Napoli carrots in half the bed. With the Kyoto Red mostly gone to seed, I figured they could wait.

Pulling them all from in between the weeds was certainly a challenge, even using a garden fork to loosen the soil and weeds!

After draining the second battery on the baby chainsaw, I had time to clean up the weeds, pulling out all the roots I could. If some leaves got left behind, I didn’t care, but my goodness, there were some REALLY deep roots I had to dig out!

Half the bed, all done! Hopefully, I’ve pulled out enough roots that it won’t get this bad again, next year! The time it took to do this was enough for a battery to charge, and get more done on the right raised bed.

The temperatures are supposed to stay the same as today for a couple more days, then start to warm up again, which should hopefully give more time to work on the high raised bed and, of course, finish cleaning up all the garden beds and ready them for next year, too.

The Re-Farmer

Low raised beds: ready for planting

Oh, what a lovely day we’re having today! As I write this, we are at 17C/63F, which is a couple of degrees warmer than forecast. We’ve got beautiful blue skies and sunshine, though it was a bit winder than I would have liked – only because I needed to do some spray painting.

While the girls cleaned the eavestroughs, then brought the pieces of insulation from the barn to put around the based of the house, I started with spraying the sign I’m working on with reflective paint. With a white base, the reflective paint is not visible. Later this evening, I want to try taking a picture of it with flash, which should show me how well it worked. According to the label on the can, it works better with a light coat than with a heavy one, so as long as I got good coverage, it shouldn’t need another coat.

That done, I grabbed the baby chainsaw with the one charged battery (I forgot to switch them in the charger!) and did quick work on the high raised bed. After taking about an inch more off the notch on one side, that was done. I had enough juice left in the battery to start cutting away excess on the top of the end piece, where the next log will rest. I didn’t get very far, though.

Those little jobs out of the way, I got to work on the big job! Topping up the low raised beds, so we’ll have somewhere to plant the garlic when it arrives.

One of the beds wasn’t filled as much as the other, so I started with that one, first. We had soil from the potato bags in the kiddie pool, and there are still 10 bags of fingerling potatoes, so I decided to use it as filler, as it had already been amended with organic material. With all the rain we’ve been having it was very wet and heavy! While filling the wheelbarrow, I could see some nice, fat, happy worms in there, too. :-)

It filled a couple of wheelbarrow loads, with some soil being left to weigh down the kiddie pool, so it doesn’t blow away. I even found a couple of little potatoes that got missed in the process! After spreading it around evenly, I added another three wheelbarrow loads of the garden soil we bought in the spring. I’m really glad we were able to get two dump truck loads! We’d have been out by now, if we hadn’t, I’m sure.

After the one bed was filled, I brought another three wheelbarrow loads of soil for the second bed, then leveled them both with a garden rake.

Next, I split a 40 pound bag of hardwood pellets between the two beds, and worked them into the soil. One of the things we found with the new garden soil is that, over time, it gets really hard and compact. Since we don’t have any compost or manure to help prevent that, the pellets should do the job.

After working the pellets into the top couple of inches of soil, both beds got thoroughly watered, until the pellets reverted to sawdust. They absorb quite a lot of water in the process.

The sawdust does tend to rise to the top, though, so after they got a solid soak, I worked it back into the top couple of inches again.

They are actually a bit fuller than I had intended. The garlic will get a heavy layer of straw mulch after they are planted, so having it a bit lower would have help keep it from blowing away. The beds will settle, though, plus they will be covered with plastic, before we get snow that stays.

If all works as intended, these beds, with their layers of wood and lighter organic material in them, should require almost no watering, even if we have another summer of drought. If we had a wet summer, they should have good drainage, too.

I do find it kind of funny that I had to get these two beds ready for the garlic, because the other beds we have, in the old garden area, still have things growing in most of them! Not counting the one that’s being converted to a high raised bed right now, the only one that’s completely empty had onions growing in it, so I wouldn’t want to plant another allium in it.

It should be interesting to see how the garlic does in these beds!

The Re-Farmer

Our 2022 garden: starting the first high raised bed

Our glorious weather isn’t going to stick around, and we’ve got garlic ordered, so I wanted to make sure we had at least one prepared bed for them.

This is the empty bed that had yellow onion and shallot sets in it. It was also supposed to have purple kohlrabi, but that never grew. We were planning to rotate our garlic to a different location that did not have alliums in it, but this bed is going to be so drastically changed, it shouldn’t matter.

Also, in the foreground, in the right hand corner, is a single onion that got missed! :-D

The first order of business was to move out the bits and pieces of logs framing the bed.

One of them had mushrooms attached! :-D

These are all the logs that were framing the bed. They will be buried at the bottom of the high raised bed. These are already starting to rot, which will be a good thing for our modified hügelkultur method of filling the bed.

Also, my spell check has hügelkultur in it!

This bed is so overgrown, you can hardly tell all those logs were removed!

Next began the tedious process of loosening the soil and pulling all the crab grass and weeds out by the roots and rhizomes.

Mostly crab grass.

When we built this bed in the spring, we extended what had been a shorter potato bed, using the Ruth Stout method, the previous year. Basically, potatoes were laid out on the ground and buried under straw mulch. After the potatoes were harvested, the straw was worked into the soil a bit. For the added portion, we just laid down more straw over the grass, as well as the previous year’s bed, then topped it with new garden soil.

There’s a reason we did it that way.

This is as deep as I could get the garden fork into the soil. About half the length of the tines. After that, I was hitting rocks. I’d shift the fork a few inches, and hit more rocks. Shift, hit rocks. Shift, hit rocks. It was insane!

Along with the onion that got missed, I found a shallot, too!

They got set aside on the chicken wire cover over the chard to cure. :-D

I pulled as many weeds by the roots as I could, but there’s no way I got all of them. The wheelbarrow is mostly crab grass, so this is not something that will go into our compost pile. I dumped it by the edge of the spruce grove, instead.

The high raised beds will be 9 feet long, and this bed is about 14-15 feet long. Originally, I wanted to keep them long like this, but we also want to be able to cover them, and at that length, the covers are very unwieldy. By going shorter, we can potentially add a second row of beds. I had to decide. Should we build the high raised bed at the south end, leaving room for a second row on the north, or start it at the north end, with a potential second row on the south side?

In the end, I decided to build the bed on the south end. It was the shade that decided it for me. If we were to make a second row of beds further south, they would be more shaded by the trees between the garden and the house. If we add a second row on the north side, they will be closer to the short row of trees my mother allowed to self seed among what had been her raspberry patch, but I want to get rid of those trees, as they are causing problems. If nothing else, they won’t be shading any new beds that are closer to them.

That decided, it was time to start digging!

I dragged over a couple of logs to use as a guide, then started removing the loose soil and piling it on the end that will not be part of the bed, pausing to remove more roots and rocks every now and then. I was happy to see how much the straw had broken down – and by how many worms I was finding!

This is it for the day!

I dug down only as far as the rocks, so it’s not very deep. Mostly, I just removed the straw and soil layer we made in the spring, and maybe a couple of inches lower.

The next step will be to level this off and straighten the edges for the logs. I cut the logs a bit longer than 9′ and 4′, to give room to trim the ends straight, but I may not even bother with that. As long as the beds themselves measure no more than 4′ wide on the outside, we’re good. I don’t care if there are bits that stick out a bit further at the corners.

I want to get this bed at least 2 logs high before I start putting the layer of logs on the bottom down. They’re smaller and lighter, but it’ll be easier to put them into place while the walls are a bit lower. The other layers can be added when the bed it as its full height. When it is 3 logs high, I’ll decided if it needs to be higher or not. Then it’s a matter of filling it with layers and getting it ready to plant garlic in. We might be able to plant all three varieties on one bed.

As much as I enjoy the work, it does help me realise how necessary having high raised beds will be. I don’t know how much longer I will be able to continue doing stuff like this. Weeding the bed was the most difficult and painful part. Thankfully, I was able to sit on the scooter for some of it, which helped, but this old body is breaking down. I can still do big stuff, like cutting and breaking down trees and carrying logs, but I’m loosing my fine motor skills on my hands. I drop things a lot more often, the joints are almost always stiff and sore, and that one finger just doesn’t seem to be getting any better. Then there is the back pain from bending over to weed. I can’t bend at the knees, since my knees are already shot. Strange that I’m losing my ability to do small, easy things faster than doing heavy manual labour!

I can still crochet, though, so that’s good. I whipped up a couple of hats recently, and plan to work on other small projects. The only problem has been choosing what yarn I can work with. My hands are so rough right now, some types of yarn catch on my fingers while I work! LOL Working with my stash of metallic yarns is out of the question, as well as anything the least bit fuzzy. :-D

Hopefully, I will be able to continue working on this raised bed tomorrow, after I’ve headed out to do some errands. We hit 27C/81F today, but tomorrow should be a bit cooler, and we’re expected to get rain – possibly even a thunderstorm – over the next couple of days. Looking at the long term forecast, we’ve got another nice, warm week before things start to cool down, and overnight temperatures may result in frost. It’s not until the end of October that we’re looking at the possibility of snow. Of course, looking that far ahead, things are very likely to change, so we shall see what really happens! Until then, I’ll be taking advantage of the mild weather and doing as much work outside as I can!

The Re-Farmer

Let’s get fungi!

After working on the low raised bed yesterday, I was not physically up to working on another one today, so I figured I would do a project that was less physically taxing.

In other words, I’m a bit of an idiot. :-D

It’s gotten to be that time of year to do something with the mushroom spores my awesome husband got me for Christmas. Today, I started with the morels.

The package doesn’t have a lot of information about how to inoculate an area with them. One thing it did recommend was several different types of trees to inoculate under. The only one we have around here is elm.

I spent some time online, seeing what other people did, and came up with a plan of action. I used one of the remaining sections of the old goat catcher we made, a couple of summers ago, and made it into a box frame.

Then it was time to work on the location we finally settled on.

This double row of elms in one area is too narrow and lumpy to mow well, and far enough away that I really don’t want to bother with the weed trimmer. So both the morels and the giant puff balls will be going here.

Since the morels will be going into a framed bed, they were going into the widest, most open part of the area.

First, it needed to be cleaned up. The stump of a dead little elm tree got trimmed flat to the ground, and a thatching rake was used to remove leaf litter and other debris. The remaining quack grass was so sparse, I ended up going over the area and pulling them up by hand, getting quite a bit of the rhizomes out in the process. Then I went over the area again with the thatching rake, loosening things up even more and getting a bit more debris out.

Next, the frame was brought over and placed in the most level spot that could be managed here. I wasn’t too worried about being perfectly level, since the next step would make that a non-issue.

We had kept the box the new washing machine came in, with its wonderfully thick cardboard. I was able to cut it in half, and use it to line the framed space in two layers. This should not only keep the crab grass from coming through, but ensure that little elm stump won’t start sending out suckers, either.

The next step was to give the cardboard a thorough soaking. As it is two very thick layers, I just left the hose running while I prepared for the next step. Morels like wood ashes; there is always a bumper crop after a forest fire. In the time it took me to get wood ashes from the fire pit and mix it with some of our purchased garden soil, there was a bit of a pool inside the cardboard! :-D

The wood ashes and soil combination made only a thin later on the bottom, and that’s okay. From what I was finding online, this could have been filled with straight wood pellets or shavings, and no soil at all.

Speaking of which.

After thoroughly soaking the ash/soil mixture, I used the remaining half of the 40 pound bag of wood pellets I’d used in the low raised bed I made yesterday. Once those were spread out, they got a thorough soaking as well.

Then, while the pellets absorbed the moisture and began to break apart, I opened up a bag of wood shavings. Our general store/post office has them, probably for chicken coops. It’s the same sort of stuff you can get at pet stores for animal cages, except in a bigger bale.

A very thin layer of the wood shavings was added, more to cover the ash/soil mixture, and it got yet another soak with the hose.

Time to inoculate!

The packet the spores were in was the same sort of packet most garden seeds come in. Usually, mushroom spores come in blocks that get broken apart, so I was very curious as to what I would find when I opened the packet.

Huh. Interesting! These are about the size and shape of Orzo pasta, or some types of rice.

They got scattered over the shavings and wood pellets as evenly as I could. Can you spot them in the picture?

Those wood pellets have really expanded and broken apart. Perfect!

Once the morel spores were scattered, the bed got a light misting, more to make sure nothing would blow away.

Finally, a thick layer of the wood shavings was laid down and gently raked out evenly. Most of the bag of shavings got used up for this part. Once it was spread out, the whole thing got one final, very thorough, soak with the house.

And that’s it! It’s done! Now, we just wait and see. Hopefully, we will see morels in here around May next year, though it may take a year or two for anything to show up. That’s one thing that the package did say; it can take years for the spores to actually fruit. Or, nothing may show up at all. It’s hard to know.

As for the giant puff balls, those did come with more instructions, and need to be soaked in a water and molasses solution for a couple of days. After that, it just gets poured over grass. No advance preparation of the soil needed. If I can find a suitable container the cat’s won’t knock over, I’ll get those started tonight.

Meanwhile, now that I’ve had a delicious supper my daughters prepared, I think it’s time to pain killer up! This may have been less physically demanding than digging out a garden bed, but I probably should have given my broken old body a day to recover, first! :-D Actually, it’s not to bad. The thing that’s bothering me the most is the arthritis in my finger joints, which is more of a problem while typing than while shoveling. :-D

The Re-Farmer

Second low raised bed: done!

You can read about the first raised bed I did, here and here. Things were done a bit different this time, so here is another step-by-step post with lots of photos! :-) I actually started this bed over a week ago. This is how it looked then.

This bed has been almost completely untouched since the garlic was harvested, letting the weeds get fairly large. This made them easier to pull.

Along with pulling the weeds, with as much of the roots as I could, I lengthened the bed to match the size of the box. Right away, I could tell this one was going to need a “foundation” under the box, too. I was definitely hitting rocks, and a whole lot of roots, while trying to loosen more soil and remove grass and weeds.

Once the weeding and loosening of soil was done, it was left to sit so that any weeds I missed would have a chance to start growing again.

When I started working on it today, the first thing I did was go over the area again, pulling out any new growth by the roots. Then it was time to start shoveling!

Like the previous bed, this one had been originally amended by burying the contents of our compose pile and straw. So I only wanted to remove up to the straw, basically.

In the process, I was finding a LOT more roots! It looks like the cherry trees are encroaching again.

Once I was satisfied with how much of the topsoil I had removed, I raked around the edges to try and level the soil where the box would be resting, as much as possible, while heaping it all in the middle.

Then the box was laid down and, once I had it where I wanted it, I used a sledge hammer to hammer in the supports on either side, at the middle, to prevent the long sides from bowing out when filled with soil. I also hammered down the corners and such, to leave marks in the soil that I could use as guide lines.

The ground wasn’t anywhere near as level as I probably should have made it, but that’s okay. Things will settle and adjust over time, and these boxes can be easily replaced in the future, if need be.

The next step was to raid the pile of old, salvaged boards that the groundhogs have made their den under, and build up a foundation to support the box. Once that was in place, a daughter came out to help me carefully place the box on top of the foundation, and in between the support posts.

Then it was just a matter of shifting the foundation boards a bit, to make sure the box was fully supported. Again, not quite level, but that’s okay.

The soil heaped in the middle was then raked out to the sides, covering the foundation boards and creating more of a recess in the centre.

Then it was time to add the first layer of fill, and raid the branch pile. This time, I added more and larger branches than with the first bed I did.

This, unfortunately, left a lot of gaps and air pockets. They will fill in as the wood decomposes and everything settles and sinks, but that will take time. To help fill in spaces and speed up the decomposition process, I started adding back some of the soil. After returning about a quarter of the soil, I hosed it down thoroughly, so wash it further down into the gaps, then added about another quarter of the soil and soaking it down again.

The next layer was contents from the compost heap, most of which was greenery I’d cleared from around the dead spruce trees that were cut down. This got another soak, another scattering of soil, and yet another soak.

The next layers were grass clippings and shredded paper. This time, after soaking it all down, I walked back and forth over the whole thing, to try and compact and break the buried branches more.

It as at times like this that being a woman of generous proportions comes in handy. ;-)

Yet another thin layer of soil was added and soaked down.

Note the gap between the box and the board path. By this point, it had become a bit of a safety hazard! Without the soil to hold them in place, the boards at the edge kept moving and catching on my feet, and I was constantly catching myself to avoid twisting my ankle in the loose and lumpy soil in the gap.

Another thin layer of grass clippings was added and hosed down. At this point, the fill in the new raised bed is about the same level as in the first one. Adding the extra and larger branches made a noticeable difference, even after being tromped down.

Once this was done, it was time to amend the remaining soil on the tarp. I added about half a 40 pound bag of wood pellets, as was done in the first raised bed, and then a couple of wheel barrow loads of new garden soil was brought over; one added to the soil and wood pellets on the tarp, and the other added directly on top of the grass clippings, then raked out as evenly as I could.

It was about this time that a daughter came out with the kitchen compost buckets, so that got added straight into the raised bed and spread out, then hosed down again.

The next while was spent mixing the soil and wood pellets together, as much as I could, before adding it to the bed.

Once the soil was added, it was raked out evenly. This layer was NOT hosed down, though.

One more layer of grass clippings was added as mulch, then it got one last, very thorough, soak with the hose. This was the time to clean up the sides and edges, too.

This is as much as will be done in the bed, this year. Both beds will get more amendments added to them in the spring, after they’ve had a winter to settle and sink.

Also, remember the gap in the path on the other side of the bed?

I was going to work on filling that to make it safe, but I had reached my limit. A daughter will be working on that for me later. As these beds have been worked on, and rocks were found, I had been tossing them next to a nearby stump; you can see it in the background, with some bricks on it. Those can be gathered to use as fill in the large gap on the far side of the bed, and more boards will be added, and whatever else my daughter can thing of to make it safe to walk on. The eventual plan is to cover the board paths with sand and gravel.

After this, there is still the third bed in this location to be made, but with the beets still growing, there is no hurry. The last bed will be just one board high, as that is all the wood of this type we have left, but these boards are slightly wider, plus we still have plenty of the scrap wood bits to use as a foundation, so it shouldn’t be too much of a difference.

Two raised beds down; seven more to go! :-D

The Re-Farmer