Our 2021 garden: progress in the old kitchen garden

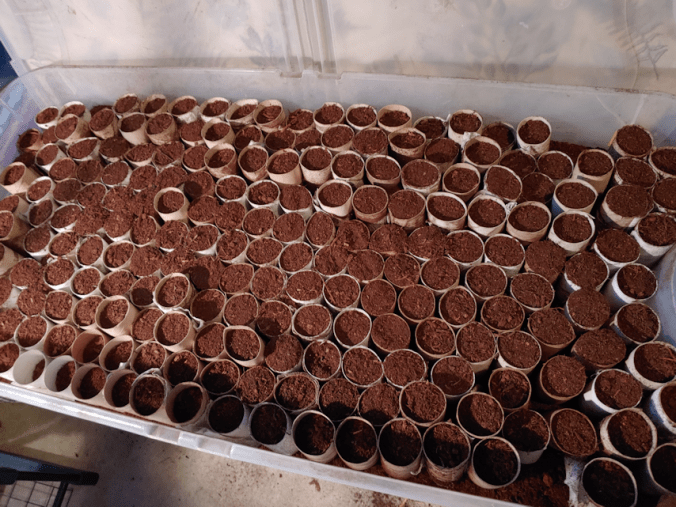
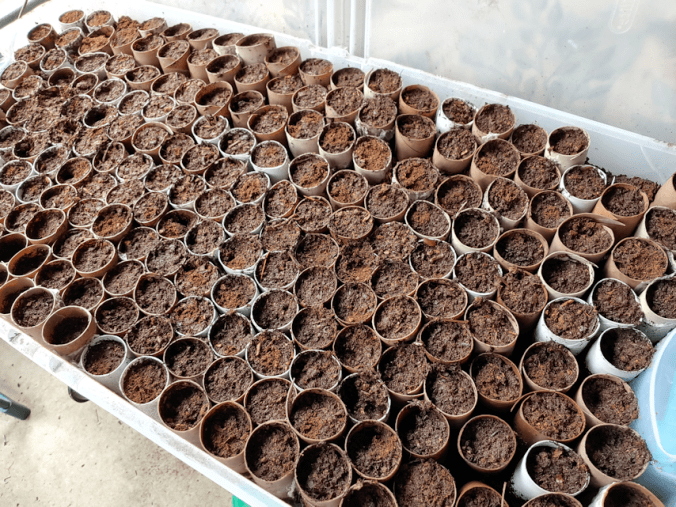
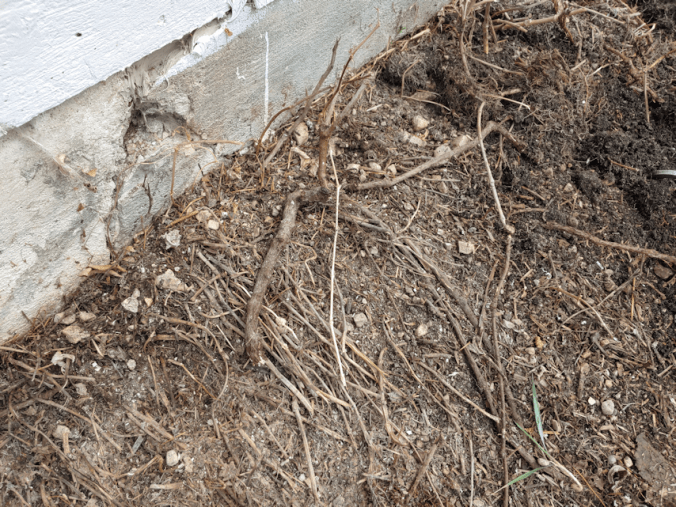
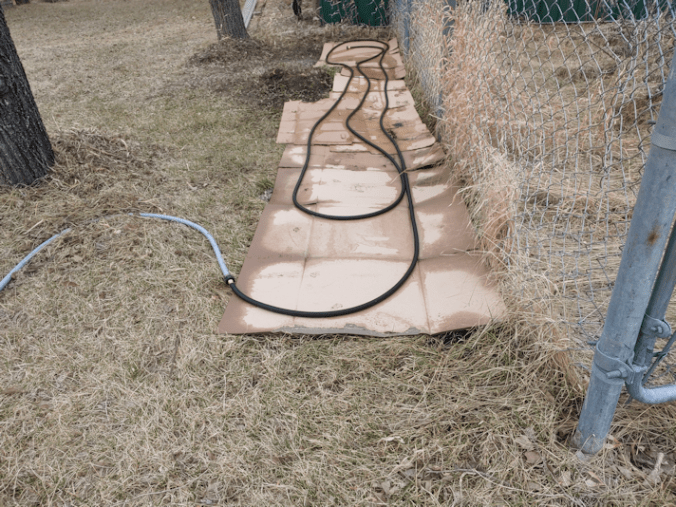
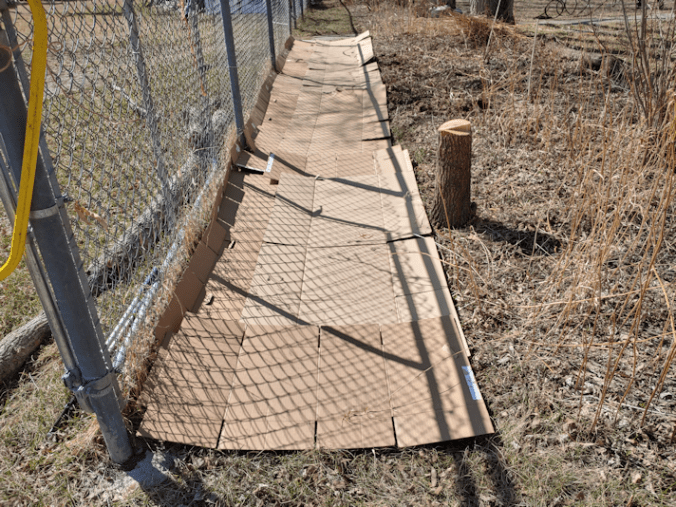
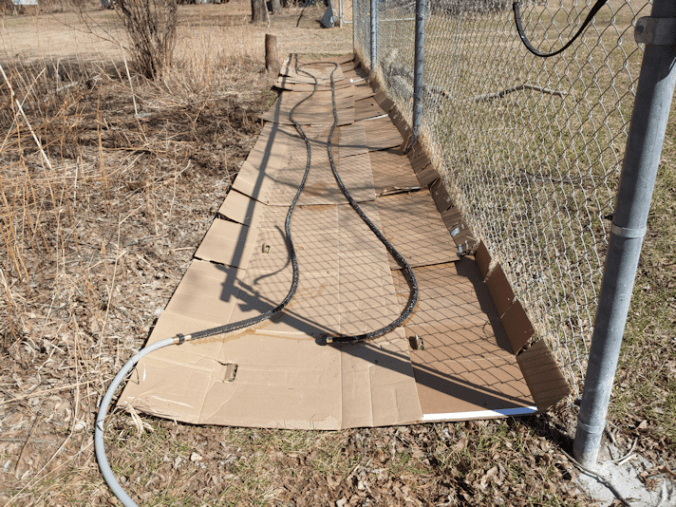
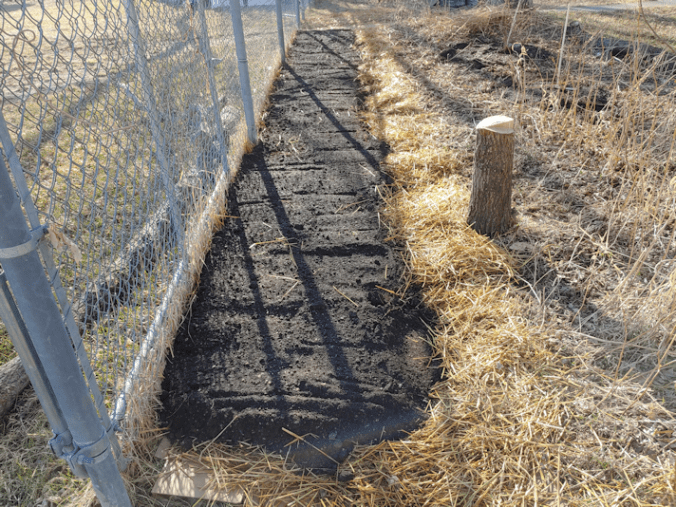
After finishing planting the carrots and beets, it was time to get back to the old kitchen garden. We’ve done almost nothing there, since we ended up building the path instead of hauling soil over and planting.

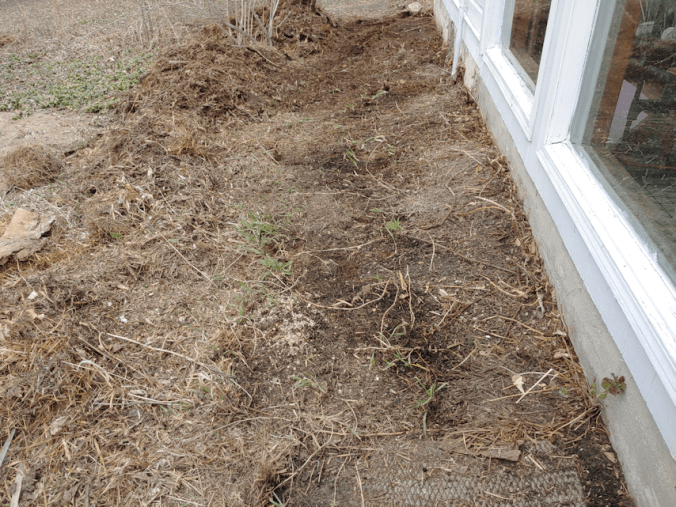
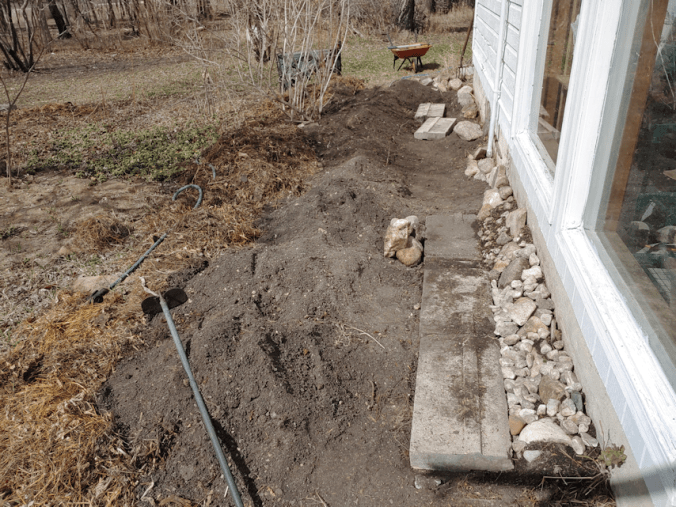
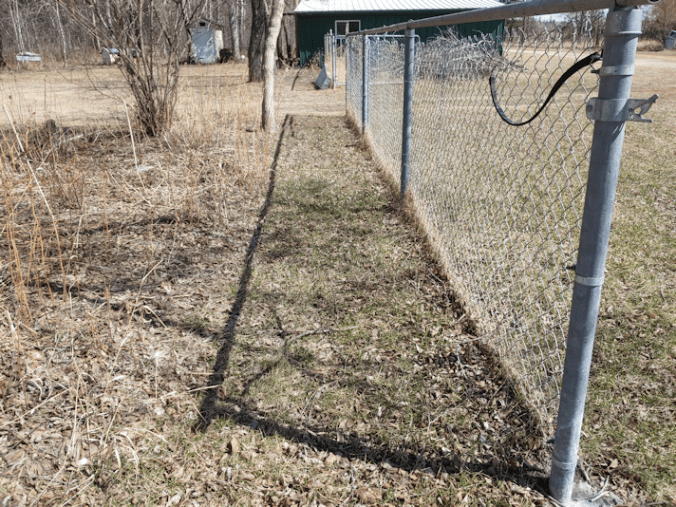
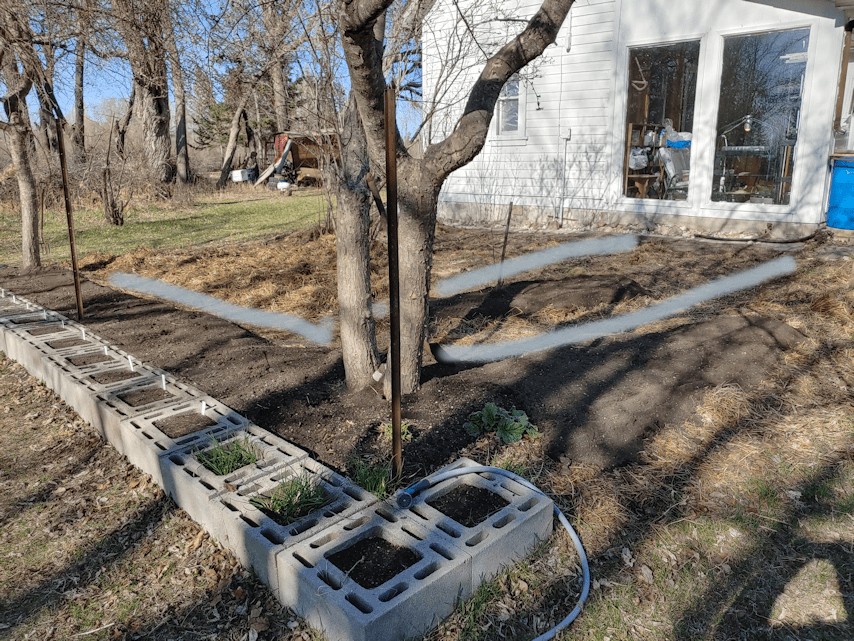
Here is how it looks before I started.

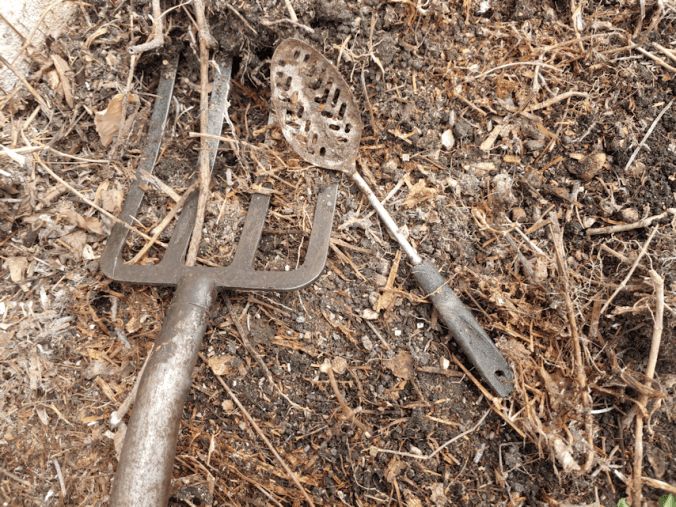
The first thing that needed to be done was to get rid of the lump of soil near the new path. A thatching rake did that job well, as I spread out the soil and mulch down the slope, or around the lilac, honeysuckle and rose bushes.

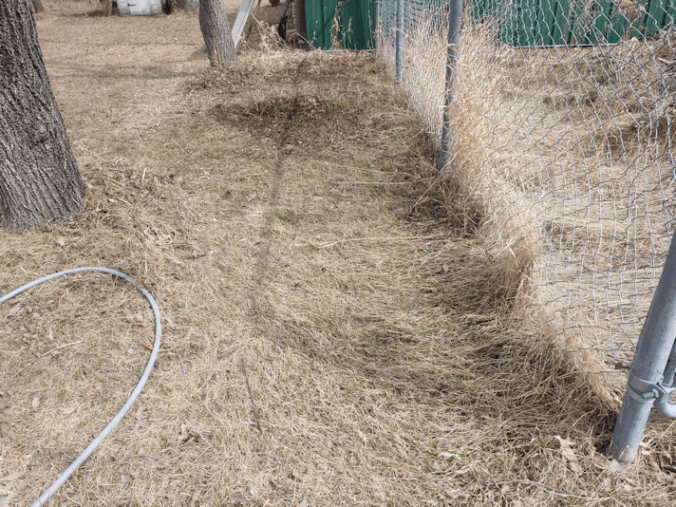
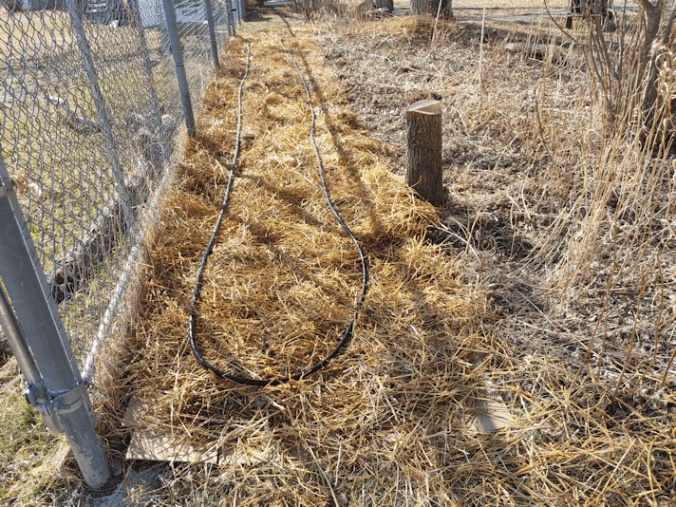
The long row of mulch on the grass in the background was removed from one end of the garden. It was excess flax straw from inside the cat shelter, and was added as mulch last fall. It’s not breaking down very much, so I plan to go over it with a lawn mower.

I also pruned a large branch from one of the ornamental crab apple trees. That poor little pink rose bush will finally get more light!

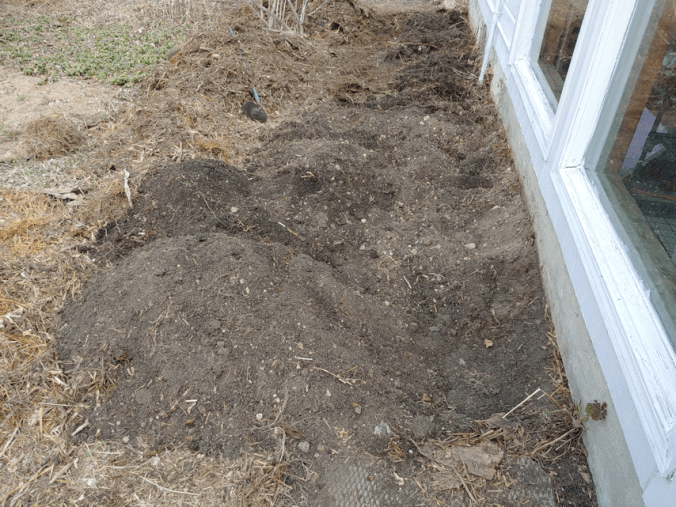
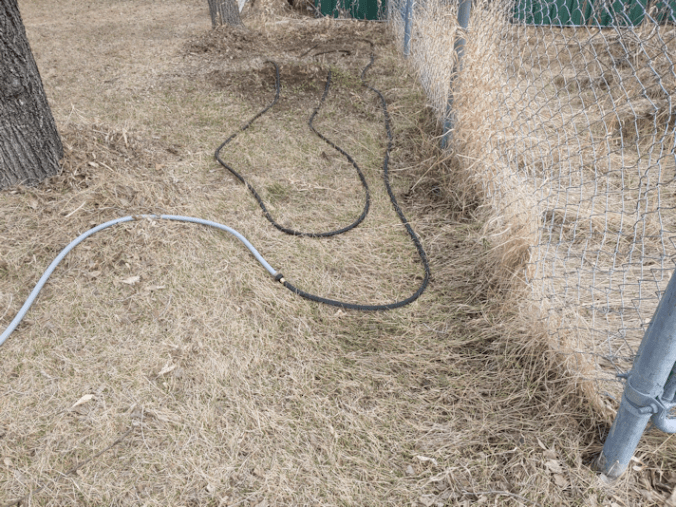
After leveling the ridge of soil from the path at the back, I worked out where more paths would go, and raked those areas clear. I was almost done with that when my older daughter came out to help, and she started bringing over loads of soil. It’s hard to see, but along the retaining wall is a bit of green. That’s a flower that managed to work it’s way through the layers of mulch and bloom last year. We ended up transplanting it to a corner near the rhubarb, where it’s too awkward to plant anything that requires tending.

We were not going to finish the job today, but we did get quite a bit done! Here is how it looked, when we stopped for the day.

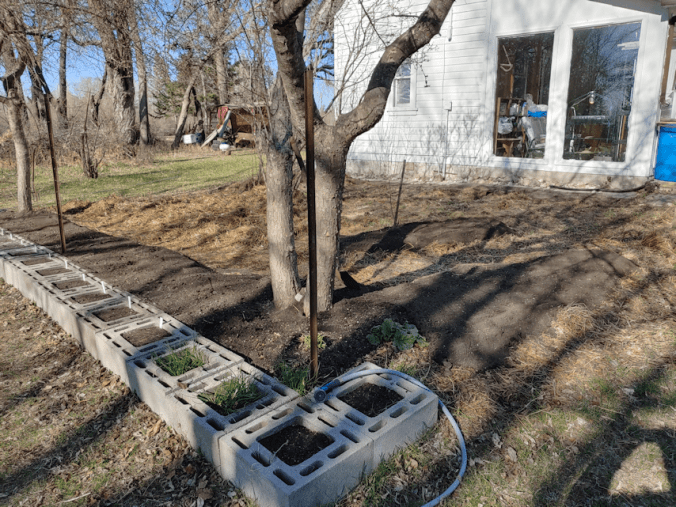
The area next to the retaining wall is filled to the edge of the path and ready for planting. A small “island” at one end was made, and that’s where we ended up planting the poppy seeds. Flowers next to the flowers! The bulbs my daughter planted there are just starting to emerge. :-)

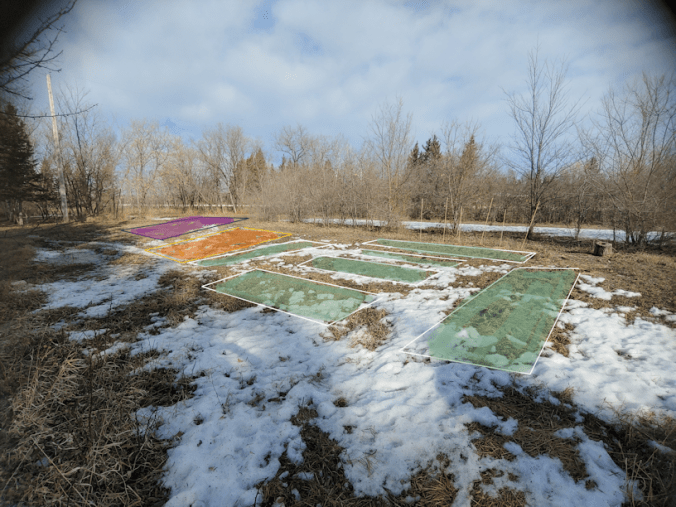
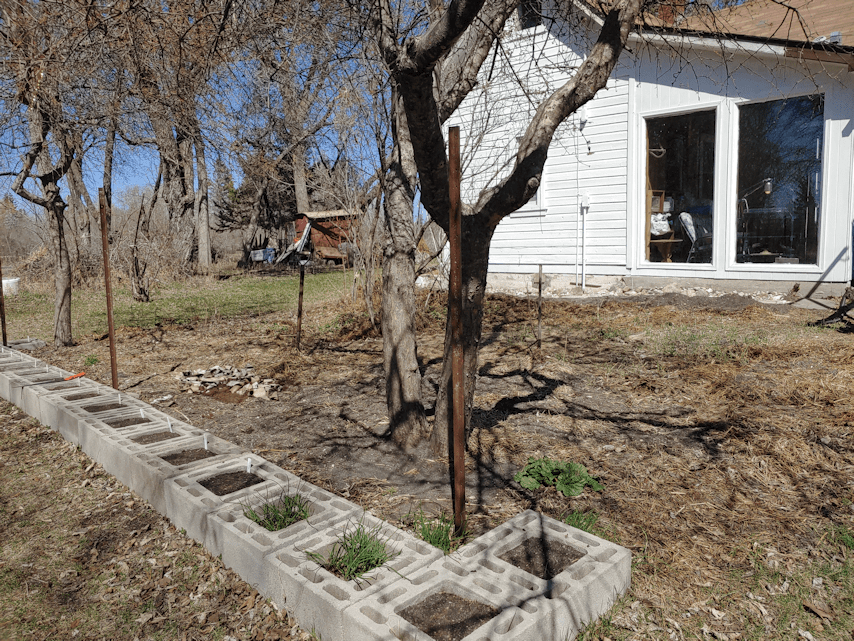
Here is where the paths will be, marked in grey.

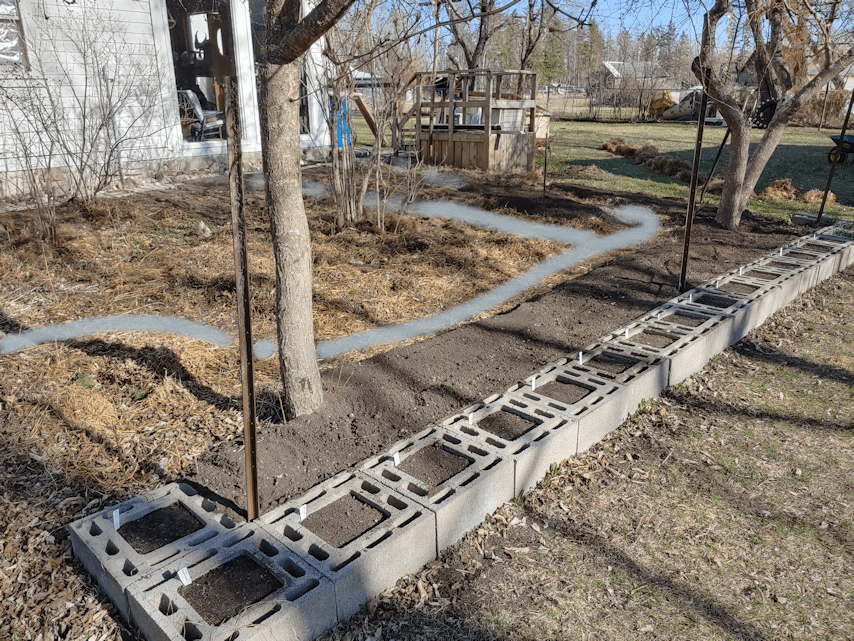
We will continue adding soil to finish the “island” around the little rose bush, which will be extended to the stone patch. Another path runs through about the middle of the garden, joining the stone path and the one that runs across the garden. In the one corner, the path runs around a patch of rhubarb. More soil will be added to border the path, but we will not be putting soil all the way in. There are flowers in one area that we will eventually transplant, but most of that area is crowded by the lilacs, honeysuckle and white roses, and not a good place to plant things anymore, so we’ll just stick to the border of the path. More beets and carrots will be planted in the fresh soil.

It may not be done, but the poppies are now planted, and it shouldn’t take too long to finish adding soil.

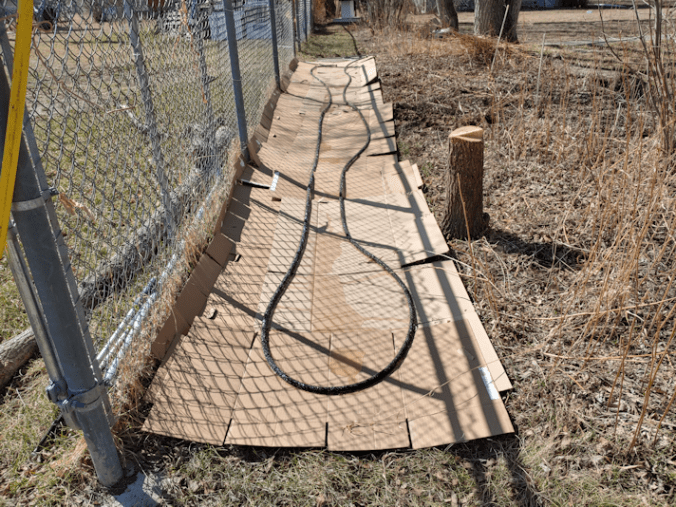
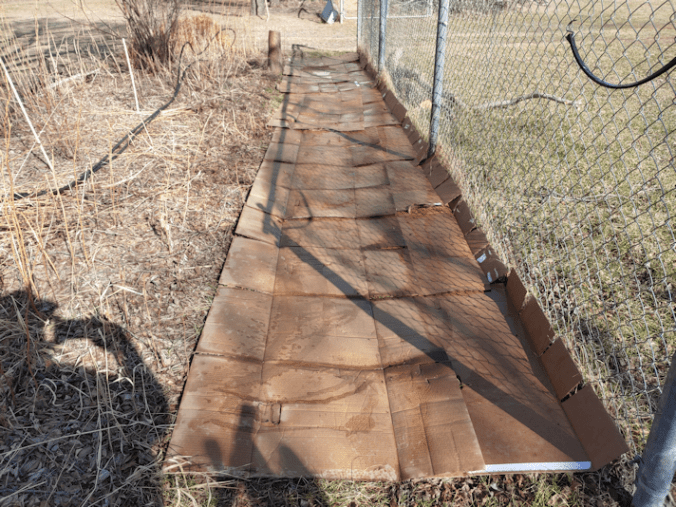
We haven’t figure out what we’re going to use on the paths to walk on. We need to put something there, if only to have something to keep the soil from spilling onto the paths. We’ll have to figure that one out.

So that is now done and soon, the rest will be ready for planting in.

It was a good day’s work!

The Re-Farmer

Our 2021 garden: an experiment, plus the jiggler is in!

Today I took my mother to her doctor’s appointment, so I got very little garden stuff done today. Last night, however, I was able to start prepping the toilet paper tubes we’ll be using to start the Montana Morado corn in.

I picked up this coolant funnel long ago, because it’s perfect for jobs like this! :-D

I neglected to take photo of the next step. After filling all the tubes with peat, I used the 1/4″ hardware cloth I still have a piece of, laid it over the bin, then sifted peat over everything. Aside from topping up the tubes, I wanted it to get in between the tubes and fill the gaps to hold them in place. Especially in the spots where the wheels of the bin are, with a “fender” on the inside that I couldn’t put tubes on because it was too uneven.

After that, a whole lot of water was poured over all the tubes using a watering can. It would have been much easier to use a hose on “mist”, but by then it was night and too cold to use the hose.

The sun room was nice and warm still, though!

Adding the water had two unexpected effects.

The first was, the tubes started to float! I should have expected that. The problem was, you can’t actually see that it was floating. I’d added another watering can of water before I reached out to even the tops of some tubes, and the whole thing sank!

The peat may have been all light and floating, and it takes a long time to absorb moisture, but the tubes are a different story! They not only quickly absorbed water, but some of them started to come apart at the seams. Thankfully, they’re packed tightly enough to hold each other in place.

It did make be wonder if this would work at all.

I think it will. Here is how it looked this morning.

The cardboard actually seems to be helping the peat absorb more moisture. I went over the surface with a spray bottle. You can see in the photo that some of them still have dry areas. This is all being absorbed from bottom, though, so they should have been mostly moistened through. Normally, I would have premoistened the peat, but there was just too much needed for this job.

I’ll check it again tonight and see if I can start planting the corn, or if it will wait until tomorrow. There is still enough water in there that the tubes in the middle are still floating a bit, as the bottom of the bin is sagging from the weight of the water in that area.

After I got home from helping my mother, I made a quick run into town and made a special trip to a dollar store. I picked up some hula hoops. We haven’t been able to find row cover supports, so my daughter thought of cutting hula hoops and using those. If it works out, we can get more later.

I also cleaned the store out of pinwheels (they only had 6 left), plus I got some spinners and wind vines. When I did my rounds this morning, I found birds digging in the dirt in the bed we planted carrots in. :-( All those beds now have shiny metallic pinwheels in them. I’ve set up wind vines at the strawberry spinach, and as close to the garlic beds as I could. I put spinners in the ornamental apple trees over where the spinach was planted. We still have a few more of those, but we’ll save them for later. I will probably get more pinwheels after the store restocks. It would be good if we could replace the plastic grocery bags on the pea trellises with things like that. I noticed there was a solar motion sensor floodlight that would be good for startling deer, but it was out of budget. :-/

The girls and I were quick about putting the bird scarers out. I had hoped to cover the beds with plastic, but it was just too windy. So I watered the beds again. The water will help regulate the temperature in the soil as temperatures dip overnight. At least, that’s what I’ve read! I didn’t get any photos because, to be frank, I just wanted to get back inside again! When I checked the weather once I was inside, it said we were at 2C/32F – but the windchill was -6C/21F! It certainly felt like it was below freezing. Meanwhile, the thermometer in the sun room was reading about 28C/82F.

One of the things I made sure to do before I went to my mother’s was to get the mail. The last of our onion sets were in, but so was another pleasant surprise!

The kit to convert our pressure canner to use a weighted gauge (aka: jiggler) is in!!!

I can hardly wait until we can test it out!

That might be a while, though. We’ve got lots of outside stuff that needs to get done, and we won’t be in a position to continually monitor the canner while it’s being tested.

I’m really looking forward to it! :-)

The Re-Farmer

Our 2021 garden: old kitchen garden, part one

A change in plans.

Today, I wanted to get started on the old kitchen garden, where we intend to plant the poppies.

This is how it looked at the start.

The hose is from the sump pump in the old basement.

It has not turned on in ages. It’s simply been too dry.

You can see a path has started to form, a couple of feet from the wall. This is mostly from the cats crossing the garden, though we sometimes walk through there, too. The plan was to add new soil against the wall, to plant the poppies, and put in a stepping stone sort of path where one naturally formed. We found some concrete blocks out near the barn that we decided to use for the paths.

But first, it needed to be cleared.

Our first summer here, we did a major clean up of this old garden, removing a fence, cleaning it out as best we could, laying down cardboard, then covering it with straw, grass clippings, kitchen waste, and any soil from various places that we could get it. You can read about the clean up we did here, here, here and here. Yeah. It took a while! (all links will open in new tabs)

My mother had flowers growing here, and quite a few of them made their way through the layers. So did the crab grass and a vine we’ve been fighting continually since moving here. So the first thing I had to do was rake away the mulch, down to what was left of the cardboard layer. You can see lots of roots that were uncovered!!

Most of the biggest ones were from that invasive vine. It used to cover the entire wall until my brother and his wife pulled it down while painting the house, the summer before we arrived. They were causing damage, so we don’t want them growing back.

Speaking of damage, that crack is in the foundation under the old kitchen, which was tacked on to the log cabin portion of the house at some point. There’s a crawl space under there.

My brother told me about fixing the broken attic window above the old kitchen. It never occurred to me that the glass would still be on the ground! We’d laid cardboard over it, and never new it!

Finding glass from a broken window, I can understand. But this?

Why a spoon?

At this point, I was breaking up the soil with the fork and pulling out lots of roots.

Lots of roots.

So many roots.

Which created a problem I did not expect.

I was pulling roots out from under the old kitchen foundation, and the concrete floor of the sun room. In the process, soil started falling out from underneath.

No wonder the windows in the sun room are cracking as it shifts!!!

This required a change in plans. There was no way I was going to turn this into a garden bed, where watering it might continue to undermine the concrete. I needed to get those roots out, then shore up the sides.

It’s a good thing we have a nice big rock pile over by the power pole. We also had piles of smaller rocks we’d gathered from the garden, though not very many.

Large rocks were placed against the wall, soil put back to fill gaps and support the rocks, smaller rocks are added on top, and the concrete blocks were placed to begin the path.

We brought those blocks over in the wagon, which is rated to 300 pounds. I don’t know how much they weight, but with three blocks, the wagon didn’t want to roll. My daughter pushed while I pulled. After that, I only put in two blocks at a time.

The wagon was used to bring rocks over, too.

After a while, it started to get hard to find smaller rocks. There is decades of detritus that has decomposed on them, with a very strong layer of crab grass rhizomes!

As we worked our way down, still clearing away roots, we got hung up by an old rose bush. It took a while, but I finally got it out!

That is one weird looking root clump!!

My daughter was just coming back from a break (we were very careful not to overdo it; the last thing we need is to injure ourselves!!) as I put it in the wheelbarrow with all the other roots. She was checking it out when she suddenly dropped it in alarm.

This thing had been exposed and wriggled at her!!

I don’t know what this grub is, but considering it was burrowing in the rose roots, I’d say it’s not a beneficial creature to have in the garden. :-/

This is where we stopped for a longer break. Sustenance was needed!

There are enough larger rocks to line the wall. My daughter used some to make a little wall around the power cables that run under the old kitchen. We also found a cable running along the wall to the corner, which is going to be carefully covered with rocks.

There are two more of those blocks in the wagon. They will be spaced out from one end to the other, and the gaps filled with soil and rocks.

As for the poppies, they will now be planted on the other side of the path!

Meanwhile, as I’ve been working on this post, the girls have gone back outside and are planting the Strawberry Spinach. :-)

The Re-Farmer

Snowy morning

This morning, we had snow coming down with flakes so big, I could see them without my glasses! :-D

They even triggered the motion sensor on the security camera during daylight. That happens all the time at night, with the infrared flash (and I wake up to hundreds of emails with images of snow or rain streaking across… :-D ), but almost never, during the day.

The outside cats are completely unphased by this little bit of snow. :-)

The future tomato bed got some much needed moisture! The more the better, to help break down that cardboard and straw.

The garlic sprouts don’t mind the snow at all. :-) The snow actually made it easier to see how many more have sprouted since I last checked them out.

It was interesting, going through the maple grove and checking out the areas we planted bulbs and corms in. There was a void in the snow, under every single spruce tree. This is a good visual to ID which areas are getting the least moisture, so if/when we do water where we planted, we know which areas need it more. Of course, once the other trees and bushes leaf out, there won’t be any difference, but that’ll be a while, yet.

There are still only two tulips showing, and that one onion that’s managed to survive from when this was my mother’s garden, in the areas my daughters planted their bulbs. They don’t seem to mind the snow at all!

In the sun room, while it was still just below freezing outside, the thermometer was reading 10C/50F. That is more than adequate for the onion seedlings. The light and heater bulb kept the tomato and luffa seedlings nice and warm through the night.

By the time I finished my rounds, much of the snow was already melted away, and from what I can see on the security camera live feed, there isn’t a bit of it left.

I don’t know that we’ll have a nice enough day to continue working outside today, but we’re supposed to get warmer over the next couple of days, then cool day with rain. As much as it slows down how much progress we can make on the garden beds, I am thankful for every drop of moisture we’re getting right now! After one hot day, the temperatures will drop down and basically flat line at around 8C and 10C (46-50F) for highs, and hovering at or just above freezing for the overnight lows, for the next two weeks. We might even get a bit more rain in there, too!

The weather for today is still saying we’ll have a high of 7C/45F, but that it’ll feel like 4C/39F. I’m hoping to be able to get some more progress outside, but we shall see. The melted snow might actually make it easier to dig more post holes for the other pea trellises we’ll be making. If we can’t get to that, there’s plenty of other things we need to work on! :-)

What fun! :-D

The Re-Farmer

Our 2021 garden: killing grass, and first one!

While doing my rounds today, I brought out one of our black tarps and headed over to where we will be planting the Montana Morado corn.

None of our corn can be planted until well after our June 2 last frost date. Covering this area now will give us about 5-6 weeks to kill off the grass as much as possible, before the corn can be planted. There’s a lot of crab grass around here, so I don’t expect to kill those off completely, but we should be able to pull up a lot of the rhizomes later on.

The Montana Morado is the only corn we will be starting indoors, as we are not sure how well they will grow in our zone. If things go to plan, we will save seeds from these and, over the years, it should develop hardiness to our local climate. But first, we have to get a successful crop! I’m really looking forward to how these turn out.

Of course, while continuing my rounds, I checked the areas where we planted in the fall. There are more tiny little muscari showing up, as well as the snow crocuses. This was my morning surprise, though.

The very first of my daughter’s tulips has emerged! So exciting! The tulip bulbs they planted here needed to be buried quite deep, and heavily mulched. While they need cold winters, we didn’t know if they survived the extreme cold we got in February. If they had been established, I would not have been concerned, but this is their first winter after planting, and they were more vulnerable. Hopefully, this means we will be seeing the other tulips, and the irises come up soon.

We did see something coming up that we thought might have been an iris, though my daughter didn’t remember planting that far out. It turned out to be an onion! When we moved here, the old kitchen garden had a fence around it, and my mother had some onions just outside the fence line. One or two have been coming up every year, but they never reach full maturity before dying back, so I’m really surprised to see one coming up.

It makes me think about transplanting our bulb onions in the sun room soon. The ones started in the Jiffy pellets are getting really big. :-) We still need to add soil to the beds those will be going into, though, which means I should probably start hardening them off now.

We’re going to have an awful lot that needs to get done, all at once, pretty soon!

The Re-Farmer

Our 2021 garden: marking spaces

After working things out and making some decisions on where we want to plant things, we are ready to mark out beds in preparation for planting. We have seeds than need to be direct sown before our first frost, and those are the areas we want to focus on.

We’d decided to mark off blocks at 20′ x 20′ (about 6m x 6m) for the corn and 20′ x15′ (about 6m x 4.5m) for the sunflowers, and then make 3′ x 8′ (about 1m x 2.5m) beds for most of the rest.

With that in mind, I figured the easiest way to mark off blocks would be with knotted cord. I used 2 lengths of paracord with a loop at one end. From the loop, I tied knots at 3′, 8′, 15′ and 20′ We have a bundle of small marker flags, and I grabbed those to mark the corners of the plots.

The first thing I did was mark off a 20′ x 20′ block in the furthest corner, from which everything else would be lined up.

I decided to start the rectangular plots roughly 4′ (just over 1m) away from where the corn will be. Once I started marking off the first one, though, I quickly threw away the idea of making them only 8 ft long. For this space, that is just minuscule!

I made them 20′ long, instead.

In the above photo, there are 4 plots marked off, with 3′ paths between them.

I added 1 more and ran out of flags, so I used a stick from the pile of branched I’d pruned a few weeks back.

Then I went back and made more marker sticks. We’ve got the bright orange marking paint, so I used that on one end of the sticks so they would be more visible.

Using the two knotted ropes to find where to place the markers worked really, really well. With the looped ends at markers or flags, lining up the knots to find the next spot to mark also made it easy to keep straight lines and right angles at the corners. It’s not perfect, of course. The rough ground alone made that impossible. They don’t need to be perfect. All of this is just temporary, anyhow, until we plant trees here.

I took the time to make more markers from sticks, spraying one end with the bright orange paint, then made another row of plots.

This is how it looked when I was done.

Yeah. I know. Hard to see!

So I edited it to as close as I could match the lines.

The big block by itself is where the corn will start. It’s hard to know how much space we’ll actually need, but at least we have the general area worked out.

With just the rectangular plots, this is an area that’s 15′ wide and 66′ long (about 4.5m x 20m), including the paths in between.

We will be marking more of the rectangular plots, as well as another corn block at this end.

Our three varieties of bush beans will be planted in the plots nearest the corn, though I’m already rethinking that. The peas, which need to be planted right away, will need to be trellised, so they need to be to the north, so they don’t shade other plants. We have only 2 varieties, but one of them is a bag of 200 seeds, while the other is a typical seed envelope, so having two sections of the green peas and one of the purple should work out. The three varieties of beans can take the next three sections.

The actual dimensions of the area, compared to what we thought we had on the satellite image, means we’ve got three plots at the end that does not have anything specific planned for them. It’s hard to see in the photo, but even the furthest plots are still far enough away from the apple trees that they will still get full sun.

We’re out of cardboard, and we’ll be running out of straw very quickly. It’s going to be a challenge with all that grass, until the plants fully mature. By planting densely, they should shade out and choke out the grass and weeds. When we do add the soil, we will have to be careful in how we use it, or we’ll run out very quickly! One of the things to keep in mind, as always, is that this is meant to be temporary. When it comes to food trees, they take so long to reach productions stage, we really need to get those planted quickly. If we can swing it next year, that would be amazing, but even if we can only afford to do a few a year, rather than a whole nut orchard, all at once, that will be a good start.

Until then, we’ll be breaking up and amending the soil with vegetables. :-)

The Re-Farmer

Our 2021 garden: unplanned garden bed

My daughters and I have spent quite a bit of time, working out where to plant what, so we know where to build beds to plant in. Then I realized we completely forgot about the purple asparagus crowns that will be shipped later, to arrive at time of planting in our zone 3 region.

We’d talked about them before, but hadn’t made any decisions. Where my mother had asparagus was ruled out. She’d planted trees and bushes in that garden, so that area no longer gets enough hours of sun in a day. Asparagus will produce for up to 20 years, so we couldn’t include them in most of the areas we will be planting in this year.

After talking about it, we settled on a spot where we had not originally planned to have any garden beds at all this year.

This is the spot we settled on, after I’d raked it out.

Part way down is where there used to be one of my mother’s tire planters that I’d taken out. I’d dumped the soil out to remove it, and found it was on top of the remains of an old maple.

I know it was an old maple, because it immediately began sending up suckers.

I had covered it with the soil inside the planter as much as I could. The flowers that were in that planter have been showing up, which was nice to see at least. :-) Much of this area is difficult to maintain, though. So now we will be planting two things here. At the far end, on the other side of the remains of maple, is where we will be planting the Strawberry Spinach. In reviews on the Baker Creek website, where I bought the seeds, it was mentioned that these self seed easily, and it was recommended to plant them in a permanent location because of this. That was kept in mind when we chose this location.

In the foreground is where the asparagus will go. For that, we will need to dig a trench long enough for the 6 crowns we will be getting.

Digging a trench here is going to be a challenge.

So today, I set up the soaker hose directly on the ground to start. Saturating the soil will make it easier to dig the trench.

While that was soaking, I prepped as many cardboard boxes as I could find, removing any tape or stickers on them.

My daughters helped me to lay the cardboard under the soaker hose, and we left it running for a while as we checked other areas. The rain barrel was full, so we used it to fill our watering cans and wet down the cardboard more, and finally just left the soaker hose going for about an hour. The above photo is what it looked like when I turned off the water.

(We are now out of cardboard. :-/ We do still have some moving boxes left, but they’re in really good shape, so we’re saving them for something else.)

We were planning to put straw over the cardboard, too, but it was way too windy today. We have several weeks before the asparagus crowns will arrive, so covering the area now will help kill off the grass, as well as make it easier to dig a trench, later. We’ll just have to keep soaking it. Where the Strawberry Spinach will be planted can have mulch and soil added to it at any time.

I’ve been looking at instructions for planting asparagus, and some places say to dig a trench 15 inches/38cm.

That’s not going to happen!

Those articles, however, also say to fill the bottom third of the trench with compost. We don’t have compost left.

Other articles say to soak the crowns in compost tea for 30 minutes before planting.

Since we don’t have compost to make compost tea with, that’s not happening, either. Our new garden soil, however, has plenty of compost in it.

I’m reading that the crowns should be planted 1 1/2 – 2 ft/46-61cm apart. We will be getting 6 crowns. That space isn’t long enough to plant them in one long row, but it’s wide enough to plant them in 2 rows, so we’ll need to made a double wide trench – about 24-30 in/61-76cm wide. A depth of 8 inches/20cm should be good, but we will be building the area up, so we won’t need to go quite that deep. I don’t know if we even could go any deeper, with the trees being so close. I expect to find a lot of roots under there. By the time we’re done, this area should be about 4-6 inches/10-15cm higher than it is now, so all we really need to do is get rid of the top layer of grass roots.

Hopefully, we will be able to remove more of that tree stump and cover the remains over, in the process.

Once it’s done, we should be able to leave things here and just keep them maintained, for the next couple of decades.

The Re-Farmer

Our 2021 garden: new bed built

It was an absolutely gorgeous day today!

My younger daughter and I took advantage of it and built a new garden bed in the area we plan to plant tomatoes.

The tomato seedlings are doing well, as are the luffa.

They have roots starting to show out the bottoms of the pots already!

The onions in the sun room are doing well, but not to much the ones planted more recently.

As for the gourds, none have sprouted yet but, from what I’ve read, they do take a long time to germinate.

Here is where the tomatoes will be going.

We did absolutely nothing to the ground before we started. There really wasn’t any point of even trying.

The first step was to cover the grass.

Actually, the first step was to cut down that maple. I’d already noted that it was creating so much shade when in full leaf, that a unique lilac in the flower bed beside it was being killed off. The stump was left high and will become the support for a seat. The main trunk and some of the larger branches are being kept for future projects.

We’ve been saving the cardboard boxes from cat litter, and their flaps were placed against the fence as a short barrier to hold in the soil.

Well… after spending some time removing all the tape. It took more time to get all the tape off than to lay out the cardboard!

Those and some moving boxes were enough to cover the entire space between the flower bed and the fence. :-)

Then, we broke out the new soaker hose! :-)

We will likely be going below freezing tonight, so the water will still need to be shut off from the basement when we’re done, but for a warm day like today, we could use the hoses for a while.

The soaker hose is 50 ft/15m, so we’re looking at approximately 25 ft/7 1/2m for the new bed.

While letting that soak, my daughter and I began bringing loads of straw over from the bale in the big garden area.

We probably could have left the water running all day to soak it thoroughly, but we didn’t bother. We did move the soaker hose over by the haskap berry bushes, though, and left the water running while we moved on to the next step: spreading the straw.

Actually, I spread the straw while my daughter filled a couple of wheelbarrows of soil and brought them over. Once the cardboard was covered, we tromped back and forth on it, stamping it down, then lay the soaker hose back over it.

We left that to soak and took a walk around the big garden area and talked about changing a few things.

The above image shows the existing beds from last year’s garden, in green. The three smaller beds in the middle were going to be where our three varieties of spinach would be planted. I was thinking we might change those up completely. Instead of three short beds oriented East-West, it would probably be better to have two longer beds oriented North-South, like the two we already have. One of the North-South beds was supposed to have shallots planted in it, but the shallot seedlings failed, so we’ll still have three beds available to plant spinach (and whatever else we interplant with them).

Eventually, we will be building accessible raised beds here, so nothing is permanent at this point, anyhow.

There’s also the two small beds – the shorter green rectangles in the above pictures – where we’d planted potatoes last year. There’s nothing stopping us from making those longer, stretching into the skinny bit that’s marked in orange.

So that’s what we’ll do with those areas.

By the time we went back to the new bed, my older daughter was done work for the day and was able to join us.

The first thing they did was stop using the larger wheelbarrow, because it sucks. :-/ Actually, they both do. We need to get a new wheelbarrow! Just one good one is enough. :-)

So one daughter had shovel duty, filling the smaller wheelbarrow, while the other brought it over and dumped it, then I spread the soil until a new load was brought. The job was done very quickly!

The area of straw left uncovered will be a pathway. At some point, we’ll put in some pavers or something, but for now, the straw and cardboard will keep the weeds and grass down. That and lots of tromping it down with our feet. :-)

Each of the haskaps got a load of soil around them, too.

Then, because the hose was handy, the soil got a brief watering, more to keep it from blowing away than anything else.

Our last frost date is June 2, so this will have more than a month for the straw to settle. We’ve got one more warm day, then we’re supposed to get snow. Long range forecast sees more snow and rain into the first few days of May. Any precipitation we get will help settle it more, and we’ll be able to see if we need to add more soil or not.

If all goes well, I will use tomorrow to dig a new bed next to the garlic beds, before things cool down again. That one will be a lot more physical labour than this one was!

I’m looking forward to it. :-)

One area done, many more to go! :-)

The Re-Farmer

Our 2021 Garden: the garlic beds

My older daughter and I headed out for a walk, and we decided to go ahead and remove the plastic covering our garlic beds.

When looking up how to plant winter garlic, all the resources said to cover the garlic with a heavy layer of mulch.

What none of them did was mention when to take off the mulch in the spring. I knew the mulch was removed, because all the videos and photos I saw that were taken later in the growing season showed the garlic growing out of bare soil. No mulch in sight. It took some dedicated searching, but I finally found resources that said to remove the mulch after overnight temperatures were consistently above -6C/21F. Looking at our long range forecasts, we seem to be at that point, as overnight temperatures are generally supposed to stay above freezing. We’ve started by just removing the plastic for now, though. We’re supposed to get some much needed rain tomorrow, and have decided to leave the mulch a bit longer. Right now, it’s keeping the beds from drying out, like everything else has done this spring. With so little snow over the winter, and very little precipitation so far this spring, every little bit of moisture is precious.

When I dug these beds out, I moved the soil to one side, put the contents of our compost heap on the bottom, added straw on top, then put the soil back, including the soil that was in what are now paths. I dug those areas down to the gravel, using it to raise the garlic beds higher, then filled the space with scrap wood to create the paths.

I won’t be adding another path on the other side of the third bed, which means I’ll only have what soil I take off the top. I’ll be emptying out our compost heap into the bottom, then add in the mulch from the garlic beds, before putting the soil back. I don’t think it’ll be as high as the other beds, but hopefully we’ll have our loads of garden soil delivered soon, so I’ll be able to top it off with that. The mulch will probably be removed before then, and I’ll just move it onto the paths at first.

We’ve had quite a few warm days. I think I’ll call the company up in the next day or two and see if their soil is thawed out enough to load into their trucks or not.

I might be just a little bit excited about getting that soil! :-D

The Re-Farmer

Clean up: trees in the old garden

We had such a lovely day today, even with fairly high winds, that I couldn’t resist going outside and doing a bit of clean up. This time, I decided to work in the old garden area.

As we clean up around the property, there is one thing I find myself struggling with that I did not expect.

Trees.

In the decades I was away, my parents slowly reduced the size of their gardening, which made perfect sense. Unfortunately, at the same time, they planted trees. Poorly placed trees, many of which I am now having to cut down for various reasons, while trying to save as many as I can. At the same time, they also allowed self sown trees to grow where they really shouldn’t have. Some of them now need to be removed because they are causing damage. Others… well. Let me show you.

This is the before picture.

My mother had a row of raspberry bushes here. Elms and maples had self-sown among them. When my mother transplanted the raspberries (into an area that’s full shade!), she left the self-sown saplings. For a “wind break” she told me. The garden used to extend another 6 feet or so to the north. As they are now, the trees take up a space about 10-12 ft (3-3.6m) wide, and about 100 ft (30.5m) long.

That’s a lot of square feet of full sun garden space that can no longer be used.

Between these and the shade created by the trees they’d planted into the garden area on the south side, huge amounts of garden space have been taken out of production. Space that’s the closest to the house and water.

When I brought up taking them out and reclaiming the garden space, my mother was adamant that they not be touched. Apparently, if we take them out, we won’t have any wind break anymore or something, even though there are plenty of other trees and the lilac hedge to shelter us from Northern winds. :-/

Well, we’re not in a position to actively remove the trees quite yet, though the arborists recommended taking them out while they’re still small enough to be pulled out by the roots with a tractor. While trying to garden near these on one side, and tend the lawn on the other, I figured the least that should be done is to trim and clear them.

Yes, I know. This is probably the worst time of year to be trimming trees, but these are not trees we plan to save. They’ll do just fine, though. In fact, they’ll probably thrive. :-/

Starting at the end I took the photo at, I worked at it using both the baby chainsaw (aka: cordless pruner) and the long handled pruners. Loppers, I think they’re actually called. I used those quite a bit, because the branches and suckers were so dense, I couldn’t get in with the baby chainsaw to cut where I needed to. Which is fine. It reserved battery power for the pieces too large for the loppers. I got about 1 1/2 hours in before the battery died, then I continued for another half hour or so with the loppers.

Here is how it looks now.

That log that is now visible marks the corner of the mulched area we gardened in last year. I cleared until just past that log.

This is my branch pile.

I at first tried to trim the larger pieces and set them aside for potential use later, but that was taking up too much time, so I just added to the pile. When it’s time to deal with the pile, it will be easier to use hand pruners to trim any larger branches that might be usable for other things. The smallest pieces will go onto a chipping pile.

I did use pruning paint on the cut ends of the trees, though the maples were pouring so much sap, a lot of it was washed away! The elm sap isn’t running yet.

For all my mother’s admonitions to leave the trees alone, I found evidence that I was not the first to try cutting these away. In fact, some of what I found were growing out of stumps. Someone had tried cutting them down, and they grew back.

I also found this little group.

Three elms growing into each other! We couldn’t see this until I cleared things away. In fact, I couldn’t stand in the spots I was in to take the photos, either.

I worked on a maple just past this group of elms and found myself pulling out large strands of vines as well. The rest of the section has more of these vines. My mother had planted them (not here!) years ago, not realizing they were invasive. Now they’re spreading all over, and I’ve found at least a couple of trees that have been killed by them. So I stopped to continue another day, since more time will need to be spent pulling up these vines, which will need to be burned.

The irony of pulling up vines that are killing trees we plan to get eventually get rid of is not lost on me!

By the time I’m done with these, we should be able to walk through and around the trees without having to fight branches. I’ll even be able to mow past them without branches pulling off my hat!

Hopefully, their roots won’t make gardening near them too much of an issue. Eventually, we do plan to build some permanent, high raised beds in this area closer to the house, so it won’t be an issue for long. When we build the permanent garden beds to the south of the house, that will be where we will focus more on things that take longer to mature and get harvested in the fall, while areas closer to the house will be more kitchen garden type things that mature quickly, or have a continuous harvest.

Little by little, it’s getting done! :-)

The Re-Farmer