My daughters and I have spent quite a bit of time, working out where to plant what, so we know where to build beds to plant in. Then I realized we completely forgot about the purple asparagus crowns that will be shipped later, to arrive at time of planting in our zone 3 region.
We’d talked about them before, but hadn’t made any decisions. Where my mother had asparagus was ruled out. She’d planted trees and bushes in that garden, so that area no longer gets enough hours of sun in a day. Asparagus will produce for up to 20 years, so we couldn’t include them in most of the areas we will be planting in this year.
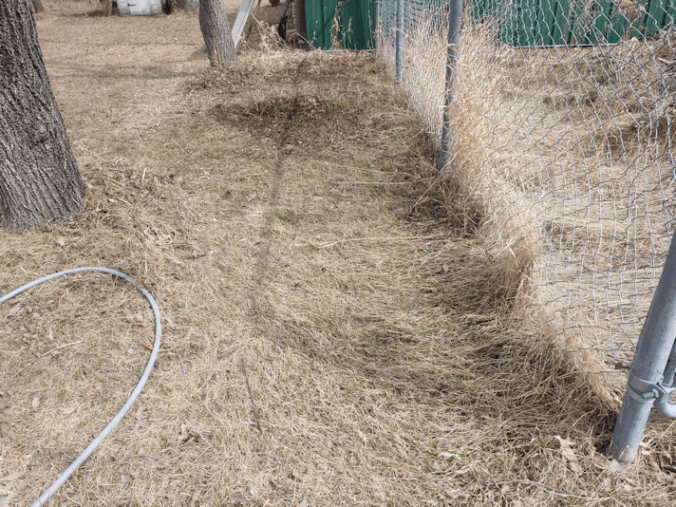
After talking about it, we settled on a spot where we had not originally planned to have any garden beds at all this year.
This is the spot we settled on, after I’d raked it out.
Part way down is where there used to be one of my mother’s tire planters that I’d taken out. I’d dumped the soil out to remove it, and found it was on top of the remains of an old maple.
I know it was an old maple, because it immediately began sending up suckers.
I had covered it with the soil inside the planter as much as I could. The flowers that were in that planter have been showing up, which was nice to see at least. :-) Much of this area is difficult to maintain, though. So now we will be planting two things here. At the far end, on the other side of the remains of maple, is where we will be planting the Strawberry Spinach. In reviews on the Baker Creek website, where I bought the seeds, it was mentioned that these self seed easily, and it was recommended to plant them in a permanent location because of this. That was kept in mind when we chose this location.
In the foreground is where the asparagus will go. For that, we will need to dig a trench long enough for the 6 crowns we will be getting.
Digging a trench here is going to be a challenge.
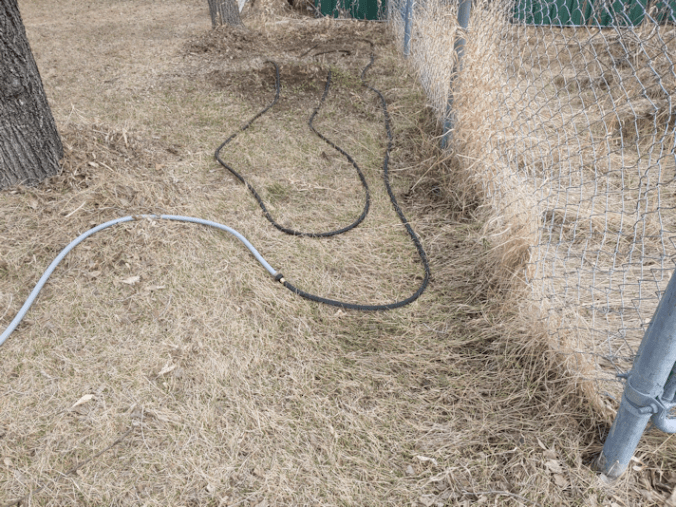
So today, I set up the soaker hose directly on the ground to start. Saturating the soil will make it easier to dig the trench.
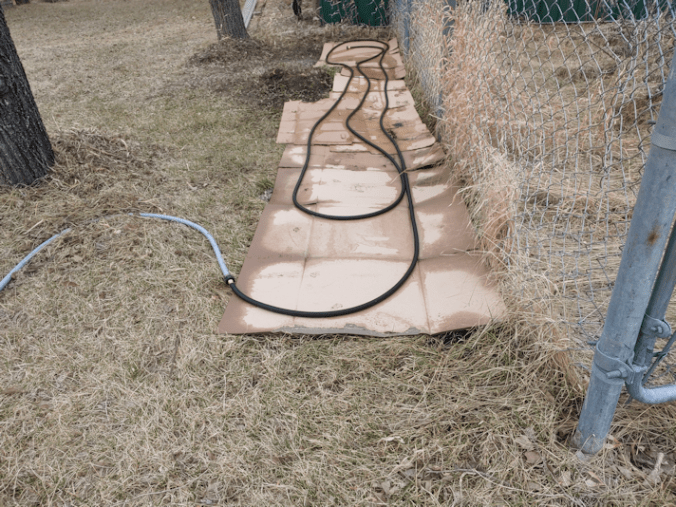
While that was soaking, I prepped as many cardboard boxes as I could find, removing any tape or stickers on them.
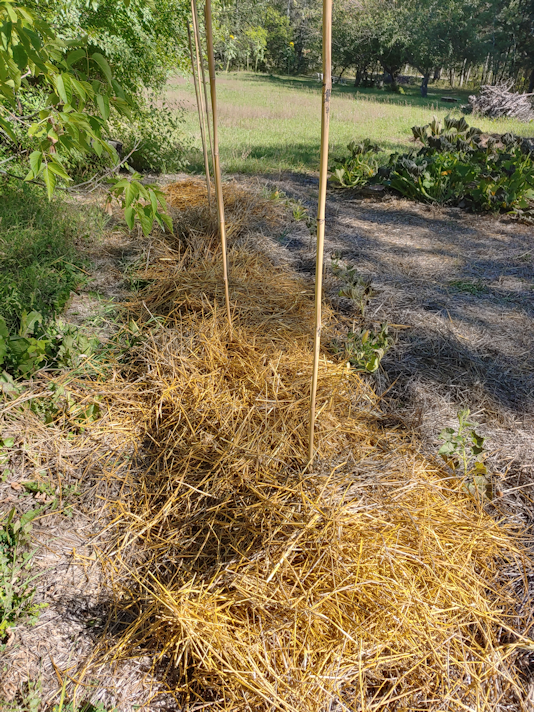
My daughters helped me to lay the cardboard under the soaker hose, and we left it running for a while as we checked other areas. The rain barrel was full, so we used it to fill our watering cans and wet down the cardboard more, and finally just left the soaker hose going for about an hour. The above photo is what it looked like when I turned off the water.
(We are now out of cardboard. :-/ We do still have some moving boxes left, but they’re in really good shape, so we’re saving them for something else.)
We were planning to put straw over the cardboard, too, but it was way too windy today. We have several weeks before the asparagus crowns will arrive, so covering the area now will help kill off the grass, as well as make it easier to dig a trench, later. We’ll just have to keep soaking it. Where the Strawberry Spinach will be planted can have mulch and soil added to it at any time.
I’ve been looking at instructions for planting asparagus, and some places say to dig a trench 15 inches/38cm.
That’s not going to happen!
Those articles, however, also say to fill the bottom third of the trench with compost. We don’t have compost left.
Other articles say to soak the crowns in compost tea for 30 minutes before planting.
Since we don’t have compost to make compost tea with, that’s not happening, either. Our new garden soil, however, has plenty of compost in it.
I’m reading that the crowns should be planted 1 1/2 – 2 ft/46-61cm apart. We will be getting 6 crowns. That space isn’t long enough to plant them in one long row, but it’s wide enough to plant them in 2 rows, so we’ll need to made a double wide trench – about 24-30 in/61-76cm wide. A depth of 8 inches/20cm should be good, but we will be building the area up, so we won’t need to go quite that deep. I don’t know if we even could go any deeper, with the trees being so close. I expect to find a lot of roots under there. By the time we’re done, this area should be about 4-6 inches/10-15cm higher than it is now, so all we really need to do is get rid of the top layer of grass roots.
Hopefully, we will be able to remove more of that tree stump and cover the remains over, in the process.
Once it’s done, we should be able to leave things here and just keep them maintained, for the next couple of decades.
Little bitty sprooooots actually showed up a couple of days ago, but they were so tiny, I didn’t bother trying to take a picture through the glass of the tank.
So far, only the Spoon tomatoes have started to show, not the Mosaic mix, though some of the bunching onions emerged even earlier.
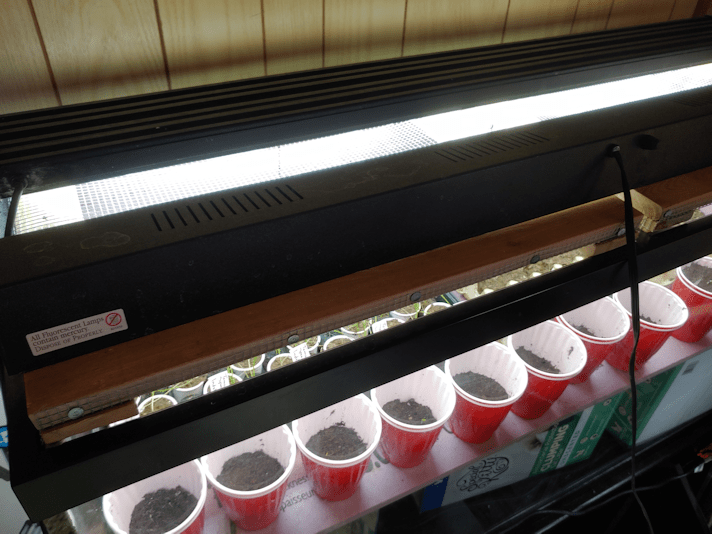
I unpacked the second light for the tank – this was the one that originally came with the tank kit – and set it over the red solo cups. It’s sitting partly on the wood of the mesh frames, to better light up the inside of the cups. That wood is way too wide, really, but it’s what I had available.
Sometimes, I will also put another light fixture on the tank covers, too. While it does have a full spectrum bulb in it, it’s more because it’s an incandescent bulb, which provides a bit of heat. The onions don’t need it as much, but from everything I’ve been reading, tomato seedlings need more warmth.
I look forward to when things warm up and we can start moving seedlings to the sun room (after Ginger has completed his convalescence in there!). By then, the tomatoes and, later, squash seedlings will get all the heat they need in there!
A while back, I used a satellite image to plan where we could plant our garden this year.
Getting a gasp of dimensions was difficult on this, though, but at least it could be used as a guide. Things need to be pretty flexible at this point, anyhow.
With the snow clearing away, we have been getting into the areas and realized that there was a lot more room to the West of the existing beds than there appeared to be, in the satellite image.
Here is the areas with the existing beds where we had planted squash last year.
The perspective makes it look a bit strange.
Two years ago, the area where the green marked beds are was mulched with straw, then covered with black … tarps? Possibly landscaping fabric? Whatever it was we salvaged when cleaning up the old wood pile. That log marks one of the corners of the area we mulched. This made a HUGE difference in the workability of the soil when we planted last year, as well as killing off a lot of the grass and weeds. This area was no longer hard as concrete, and could actually be worked, though we did still dig out pockets to fill with a soil mix that we could transplant into, because of all the rocks.
The long bed in the back has bamboo poles marking where I’d stuck the seed potatoes found last fall that, for some reason, didn’t sprout but still looked completely fresh. There is one more potato than I had poles to mark the spots with. :-D When the garden was prepped for winter, that bed was actually widened a bit, so even if the potatoes do miraculously start to grow, there is room for something in front. Which will probably not be use this year, but it’s an option. If we are unable to get rid of that row of self-sown trees, then we will likely create a series of long, narrower, bed with trellises on the North side, for any climbing plants we decide to grow in the future.
Then there are the three beds down the middle, which used to be pumpkin mounds, with longer beds on either side. The three beds down the middle are all the about same size, while the two on either end are almost exactly the same size as each other. With our current plan, the three smaller beds in the middle will have our three varieties of spinach, while the larger beds on either side will have two of our varieties of onions, which in turn will probably be interplanted with other things. Possible kale and kholrabi, as the onions will help protect them from insects. We shall see.
In the back of the photo is a purple block which is where we are planning to plant the Montana Morado corn. That leaves a surprisingly large space (in orange) that didn’t get marked on the satellite image, where we can plant something else. Perhaps one of the three bush bean varieties can go there.
After we dig out the huge rock that’s half buried in there. When this area was plowed last, the person who did it went around the rock, creating a hill in one area, and a low spot in the other. :-/ This is one of the roughest areas of the entire old garden space. Even where the Montana Morado corn will be planted in ridiculously rough.
As you can see, there is a substantial area in shadow, so there is quite a bit of space that can only have shade loving plants. Most of what we have requires full sun, and even the cool weather plants still need more sun than those areas get. An unplanned consequence of my parents crowding more and more trees into what used to be part of the garden.
Still, it is here that we are intending to make permanent, accessible, raised bed gardens. The plots we have now do not have the dimensions needed for that (which must include the paths as well as the raised beds), so even here, everything we do is temporary. One of the reasons this area was chosen for permanent gardening is its nearness to a water source, and to the house itself. Accessible raised beds will also be high enough to address the shadow problem, at least somewhat.
Now to the other side…
In the foreground is one of the old squash beds marked off in the earlier photo. The smaller two beds are where we had potatoes last year, and where we hope to plant the shallots and bunching onions, if the seedlings survive. Those two beds are a bit under 4″x8″ in size (or a little more than 1m x 2m), to give you some perspective.
All the orange area will be for new garden beds. Most of it was part of the old garden that had been plowed before we moved here. Of that space, the only area that has seen and mulching was where we planted the sunflowers. As with the squash, we dug holes and filled them with a soil mix, in which we planted the sunflowers, because of how hard and full of rocks the soil is. As we were able, we added grass clippings around the seedlings for mulch.
The furthest we’d planted the sunflowers are almost to the very end of the row of crab apple trees. Again, for perspective, we could just barely reach those ones with 260′ of garden hose – almost 80 meters.
Way in the back, at the corner, there is a large L shape inside the orange area that has never had any garden in it. We will be working this area for gardening for the first time. I would estimate the orange area, along the edge on the right, near the old potato beds, to be probably 250′, or about 76 meters, long. The far end, along the fence line, is probably 300’/91m.
Funny. It sounds so much bigger when I write that down. When I’m standing in the middle of it, remembering the garden of my childhood, it feels very… small.
The orange area gets full sun, up until you get close to the crab apple trees that are beyond the right edge of the photo. It gets very hot and dry, so we will have our work cut out for us to grow the corn, sunflowers, beans, peas, melons, radishes, summer and winter squash, and gourds we intend to plant there. Getting water that far out from the house is going to be the biggest challenge.
Part of the goal in breaking soil here is for the future planting of nut trees. Many varieties do very well in poor conditions, but not all. Any improvement of the soil will give them a better chance of survival, and when we’re talking about something that may not produce for at least ten years, any losses have much longer term effects.
The orange area closest to the green areas may become part of the permanent garden beds on this side of the house, but that has yet to be determined. Our plans still need to be very flexible at this point.
After taking these photos this morning, I also took photos of the spruce grove areas we need to work on.
Here are out garlic beds. Another bed will be created to the left, near the current compost ring location. There will likely be beets grown there.
The mess of little trees beyond the garlic beds all need to be cleared out. The ones with whitish trunks are poplar trees, and there are many, many, MANY more of them growing towards the garage, and then down towards the road. They also keep trying to come up in the yard. I had not realized how invasive they could be! These will become the materials to build trellises and arbors for our climbing plants.
The darker colours stems that you see are mostly cherry, from a parent plan from Poland. Something we saw happen since we’ve moved here, and probably happens often, is that the cherries start to bloom quite early in the spring, as soon as it warms up. This, however, is Canada, not Poland, and they got hit by a late frost. This killed off the trees that had bloomed. New shoots, however, come up from the base. So what we’ve got is a lot of dead cherry trees, surrounded by immature new growth.
Cherry trees, we’ve learned, also spread by their roots. I had to deal with that while clearing out the area under the old wood pile, so we could plant carrots, beets and parsley here, last year.
So we’ve decided all of that is going to be cleaned out, as far back as we can. It’s a huge area, and the clean up will likely be done in stages over several years. We don’t want to take too long on that, though, because this is where we would like to plant berry bushes and fruit trees.
Then there’s this area…
Every red line marks a dead spruce tree. The two on the left, by the junk pile, are the ones closest to the house that we were already looking to hire someone to take down for us, along with the dead spruce by the garage and outhouse. Counting that one, there’s a dozen dead spruces that need to be taken down, before they fall down, in this area. There are also plenty of fallen trees that need to be cleaned up, along with the junk pile and the spirea (which is hiding at least one, maybe two, fallen trees). There are Saskatoon bushes beyond the junk pile that we want to clean up around, including removing some chokecherries, which will provide them with the air flow and sunshine they need to thrive. So far, none of these has shown signs of disease.
In the middle of the photo, tucked into where there are so many dead trees, is where we planned to plant the mulberry tree that’s set to arrive later in the spring, in time for planting in our zone. We chose this location, because it’s a zone 4 tree and needs the protection the other trees will provide (the ones still alive, anyhow), and still get a lot of sunlight. With so many dead trees to take down first, however, I’m almost thinking we might want to put it in a pot until next year!
In the foreground, behind the compost ring, is where we intend to build the cordwood outdoor bathroom. I had been upset that we were not able to at least get started on leveling a foundation for it last year, due mostly to the excessive heat, but now that I’ve realized how many dead trees there are, I’m glad it didn’t happen. Any one of those trees could come down in a storm or high winds. Can you imagine doing all that work to build a cordwood shed, only to have a tree fall on it?
Oh, and along with these, I was able to make my way through the spruce grove near the fence line and take a closer look. I found five more dead trees. Those ones are not as urgent to take down, though. It’s the ones near the house and garage that have priority. Of course, there are the trees that have already fallen that need to be cleaned out, too. Focus that far out, however, will be on the south end of the spruce grove, along the driveway, where there are almost no spruces left. Lots of little poplars to take out, and probably some larger ones, too, and lots of underbrush, fallen trees and dead branches to clear away. Only then can we figure out if the crab apple trees my mother planted in there can be salvaged. They’re not as overshadowed as the other ones I found near the maple grove, but last spring, I only saw one branch bloom, and no apples produced. I think I would rather take those out and transplant more spruces in that area, and save the fruit trees for better locations. There are a number of little, self-sown spruce trees that I would rather transplant than get rid of. I’ve had to kill enough trees while cleaning up, already, and will have to do more. If transplanting some is an option, I will be happy to take it!
Today, we took advantage of the warmer weather and dug up our two potato beds.
The first one got done fairly early in the morning, before we headed to the city. Having already dug up a few of them earlier, I had some idea of what to expect, but I have zero experience with growing potatoes the “Ruth Stout” way.
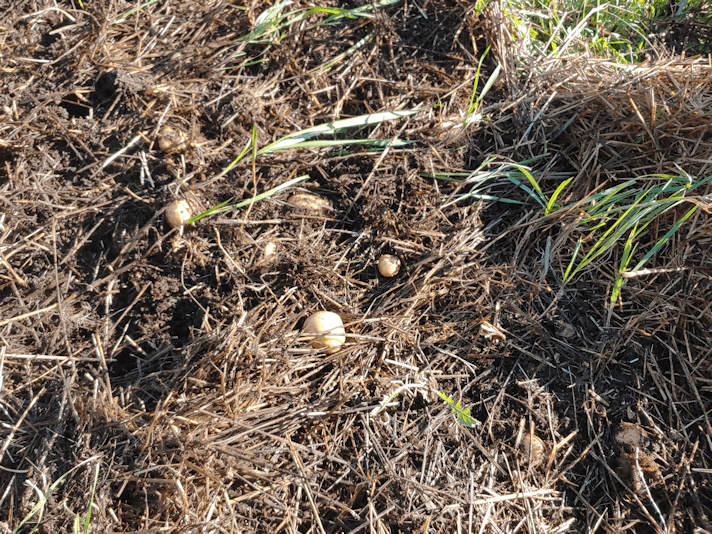
I first pulled up the potato plants, then carefully used my potato fork to lift off, then “rake” the mulch away. Here, you can see some of the potatoes I uncovered in the process.
I also uncovered several chilled little frogs! I carefully moved them to the mulch by the squash, where they could warm up in the sun.
I also uncovered slugs.
I did not rescue them. ;-)
Almost all the potatoes I found were just sitting on top of the soil! Some took a little more raking away of the mulch to find, but not much more.
What had been rock hard ground when we started, the mulched soil was so much easier to work – even with all the rocks.
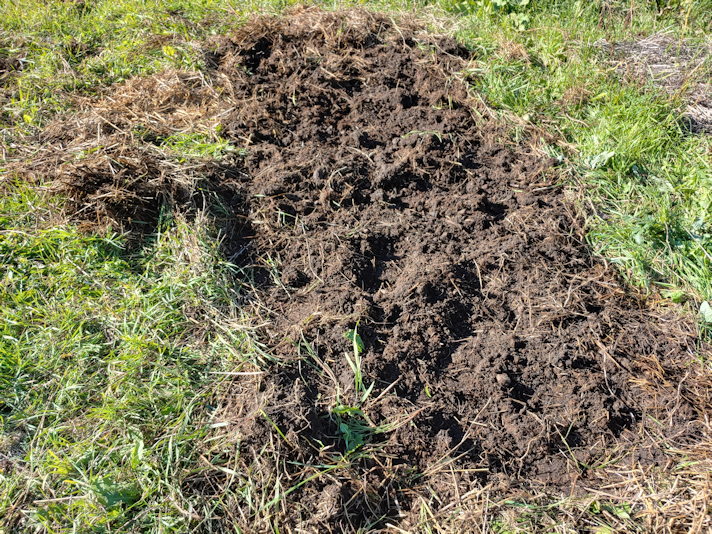
I took advantage of the situation and dug up the entire plot, so I could pull out as many weed roots as I could. The crab grass came out pretty easily. Then I hit a solid mass of roots near the surface, with a tap root of some kind that continued deep into the ground. I could not get it out with the fork! If I’d had the spade handy, I might have been able to cut through it, but since it seemed to be dead, I left it. It will be buried.
I did find a couple more potatoes in the process!
The end result looked like a 4×8 foot grave! :-D
When I finished pulling up as many roots as I was able, the mulch all went back – along with the potato plants that had been pulled up.
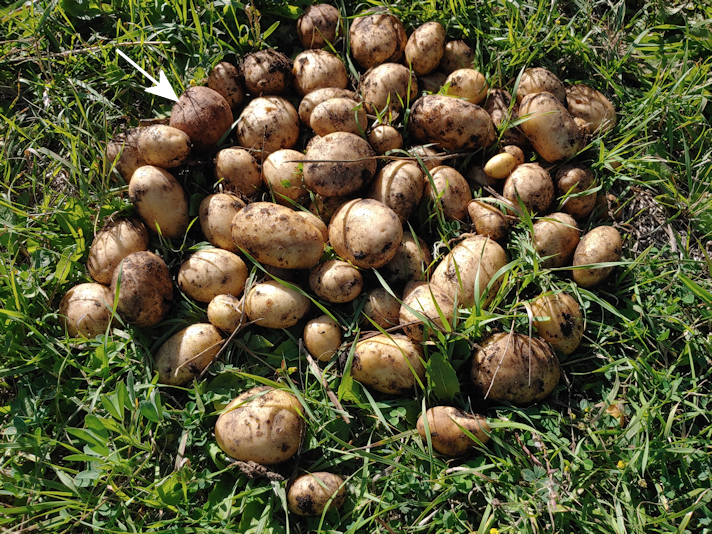
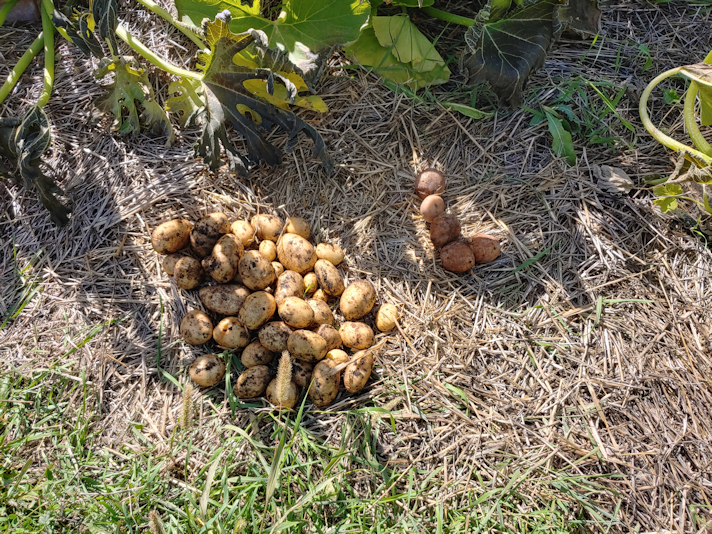
These are all the potatoes I got out of the one bed.
Also, note the one slightly darker potato with the arrow pointing to it. I’ll explain that, below!
When we got back from the city, I continued working on the second bed.
Once again, I was finding most of the potatoes on the surface of the soil as I pulled away the mulch.
These are all the potatoes I found, before I did any digging at all. Unfortunately, quite a lot of them had holes eaten into them. :-( After digging, I found maybe 5 more.
Speaking of 5, do you see those 5 darker potatoes on the side?
Those are the original seed potatoes! The other bed had only one. While they had stems and roots that I broke off of them, they are just as hard as the day I planted them. I found the remains of some other seed potatoes, all mushy and used up like one would expect at the end of the growing season.
I got two 3 pound boxes of seed potatoes, which gave me 3 row of 6 potatoes in one bed, and 3 rows of 5 potatoes in the other, plus an extra. That’s 34 potatoes – and 6 in total never grew more potatoes!
As with the previous bed, I dug it all up, finding a few more potatoes, a whole lot more slugs, and pulling out weed roots.
Would slugs be the cause of those holes in the potatoes?
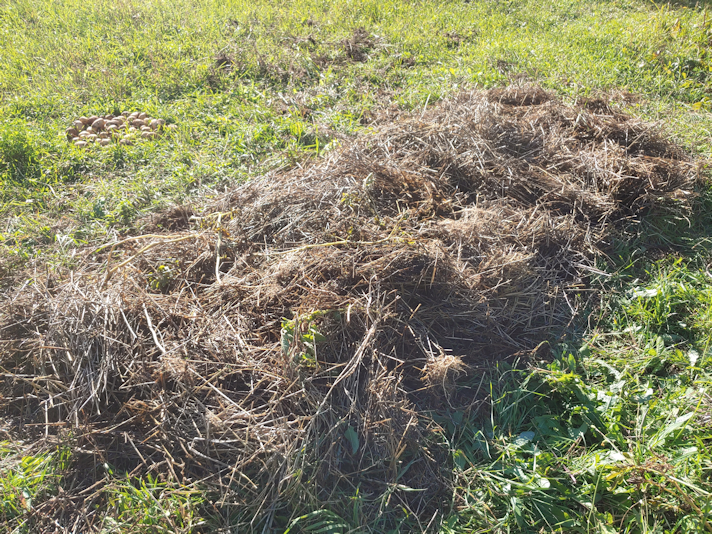
This bed had quite a few more rocks near the surface that I got rid of, too. My fork was hitting many more as I dug down, but I didn’t try to get them out, since we will continue to build these beds up. The mulch and old potato plants went back over the soil.
I then took all the harvested potatoes and laid them out on the dry straw mulch between squash beds, so they can cure (is that the right word for it?) in the sun. Except for the tiniest ones, which will be cooked and eaten right away. :-)
I then had the 6 original seed potatoes. What to do with those??
Yeah. I planted them, almost the same way they were planted in the original beds. The only difference is that I did loosen the soil a bit, first. Not to bury the potatoes – there are so many rocks along this end, I could barely do more than scrape away the mulch on top! No, it was so I could push in the bamboo poles to mark where they are. Even then, I don’t think the poles will be able to stay up for long. I could barely get them into the soil at all. No matter how I shifted and searched, I kept hitting rocks just inches below the surface.
What will most likely happen is that the potatoes will freeze over the winter, and nothing will come of them. Another possibility is that they will be protected by the mulch and, as soon as it gets warm enough next spring, they will start growing and we’ll have early potatoes started.
We’ll find out next year!
As for now, the potato beds are put to bed for the winter. I don’t know what we will plant in those spots next year. We do intend to do potatoes again, but in a different location. We don’t want to entice the Colorado potato beetle by planting in the same location again. We didn’t see a single one this year, but one of my neighbours a mile up the road mentioned that his potatoes had been decimated by them! My parents always planted lots and lots of potatoes, and I well remember going through the rows, picking off the beetles or their larvae, and hunting for the eggs to crush. Even with several of us doing that every day, some years my mother had to resort to using a poison powder of some kind, to get them under control.
I’d really rather not have to deal with them at all, if I can avoid it!
As for the squash, for now I have stopped harvesting any more of the sunburst squash, though there are a couple of zucchini that are almost large enough to pick. I prefer them when they are quite small, but with the sunburst squash, I want to give them as much of the remaining warm weather as I can for them to grow. As I write this, past 6pm, we are still at 21C/70F. We are supposed to stay fairly warm over the period covered by the long range forecast, with no more frosts expected overnight. That should give our produce a bit more time before we have to harvest what we can, then prep for the winter – and next year’s gardening! :-)
Our first year gardening since moving here has been quite interesting, and quite the learning experience. We will, for sure, continue using the Ruth Stout method until we are able to start making the accessible raised beds that are the ultimate goal. The extensive use of mulch is making a very noticeable, positive difference in the soil, even after just one year. My mother may be disappointing in our gardening, compared to what she had here, years ago, but I’m happy with our progress so far! :-)
I’m happy to say that last night’s frost seems to have had no effect on the sunflowers at all.
The only leaves with frost damage that I saw were leaves that had first been broken by the high winds we had a few days ago.
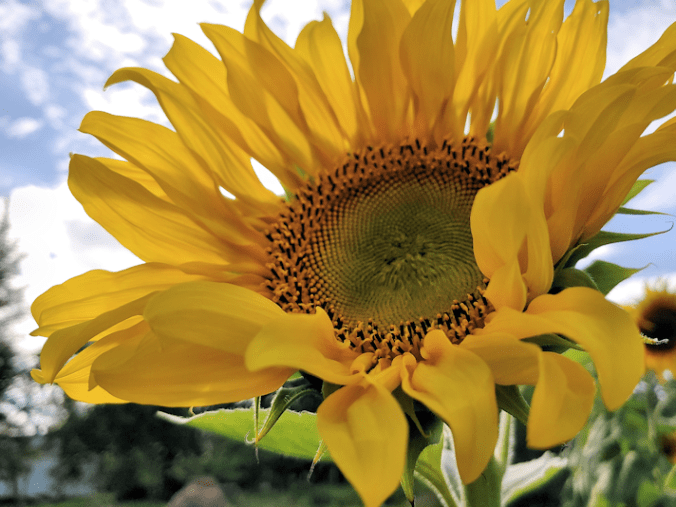
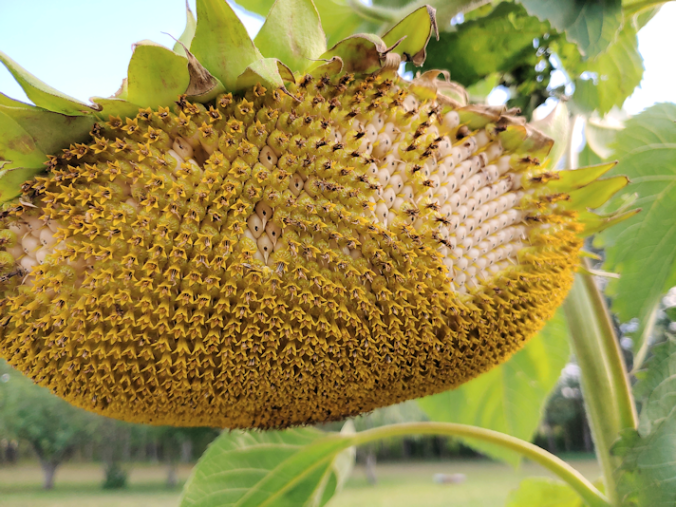
Right now, we’ve got seed heads at pretty much all stages of opening and ripening!
The birds seem to have finally discovered this one. Based on what I researched, I should be able to cut this seed head off and set it up to dry, but in the video I saw that demonstrated this, the guy was able to easily brush off the flower heads from the seeds. That isn’t happening on this seed head at all! The ones that haven’t already fallen off on their own are still attached quite well.
The girls and I will be heading into the city tomorrow, but I might harvest this seed head after we come back. If not then, then the day after. I’m planning to dig up the potato beds as well. We’ll see how the timing of things goes.
Hopefully, tomorrow’s trip to the city will be more productive than today’s – but that will get it’s own post later!
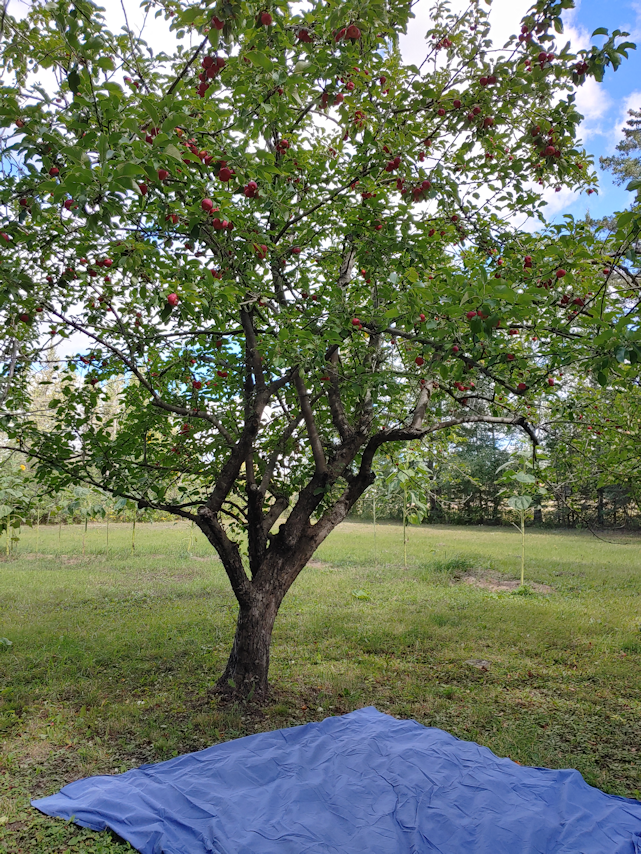
Today, I headed out to pick the apples off of one of our crabapple trees.
This is the one that has such bright red, sweet apples. It also ripens earlier than the other trees.
Last year, most of the apples disappeared before I had a chance to harvest them, so I wanted to get them before the … deer? … get them first.
When we were cleaning things out, I was flummoxed by finding a grabber with spoons attached to it. My mother eventually remembered that my dad used it to pick apples.
I’m happy to say that it works absolutely beautifully!
Since there were so many apples to pick this year, I laid out a sheet on the ground for them to fall on. It also made it much easier to move the apples into a bucket.
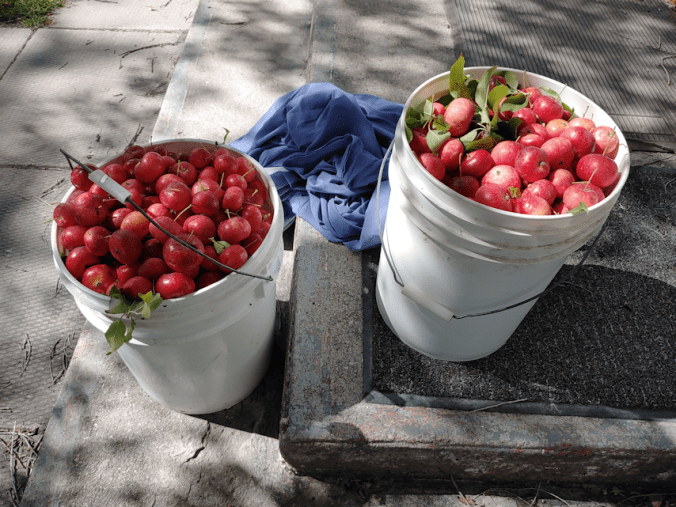
I was able to fill a 5 gallon bucket just with the apples I could reach with my hands, or the grabber. I did try shaking the trees, too, but the branches are a bit too thick to be able to shake much at that height, so I didn’t get a lot that way.
Using the step ladder, I was able to fill another 5 gallon bucket. I could have gotten more, but by then, it was getting too dangerous to try and get the apples, even with the grabber. The remaining apples will be for the birds. :-)
Ten gallons of apples is so awesome! Last year, I used the apples from this tree to make apple cider vinegar. After trimming and chopping, I filled a quart jar 3/4s full.
That’s it. That’s all we had.
This year, I plan to make more apple cider vinegar, then juice at least a gallon, to make hard apple cider. There should still be plenty to give to my family, when they come out this weekend, if they want some.
For the hard apple cider, we have gallon jugs, bungs and airlocks to use. When we made apple cider vinegar in a quart jar last year, it was a success, but there was a problem with fruit flies being attracted to the coffee filter covered jar in the cupboard. So this year, I plan to use an air lock (they’re so cheap, I’ve been buying extras).
I’ll be using a repurposed gallon sized pickle jar for this, which means I need to find a way to get an airlock into the lid.
Which I’ve already gotten started, and will show how in my next post. :-)
Among the things we chose to plant for our first garden since moving out here were Yukon Gem potatoes. My view when it comes to planting potatoes is, since they are so inexpensive and easy to find in the grocery stores, we’ll choose a variety that are not available unless we plant them ourselves. Yukon Gem are a yellow flesh variety that is supposed to be more resistant to disease, and are good for both fresh eating and storage.
We only got 6 pounds for our first try, so we’re not expecting to have any to store. At least not for long! :-D
The biggest thing we did differently, though, was to use the Ruth Stout method. When my mother had her garden in this location, she had my dad or my brothers to plow it for her, every year. She had a working tiller (we’ve got 4 or 5 lying about, and none work), and 5 kids to help pick rocks.
While the area did get plowed before we moved here, no one’s been picking rocks for ages, and the plow job was a bad one. So what we’ve got to work with is rock hard soil, full of rocks, and very little equipment. The traditional method of growing and hilling potatoes was simply not manageable.
Among my recommended posts is a Canadian gardener who tried the Ruth Stout method in his own garden. He sowed his potatoes on top of hard, grassy ground, covered them with a thick layer of hay for mulch, and at the end of the season, he had lots of potatoes, and the ground beneath was greatly improved.
We didn’t have hay, so I used straw from the bale we got last fall. What we don’t use to cover our septic tank gets used for mulch, and we still have plenty left this year. Mulch was already a big part of our plans to improve and amend the soil.
Well, the potato plants seem to struggle through the mulch, and never got really bushy. They did bloom, however, and at one point I dug around under the mulch to see if I could get some baby potatoes to try.
Even though this was after a rainfall, and the straw was damp, the ground beneath was bone dry. The only potato I could find was the mushy seed potato.
So… I was beginning to think this was a write off. I don’t know if it was because I used straw instead of hay, but it seems like the straw absorbed all the moisture, and it never made it to the soil.
While going through the garden over the past few days, I’ve been watching the potatoes. Some of them have already died back completely.
This morning, I decided to dig up the 3 potato plants that had died back on one end of a potato bed.
After moving the straw, there wasn’t much to see.
That is the seed potato, and no sign of any others. Only after digging, did I find one tiny potato under this plant.
It wasn’t a complete loss, though.
A few others were visible once the straw was moved, and they were looking pretty good.
Time to carefully dig around with the potato fork and see what I could find.
The first thing I noticed was how different the soil was. Even with plenty of rocks to dig around, the soil itself was much, much softer. I even found worms, as well as a single slug. :-D
So even if we don’t get a lot of potatoes out of here, we will have at least improved the soil!
How many potatoes did I find?
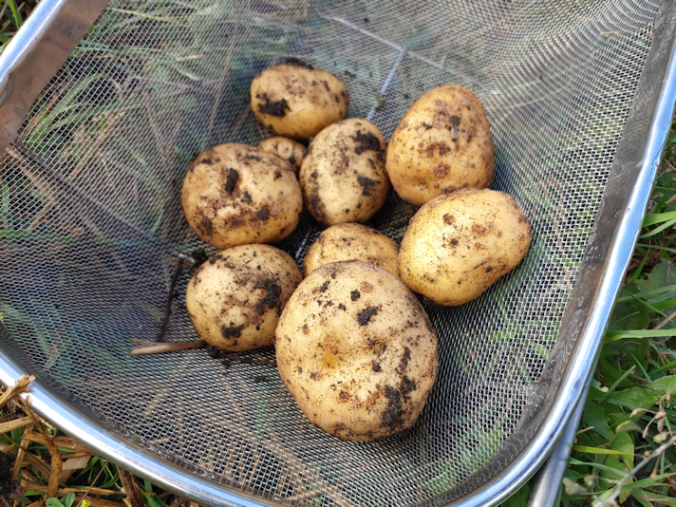
Here they are! Our first potatoes!
I’d say these were from 3 plants but, really, they’re from 2 plants. You can just see the itty, bitty potato that I found by the seed potato of the third one.
Of all the larger potatoes, one had a hole in it from a bug. The rest were solid.
I’m rather pleased! After what I found earlier, I was really wasn’t expecting to find much of anything.
Now to think about how to cook them for supper this evening. :-) I’ll likely make them very plain, so we can get a sense of how this variety tastes, compared to what we usually have.
It’s a good thing we started so many squashes, and ended up transplanting them as such different times. The ones that sprouted later and got transplanted later got missed by that last frost of the season, and have been quite prolific. A couple of frost damaged ones in the first bed, both zucchini, recovered enough that they got quite large and are producing green and yellow zucchini for us.
Others…
They’re still working in it.
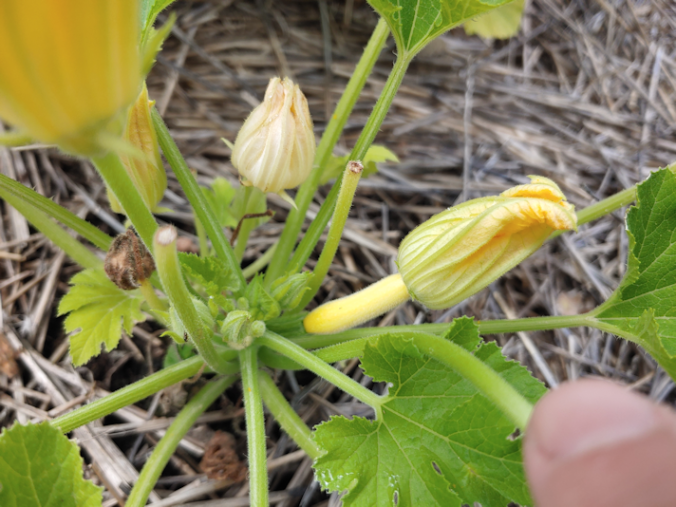
Some have started bravely blooming, putting out flowers bigger than their leaves!
With the tiniest of yellow zucchini!
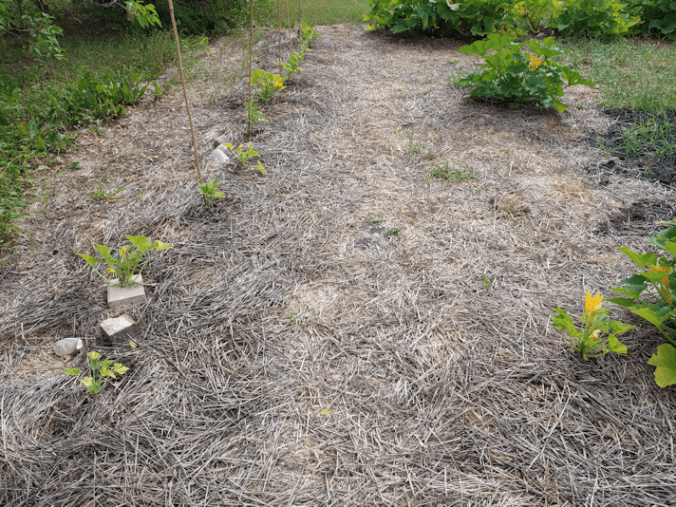
I finally remembered to get a picture of the back row. The plants with the bamboo poles marking them are all ones I have been able to confirm as the birdhouse gourds. I put bricks or rocks under some of them, to support the weight of where the leaves are growing out, as the stems are a bit long and gangly.
You can see a pumpkin mound to the right of centre in the background, and way at the far end are the squashes from the second planting that have done so well.
While there were very few squash to collect this morning, there are so many new flowers right now, and lots of pollinators, so I am expecting a second wave of squash to harvest, soon.
I am looking forward to having enough to make more of the quick pickles!
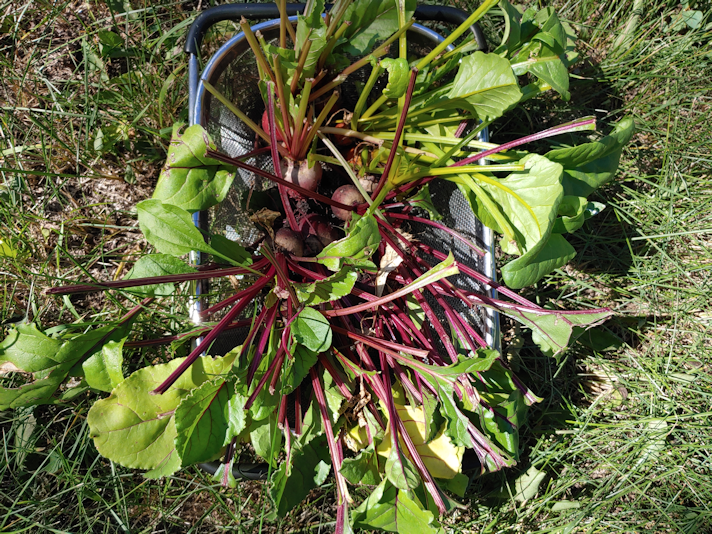
While doing my rounds this morning, with my usual checking of the garden beds, I decided to try and harvest some of the beets.
Our poor, sad little beets.
I could tell that a deer had visited last night, as pretty much the last of the larger beet greens are gone. I had been looking at them while doing my rounds yesterday evening, thinking about how they were the only ones left, and now they’re gone, too!
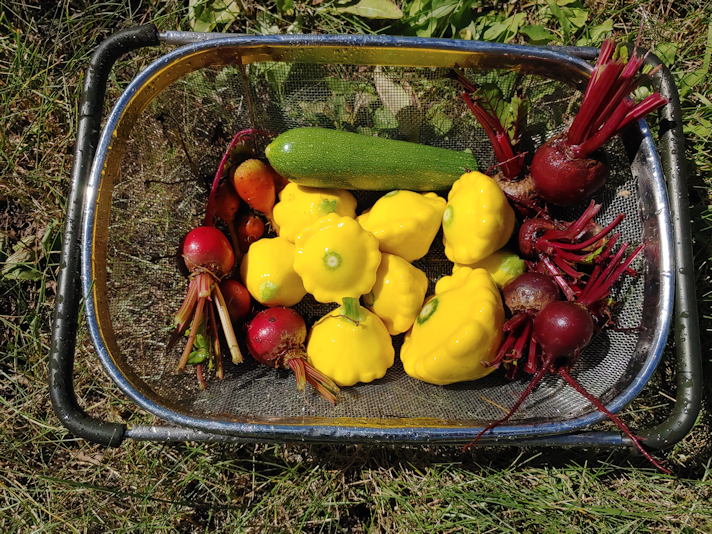
Of the three varieties, the dark red Merlins have managed to survive the most, and have the biggest beets. This is the bed furthest from the spruce grove, and the one that had the last of its big leaves eaten last night.
The yellow Boldor variety seemed to be a favorite of the deer! As you can imagine, they aren’t very big. In fact, some of the ones I picked are so small, I’m not sure they’re even edible. I’m not sure, but I don’t think they have a developed flavour at that size. I’ve never tried to eat beets that small, so I really don’t know!
The Chioggia, which is supposed to have alternating rings of purple and white inside… I was able to pick only three of them.
It’s looking like most of the beets are a write-off.
But at least we’ve got lots of sunburst squash!
Yesterday, I was going to try cooking in the fire pit, and had prepared things in foil packets. It was way too windy, unfortunately, so I just baked the packets in the oven. With one of them, I’d cut sunburst squash, and all 3 kinds of zucchini, into similar sized chunks. After tossing them in olive oil and seasonings, I wrapped them in several layers of heavy duty aluminum foil, sealing them tight. After baking them for half an hour at 350F, I cut open the foil, added dollops of butter, then put them back into the oven until fork tender. They turned out very well! I think they would have turned out even better, cooked over a fire.
Among the things we’ve learned since moving here is, when we do set up a permanent outdoor cooking area, we will have to make sure there is shelter from the wind! It’s frustrating to have a wonderful day to cook outside, but not be able to do it safely because of the wind.
As for the beets, I’m not sure what to do with them. There are so few of them to work with!
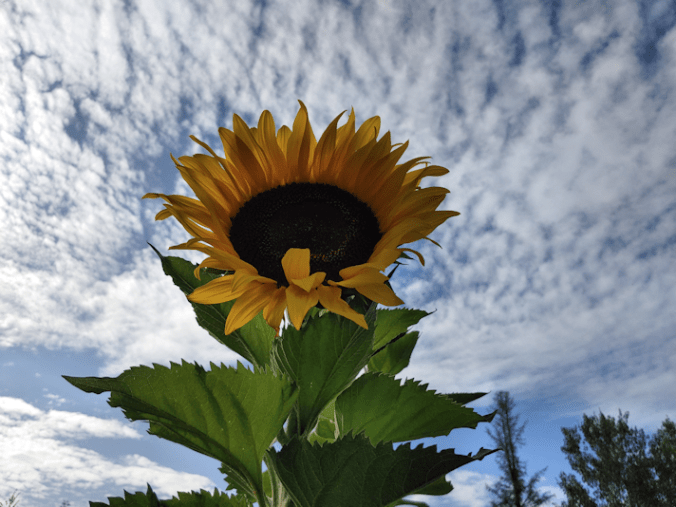
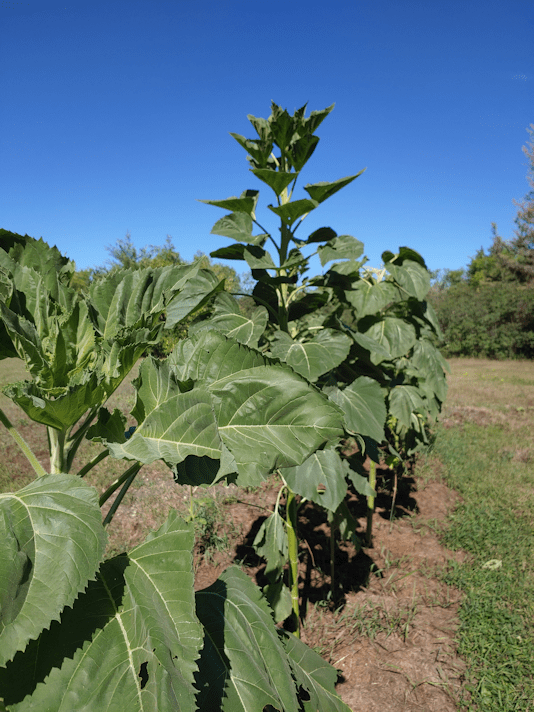
It’s just towering above the others! I figure it’s getting close to 7 ft tall. :-)
There are a couple of others that are getting really tall, too. Like this one.
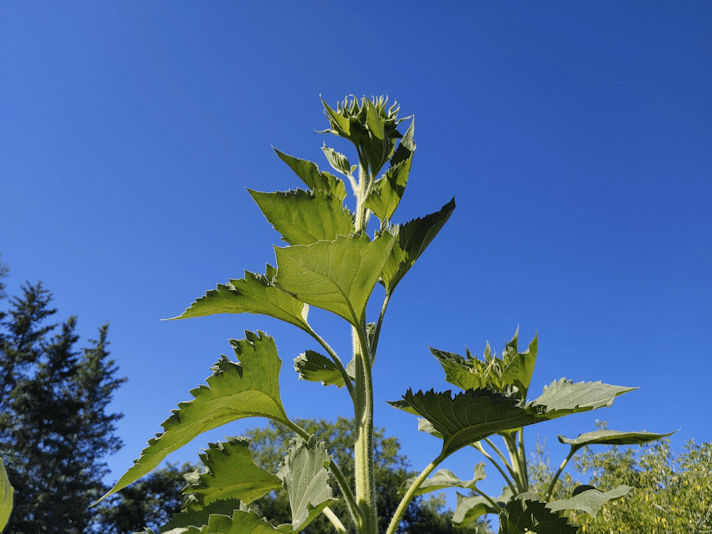
You can really see the huge seed head developing on this one – and it should get much, much bigger!
But… something’s wrong with another tall one. It’s head is gone?
Nope.
Just fallen over.
It looks like some sort of grub got in there.
This is actually above my head, so I am seeing it better now, in the photo, than I could while looking at the sunflower. The head is still alive, so I’m hoping it’ll survive. It’s the only one that has this.
While going through the squash and harvesting some – the sunburst squash is very prolific! – I spotted an odd looking squash and took a closer look.
This green, bulb shaped squash is a sunburst squash! It looks completely different from all the others on the plant.
I left it, and look forward to seeing how big it gets, and if the shape changes. :-)
The girls and I have been talking about what we want to plant next year, and sunburst squash is definitely staying on our list!