One of my long time interests is experimenting with historical cooking.
I say experimenting, because it’s not unusual for these recipes to include ingredients that are no longer available, hard to find, unknown or even extinct. Plus, they often don’t include a lot of information, either because it was assumed the reader already understood what was needed, or it was simply technologically impossible for the time period.
Thankfully, that’s not as much of a difficulty for recipes from more recent time periods.
Not too long ago, I discovered a YouTube channel called Townsends, featuring all things 18th century. I highly recommend it! I was intrigued by this video on how to make Mushroom Ketchup.
Yes, you read that correctly! Mushroom. Ketchup.
It sounded both weird and delicious at the same time! :-D
Yesterday, my daughter was a sweetheart and racked it to another 1 gallon carboy.
It is now back in its little corner, all swaddled like a baby.
The mead was very clear before it got racked, but between the raisins floating on top and the sediment on the bottom, a fair bit was lost in the process. The jug wasn’t full anymore, already, and now it’s about 2/3rds full.
We’re still going to keep it in the 16C – 20C range, though I’ve read that cooler temperatures are just find by this point. We really could have bottled it, but we will leave it to ferment with an air lock for a while longer.
Now that it’s separated from the sediment, it should not develop any off tastes. At least according to what I’ve been reading. Any fermentation that continues at this point will be very slow.
I figure a couple more weeks, maybe a month, we’ll bottle it and do another test with the hydrometer to check the alcohol level. Given how much was lost to racking away from the sediment, I’m hoping we get 2 full bottles, plus a some left over to test and taste. :-)
For those who have recently started to follow this blog (welcome!), here are the previous posts about our second attempt to make mead. All links should open in new tabs, so you won’t lose track of this page. :-)
Since then, we have been monitoring the Baby closely. While there has been virtually no visible activity in the air lock, when we looked at the liquid itself, we could see that it was clearing up, and there was a steady stream of tiny bubbles of carbonation moving upward. If the temperature dropped to 16C, we would turn on the warming pad, which would typically bring it up to about 18-19C.
Recently, its temperature would drop to 16C a lot faster, and we could no longer see the carbonation. It was looking a lot clearer, and we could see a fair bit of sedimentation at the bottom.
However, it was less than 2 weeks since we started the second fermentation. While I’ve read a mead can be ready in that time, most videos and websites I’ve been looking at showed active fermentation for about a month, and gave advice on how to reactivate fermentation if it stopped to early.
Since that was the problem we had with our first attempt, we debated. Is it done and time to bottle it? Should we rack it into another bottle to get it away from the sediment and leave it longer? Do we add something to boost the fermentation?
I’ve read various ways to boost fermentation in mead, including those that recommend adding a chemical that is used in wine making.
Or we could just add some raisins.
So that’s what we decided to do.
With a 1 gallon carboy – and it’s not full – not a lot of raisins would be needed.
We added three.
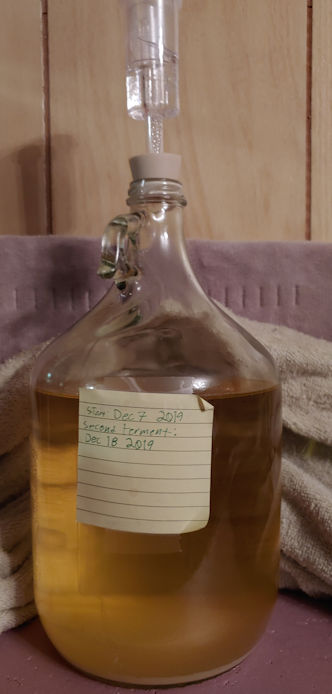
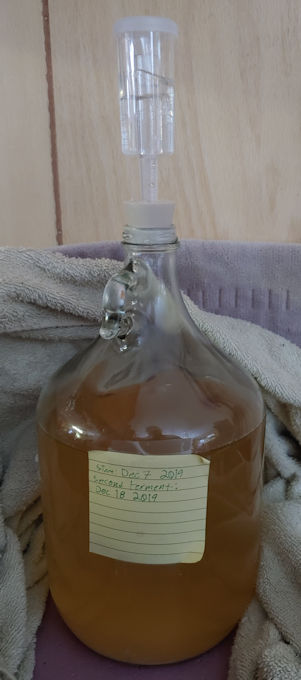
Here are photos, taken a day apart, showing before and after we added the raisins.
As you can see in the photo on the left, the mead had gotten quite clear, and there’s a pretty thick layer of sediment on the bottom. It’s hard to tell with the reflections, but in the second photo, you can actually see a couple of the raisins floating at the top. The mead is cloudier, but when we shine a light into it, we can once again see that steady stream of bubbles going up to the top.
We’ve been checking its temperature regularly and, aside from an initial warm up after adding the raisins, it’s been keeping its own temperature at 19C.
Right now, the plan is to leave it until we can no longer see those bubbles, rack it into another carboy to get it way from the sediment, then leave it for a while longer before bottling it.
A lot of the information about mead making I’m finding is conflicting, but one thing that all our sources agree on is, the longer the mead sits after bottling, the better it tastes. Most recommend at least a year.
I doubt we’ll wait that long, but with bottles at 750ml, even with having less than a gallon in the carboy (and I expect we’ll lose more after racking it again), we should still be able to get 3 – 4 full bottles out of it, so we can have one right away, then try the others at different ages.
So if we want to start a malomel (mead made with fruit) as we planned, we should pick up another air lock and two, so we can have multiple batches going at once.
You know, for someone who doesn’t actually like alcohol all that much, I find the process of making it quite enjoyable!
We’ve been keeping a close eye on our baby mead, keeping the temperature at the warm end of the temperature range recommended. If it dropped to 16C, I would turn on the electric heating pad to the “warm” setting, and that would bring it back up to 18C.
We could see bubbles inside the airlock, so there was still active fermentation – something we’re pretty sure had stopped completely well before this point in our first batch. The “burp” had dropped to about 23-27 seconds apart and seemed to be staying there for the past few days, so my daughter and I planned to transfer the must to another 1 gallon glass carboy for a second fermentation today.
It’s now been 4 weeks since I put up my second attempt at these. If you missed the earlier posts, you can click here, or read about our 2 week taste test here (likes will open new tabs).
Since the recipe I got from my friend said 2 – 4 weeks fermentation, I wanted to see what difference the extra time made.
I continued to monitor the jar over time, and did end up adding some water once, as the brine evaporated enough that the top was no longer covered. Both jars had been topped up in the previous two weeks. In keeping with the changed made after our first, failed, attempt I only used either water that had been previously boiled, or bottled water, just to be on the safe side in regards to our well water.
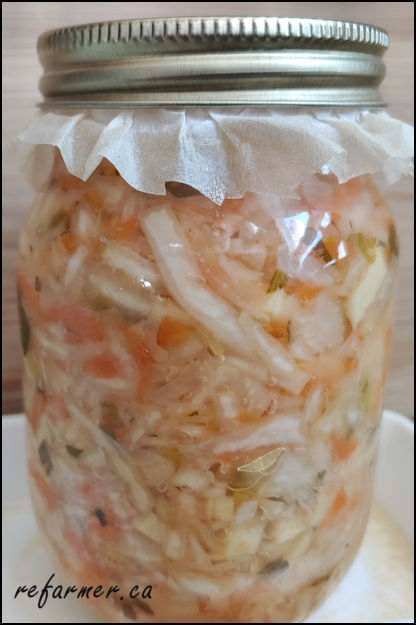
As you can see in this picture, the brine was no longer quite covering the cabbage leaf, even after being topped up. The leaf itself had floated out of position, though, so I wasn’t too concerned. The main thing is that there is NO sign of mold!
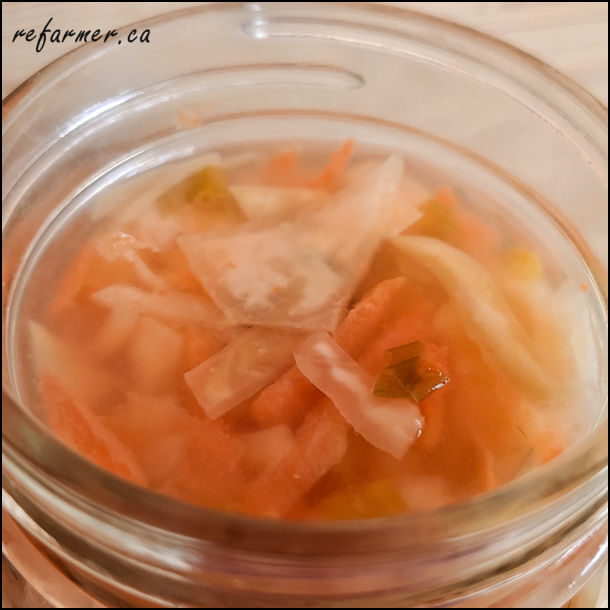
Here, with the cabbage leaf removed, you can see that the vegetables were still covered with brine.
Once again, no sign of mold! Yay!
Then came time for the taste test! After digging some out (and I do mean dig! The contents were very tightly packed. :-D ), I put a regular lid on the jar and refrigerated the rest, which will stop the fermentation.
So… how did it taste?
To be honest, I’m not sure I can tell what difference the extra two weeks made! It still had a nice crunchy texture, and didn’t seem to be any more sour. If I really had to come up with something different, I would say that perhaps the flavours were a little more blended, but even that would be a stretch.
I am also still getting that hint of after taste from one of the ingredients that I don’t really like. I wonder if it’s the ginger? Or maybe the parsley? Definitely not the garlic. Hmm.
I definitely will be doing this again, though I think I will modify the recipe and simplify it. Maybe keep the carrot and garlic, but drop the ginger and parsley, and see what difference that makes.
Today, we started up a second – smaller – batch of mead.
I hope.
I documented our first attempt, throughout the process, which you can revisit at the following links (they will open new tabs, so you won’t lose your place. :-) )
Part 1 getting started Part 2 early stage maintenance Part 3 early stage maintenance, completion Part 4 transferring for second fermentation Part 5 bottling and initial results
Traditionally, bigos – otherwise known as Hunter’s Stew – is made with game meat and a whole lot of ingredients I don’t typically have on hand. I just used what I had! Maybe I should call it Non-Hunter’s Stew? :-D
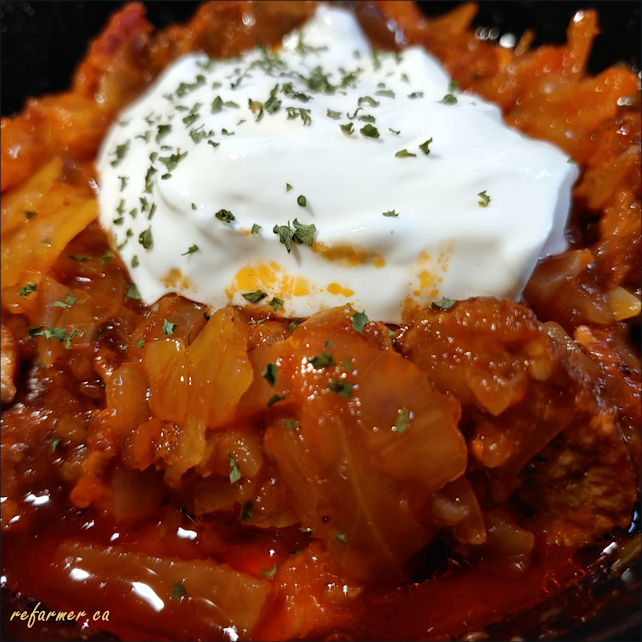
This is my version of Poland’s national dish!
I made this yesterday evening, for today’s eating, and I must say, it turned out very well!
cooked sausage, cut into 1 inch pieces, to make about 2 – 3 cups
2 cups cubed pork or fresh meat of choice
1 package bacon
1/2 cup crab apple cider vinegar, mixed with 1/2 cup vegetable broth, or 1 cup de-glazing liquid of choice.
1 can crushed tomatoes
1 can tomato paste
optional: seasonings to taste
Top row, left to right: sauerkraut (rinsed and draining), chopped crimini mushrooms, cubed pork, cooked sausage (honey garlic). Middle left: frying bacon pieces. Middle right: de-glazing the pan Bottom row, left to right: softening cabbage mixture, all ingredients stirred together, stew after 1 hour in oven, stew after 2 hours in oven. Centre:Bigos, after resting overnight, topped with sour cream and parsley
Instructions:
Turn oven on to 350F.
drain sauerkraut, rinsing if desired. Squeeze out excess liquid.
chop onion and garlic coarsely
core and finely cut fresh cabbage. Cabbage, onion and garlic can be combined into one bowl for later.
trim mushroom stems, cut mushrooms in half, then slice. (Alternatively, re-hydrate dried mushrooms in boiling water, then chop coarsely. Reserve liquid to add to the stew.)
cut bacon into 1/2 inch pieces
prepare de-glazing liquid (my vegetable stock was hot water and powdered bouillon)
Place the cooked sausage pieces into a large, oven safe pot with lid.
In a large frying pan, fry the bacon pieces until just browned. Add bacon to the sausage, reserving rendered fat in pan.
Brown pork cubes in the bacon fat. These do not have to be cooked through. When browned on all sides, add to the sausage and bacon mixture, reserving fat in pan.
Add mushroom pieces to the reserved fat and cook until just starting to brown, stirring frequently. (If using reconstituted mushrooms, skip this step and just add the mushrooms to the pot with the meat.)
Add de-glazing liquid to the pan and cook liquid down to about 1/3rd volume.
Add cabbage, onion and garlic to the pan. Cover with lid to steam for a couple of minutes, and for the cabbage to reduce slightly. Continue to cook, turning the mixture often, until vegetables are softened.
Add the sauerkraut and softened cabbage mixture to the pot with the meat and mushrooms.
Add the crushed tomato and tomato paste (plus reserved mushroom stock, if reconstituted mushrooms were used). Mix thoroughly.
By now, the oven should be preheated. Cover the pot and place in oven.
Check after about an hour and stir. If the liquid level seems low, add boiling water, as needed to prevent burning.
Check after 2 hours and stir. Adjust liquid again, if needed.
Cook for another half hour or so.
Can be eaten immediately, or left to cool and rest overnight (recommended).
Serve with rye bread, or a dollop of sour cream. Garnish with parsley if desired.
For this, I used no added seasonings at all. The ingredients themselves add a lot of flavour on their own. However, feel free to add whatever seasonings you like, if you feel the need.
Of course, after this was done cooking last night, I had to have a small bowl to taste it. It was definitely a success! Letting it rest overnight did allow the flavours to mellow and combine very nicely. It was a subtle difference, but enough for me to recommend giving it that extra time.
The more traditional ingredients for this dish includes a greater variety of meats, with game meat being the prime ingredient, and even prunes – though the bigos I’ve tasted in the past did not include prunes. Some versions include things like grated carrot, but my fermented vegetable sauerkraut includes carrots, so there was no need to add more.
The amount of sauerkraut I used is a bit on the low side – a typical jar of commercial sauerkraut is about 900-1000ml (approximately equal to a quart jar) and my jars are 500ml. Even adding the last of my plain sauerkraut gave me just over that amount. However, that is also the equivalent of more than half a head of cabbage. The fresh cabbage I used was more on the large than medium size, so between the two, the total quantities didn’t change much.
This makes quite a large quantity of stew, and it really helps to have a very large, deep frying pan with a lid. Even then, I had to be careful adding the cabbage mixture to the pan! Using the lid to let it braise for a bit made it much easier to stir, as the cabbage released its liquid and reduced in size.
This dish can be made on the stove top instead of the oven, but that would require continuous attention and stirring to make sure it cooks evenly and doesn’t burn on the bottom. Using the oven is just simpler and more efficient.
If you try this recipe, do feel free to let me know how you liked it!
Today, we got out one of my jars of probiotic fermented vegetable sauerkraut for a taste test!
Before I get into that, though, if you haven’t seen my earlier posts, you may want to visit the links below, first (they will open in new tabs, so you won’t lose this post!).
The recipe I got from my friend said to leave it to ferment for 2-4 weeks. It’s 2 weeks today, so we’re trying the one jar, and will leave the other to ferment for another 2 weeks.