With my concerns about the drive, my older daughter was willing to take time off from working on commissions to go with me. Her sister is my back up driver, who would be able to take my mother’s car to come get me, if it ever came to that, so she had to stay home.
I had gone ahead to start the van and give it time to warm up. The first time I started it, it immediately stalled. It started again, and I could hear the fan and belts screaming from being so frozen, and the idle was way too high.
It’s just cold. It’s entirely possible that, if I just left it running for a few minutes, the engine would have warmed itself up and been just fine.
Memories of a rental car’s engine block cracking from the cold, many years ago, were enough to convince me not to push our luck.
My daughter barely had time to get out of the house by the time I was closing up the garage again.
At least we have a garage! It may be completely insulated, but at least the vehicles are getting hit by the winds and snow; just the temperatures. Even when we were living in the city, we just had an outdoor parking spot, and our old home has been hit with the same bitter cold we have.
Which means it will be at least a week before we can do any sort of major shopping. I should be able to take my mother’s car (which has a battery warmer and trickle charger, as well as a block heater, and that part of the garage does actually have a bit of insulation) to the post office/general store. We can at least get some basic groceries, cat food and (I think) litter, if we need to.
For now, my younger daughter and I have been doing some bread baking, and I whipped up some mayonnaise. Making mayonnaise is easy, but it takes a lot of oil. Thankfully, the last time I picked up a few groceries, I did get a large jug of basic cooking oil, so we’ve got plenty.
All this, because our van started acting up and needed repairs at a time when we should have been using it to stock up! Frustrating, but our habit of stocking up in general means that we will manage okay, even if we do run out of a few things. It’ll be inconvenient, but we’ll be okay.
It looks like we’re being hit by the edge of a storm passing to the south of us, so we wanted to make sure we could close the inner door overnight.
All I wanted to do was trim the pegs and get them flush to the surface, first.
You’d think that would be easy, right? Ha! Of course not!
I first tried using a small cutting wheel on the Dremel.
I went through two of them before I gave up. The space was just too tight, and the cutting wheels shattered!
I did have a small saw that I brought, just in case. I just couldn’t cut flush to the surface (may apologies for the crappy photos; the light sucked, too!
Unfortunately, that left me with quite a bit of wood to get rid of. For this, I switched to small sanding disks.
I don’t know how I would have done this without my Dremel tool. We probably would have had to take the door off completely, which would haven us a whole new set of problems!
It’s really hard to see, but the wood plugs are now flush with the surface.
This was enough to let us close the door, and that was the main thing!
Tomorrow, I’m taking the van in to the garage earlier in the morning, so we’ll finish the rest after I get home. We’re expecting snow all day tomorrow, and through to Friday morning, but the temperatures aren’t expected to take another deep dive until the weekend. That gives us time to get it done, without getting things too cold in the entry.
I’m glad we have a storm door, of this would be waiting until spring!
Well, for better or for worse, I’ve started working on the door hinges.
This is intended to be a temporary fix, until we can replace the door and frame completely, but I have no idea when we’ll be able to do that, so this patch job may need to last a while.
The first thing to do was to open the door as wide as possible (with a built in closet in the way, that isn’t as far as I’d like!) and place supports under it to hold the weight.
One of the things we’ve been finding lots of, while cleaning this place up, is laminate floor tiles. It’s amazing, how handy these have become. A couple of pieces of wood under the door made up most of the height, then it took 3 of these tiles to get it fully supported where it needed to be. We’ve also used them to put under bench legs and wooden shelves in the basement, to get them off the damp concrete, and so on. I’ve found a couple of cases of these tiles, just in the basement – there are more in the barn. Definitely things to keep, even though they’ll never be used as flooring! :-D
Once propped up, I could remove the screws which, I’m happy to say, were not damaged as I had thought they were. I do not have to replace the screws. I was able to remove 2 of them with just my fingers, and the only reason I had to use a screwdriver for the 3rd one was because it was the offset middle one, where the hinge wasn’t pulling away from the door as much.
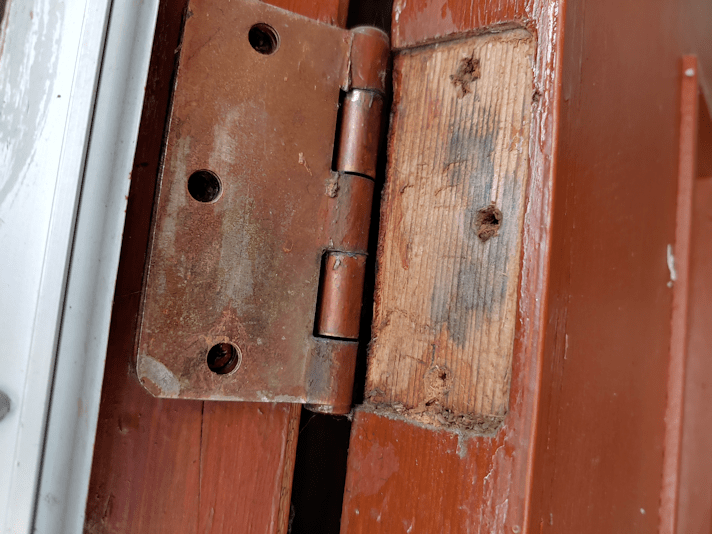
The hinge still needed to be pried loose before I could take a good look at the damage. It fits perfectly in that recess.
Because of how close this is to the frame and storm door , I actually got a better look by taking a picture, then with my own eyes!
The damage isn’t actually as bad as I feared it would be.
The next step was to bring out the Dremel to clean out and enlarge the screw holes.
The Dremel just barely fit in the space available, but it worked. I used a couple of grinding and engraving tips; first a small cone shaped one to clear out the holes, then a metal tip to clean out further into the openings than the cone could go.
The wood is so dry, there was smoke coming out of the holes from the friction!
For the wood plugs, I ended up choosing some pieces of lilac branches I’ve still got hanging around. They were already the size and shape I needed; I only had to strip bark off the pieces, then make one end slightly narrower. Also, I will need to pre-drill holes before putting the screws back in, to prevent cracking, and the core of the lilac is already little more than sawdust that can easily be removed. They’re basically already pre-drilled. :-D
I was going to use wood glue to put the pegs in, only to discover it had dried out, so I went with all-purpose glue that I happened to have.
After making sure the pegs fit into the holes, I applied a bit of glue to their ends, then gently tapped them into place with a little bitty hammer I happened to have. With a normal sized hammer, I wouldn’t have had the space to swing, without hitting the window of the storm door.
The pegs will now sit for a few hours before I check the glue and decide to cut the pegs flush tonight, or wait until tomorrow morning. If I can cut the pegs, we’ll be able to close the door most of the way as the glue finishes setting overnight. If not, we’ll be stuck with this all night…
These are the pieces of insulation we’d cut last year, to fit over the inner door, held in place with Velcro strips, to keep frost from forming on the bottom of the door, and ice on the windows. It worked well, but there were some issues with the strips, and we haven’t found a workable alternative, yet. Thankfully, this winter has had only a few days cold enough for the ice and frost to form.
The arm bar is coming handy for holding the pieces in place!
If this works out, we’ll do it again for the middle hinge. That should tide us over until we can replace it all with an insulated steel door and a steel frame.
Today, I was finally able to continue setting up cat proof greenhouses in our unused fish tanks, to start seeds.
What I wanted to do was line the tanks with rigid insulation where they were near walls. Since there is no way to lower the lights to be closer to the seed starts, I was going to line the insides with foil for reflective light.
I may not need to do that.
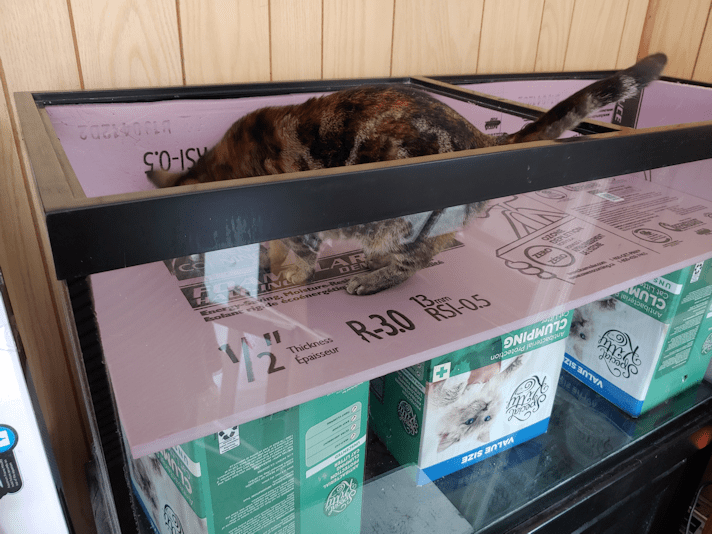
Here is the big tank.
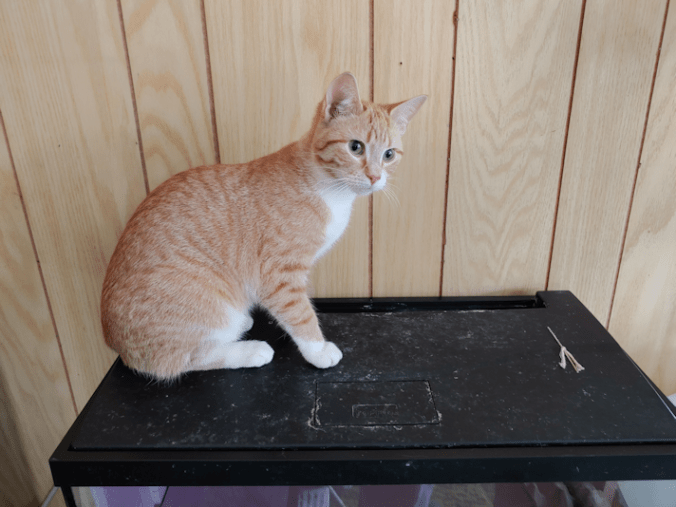
I got photo bombed by a Susan.
I had three boxes with identical dimensions, which allow me to raise the rigid insulation floor high. As the seedlings get bigger, I can change the positions of the boxes to get different heights. I’ve got 3 boxes in there, but I might try to squeeze a 4th one in, to stabilize the floor better.
Because of how the top of the tank is designed, to hold glass covers that broke long ago, I had to cut the insulation to fit the opening, rather than the space I wanted them in. That meant the floor piece has quite a gap around it. The sheet of insulation I cut to size for the long, back wall had to be cut into thirds to get it in. Plus, there is a sheet at the end. The wall in the back of the picture is one of the original log walls. The wall at the left is an exterior wall. Yes, it has more modern (almost 50 years old) insulation, but it’s still pretty cold!
The insulation on the sides helps to fill the gaps around the floor piece, which stabilizes it as well.
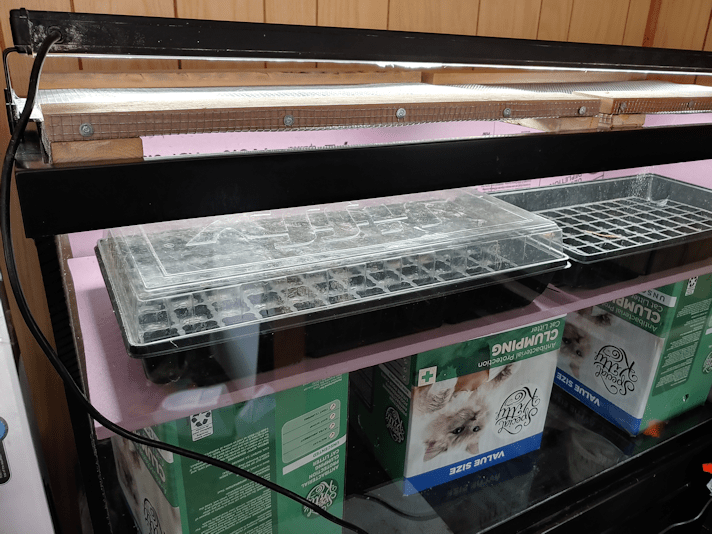
At these dimensions, I can only fit two seed trays in here, which means there is a fair amount of space around them to add more containers with seed starts. I just have to figure out what waterproof surface I can fit in there to put them on.
I think I can get away with not adding foil, though. What do you think?
The second tank was much easier and faster.
Once again, I had to cut pieces smaller, to be able to fit them through the top. I only needed to add insulation to the back, which is against the exterior wall, but I added more to the sides to help fill in gaps around the floor piece.
I’m going to have to find something better to raise the floor. The orange box is a bit too small.
Photo bomb, courtesy of Saffron!
As you can tell by the dusty footprints, the cats like the lid of this tank!
At this point, I should be ready to start seeds in here. According to the package instructions, I don’t need to start my onion seeds – the ones that need to be started the earliest – until the end of March, but experienced zone 3 gardeners in groups that I’m on have already started theirs, and say they should be started now. The seed trays I have are too big to fit into the smaller tank, so I will have to find something else waterproof to hold seed starts in the little tank. I want to buy more seed trays, anyhow; I’ll have to take a good look at what dimensions are available.
There is only so much I’ll be able to fit in these, even if I’ll later be able to move the onions into the sun room and make room for something else. I did find something that I might be able to use, for when I’m starting the squash and gourd seeds.
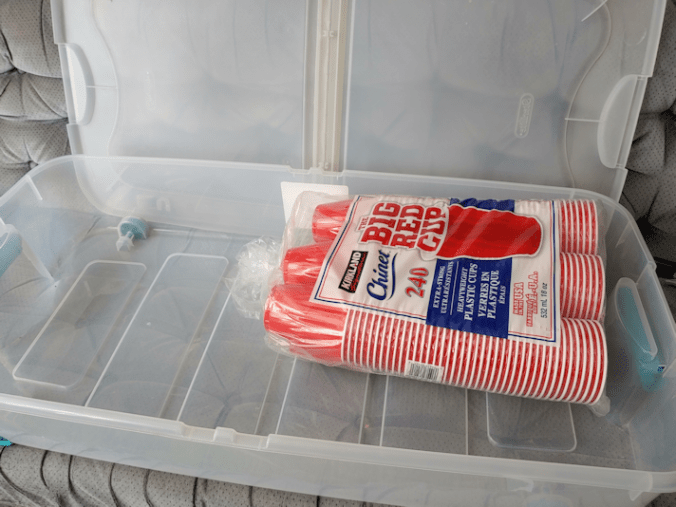
The squash and gourds need more space to grow, and they are the things that need to be started soonest, after the onions. I’ll be using these cups, with drainage holes punched into their bottoms, as pots. The storage container is designed to fit under a bed, but the hinge on the lid is broken, so it has been languishing in the basement until now. I have a second one. Once I figure out what to do with the stuff stored inside it, I’ll be using that as well.
We have so many varieties of summer and winter squash, as well as gourds, to try. Depending on how many seeds are in each package, I may not plant them all. Some are packed by weight rather than number of seeds. I figure, at most, I’ll start 10 seeds each of the summer and winter squash. Whatever the germination rate turns out to be, that’s what I’ll be planting. If I get just a 50% germination rate, we will still have lots of each variety, and with the number of varieties, we should have plenty for both fresh eating, and preserving and storage. For the gourds, I’ve decided to start 5 seeds of each, and see how they do. One of them is an eating variety, but the others are to dry and use for crafting purposes. Curing them takes about a year, so the sooner I can get some grown, the sooner I’ll have materials to work with! If space in an issue, though, I’ll drop the gourds for this year.
I still have the mini greenhouse that my daughter bought for me last year, which can hold three of the trays that are in the big tank. The cats still managed to get into the closed plastic cover, and it gets knocked over easily, so anything we start in there will be done later in the season, and in the sun room!
With the trays I have now, all I need to figure out is what to use in the small tank, and I should be able to start the onion seeds very soon!
I found them while looking for something else, of course. :-D
Here is where, on the tank, I want them to sit.
The bar across the middle has extra surface area in the corners of the ledge the covers rest on. There’s lots of room, here.
The outer corners, however, don’t have that, so there’s a lot less margin for error in positioning the pads well.
The first step was to clean off the ledge the frame rests on. An old toothbrush worked very well for that!
Since the cross pieces of the frames have an angled edge, to better fit into the space, I figured it would be easier to place the felt pads in position on the ledge first, adhesive side up, then placing the frame on top.
The felted pads I have were from a larger package with mixed sizes of circles, plus long, narrow ovals. The larger circles were used up, and all I had left were smaller ones, and some of the long ovals. I’d hoped I still had some larger circles left. If I had, I would have cut them in quarters, and fit them right in the corners, but half circles would have to do!
Once they were in position, I lined up the cover and dropped it down, pressing just enough to make sure the adhesive stuck, then removed it to press the adhesive in more thoroughly.
In this corner, you can see the pad will protect the tank’s frame from the wire. This was the edge of the roll, so no sharp bits sticking out, like the edges I had to cut, so I didn’t trim it.
And this is why I lined the pads up to the corners of the tank, rather than the frame. Yes, there’s a likelihood that the pad will get pulled off where it’s overhanging, if I leave it like that (I will trim it later), but it also isn’t sitting on the screw head. It was supposed to be countersunk, but some of the screws simply stopped and would not screw in any further. I am not sure what was stopping them but, whatever it was, I was wrecking my screwdriver’s tip, trying to get them to go in further, so I stopped. The others were just fine.
So the corners are padded now, protecting the tank’s frame from being scratched up, should a cat decide to jump onto the cover.
When I was fussing with everything to prepare for this, I did have a kitten not only jump onto one of the covers while I was there, but also walk across on the light fixture! Not a problem for a light kitten, but a potential problem, if one of the heavy adults tries to do it. Thankfully, they seem to not like the new covers and are staying off. At least while we’re around to see! The few times I’ve seen one of the adult cats up there, they have stuck to walking on the wood and stayed off the wire and away from the light fixture.
Meanwhile, the baskets and other items stored in the tank have been removed. I’ll need to take a vacuum to the bottom to clean it, then see how my seed trays fit on the bottom. That will help me decide whether the rigid insulation will be lining the inside, or the outside, of the tank. Whatever I do with the sides, the bottom will have its own layer of insulation lining it, too.
It’s remarkable how handy that insulation has been. I’m glad my daughter bought so much extra!
I’m going to need the little step ladder to be able to access the bottom of the tank. I could barely reach to get the smaller baskets out!
The joys of being short! LOL
Another little bit of progress made! :-) I can hardly wait to see how this works for starting seeds!
The second one was much faster to build than the first. :-D
For those who are new to this blog *waves hello* you can catch up on the project with part one and part two. Links will open in new tabs, so you don’t lose your place here. :-)
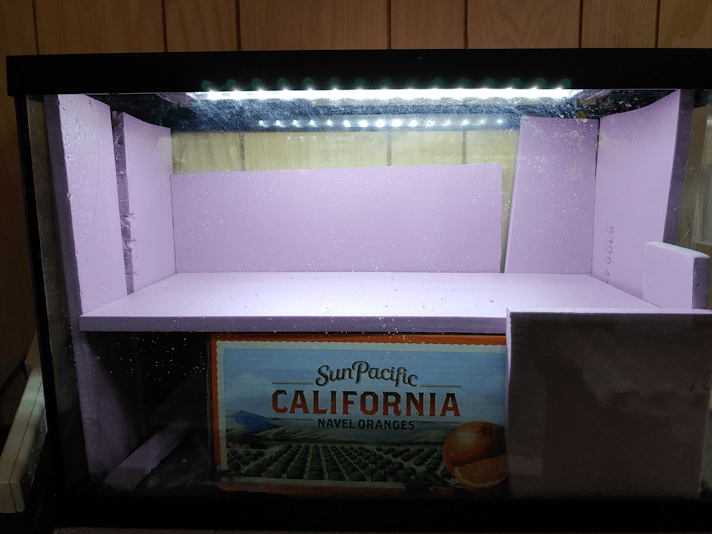
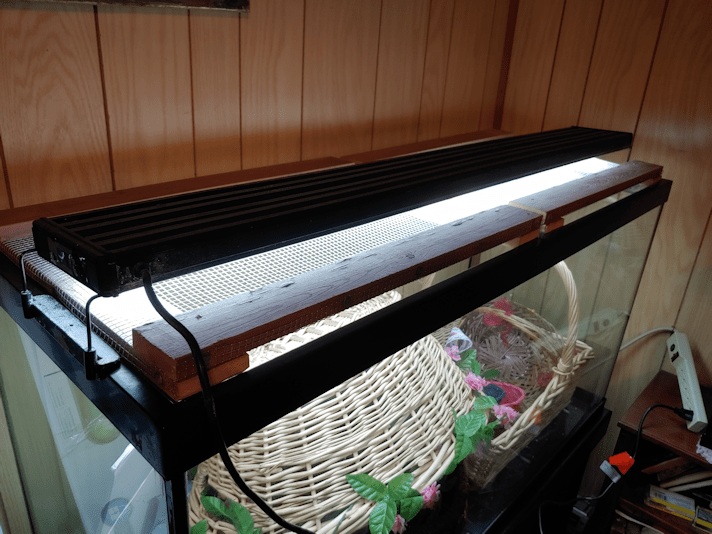
Once the second cover was done, I unpacked the light fixture, which has been sitting in its box next to the tank since the move, and tested it out. Considering what a disaster the movers were, I would not have been surprised to find the bulbs shattered or something.
It worked just fine! :-)
Of course, as soon the covers were on, cats were on it! So far, they have not tried to climb on the light fixture, but there is no doubt that they will, at some point. Hopefully, it will hold up okay.
I was concerned that the frame would create shadows in the tank, but that does not seem to be an issue at all!
Now I have to figure out how to set the time and program it to turn on and off. It’s been years since it was last done! There is time to look that up, though.
We still need to cover the sharp edges of the wire mesh, and I still want to put felt pads in the corners to protect the tank a bit, but other than that, the covers are done.
We still have the original light that came with the tank, which rested right on top of the original covers. The tanks will only hold so many seed trays. With things like the onion seeds needing to be started so much earlier than anything else, I can see us rotating trays out from the tanks and into the sun room (which should be warm enough, by the time the next groups of seeds need to be started), and using the second light there.
Now I need to figure out where to store my baskets, then line the inside of the tank with foil to reflect more light. Since this room is rather chilly, I plan to use pieces of rigid insulation on the bottom and around the sides, too. We will likely cover the insulation with foil on one side to make it easier to take it in and out, but I will see how the seed trays fit inside, first. If the insulation takes up too much space, I’ll put them on the outside of the tank.
Progress has been made! :-)
I am so looking forward to gardening this year! :-)
Yesterday, I got started on making covers for our big fish tank, to keep the cats out. Today, I assembled the first one.
Of course, things did not go to plan.
Does anything ever? :-D
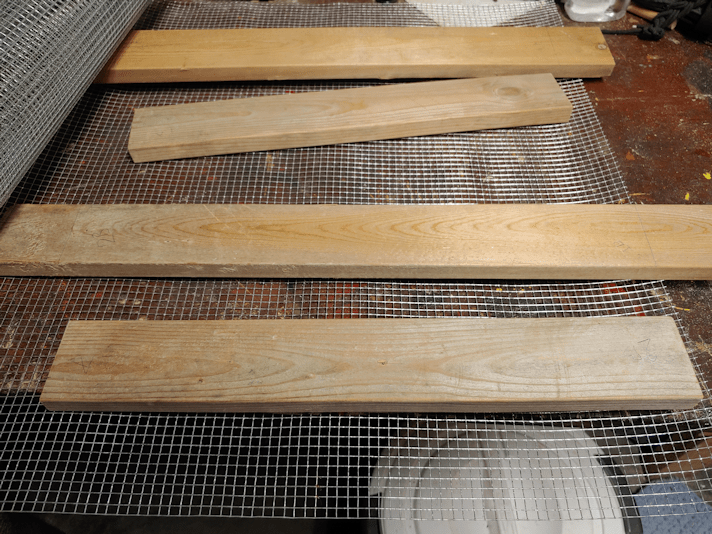
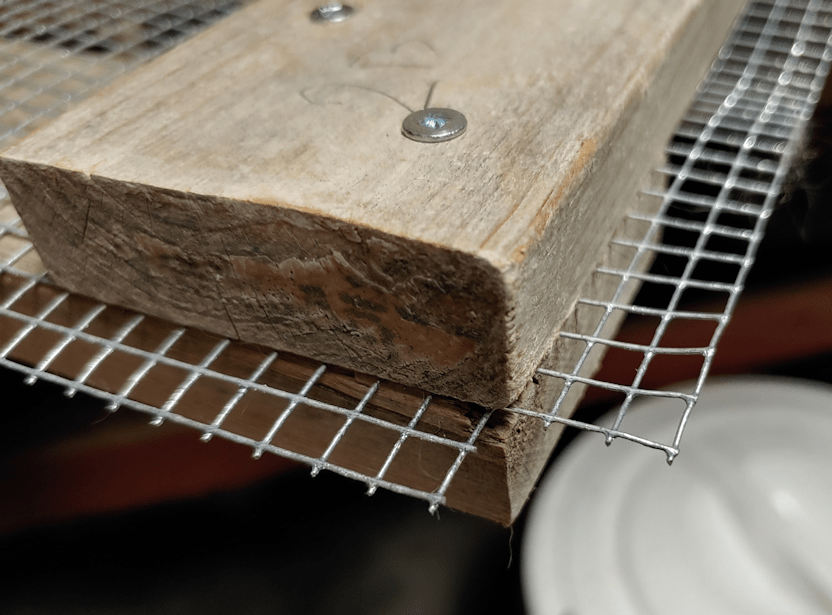
One of the things I needed to figure out was how to secure the hardware cloth to the frame pieces, for those inevitable times when a cat jumps on them. All I’ve got for materials is whatever we can find lying around the farm. While doing my rounds this morning, I went digging in the side of the garage where we store the lawnmowers and snow blowers. I knew there were some roofing nails in there, so I grabbed a while bunch and brought them inside.
Here is the first problem.
All of the nails were huge. There was only a single smaller size, and it was still too large. What I wanted to do was secure the mesh to the tops/bottoms of the boards making up the frame. Previously, we’ve used a staple gun to do that, but these were not for things where the wire mesh was expected to hold weight. Particularly not the sudden weight of a cat leaping onto it from above.
The mesh was going to have to be secured along the sides.
That meant cutting it with a half inch overlap on all sides.
I’m getting closer to the end of my roll of 1/8 inch mesh, and it really does not want to unroll at this stage! :-D I had all the boards on there to hold it down, and it still kept rolling itself back up again!
Once the mesh was cut to side and flattened, I affixed it to one side.
Normally, I would have used the staple gun to tack it in place, but I couldn’t find it anywhere. Which is really weird, because I’m the only person who uses it!
So it had to be tacked in place by screwing in the cross piece, holding the wire as taught as I could in the process.
Then I took out one of the screws in each corner.
I had placed the wood in place on the tank and marked each one with pencil, but once the hardware cloth was in place, I couldn’t really see my marks anymore. Plus, with the cross pieces a fraction too long, I had to make sure I didn’t line the side pieces up to the other end, or the while thing would be to big.
So I quickly drilled a pilot hole in each of the other corners of the cross pieces, then went back to the tank.
This way, I could place the long pieces where they were meant to sit, line everything up, then add a couple of screws through the pilot holes to hold them in place.
Then it was back to the basement to continue.
Once each corner was secured with a pair of screws, it was time to bend the wire mesh. Since the sides would be bent in one direction, and the ends in the other direction, I first cut out the corners.
The wood pieces may have been lined up to the tank, but no matter how careful I tried to be, the wire mesh ended up uneven.
Ah, well.
Once the mesh was bent, I drilled pilot holes for each nail (to prevent the wood from splitting) and hammered them in. The flat tops of the roofing nails were perfect for securing the mesh. Very different from how I had to do it with the larger mesh on the screen “door” we made to keep the cats out of the old basement.
Time to test it out again!
Oh, dear.
The addition of mesh and nails – especially the nails – made it wider. It wasn’t so much that it no longer fit. I could have let it just rest on the nail heads, I suppose. They would, however, damage the tank’s frame.
There was a very easy solution to this problem.
Flip it upside down.
With the cross pieces being every so slight too long, I used my Dremel to take off the corners at roughly a 45 degree angle.
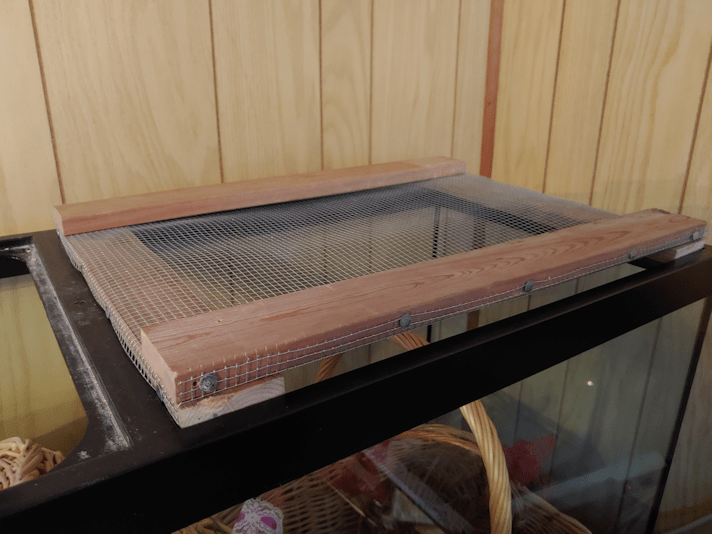
It now fits!
Unfortunately, the wood is a bit warped, so it doesn’t sit flat, but it should still do the job.
There are still a couple of things I need to do. One is to find some way to cover the edges of the hardware cloth, for safety reasons. I’ll probably just use Gorilla Tape, if we still have some.
The other is to find my self-adhesive felt pads. The kind that’s meant to go on the bottoms of chair legs or the like, to protect floors. Since the bottom is now the top, the screw heads are facing down, and each corner screw is sitting on the plastic ledge in the corners of the tank. It wouldn’t be an issue, if I weren’t expecting cats to jump on it, so a bit of padding would be a good thing. I haven’t seen them since we packed for the move, though. :-/
Aside from those 2 things, this cover is done.
The other one will wait for another day! :-D The earliest we should be starting any seeds is in late March, so we have time! :-)
Happy New Year! I hope you all had a wonderful time last night, kicking out the old year, and bringing in the new. :-)
For us, we don’t normally do a whole lot. Living away from town or city celebrations is quite within our preferences! We had good food, each other’s company, and the entertainment of cats that were very interested in those good food smells! ;-)
This morning, as I went into the sun room, I discovered one of the spice boys in there! He would have been there since yesterday morning. :-( Not a very good New Year’s Eve for him!
Normally, when a cat gets accidentally closed up in there, we hear a ruckus or meowing and know to let them out.
We heard no such ruckus.
I suspect he didn’t actually mind being in there all that much. It’s much warmer than outside, and there are soft things to curl up on. He had to have been pretty hungry and thirsty by morning, though!
I’m not even sure which of the spice boys it was. As soon as the door opened, he ran and hid under the swing bench, then peeked at me. The two of them look so much alike, and move so constantly, it’s really hard to tell which is which unless they are next to each other. Even then, we haven’t decided which one is Nutmeg and which one is Ginger! :-D
That didn’t stop both of them – and four other cats! – from following me around as I finished my rounds!
Just look at that face! :-D What a glare!
Today is going to be a quiet day of rest for us, then tomorrow is going to be a busy one! I will be heading into the city to do our monthly shop, as early in the day that I can. When I get home, we’ll unload the groceries, then load up the garbage and recycling for a much delayed trip to the dump. Earlier in the week, I had my days mixed up and thought we could do it on Thursday night, thinking that New Year’s fell on Saturday, not Friday. Thankfully, Saturday is the one day a week they are open for a full 8 hours – and it’s not a holiday – so we will have time make the trip to the city first. It’s been so long since we’ve gone to the dump, though, we might have to make two trips. We shall see.
Amazingly, it’s going to warm up quite a bit over the next couple of days. For Sunday, the predictions keep going up, and are now at 2C
Yes. Two degrees above freezing. In January! That would be 35.6F Then it’s supposed to stay warmer than -10C/14F for the next two weeks.
I had feared we would have another bitterly cold couple of months, as we had for the previous winters we have been here. I am really going to enjoy a milder winter – and the reduced electricity/heating bills. Even our equal payment plan payments will drop, with temperatures this warm! Before we were able to get on the equal payment plan, we were paying over $600 a month for December, January and February. Last year, we had a month were we would have been paying over $700 for our electricity. On months like that, our equal payment plan adjusted to a little over $300. Usually, it’s about $290, though it’s dropped to as low as $250ish.
This house is not very energy efficient, at all! :-( And the upstairs is freezing cold in the winter, with it’s one heat vent for the entire floor. When I stand at the bottom of the stairs, I can feel cold coming down, like a breeze. The girls put sheets of rigid insulation on the walls by their beds, which they then covered with decorative fabric, which made a big difference. Without out the insulation, they were actually feeling waves of cold, coming off the walls. !! This year, they haven’t even needed to use their little heater, yet. Meanwhile, in the summer, it gets insanely hot up there. :-/
Of course, with snow on the ground, my mind keeps going ahead to garden plans. In fact, I’ve been almost obsessed with garden plans! In a good way. ;-) I’ve been researching on different ways to start seeds indoors – something we had issues with last year. I am constantly reading about how important it is to use grow lights, which is something we just don’t have and can’t afford right now.
Or…
Maybe we do…
Everything I’ve been reading says ordinary lights can be used, so long as they’re bright enough.
We have two aquariums.
The little 20 gallon one I’ve given up on after the last fish finally died, has a light that is part of the lid, so no worries about the cats getting into it. It can hold one of the seed starter trays we have now, and maybe a bit more.
The big tank has two lights. The original that it came with, and one we got later. The glass lids on the big tank eventually broke and couldn’t be used. The original light rested very close to the glass lids, which actually caused problems with algae growth and scale forming on the undersides. When we had to get rid of the glass lids, the light was no longer protected from what little splashing there was from the filter output, so we got one that with risers that set it higher off the frame. It also has a built in timer.
Since a piece of the filter system broke during the move and we have not been able to find a replacement part, the tank has been used to store baskets, hidden by a cover that the cats can sit on. If we can find a way to cover the top of the tank to keep the cats out, while still allowing full light and air flow, that tank would make an excellent greenhouse for a whole several seed trays or lots of pots! We plan to use at least 3″ pots to start squash, this time, and we have a lot of summer and winter squash we want to start this year! :-)
So that is going to be a project for the next while. I’m pretty sure I have enough hardware cloth left cover the top of the big tank. I just have to figure out how to make a frame that can handle the weight of cats that are sure to jump on it, while making sure the stands that hold the light will still sit on the tank edges, where they are supposed to.
That would leave us with one more aquarium light from the big tank. If we can find a way to set that up over trays and keep the cats off at the same time, we could have even more seed trays well lit.
My goodness, I can hardly believe it’s just barely afternoon as I write this.
Sunday is supposed to be a day of rest, isn’t it??
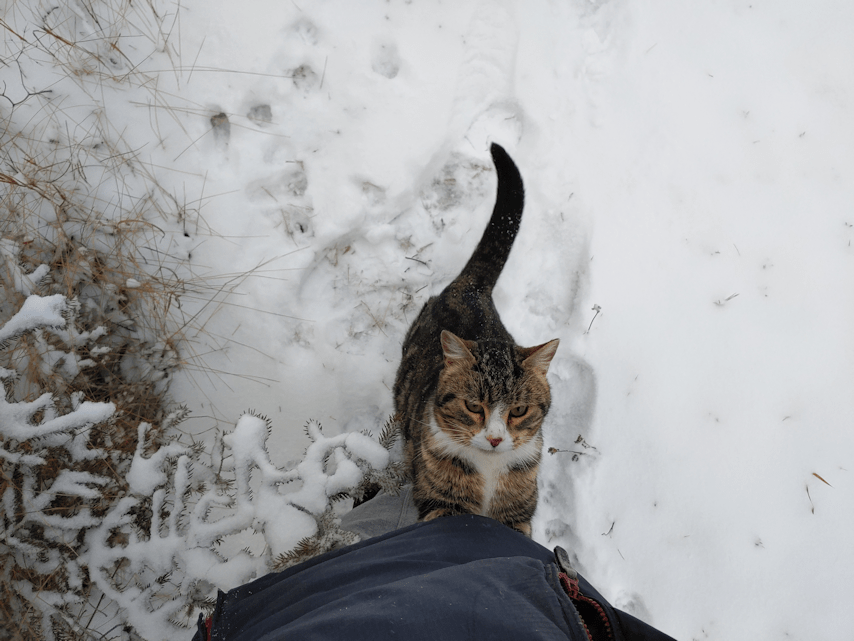
Things started off pretty routine. I did my rounds and the outside cats were very happy to see me. Well. Happy to see fresh kibble and water!
Potato Beetle joined me, as he often does. I caught this picture just before he jumped straight up me!
Doesn’t that expression look malevolent? :-D
The Potato, however, was not the walking disaster today. Oh, no! It was the cute, little adorable ones that were pure destruction!
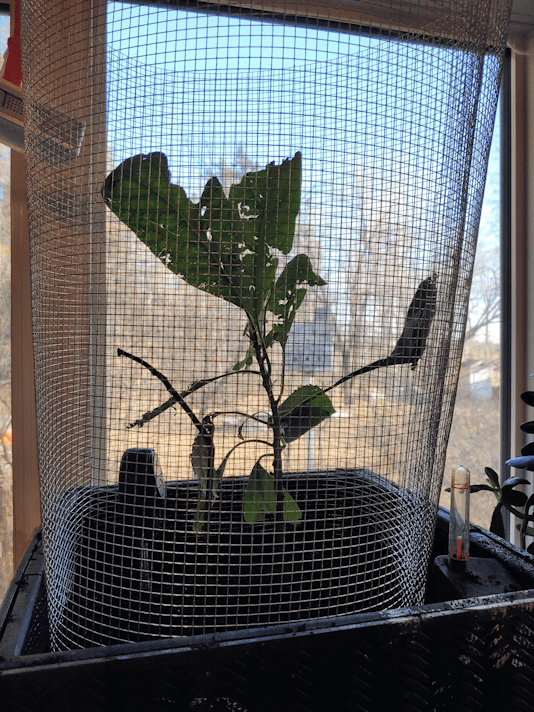
I posted a while back about how we had to do an intervention to rescue our remaining avocado plants.
We had started off with 5 plants, and now we’re down to one poor, battered avocado… and a stick that still had live roots on it, so we’ve left it for now.
The cats did try to get in there, but the cage worked. I think the avocado is recovering, but it still looks pretty beat up!
Well, that didn’t stop the cats, unfortunately. They just moved on to other plants.
First, was the umbrella tree. After various barriers were tried and failed, I was able to put some 1/2 inch wire mesh around it that I had left over from some other projects. They still could get over it, though, and every now and then, we find a kitten sitting in the middle of it.
Yes, we have barriers in there, too. I made a spiderweb of cord to support the branches, and they still fit in between. This morning, I heard a strange noise and found Cabbages trying to climb the wire mesh to get at either Nicco or Tissue, half-hidden in the middle.
At least they’re not digging in it anymore.
They just moved on to other pots.
We have since lost a small pot with a jade plant in it – and it was one of the ones that was covered by a cloche to protect it! A while pot full of soil, all over a shag carpet… Fun times! A couple of succulents that were hanging in windows had to be moved, because they were still getting at them, including all my daughter’s orchids. The biggest jade plant got 4 hollow tubes (unused legs from a utility shelf) inserted into the soil, with cord wrapped around, because the cats kept sitting in the middle of it. That seems to be working, plus I found it works well to water it through the tubes. :-D
Then they moved on to another large jade tree. That one even got knocked off the shelf several times. For that one, I tried laying foil over the soil, but that does not deter any of our cats! We have some large plastic containers from Cheese Balls and pork rinds I would get at Costco. The containers make great cloches and I was saving them for spring planting. I ended up cutting one to get the straight middle part of the container, which I was able to fit under the jade plant branches and place around the edge of the pot.
That finally stopped them!
Unfortunately, I just discovered they have moved on again, and started digging in one of the aloe vera pots. This surprised me, because aloe vera is so splayed out, the soil is hidden. They had to actually dig out a couple of aloe babies to get at the soil. It wasn’t much, though, so I moved the plant pot to the dining table and finished my rounds.
Later, while I was on the phone with my mother, my husband popped his head through the door to tell me that cats had been digging in the pot.
*sigh*
When I finally came out, I found Cabbages, innocently sitting on the table next to the pot, and soil all over the table and floor.
*sigh*
The face of destruction!
As I cleaned up, I put a towel on a chair and moved the pot over. While working on the table, I happened to look up to see Fenrir on the chair, her front paws in the soil, starting to dig!
Another face of destruction!
I ended up having to put the pot with my husband, so he could guard it while I finished cleaning up.
So how do I stop the cats from doing this? After many years and many moves, it was a very long time before we lived anywhere long enough to have house plants, so having them is not only something I really enjoy, but it gives a feeling of stability for me. Unfortunately, the cats just can’t seem to resist them! They dig in the dirt like a dog digs for a bone!
What to do? If I protect one pot, they just move on to another.
Well, I did have a few more of those plastic containers left.
My poor, sad, beat up, cat chewed aloe vera!
I ended up using the flat side pieces to protect three aloe pots, including one rather large one. I have no idea how the plants will adjust to this, but it can’t be any worse than the damage the cats were already doing to them, just in going to and from the window ledge. I used the curved top of one of the containers around another jade plant. There is still one more aloe vera left without a shield of any kind, but that thing is so massive, there is simply no way I can do anything around that pot. Hopefully, the sheer size of it is enough to keep the cats from trying.
While I was doing all this, I kept finding kittens on the dining table. Mostly Cabbages! I hate having to chase her off. She still isn’t completely socialized, and this will set her back, but there are some places we just can’t let the cats get onto.
Hopefully, they will stop digging up our plants now. It would be great if we could set up a bin with soil for them to dig in, but they’d just use it as a litter box. I do wish I knew why they all suddenly decided that digging in plant pots was a good idea! We’ve never had this problem before.
Leyendecker is undisturbed by human regulations and restrictions! :-D
Normally, our tree would have already been decorated, and the Advent wreath, with its candles, set up.
It doesn’t look like we’ll be able to have a tree this year. The cats just seem to wait until we’re not around, then go after it. The main problem is, there’s really just one place that works well for a tree in this house, and there isn’t any way to stabilize it. At least not without making holes for hooks in places I really don’t want to put holes.
So we’re thinking of using a garland that looks like spruce branches in place of a tree, and focus more on decorating the house.
At least, up near the ceiling! :-D
As for the Advent wreath, I forgot we no longer had candles. There are supposed to be 4 of them. Three in blue or purple, one in pink. One after another is symbolically lit on each Sunday of Advent. A 5th candle, in white and representing Christ, can be included, to be lit on Christmas day.
If I’d remembered we burned away the last of our supply of these candles last year, I would have gone hunting for them long ago. I’d found them at Michael’s before, but outside of boxed sets specifically put together for Advent, it’s hard to find the right colours, this time of year. Michael’s, of course, is shut down right now, along with all the other “non essential” stores. Churches are shut down, too, so there’s another potential source no longer available.
I did have other candles, though. I have a silver candelabra my husband bought for me years ago, that holds 3 candles – and I had kept the candles from the last time we’d used it. They’re gold instead of blue or purple, and only about 4 inches long, but they’ll do. In place of the pink candle, I have a white one. For the Christ candle, I have another white one, marked with a cross, that had been included in our traditional Easter basket for blessing.
Yesterday, I helped my mother do her grocery shopping. Her building is closed off to all but residents and staff, so she had to meet me outside. She wasn’t wearing her face shield, but the surgical mask under her nose again. When I asked why, she ignored me, so I suspect she’s afraid of being hassled, even with the shield. She had to go to the bank, first and had called ahead to make an appointment the day before. She was told she could come any time during opening hours, and given instructions. They don’t allow anyone into the bank anymore. There’s a table set up in the vestibule. Only one person allowed at a time. Not that there’s room in there for more. My mother filled out what she needed, then knocked on the door. When someone came over, they couldn’t even open the door very far, because there was no room with her walker in there.
I waited outside while she sat in her walker. Some guy came by, wanting to go in. After confirming with me that my mother was not waiting in line, but had already been helped, and that I was not waiting in line, either, he read the signs while putting on his mask. He read the “one person in the vestibule at a time”, then asked, “what’s a vestibule?” :-) It is not a word that is commonly used out here!
Then he decided to try and get into the bank.
Yup. Went in, with my mother, and tried to open the locked inner door.
*sigh*
I don’t know what my mother said to him, but I heard him answering “I know that” as he left. :-D
We started chatting about the ridiculousness of it all (seriously; in that tiny space, if the virus were an issue around here, which it isn’t, it’s like they’d created the very conditions it would most likely be spread!), and he started going on about how the reason we were having so many problems was because all the kids are allowed to go to school and spread the bacteria.
Yes. He said bacteria.
Thinking he may have misspoke, I mentioned it was a virus, and he just brushed it off and kept talking about how all these asymptomatic kids are getting everyone sick by spreading the bacteria.
Thankfully, my mother was soon done and I had to help her with the doors. Because, of course, they’re not using the entry with automated doors for persons with disabilities.
*sigh*
The rest of the trip was uneventful, and my mother is now well stocked for a while. I made a point of bringing our folding wagon along, so while my mother unlocked the side door closer to her apartment, I loaded it up and brought it over. She then had to push her walker while pulling the wagon to get her groceries in, then bring it back. If I weren’t concerned about her being hassled, I would have gone in anyway. :-(
Since I was out with my mother yesterday, it was today that I started something for Christmas that I’ve been wanting to try for some time.
I cooked up a baking soda and cornstarch dough. My intention was to make cookie cutter ornaments with it. I have a set of cutters that are meant more for gingerbread house type dough, that make interlocking pieces. Once dry, the pieces can be put together to make a 3D tree, star or reindeer. I had another set of cookie cutters in a variety of Christmas themed shapes.
It didn’t work.
I think I might not have cooked the dough long enough or something, but I cooked it until it was so thick, I couldn’t stir it anymore, so it should have worked. Yet it was way too soft to be able to do anything after cutting the shapes I wanted. After several attempts, I gave up and offered the dough to the girls. They made a bunch of little sculptures, instead, which will take several days to dry.
I guess I’ll just stick with the orange slice decorations I was going to start on while the baking soda dough ones dried.
It’s funny. With having moved so many times over the years, and now with my husband’s mobility so reduced, there is nothing unusual about having Christmas with just the 4 of us. Since we were already living on my husband’s disability payments, we’re used to being extremely fugal. Living in relative isolation, a lot of the restrictions and regulations don’t affect us directly most of the time. Yet, the long tentacles of government overreach is affecting even us. When we do go into town, we’re not allowed to buy anything Christmas related (unless it’s for pets; you can buy all the Christmas themed pet toys you want, but you can’t buy toys for human children), nor books and magazines, most clothing, and so many other things government talking heads have decided are not “essential”. All of this is affecting everyone, as prices for basic necessities, have to go up in response. So people like us and my mother – who at least have incomes, as small as they are – are going to be having a harder time of it. Gas prices are going down again, but there is nowhere to go. Supposedly, the lock down is going to end on Dec. 11, but our premier is already saying it’s not going to be lifted much, and telling people not to get together with family for Christmas, even with the reduced restrictions.
Meanwhile, it’s our seniors in long term care in the city, surrounded by people in PPE, but no family or loved ones, and no activities to help combat cognitive decline or loneliness, that are dying. Not necessarily of the virus, but of starvation, dehydration and neglect. Meanwhile, my mother can’t even find out how her sister is doing; her niece isn’t returning her calls (not sure what’s going on there), and my mother can’t navigate the automated phone system to talk to a human being. I’m not on the list of people they’re allowed to talk to, so I can’t find out for her.
I think I’ll call, anyway, and ask them to phone my mother or something.