A Good Day

The winds continued to blow all night; though they died down by morning, that was purely relative, as they were still quite high!

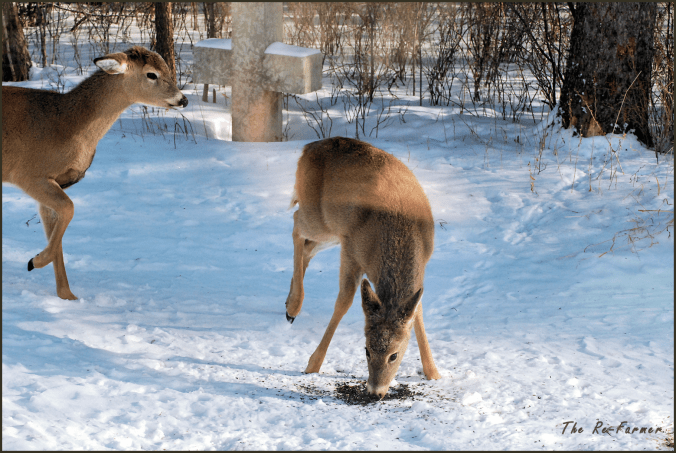
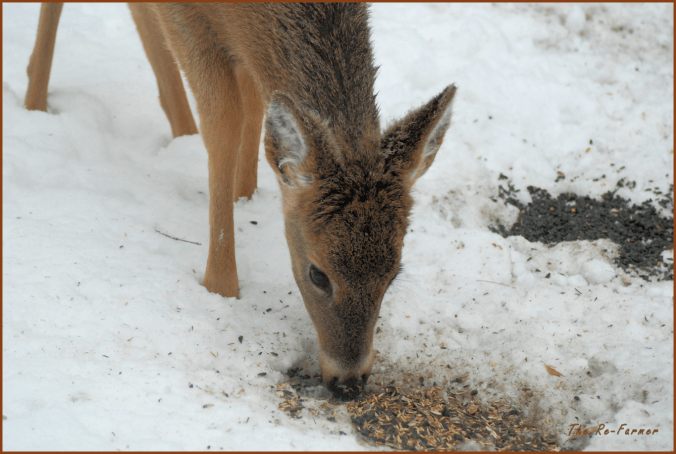
Our deer feed and bird seed had been covered, but by morning, the snow was dug up in each of the spots I’d put them in, and there was very little left.  So we know that we do have deer coming in during the night to feed.

I’ve very glad to here from my husband that the mama and her twins were back this morning, though from the looks of the ground, it was already dug up before they got there.

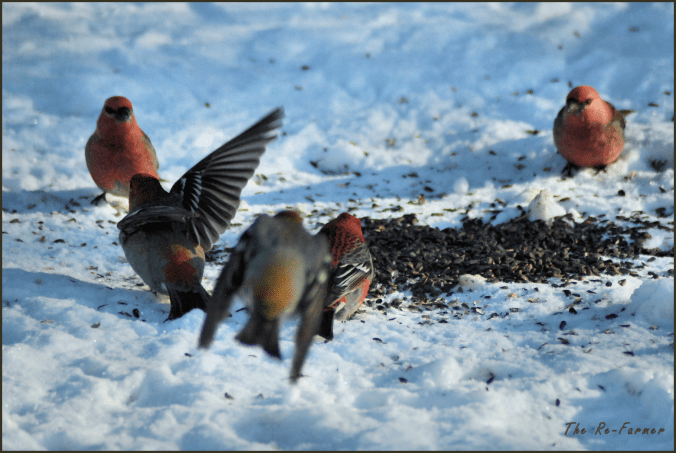
Even before we had a chance to put more food out, Barbecue came by, soon followed by Hungry Girl, though she stayed away from the feed.  They ran off before my daughter went over with more food, and I never saw if they came back during the day or not.

2018-01-31.whitetail.deer

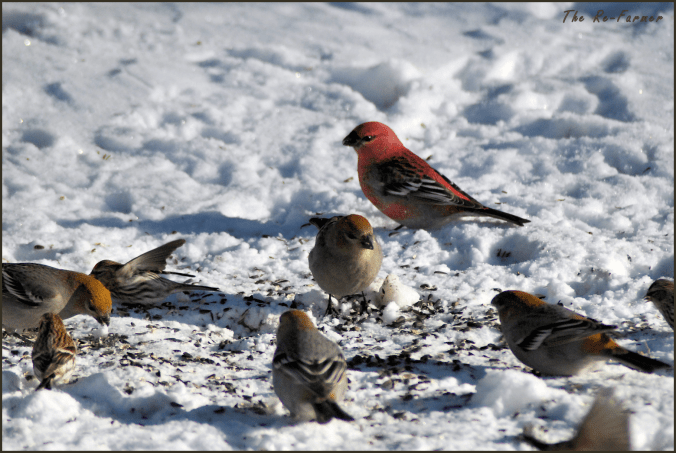
The birds and squirrels were sure busy, though!

2018-01-31.bluejay2018-01-31.squirrel

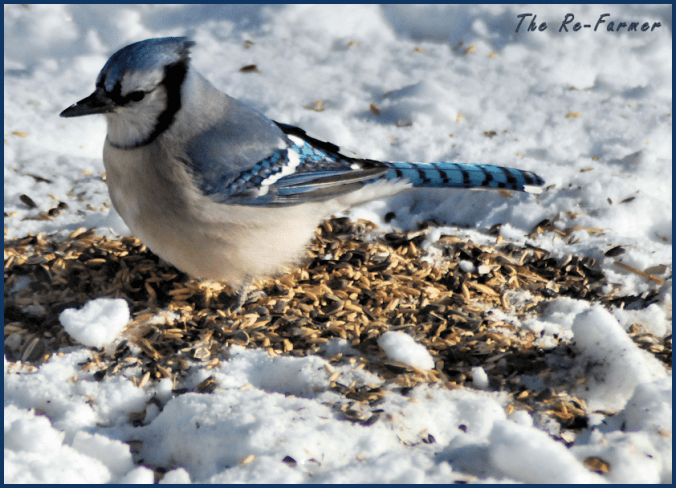
The camera still seems to be working fine again, though I’ve cut down the number of photos I take quite dramatically, so no photos of the chipping sparrows, grosbeaks and chickadees today.

I was busy, anyway.

Since we weren’t going to do the trip to the city we normally would when pay comes in, I focused on more unpacking.  Or partial unpacking, as it were.  There were a couple of small book boxes that had been partially unpacked and waiting in the living room, so I cleared out some shelf space in one of the dividers between living and dining room.  That included finally unpacking a curio shelf I have and getting my daughters to hang it on the wall in my crochet corner.  Much of what I had to move still isn’t in their permanent places, but their permanent places aren’t ready yet.

Almost all the books fit into the one shelf I was able to clear, though some had to go into the wall shelf in the master bedroom.  That space is beginning to turn into a catchall space, and I don’t like it.  Not much choice right now, though.

A bit of re-arranging in the bedroom meant I was able to unpack my cookbooks, too.  Again, they are not in their permanent space, but at least they’re out and accessible.

Then there were the big boxes sitting on the piano.

Ugh.

One, I went through and ended up breaking down a lot of packaging from camera and lens purchases for the burn barrel.  We’d kept the original packaging and receipts in storage for years, and there were even accessories in there.  I found the original packaging for one of my husband’s first smart phones, too!  The Treo.  Oh, how phones have changed over the years!  The other box was one the movers packed.  A very strange combination of things from various rooms, inefficiently packed.  There was even a folding step stool in there, turned upside down and used like a basket, rather than folded closed.  Again, it looks like they just tossed things into the box.

And we’re still missing things.  In fact, I just realized we’re missing both our irons.  I didn’t even think of it until I was looking at our ironing board, leaning against the wall by the piano, wondering where I can put it.  That’s when I realized I haven’t seen our irons in any of the boxes.  We pretty much never iron anymore, so they weren’t something we’d miss right away.

A strange thing to go missing.

Now that the movers have paid up for our broken stuff, I no longer need to hang onto them, so that box got cleared off the piano, too.  The only thing in that box we can try to salvage is the latch hook wall hanging made by my late mother in law.  We’ll have to replace the broken wood hanger.  We should be able to remove it without damaging the mesh.  The rest of the broken stuff in the box is garbage now.

But the top of the piano is clear now, so we can hang up that antique mirror of my mother’s, above it, and eventually put some stuff on display on the piano itself.  Like the creepy, creepy baby doll wearing one of my baby dresses that my mom gave me, and has somehow managed to creep its way into our hearts.

The stuff of nightmares, that thing is.  I love it! :-D

The cats, meanwhile, are very happy to be able to go on the top of the piano again.

Altogether, I finished unpacking 5 more boxes today.  A very good day! As of right now, the only things left to unpack are all in my office.

My tiny little office.

I’ll figure something out… :-D

Granted, I still need to deal with our 90 gallon aquarium, which I’ve left wrapped in the foam pieces I’d taped around it to protect it.  The plan had been to set it up at an angle in the corner, then focus on aquascaping, once filled.  My aquatic plants are doing very well in the 20 gallon tank they’re in now, but when I set up the big tank, I also want to get plants that grow a lot taller for the background, and dwarf grasses for the foreground.  I will need to find someplace to get replacement parts and hoses for my brand of filter first, though, and I’ll also need to check and make sure the additional weight once it’s filled won’t be a problem.  If it were just the piano or just the aquarium, I’d be less concerned, but both in the same general area of the living room? I’d rather play it safe!

Little by little, it’s getting done!

The Re-Farmer


Critter Pics and… sadness

I only have a couple of critter pictures for you today, and both were taken with my phone camera.

I took many photos using the digital camera we keep on a tripod by our living room window, but then the camera died.

Then it worked again.

Then it died again.

Then it started doing weird things, like the viewfinder going completely black and the shutter getting stuck open.  Not being able to focus.  Error messages showing up.

My husband is the camera guy, and he opened it up, did some cleaning and checked it out.  The cleaning seemed to have helped a bit, but then the problems all started up again.

It looks like the camera body is on its last legs.  We hadn’t used it for so long, then suddenly we were taking probably an average of 150 photos a day.  It may not have handled that well!

When I uploaded the memory card onto the computer, there were only a few photos, taken later in the day.  Everything I’d taken before then was gone.

Our older daughter has offered to lend us hers; she has a Nikon D80, too.  I’m now paranoid that if I start using her camera, it’ll end up like ours.

Something else to add to the list of expensive things we’ll need to replace.  As much as I love my phone’s camera, it still can’t do as well as a good DSLR and some quality lenses.

*sadness*

We did get one deer visit today.

20180129.white.tail.deer

This is Barbecue.  Hungry Girl didn’t show up today.  At least not that I saw.

I later saw that my brother’s dog had come out to check on his van, and that may be what has the deer’s attention in this photo.

The van is parked in front of the main entry, outside the kitchen window.  It was when I noticed the dog that I also saw this…

20180129.cats

Nasty Crime Boy and Rolando Moon were checking out the dog – and me! – through the window.

The Re-Farmer


Home Made Yogurt and Yogurt “cheese” – Day Two; finished

Here are the final results of the yogurt and yogurt cheese making process.

You can visit the first part here, with the recipe, and the second part here, with the step-by-step to make the yogurt cheese.

First up, let’s compare the finished yogurts.

20180129-yogurt6

This was after the home made yogurt was in the fridge for several hours.  It did thicken somewhat from when I first put it in the containers, but as you can see, it’s still quite a bit thinner than the commercial yogurt I’d used as a starter.  That yogurt, by the way, was just a house brand of plain “Balkan” style yogurt.  I normally buy Greek yogurt, but it was more than twice the price!

As far as texture went, the only difference was that one was thinner than the other.

I couldn’t really taste any difference in flavour.

After taking the photo, I mixed both together with a bit of brown sugar and cinnamon.  It was quite nice!

One of my daughters promptly claimed the container that wasn’t quite full for herself, and ate it straight. :-D

Now, on to the yogurt cheese…

After hanging for about 3 hours, there was quite a lot of liquid in the container.  Enough that I poured it off into the container I’d already started in the fridge, almost filling it, so that the bag wouldn’t be sitting in so much liquid.

When very little more drained out of it after another hour or two, I decided to take it out and finish the process.

20180129.yogurt.cheese9

Look how much liquid there is!  I can hardly wait until our next bread baking day. :-D

Once the bag was on the plate, I could really feel how the middle was thinner than the outside.  If I had a cheese press, I would have been able to get more liquid out, more evenly.  Maybe some day.  For now, I’m happy with doing it this way.

20180129.yogurt.cheese.10

And here is my yogurt cheese baby.  With the outside being drier, it allowed me to gently roll the cheese out of the cloth.  If that part had broken up more, the softer middle would have got on the cloth and made it much more difficult to get out of the bag.

Guess how I know that? :-D

20180129.yogurt.cheese.11

Once out of the cloth, I mixed it thoroughly to make it an even texture.  This is a bit on the thin side to be a “cream cheese.”  More like a really thick sour cream.

I had a couple of smaller containers waiting for it…

20180129.yogurt.cheese.12

I filled one with the plain yogurt cheese, then added some garlic powder, onion salt and parsley to what was left in the bowl.

I admit, I licked the spatula after doing this, and the onion and garlic one was sooo good!

Like the plain yogurt, it thickens a bit in the fridge, but not by much more.

If I had wanted to, I could have left the bag to hang longer to drain more liquid out and have more of a cream cheese texture, rather than a sour cream texture.

We are looking forward to trying some of this on pierogi soon!

If you try making this yourself, please to pop by and let me know in the comments, how yours turned out, and what you think of it!

The Re-Farmer

Hello, Deer

Today was a very busy bird day!  Especially the grosbeaks.  So many of them!

At least until the deer came.  It was continual back and forthing between the birds and the deer!

2018-01-28.bird.crowd.1

While there were plenty of chickadees, as always, and a blue jay also made an appearance, it was the grosbeaks that really stole the show!  There were so many red ones today, too.  Constantly flying in and out of the area.

2018-01-28.bird.crowd2

Also very busy today were the chipping sparrows.  Just masses of them!  They dash in and out a lot faster than the grosbeaks.

Then, out from the garden, a deer came loping enthusiastically in, and the birds took off.  Much to my surprise, it was the little hungry looking one!  The other one she usually follows came prancing in some time later.

2018-01-28.two.whitetail.deer.1

He did try to chase her off, but amazingly, this time she just shifted to another pile of feed, and they both ate together for quite some time!  A couple of times, she got chased off a bit farther, only to come back again, prancing in quite enthusiastically.

2018-01-28.two.whitetail.deer.2

It was so good to see her getting a decent amount of food, for a change.  And to see her being less skittish. I look forward to seeing her get all sleek and fat, like the other one.  That one clearly has seen no deprivation, this winter!

I wonder if the little one had gotten sick at some point?  Aside from when we had that polar vortex some in, with bitterly cold temperatures, it’s been a light winter, with very little snow to prevent deer from foraging.  There is lots of wild food to be had.

Eventually, he chased her off for good.  Then ran off, himself, later on.  He came back a couple more times throughout the day.

I’m thinking of calling the mean one, Barbecue.

The Re-Farmer


Home Made Yogurt – Day One

I hadn’t intended to make this again so soon, but my daughter and I were able to make a quick trip into town and she made a passing comment about how we should make yogurt again.  I’ve been thinking of it since I posted about using the liquid from making yogurt cheese in bread baking, so that was all it took to convince me to get what we needed to make some now.

Making yogurt is really pretty easy.  The main thing is to have a warm place for the bacteria to do its thing for the hours it needs.  I’ve found leaving it in a warm oven with the light left on overnight to be adequate, but there are other methods.

Since that is my preferred method, it’s a two day process.  I use a full gallon of milk, and plan to use half of it to make yogurt cheese tomorrow.

Along with the ingredients, a candy thermometer is needed, and containers you can sterilize to store the yogurt in, later.  Any container that can handle being scalded, with an air tight lid, of the appropriate size for your amounts will do.

The recipe I use is from Whole Foods for the Whole Family, from La Leche League International.  I have a 1991 printing of it.  It’s a very handy cookbook, if you like to make things from scratch.  I modified the recipe for larger quantities, so I’ll include both the original quantities, and my own variation (in brackets).

This recipe uses plain commercial yogurt as a starter.  Make sure you check the label to see that it says something like “active bacterial culture” or “live bacteria” on it.

Do not use the optional gelatin if you’re planning to make yogurt cheese.  The gelatin serves only to make a firmer yogurt.

20180128-yogurt1

4L milk, scalded

Yogurt

4 cups milk (4 litres/1 gallon)
1 cup powdered milk (4 cups)
2-4 Tbsp plain yogurt (1/2 – 1 cup)
2 tsp (8 tsp) unflavored gelatin, softened in 1/4 cup (1 cup) cold water – optional

  1. Scald milk.
  2. Cool to 95 – 155 degrees. (The recipe does not specify, but looking at my candy thermometer, it must refer to Celsius, not Fahrenheit)  Check with candy thermometer to be sure.

    20180128-yogurt2

    Yogurt starter and powdered milk stirred in.

  3. Stir in powdered milk and yogurt.  Add optional softened gelatin.
  4. Pour into sterilized jars, a baking dish with a cover, or a thermos rinsed with very hot water.  (Because I use an entire gallon of milk, I leave it in the same container I heated it in and cover it with a lid.)
  5. Place into or on a yogurt maker or use other heat source.  A thermos just needs to be wrapped in a towel.
  6. Put in a warm place and allow to incubate at 95-155 degrees until yogurt sets.  It can take from 3-9 hours, depending on your heat source.  Check after 3 hours to see if it is set by tilting the container or tapping it with the heel of your hand.  When set, refrigerate immediately.

Maintaining the temperature is vital; too cold, and the milk can go sour.  Too hot, and it will kill the bacteria.  The recipe lists several options for maintaining the right temperature, but a few of them a fire hazards, so I won’t bother including them. :-D

Yogurt cheese isn’t really cheese at all, but is has a texture similar to cream cheese and makes a wonderful spread.  To make it, you’ll need cheese cloth, and somewhere to hang it.

Which I don’t have.  So I have to figure something out for tomorrow.

Anyhow… to make yogurt “cream cheese”

  1. Line a colander with 2-4 layers of cheesecloth.  Place the colander over a bowl, then dump home made yogurt onto the cheesecloth.  Pull up the corners of the cheese cloth and tie them together so it can be hung.  Suspend the resulting bag of yogurt over the bowl and leave overnight. (Or just a few hours, depending on how thick you want it)
  2. Reserve liquid in bowl for bread baking.
  3. Remove yogurt cheese from bag and refrigerate.

Fair warning: getting the yogurt cheese off the cheese cloth can be a messy job!  Also, the outside will often be drier than the middle, so you’ll probably want to mix it together.  If you wish, you can mix in some dried herbs or garlic or otherwise experiment with it.

More, tomorrow!

The Re-Farmer


Quick Sourdough Chocolate Cupcakes

When we were living in Victoria, BC, and had made our first sourdough starter, this recipe from The Sourdough Cookbook was one of our favorites.  Not only was it chocolatey and delicious, it was one of the few things we could bake in our wonky PMQ oven.  We couldn’t bake a cake, because it had hot and cold spots so bad, parts of it would be raw and parts overcooked, but we could manage cupcakes and muffins.

We didn’t bake very often at all while living there.

Last night, I gave Sir Sour Alot a new home in one of our giant Tupperware Thatsa Bowls.  Since there is so much room in there, I fed it more than usual so that there would be lots left over after my daughters baked bread today.  With the larger amount of starter, it will be good to be able to use it for multiple things, all in one day.  They made 4 loaves of black olive and cheddar bread today.  While the first pair of loaves was baking, I started to pre-measure the ingredients and prepare the pans.  That way, when the second pair of loaves came out, I could quickly start mixing the batter while the oven got to temperature (the bread recipe calls for the same temperature, but with glass loaf pans, we reduce by 25F, so it was already pretty close).

Here is the recipe;

20180127sourdough.chocolate.cupcakes.ingredients

Quick Chocolate Cupcakes
(from The Sourdough Cookbook)
preheat oven to 400F and pre-measure the ingredients.

1/2 cup sourdough starter
1 egg
1/2 cup milk
1/2 cup softened butter
1 tsp vanilla extract
1/2 cup cocoa powder (sifted)
1 1/2 cups all purpose flour
1 cup sugar
1/2 tsp baking powder
1/2 tsp baking soda
1/4 tsp salt

  1. Grease 16 muffin cups, or line with paper liners; set aside. (note: I prepared 18 muffin cups)
  2. Place all ingredients into a large bowl – do not mix until all are combined.
  3. Beat with electric mixer on high speed for 2 minutes.
  4. Fill prepared muffin cups 2/3 – 3/4 full with batter.
  5. Bake in preheated oven for 18-20 minutes, or until a toothpick inserted into a cupcake comes out clean.
  6. Remove from muffin cups and cool on rack.

The recipe then says to put frosting on them, but I don’t think we have ever bothered! :-D

When I started mixing these today, the batter was MUCH thicker than I expected.  Almost a dough, rather than a batter.  I think perhaps the sourdough starter was thicker than when we’d made it before.  I ended up adding extra milk to it.  It still was really thick, but it turned out wonderfully, anyways.

The recipe said 14-16 cupcakes, but I filled 18 muffin cups (I had three tins with 6 muffin cups each), so they were a bit on the small side.  They turned out very light and airy.  So much so, the first one I tried to photograph didn’t work out because, when I started to break it open with my fingers, the inside was so delicate, the slightly crispier outside just crushed it!  So I got another one and very carefully used a knife to cut it open.  :-D

These have a rich chocolate flavour, but are not too sweet.  So you taste chocolate, not sugar.

As for the sourdough, you don’t really get a “sourdough” taste, but there is definitely something there that’s different.  It adds a depth and complexity to the flavour that is quite nice, and of course, it adds to that light and fluffy texture.

Very delicious.

And, judging from how many are disappearing with the girls upstairs, they might not last until morning.

Ah, well.  I guess I’ll just have to make more…  Oh, the tragedy. ;-)

The Re-Farmer

Daily Deer

I may not have posted deer photos yesterday, but I did get some!

My older daughter also took advantage of our camera set up and got a few nice shots of a blue jay in the trees.

2018-01-25.bluejay

The two deer that come together came yesterday, and today.  Yesterday, the one that looks so hungry all the time did get some of the feed, but she’s so skittish, she ran off quickly, and ever got a chance to come back.

I did manage to get a photo of her in mid chew, though.  I love it!

2018-01-25.whitetail.deer.aaaah

She looks like she’s making faces at me! :-D

I have noticed that, when they come together, they both go to different food piles and eat together for a while.  However, hungry girl gets startled far more easily, and dashes off a few feet.  She then hangs around, looking everywhere, before she starts making her way back to the feed.  That is when the mean one starts chasing her away. :-(

Today, however, it was a bit different.

2018-01-26.white.tail.hungry.deer

Now that we have a sack of bird seed as well as deer feed, I did things a bit differently, by putting out alternating piles of deer feed and bird seed.

I don’t know if that made the difference, but today, when she got startled off, she actually came back and ate some more, without being chased off.

The other deer started out eating the bird seed.  Considering the birds have been eating their feed for all this time, I figure that’s a fair deal. ;-)

The other possibility is that the other deer was just too distracted to chase off the hungry one.

2018-01-26.white.tail.alert.deer


As the deer were coming over, this one was very leery of the cat at the bottom of one of the spruce trees.

The cats, on the other hand, don’t seem all that disturbed by the deer. :-D

I didn’t take many photos today, because our movements distract her, and I didn’t want her to run off.  I hope that, for today, at least, she got a full meal!

The Re-Farmer

Our Pot Overfloweth

We need a bigger pot for Sir Sour Alot!

This is what I came out to, this morning.

20180126-sourdough.starter.overflow

No, that is not a ladybug on the counter in the bottom right of the photo.  It’s an Asian Lady Beetle.  And they are EVERYWHERE this year!

Since transforming Sir Sour Alot, we have been using it about every other day, feeding with just flour, water and a bit of sugar, as usual.

Yesterday, I boiled potatoes for supper and kept the water I drained for bread baking.  Because using potato water when baking bread is delicious.

Since I had as much potato water as I did, after I poured out enough starter for a doubled recipe of bread, I figured I’d use some of it to feed the starter instead of plain water.  I’d measured out 2 cups of starter, which left very little behind, so I added about 2 1/2 cups flour and maybe 2 cups of potato water, with about a tablespoon of sugar, to feed it.

There are pretty standard amounts.  I’ve added as much as 3 cups of flour into this container when there was nothing but dregs left after use.  I’ve had it over flow only once before, when the container was placed on the stove, where it was warmer.

While we were working on the bread last night, we noticed that Sir Sour Alot had started to overflow.  Clearly, it liked the potato water!  I stirred it down and figured it had already reached its peak expansion for the night.

Boy was I wrong!

20180126-sourdough.overflow

Not only did it overflow the pot and the bowl under it, it went down the counter, all the way to the floor!

We need a bigger container.

We don’t boil potatoes all that often, but when we do, I plan to treat Sir Sour Alot with some potato water in the future (not to be confused with “rich potato water”, which is potato mashed into the water).  It obviously really does well with it!

The Re-Farmer

Magical

Some days, it’s clear I live in a magical fairyland.

It’s warmed up again, enough for there to be fog last night.  Which promptly became frost on anything it touched.


20180125_124647902823632.jpg

The view of our spruce grove from our driveway gate.


Usually, it goes away rather quickly when the sun comes out, but it’s been overcast and still a bit foggy, so the magical fairyland remains.

So gorgeous.

The Re-Farmer