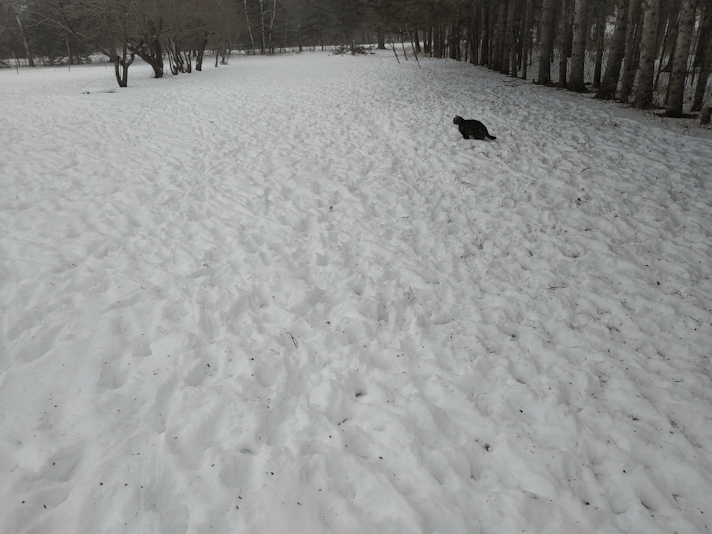
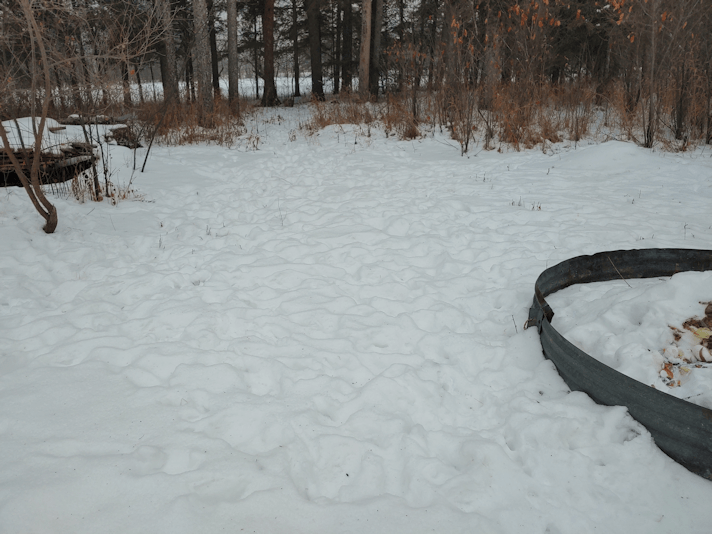
When I headed out this morning, we were at -21C/-5.8F with a windchill of -33C/-27.4F
We’ll be getting colder over the next week, before we start going back to normal temperatures again.
It’s going to be a good time to stay indoors, drink lots of tea, and catch up on my crochet… :-D
Who am I kidding? The girls and I will probably be putting our heads together to figure out a gardening map. We’re dedicating a lot of planning for what will be temporary locations for almost everything, but we’re using our garden plots this year to help prepare the soil for when we plant fruit and nut trees in some of these areas.
Today, I was finally able to continue setting up cat proof greenhouses in our unused fish tanks, to start seeds.
What I wanted to do was line the tanks with rigid insulation where they were near walls. Since there is no way to lower the lights to be closer to the seed starts, I was going to line the insides with foil for reflective light.
I may not need to do that.
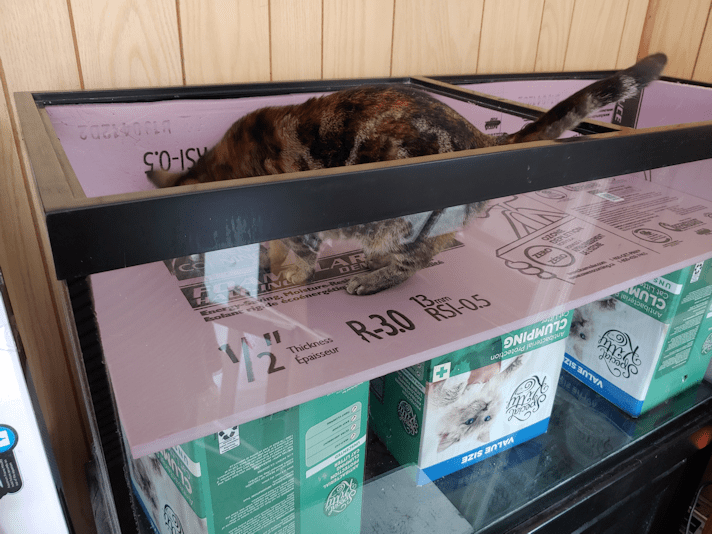
Here is the big tank.
I got photo bombed by a Susan.
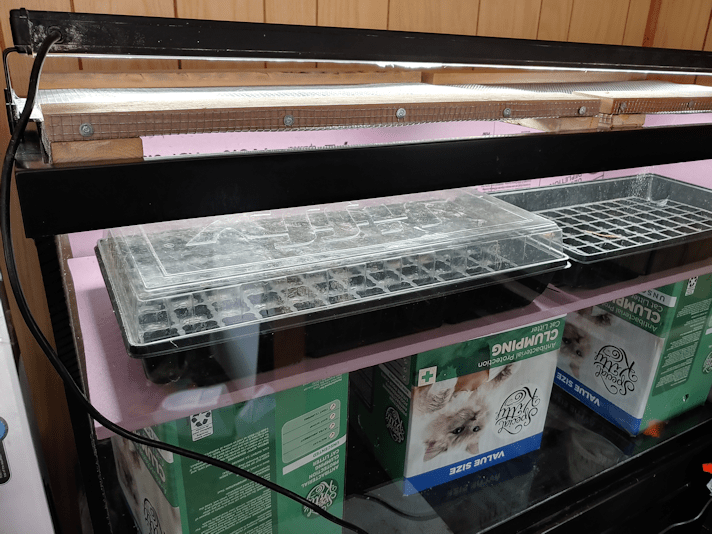
I had three boxes with identical dimensions, which allow me to raise the rigid insulation floor high. As the seedlings get bigger, I can change the positions of the boxes to get different heights. I’ve got 3 boxes in there, but I might try to squeeze a 4th one in, to stabilize the floor better.
Because of how the top of the tank is designed, to hold glass covers that broke long ago, I had to cut the insulation to fit the opening, rather than the space I wanted them in. That meant the floor piece has quite a gap around it. The sheet of insulation I cut to size for the long, back wall had to be cut into thirds to get it in. Plus, there is a sheet at the end. The wall in the back of the picture is one of the original log walls. The wall at the left is an exterior wall. Yes, it has more modern (almost 50 years old) insulation, but it’s still pretty cold!
The insulation on the sides helps to fill the gaps around the floor piece, which stabilizes it as well.
At these dimensions, I can only fit two seed trays in here, which means there is a fair amount of space around them to add more containers with seed starts. I just have to figure out what waterproof surface I can fit in there to put them on.
I think I can get away with not adding foil, though. What do you think?
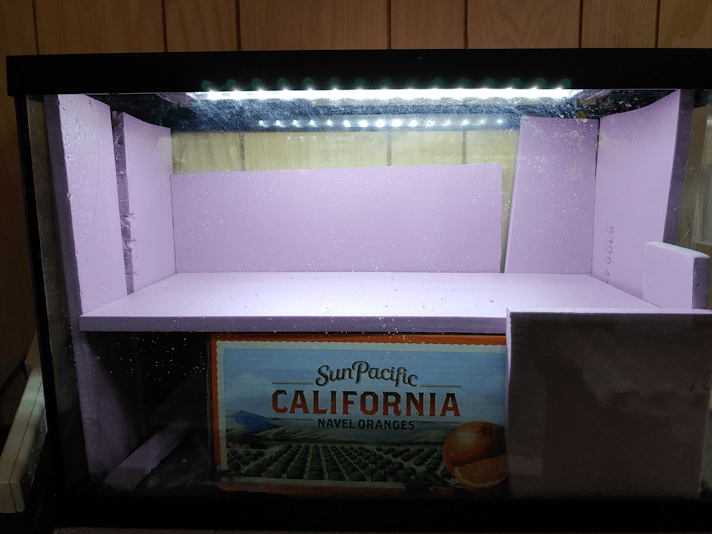
The second tank was much easier and faster.
Once again, I had to cut pieces smaller, to be able to fit them through the top. I only needed to add insulation to the back, which is against the exterior wall, but I added more to the sides to help fill in gaps around the floor piece.
I’m going to have to find something better to raise the floor. The orange box is a bit too small.
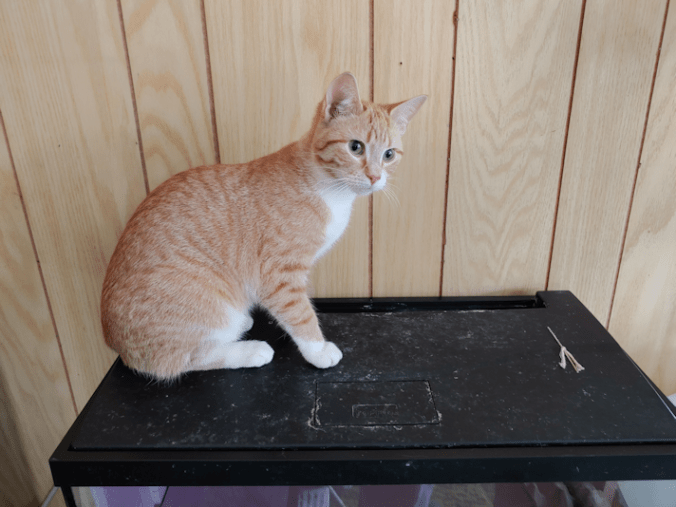
Photo bomb, courtesy of Saffron!
As you can tell by the dusty footprints, the cats like the lid of this tank!
At this point, I should be ready to start seeds in here. According to the package instructions, I don’t need to start my onion seeds – the ones that need to be started the earliest – until the end of March, but experienced zone 3 gardeners in groups that I’m on have already started theirs, and say they should be started now. The seed trays I have are too big to fit into the smaller tank, so I will have to find something else waterproof to hold seed starts in the little tank. I want to buy more seed trays, anyhow; I’ll have to take a good look at what dimensions are available.
There is only so much I’ll be able to fit in these, even if I’ll later be able to move the onions into the sun room and make room for something else. I did find something that I might be able to use, for when I’m starting the squash and gourd seeds.
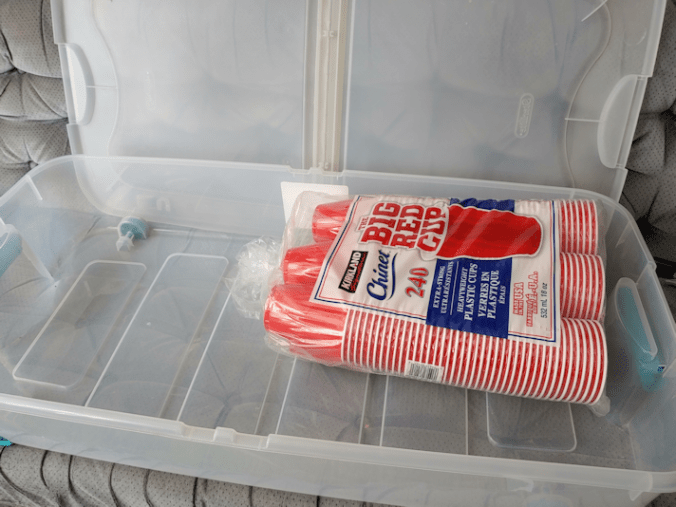
The squash and gourds need more space to grow, and they are the things that need to be started soonest, after the onions. I’ll be using these cups, with drainage holes punched into their bottoms, as pots. The storage container is designed to fit under a bed, but the hinge on the lid is broken, so it has been languishing in the basement until now. I have a second one. Once I figure out what to do with the stuff stored inside it, I’ll be using that as well.
We have so many varieties of summer and winter squash, as well as gourds, to try. Depending on how many seeds are in each package, I may not plant them all. Some are packed by weight rather than number of seeds. I figure, at most, I’ll start 10 seeds each of the summer and winter squash. Whatever the germination rate turns out to be, that’s what I’ll be planting. If I get just a 50% germination rate, we will still have lots of each variety, and with the number of varieties, we should have plenty for both fresh eating, and preserving and storage. For the gourds, I’ve decided to start 5 seeds of each, and see how they do. One of them is an eating variety, but the others are to dry and use for crafting purposes. Curing them takes about a year, so the sooner I can get some grown, the sooner I’ll have materials to work with! If space in an issue, though, I’ll drop the gourds for this year.
I still have the mini greenhouse that my daughter bought for me last year, which can hold three of the trays that are in the big tank. The cats still managed to get into the closed plastic cover, and it gets knocked over easily, so anything we start in there will be done later in the season, and in the sun room!
With the trays I have now, all I need to figure out is what to use in the small tank, and I should be able to start the onion seeds very soon!
Before I get into various things, I want to share some cute stuff with you, first!
Our collection of baskets that had been stored in the big fish tank ended up on top of the piano for now. The cats love to go up there, so I fully expected them to take advantage of the situation.
It wasn’t long before I found Tissue and Leyendecker among them!
Tissue is in three baskets at once! :-D
The largest baskets, with decorations on them, are the ones we use for our family Easter basket. There are some smaller ones in the collection that we found while cleaning up the house, including a basket that used to be my very own basket to take to church for blessing on Holy Saturday, along with the family basket, when I was a child!
Here is some more cuteness for you to enjoy…
This piece of foam is what was inside the new washing machine when we bought it. Our old mama cat, who moved out here with us, immediately adopted it as her favourite bed, and now Cabbages loves to join “grandma” for cuddles!
The cats also like to bite off pieces along the edges and spit them out.
Our living room carpet is continually covered in cat fur, foam from this thing, cardboard from their scratch pad, and the dirt they’re still managing to dig out of some of our plant pots! The cats leave trails of detritus, everywhere they go. :-D
Our old mama cat has been quick to adopt any new cats introduced to the house, and is STILL allowing several of the kittens – now almost adults – to try and nurse on her, including Cabbages. Cabbages has been taking a long time to socialize but, thankfully, she is getting along quite well with the other cats. Grandma and Keith are her favourites!
Cabbages and Keith will spend hours like this, all snuggled together and napping on my bed.
Cabbages has finally reached a point where we can pet her regularly, and she doesn’t immediately run off. She seems torn between not wanting those big, clumsy humans clomping about near her, and wanting those scritches and pets. She will even tolerate being picked up and held, if only briefly. That is significant progress!
In other things, we warmed up enough today that I finally switched out the memory cards on the trail cams. That micro SD card I put in the new camera this morning, which had been used only once and did not require formatting in the camera when I put it in the first time, needed to be formatted this morning. *sigh* Why would it work fine the first time, after I’d formatted it in the computer, but need to be formatted in the camera, the next time it was used? The other micro SD cards I’d bought at the same time had done the same thing. I had assumed it was because they were not as high end, but that doesn’t seem to be the problem, after all.
Ah, well. I’ll figure it out.
With the bitter cold we’ve had for the past few days, I was not expecting to find much on the cards. Especially from the new camera, which has been just dying with the colder temperatures.
I was surprised.
The older camera was shut down when I switched out the memory card. When it gets cold and the batteries can’t handle it anymore, it shuts itself off. When I turned it back on, the batteries were still at half power, so it was just from the cold. There were still a few files on the card, though, all from one day.
The new camera had files recorded on each day of the deep freeze! This camera displays the temperature, and it actually kept on recording with an internal temperature of -25C/-13F !! Previously, this camera would die before reaching -20C/-4F! It did shut itself down during the nights; the only night files we did get, had a warning displayed in large red letters, saying it was low power. This camera will actually turn itself back on again when the temperatures warm up. I am totally shocked – in a happy way – that it kept working through the deep freeze. I have no idea why it would stop working before, but is working now, at these temperatures. I’m not complaining, that’s for sure! I did still have to warm up the camera with my hands, so I could see the screen, but that would only be a real problem if I had to do it during the deep freeze, because of the frost bite risk. Since I don’t even bother switching out the cards in temperatures like that, it’s a moot point.
This afternoon, we warmed up to -14C/7F, which made me a lot more comfortable about heading out to help my mother with her grocery shopping. She didn’t need much, but took advantage of having access to her car and stocked up on other things. I gave her some of my extra Mingle Masks, hoping she would use one instead of struggling with the surgical mask she normally uses, but she wasn’t up to it. Still, she has them, and saw on me how to use them, so I hope she gives them a try. She will actually be able to breathe in those. She still would have to use the type she struggles with at the pharmacy, though, so she might not bother. Frustrating.
After helping my mother with her shopping, I went back to the grocery store to pick up a few things to tide us over until we can do our big shop, whenever that will be. I had to pick up some bigger stuff, like cat litter and cat food, so there wasn’t enough room in her car for her shopping, her walker, and my shopping, all at once. Which is fine by me. The final bill was a shocker, though. I didn’t get very much, but it cost almost $270. Considerably more than if I’d been able to go to the city to buy the same things.
Bird tracks in the snow, found when I came home. This is nowhere near the bird feeders, but those are sunflower seed shells on the snow. Which shows just how windy things go!
There’s a reason we try to do monthly shops in the city. We save at least several hundred dollars every month by doing that, which means we have more budget left over to buy fresh foods locally. The more we’re forced to make smaller, local shopping trips, the more gets eaten out of our budget, and the less we can get overall, either locally, or in the city.
I did splurge on one thing, though.
I bought a 240 count bag of those red plastic beer cups.
I’m on several cold climate gardening groups, which are all busily talking about starting seeds indoors right now. I’ve seen people recommend using these as pots to start seeds in. They just need to have drainage holes punched into their bottoms. While I will be starting some seeds (like onions) in Jiffy pellets, and others (like corn) in toilet paper tubes, I learned from last year, that I need something bigger to start squash in. I did transplants outdoors too soon because they had gotten too big in their starter trays, only to lose most of them to one last late frost. By starting them in something bigger, even if the weather is not cooperative and they get in the ground later, they will have enough room to keep growing in their pots.
Ideally, I would be using biodegradable pots that can be put straight into the ground, with no disruption of the roots. That’s what I will be doing with the toilet paper tubes and corn. I’ve been looking at pots like that. The Jiffy peat pots are relatively inexpensive, and come in larger count packages. I would have ordered some last night, along with the seeds and plants I got for my daughters, but they were sold out. The alternatives were “cow pots” – the same idea, but made with cow manure instead of peat. They are way too expensive, though.
So when I saw the beer cups in the store, I went for it. They are the size I need, and can be reused. With 240 of them, I have more than enough to plant everything we have that need to be started indoors, and need the extra space.
Now I just have to figure out what to put under the the drainage holes. I can think of all sorts of possibilities, but they all require buying something, and that’s just not an option right now. Even if I could find them, they are “non essential” and stores still wouldn’t be able to sell them. (Like with clothes.) Maybe I’ll find something later in the month that I’ll be allowed to buy. The first seeds need to be started the second half of March, so I have a bit of time to find, or even build, something.
One more little step of progress towards our gardening. :-)
Tomorrow, we take the van in to the garage and hopefully find out why it’s been stalling. What we find out then will determine what we do and when, in regards to getting the monthly shopping done, and picking up the new hot water tank on warranty.
Ah, that reminds me. I asked around about how this location has been about medical mask exemptions and things like shields and Mingle Masks. It turns out they’ve gone full mask nazi, even to the point of staff following people around, harassing them and kicking them out.
That is going to be a problem. At the very least, I need to go to the customer service desk with the sticker from the hot water tank, and warranty authorization number.
I did find out another location has been safe to go to. As far as I have been told, I need to go back to where the tank was purchased, but that may mean only the franchise, not the specific store. The first tank we got was from a location in town that told me they don’t do warranties, so I had to go to this other location. The one that was recommended to me is actually a bit closer; just in a town to the north of us, that we almost never go to.
I’ll have to make some phone calls.
What a hassle even the simplest things have become.
Truthfully, the things I ordered today are not for me. They are for my daughters. My excuse is, they both have spring birthdays, so this is my gift to them!
Here is what I’ve ordered. (All links will open in new tabs)
Purple Passion Asparagus: This is the one that got the bug in my ear to order more! The new Vesey’s spring catalogue had come in, and my older daughter came to me, all excited about these. They are not only hardy to zone 2, but apparently are so sweet and tender, they can be eaten raw. She didn’t ask about ordering it, though, since she knew we already had so much.
So I ordered it anyway. :-D We do have some asparagus here; a few brave spears come up in the spring, but not enough to harvest. Asparagus takes 2-3 years to get going, so ordering fresh root stocks now just makes more sense. Once they’re established, they should keep producing for up to 20 years. We’ll be getting the 6 pack of these, delivered in the spring.
April Cross Chinese Radish: This is a Daikon type of radish. I actually don’t like these – or any radishes at all – but my younger daughter really likes Daikon radish, so this is for her!
Red Meat Watermelon Radish: This one is for both my daughters! A white radish with a pink interior and green “shoulders”.
Robin Beet: We got only one variety of beets this year, with a second variety my younger daughter had wanted being out of stock. It’s still out of stock. Both my daughters really liked the deep, dark, sweet beets that we grew last year, so these should be right up their alley. These are “baby” beets, maturing at only 25-30 days.
Black Form Iris: this is another one for my younger daughter. There is another black iris that she had wanted to get for our fall planting, but it was out of stock, and still is. I know she’ll like this one, too. Like the asparagus, this will be delivered in the spring.
So that’s it! Just a little order, at least compared to the last one I made at Vesey’s! :-D I think the girls will really enjoy growing these.
I found them while looking for something else, of course. :-D
Here is where, on the tank, I want them to sit.
The bar across the middle has extra surface area in the corners of the ledge the covers rest on. There’s lots of room, here.
The outer corners, however, don’t have that, so there’s a lot less margin for error in positioning the pads well.
The first step was to clean off the ledge the frame rests on. An old toothbrush worked very well for that!
Since the cross pieces of the frames have an angled edge, to better fit into the space, I figured it would be easier to place the felt pads in position on the ledge first, adhesive side up, then placing the frame on top.
The felted pads I have were from a larger package with mixed sizes of circles, plus long, narrow ovals. The larger circles were used up, and all I had left were smaller ones, and some of the long ovals. I’d hoped I still had some larger circles left. If I had, I would have cut them in quarters, and fit them right in the corners, but half circles would have to do!
Once they were in position, I lined up the cover and dropped it down, pressing just enough to make sure the adhesive stuck, then removed it to press the adhesive in more thoroughly.
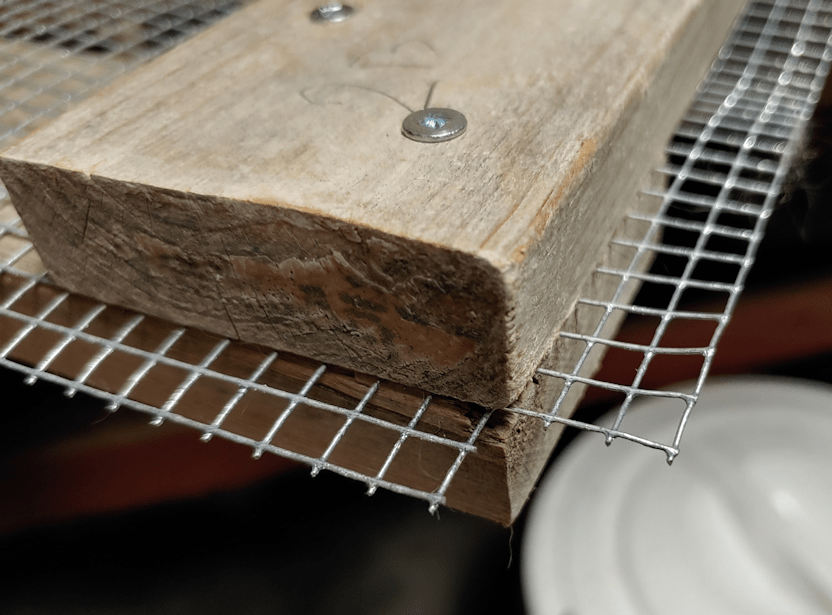
In this corner, you can see the pad will protect the tank’s frame from the wire. This was the edge of the roll, so no sharp bits sticking out, like the edges I had to cut, so I didn’t trim it.
And this is why I lined the pads up to the corners of the tank, rather than the frame. Yes, there’s a likelihood that the pad will get pulled off where it’s overhanging, if I leave it like that (I will trim it later), but it also isn’t sitting on the screw head. It was supposed to be countersunk, but some of the screws simply stopped and would not screw in any further. I am not sure what was stopping them but, whatever it was, I was wrecking my screwdriver’s tip, trying to get them to go in further, so I stopped. The others were just fine.
So the corners are padded now, protecting the tank’s frame from being scratched up, should a cat decide to jump onto the cover.
When I was fussing with everything to prepare for this, I did have a kitten not only jump onto one of the covers while I was there, but also walk across on the light fixture! Not a problem for a light kitten, but a potential problem, if one of the heavy adults tries to do it. Thankfully, they seem to not like the new covers and are staying off. At least while we’re around to see! The few times I’ve seen one of the adult cats up there, they have stuck to walking on the wood and stayed off the wire and away from the light fixture.
Meanwhile, the baskets and other items stored in the tank have been removed. I’ll need to take a vacuum to the bottom to clean it, then see how my seed trays fit on the bottom. That will help me decide whether the rigid insulation will be lining the inside, or the outside, of the tank. Whatever I do with the sides, the bottom will have its own layer of insulation lining it, too.
It’s remarkable how handy that insulation has been. I’m glad my daughter bought so much extra!
I’m going to need the little step ladder to be able to access the bottom of the tank. I could barely reach to get the smaller baskets out!
The joys of being short! LOL
Another little bit of progress made! :-) I can hardly wait to see how this works for starting seeds!
Yesterday, I got started on making covers for our big fish tank, to keep the cats out. Today, I assembled the first one.
Of course, things did not go to plan.
Does anything ever? :-D
One of the things I needed to figure out was how to secure the hardware cloth to the frame pieces, for those inevitable times when a cat jumps on them. All I’ve got for materials is whatever we can find lying around the farm. While doing my rounds this morning, I went digging in the side of the garage where we store the lawnmowers and snow blowers. I knew there were some roofing nails in there, so I grabbed a while bunch and brought them inside.
Here is the first problem.
All of the nails were huge. There was only a single smaller size, and it was still too large. What I wanted to do was secure the mesh to the tops/bottoms of the boards making up the frame. Previously, we’ve used a staple gun to do that, but these were not for things where the wire mesh was expected to hold weight. Particularly not the sudden weight of a cat leaping onto it from above.
The mesh was going to have to be secured along the sides.
That meant cutting it with a half inch overlap on all sides.
I’m getting closer to the end of my roll of 1/8 inch mesh, and it really does not want to unroll at this stage! :-D I had all the boards on there to hold it down, and it still kept rolling itself back up again!
Once the mesh was cut to side and flattened, I affixed it to one side.
Normally, I would have used the staple gun to tack it in place, but I couldn’t find it anywhere. Which is really weird, because I’m the only person who uses it!
So it had to be tacked in place by screwing in the cross piece, holding the wire as taught as I could in the process.
Then I took out one of the screws in each corner.
I had placed the wood in place on the tank and marked each one with pencil, but once the hardware cloth was in place, I couldn’t really see my marks anymore. Plus, with the cross pieces a fraction too long, I had to make sure I didn’t line the side pieces up to the other end, or the while thing would be to big.
So I quickly drilled a pilot hole in each of the other corners of the cross pieces, then went back to the tank.
This way, I could place the long pieces where they were meant to sit, line everything up, then add a couple of screws through the pilot holes to hold them in place.
Then it was back to the basement to continue.
Once each corner was secured with a pair of screws, it was time to bend the wire mesh. Since the sides would be bent in one direction, and the ends in the other direction, I first cut out the corners.
The wood pieces may have been lined up to the tank, but no matter how careful I tried to be, the wire mesh ended up uneven.
Ah, well.
Once the mesh was bent, I drilled pilot holes for each nail (to prevent the wood from splitting) and hammered them in. The flat tops of the roofing nails were perfect for securing the mesh. Very different from how I had to do it with the larger mesh on the screen “door” we made to keep the cats out of the old basement.
Time to test it out again!
Oh, dear.
The addition of mesh and nails – especially the nails – made it wider. It wasn’t so much that it no longer fit. I could have let it just rest on the nail heads, I suppose. They would, however, damage the tank’s frame.
There was a very easy solution to this problem.
Flip it upside down.
With the cross pieces being every so slight too long, I used my Dremel to take off the corners at roughly a 45 degree angle.
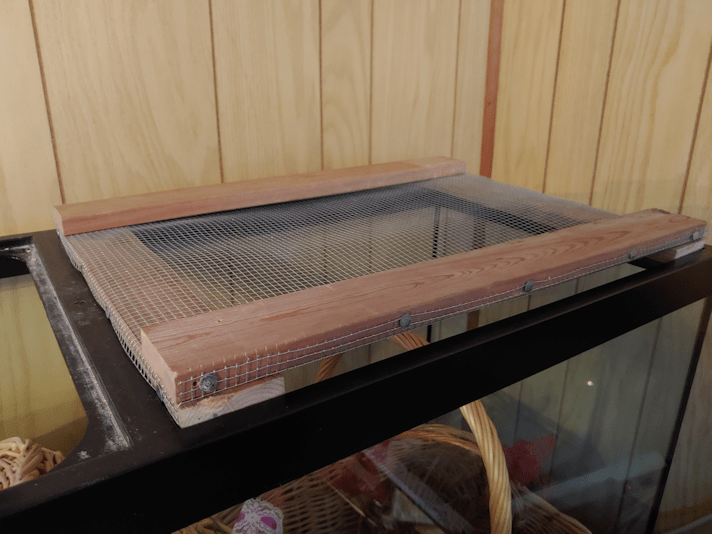
It now fits!
Unfortunately, the wood is a bit warped, so it doesn’t sit flat, but it should still do the job.
There are still a couple of things I need to do. One is to find some way to cover the edges of the hardware cloth, for safety reasons. I’ll probably just use Gorilla Tape, if we still have some.
The other is to find my self-adhesive felt pads. The kind that’s meant to go on the bottoms of chair legs or the like, to protect floors. Since the bottom is now the top, the screw heads are facing down, and each corner screw is sitting on the plastic ledge in the corners of the tank. It wouldn’t be an issue, if I weren’t expecting cats to jump on it, so a bit of padding would be a good thing. I haven’t seen them since we packed for the move, though. :-/
Aside from those 2 things, this cover is done.
The other one will wait for another day! :-D The earliest we should be starting any seeds is in late March, so we have time! :-)
I have spent some time thinking about how we can convert our big fish tank into a greenhouse to start seeds in, while also making sure the cats couldn’t jump in.
The original covers the tank came with would have been ideal, but the hinges on those broke long ago.
Since a piece of the filtration system broke during the move, it’s just been sitting in a corner. To keep the cats out, we cut pieces of foam core to fit across the top, then covered the whole thing with a huge table cloth. It turned out to be a great place to store baskets in, and the top became a favorite place for the cats to hang out.
Until they broke through.
We ended up cutting some rigid insulation to fit and taping it in place, which worked much better. With their jumping from the piano onto the top of the tank, though, they’ve knocked even that right off!
What this means is that the cats are used to having access to the top of this tank. If I set it up as a greenhouse to start seeds, they’re just going to jump in, unless I find a way to cover it.
The tank has a bar across the centre and, after thinking about it for a while, I decided to make a pair of wood frames with hardware cloth, that will fit on each side of that centre bar. That way, if I need to get at the seed trays inside, I just need to lift one smaller cover at a time, rather than struggling with one large cover.
I fully expect the cats to jump on while I try to do anything in there!
Today, I got started.
The first thing was to take a tape measure to the inside of each half of the top, as well as the lip the original covers used to sit on. Each side is 16 3/4 inches by 22 3/4 inches. The ends and centre bar have a 1/2 inch lip, while the sides have a 1/4 inch lip.
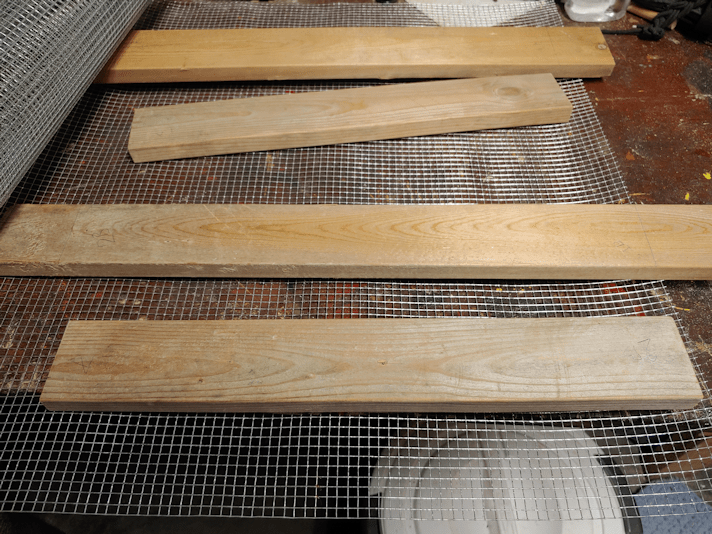
I then grabbed a couple of pieces of wood I’d salvaged from a shed and started by cutting the long sides. Once I had 4 of them cut, I double checked that they fit properly.
They fit just fine, with a little bit of play that will make putting them in and taking them out easier.
While I was checking the fit, my daughter came by. As we were talking, she reminded me of one of her Christmas gifts to me.
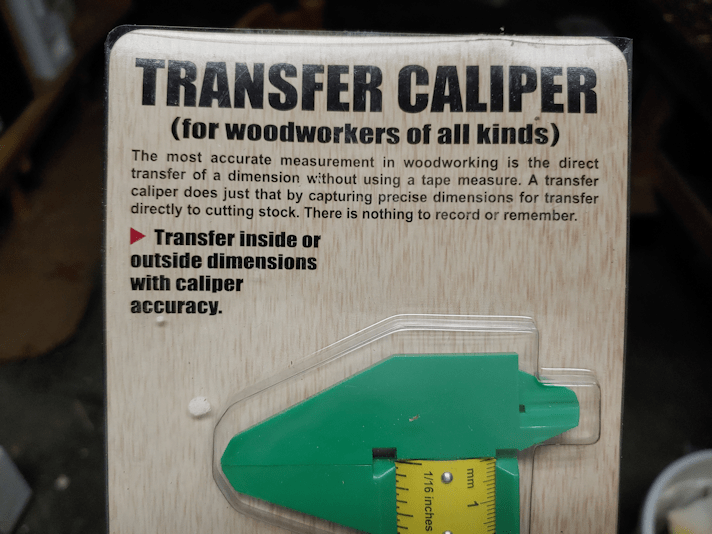
I wish I’d remembered them before I took the measurements! This thing is MUCH easier for me to read than the tiny lines and numbers on my tape measure. It made marking the distance to cut the short pieces a lot easier, too.
Another reason I wish I’d remembered them before I took the measurements.
When I checked the short pieces, they were just a hair too long! The difference is so slight, I could probably sand it to size.
But I shouldn’t need to.
This is how the frame will be laid out. The hardware cloth will be sandwiched between the top and bottom pieces at the corners. I haven’t figure out what I can use to secure the hardware cloth best. Ideally, the wire mesh would be sandwiched between wood all the way around, not just at the corners, but I just don’t have the wood to do that. Nor can I think of anything we have that could be used in a similar way. Whatever I come up with will have to not just support the weight of a cat that’s decided to lie on it, but the force of a cat jumping onto it from the top of the piano. All sorts of ideas some to mind, and get discarded just as quickly. :-/
The thing I’m holding in place in the photo is one of the supports for the light fixture. The L bars insert into ports at the bottom of the light’s frame, so where they are is where the bottom of the light fixture will be.
Once I double checked how everything was going to fit together, I moved on to the next step.
Washing the pieces of wood.
They were probably sitting in the shed I found them in for more than 10 years. My mother tells me that shed was full of lumber when she moved off the farm, some 7 years ago, so what little we found in there was the junk that wasn’t worth stealing, I guess. :-/ Still better than nothing, I suppose. Anyhow. There was a whole lot of grime on them, so I gave the pieces of wood a quick scrub. They don’t need to be really clean. I just need to be able to handle them without getting filthy, and trying to scrub them after the hardware cloth is in place is just not a good idea! :-D
So they are now all laid out in the basement with a fan on them, do dry. I will continue to work on the frames tomorrow!
One of the recommendations for using grow lights to start seeds is to have the lights very close to the soil, and gradually increase the distance as the seedlings grow.
That won’t be an option with this set up.
I’m thinking of lining the inside of the tank with aluminum foil to reflect more light onto the seedlings. It doesn’t need to be from top to bottom; just at seed tray height. Which means I could probably get away with lining all 4 sides with foil in the big tank. I will probably line 3 sides of the 20 gallon tank, too.
The other thing to consider is warmth. We don’t have grow mats, and it’s unlikely we will be able to get any. We do, however, have more pieces of rigid insulation that we can put under the trays, or even along the sides closest to the walls. The LED lights won’t generate heat, but I’m sure we could find some way to warm up the tanks enough for seeds to germinate.
Progress on the set up has, at least, finally begun!
The last of our seed orders FINALLY came in the mail today. They were shipped quite a while ago!
This was the first batch that was ordered.
I completely forgot that, on noticing how few seeds were in the packets compared to the giant sunflowers we ordered last year (which was by weight, not seed count), I had ordered two of each.
The Crespo squash, which is a type of pumpkin from the Andes, was a last minute addition. I couldn’t resist!
I love how they use adorable children for scale.
This was my second order.
This was another “I couldn’t resist” order. After placing the first order, I went looking around the site. Baker Creek then sent me an email to up-sell me, using some of the new things I’d added to my wish list. I ended up ordering all of them. With seeds selling out so quickly again, I figured it was worth it. The price was right, too.
I have no idea if we will be able to plant any of these this year. We shall see how much space we have for starting seeds indoors. I think, at the very least, I want to try and germinate 2 or 3 of each variety.
Then there are the freebies.
This is the second package of purple kohlrabi we’ve been sent. I really, really want to try growing kohlrabi again. Gotta protect them from the bugs somehow!
As for the kale… we’re not fans of kale, except as kale chips (leaves tossed in olive oil and salt, then dehydrated in a warm oven). They are supposed to be very cold hardy, though, so that’s always a bonus for our area. We’ll make that decision then the time comes. I’m certainly willing to try a new variety!
I was very relieved to have these finally come in the mail! We do still have some back ordered items, and others that will be shipped at planting time, from Veseys, but those haven’t been shipped yet. These were shipped about month ago.
Something else came in the mail today.
It was from my husband’s health insurance.
Every year, he has to fill out a form to confirm that yes, he is still disabled, still under the care of a doctor (well… as much as he could be, this past year) and still alive. He is able to fill out the form, take a picture of it, and email the image, rather than send it through snail mail. At this point, he doesn’t even need a doctor to sign anything anymore. Everything gets process very quickly, and he later gets a letter detailing how much he will be getting in disability payments per month (it changes by a few dollars every now and then).
A while back, he got letter reminding him to send in the form.
Which he had already sent in.
He phoned them up and, after some digging, discovered that there was a different email for these forms than the one he’s been using for the last 5 years. Once he had that, he sent the form in again.
Today, he got another letter, reminding him to send in the form.
!!!
Thankfully, it was still early enough that he could call the insurance company, the office of which is in a different time zone. After sitting on hold, then being transferred to several different people, he got to the right one. His filed was looked at and…
All is good. His form had been processed.
Yesterday.
So that was a bit of a heart attack. If something had gone wrong, we don’t just loose the income we’re living on. We lose his coverage for prescriptions. This province does have Pharmacare, but that does not cover all of the medications he’s on. The medications are actually covered by a different company. His employer switched companies after he went on disability, so while his long term disability payments stayed with the original company, prescriptions are now covered by the company they switched to. If he loses one, he loses the other.
Which means we really, really appreciate that his insurance company was willing to send not one, but two reminder letters!
One thing I can say. Even with some screw ups related to the move, the insurance companies have done very well by my husband, and even gone above and beyond.
I thank God constantly for the excellent health insurance plan my husband was on. Yes, Canada has a “safety net”, but I know people who rely on it, and it sucks. We would have been financially devastated within months, probably weeks, without private health insurance.
It’s past 10am as I start this post, and we are still surrounded by fog!
The camera automatically cleans up images, so this photo does not reflect just how dense the fog was when I took it!
Not only does fog normally disappear quite a bit earlier than this, but it’s also pretty breezy out there. I’m used to winds and fog on the coasts. On the prairies, a stiff breeze usually blows the fog away in no time. Not today!
I just had to share this high traffic zone picture!
There are deer paths cutting through the old garden area, but most of the tracks are all long here. When we first moved here, you couldn’t walk under the spruces, because of all the overhanging branches. The deer seem to be very happy that it’s all cleaned up!
Down the middle of this area, between the spruces and the crab apple trees, we are planning to plant Korean Pine Nuts. They need to be kept shaded for their first 5 years (the transplants are typically sold at 3 years), and this location is prefect for that. We will still put covers to shade them more, but also to keep the deer from trampling them. After 5 years of being really tiny, they are supposed to have a sudden growth spurt. It would be another 5 years or so before they have edible pine nuts. We are hoping to buy them and get them started next year.
This is another high traffic zone for the deer. The open space in front, past the ring for the compost pile, is also where we plan to build the outdoor bathroom.
Not getting that started last year, as I’d hoped, may turn out to be a blessing. While taking this photo, I took a good look at the spruces in the background. There was one I had already identified as needing to be cut down, but looking more closely, there seems to be at least 6 or 7 dead spruces that we’ll need to cut down. Possibly 8 or 9, if I count the ones closer to the house (we’ll be hiring someone to take those ones down). I wouldn’t want any of them falling on our shed after we build it! Plus, if we cut them down before they fall down, the wood might still be usable for projects. Usually, by the time they fall, it’s because ants have made nests in the trunk and they are left basically hollow.
Once the dead trees and some of the underbrush (mostly spirea!) is cleared away, that is where we will be planting the mulberry tree we will be getting this spring. It will get full sun, while still being sheltered by the other trees. This is one tree we’ll have to make a point of wrapping up in the fall, for at least the first few years. A mulberry tree can start producing fruit by the second year, so that will be exciting! In the future, we plan to get a variety native to the more Eastern parts of Canada. It is becoming rare, so we will have to make sure to plant it away from any others we get, so they don’t cross pollinate. That might be 2 or 3 years from now, though.
One of the things I love about doing the morning rounds is looking at the progress made. Even though we are “behind” on getting this area in particular cleared out, it’s reached a point where it no longer seems as overwhelming, and I can get excited about the things we can do in the increasingly near future!
Ah, January. The perfect time to be planning our gardening!
Last year, a lot of what we did was flying the the seat of our pants. Yes, we did some planning, but mostly we were just forging on ahead before things were fully ready. If we waited until we were ready before starting all the time, things would never get done! :-D Sometimes, you just have to just say “screw it” and jump in with both feet.
There will still be a lot of that this year, but we have more information and are in a better position to plan things out.
One of the things I’ve done was find some Facebook groups that are dedicated to Zone 3 (or colder!) gardening. One of them is dedicated to cold hardy fruit and nut trees! It’s been pretty awesome to be able to talk to people about the different things they’ve come up with to extend their growing seasons.
Some of them are already talking about starting their onion seeds NOW!! It turned out these are people with greenhouses. They start the seeds indoors, where it’s warm, later move their trays to their unheated greenhouses to start hardening off before finally transplanting them outdoors.
This had me wondering… I know my mother grew onions, but I had no idea how she started them. I remember we had a cold frame with cabbages in it. I know she grew tomatoes, so she had to have started those indoors, somehow, and while I remember the onions in the garden, much later in the season, I have zero memory of how she started them. Did she use seeds? Sets? I didn’t know.
When we first moved here, my mother was quite furious that we didn’t plant a garden right away. The way she did it, years ago, of course. ;-) One of the things she kept saying to me is that we should at least plant onions. They’re easy to grow, and we’d save money, so we needed to at least plant onions…
It seems to be a really big deal to her, for us to grow onions.
Now, over time, while she still tries to guilt me about not allowing her to hire someone to plow the garden area, because there was too much other stuff that we needed to focus on, first (an offer she has stopped making, now that we are more ready! LOL), I think she finally has started to understand that the land she remembers as being so perfect in every way, isn’t. At all. Of course, nothing we did do was good enough; we used mulch, which she’d never heard of being done before, therefore it was bad. We used only a small part of the old garden area. She didn’t approve of how we planted them anything, and she did not approve of our growing sunflowers at all, because when she grew them, the birds ate the seeds, And so on. She also kept asking me about her onions and if they were still growing. There were a few that started to come up, along a section of fence that used to be around the old kitchen garden, but they didn’t grow much. She seemed quite disappointed and I got the impression she thought I deliberately killed them off. :-/
Still, when I had the chance, I asked her about her onions. I told her I was going to plant 4 varieties, three of them from seed and one from sets, but that I could not remember how she started hers.
We talked a bit about the cold frame I remembered, and it turned out that cabbages and tomatoes where the only things she started in the cold frame. She did not start onions from seed, nor did she get sets.
It turns out she had a variety of onion that comes back year after year. She referred to them as Spanish onions when I last spoke to her, but I remember a previous conversation with her where she mentioned Egyptian Walking Onions. I think that’s what she actually meant.
It turns out she didn’t like the onions themselves, but just used the greens.
???
All that fussing and verbal abuse, and it turns out she didn’t even like the onions she grew? She just grew them because they were “free” and she didn’t have to buy them.
I did mention to her that, while that can be good, sometimes you get what you pay for! In this case, it was onions she didn’t like to eat!
She was absolutely indifferent to my telling her I was planting onions this year, too.
*sigh*
It’d be nice to be able to learn from her experiences, but that doesn’t seem to be much of an option. Ah, well.
With so many seeds that we ordered already in, more still stuck in the mail, and others to be shipped closer to planting time in our zone, we needed to find a way to organize them and plan things out. I’d spent some time looking at planting charts, many of which are available as free printouts, but none of them were suitable for us. It took some digging to find any for Zone three, but they also all had lists of vegetables already on them, most of which we aren’t growing. Sure, someday, we’ll probably try to grow some of them, but not yet. Meanwhile there are things we are planning to grow that weren’t included.
On top of that, these were all printer sizes. Too small!
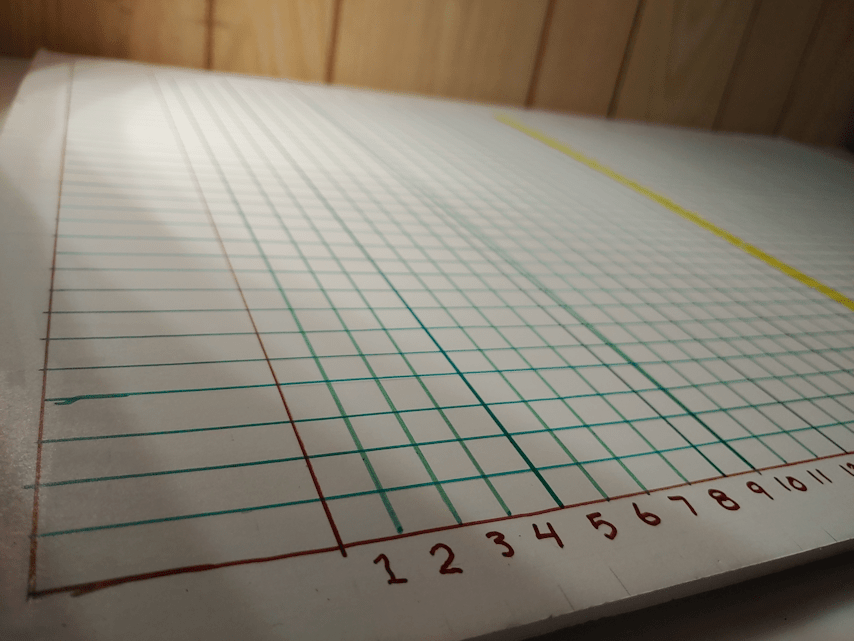
I decided to make my own planting chart, large enough to stick on a wall or something.
Time to dig through my craft supplies!
I had a sheet of foam core that got pretty beat up during the move, but not enough to throw it away. It was just the size I wanted!
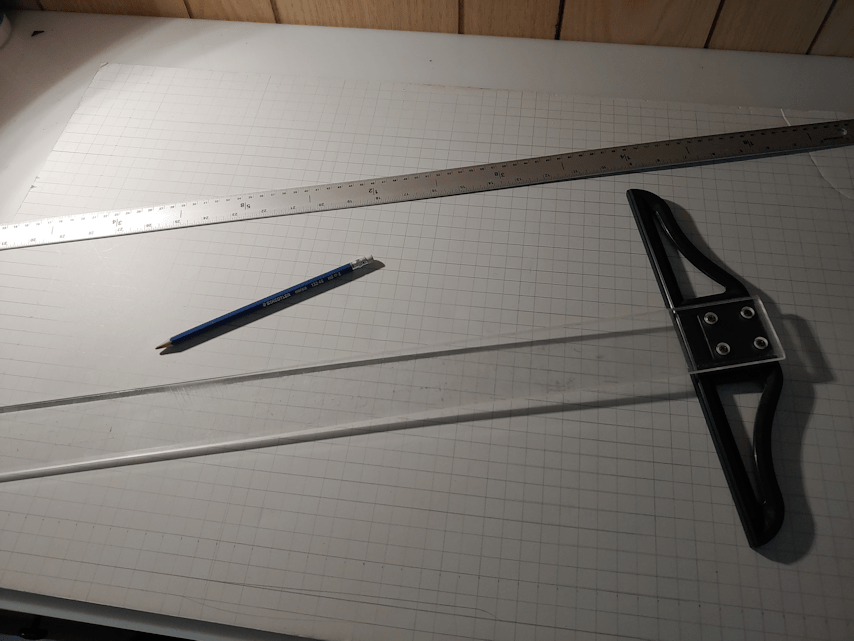
My daughter loaned me her T-square and steel yardstick. The sheet is 30 inches long, so I marked of a grid of half inch squares in pencil.
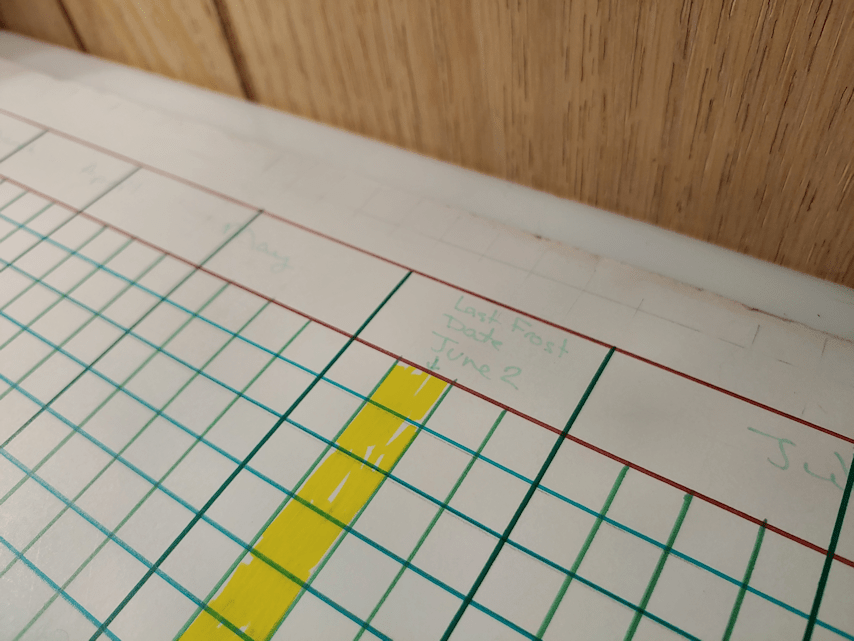
Then I broke out my collection of Sharpies and marked off a table with the weeks, with a different colour every 4th week, and so on.
Before erasing most of the pencil marks, I remembered to keep the week numbers in permanent marker.
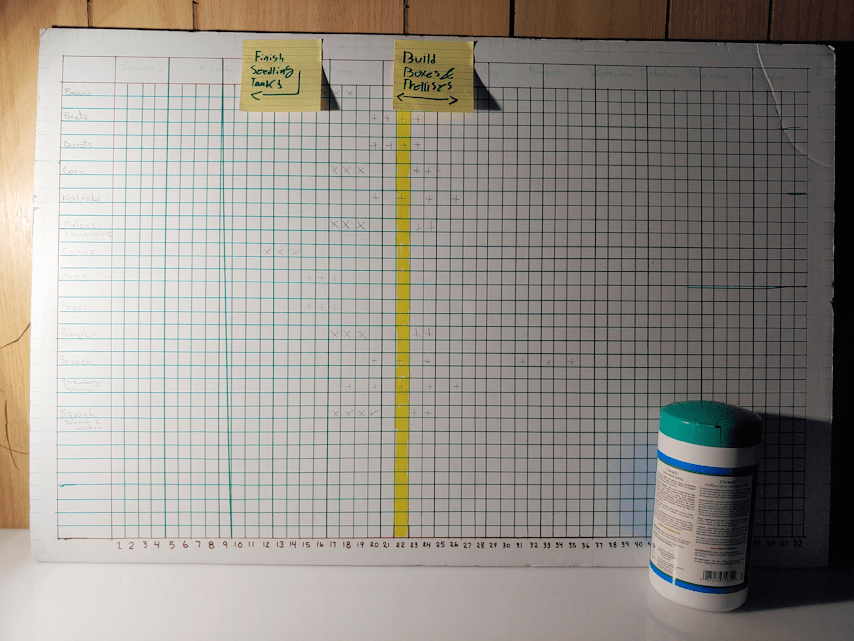
Of course, the months don’t line up with perfect 4 weeks groups, so I counted back on the calendar on my phone and found our last frost date of June 2 falls in the middle of week 22 this year. So I highlighted that week. I figure, from year to year, it’ll still be around that week.
After the pencil marks in the grid were erased, I brought out the seed packs we have right now, sorted them in alphabetical order, then worked out the times for starting seeds indoors and transplanting or direct sowing.
There is room enough to add the other seeds that have yet to arrive.
How the months line up are not as important as the last frost date. We can now look at it and see at a glance, what time range the seeds should be stared indoors. If something needs to be started 4 weeks before last frost, for example, I marked off blocks for 3, 4 and 5 weeks. Some things recommend succession sowing directly into the soil, starting before the last frost date, so I marked off every other week for those. Things like that. We will probably mark off harvest times and the first frost date later on, too, but this will do for now.
After looking it over, one of my daughters added the Post-it Notes. We will also be starting up a shopping list of materials we will need to make the trellises, covers and deer fencing. Having all the things we’ll be planted, listed out like this, will also help us work out where some things will be planted, how many boxes, trellises, etc. we need to build, and so on. Thankfully, one thing we do have a lot of is space. It may mostly be hard as cement, but we can work with that!
All of the squash and melons need to be started at basically the same time. That’s the period we’re going to have the biggest challenge with, as far as space for seed starts. There are just so many varieties we will be planting!
And yes, I plan to start corn indoors. From what I’ve been reading, I’m going to try planting them in toilet rolls for pots, so that we can later transplant them without disturbing the roots. Some of the people in the Zone 3 gardening group use the red plastic beer cups. My mother had always direct sown corn, but I’m remembering this from the very warm decade of the 80’s, when it was hot enough in May and June for kids in school to be passing out in the hallways. Most of the people in the gardening groups are saying they have never been able to successfully grow corn without starting them indoors first; things had cooled down quite a bit over the 90’s, and the 2000’s haven’t been any better, really. Any hot summers we’ve had did not make up for late, cold springs. I really, really want that purple corn to succeed, so I want to give it every boost I can!
I even have the Kohlrabi on there. I want to find a way to grow those, without them being decimated by deer, caterpillars and beetles!
I think this will work out rather well, and if it does, we can potentially reuse the chart, year after year.
The first thing we need to do is get those aquariums ready to use a cat proof greenhouses!