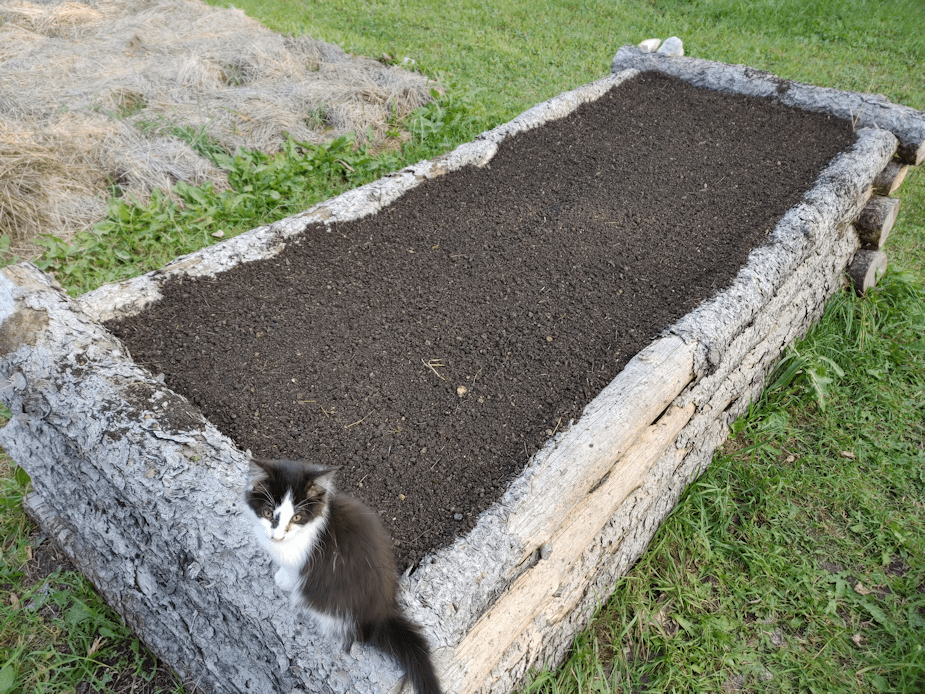
Today’s progress: high raised bed and half a carrot bed. Plus, a robocall with a difference!

One of the things about living our here is that phone calls are pretty rare things.

We like it that way.

Every now and then, we’ll get a robocall. Sometimes, from political parties, for conference call town hall meetings, or urgent messages telling us that we are about to be arrested by Canada Revenue for some reason or another, if we don’t call them immediately – and give them our personal information, of course. You know. The usual.

I was just preparing to write this post when we got a robocall with a difference. It was for our municipality, but from the RCMP. It was a warning that there was possibly an armed and dangerous suspect in our area! And by “our area”, they meant the two nearest cities, plus our region. Not municipality. Region. Which is huge.

The alert came with a name, but no description of the person. We did get a description and license plate of their truck, as if that means anything.

After the call, I settled back at my compute to continue with this post. I am happy to say I finally got some progress on the high raised bed that’s worth blogging about. Of course, I’m keeping a close eye on the weather. One of the handy things is that I have a little icon from The Weather Network in the corner of my task bar with the temperature on it and, when warranted, it flashes red with a white lightning bolt as a weather warning. We used to get those whenever there was a frost warning, but I have not seen that, even after last night’s heavy frost. It was flashing when I sat down, though, so I figured we were finally getting a frost warning.

Nope.

My weather app was giving a public safety alert, and it took me to the exact same message from the RCMP that I got from the robocall!

There is no other information about this guy, but they sure to want us to know he’s dangerous and might be in the area!

Or hours away from us, considering how large of an area they are including!

None of us are particularly concerned, but the warnings are appreciated.

Anyhow. To the topic at hand!

Progress on the high raised bed has been frustratingly slow. My tools are the baby chain saw, a hatchet (our other axes are too big for the job), a hammer and a chisel. Basically, I use the baby chain saw until both batteries are drained, with the other tools used to remove material in stages.

Today, I also worked on the carrot bed next to the high raised bed, which meant the first battery actually had time to charge, giving me a chance to get more done than usual.

Which means I FINALLY got the second log in place on one side of the bed.

That took ridiculously long to do! But, it’s now in place, and I’ve started on the other side.

I used the second log to mark where I needed to cut the notches on the side log and end logs. The logs at the end are the thickest, so I started removing material from there, first.

I think part of why I’m so frustrated is, I’ve got three chain saws. The gas powered one broke when I tried to start it, simply because the plastic shell was so old and brittle. The electric one I found was checked out, and they found nothing wrong with it and just sharpened the chain for me, but I discovered it leaked chain oil when I found it in a puddle after the first time I used it, which was for just a single cut before I switched to the baby chainsaw. The next time I used it, I found it would simply stop cutting after just a few seconds. I still have the little, electric, convertible pole chain saw with a 10 inch blade my husband got for me a couple of years ago. It would be enough to do the job, but something went wrong with it the first summer we got it. I checked it out again today, and it basically just screams when I try to make a cut, and the chain stops turning. I’ve got that in the van now, for the next time I go into town and can leave it at the small engine shop to see if they can fix it. I can’t even try using the reciprocating saw. It runs, but no longer shuts off. It needs to be unplugged to turn it off, and it even starts trying to run when it’s plugged back in, making and it quite unsafe to use.

If even one of those chainsaws worked, this thing would be done by now!

*sigh*

Ah, well. It is what it is. Hopefully, I will still be able to complete the high raised bed, and fill it, before the snow flies.

One of the things I found with the baby chainsaw is that, when it first seems to run out of juice, and the red light starts blinking on the battery meter, I can set it aside for a little bit and it will actually “recover” and run again for a while. That usually gives me time to chop or chisel away excess wood. I can usually do this a few times before the battery is finally completely dead. This also gave me time to pull carrots while waiting on the battery life.

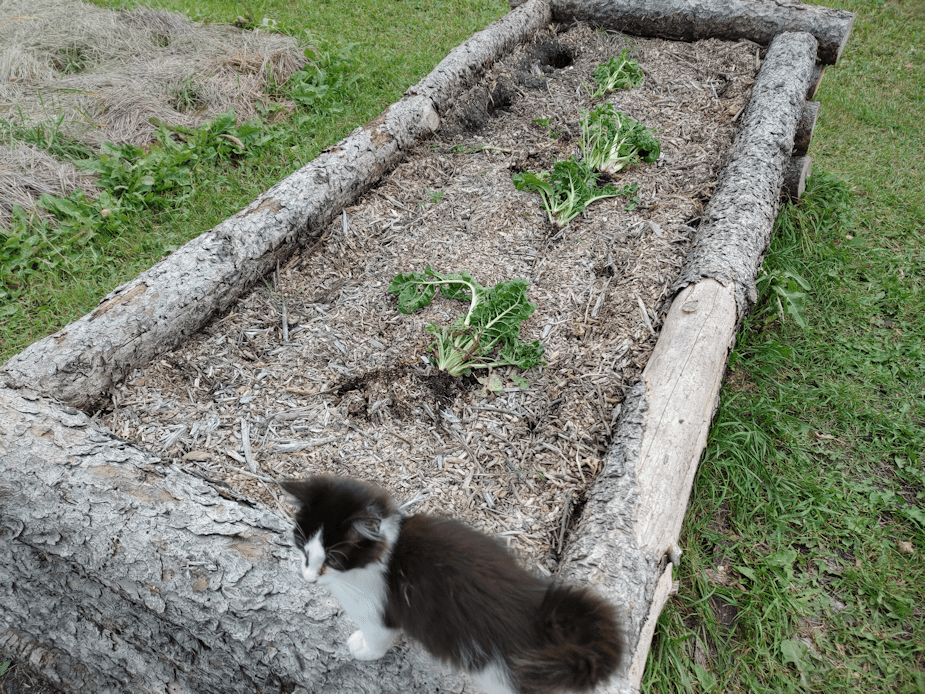
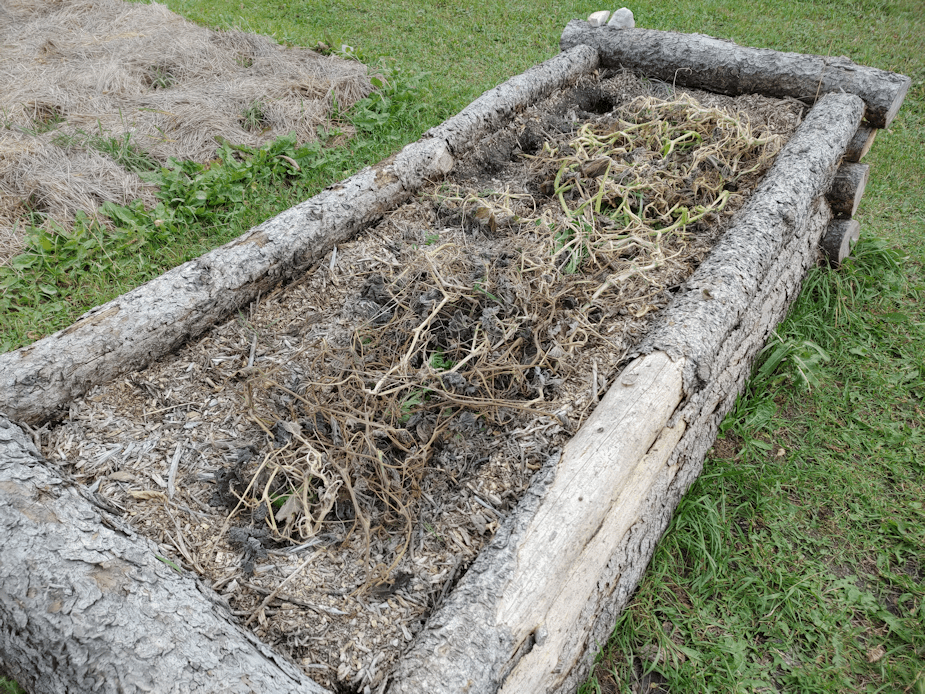
I just dug up the Napoli carrots in half the bed. With the Kyoto Red mostly gone to seed, I figured they could wait.

Pulling them all from in between the weeds was certainly a challenge, even using a garden fork to loosen the soil and weeds!

After draining the second battery on the baby chainsaw, I had time to clean up the weeds, pulling out all the roots I could. If some leaves got left behind, I didn’t care, but my goodness, there were some REALLY deep roots I had to dig out!

Half the bed, all done! Hopefully, I’ve pulled out enough roots that it won’t get this bad again, next year! The time it took to do this was enough for a battery to charge, and get more done on the right raised bed.

The temperatures are supposed to stay the same as today for a couple more days, then start to warm up again, which should hopefully give more time to work on the high raised bed and, of course, finish cleaning up all the garden beds and ready them for next year, too.

The Re-Farmer

Our “second bathroom”; footing

Today, temperatures dropped quite a bit from yesterday’s warmer than forecast day. We reached a degree or two warmer than forecast, with rather high winds. I used it to do a bunch of jobs outside. One of them was to finish putting rigid insulation around the bottom of the house, in preparation for winter. The only area I didn’t finish was around the back tap for the hose, since we will be using it for a while longer.

We seemed to be short some insulation pieces, though. My daughters had brought them from summer storage in the old barn for me, so I went to see if maybe some pieces got missed among the junk.

There wasn’t any, but I did use the opportunity to grab some stuff I decided to use on the floor of the outhouse, with an extra piece for outside the door.

I’d noticed these scrap pieces a while ago and thought they were some type of black, high density foam. Sort of like the super durable stress reliever stuff used on shop floors. Well, that’s probably what these were originally used for, but they turned out to not be foam, but some sort of synthetic rubber.

The pieces I grabbed had already been hacked to smaller sizes, though still bigger than the outhouse floor. They also turned out to be far heavier than expected, for their size.

I trimmed one of them to fit on the outhouse floor, then washed them down with a hose…

… and discovered they were actually blue!

I didn’t scrub them any more than this, because I really don’t care about their colour. What scrubbing I did was good enough for the outhouse floor!

I didn’t bother trimming the second piece at all. This stuff is not easy to cut! It just got a bit of a cleaning to get the big stuff off. This piece is to for a non-slip surface on the metal sheet that’s covering the gravel used to patch and fill the hole was under the door.

I had trimmed the rough edge on the piece of inside, then cut slits to match the door frame, so it would fit around it.

This stuff should work well to protect the floor. If one of the boards ever does go, it’ll keep a person from having their foot go through! Plus, it’s not so thick that it would make it uncomfortable to sit while using the… facilities. ;-)

Though it does look like we’ll need to paint the floor, after all. Which will get done when we’re ready to paint the outside, which is a project for next year.

The Re-Farmer

Our 2022 garden: a bit of high raised bed progress

After several days of rain, I was finally able to get a bit more work done on the high raised bed that is being built.

Such slow going!

I was able to cut the four notches to fit the end piece on, but it is not done. I made as many cuts as I could with the baby chain saw, then used the hammer and chisel to take off the excess wood while the batteries charged. Unfortunately, I finished with the chiselling faster than the batteries charged, so when it came time to use the baby chainsaw to do the finishing, I didn’t get very far.

I’ll have to get back at it, later. It’s the notches on the side logs that need to be deepened more.

Little by little, it’ll get done!

The Re-Farmer
Our 2022 garden: high raised bed build, day 2

I did a fair bit of running around this morning, and was even able to get a quick visit in with my mother. We are hopefully now well stocked with cat kibble for the rest of the month. It’s also coming up on Thanksgiving here in Canada, which means cheap turkey season, so I got one for this weekend, and another for the freezer. :-)

Once back at home, I grabbed a quick lunch and the girls and I headed outside. While they worked on raking leaves for me – and running to and from the house for any tools I needed – I worked on the high raised bed.

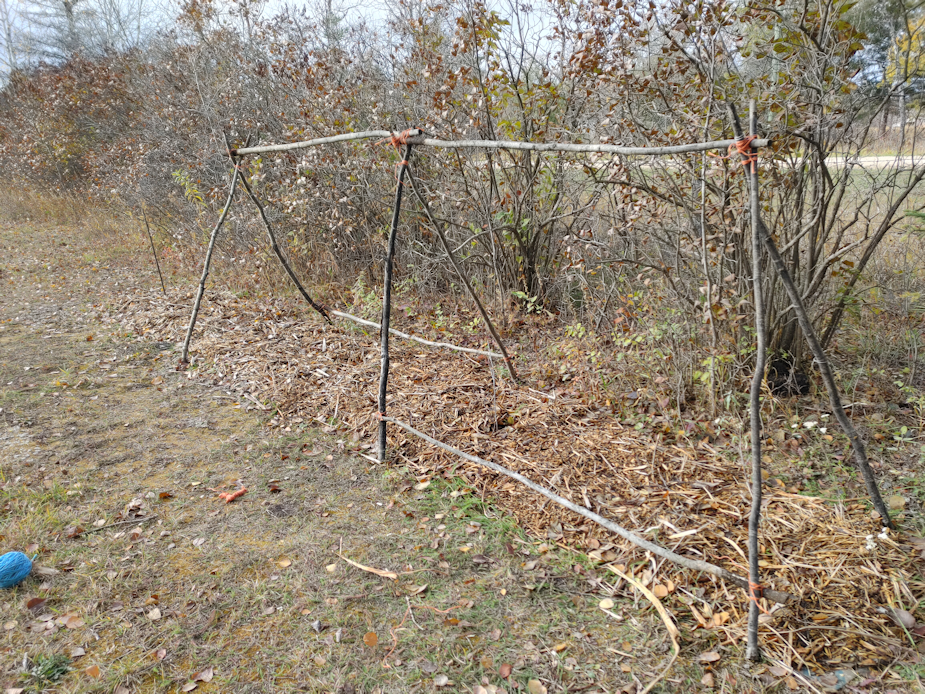
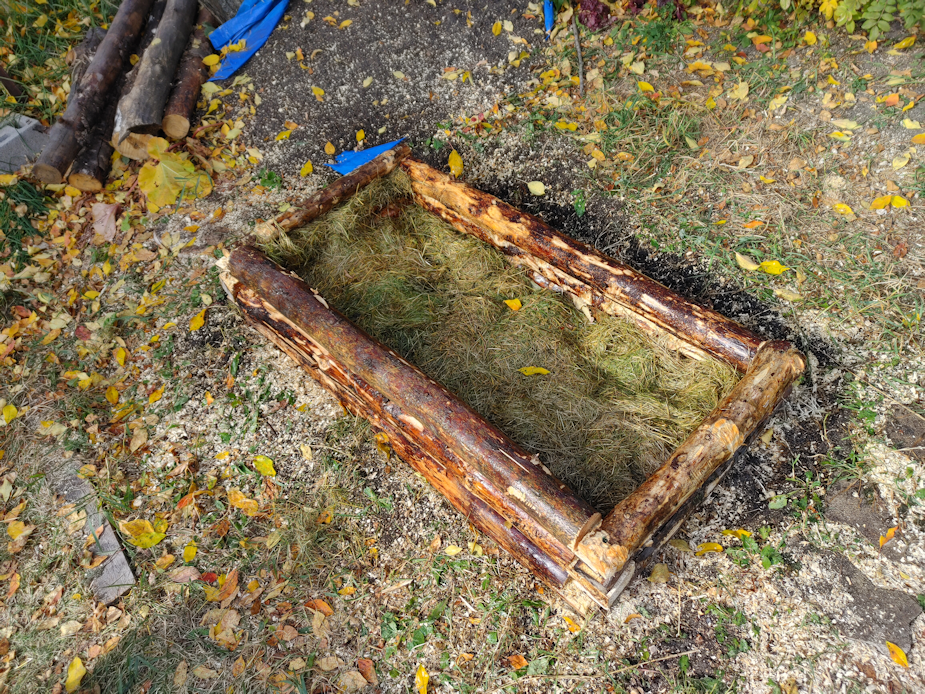
The bottom got prepared a bit, first. I straightened out the edges and shoveled out some more soil, then used a thatching rake on the bottom. I eye-balled four feet across and raked up the edges where the logs would go. Then I got two nine foot lengths in. The first one was placed right where I wanted it to go (that’s the one on the right), then placed the two sticks against it. From the sticks, I measured four feet and placed two more sticks, then rolled the second log up against the second pair of sticks.

Once those were in place, I rolled an end piece against them and used their width to judge where to begin cutting. This end piece was the bottom of the trunk, so it had one very uneven end. It was measured and cut at more than four feet to compensate for that. That made it long enough to cut a notch out to fit the logs, rather than cutting right to the edge.

I used the baby chainsaw to cut the outer edges of the notch, then made a cut lengthwise. I then spent the next while using a hammer and chisel, sometimes a hatchet, to cut out excess wood, which you can see inside the bed. After most of the wood was chiselled out, I use the baby chainsaw to cut into the remaining excess wood, as you can see above.

Then I kept running it over the area to level it more. I wasn’t after perfection, here, and don’t have the tools to do a better job, so this was as good as it was going to get!

It didn’t take long for me to drain the battery on the baby chainsaw and have to switch to the second one

When I started working on the other end, I made plenty of cuts to make chiseling the excess out, easier!

I got it to this point with the chisel before going at it with the baby chainsaw to level it off some more.

Then I got a daughter to help me place it on the logs, so I could use it to mark were to cut wood out of the ends.

By the time I finished making cuts to depth, I drained the second battery. That’s okay. It was enough to get started, and since I was removing wood to the edge, it would be easier to take off the excess with a chisel than with the notches.

Right?

Ha! Of course not.

Both logs had knots in them. One of them had two.

Those were a real pain in the butt to work through with nothing but a chisel or a hatchet to cut through them!

On the plus side, working on this took enough time that the first battery was almost fully charged again, so I could use the baby chainsaw to finish off the area.

That done, the end piece could be set in place.

As you can see, there is quite a bit of a gap under the end piece. This is not a concern, as the bottom of the bed will be filled with logs. It will be an easy matter to find a piece that can be fit under that cross piece.

The good thing is, all those bits of wood I’m cutting out will not go to waste, as they will be buried with the old logs. We’ll have things decomposing at different rates, all of which will release their nutrients slowly over time while the wood will act like a sponge, reducing the need for watering.

By this time, we started to get a bit of rain, so I stopped for the day. The girls finished raking and headed in to make supper while I prepped to continue later.

I chose a second cross piece that was close in size to the one at the opposite end. As before, I will use the other logs to see where to make the cut outs. Hopefully, I’ll be able to continue on this tomorrow. It depends on whether or not my mother will need me to drive her around or not.

This would go a lot faster if I had a full sized chain saw. :-D Ah, well. We use the tools we have!

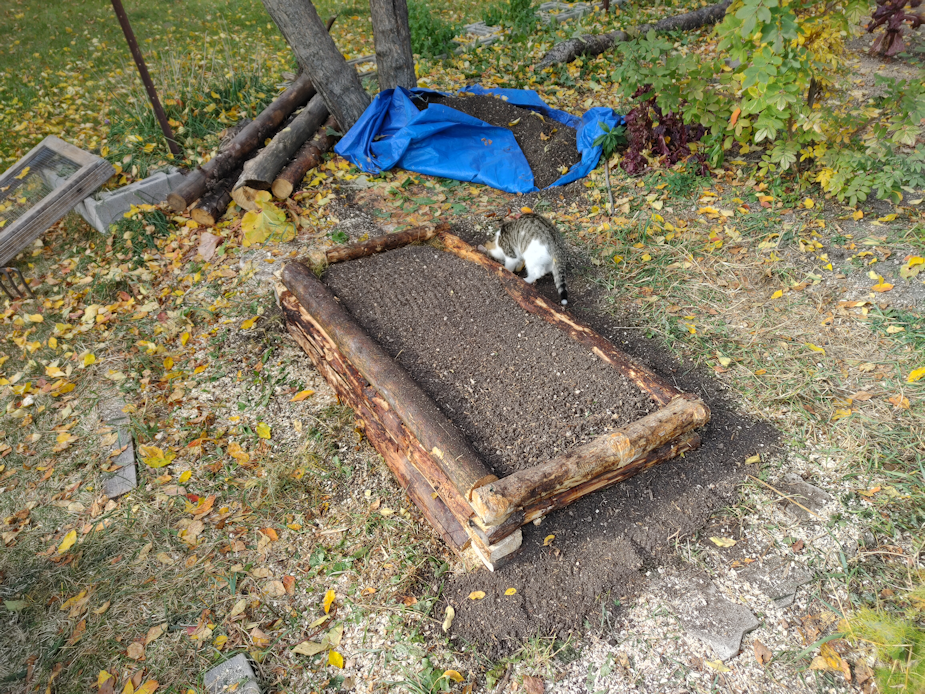
Meanwhile, I now have a nice pile of leaves to use when it’s time to start layering on top of the logs that will go on the bottom of the new raised bed! It’s been pretty windy, but hopefully they won’t blow away. ;-)

I’m glad we have found a way to make use of all those dead spruces we need to take down!

The Re-Farmer
Fall garden update: carrot and beet surprise!

One last garden update to post, interrupted by having to make a run to the post office to pick up a package before they closed! :-D

With the kittens mashing down the netting on two of the beds in the old kitchen garden, I finally gave in and removed the mesh completely.

With the beets along the retaining wall, there isn’t much we can do about them anymore. If the deer eat them, it’ll be no more of a loss than it already is. I’ll be cleaning that bed up for the winter soon, and if there are any beets to harvest in there, that’s just bonus. The L shaped beet bed, however, will remain covered. The kittens haven’t been going after that one, and they are doing well enough that we don’t want the deer to eat them.

After removing the hoops and netting from the carrot bed, I found my first surprise. I did not plant this bed. My older daughter did. Two types of carrots, with kohlrabi down the middle.

Well, nothing came of the kohlrabi – I finally decided the big leafy plants that did show up were a weed of some kind, as I found them growing in other areas where kohlrabi has never been planted.

What I did notice is that there are three carrot labels, not two. Which I sort of noticed before, when I weeded the bed and added the hoops, but for some reason, never stopped to actually read the label. Along with the Deep Purple and Lounge Rouge Sang, there are Kyoto Red! If you look at the photo, towards the far end of the bed, you can see carrots that have gone to seed. Those are the Kyoto Red. Like the ones planted in the main garden bed, after the groundhogs ate the greens, they got tricked into acting as if they were in their second year and started to develop seed heads. The other two varieties didn’t.

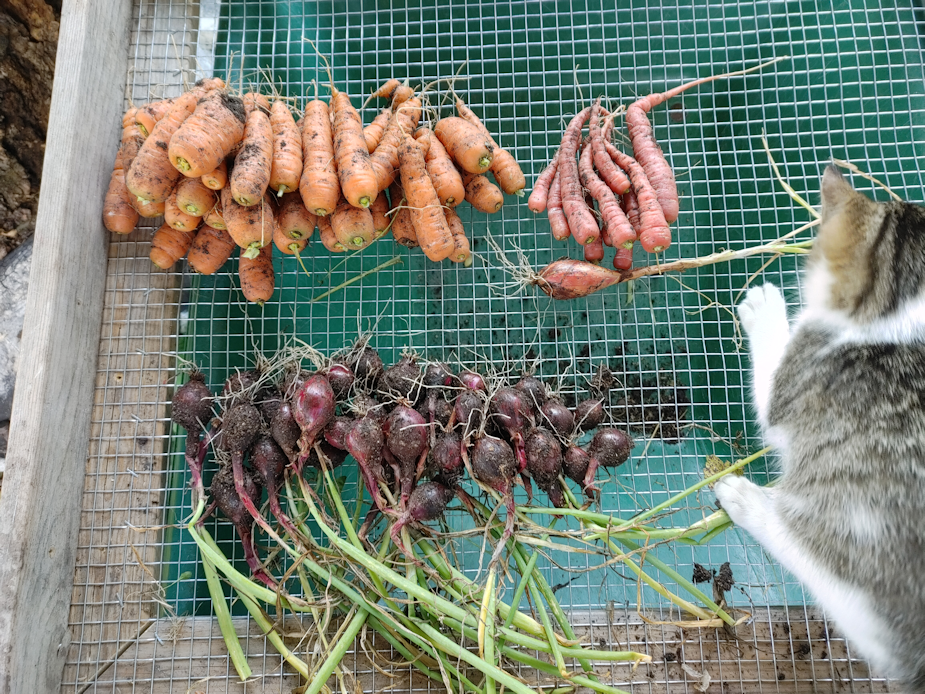
This morning, I decided to pick some, and ended up up quite a few. The ones on the far left are the Kyoto Reds. There were very few that haven’t gone to seed, so I only got a couple of them. The purple ones are obvious the Deep Purple variety, but when I’d picked from that bed before, they were not this dark purple, and I thought they were the Lounge Sang Rouge!! I hadn’t picked any from the other row, as they did not need any thinning.

Which means we got to try two new varieties of carrots today! My daughter decided to use up the summer squash we had in the fridge and make a soup, and she included a few carrots as well. After they were sliced up, we tried each of them. The Kyoto Red, unfortunately, was bitter. They may not have been going to seed, but tasted like they were ready to. The other two tasted fairly similar. We’ve had the Deep Purple before, and they tasted much the same as I remember from last year. The Lounge Sang Rouge seemed to be a bit sweeter.

When cut, the Kyoto Red was that deep reddish-orange colour, all the way through. The Deep Purple carrots were purple with a pale orange, almost yellow, ring inside. The Lounge Sang Rouge was a solid pale orange.

After picking the carrots, I used the rain barrel to water the old kitchen garden, then went on to water the loan beet bed that we made in the spring, next to where the fall garlic beds. This bed was planted with Merlin beets, only. That bed is covered with netting, too, tacked down on the long sides with tent pegs, and the excess netting on the ends rapped around boards to weigh them down. After watering it, I decided to lift the boards at the ends to see how the beets looked.

I ended up picking a couple from each end!

I should have held these differently; there was one quite large beet, but it’s underneath. It’s about the size of the other three, all together!

I’m rather pleased with these – and I know there are larger beets in the middle, from when I last tended it. I’d found a groundhog had managed to squeeze it’s way under the netting, when it was only weighted down with rocks and bricks.

We don’t plan to harvest the beets for a while; possibly not until after first frost. When we do, however, we should have enough to make it worth doing some canning!

Aside from the deer and the groundhogs wanting to eat them, beets have been among our most successful vegetables. We planted a LOT of beets this year, which we may not do next year, but I’m sure we will plant them again. We’ll just have to decide on what varieties we want, and if we want to try some new ones.

And that’s it for our fall garden update! The other parts of the garden were pretty much unchanged, so there’s nothing to really say about them. :-)

I am so incredibly grateful that our growing season has been extended this year, and am glad our drought and critter ravaged garden has had a chance to recover and continue to produce as much as it has!

The Re-Farmer

Fall garden update: Crespo squash

These guys get a post, all to themselves!

The Crespo squash has turned out to be another one of our surprises. They are another of our “fun” choices; a Peruvian variety of pumpkin that gets large, green and warty.

I couldn’t resist.

They seemed to thrive in our climate (there was no zone information with the seeds), and were doing so well until they got repeatedly eaten! I thought for sure they were done for, and was already looking ahead to how we could protect them as we tried them again next year. I hadn’t planted many seeds, so we do still have some left over.

But now we have our mild October, and have had no frost at all, and the Crespo squash is recovering to an amazing extent!

Some of the colder overnight temperatures have done a bit of damage to the leaves, but look at those flowers – both male and female!

I actually had to rescue the one in the foreground; the flower was half way through the mesh. :-D

There are little squashes like this, being held high on their vines, all over the place.

Hopefully, we have enough active pollinators, because with the barriers to keep the deer out, there is no way to be able to get in and try hand pollinating them.

Some newer squash are looking bigger, and appear to have been successfully pollinated.

The very first squash that we found, way in the middle of the two plants, did end up withering away and dropping off, but these two that developed next are getting bigger and look like they are going to make it.

At least until we do get our first frost.

These are supposed to get quite large, but I don’t know how fast the fruit will grow, once they get doing. Well they have enough time to fully mature?

I guess we’ll find out! :-D

The Re-Farmer

Fall garden update: the covered beds

In the main garden area, which will be a permanent garden, we’ve still got the two beds covered with mesh to protect them from the deer. Unfortunately, that leaves them pretty neglected, due to the difficulty in moving such long frames.

Of the radishes we planted, there are two French Breakfast radishes that survived the grasshoppers, and they are actually now looking stronger and healthier than ever! They were so eaten up, I did not expect them to.

And just look at the big mutant radish bulb. :-D

Will they get to the pod stage they were planted for? I have no idea. Normally, I’d say it’s way too late for that, but then I look at the long range forecast and think… maybe they will?

The surviving chard, on the other hand, are just thriving! The problem is, we’re not really using them much. It’s not that we dislike them or anything. It’s just a pain to get at them.

The lettuce is also doing really well – as is that one tomato plant that showed up on its own!!

If I were not sure that deer are still passing through the garden areas, I would take the covers off completely. Then they could be tended and harvested more easily. Which won’t be much use if I come out one morning and find it all gone. Mind you, from what I’ve seen on how big radish plants get when they start to develop pods, we’re going to have to take the cover off at least that bed. And what will we do about this very strong, very healthy tomato plant that started itself so late in the season? I don’t even know what kind of tomato it is. Can tomatoes be transplanted into pots and grown indoors over the winter? I have no idea.

At least the groundhogs are no longer a problem. For them to go into hibernation so early, I would be thinking we’re in for an early and bitterly cold winter, and yet it’s supposed to continue to be warm throughout October, for as far ahead as the long range forecasts go. Plus, The Old Farmer’s Almanac is predicting a milder, wet winter for our region.

Once protected from critters and insects, we can at least say that the chard, lettuce and radishes were – eventually – a success. When we have our permanent, high raised beds, which will be only nine feet long, we will be making sure the covers we make for them will be easy to move aside as needed!

The Re-Farmer

Fall garden update: sunflowers, corn and peas

When it comes to the sunflowers, it looks like we’ll have a few Hopi Black Dye seed heads that will fully mature, but I wasn’t expecting much from the Mongolian Giants.

Then I took a closer look at one of the largest heads.

This is only about a third, maybe a quarter, of the size it should be, and yet there are maturing seeds in here!! There are so many developing and opening seed heads still, too. I don’t think there are any other Mongolian Giants like this one, with pollinated and maturing seeds in them, but while looking at them this morning, I did see some bees fluttering around, so who knows what will happen? It’s been such a strange growing year, there’s just no way to know anymore.

Some sad little peas among some sad little corn! This is the sweet corn block that is doing the worst, and yet they are still trying to produce little bitty cobs! We’ve got the most pea plants growing in this block, though, so at least this area should see the most improvement from their nitrogen fixing capabilities.

And we’ll even have a few peas to harvest!

The Montana Morado corn – what’s left of it – is being left to go to seed, and a few of the cobs have uncovered themselves. Which is helpful, since it lets me see how the seeds are maturing and drying on cob. A fair number of peas interplanted with them have been managing to grow, too. Not a lot of pods developing, but I’m seeing flowers around.

When it comes to the corn, I find myself waffling back and forth over whether or not we want to try growing them again next year. I still want to get Maize Morado seeds to try, and maybe we’ll do the Dorinny Canadian hybrid again. It’s hard to guess how much better the sweet corn would have done, had we not had drought conditions. The soil is nitrogen depleted, but we did use a water soluble, high nitrogen fertilizer on all the garden beds, a few times over the summer, plus were able to amend a bit with the purchased garden soil.

Is it worth trying the sweet corn again? I really love corn, but until we are able to improve our nitrogen depleted soil, is it really worth it?

The Re-Farmer

Fall garden update: squash tunnel gourds

While the squash and melons are died back, or in the process of doing so, I continue to be amazed by the Tennessee Dancing Gourds.

These were one of our “fun” crops. Yes, I hope to use them for crafting purposes, but really, I just thought they were adorable and hoped that maybe, just maybe, they would grow in our Zone 3. From reviews I read when I bought the seeds, I knew they could be prolific, and the certainly have been, even with poor growing conditions.

While I’ve harvested only four mature dancing gourds, that are now drying out on our kitchen counter (protected from the cats!), there are more on the vines that are just as big, but still firmly attached.

More amazingly, the vines are still growing and blooming, with both male and female flowers. They have been doing amazingly well!

The luffa have decided to surprise me. I thought that, by now, they were basically a lost cause.

The very first luffa gourd that started to form ended up withering away, so when these ones showed up, I tried to hand pollinated them. Which I hope worked, but it’s still too early to tell.

You can just see a minuscule female flower developing, above my finger, too.

There are more male flower buds forming, and even another tiny female flower, with its tiny gourd, developing.

The vine itself is the only one that has grown enough to start making it’s way over the top of the squash tunnel.

I took this picture above my head to show the flowers that are blooming, but I was pretty blinded when I took it. So it was not until I uploaded the photo that I realized, there are gourds forming up there, too! There is no possibility of hand pollinating them, as I can’t reach them, but they might just make it!

None of the gourds we planted are zone 3, so that was a strike against them growing here, right from the start. While they would have loved the heat of our summer, it was difficult to water them adequately during drought conditions, so that was another set back. Though we have not have frost yet, we have had some pretty chilly nights, so I am really amazed they are still green, growing and flowering, while plants more suited to our zone, such as the nearby winter squash, are dying back. Especially the luffa, which didn’t even start blooming until very late, and didn’t start producing female flowers even later. It is unlikely the mild temperatures will continue long enough for the luffa gourds to fully mature, but the Tennessee Dancing gourds are doing just fabulously! I definitely want to try growing both, again. If they did this well in such poor conditions, imagine how well they’d do in better conditions?

The Re-Farmer

Fall garden update: winter squash and melons

While going through the garden beds this morning, I was just blown away by how much is still growing – and still getting a chance to grow, if the forecasts for October stay true!

The last time I had so many photos to share, I put them together into a video, but it only ever got one view. Clearly that’s not something people are interested in. So today, I will instead make a series of short posts, instead, starting with our winter squash and melons.

This is the very first Red Kuri/Little Gem squash that matures. As you can see in the photo, the vine is completely died back – except for the few inches on either side of the stem!

The vine with the next biggest one still has some green leaves on it. There had been another small squash that started to develop, but it withered away and fell off.

The other one, however, is still getting bigger, and just starting to deepen in colour. The vine it’s on has a lot of cold damaged leaves, but is still mostly green and growing, so this one may actually get a chance to fully mature.

The vine the mutant is on is also still growing, with fresh new leaves showing up even as the older ones get killed off by colder overnight temperatures. We still have not had a frost, which is the only reason we still have hope for our garden!

We are back down to the two Teddy squash, one on each plant. The others that had started to form, withered and fell off, likely due to lack of pollination. I don’t know how much bigger this well get, as they are a very small variety to begin with.

If you notice the white on the squash and leaves, no, that is not powdery mildew, or any other sort of fungal disease. That’s road dust. Even with the lilac hedge nearby, dust from the nearby road still gets through and coats things. Even the summer squash, which is furthest away, has road dust on them. Another reason we want to complete the hedge with dense bushes, and also plant taller trees. They will serve as more than wind breaks and privacy screens, in this area!
Here, you can see that the melon vines have all completely died back. All of them. And yet…

… the remaining melons are very firmly attached to their vines! Of course, they can’t grow any bigger, but I’m hoping as long as they stay out here, they will continue to ripen.

Under the conditions we’ve had, I’m really impressed with all of these. The melons managed to be quite prolific. The winter squash were not as prolific as they normally would have been, but we will at least have a few squash to try, and to see if we like them enough to want to grow these varieties again. We certainly would be willing to grow the Halona and Pixie melons again, though I think that we will try new varieties next year, to see what other varieties we enjoy eating.

The Re-Farmer