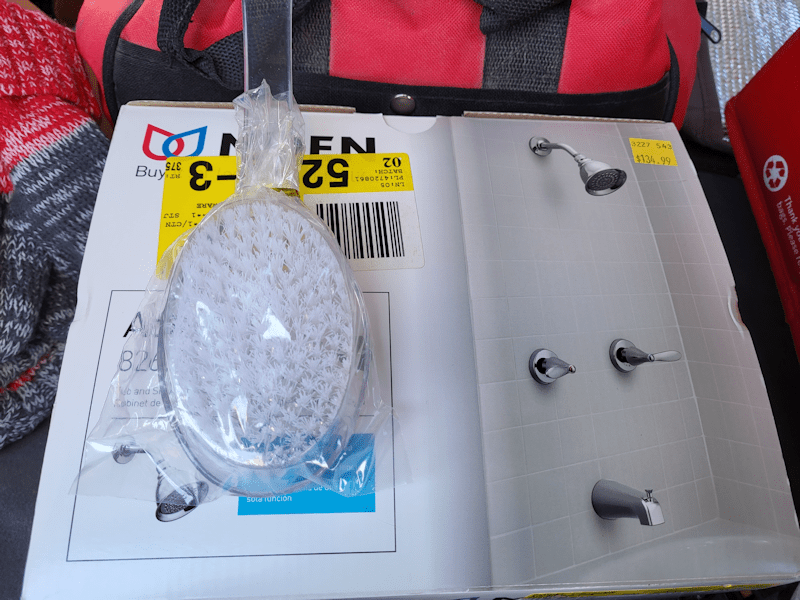
I did a lot of highway driving today, and my last stop was to pick up the replacement tub surround. It just barely fit into the back of my mother’s car! I actually couldn’t close the hatch after taking this photo, and had to lift the other end to rest on the back of the front seats, first.
The surround I’d found online wasn’t in stock, so I ended up one that was a bit more expensive. I think it’s identical to the one we have right now. I also got the adhesive and caulking.
One handy thing with getting the same type of surround: after we take off the old pieces, we can use them to mark out exactly where to cut holes for the taps and faucet – and the screw holes for the arm bars. I would rather not make new holes into the walls if I can avoid it, plus they are currently in just the right positions, too.
Until we take off the old pieces and see what’s under it, we won’t know if what sort of damage there may be underneath. Only then will we know what else we may need to get to finish the job.
That won’t happen until the plumber makes it out. I left a message with him and he hasn’t called back yet, which is very unusual. I think I’ll call again.
Meanwhile, I also got the replacement fixtures, though again, not what I was originally looking for.
I did find the set that was just like what we have now, but for an extra $5, I got this one, instead. Levers instead of round knobs will be much better on arthritic hands.
We don’t need the shower head, since we have the hand held, but there were no sets without the shower head. Just sets without the faucet and diverter. Which is fine. An extra shower head is not a bad thing to have.
Now we just have to see how much the plumber will end up costing! Who knows. If all goes well, I might still be able to get my new glasses, after all!
On another note, my media storage on WordPress is well into the red zone. I’ve tried resizing old photos from blog posts made in our early days, before we realized just how limited our storage was, started resizing our photos to smaller file sizes and upgraded. My current plan with WordPress doesn’t exist anymore and is grandfathered in, and the next one up is way too expensive, when all I need is media storage space, nothing else.
So I have decided to go back and remove some older posts. For a long time, I had a Critter of the Day series, with photos of birds, deer, cats and other wildlife. I haven’t made those posts in a long time, and they don’t get hits anymore, so there’s no reason to keep them, even though they were fun.
Hopefully, that will free up a decent amount of storage space. I posted quite a lot of those!
What a gorgeous day it is today! As I write this, we are at -2C/28F, with beautiful sunshine and next to no wind. Snow is melting all over the place! Including our nice new roof – with not a single leak into the sun room!
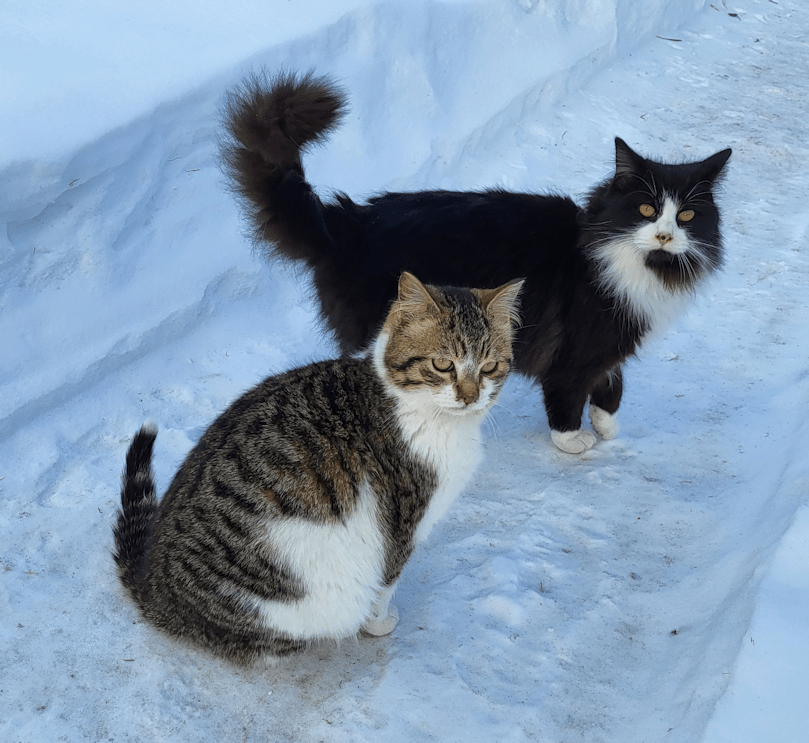
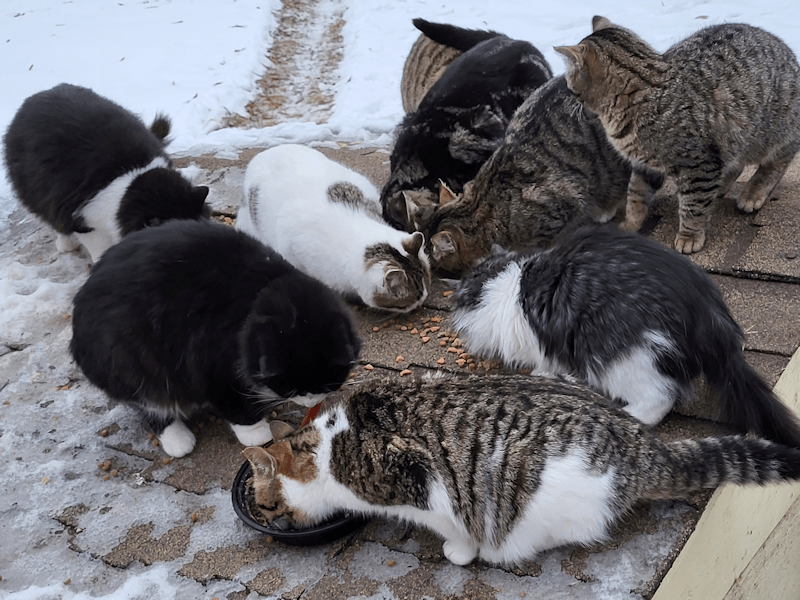
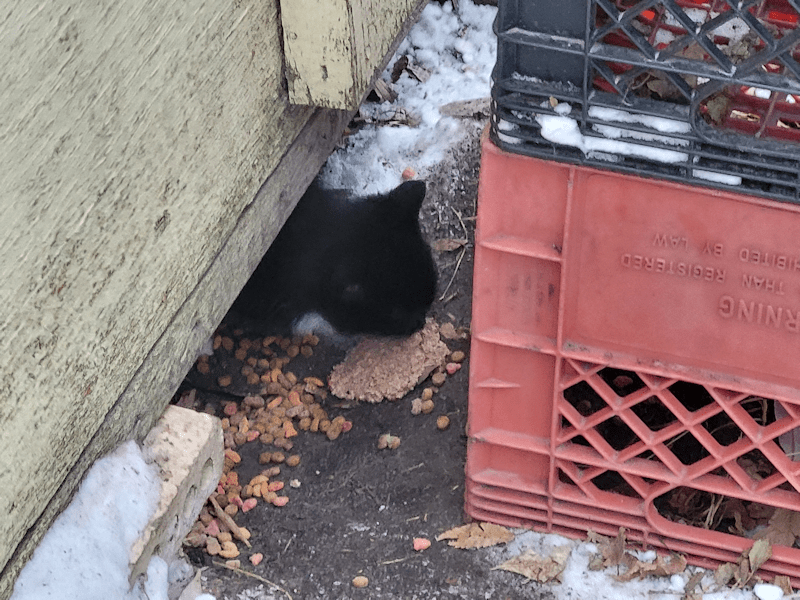
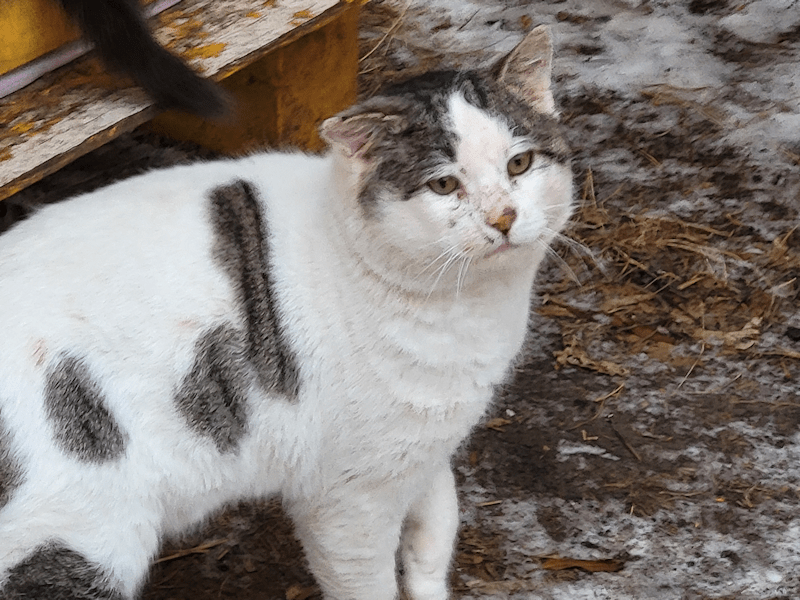
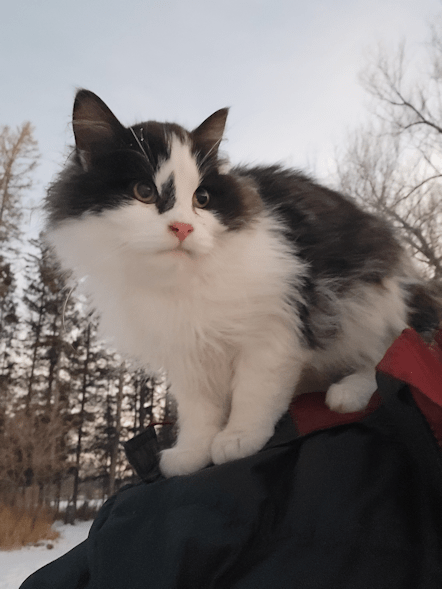
I’m not sure how many cats I saw this morning – I lost track after 20. That long haired tabby even let me pet him, as he followed me up the driveway. On the way back, I spotted The Distinguished Guest, tucked into a path in the snow, waiting his chance to come closer to the house and get some food.
I got a message from the garage, letting me know our van was ready to pick up. The final bill was $216 and change. It meant setting a little bit less aside for our “car payment”, but not by much.
We got to talk about his trip to the auction, and no, he was not able to find anything, and he was able to explain the issue.
We actually got approved for a larger amount loan than the cost of the vehicle we were interested in. The problem was that the monthly payments would have been $750 a month, because of the interest. As my credit score is so bad, the interest rate would have been 29%. Which is insane. To get a vehicle that meets our needs, with payments we could afford, that was also 2014 or newer, with a maximum 180,000 km… well, it just doesn’t really exist.
Of course, right now, we have nothing to improve our credit rating. We have no debt. No rent or mortgage. Nothing that would improve our credit rating.
His suggestion?
Get a credit card.
More specifically, get a card with a $300 or $500 credit limit. Max the card out every month, and pay it off every month. Which we could easily do with a single Costco shopping trip. In 6 months, we’d have a good credit score. Together with the money we are setting aside every month towards a down payment, he’d be able to get us a much newer and better vehicle, with payments within our budget.
While we were talking, his mechanic joined the conversation. He knew full well what we were going through. Thanks to the lockdowns, he lost his small trucking business 2 years ago. It wiped him out completely and, of course, his credit score was wrecked. He wanted to get a loan for a truck to start over, but couldn’t get one. He got himself a $500 credit card, maxed it out and paid it off every month, and it repaired his credit rating enough that he was able to get a lone for a truck – and those things go for about $200,000!
It’s basically the only way we have available to us to repair my credit score, so when I got home, I went online with my bank and started looking up what was available. Once I got to a certain point, though, I decided I needed to talk to someone, so I called it in. As I spoke to the representative, he told me the main issue was that I have no income – it will be based on household income. My chances of being approved was pretty low, but I could apply for a secured credit card. That, however, had to be done in person. He recommended I do that, rather than continue trying to apply over the phone.
Well, it was early enough in the day, so off I went to the nearest branch, in the town my mother lives in. I tried calling my mother to see if she would need groceries, but got no answer, so I took her car just in case.
I got in to see someone fairly quickly and explained our situation. We started the application for a secured credit card. The down side of this is they work it by locking the amount – in this case, $500, which is their minimum – in our account, so that if we ever reneged on a payment, they would get their money out of the locked funds. However, she suggested we go ahead and try for an unsecured account, first, and see how it that went.
Much to my shock, I got approved for a $1000, unsecured credit card!
I asked if it could be reduced to $500, which she was able to do.
I should be getting my card in 7-10 business days.
The whole thing was shockingly painless!
Once it comes in, it will be used only for gas and groceries, within our usual budget, that’s it!
With that done, I finally managed to connect with my mother and popped in for a visit. She only needed a few things, so I just ran out and picked them up for her. She commented that she wasn’t feeling that well, after the procedure – then started to tell me again that if they couldn’t do what she was there for, because she was on blood thinners, then what was the point? I told her, she was there for the scope; the taking of samples would have been only if they found something of concern, and for that, they would have had her come back. She started to get angry and insisted she never left the room and never had the procedure. She watched other people come and go, but not her. I explained the light sedation to her, and told her I don’t remember getting my bronchoscopy, either. Turns out she’s working herself up to thinking that the stuff they sprayed in her mouth, and lying about doing the scope on her, and her now not feeling as well is them trying to kill off old people to save money.
The sad thing is, I can’t fault her for thinking that. However, our “wonderful” health care system is now using MAiD – Medical Assistance in Dying – for that, so there’s no need for the elaborate scene she’s building up in her mind. So far, no one has tried to talk her into offing herself, at least. It’s a good thing we don’t live in BC. 😕
Anyhow, I temporarily mollified her, but I know it won’t last long. Aside from that, it was actually a really good visit, and I even got to talk to her about our plans for getting chickens (which she enthusiastically supports), and to make it so that if things happen, like the power going out for a long time, we’d be okay. Every time I bring that up, she starts talking about being able to use the old wood cookstove in the old kitchen, and I had to explain to her again, how badly damaged it is, and why it would be wildly unsafe to use it, even if we did manage to repair it. We may some day be able to fix it up, but until then, there are other things that we can do that we can do ourselves, at little cost, like building and outdoor kitchen under a shelter. In the past, she would have mocked me for the things I was talking about, but she doesn’t do that anymore. Since we’ve moved here, she gave us the hardest time over our plans, because they were so different from how she did things, and she didn’t believe we would actually do them. One example being the retaining wall I wanted to build at one end of the old kitchen garden. When I described to her what we had in mind, she laughed out loud. Then she told me how the family that used to live across the road from here (no one lives there now) had all sorts of grand plans for how they wanted to fix up the property, with retaining walls and garden beds and more. In all the years they lived there, they never did any of it. Therefore, neither would I.
Then I build the retaining wall, and we did several other things I’d told her about that she laughed at me over, or even became angry over, because she would not have done things that way. But they worked. So now, she no longer laughs.
Progress!
For now, anyhow.
So it’s been a pretty productive day, even if not in the ways I expected or planned on!
Butterscotch has discovered the window shelf! She doesn’t spend much time there, but enough to keep Nosencrantz from using it as often. 😄 So far, the only other cat that’s checked it out is Potato Beetle, and he does just that – checks it out, then leaves.
At the moment, I’m taking a bit of a break from preparing for spending a day and a night at my mother’s. This will be the first time I’ve been away from the farm overnight since we’ve moved here! Which means I’ve been spending a fair bit of time digging around, trying to remember, where is my travel toothbrush? Do I still have a travel toothbrush? Oh, there’s a case for a full size toothbrush. What smaller bag should I use to pack into, and how much will I have to dig to find it behind the barricade made to stop the cats from using the suitcases and scratching posts? Does my husband have an extra pill case I can use for my meds and supplements?
It’s just an overnight trip, but it’s an overnight trip to my mother’s which puts a whole new level of considerations. Plus, I want to stick to my Lenten fast while also not depleting my mother’s grocery supply, so I’m not only bringing food for myself, but enough to share with her. She won’t be able to eat for at least 4 hours after the procedure, since they are going to be freezing her throat, so she’s going to be hungry.
I ended up making a quick trip into town with my mother’s car for a few things for my overnighter, plus a few extras until I can make my next city trip. That will, at the very least, have to wait until after the tire on the van is fixed. Hopefully, our mechanic will find something suitable at the auction that the financing company will accept for the loan that’s already approved. So many things are getting delayed or side tracked because of all the problems with the van!
I am so thankful we have my mother’s car that we can use as a back up vehicle. It’s been needed often enough to be worth the extra expense. Living out here, having two vehicles is a necessity, not a luxury.
Meanwhile…
While tending the seedlings in the large aquarium greenhouse, I graduated the drum gourds that germinated first. They’re getting tall enough to need more space from the lights, so that one pot has been moved to the lower tray that the onions and luffa are on. I almost, kinda, maybe, think I could see new growth in the one last pot with drum gourd seeds!
Now, in theory, I really should thin out one of the seedlings in the pot I moved. The problem is, they are both so very strong and healthy! Meanwhile, the second pair of seedlings are still recovering from being stuck in the hulls of their seeds and are not looking anywhere near as healthy yet. So I am keeping both and, when it’s time to pot them up, will thin by transplanting one out into its own pot, while the other can be potted up without removing it from the biodegradable pot. Hopefully, the one that gets thinned out will survive. The more seedlings I can keep alive until it’s time to transplant outside, the better our changes of having at least one plant survive transplanting and maybe even enjoy a full growing season!
I took a closer look at the tiny little zucca seedling. There was still just an “elbow” showing, but something seemed odd about it.
Where those roots?
Yup.
I very gently poked around in the soil and found the seed leaves were still thoroughly encased in the hull, which was trapped enough by the soil that instead of the leaves lifting up, the root end was being pushed out! So I very, very carefully and gently uncovered the seed hull encased leaves while covering the roots – only to accidentally reveal a second seedling working its way out, too! That one was also still stuck in the hull, so I loosened the soil over that, too. Once they’ve gotten large and strong enough to fully emerge and start standing upright, I will gently remove the hulls, like I did with the second pair of drum gourds that germinated..
I’m just babying these suckers! 😂
I am just itching to start more seeds but, for what we’ve got, it’s still a bit too early.
Well, break time is done. Time to go dig out a bag to pack for tomorrow.
This is Fenrir, calmly chilling on my bed, and NOT trying to attack Nosencrantz!
Yes, we have made HUGE progress.
Of all the cats, none are so determined to get into my office/bedroom – the isolation ward – than Fenrir. So many times, I’d open the door and she’ll teleport through in the blink of an eye.
Then immediately go searching for Nosencrantz and try to attack her.
Well, I’ve been trying to let her in more often, kicking her out as soon as she started behaving aggressively. I think she’s learning.
Last night, I let her in, and she just found places to nap. Or crawled onto me while I was trying to type. Before my room became the isolation ward, that was her favourite thing; to curl up on my chest while I was at my computer, and make it difficult to actually get any work done!
I even had her in the room while doing the evening feeding with wet cat food. She ate from a bowl right next to Marlee – Marlee!!! – and they didn’t growl at each other. She was even okay around Butterscotch, one of her adopted mothers. She behaved so well, I allowed her to stay in the room overnight.
Which worked until about 3am, when I was awakened by a cat fight next to my bed, and out she went.
With Fenrir behaving so much better, I’ve even tried leaving my door open and allowing other cats to wander in and out. Marlee isn’t too happy with that, but most of them ignore her growling.
Except Turmeric.
Turmeric may have calmed down a LOT since she was spayed, but she will still go after Nosencrantz and Marlee, with no provocation at all. I don’t see her going after Butterscotch, but I suspect that has more to do with lack of opportunity.
Still, getting Fenrir to the point that I can actually leave her in my room, with the door closed and unsupervised, is HUGE!
At some point, I want to be able to leave my door open so Marlee – who is very interested in the rest of the house – and Nosencratnz can go exploring. Butterscotch, too, though I don’t expect her to. She’s enjoying her retirement too much.
Things have been warming up nicely here, now that the cold snap has passed. Yesterday, we exceeded our predicted high and reached -13C/9F, though the wind chill was -23C/-9F. Today, we’ve already reached -13C/9F and are expected to warm up to -10C/14F
Seeing what’s been going on with severe weather in the US and Canada right now, I am extremely thankful to be in a bubble of milder temperatures. It’s heartbreaking to hear that so many have died, while ten’s of thousands are without power. The amount of snow some places are getting is mind boggling. My husband grew up in New Brunswick. He is much more familiar with those levels of snow than what we typically get here in the less humid prairies!
Depending on what the winds are like today, I’m hoping to get back outside and start clearing the paths that have drifted over, and opening up more of them. I plan to “cheat” and break out little Spewie. I’ll put up with dragging around extremely long extension cords for the amount that needs to be cleared. I want to get it done before we get more snow, later in the week. If all goes well, I’ll head out for a small shopping trip. Mostly for cat food – the one thing we haven’t been able to stock up on. We simply need too much of it. We did get a lot for December, but with the cold we’ve had, the outside cats have been needing extra food, so we’ve gone through it faster. We’re not out, but I’d like to get more before we start getting too low. I’d really prefer not to go anywhere near a store until after New Year’s, but it is what it is!
Meanwhile, we’ve been focusing on socializing the littles.
These two have been easy.
That’s my arm Bobby and Walnut are sleeping on.
Yes, the bitty has a name, now! My daughters had shared a picture with some of their friends, and one of them commented that he looked like a bobcat that fell into some bleach. So now he is Bobby – short for Itty Bitty Bobby!
One of my daughters had bee supervising the cats while I was doing other things; Marlee was in a mood and doing a lot of snarling at them! She started watching The Victorian Farm, Christmas Special on my computer, so when I came back, I moved the monitor so I could lay down on my bed to watch it with her.
I fell asleep, and woke up to find Walnut on my arm. Then I moved, and her head rolled aside, which is when I found myself staring into the giant eyes of Bobby!
Since I was trapped, anyways, I stayed for a nap. 😁 I was able to get this photo before I managed to slither my arm out from under them to get up.
I’m happy to say that Butterscotch is increasing tolerant of the littles.
For Butterscotch and Bobby to be so close together, without Butterscotch hissing and leaving, is huge on its own, but for them to even be touching paws? Major progress, there! Not only that, but I’ve even seen Butterscotch come up to Bobby to sniff him, and even groom him a bit! I don’t blame Butterscotch for not wanting to be around kittens, now that we know her last few litters must have been incredibly painful for her. I’m so glad we were able to get her fixed! I doubt she’d still be alive right now, if we hadn’t, she was so damaged inside. That she is now willing to tolerate the littles means she is healing in other ways, too.
Nosencrantz has started to get used to them, too, but Marlee… well, she just doesn’t seem to like the other cats in general, and especially doesn’t like the kittens. She’ll start growling as soon as she sees them, even if they are nowhere near her. The kittens aren’t at all intimidated by her, and generally ignore the hissing, until they get close enough that she swats at them.
As for Bobby’s sibling, whom I’m now calling Sprite (short for Soot Sprite), there has been some progress. He (or she) still leaves if a human approaches, but in a calmer way, rather than in a panic. He’s even gone under my desk and office chair while I’m there. Wheel checks before moving my chair is a necessity, as both Sprite and Bobby like to hang out there! My daughters and I took turns playing with them with a cat toy on a string. Walnut and Bobby were right into it, and Sprite even joined them for a bit. One of my daughters was even able to pet Sprite when he paused beside her, though he did run off once he realized he was being touched by a human. Still, progress is progress!
Bobby, unfortunately, has been getting really stuffy. Both he and Walnut are sneezing. I’ve started to add lysine into their wet cat food – something we have not been doing with the inside cats. The 300gr tubs come with tiny little scoops buried in them – I at first thought they didn’t have any, they are buried so deep! – and one scoop is the equivalent of a pressed caplet. I mix one of those into a can of wet cat food. We split it up among all the bowls, so that means all the cats in the room will be getting some, but it’s the only way we can be sure the kittens will get some. Hopefully, we’ll see some improvement before the Cat Lady comes to get the littles.
I am hoping to hear about our financing application soon. Today would be awesome, but we shall see. If we are approved, that means we should be able to trade in the van and have the replacement vehicle before New Years – and I’ll be able to meet the cat lady with the littles (and Tissue) part way, rather than have her driving all the way to our place.
Oh, my goodness!!!! I am so excited! I just noticed that Sprite and Bobby were cuddled together in baby jail. Not only did I (hopefully) get pictures, but I was able to pet Sprite!!!! He didn’t run away!
Okay, so we’ve been having good progress with the littles overall.
Walnut and Leyendecker napping together is very good. Leyendecker will sometimes groom and play with them, but generally will just nap on my bed, and he’s good with having a little company.
Also, my blanket is absolutely covered in cat hair. Even after washing, there’s still cat hair stuck in the fibres!
Also, also, my carpet is horrific. The cats keep spilling the kibble bowls and kicking sawdust out of the litter box, but I can’t vacuum it right now. It would be too much of a terror for kittens we are working to socialize!
The bitty (we need a name for this guy!) has rediscovered the security of baby jail, and likes to chill in one of the upper level beds.
He is SO much more settled and getting socialized. Last night, I found myself being cuddled by both littles against my back. When I lie on my side, I have my top leg bent and my bottom leg straight. That turns out to create a perfect little nest for a bitty, and I’ve been waking up to find him there. I can tell it’s the bitty because of how tiny and light he is! He has also discovered that playing with fingers is a fun thing to do, and then he discovered this strange protuberance in the middle of my face that is quite fascinating. And tasty, apparently.
Also, he is very sharp.
What a way to be awakened during the night!
While nowhere near as greedy for cuddles as Walnut is, the bitty is really enjoying getting pets and cuddles.
Which is working out perfectly, because he’s now helping his soot sprite sibling settle in.
Yes!!!! We caught the other bitty!
I have had no opportunity to get a photo, but I’ll be sure to try to get one later.
For the past few days, we’ve kept one of the hard sided cat carriers in the sun room with the door open. When putting food out, I’d toss a handful into there. The cats had explored it, and I would often find a cat sitting on the blanket inside, just chillin’
This morning, I came into the sun room, and the little soot sprite was looking at me from the doorway of the carrier.
I very quickly just closed the door. The carrier opens from the top, so I used that to put some kibble in with it. I then quickly did the food and water for the rest of the cats – Broccoli was eating on the cat house roof, and while I could come pretty close, she would not let me touch her.
I’d really love to bring Mama in, and reunite the family! Especially since I see she is still letting even a much older kitten nurse her.
Once the food and water was done, I brought the carrier in and let a daughter take over while I finished my rounds. We’d already reached our forecasted high of the day, -15C/5F, though after having no wind yesterday, a wind chill of -24C/-11F was more of a downer. Still, I did finally switch out the memory card at the sign cam. We’re going to have to dig a path to there again. A lot of the paths around the house are now drifted over. With the more pleasant weather ahead, it’ll be good to get as much of that cleared again before the next snowfall.
Meanwhile, my daughter was able to put the bitty tabby into the carrier with his sibling, then gave all the cats some wet cat food, with the siblings sharing a bowl. They reunited quite comfortably. She had the door open a bit and the bitty tabby went out, but the bitty tuxedo didn’t go out until she opened the top. Once the carrier was available again, I took it back to the sun room. Who knows. I might catch Broccoli in there, too!
The bitty tabby immediately started playing with and chasing around his sibling. The tuxedo has been exploring, as well, but is nowhere near as nervous as the tabby was when we first brought him in. I’m sure the tuxedo remembers Walnut, too. Of course, the tuxedo still won’t let us near it, but I don’t think it will take long.
Marlee is not a happy camper. Anytime she sees a kitten, she starts growling!
Butterscotch and Nosencrantz seem more accepting of the new addition.
My daughter let Cheddar in. He when straight to the new kitten, snuffled it – then started grooming it!
Cheddar is such a good dude.
So now I sit, monitoring an exploring soot sprite, sitting in the world’s creakiest office chair, which isn’t helping things. We’ll need to take turns supervising the new addition. Not so much that we’re worried about the tuxedo, but more because Marlee is not enjoying them and we try to keep them away from her favourite corner as much as we can. The kittens pretty much ignore her growling and hissing, and sometimes want to go over and check her out in spite of it, and we just want to reduce her stress levels.
I’m just so happy we finally got the last bitty!!!!
The fact that we can’t keep the littles inside baby jail, because they can climb up to where the openings are larger and squeeze their way out, is making it more difficult.
First, the good news.
Walnut has adapted very quickly.
One of the few times I drifted off, I woke to feel something small against my leg. I was able to grab my phone and use the selfie setting, with flash, to get this picture and see who it was. It took a few tries, but the flash did not wake her up!
Walnut is all over the room. In fact, she’s been making it hard to work on this post, because she keeps climbing me, or trying to walk across my keyboard. I have a brief respite, as she leapt from the back of my office chair onto the top of the baby jail. It has a couple of strips of cardboard and towels over 3/4 of the top. The towels were to help calm down any cats inside, but the other cats like to use it as a bed now, and their feet keep pushing the towel through the cage, so I added the carboard.
The bitty tabby, however, is having more difficult. It’s shy around me, plays with Walnut, and keeps going after the other cats. These kittens are used to having a lot of other cats around them, without much issue. Walnut in particular would be used to being part of a cuddle pile. The bitty tabby was just getting used to that when we brought her in. Plus, of course, she is looking for a mama to comfort nurse.
Marlee has been in a state, ever since the littles arrived. Most of the nice, she was growling and snarling, even if they weren’t near her. She’s been batting at them if they come too close – and even snarling and growling at me when I try to calm her down! She’s spent most of her time in her new favourite spot on the rolled up blanket near my bed, but she also liked to spend time loafing in baby jail, or under my vanity – both spots the littles have taken over.
Cheddar has been good, overall. He’d come in and immediately sniff at whichever kitten was nearby – usually Walnut – and even give them kisses. Walnut responded to Cheddar by immediately nuzzling him and rubbing her shoulders against him. That was too much for him, though, and he was soon asking me to open the door to let him out!
Leyendecker has also been all right, for the most part. At one point, I’d turned the light on to see what Marlee was snarling at, and found him on my office chair, as usual – but with Walnut curled up with him! He couldn’t tolerate that for long, though, and soon left the chair to her and went to sleep on my bed.
Butterscotch… is Butterscotch. She is done with kittens. Wants nothing to do with kittens. She’ll ignore them, but if the come too close, she’ll start hissing. The problem for her is, once she goes down to the floor to get some food or something, the bitty tabby comes running, and that gets her really upset!
Nosencrantz spends most of her time on her favourite spot by the ceiling, but when she did come down, she ended up under my foot stool. It’s a favourite spot, normally, because it’s kept right next to the heat vent, which the bitty tabby has discovered. It also is a good hiding spot. The bitty tabby tends to run under there when I move around, but Nosencrantz started snarling and batting at her every bit as much as Marlee.
Butterscotch and Nosencrantz both ended up at the top of the shelf to get away from the littles. Which was fine, until…
… Leyendecker jumped up to get away from the littles, too.
Butterscotch was NOT happy!
One of my daughters took over supervisor duty while I did the morning rounds, and she ended up having to kick Leyendecker out.
Meanwhile…
… still no luck in snagging the other bitty.
What an adorable little soot sprite!
If we could get Broccoli, too, that would be fantastic. She could stay with her babies longer, and even Walnut would enjoy her mothering. Broccoli has been letting some of the white and greys nurse, too, even though they are so much older and not her kittens.
I now have Walnut on my chest, attacking my face and the end of my braid.
She’s sharp!
Anyhow… Where was I?
I’ve been making a point of…
…
Oh, dear.
Walnut just tried to run away with my braid. It didn’t work and she fell onto the floor. Now she’s back, trying to attack my braid, and face, again!
What a little beast!
As I was saying… I’ve been making a point of leaving extra food in the sun room, so the cats don’t have to go outside to eat. The adults and the cattens don’t have too much issue with going out to eat. Especially the long haired ones. The littles would rather stay in the sun room, which I want to encourage. At least until this cold snap passes. Hopefully, that will also make it easier to catch the last bitty – and maybe even Broccoli.
I don’t think Marlee would be happy with the additions, but at least it would only be until the end of the year, when the Cat Lady will come for them.
She may still snarl and growl at the other cats, but she’s doing really well. Last night, I put her on my bed and she actually stayed for a while, rolling around and streeeeettcching herself out. I sent a picture to the cat lady, who was shocked. She’d never shown them her belly!
The outside cats have been pretty excited about their wet cat food treats this morning, with a couple of them cleaning out the bowl for me. I’ve been mixing in some lysine before doling it out.
I spotted the tuxedo in his favourite spot under the cat house, so he got a big dollop. I later spotted the bitty tabby under the cat house in a different spot, but couldn’t get a picture. Pinky kept blocking my view!
I left quite early to take my mother’s car to the garage, and my daughters took turns supervising the cats in my room, and indulging Marlee. She has started to jump up onto the bed with them, and rolling around while being petted. She still snarls and growls at most of the other cats, but she was okay with lying on my bed next to Cheddar, which is awesome.
Cheddar is really good with other cats!
Big Rig has been a pain! She wants out of the room, but when we did let her out, she immediately went after one of the other cats. She has only a tiny incision, but if she’s going to be picking fights with other cats, we’re going to have to keep her isolated longer, to give it more time to heal. The last thing we want is for her to open it up because she’s being a big B to the other cats! The problem is, even when being kept in my room, she’s been going after Butterscotch, too! I’m not impressed with her. 🤨
As I write this, she’s made her way onto my arms and is currently using one of my elbows as a pillow, while her body is sliding down and pushing my keyboard further and further away.
She makes it quite difficult to type!
While I was in town, I was early enough to fill my mother’s gas tank and get a car wash. I figured the mechanic deals with enough filthy vehicles. Especially with our current temperatures hovering around freezing, making for some very messy roads. When I dropped off the keys, I was still almost an hour early, so I went for lunch. He wasn’t very busy, and since I was just there for an oil change and coolant check, he got it in and finished before my official appointment, so it was ready and waiting when I got back. It has been so long since the oil was changed (thankfully, it doesn’t get used all that much), the tag from wherever it was done last was unreadable. Whoever did it last hadn’t done a good job, and it may have been leaking slightly all this time. The oil level was a bit low when I checked it, but not much, so it wasn’t too bad, at least. The filter was changed and the coolant topped up as well, and now my mother’s car is very happy! I could feel the difference as I drove home.
Gotta make sure it never gets that long between oil changes again!!!
By the time I got home, it was time to feed the outside cats again. This time, I saw Shop Towel coming a lot closer than usual – he was smelling that wet cat food and I could see he was wanting some! I don’t know of there was any left, by the time he showed up. My focus is on making sure the bitties get their fill.
Shop Towel (aka: Sad Face) was not looking good today!
He has clearly been in fights recently. You can even see blood in his fur on his side. We haven’t been hearing any cat fights, so this likely happened at one of the other farms in his territory.
I want to snuggle that sad faced boy so badly!
I ended up sending a picture to the cat lady. I told her, this isn’t one of our cats, but he’s been coming around for a few years. Because he’s so aggressive with our male cats, we haven’t been encouraging him to stick around, aside from filling his belly. We’re not exactly chasing him off, either. We’d love to actually befriend him, but not with the way he behaves with the other cats. I suggested that, if we could ever trap him, he’d be a good candidate for a TNR.
Much to my surprise, the cat lady said that she knows of a farm with no other cats where he could be released! That would be ideal for him – and there would be a better chance of him being at least somewhat socialized, if he’s not fighting for territory with other males.
Of course, the idea of a farm that doesn’t have cats is just… so foreign to me! 😄 Usually, they just show up.
Now that the car is taken care of and the cats brought home, we actually have some quiet time over the next while. No trips to the city, no errands, no more waiting for the roofers… I can actually stay home for the next few days! About the only thing I expect to need to do is help my mother with her shopping, now that her car is done.
I look forward to tucking my head into my shell and being a hermit for a while!
I made sure to have as few cats as possible in my room overnight, so I could leave the baby jail open, and Marlee could come out any time she felt comfortable. That meant Nozencrantz and Butterscotch, who simply won’t leave, Big Rig, who wants to leave, but we’re keeping her isolated for a while longer as she recovers from surgery, and Marlee.
This morning, she was not in the cage. I eventually found her, peeking at me from under my vanity – then she came out for pets! Which is really funny because she’ll be enjoying pets, but if she so much as hears another cat moving, she would hiss and growl – while still demanding pets! After a while, she seemed to be trying to get at her food bowl inside the baby jail, from outside, so I put her in and she enthusiastically ate and drank. For a cat that has known hunger for the past couple of years, I fully expect her to be taking many opportunities to eat!
What I can’t tell is if she has used a litter box. The one in the cage looked unused, but there are two others that should could have used. Or, she might have used some corner of my room that I haven’t found, yet! The cat lady uses stove pellets for litter, too, so I know she is at least used to that.
I made sure to update the cat lady about how the night went, and they are SO happy with how Marlee has been doing. Her husband was saying, cats know when they are home! I hope that’s how Marlee feels, because after all she’s been through, she deserves a soft and comfortable life indoors, with lots of love! The only issue we might have is with the other cats. Unlike Nosencrantz, however, I’m sure Marlee will handle potential conflict better, and not collapse into a ball of panic and anxiety, like Nosencrantz sometimes does.
So that’s good news!
I did get a daughter to stay in my room and supervise while I did the morning rounds, just in case. Cheddar forced his way into the room as I was leaving, but this is Cheddar. He accepts all cats. Marlee hisses at him, and he’s completely oblivious. If any cats gets through to her, I’m betting it’ll be Cheddar. Even Nosencrantz and Butterscotch like Cheddar!
The outside cats were completely out of water in both heated water bowls this morning! The heated bowl that isn’t working and has been sitting in the sun room, full of ice, has been melting, though, so they do still have access to water. Once I got their food and warm water out, I got one of the big cans of donated wet cat food and emptied into a bowl, then broke it into much. I didn’t think of it until later, but I should have mixed in some lysine while I was at it.
After that, it was a race. There were kittens in the sun room, so I gave them a few spoonfuls, dropped spoonfuls in front of the cats in the shelf shelter, then quickly started dropping spoonfuls across the roof of the cat house, where most of the big cats were still eating.
By then, I had the attention of the kittens that hide under the cat house, so I quickly dropped some food for them before adding to the trays in the kibble house and under the water shelter. By then, all the cats were pretty excited about this whole wet cat food nothing – it’s the first time most of them have ever had any – so I was able to dump the bowl onto the tray inside the cat house entry, for the bitties.
Then, as I was starting to leave, I saw a little face poking out from under the cat house, near the counterweight. I hadn’t left any wet food there! So I started scraping the bowl and managed to leave a bit for that one, too.
I had considered using more than one can; they’re big cans, but that’s a lot of cats. In the end, I decided I’ll just do it again when I feed them in the late afternoon. The main thing is to get it to the bitties. What I’m spreading out for the older cats is a distraction. A treat, not a feeding.
That done, I finished off my morning rounds, and as I came back into the sun room, I found this adorable trio.
That’s Pointy Baby on the left, Pinky in the middle and Gooby on the right.
It’s funny how they like to sit on the board the heat bulb’s fixture is attached to! I’ve got it on the top shelf, so cats can sit under it on the bottom shelf for warmth, without any chance of them touching the bulb. It might be a bit too high for the warmth, but I do see kittens under there every now and then.
Today, I finally have a day where I don’t have to go anywhere. Now that the morning rounds are done, I am seriously considering pain killering up and going back to bed! I can finally have a day of rest – until I have to go out again, tomorrow, and get my mother’s car to the garage for a much needed oil change. Thankfully, it’s supposed to be just below freezing tomorrow, so I will be able to walk around town while I wait and do a few errands.
I think a day spent at home and loving on a traumatized cat, is a good plan!
Well, here we are. One more day with the roofers. I turned out to be right when my brother, his wife and I were guessing how long it would take them do finish the job.
I have not taken any pictures today, so here is an adorable “selfie” with Pointy Baby, who decided to join me while I was doing my rounds yesterday morning.
I started this morning’s rounds even earlier that yesterday; it was just barely light out, and the sun wasn’t going to rise for another 2 hours. Not because I was expecting the roofers to come that early (it never came up, when I spoke with them yesterday), but because I’d received a message from my brother letting me know he was on his way! For him, he actually had to get up at 4am so he could arrive here at a decent hour. It took him at least an hour just to get things loaded into his truck. He always brings as many tools as supplies as he thinks he might need, having learned long ago that our father’s tools were constantly being “borrowed”, or used and not put back, or simply lost.
So I got my rounds done early, then I backed the van up to the house to load it with the garbage bags we keep to freeze in the old kitchen, until we can make a dump run. I wanted to make sure I got that done before the roofers had their own truck parked by the house.
I decided to do a meat loaf with potato wedges for the crew today, and my brother arrived just before they went into the oven. He then did his usual running around and finding things to work on or check out – like going into the barn to see if he could find where the metal roof has been leaking, to searching the basements for antennae wire, before he was up on the roof. He’d brought heavy duty anchors for the guy wires on the TV antennae, but when he got up there, he discovered one of them was broken! So he found more wire and was back up on the roof to replace the broken one.
Which meant he had to drag up our step ladder to the very highest point of the roof, borrowing one of the stabilizer boards the roofers had left up there to hold it. Thankfully, it was a wire that was mounted only half way up the antennae’s pole, and not one of the ones mounted at the top! Still, he scares me sometimes! He even took pictures of the step ladder after setting it up, the wires, the mounts, etc. I don’t know why he’s so utterly committed to making sure that antennae stays up there, but my goodness, he took some risks to replace that wire!
He was still up there when I brought the recycling and electronics waste to the van, then did the dump run. The roofers still weren’t there when I got back! While my brother was still working up on the roof, I started shoveling out more of the paths and around the fire pit, so that when things warm up, the paths will melt clear. It was while I was working around the fire pit that the roofing crew arrived, and my brother was able to talk to them for a bit. I shoveled the paths to the compost pile, outhouse and the back of the garage, too. Earlier, my brother had told me that he saw the roofers had put shingles over the fascia in one area, when they are supposed to go under. He came over while I was shoveling behind the garage and let me know what he’d found out. It turns out they did put shingles under the fascia – then added more on top, so that it would look nice! My brother was very happy. He’s not used to “looks nice” being an important consideration, most times!
One of the things I’d mentioned to my brother is that I’d told the crew that the outhouse was fixed up and useable, if for some reason the inside bathroom wasn’t available, making sure they knew where the toilet paper was tucked away. When my brother joined me in the house later, he told me it looked like the crew was using it – there were fresh footprints in the path I’d shoveled to the door! 😅 Whatever they’re more comfortable with! 😁
My brother didn’t stay for too much longer after the roofers were here; he’d already had a long day of it. He’d considered stopping to pick up our mother on the way here, but it was too early. I’m glad he didn’t. She would have been absolutely furious about the state of the house, because it doesn’t look like something out of a magazine. Her expectations of how we are supposed to keep the house are a lot higher than her own expectations for herself. He was, however, going to stop by her place on the way home.
I do hope she is kind to him. He’s got so much going on right now, that last thing he needs to for her to give him a hard time!
After we said our goodbyes, however, I saw him coming back to the house, setting up our own ladder on the side of the roof the roofers weren’t working on, and going up. Several times! I don’t know what he was doing there, but it was quite some time before he was finally done and heading out. That man always seems to think of one more job to do, one more task to complete…
Oh! I just remembered something very interesting he told me. When I was done shovelling, he had done back into the barn to get some more photos, so I went to join him. He ended up being able to bring down a some lumber that was up there for me, and I was talking about how great it was to have lumber – even such a small amount – that isn’t rotting. As we were walking back towards the house, he commented on the shed with the collapsed roof, and how the wall joists would still be strong. We could just put a new roof on it. I told him I wanted to take it apart and use the wood to build something else. That reminded me of the old wagon I was looking at, in the car graveyard. I told him that the chassis looked like it was still good, and I hoped to bring it over. The wooden sides are rotted, so I’d get rid of that, but if the rest of it is in good shape, I want to build a mobile chicken coop on it. Once he was sure which piece of equipment I was talking about, he told me that that wagon is probably close to 100 years old! He thinks it might have been build in the mid 1930’s. He would be very happy if we could fix it up and use it again! I’m just hoping it hasn’t been too damaged from sitting out in the elements for who knows how many decades. I’m even more excited about finding a way to use it, now. 😊
But that will have to wait until the snow is gone, and the ground dry enough to roll it close to the barn!
Well, I think I’ve spent enough time on the computer. Time to see what the status is with the roofers, and probably feed the outside kitties again. 😊