My goal for today was to finish sorting enough aluminum to fill the truck bed, go to the salvage yard to drop it off, then go to the nearest Walmart to meet with the Cat Lady and pick up more cat food. We also need a few more things for the bathtub tap repair.
It was raining all morning, so I backed the truck out of the garage so I could work on the cans in the garage. Once I had ten bags, I turned the truck around to make it easier to load. It took longer than expected, and I was no longer sure I’d be able to connect with the Cat Lady.
I was able to get 10 large bags in the truck. All strapped down an ready to go.
I got about half a mile before the onboard computer started dinging, and I got a red flashing “oil pressure low, shut of engine” warning.
So I pulled over and shut it off. After waiting a bit, I tried again, but it went off again almost immediately.
We were due for an oil change, but I’ve never had this happen before!
I ended up walking home to get some oil, and my younger daughter walked back with me. As we were going along, we saw a vehicle stop beside the truck for a while. The driver stopped again when he reached us. It turns out he was a neighbour from up the road. He was hauling a flatbed trailer, so he went home to drop that off, then came back to help us.
Long story short, we manage to get the truck home, and I was able to park it in such a way that it can be easily accessed by a tow truck.
Yup. We are down to no vehicle right now.
And we’re going to run out of kibble, tomorrow.
F***
I updated the Cat Lady and she said she would get cat food to us, but I have no idea how. Someone would have to deliver it to our place, since we can’t go anywhere.
A tow has been arranged for tomorrow morning, and the garage is already expecting it. We’ll get a diagnostic and an estimate, but we won’t have a budget for any repairs until my husband’s disability comes in at the end of the month.
Today is the 22nd. CPP Disability comes in on the 29th.
That’s a week with no transportation. Heck, I don’t even know how I will get to the garage to pick up the truck once it’s repaired – assuming it’s a repair we can afford. It’s entirely possible the problem is gunk in a sensor. Or it could be something major. The engine itself sounds just fine.
Meanwhile, we’ll need to take off the load of aluminum before the truck is taken in, but that will wait until tomorrow morning. I just don’t have the spoons to do it tonight.
I’m going to have to go through our pantry and freezer and see what we can use for cat food.
The past 12 months has seen so many things breaking down this year. It’s been insane. It seems like every time we take a step forward, we get yanked back five.
One of those things that broke down has been my mother’s car – our back up vehicle – which started to make a banging noise. Since then, it now has a tire that keeps going flat, even though we’ve been using the compressor to pump it back up every couple of days. Even if it were running, though, we no longer have the budget for insurance and fuel for two vehicles anymore. Partly because we now have the truck payments, but also because the cost of everything has gone up so much.
I am just so tired, right now. Not physically tired. Not even emotionally tired. More psychologically tired.
It was around this time, 7 years ago, that my husband and younger daughter flew out here earlier than planned, as my FIL was in the hospital and things were not looking good for a while. I started this blog on the 29th of October, 2017, and we weren’t all united again here until the middle of November. Those first few months saw some rough times, and we’ve certainly had our challenges, every year since. Even so, we’ve have had so many things break down, one after the other, like we have in the past 12 months.
I’m just pausing to write a quick post, before I go to help my daughter with the bathtub plumbing.
We got the new hot water tank element tool out just a little while ago, and headed into the basement to see what we could find in the two older tanks. The hope was to be able to use one of the elements from the old tanks to replace the burnt out one in the current tank.
Yeeeeaaaahhhh….
That’s not gonna happen.
This is what we pulled out of the first tank, where I’d already opened up the panel for the top element. The bottom one was encrusted in scale on the outside, so that one was clearly not going to be good.
Yeah. That plastic cover is melted. That thermostat is burned.
Click through to the next image, and you can see more of the damage, and how completely encrusted the outside of the element is!
It is an absolute miracle that there wasn’t a fire started.
As for the current tank, we no longer even have warm water, so we’ve shut the breaker off. It looks like both elements are burned out now. Seeing what we pulled out of the old tank, I’m not at all surprised!
When the first tank died, it was after less than 2 years of use, which is why we were able to replace it on warranty. About a year later, when we saw the replacement tank starting to leak on the bottom, we were able to replace that on warranty, too, even though we should not have been able to. We kept the new tank in the box until the second tank finally died. It lasted far longer than we expected.
I just looked up my old posts. This current tank was installed just over a year ago – Oct. 10, 2023, to be exact. We were able to pick it up as a warranty replacement in April of 2021. Before that, we got a new tank in January of 2020, though it took a bit longer before we could get it installed. The tank that was originally here was replaced in December of 2017, just in time for Christmas. All four of us had been here for little more than a month at the time!
Not counting the original tank – I found the original warranty papers for that, dated 1963, if I remember correctly – we have gone through 3 modern tanks in less than 7 years of living here.
The most recent one lasting just over a year after installation.
That. Is. Insane.
It all really comes down to our water. I remember talking to the plumber during one of the installations, and he told me that this is pretty typical for hot water tanks in our area.
When all this started, these tanks cost a little over $400. Looking at them now, I see they cost about $700 for the exact same tank.
The elements cost about $40 each.
With the powered anode rod that should arrive next week, that will hopefully keep the tank going longer, though we still need to get the right tool to remove the old anode rod. I thought the tool we got for the element might also work for the rod, but it’s way too big. We need to buy the right size socket to be able to remove the anode rod.
For right now, though, I need to go help my daughter. She was able to get the piece out that needed to be cut out. With the adapters, we might not even need to replace the copper pipes to the basement, though the hot water one has the 90° elbows in it, so that one should probably be replaced with Pex, at the very least.
We’re at 27C/81F right now, with the humidex at 33C/91F It’s sunny, hot, humid, and there’s virtually no breeze at all.
A perfect day to be fighting with our septic system again, right?
*sigh*
I actually wasn’t feeling very good this morning. The girls took care of the usual outside stuff for me so I could go back to bed. They’d been up all night, of course, taking advantage of the cooler temperatures for my older daughter to work on her commissions, and do things like their laundry. We’re still running the hose out the storm door window, so at not to add more wear and tear to the septic system.
When I finally got up, I thought I was hearing a pump running, but we’ve got so many fans going, I wasn’t sure. I went down to check and, sure enough, the pump was running dry again.
I tried the usual things. Priming the filter and turning the pump’s switch on again, only for it to still start running, draining the filter and continuing to running dry. I even stuck the hose through the floor pipe, but there were no blockages. I checked the tank, and everything looked normal, there. The grey water side was pretty full, but not so full as to trigger the float yet.
So I grabbed a particularly strong hoe that we have. I actually remember using it as a child. At some point, the original handle must have broken, and the head was welded onto some steel pipe. That thing is practically indestructible. I also grabbed a flexible drain cleaner meant to be used in sinks, thinking it could be used on the outflow pipe.
I also made sure to be wearing my rubber boots!
I went through the barn’s back door to go around the outflow pipe from the far side. This gave me a chance to see the state of things on the downhill side.
I look forward to when the renter’s cows are here. The grass is chest high right now!
The outflow pipe has a sheet of metal roofing material under it, to guide the flow of water away and towards a sort of pond; it’s a low area that is dry most of the year, but hold water in the spring.
Before I could even get to it, I was using the hoe to cut away a forest of burdock. None gone to seed yet, thankfully. Just really tall and lush growth!
[sidetrack: after water was used again, I turned the pump back on. I had to prime the filter again, but the pump did finally start to actually draw water from the tank, then ran and shut itself off, as it’s supposed to. Yay!]
I eventually found where the sheet of metal was buried and started clearing that off of mud and crab grass – and even a bullrush! That cleared off the metal fairly easily, but I found that the entire sheet had been shifted at the end, likely from cows walking over it. I also found a spot where the metal had rusted away completely.
Once I got it clear of gunk and could move it, it was obvious it needed to be replaced. In between where the outflow is, and the barn, there is a lot of stuff, including leftover sheets of metal roofing. I started through the tall grass towards where they were and conveniently found a long sheet that the wind had blown closer. Even better, one end of it was curled, while the other was flat.
While I pulled out the old sheet, it basically folded in on itself where it had a corroded chunk missing. I set the folded end to one side of the outflow pipe, partly to keep things from growing back beside it, and partly to make use the curled end of the new sheet didn’t end up flopping in that direction. With the way the water had been flowing, it was draining towards that side, and pooling by the collapsed log building behind it.
Once the new sheet was in place, I dug around in the grass and found some old branches that I lay on it, to weigh it down. I don’t want it to blow away, the next time we get high winds.
That done, I popped the cap open and pulled out the outflow pipe (it’s all one piece). It’s quite long, and the overhanding willow branches got in the way. I’ll have to go back with the loppers and cut them away.
At the bottom of the pipe is what my brother called a Venturi. I had to look it up, and I guess he meant venturi pipe? Anyhow, it has a section at the bottom that comes almost to a point. I went to clear it with the drain cleaning rod I brought – it has bristles at the end, like a bottle brush – but couldn’t get very far. It was clear, anyhow. So back it went, and I made sure I felt it pop into position at the bottom.
So at this end, at least, things should be working better. I’ll have to check it to make sure it’s directing the flow to where it should, properly, or if the metal sheet needs to be shifted or something. I even made sure to walk down the middle of it, to the flat end, to create a bit of a hollow. The roofing metal already has ridges to directed the flow of water, so it shouldn’t be an issue, for the amount of water that flows through at a time, but I’d rather take the extra precautions! The only real issue I can think of is that the renter’s cows will probably walk on it. There used to be a barbed wire fence around it, and the low area the water is supposed to drain into, but that collapsed long ago.
That done, I went back and tested the pump again, and it still kept just draining the filter and running dry. I finally primed the filter and just left the pump off.
Getting back into the house, however, was a challenge.
Driver was not only nursing her four, just inside the doorway, but Button was in there, too! Driver would have only four active nips, though, but Button was quite aggressive about getting access to one of them!
With the washing machine hose through the main entry, the storm door is locked from the inside, so the cats don’t accidentally open it and get out. The inner door at the the dining room has a security latch. We installed it because of our vandal, but we’ve since discovered that, as the house shifts, the inner and outer doors sometimes pop open on their own. The storm door, I can see, but the inner door, too? So those doors are locked and latched from the inside, all the time.
Well, I needed to hose off the hoe and drain cleaner wire, anyhow. By the time that was done, Driver had moved.
By this time, it was past noon and I hadn’t eaten yet, so after checking the pump and it still running, I just left it off. I knew it would soon need to actually empty the tank and, even if we didn’t use much water ourselves, the weeping tile under the new basement is constantly draining into there, so it wouldn’t be long before I’d need to turn it on again.
It was almost another hour before I finally settled down with some food! Since I’d slept in, I hadn’t had breakfast, and was so hungry, I was feeling sick. Especially out in that heat!
Since then, the pump has been turned back on and is working again. I’m glad we can see into the filter like that. I knew the tank should have been full enough to be emptied, so I was watching closely. After the pump drained the filter and started running dry again, I primed it and tried again. This time, I could just see water starting to flow into the filter, so I left it running. It was slow going, but it finally started to pull more water, and was at least not running dry. A little longer, and the flow of water increased, and I could see it splashing against the clear lid. I puttered around in the basement as it ran, and was happy to hear it turn itself off on its own, just like it should!
The basements, meanwhile, are still pretty wet. The old basement is pretty much wet all summer, but it’s the new basement that is the concern. It has weeping tile. It shouldn’t be so wet. I ended up moving one of the blower fans into the new basement, and set it up on a block near the middle of the basement, pointing downwards. The oscillating pedestal fan got moved closer into the wettest corner. Between the two of them, things should start drying off. It’s a shame I can only open one of the basement windows for air circulation. The other two are missing their screens.
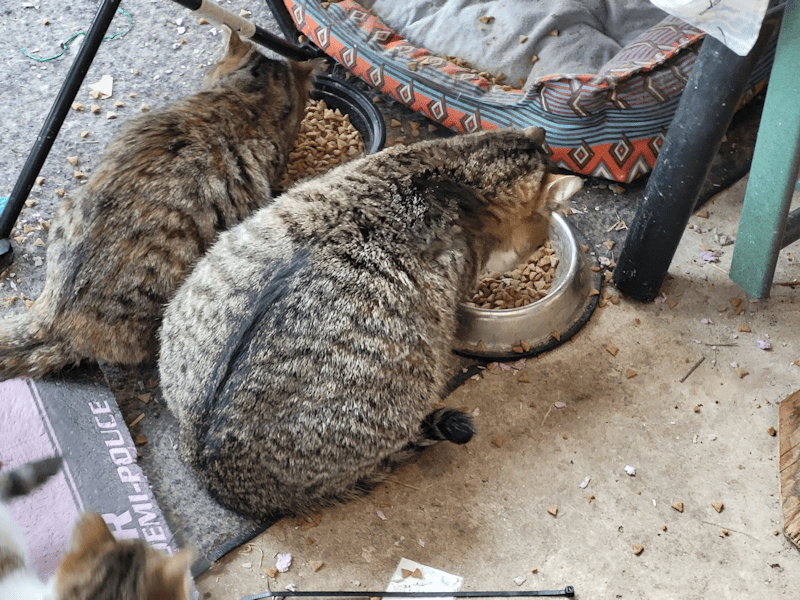
So that’s what I’ve been fighting with all day – but I’ll leave you with more cuteness! I got this photo through the bathroom window. I didn’t want to disturb them!
Yes, they are both asleep. Button draped over that sponge (they love to play with that sponge, so I gave up trying to put it back on the shelf! 😄) is just the cutest thing, ever!
I’ve sent pictures of Button to the Cat Lady to share in her groups. We can’t bring him inside. Aside from already having too many cats indoors, as long as he stays close to the house, he’s got at least two, maybe three, mamas that are willing to nurse him, and he’s way too little to be weaned. Better a mama, outside, than a bottle, inside! But there might be someone out there willing to rescue an abandoned kitten, and willing to bottle feed him until he’s old enough to be fully weaned.
I was able to give the kittens some leftover turkey as a treat today, and made sure to give Button his own piece, away from the other cats and kittens. He does love his solid food, that’s for sure! Hopefully, he will grow big and strong and healthy.
Speaking of which, my daughter got a look at Shop Towel’s cheek while feeding the cats this morning. She says it looks like a hole! My guess is the original wound got infected and maybe abscessed? He is, however, eating normally and doesn’t seem to be bothered by it. It’s not bleeding or anything like that, and since it’s not being bothered by insects, it’s not leaking any fluids, either. It’s just… there.
What’s interesting is that he’s been really good with the kittens. Where other adult cats, both males and some of the more feral mothers, will bat at the kittens, or growl and hiss at them, he is just fine with them. I’ve seen him curled up and sleeping on the log pile by the old garden shed, with Broccoli and her two kittens curled up and sleeping on another log next to him. At night, the sun room kittens like to pile up together in different “rooms” of the cat cage, while a mama or two like to sleep on top of it. This morning, my daughter found Shop Towel curled up in one of the cat beds on the cage – with several kittens! So he’ll attack an adult cat, unprovoked, but is a cuddle bug with the babies. While I can appreciate it, it does seem quite strange!
Hmm. I was wondering if it would be worth it to try and get some stuff down outside. The temperature had dropped while I was working on this, but it’s gone right back up to what it was when I started! It’s not supposed to start cooling down until about 8pm, and it’s just past 3pm as I write this.
*sigh*
Well, it is what it is. We’ll just have to get used to it.
I’m happy to say that I have no errands to run, no unexpected outings, nothing. Just a day to stay home, inside and out of the wind!
We’ve had a very mild winter so far, but as we head towards the end of January and into February, we are expected to get more average temperatures. Not so much that we need to worry about the vehicles freezing, or even plug them in. Which is good, since I discovered the truck’s block heater plug end was ripped off and never repaired. Clearly, it wasn’t an issue for whomever owned it before. This thing can handle the cold much better than the van could.
We do need to try and get the garage door closed, though. One corner wheel came off the track. I’m hoping that, if one person is able to push up the opposite corner, it will move the loose corner close enough to the track to be able to get it back on. This is something to do on a warmer day and will require taking the truck out, setting up a little ladder at one corner, and the folding scaffolding set at the other. It will take three of us to manhandle the thing. One to push up the opposite corner, one to move the loose corner towards the track, and one to try and get the wheel back on the track. It’s an unusually large door for its type.
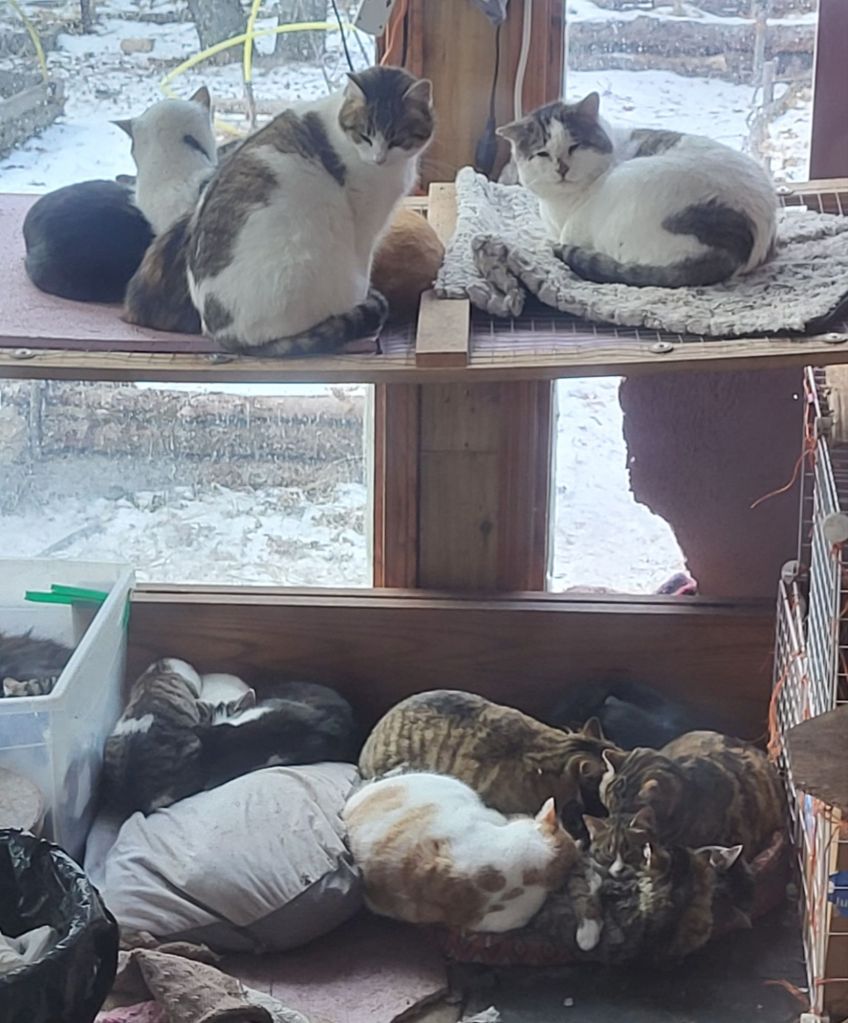
The outside cats are appreciating being out of the wind. This morning, I counted 33 of them. Last winter, we had a ceramic heat bulb set up for them, but the old fixture we were using stopped working. We currently have a replacement on the way. What we had before was something my brother had put together to set up under the kitchen sink, so the heat from an incandescent light bulb would help prevent pipes from freezing, while the house was empty. The kitchen has no heat vent, so it was the one area of concern in the house.
What we are getting is a clip-on lamp designed for chickens. It has a heat reflector shade and comes with a ceramic bulb. I plan to set it up facing under the platform, which will have the added benefit of the sheet of insulation above, to help keep the heat in their favorite sleeping spot. If it gets too warm, they can go on top of the platform. The only thing I’m not sure of is how I will attach it securely. I’ll figure that out, once it arrives, and I can see exactly how the clamp is designed.
Meanwhile, we are still figuring out our phone problems. I spoke to my brother, through Messenger, and told him we thought the problem was the jack in my husband’s room. My brother suggested we simply detach that jack and see. I never even thought of that! So I went into the basement and traced the wire to the hub, and removed it.
Nothing changed.
My brother said it sounded like moisture got into a jack, which is what we think, too. Likely due to our two fixed males that still spray! There are two other jacks on the ground floor, but there is no way cats or moisture could get to either of those. That leaves the one jack upstairs, which we’ve never used, which could have had damage to it. So, one of my goals for today is to find and trace that wire and remove it.
If that doesn’t do it, then the problem is something else, and we’ll have to call someone in.
The main problem is, either how we have things set up, it’s hard to access all but one of the jacks. We will have to clear things for a tech to reach them, if he needs do.
Speaking of clearing things, once Christmas is over on Jan 6, and we store away our decorations, we need to rearrange parts of the living room again, so I can access the big aquarium greenhouse. We need to get our onion seeds started!
Then we will need to bring other things in from the sun room, including one of the shop lights, to set up our growing zone again. We won’t be able to do the same setup as we did last year, but I think we might not be starting quite so many seeds indoors this year. We shall see.
Toni is healing up nicely and doing great. When we first brought her in and she was recovering from her amputation, we kept her isolated in my room. Once it was safe to let her out, she had zero interest in coming back. Lately, though, she’s started to come back into my room and will stay there, even overnight. Sometimes she’ll cuddled with the kittens, or will get into wrestling matches with Clarence – who is starting to be bigger than she is! Mostly, she seems to just enjoy being on my bed.
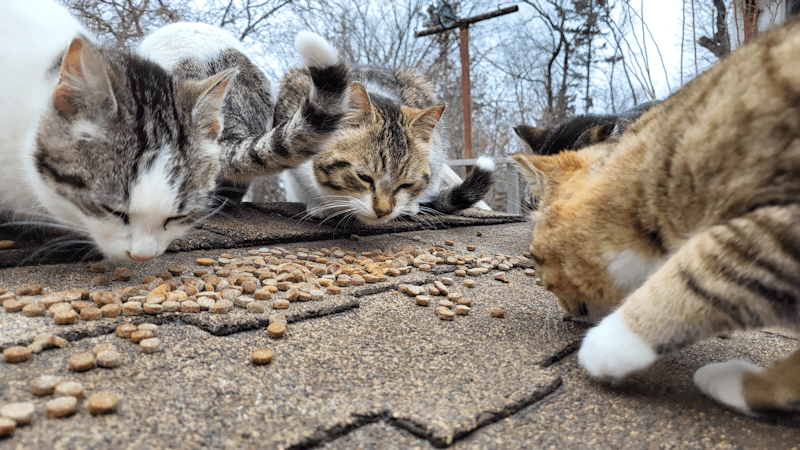
While doing my morning rounds, I was surprised to see there was actually still a bit of kibble from last night. Which means, no visits from the racoons! I saw only about 23 cats when I did a head count.
I did find one other, though, just towards the end of my rounds, and it was a sad find. I was coming around the west side of the house, and could just see the tail end of a cat under the cat house. That in itself is unusual. We see them going under on that side, or peeking out, but not lying on the ground. Even before I moved around a piece of insulation we have under there, to see if it would move, I knew it wouldn’t. I can see that it’s a tabby, but that’s it. We’ll have to pull it out later and cremate it, but it’s too windy to get a burn going.
I find myself wondering if this was the result of injuries from a cat fight, just because of how and where I am seeing it. I won’t be able to see if there are any obvious injuries until we get it out.
I didn’t have much time to think about it, either. We had a tow truck booked to get the truck. I’d called CAA last night to make the arrangements, making sure to tell them the tow could be done in the morning. I was told they would release the call at 8:30. Once a tow company accepted the call, they’d let us know and give us an ETA. Once that was arranged, I messaged our mechanic to let him know what was arranged and asked him to check the fuse box along with changing the battery, just to be on the safe side.
I got an automated call just before 8am, with an estimated arrival time for the tow truck at 60 minutes.
He got here before I finished my rounds! I thought I had at least another half hour, so I hadn’t unlocked the gate, yet.
Getting the truck was a bit of an issue. He could back up to it, but only at an angle, because of trees. The truck, however, was also parked at an angle, so it worked out. What he ended up securing it just enough at the front of the truck, to get the road. Once on the road, he unhooked it, drove around to the other end, then hooked it up and secured it properly from the back.
As he was pulling in, I went to put the truck in neutral. I turned the key to light up the dash, so I could see the display, but there was nothing. No dash lights or any sound at all. That battery was stone cold dead! I still put it in neutral; I just couldn’t see to confirm.
I hadn’t had much sleep last night, so once that was gone, I was going to try and get a bit of a nap. I ended up messaging with my SIL, which reminded me to send some photos for my brother that I took this morning.
I couldn’t close the garage door last night.
The top of the frame has been slowly sagging, so when we open and close the door, it hits the frame. That’s why there are pieces of metal under it; they help the door slide across without getting caught and damaging the wood. Over time, we found we’d have to push the door inwards in the middle, so the handle could clear.
Now, it just bashes onto the frame. While I could probably push the door inwards and get it past, that’s just going to make things get worse, faster. You can just see in the picture, to the left of one of those pieces of metal on the frame, that there is a crack in the wood. That crack is getting bigger.
I think it can actually be fixed, still. We’d need to jack the frame up until it’s level again, then secure and support it from the inside. We might not even have to remove the door. Once the frame has been raised back to where it’s supposed to be, the door can be closed, and we’ll be able to access the inside of the wall and roof above. The problem is, we have absolutely nothing to do this with. My brother has the tools needed, and would know how or where to get the things he doesn’t have.
Anyhow; he now knows about it, and might be able to come out some time before Christmas to fix it.
That was my conversation with my SIL when I should have been trying to sleep. 😄 Of course, there were various interruptions during my attempt to get some sleep. Mostly involving a Snorri, using me as a bed! At one point, I decided to check my texts, just in case. Sure enough, there was a message from the garage, saying the truck was ready! It had come in half an hour before I saw it. For some reason, my phone doesn’t give me text notifications. 🤔 He sure got that done fast!
So my daughter and I headed out to get the truck. My daughter just dropped me off and headed home. Since I was in town anyhow, I did an errand and got some gas (the prices have gone down to 149.9¢/L) before heading home. I’m glad we had the cash from selling those scrap cars! Otherwise, we wouldn’t have been able to get the new battery until next week, and the truck would have been sitting in our yard the entire time.
It cost less than I expected. Our mechanic wasn’t there at the time and I only talked to one of his staff, so I couldn’t ask details, but clearly he found no problem in the fuse box. He charged me for the battery, but not for labour! When my husband looked up batteries for our year, make and model, the retail prices start at $250, for a mid range quality battery. Even including taxes, we got a better price by getting it through our mechanic.
As much as I would have preferred to wait until next week, I’m glad we got it done, and that we were able to get it done now!
So that means tomorrow, when the dump is open again, we can FINALLY do a dump run! We’ll also be set and safe for when we do our stock up shopping next week. Yes, there are other fixes that we are discovering – it’s a well used 2011, after all! – but they are relatively minor and do not affect the safety or function of the vehicle. Everything identified during the safety inspection got done before we bought it.
Meanwhile, we are supposed to warm up again, even reaching a high of 0C/32F tomorrow. We’ll have one day with a high of -8C/18F, and then warm up again. In fact, in the first week of December, we are supposed to reach highs above freezing. How many days above freezing changes with the app I look at, but they all say we should be getting at least a couple of days above 0C/32F in early December.
This may turn out to be the nicest winter we’ve had since moving out here!
While the power was out, my husband was able to get a weak data signal from the living room on his tablet, so he was able to report our outage to the electric company and check the status of things. The power went out at about 8:30am, and we were expected to get it back around 11:30am.
With no electricity for that length of time, we considered firing up the BBQ or getting the fire pit going to make breakfast. After checking the budget, however, we decided to be lazy. We had a couple of water jugs that needed refilling (we have 4 of these 18.9L jugs, and try to make sure they get refilled when 2 are empty and dry), which meant a trip into town. If they had power, of course. We decided we could afford to get some take out, rather than opening the fridge with no power and losing the cold.
One of my daughters came along with me, with their own shopping list. I knew we had lost power during the night, which must have been a problem for my older daughter! She would have been working on commissions on her computer. The power only flickered, however. Enough to have the garage cam reset itself and be resting in its default position – which is how I knew the power had gone out during the night – but not enough to shut down her computer. My husband didn’t mention having problems with his CPAP, either, so that was good.
As we were leaving and stopped on the driveway while my daughter closed the gate behind us, one of our neighbours was driving by and stopped to talk. He told us the power outage was quite extensive, ranging from the town my mother lives in, to the next large town to the north of us. He had heard the power was expected to return by 11am, though, which was a bit sooner than what my husband had found.
While driving to town, my daughter and I considered our options, should they be without power, too. Happily, they were completely unaffected. Which makes sense. The transformer system runs north and south along the main highways, not east and west, so what affected us would be a different branch of the system than any towns to the east of us.
We hit the grocery store first and I did our refills while my daughter did her shopping. Since we were there, I picked up a couple other things, too – like more paper towels! Leyendecker may not be eating, but clearly he’s drinking, and still doesn’t seem to have much bladder control. We’re going through a lot of paper towels cleaning up, then sanitizing, after him. Yes, we should be using rags, but somehow, they’ve all disappeared! We didn’t have a lot, anyhow.
We then decided to go to a Greek place for take out. My husband and I went there once, shortly after we moved here and he was still more mobile. They have gyros, which none of us have had in years. Personally, I’d love to have a good Donair, but the best place we’ve ever had them was in Victoria, BC, before we had children, and I don’t even know if the place exists anymore. Still, the gyros here are quite good.
Since we had stuff for the refrigerator in the car, my daughter stayed in it with the engine running and the AC going, as it was so hot and muggy already. While waiting for the gyros to be made, I realized they also had deep fried pickles – something else we haven’t had in years! So I got an order of those, too. 😊
While I was there, my daughter got a message from my husband that the power was back. It was out for only 2 hours! That’s the longest we’ve been without power since moving out here, but I’m not complaining at all. That was a very fast return.
So we had a treat for the day. Except my older daughter, who’s in bed for the day. It’ll be “breakfast” for her, when she gets up for the night.
One the way home, I remembered to stop to get the mail, and picked up these.
The couplings are in! We can finally try and fix that water pipe to the garden tap. I really hope this works, because I’d hate to have to dig up the entire line.
It’s going to be a challenge just to dig around where the crack is, there are so many roots around the pipe. From what I can tell, the roots are small enough I should be able to cut through them with a spade or loppers.
My other thought is, what to use to cut the pipe itself. All our cutting tools are designed to cut wood, not PVC pipe. I’m sure I’ve got something I can use, though. The main thing is digging enough space around it to have room for a cutting tool to work without biting into the soil. We do have a pipe cutter, but it’s for cutting much smaller copper pipe, not something like this.
Yesterday, my daughter juiced the cherries we picked, and the pulp has been hanging to drain in the cat free zone overnight. We’ve got a total of 5 cups of juice. A basic jelly recipe is for 3 1/2 cups. The remaining juice isn’t worth doing a second batch, so I’ll make a syrup with that. We plan to actually water bath can the jelly, so it will be shelf stable. With cooking the jelly, preparing the jars, then using the water bath canner, plus making the syrup, we’re looking at a lot of time over a hot stove, on a hot and muggy day. My daughter and I decided to wait until things start to cool down.
All the more reason to have an outdoor kitchen!
Hot and muggy though it may be, I think I’ll go out and see if I can fix the water pipe! I’m really eager to see if it’ll work. I’m already thinking ahead to fixing the support post the tap it attached to, which is rotting at its base, and bringing over the double laundry sink we found in the shed, to set up a vegetable washing station.
I never thought I’d ever get so excited about fixing a pipe. 😄
I will, however, have to pry Question off my shoulder. She’s been napping on me since I sat down at the computer!
I hooked up the hose end for the garden tap to the new connector, and it screwed on without any problems at all! The last few times I tried to connect it directly to the tap, the threads just would not line up, no matter what.
Which means I was able to check out where the leak is.
When I first turned on the water, I could hear it gurgling away, then start sputtering, until I could see water starting to gush out of the ground.
After a while, the pressure just kept increasing, and I had quite the fountain spraying high into the air!
I tried turning on the garden tap and did get some some water flowing. Brown, at first, which is no surprise. After a while, though, so much water was spraying from the hole, barely a dribble was making it up to the tap anymore.
When I grabbed a stake to mark the spot, I at first hit what I thought was a root going over the hose.
I was wrong.
It was the hose (looks like a pipe, actually), itself. I pushed the dirt around a bit and exposed more of it.
I honestly expected this to be buried a lot deeper. I was expecting to have to dig a trench to get it out, and was hoping it wouldn’t be too deep. It looks like it’s barely under the soil surface at all!
Which might explain those holes. They are a series of open lines in a row, not a crack. It makes me wonder if someone went over it with some sort of equipment that somehow punctured it.
When we do get around to pulling this up, I hope to be able to bury the replacement at least a little bit deeper! We’ll see how many roots we have to work around, when we do it.
I thought this whole thing was basically a buried garden hose, like the visble section by the house that gets screwed onto the tap, but the part uncovered looks like PVC pipe.
Today may be cooler, but we’re still staying above freezing, and the kitties are just loving it!
I only counted about 16, this morning. As things melt clear and my morning rounds are extending further out, I’m seeing the cats all over the place. The long haired tuxedo followed me all over the place, much like Pointy Baby did – just without actively trying to get me to pick him up and carry him!
I miss Pointy Baby.
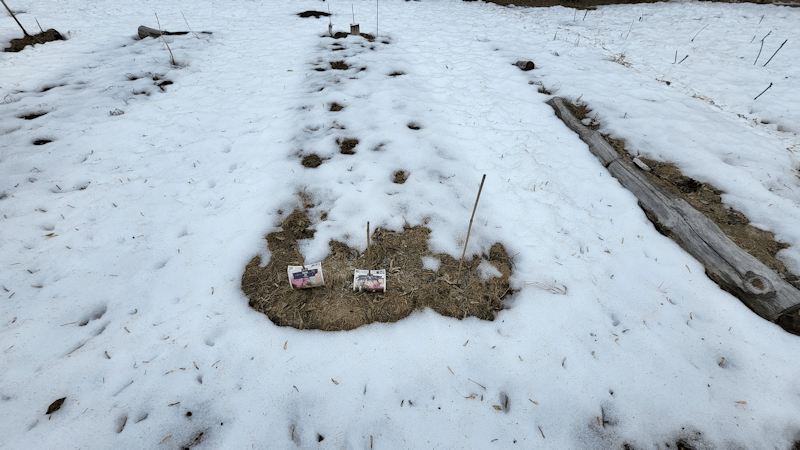
The berry bushes we planted last year are almost completely uncovered. That old saw horse with the sticks is over the highbush cranberry the deer kept eating. I checked the other one and can almost, sorta, see leaf buds starting to form!
The main garden area is still mostly covered with snow. If all goes to plan, the area in front of where I’m standing will have at least a couple of trellis tunnels built.
The garlic bed isn’t quite clear, yet!
The standing water has receded more, so I was able to get to the storage warehouse (which I would really love to reclaim as a work shop again!!) and look around. With not being able to get to the dump as often in the winter, we’ve been storing our garbage bags in the old kitchen, where it could freeze. It’s getting too warm for that, now. We need to build a garbage bin outside that is cat and racoon proof to store the bags until we can make our dump runs. There are pieces of plywood and other random boards in the warehouse. With all my parents’ stuff jammed into there, none of it is accessible. Some of the stacks of boxes need to be moved around, anyhow, as they are starting to collapse and tip. That’s as good an excuse as any to move things around. Some of the plywood sheets, however, are behind a couch, and there are all sorts of boxes and bins that predate us on and in front of it. No matter. We’ll figure out how to get to them. I’d love to get rid of all the bags of clothes in there. They’re not even suitable for donating after all this time, but my mother still insists we don’t throw anything out! *sigh* She’s still all worried that someone might come in and steal her old underwear or something. 🤨
While in the shed, I noticed an old broiler pan that will work as a kibble tray. I don’t know why we’ve been finding broiler pans all over the place – no one ever used them for what they were made for – but they make great kibble trays, so I grabbed it. With a bit of readjusting of things, I was able to reclaim two of the baking sheets I got for carrying transplants around that were being used as kibble trays over the winter. There is still one more, just inside the cat house entry, but I will leave that for now. With the two trays I reclaimed, I’ll be able to pot up the Indigo Blue Chocolate tomatoes now.
After I was done my rounds, I made a quick trip to the post office to see if a parcel had arrived. With so much snow gone, once I was back, I actually went to close the gate! I’m seeing our vandal walking by with his dog on the trail cam more often, so I wanted to have it at least closed. This makes it the first time that gate has been closed since the snow got too deep to keep clear, several months ago.
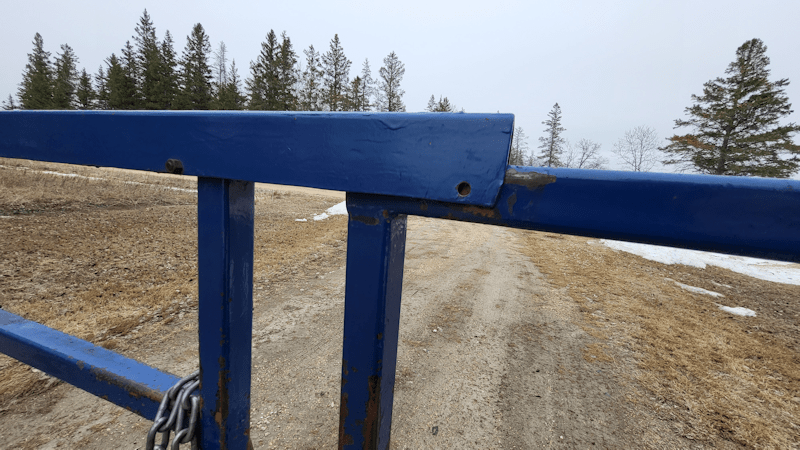
Well, now.
When my brother and I put the repaired gate back up, the two sides were even. That sliding bar holds the two sides closed, and I could put a pin through the pair of holes at the corner, which made sure the wind or whatever didn’t vibrate the bar off the end of the gate. Before winter, it was noticeably shifted, but we could still lift one side of the gate while pushing down on the bar and get the pin through. Now, it’s just too far off! We’ll have to come out with a level and see which gate post has shifted the most. I was thinking the north post was tipping away, but my daughters think the south post is tipping inwards. It could well be both. The gate posts were installed in such a way that they can be adjusted by adding washers to the bolts at the base. My brother had done that when he installed the new hinges that replaced the ones our vandal broke. I’d hoped it would be a few years longer before it had to be done again. It’s been about 3 1/2 years since these were repaired and replaced, so I guess that’s not too bad.
The main thing is, the gate is now closed! Without being able to put the pin in the sliding bar, the chain is extra necessary to make sure they don’t swing open on their own. We’ll also have to touch up the paint a bit. I think I still have a spray can of it around. I’ll have to think about what I can put around where the chain and bar is damaging the paint so quickly.
Things are going to stay colder over the next 10 days or so, with daytime highs just above freezing and overnight lows dipping several degrees below freezing. We’re also getting smatterings of rain. I’d say it’s a good thing we didn’t plant those carrots, even if we did have the plastic to cover them until they germinated. I don’t mind, though. It means things will continue to melt and be absorbed by the ground slowly. I rather like not having to wade through giant muddy puddles to get to the garage. It will give us time to work on other preparations.
I’m just thrilled to be able to get outside and get working again, even if it’s just a tiny bit at a time!
She looks ready to have a litter any day now! Way, way too early!
Meanwhile…
Looks like my tax return is not going to be used as planned.
We had some issues with the toilet being partially clogged yesterday, but I was going to fight with it after my older daughter had her “morning” shower (she works at night). I did decide to go into the old basement and check the well pump and pipes, just in case.
The first thing I saw was a bit of damp near the sump pump reservoir.
There shouldn’t be any moisture there, this time of year.
Then I heard the dripping.
We have water dripping from under the bathtub.
Pretty much since we’ve moved here, the hot water tap in the tub has leaked while in use. It has gotten worse over the years. When we had the plumber here to auger the drain pipe to the septic tank, he also took a look at it for us. He thought he could fix the taps, but I’d like to replace them, so we got an estimate of about $400 for that – and that’s with us buying the replacement faucet set. He mentioned replacing it with the kind that is one lever rather than two taps to control the temperature. None of us like those things, and I’d want to replace it with basically the same style that’s already there. I told him we’d likely buy the faucet set ourselves, so the estimate did not include that. This was a couple years ago, so I would expect it to be higher, now.
The problem is that he’d have to take off the tub surround to access it – it can’t be reached from the other side of the wall, and the last time they were replaced, it would have been done from the front. The tub surround is one of those inexpensive 5 pc surrounds, where there are three flat pieces, then the corner pieces with moulded shelves. With our incredibly hard and iron rich water, it all looks like crap. No amount of scrubbing can get these clean, just like we can’t get the iron stains from the leaking tap completely off. So I have no problem with replacing those completely.
But if water is getting through enough to leak into the basement, the problem is not just the tap. It is likely the degrading caulking, too.
Which leads us to another issue.
When we finally got an indoor bathroom, my dad choose to cover the walls with bathroom panelling that was made to look like tiles. This was in the early 70’s, and there are areas of it, like behind the sink, where the panelling has been water damaged. The tub surround is mounted on top of the old panelling, which means there is caulking behind the caulking around the tub.
Chances are, the old caulking is also degrading, and the paneling under it may be molding or rotting. We won’t know until we take the surround off.
If we do end up having to replace the panelling behind it, we have another question.
What’s behind it?
Two of the walls are the original log walls; one is still exterior, while the other now has the sun room on the other side of it. The third side is the interior wall between the bathroom and my husband’s bedroom.
What we don’t know is of the panelling has something behind it, or if it was nailed directly to the log walls and joists. I know in the “new” part of the house, the panelling was nailed directly to the one long wall, and I’m pretty sure they were nailed directly to the joists on the other walls, with nothing between them and the insulation. But I’m just guessing on that, based on what little I can see from the places where the panelling has started to warp.
Talking about it with my daughters, they are suggesting not going with another tub surround at all, but to tile it, instead. Which would indeed be preferable! But is that even an option?
So right now, we’re looking at, I’m guessing, $500 for the plumber. Inexpensive tub surrounds like what we have now cost from $250 – $275 – or we could get just the flat panels for about $67 each (we’d likely need three). I have no idea at all how much it would cost if we tiled, instead. Depending on the size, they can be a couple of bucks each, or are sold by the square foot. Plus the backing material that would replace the current wall panels, plus the grout…
Then there’s the cost of the taps and faucet set (even the faucet is so encrusted in minerals, it’s affecting the seal on the shower diverter). I’ve looked around and did find a set that’s like what we have, at only $100 – and that includes a shower head. We just got a new shower head for our hand held shower, but having a spare is never a bad thing.
So…
I guess I’m not getting glasses again this year. We should, at least, still be able to get my younger daughter her glasses, since she can’t wear hers at all anymore, and her sister has offered to help with the costs as much as she can. She needs to do her taxes, too. Last year, she did them and ended up owing money – only to have it paid back, plus a return, a month or so later!
And no. We are NOT going into the funds being set aside for the replacement vehicle. That’s just not an option.
*sigh*
Well, at least this is happening at a time when we will have the funds to pay for it. The main thing is to get it fixed before water damage gets worse. The last thing we need is for the tub to fall through the floor into the basement! It would land right on the well and sump pumps.
Sunday is normally our day of rest, though of course work still needs to be done. Today, however, is going to be more of a day of rest than I’d hoped. We had rain overnight, and everything is still wet, so finishing the mowing is out. We’re also still getting all sorts of weather warnings, from severe thunderstorms to high water levels from rain falling elsewhere. At least we’re not getting tornado warnings in our area.
The garden, at least, if finally seeing some grown spurts. I’m most happy to see how this bed is doing.
That Kulli corn has been staying small for so long, I was starting to be concerned, but it is finally kicking in. I hope the beans planted with them are helping!
Hungry kittens are brave kittens! Nice to see them actually inside the kibble house, instead of hiding under the cat house.
There was an unexpected harvest this morning. Just a tiny one.
I checked on the wild strawberry patch, and could actually see the red berries from a distance!
The berries are so tiny, they are hard to pick! Many were already over ripe, but there are still lots of under ripe ones. This is the most we’ve seen since we found the patch while cleaning out the maple grove.
At some point, I would like to prepare a bed for them and transplant as many as I can, so they’re not fighting with grass and weeds to grow.
While moving things over to the burn barrel, I found another surprise in the branch pile.
One of the other litters of kittens has emerged! I had no idea there was another litter of kittens in this branch pile. Definitely the largest litter we’ve seen, too. There are six of them.
So adorable!
The cats are going to miss this pile of branches when we finally get it chipped!
We got another, far less pleasant surprise.
Our first spring here, one of the things that suddenly gave out was the drain on one side of the kitchen sink.
Well, the other side has finally given out, too. I heard some dripping a couple of days ago and asked my daughters to check it for me, as I can’t get under to look properly. My younger daughter found where it was leaking. When examining it from below, she was actually able to push the whole thing upwards!
So today, I’ll be making a trip to the hardware store to get the kit to replace it all. They open in about half an hour, so I’ll be heading out soon. At least we know, since we’ve already had it happen before, what we need to fix it! :-)