This and that

You know, I’m really glad we’re having such a relatively mild winter right now. The past two years, it got so cold, we had issues with the vehicles and were basically stuck at home. This year, I’ve had to do more unexpected running around than I’ve done in months!

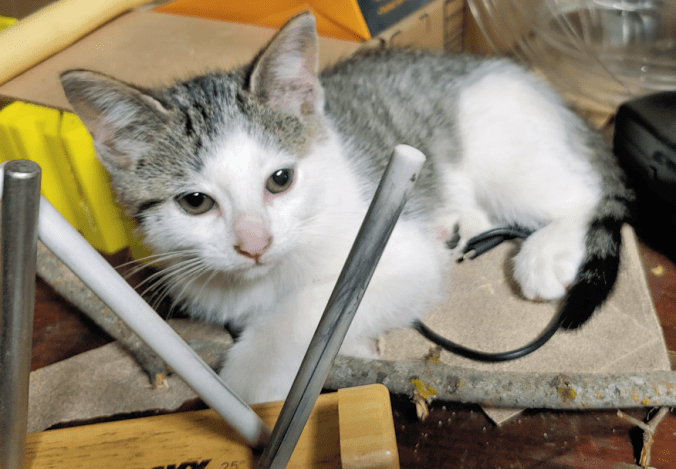
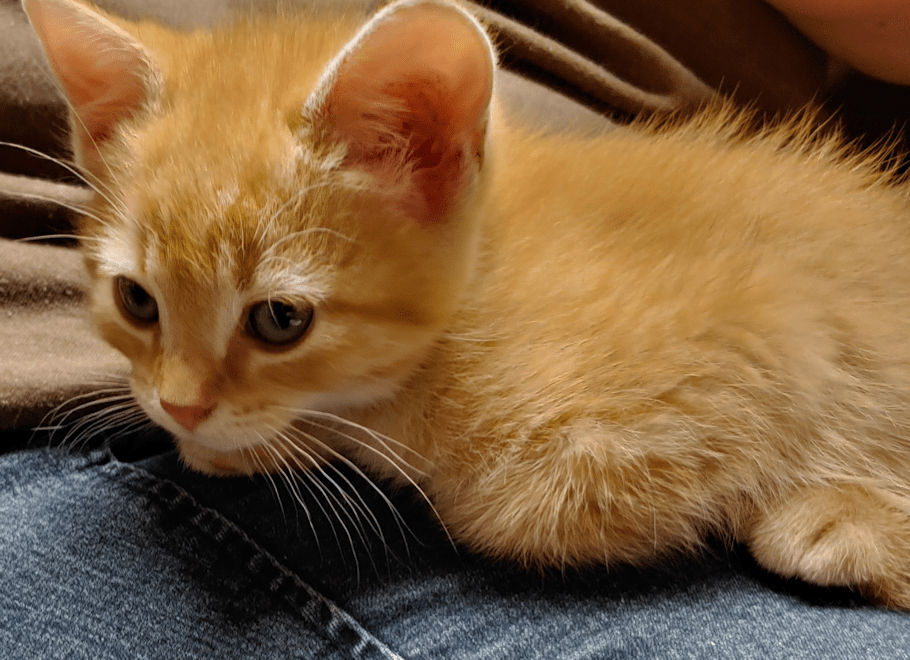
But first… some cuteness!

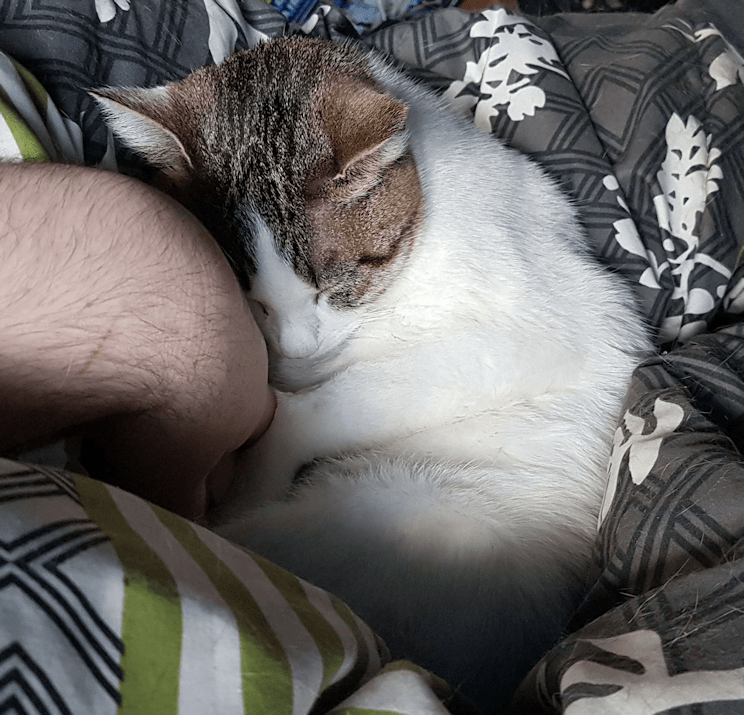
Tissue’s recovery continues, and she is absolutely thrilled to no longer be in isolation in my office. She has been almost non stop cuddling my younger daughter, or sleeping on her bed, or both at the same time! About the only thing giving her issue right now is the dead skin coming off her frost bitten paw pads, which seem to be itching her a bit. No signs of any infection or other potential issues.

My daughter has been working on an interesting project of late. When my late brother was in his teens, or even just under his teens (being the youngest, my time-scale memory is a bit off!) he had carved a wooden ship. When we moved out here, it had been sitting on top of the closet in the entry for several decades, at least. When the cats started jumping up there, we took it down to protect it from damage.

There already was some damage, though. A piece broken here, other pieces missing there.

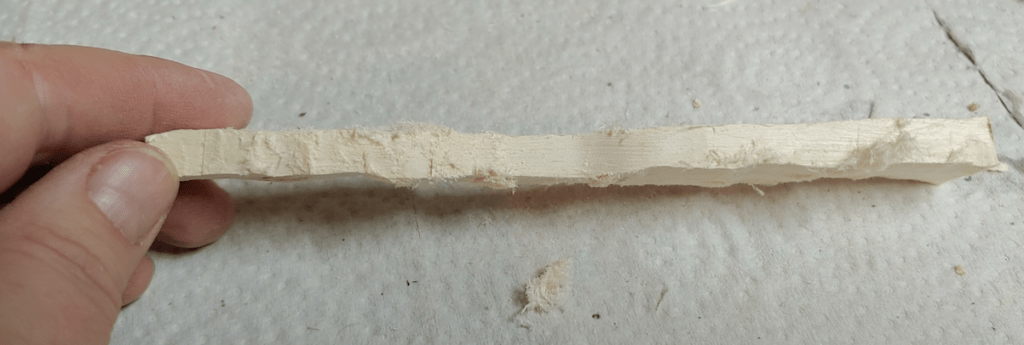
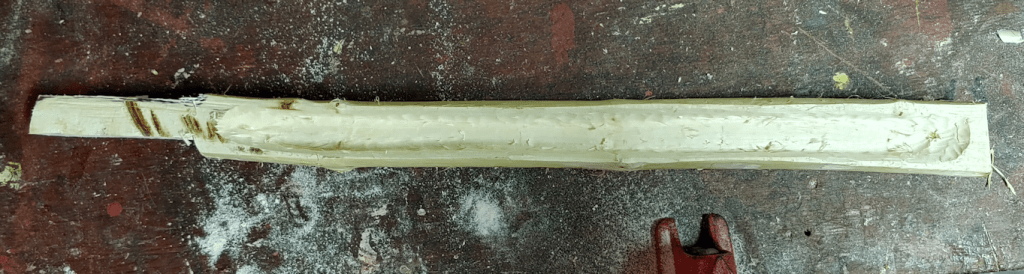
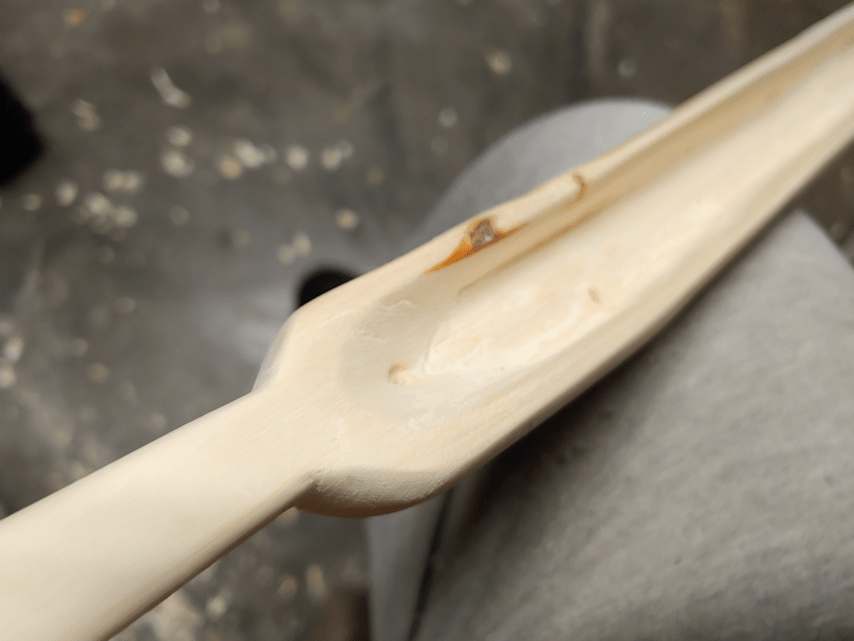
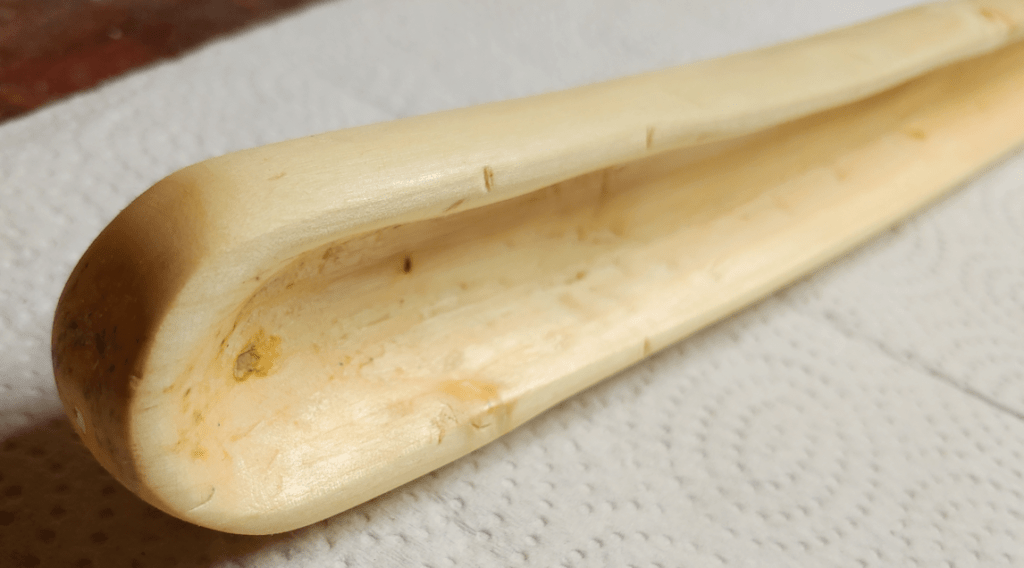
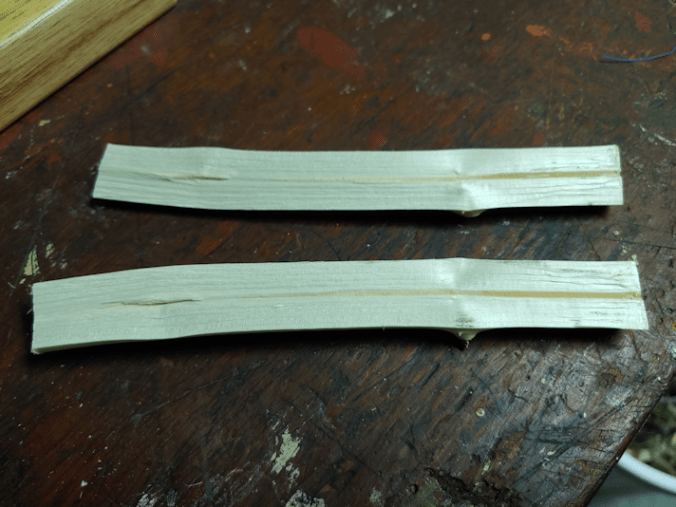
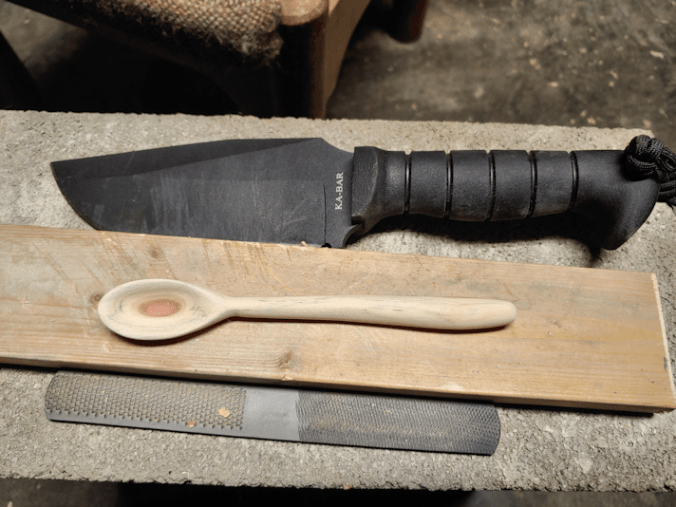
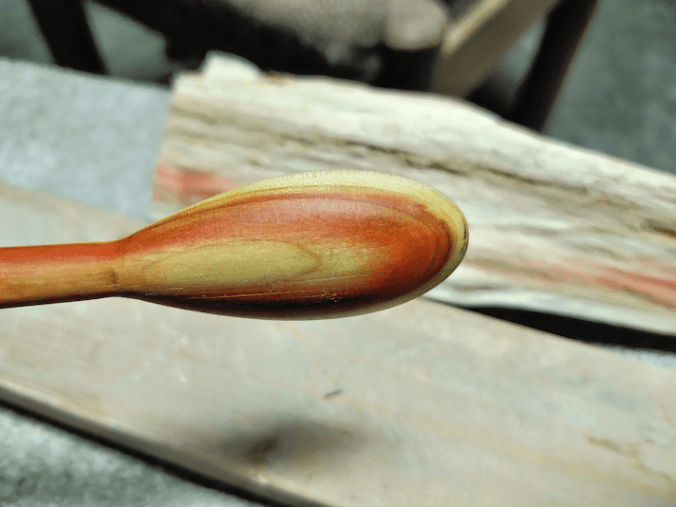
My daughter has spent the last while cleaning up years of dust and dirt, sanding it, and starting to repair it. Among the missing items is one of the small boats on the deck. She’s been using my wood carving kit and some maple we had in the basement to carve a new one.

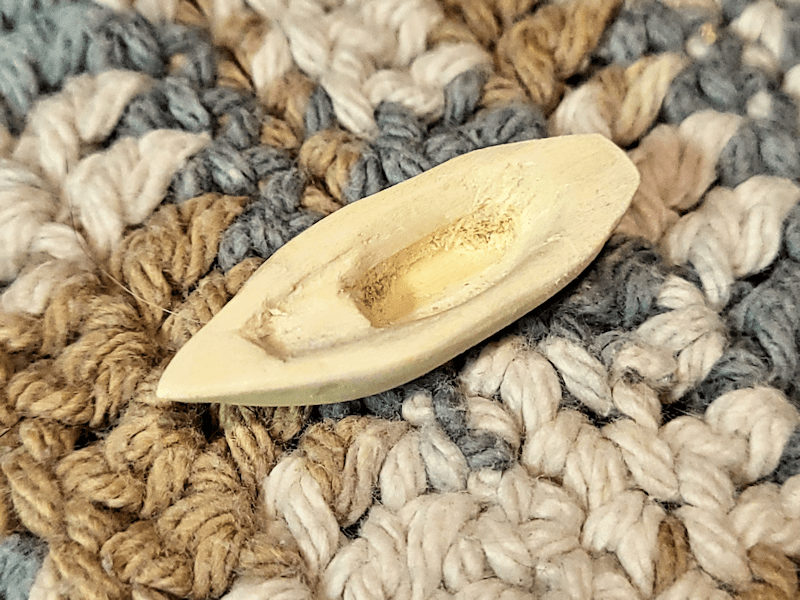
Not an easy job, considering how tiny it is! It’s the same length as the others, but slightly wider.

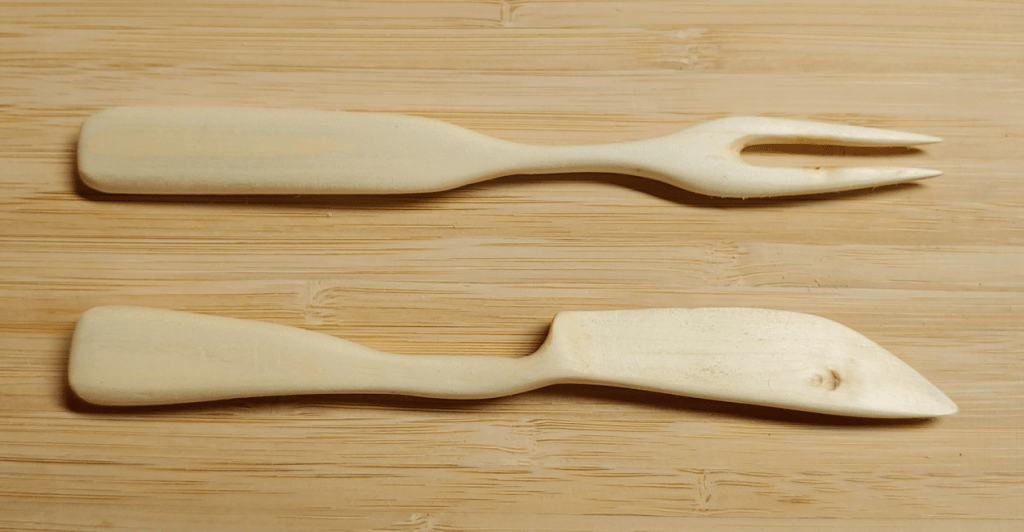
Next, she’s going to carve a couple of cannons to replace the missing ones, and figure out how to repair/replace a couple of yards and topsails. She’s doing a really great job of it! I think her uncle would have been quite pleased. 😊

In other things, I ended up going to my mother’s today. She phoned me a couple of days ago to tell me her TV stopped working, but told me not to come over to check. Yesterday, my brother had called her and tried to talk her through finding the power button the the TV, so she would at least test to see if it was the TV that was the problem, or the remote. She couldn’t find any and kept saying it was too dark to see, etc., much to my brother’s frustration.

So this morning, I called and told her I’d be coming over to check the TV. I’d already offered to help her with groceries or whatever she needed, the first time she told me not to bother coming out. Today, she started telling me that she was okay with no TV, it was giving her more time to herself, and watching too much TV wasn’t a good thing. I told her, just because you have it, you don’t have to watch it (speaking as someone who completely forgets we even have a TV! 😄). Oh, but it’s a temptation! True enough, but I told her I was coming over, anyhow.

I was going to pick up lunch before getting there, but when I called, she was having a very late breakfast, so told her I wasn’t going to bother. I then got a lecture about how it was wasting money to be buying take out, and how it’s so much better and cheaper to cook our own food. I told her, I eat my own food all the time. This is a treat. I’m allowed to have a treat!

Then as we talked about her TV again, she started saying she could just buy a new, bigger one, because my brother had suggested she would enjoy a bigger TV. Or, as she put it, he told her she should get a bigger TV, which I know full well is not how he’d said it. He just thought it would be easier for her to see what’s on the TV from her chair with a larger screen. Her TV isn’t much bigger than my desktop monitor.

I told her that buying a new TV when the problem might be as simple as needing new batteries on the remote would be an unnecessary expense. Oh, I can do what I want, she tells me. I just had to laugh and pointed out that she was just lecturing me over “wasting money” for buying food, while buying a new TV over what might be just dead batteries in the remote would be an even bigger waste of money! Let me at least come and check it, first!

So that was arranged. I came over and the first thing I did was see if I could turn it one manually. My brother had even sent me an electronic copy of the user’s manual, so I had some idea of what to look for. The manual was for several models, so there could be anywhere from 4 to 7 buttons. For her TV, I was expecting four – input, volume up, volume down and power – and I first checked where my brother had been asking my mother to look.

No buttons.

The other corner?

No buttons.

The top? Underneath? The back?

No buttons.

I changed the batteries on the remote and tried that.

Nothing.

I kept looking for buttons. The closest I could find was a button in the recessed area next to the cables that was labeled “source” and had the power button icon beside it.

It did nothing.

I picked that thing up and was flipping it in all directions to look.

No other buttons!!

It’s so bizarre!

I ended up unplugging it, plugging it back in, and trying again with the remote.

Once that was done and I sent messages to update my brother, I again offered to go to the grocery store for her. Because she’d told me she didn’t need to go to the grocery store before, I’d gone over in our van, which still has the summer tires on the back and nothing else. It looks like we aren’t getting financing (still no word one way or the other), but we haven’t put our stuff back in the van yet, but I could still pick up some milk and bread or something for her.

She had a shopping list she’d made, since I was coming over anyhow.

She also decided she needed to do the shopping herself.

If I’d known that, I would have used her car!

We did remember to grab her little stool, so she could get into the van more easily. She also decided to just use a cane, not her walker, to get to and from the van, since at the grocery store she uses the shopping cart as a walker. I wasn’t too happy with that, and could have at least rearranged the tires to make room for her walker, but she insisted.

She did okay but, towards the end, her knee almost gave out. Next time, I need to insist on bringing that walker!

She ended up doing a rather large grocery shopping trip from her usual. So much for not needing groceries!!

Meanwhile, I heard back from my brother. He bought this TV from her not long ago, and it should still be under warranty, but since she wants a larger TV, he’s going to pick one up for her and bring it out, then take her current TV home to see if he can find what’s wrong with it – or return it.

He is such a good man. She treats him so horribly, and he still goes out of his way to do super nice things for her! He’s only been back in the province for a few days, too.

At least now we do know it wasn’t just the remote needing new batteries!

Meanwhile, I’m going to have more running around to do tomorrow. We’re going to have to get those tires out of the back of the van and make a much delayed trip to the dump.

I do wish we’d been able to get that Escape. Ah, well. We’ll manage.

The Re-Farmer

(edited for typos: many thanks, MP!)

A sweet gift

My younger daughter has been slowly working on cleaning up the spring moisture mess in the basement for the last while, but also just being down there to stay in the cool.

Today, I found out she has been having fun with my wood carving tools, which I have not been able to use myself for quite some time. Her first experimentation was to finish off a fork I’d started some time ago, but stopped because the wood really sucked to work with. This is her second project, and her first made from scratch.

She make a shawl pin for me! Something to use to keep my reading jacket closed, instead of the hair pins I’ve been using.

I absolutely adore the teeny little frog she carved into the top!

What a fantastic job she did, and I absolutely love it!!

The Re-Farmer

Wood carving: completing the set

Having made an olive server, using my new gouge, I thought it would be good to use some of the remaining wood to make a spreader and olive fork.

After cutting a length off, the first thing I did was split the wood down the middle.

Here, you can clearly see the rotted out core that I had to work around with the olive server.

The utensils I wanted to make would be well away from that core, though, so this was okay. I split off some excess wood from the opposite sides, then debarked the remains.

In sketching out the spreader and fork, I decided not to include the knot at one end. It may have added visual interest, but I just didn’t want to fight with it.

Once rough sketches were made, I rough cut away excess wood. A band saw would make the job easier, but I don’t have one that works, so I made do with a little Japanese pull saw that I got last summer, and a coping saw. The coping saw has been a problem, as it won’t lock at the handle end anymore, so it tries to rotate while I’m using it!

For the spreader, I added another rough sketch on what would become the top. I wanted a slightly wider bit at the start of the spreader blade as a sort of stopper, more for visual interest than anything else. I wasn’t too worried about matching the sketch closely, since it would depend more on how much I had to cut away from the core of the wood.

Next up was using carving blades to do more shaping and trim away excess wood at the core, to take out that rotten strip.

Then I broke out the Dremel.

After trying out different tips, I ended up just using the sanding tips. They are a course grit and did a good job of taking off the excess wood, grinding away the remaining saw cuts, and shaping it more.

Then it was back to the carving knives for more delicate clean up and shaping, then sanding.

Ready for oiling!

That knot in the blade was why I switched to the Dremel. I like how it looks in there, but my goodness, it was brutal to work around!

Next, the olive fork.

For this, I just went straight to the Dremel and used the sanding tips to rough shape it.

I then used carving knives to clean it up and work on the tines end to narrow it down even more. Once it reached the point where I would otherwise have started sanding, I made the tines.

My Dremel set includes tips for carving and engraving, and I used one of them to drill a hole where I wanted the tines to join. Then I used a cutting wheel down the length of it.

There was a knot right in the middle. The Dremel cutter did NOT like going through that knot!! 😀

After that, it was back to doing more detailed shaping until it was ready to sand.

Doing those tines was a real pain in the butt!

It actually worked out much better than I thought it would, though.

For both the spreader and the olive fork, I worked my way through increasingly fine grits of sandpaper, finishing with 220 grit. Because that’s the finest grit sandpaper I have.

There they are, ready for oiling!

You can see the edges of the knot that was cut through to make the tines much more clearly, after oiling!

The slightly wider bit on the spreader turned out to be a perfect thumb rest!

When sanding the blade of the spreader, I actually had to be a careful not to make it too sharp. It’s meant for spreading, not cutting! It’s remarkable how sharp a wooden blade can get.

A closer look at the tines of the olive fork.

Then I wiped off all the sanding dust that got onto the oiled surface! 😀

They fit! I had not actually planned this, but it makes sense, since they’re from the same piece of wood, but I’m really happy to discover they fit so perfectly inside the olive server.

I am quite pleased with these. Not only with how they turned out, but how quickly they worked up, too.

Now to think about what to make next! 🙂

The Re-Farmer

Wood carving: testing the new gouge

Lo and behold, I had an open day today! Which means I finally had the chance to do a bit of wood carving and test out the wood gouge I got a month ago.

I had a particular piece of maple from clearing behind the pump shack that I wanted to use. After looking at ideas for a while, I decided to make an olive server. Something along the lines of this.

It took me about 5 or 6 hours, but I got it done! 😀

Photo heavy post ahead! 😀

Here is what I started with.

This is about half the length of the original piece. The length was decided by a bend in the wood. 🙂

I now needed to create a slightly flat bottom, and take about 1/3 off the opposite side to create the top of the bowl.

I used what tools I had on hand, which was this beast of a knife.

We’ve dragged this thing around for many moves! I’ll have to get my husband to tell the story behind it. 😀 It turned out to be perfect for the job. Especially that little sunken in part of the blade, near the handle. It was the perfect width to set at an end of the wood, then I hammered it with a rubber mallet to split off the pieces I needed to remove

Then I used it as draw knife to debark it!

Once that was done, I made a rough sketch on the wood.

The narrower end is where I placed the handle, and I decided to leave a little bit of a “foot” for an extra touch of stability.

Before I started carving, though, I decided I should try and use my new angle grinder to level off the flat parts, take off excess wood, and maybe even shape that handle.

It came with 2 metal grinding wheels. Not wood.

I tested it anyhow, just to get to know the machine. All it really did was leave some marks in the wood. :-/ Ah, well!

Finally, it was time to use the gouge!

This thing is awesome! Oh, my goodness, it cut through the maple like nothing. I could also switch hands with it. I can use my right hand, but I am left dominant. The sloyd knife from my carving kit is for righties. I can use it with my left hand, but it takes some doing, and I still need to use my right hand to control the blade. I did use the sloyd knife a bit, to give my hands a break, since it is held in a completely different way. As I got deeper, though, it just wasn’t possible to use the sloyd knife any more.

Which is exactly why I wanted the gouge!

As I went deeper, I hit the middle heart wood, and discovered it was rotten!

This would not be an issue for the bowl part of the server, since I would be cutting it out completely, but would it affect the handle or the end?

The bowl portion is done!

Along with the gouge, I used carving knives to thin the wood at the top edges, which made it easier to set the gouge to go deeper.

You can see a spot of discoloration at the near end of the bowl. That’s the heartwood. It’s really small, so I’m hoping it won’t be an issue.

The next thing to do was remove excess wood to shape the outside.

I was going to use my coping saw for the handle part, but the darn thing keeps trying to spin on me. So I used a different hand saw, and a chisel to take off the wood under the handle. I almost took off a bit too much, though. !!

The next several hours were spent using carving blades to shape the handle and ends, and smooth out the inside. The handle and the ends were a real pain to work on!

Then it was finally time to sand.

Sanding the inside of the bowl was also a real pain! Getting the curved ends smooth was the worst of it, but sanding the inside in general was really awkward. Still, working my way through ever finer grits of sandpaper, I finally got it to where I was happy with it. It’s a good thing I wanted to keep some of the “rustic” texture in there!

Here it is, all sanded.

It was worth the fight! 😀 I am quite happy with it.

Here’s a closer look at the handle end of the bowl.

Hmm… Do you see that little divot?

That’s the heartwood.

While shaping the handle, I did end up reaching the soft heartwood from underneath, so I was very careful not to expose any more of it.

Oiling the wood should help protect it. Before I did that, though, I made a last minute change.

I decided to drill a hole though the “foot” of the handle, for a hanging cord of some kind.

Finally, it was time to oil it! I use mineral oil, as it is food safe, and does not go rancid.

I love how the oil brings out the beauty of the wood, as well as protecting and preserving it!

Just a couple more detail shots. 🙂

I have since threaded some twin that’s almost the same colour as the wood, though the hole.

I think I will give this to my brother. They may never use it, but I know he and his wife will appreciate it. Especially since it was made using wood from maples I had to clear away to fix the pump shack window. 🙂 A little piece of the farm!

The Re-Farmer

The wonkiest

Today I found myself heading into town for a trip that included a stop at the hardware store. I took advantage of being there to look for some Dremel tips.

The didn’t have the individual tip I was looking for.

I ended up getting this, instead.

I think I’ve got enough tips for quite a few projects, now! 🙂

So, of course, I had to find a reason to use it. 🙂

A while back, I posted about making a maple spoon.

You see that chunk of wood beside it?

That’s what I worked with, today.

This is that same piece of wood, roughed out.

Not for a spoon, though. Today, I was determined to make a fork!

For this project, I used everything I had around to remove the excess wood. The 4 way rasp got a lot of use, but I also used several of my new Dremel tips, the big K-bar knife, and a couple of my fine saws.

Basically, I see no point in dulling the blades on my carving knives any more than I have to! 😀

I saved cutting the tines for when I was ready to start using sandpaper on the rest of it.

I used a carving knife, as well as a fine tip on the Dremel to shape the tines.

Unfortunately, while sanding them, the wood broke off the tip of one of the inside tines.

Which meant I had to shorten all the others to match.

Here it is, after sanding.

The end result is the wonkiest of forks!

But it’s still a fork. 😀

Here is it, after oiling.

Oh, gosh, it’s the funniest looking fork, ever! 😀

Here it is, next to the spoon made with the same wood.

The spoon could use another coat of oil!

Well, I at least accomplished what I set out to do. Even if it does look totally wonky!! 😀

I still have wood left from the piece I used for these. I suppose my next project should be a knife. 🙂

I’m looking forward to it!

The Re-Farmer

Maple spoon; an unexpected experiment

Today was another hot one, which made it a good day to finally go into the basement and see what I could do with the various pieces of wood I’ve brought down there.

Since getting my wood carving kit, I haven’t had much chance to make things with it. I used the spoon blank it came with for my first attempt. Then I used some of the lilac wood pieces to make a hair pin for my daughter. I have since made a longer, plainer lilac hair stick for my daughter, and tried to make one out of cherry for myself.

I say “tried” because when I got a bit decorative at the thick end, it ended up breaking, twice. The inner core of the piece of cherry I was using was rotted just enough that when I tried shaping the wood, it was just too weak. This was true of the lilac wood, too, but I hadn’t tried to carve anything that would affect the integrity as much, so they were fine.

Today, I wanted to make something with some of the maple pieces from the tree I had to cut part off, earlier this year, so it would be safer for my brother to move around on the shed roof he was patching.

I had a branch of it set aside, waiting for a day like today, and I cut a short piece to work on.

I was thinking of going very simple, and making a spreader or something like that.

Thinking of the lilac and cherry wood, though, I decided to split the piece and see what it was like on the inside.

Well, crud.

I’m not going to be able to make a spreader out of that.

So I cut a piece from a larger branch I had set aside.

Dangit!

I really hope it isn’t all like this. The stuff I want to make uses the heartwood. For the larger pieces, I’m thinking of cups or bowls. Stuff I plan to actually use.

In fact, there was a particular piece of dead maple I’d found while cleaning up the maple grove, I think in our first summer here, that I was looking forward to using.

It doesn’t look like much on the outside, but when I cut it, this particular maple had red rings inside it.

I cut a piece off the end and took a look.

That does not bode well.

So I split it.

*sigh*

Yup. The middle is rotted.

However…

What about the edges? The parts with the red it in still looked solid.

So I split it again.

It did not split well, but the wood did seem pretty solid. Could I do something with this?

I wasn’t sure.

Over the next hour and a half or so, I hacked at it with a giant knife (which I’ve been using in lieu of a hatchet), decided to try the sloyd knife to carve out a spoon bowl, gave up on that and tried the Dremel (the two different tips I tried did the job, but the friction actually charred the wood!), finally broke open my new set of rasps and used a bar rasp with 4 different surfaces, and yes, even the carving knives.

Part way through, I dragged one of the chimney blocks from the old basement to use as a lower, solid surface. Especially for when I was hacking away with the big K-bar.

So that hunk of wood up there?

This is what I got out of it.

I didn’t stop to take any photos while I was working on it because, to be honest, I didn’t think it would work!

So here, I am at the stage of using my coarsest grit sand paper.

As I moved up to finer sandpaper, I would sometimes use my little vice.

You can really see the gouges left by the rasp. The vice made it much easier to just use a narrow strip of sandpaper around the handle and pulling back and forth.

Working my way through ever finer grits of sandpaper took probably another hour and a half.

Sanding the inside of the bowl was the most difficult. While I could use the curved sloyd knife a bit, the wood was really too small for the blade. What I really needed was a wood gouge, but I don’t have one. So that’s where the Dremel came in handy, to get the bulk of the wood out of the bowl, but I still had to cut out the bits that charred from the friction and shape it. I ended up using the other carving knives more than the sloyd knife, because of that.

Here it is, after final sanding.

You can see on the scrap wood, where the knife was hitting while I was chopping away the excess wood on the spoon. 😀

I also included the bar rasp, to show the different surfaces.

Of course, I just had to get a picture of it next to a piece of the wood it came from.

I still can’t believe I was able to get this out of that chunk of wood!

As I was sanding it, I noticed black showing up in the non-red parts of the wood.

Having done my research before I started with my first attempt at carving, I recognized it as spalting. There are people who go out of their way to use spalted wood. It’s basically a sign of the wood’s decomposition.

It was very faint as I sanded, but how would it look after being oiled?

And how would that red show up after being oiled?

Let’s find out!

Wow!! What a difference!

I could have cut this part out, but I kind of like it.

Unfortunately, I find the spalting makes it look like it’s dirty. 😦

On the back, you can still see some of the roughness of the would that I didn’t quite get rid of completely. They look a bit like scratches on the lower part of the spoon. The part that became the outside of the spoon bowl had some chunks missing from how the wood split. It meant less excess wood to remove in that area, at least.

So this experiment was a lot more successful than I had dared hope! Not only was I able to get something out of a partially rotted piece of wood, but I was able to start and finish a spoon in one sitting!

One of these days, I want to try making a fork. 🙂

The Re-Farmer

Wood carving: lilac wood hair pin

I am actually not sure I would even call making this hair pin “carving”! I used the natural shape of the piece of wood, and just sort of whittled away a bit. The wood was already very close to the size needed.

I didn’t take a “before” picture, but you can see what the branch I’d cut the piece from in this photo.

It’s being grasped by Nicco. 🙂

Though the wood is from a branch that broke off in a storm more than 6 months ago, the bark was surprisingly green as I whittled it off. I think the humidity in the basement might actually have something to do with that.

Here is the finished hair pin, before oiling.

I cut the piece above where it branched off, to take advantage of the angled shape. You can see near the point, where there had been another bit of twig growing out.

I used the Dremel and the engraving tip to create the holes, so my daughter can use them to hang dangle-y bits. The natural hole at the end was where another twig had been growing out, and I included it, without trying to sand out the roughness, just for interest.

The tiny knots from the twigs where the only thing that made it more difficult to work on.

After general shaping with a carving knife, I used the tiny engraving tip on the Dremel to make the holes, and a small drum sander tip to get into the bends, where it was more difficult to safely get into with a knife. After that, it was must a matter of sanding it smooth.

Here is how it looked after oiling.

I love how the oil brings out the details in the rings.

The whole thing, including time spent playing with kittens instead, took about 2 hours.

My daughter loves it!

I’m really happy with how this turned out, and how quick it was to make! I hadn’t thought of making hair pins (which can also be used as shawl pins), but they are prefect for some of the smaller pieces of branches. I think I’ll be making more of these!

The Re-Farmer

Carving progress: it’s finished!

I am happy to say that I have finally finished my first attempt at carving!

Yay!

My trip into town was successful, in that I found a teeny tiny tip for my Dremel.

Saffron made sure to check it out, too!

I discovered something when I went to put it on my Dremel, though.

It didn’t fit.

The shaft is too small. By maybe a millimeter!

Well, it’s an engraving tip, and I have an engraving tool, so I got that out.

That one was even worse!

What to do? I wasn’t going to take it back. Not only did I have to destroy the packaging just to open it, it was the ONLY tip they had that was small enough for what I needed.

Painters tape to the rescue!

I got it on, and it was secure. Perfect!

After making a few practice passes on the piece of lilac I’d practiced the carving knives on, I started using it on the morel.

This is how it looked, immediately after I finished (and you can see the tape that allowed the tip to fit). I was really happy with this tip. It was exactly what I needed for the job. If anything, I would have gone even smaller, if I could!

While certainly better than the carving knives, it was still rather messy. Sanding it did take care of some of that.

I have sandpaper only up to 220 grit, which is adequate for the job. No way to get into the holes, though, which is okay. I wasn’t done with it.

The next step was to break out the wood burning kit. The kit has a very fine pointed tip that I used to burn inside each hole in the morel. This allowed me to also burn away any ragged bits.

Once the insides of the holes were done, I could use the side of the tool to burn the flat surfaces.

Here is how it looked, once done.

The only thing to do after this is to oil it!

Two Face decided to “help”. 😀

Here is the completed spoon.

For the mushroom, I basically poured the mineral oil over it, to get into all the crevices, then used a paper towel to apply oil to the rest. At this point, I will let it sit for a day or two, then see if it needs more oil. I’ve seen sites that recommend putting small things like spoons into a slide-lock bag with oil, making sure the air is all squeezed out, and the item is in contact with oil all over, then leaving it for several days. I might try that with future projects, but I think just a light coating of oil is adequate for this one.

I am really happy with how this turned out!

I feel much more encouraged about tackling some of the wood I’ve salvaged lately. 🙂 I think my next projects, though, will be spreaders.

No bowls to hollow out! 😀

The Re-Farmer

Spoon carving progress

Today, I got some really good progress on my practice carving, using the spoon blank that came with my carving kit.

Also, the basement is nice and cool. 🙂

I was down to cutting the last few divots out of the morel mushroom on the end of the spoon, so that didn’t take long. I also tried to deepen the bowl of the spoon itself.

Working on the inside of the spoon is a challenge. The tip of the sloyd knife kept gouging areas I wasn’t working on. The direction the wood grain is also means that, in two spots opposite each other, the wood did not cut as well or as smoothly, leaving more gouges, no matter how carefully I tried to follow the instructions from the various videos I’d looked up for beginner carvers.

The rough shaping of the outside of the bowl and handle are… well… rough. LOL

Here is how it looked, after I finished with the carving tools. The next step, was to “cheat” and use my Dremel.

I have a Dremel engraver, which I tested out on the divots of the morel. That did not work at all, which is really what I expected. I figured it was worth a try, though.

Also, that thing is incredibly loud, and scare the crap out of the kittens and Beep Beep!!

The other Dremel I have is a basic low end rotating tool. (The engraver doesn’t rotate, so there is nothing interchangeable about them.) I used a drum sander to smooth out and shape the bowl and handle.

This also took off more of the excess wood to add more shaping.

For the details in the morel, I’m going to have to pick up a fine, abrasive tip. None of the tips that came with my kit are remotely close to being usable for this.

I decided on a swoopy handle, just for effect, but it has turned out to be a great thumb rest. It fits remarkably comfortably in the hand.

This is after sanding the spoon with three grades of sandpaper. Unfortunately, even the edges of the sandpaper tends to leave little gouges inside the spoon’s bowl.

I also had an unexpected issue to deal with, though not a surprising one. The humidity is so high in the basement, both the sandpaper and the wood itself was affected. The wood dust had a tendency to clump up. It wasn’t too much of a problem, but I think it affected how well the sandpaper was able to do the job. Some things actually work better with wet sandpaper. This is not one of them! 😀

This is now it looks after I stopped for the day. After I get a new Dremel tip to finish detailing the morel, I’ll continue to sand with finer grades of sandpaper, singe the morel to add colour, then finish with mineral oil. I did some searches on food grade oils for wood, and it basically came down to mineral oil. Other oils recommended are derived from nuts or seeds, and they go rancid over time. Beeswax is something else that can be used, but it can start cracking and flaking and, of course, you couldn’t use it with anything hot (among the things I hope to carve are cups and small bowls).

Once finished, I plan to offer it to my mother, since she requested I carve her a mushroom. Talking to her since then, it turns out she wants a Portebello (she didn’t know the English name for it), but I hope she’ll be happy with a morel for now. I know she likes morels, too. Most likely, she’ll reject it, but you never know. I might get her on one of her good days.

The Re-Farmer

ps: after finishing this, I checked the weather before heading outside. Turns out the temperatures are still going up, and we’re even hotter now, in the early evening, than before!

Yes, I got kitten pictures for you!

I just couldn’t let a day go buy without kitten pictures, could I?

Well, yes, I could, but I don’t want to. 🙂

Our scorcher of a day was finally cooled down by a lovely rainfall – storms will once again go right past us, it looks like – so no chance to make use of the new mower.

*sadness*

😉

So I decided it was a good time to once again do some practice carving on the spoon blank that came with my carving kit.

Which meant spending lots of time with adorable little furballs with sharp, sharp claws.

They were determined to use me as a bed, after using me as a jungle gym.

Even Beep Beep got in on the action, clambering over her babies, then lying on her back, going from laying with her head in my elbow to licking my nose enthusiastically! 😀

Apparently, I tasted good today, because all the kittens were after my arms and fingers. It might have something to do with the ham I had with lunch before coming downstairs.

It was pretty rough and tumble, with Beep Beep moving around and pushing her own kittens around before giving up and moving on.

Eventually, a daughter was able to come and rescue me.

Big Rig REALLY liked that glove.

Yes, one is missing. Nicco snuggled with Beep Beep on another chair until Beep Beep took off.

Once the kittens were extricated, I went back to trying to carve, only to have them return. Which was okay. I can continue to carve with a couple of kittens on the table in front of me.

Yeah, my arm is a mess! When Beep Beep was shifting around, she pushed Big Rig off my arm. She grabbed my arm as she fell and was dangling there for a while before she was able to scramble up.

Yes, it is all cleaned up and treated with antibiotic cream.

Saffron is just adorable! Turmeric was content on my lap for a while.

It didn’t last, of course.

They certainly do make things interesting!!

I did, at least, get some progress on that spoon! 😀

Unfortunately, there was other damage.

From the other cats.

At one point, I had two kittens in my arms and three on my head and shoulders, when we heard a loud crash above us. The three kittens exploded off my shoulders to the ground. The two in my arms, thankfully, didn’t panic like that.

Which reminds me. I need to get my husband to check my shoulders for wounds.

Later, as my daughters were on their way from the second floor to rescue me, they found the cause.

One of the cats had knocked over a plant pot with a substantial jade tree in it.

I am not impressed.

After seeing how the jade tree recovered after our move, however, I would not be surprised to see now branches and leaves growing out of that stem.

Assuming the cats don’t destroy it completely, before then. 😦

The Re-Farmer