Gardening progress: transplanting

Today, it was time to transplant some of the squashes we started from seed indoors.

I am really hoping we’re not jumping the gun, here, but many were outgrowing their Jiffy Pellets and really needed to get in the ground. In the future, for things that need to be started so early indoors, I am thinking it would be better to go straight into 4 inch pots, instead. That would give a more flexible timeline for getting them in the ground.

In going through the seedlings to see which ones had their true leaves and were ready to transplant, I counted out 16 in total, so I decided to do two rows of 8. I think most of them – at least the largest ones – are from the zucchini surprise mix, but after the trays got knocked over yesterday, they are all going to be a surprise! :-D
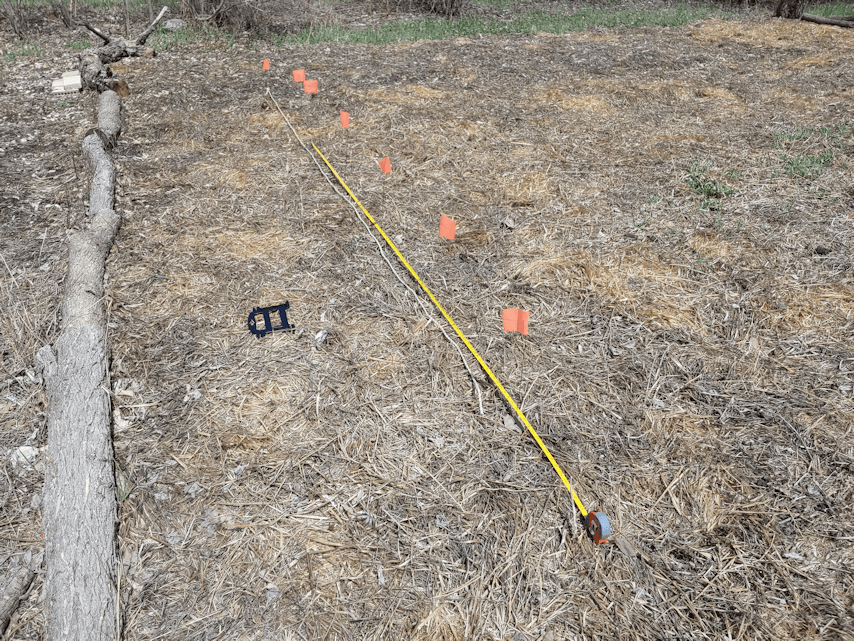
I used flags I picked up at the hardware store to mark the first row at 2 feet apart.

Though we mulched the area last summer, and the soil has improved quite noticeably, we are still dealing with lots of rocks and a soil in need of amendments. Several times, when placing the flags, I hit rocks and had to poke around to find somewhere I could push the wire in. We needed to figure out a way to get around that, and this is what I’ve come up with.
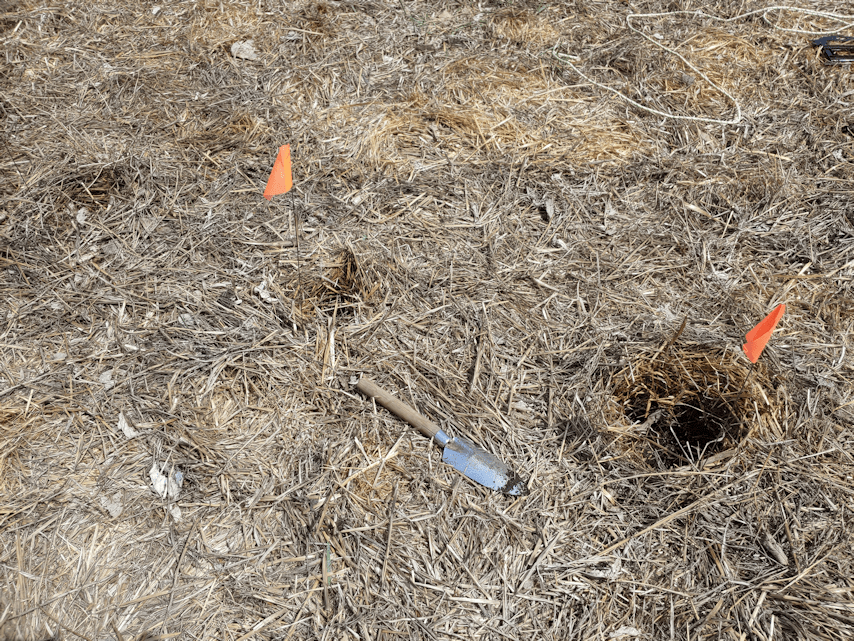
The first step was to open a hole in the mulch to the surface of the soil (removing any rocks I found in the process.

I also prepared a soil mix.
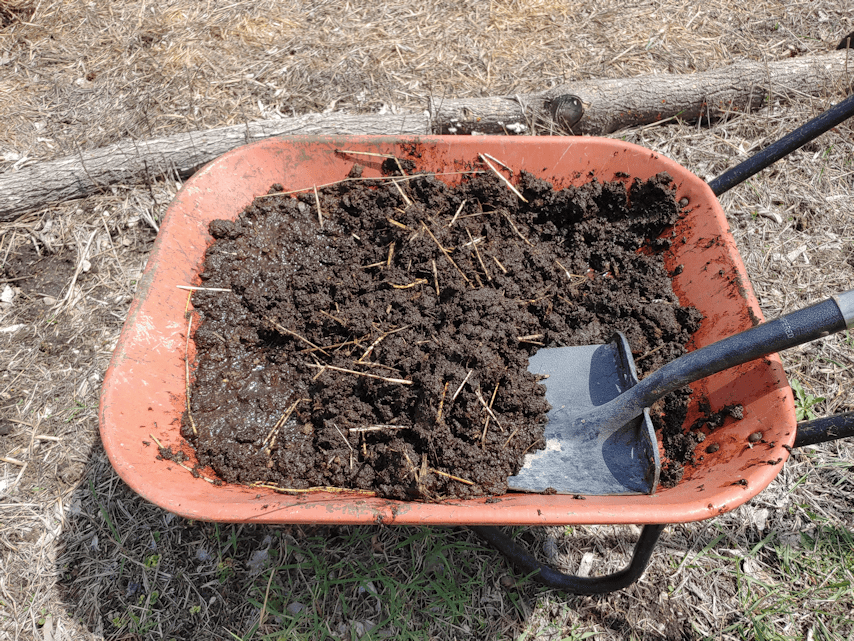
The wheelbarrow still had some straw on the bottom that I didn’t bother taking out when I dumped in a bag of garden soil I also picked up at the hardware store (only because they were on sale! *L*) and a couple of spade fulls of peat. This got mixed together with plenty of water. The dry peat was actually being blown away by the wind while I mixed! It took a while to get it wet enough for the next step.

Into each opening I made in the mulch, I added a spade full of the soil mixture. Then a hole was made in the middle of each one for the transplants, with more water added as well.

Each squash was then transplanted and secured in their own little “hill” of soil mix.

Then I mixed some more soil and peat and repeated the process for the next row, which was made about 2 feet away from the first.

Which was when I discovered I had 2 extra seedlings! LOL So I added them to the ends of the rows, taking a little bit of the soil mixture from each of the other plants, to transplant the extras into. So we now have a total of 18 surprise squashes transplanted.
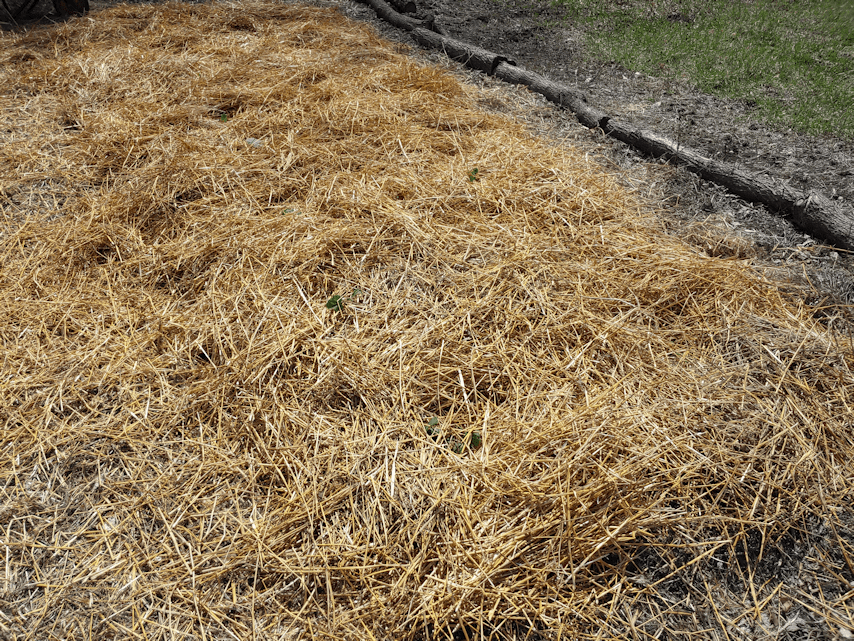
Once both rows were planted, they were mulched with more straw. When we add a trellis, it will go between the two rows.

After the straw was placed – with the wind trying to take much of it away! – I gave the bed a fairly thorough soaking, to dampen the straw. Not too much, as I didn’t want to shock the transplants with cold water in this heat! I will set up a sprinkler over it this evening. Unless the predicted showers make it to our area. It’s been quite a hot day, and the rain will be most welcome.

When I was done and inside the house, I checked the weather. My phone app said it was 18C, (“feels like 18C”) (46F).

They lie.

I checked the app on my desktop and it said we were at 26C, with a “feels like” of 28C (79 and 82F). That was certainly the more accurate one!

Our barometer agrees.
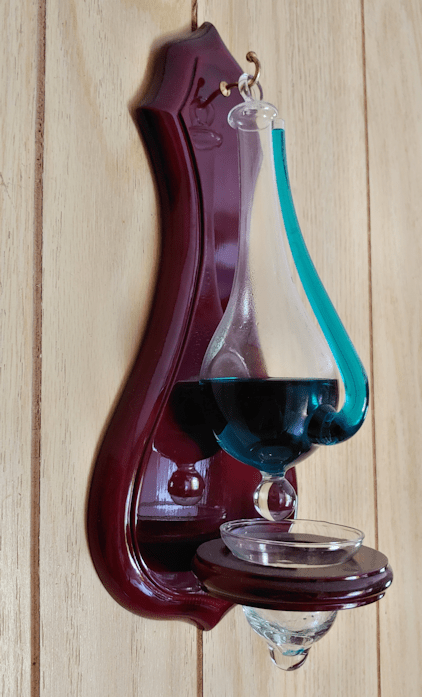
Since we cleaned this out and refilled it, I have never seen it this high!

We had thunderstorms predicted for the next couple of days, but now those have been pushed back to Sunday. Whether the storms reach us is always touch and go, but I’d like to find some way to cover the transplants, if we do. The straw will protect them, but only so much.

Meanwhile, we’ll be keeping watch on what’s left in the seed trays. We won’t be transplanting as much as we hoped, but right now the only thing I’d say is a total loss is the fennel. I still have hopes for the gourds to emerge! Not that I’d be able to tell which ones they are at this point. :-D

Still, I hope we’ll have a couple more rows of squash in this garden bed by the end of the month. Tomorrow, however, the plan is to get the sunflower seeds in. :-)

We shall see if planting them in their own little islands of soft, stone-less soil will work!

The Re-Farmer

Smiles for the day

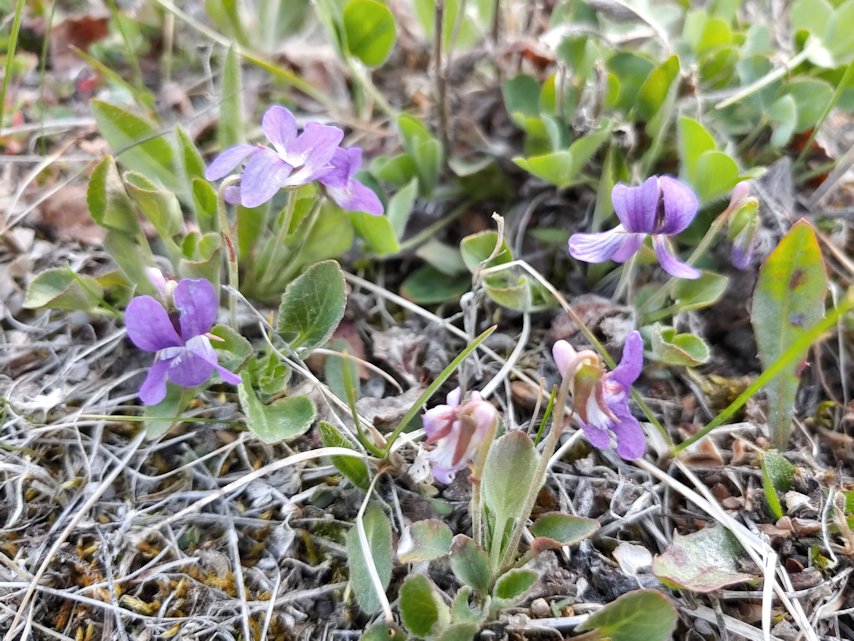
While walking around the far end of the old garden area, I found these little splashes of colour.

Such tiny little wildflowers! They were all over an area that is to dry, hardly anything grows there, and what little does manage to grow there, stays small. It’s nice to see what manages to survive there!

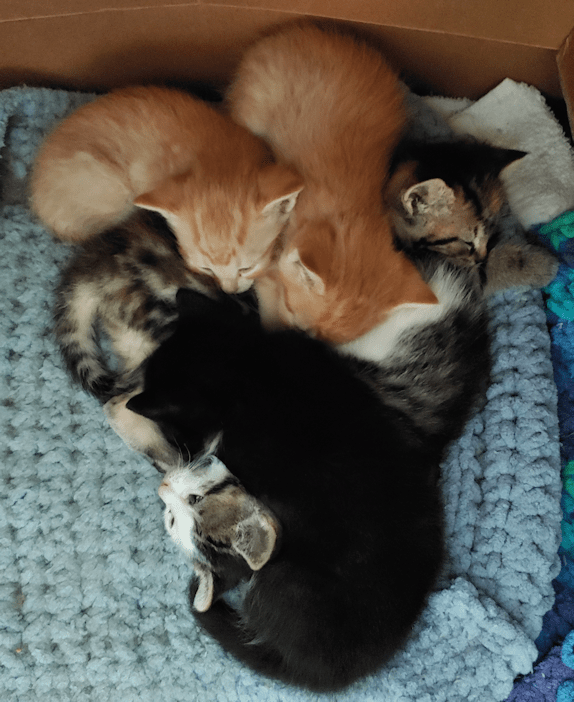
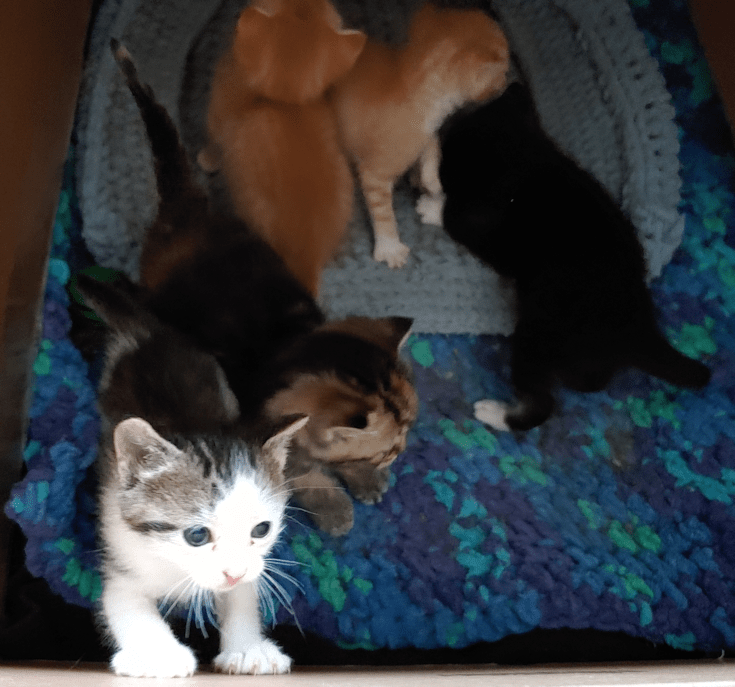
Of course, we must have a kitten picture, too!

An increasingly rare moment, when they’re all quiet instead of running, jumping, wrestling and playing around their nest. :-D

The Re-Farmer

Recommended: Townsends

Welcome to my “Recommended” series of posts. These will be weekly – for now – posts about resources and sites I have found over the past while that I found so excellent, I want to share them with you, my dear readers. 🙂 Whether or not I continue to post these, and how often they are posted, will depend on feedback. Please feel free to comment below, and if you have a favorite resource of your own, do share, and I will review them for possible future posts.

I hope you find these recommendations as useful and enjoyable as I have!

One of my favourite topics is history. Not the names and dates, conquerors and conquered type of history, but how ordinary people lived. Over the years, I found that the best way to learn about a people and their culture was to learn about their food, their clothing and their everyday items. It’s remarkable how tangential those areas are.

So this next recommendation is for something right up my alley – Townsends, with their focus on 18th century living in the US.

Jas Townsend and Son has been posting videos for 11 years! You’ll find period topics on everything related to everyday life of people in a variety of circumstances, including how men and women dressed in the period, everyday skills, such as weaving and cooking over an open fire, to building a log cabin!

Of course, food plays a big part of these, and this site is where I found out about the mushroom ketchup that we made ourselves.

We’ve used ours all up and need to make another batch! The ground is no longer frozen, so this time we won’t have to skip the horseradish. :-D

The videos also include a lot of interesting historical information, as well.

While their videos cover an amazing diversity of topics on 18th century life – even advice for reenactors! – their website is well worth visiting, too. Pretty much all of the items you see used in the videos are available on their website. Clothing, accessories, camping equipment, kits, books and more are all available, and all historically accurate to every detail available. It’s really amazing to see the variety of items they have!

One of the reasons I like historical recipes like the many that are recreated in these videos, as well as the cooking methods and tools, is that they tend to be really basic. People made these with the materials that were available, and learned to modify accordingly. A lot of modern recipes and cooking videos tend to involve things I either can’t get, can’t afford, or don’t want to use. I like to keep things simple – and cheap! We’ve gone through some very lean times over the years, and old-timey, cooking from scratch food preparation was pretty much the only option we had. Which doesn’t mean we have to sacrifice taste!

Townsends videos are really interesting, for their historical information and insights. Jas Townsend’s calm enthusiasm is infectious, and he is truly dedicated to authenticity and attention to detail. Recreating historical food is always a challenge, whether from recreating recipes that give little to no information on things like quantities, or even ingredients, to recreating foods where no recipes exist at all; just vague descriptions.

Since moving back to the farm, among the things we’ve had to consider is what do when – not if – we find ourselves without electricity, or unable to get to town to buy things we need, etc. It’s part of why we have been slowly working our way to being as self-sufficient as possible. Historical resources like this go a long way to help in planning what we want to work on, like having an earthen oven, etc.

Plus, it’s just really, really enjoyable to watch and learn from them!

The Re-Farmer

Gardening progress

We’re having another wild and windy day! Still, stuff needs to get planted. I made a quick trip into town and my errands included stopping at the hardware store. Their garden centre was open, so I checked it out.

I couldn’t resist.

I bought some muskmelon transplants. Muskmelon is a type of cantaloupe that I remember we grew here when I was a kid. I absolutely loved them. I only got 2 plants, and we shall see how they do.

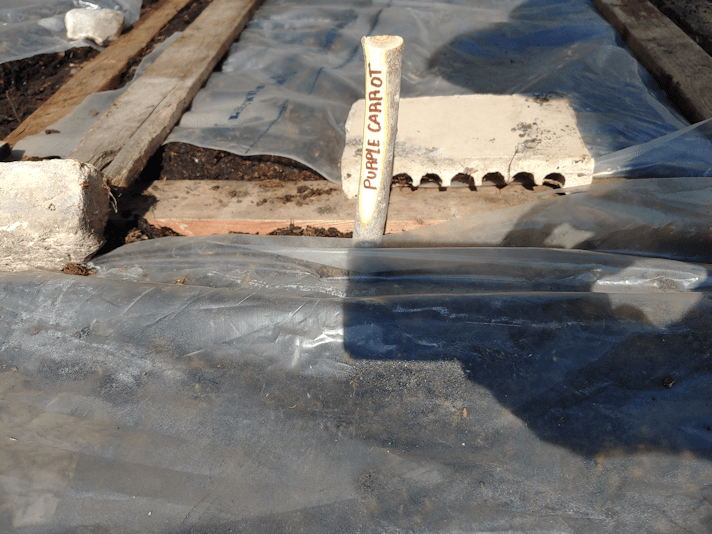
In preparation for today, my daughter and I made a bunch of markers to label our plantings.

We made one for each variety of seeds or transplants we have, plus an extra. The cucamelon don’t need one, since they are going to be completely separate from everything else.

We… won’t need to use all of them anymore.

I’ve been hardening off our seedlings. Because of the high winds, I’ve been leaving the trays inside the mini-greenhouse with the flap completely open – that way, they’d get some wind, but still be protected from the worst of it. I also put the mini-greenhouse in front of the old basement window, where it is more sheltered from the wind, and still gets full sun. When I brought home the new melon transplants, I tucked them into an empty shelf in the mini-greenhouse.

When it was time to start planting in the garden, I came out and found this.

My initial thought was that the wind had done this, but now that I think about it, I have changed my mind. If there were a wind enough to knock those trays – and their shelves – down, the whole thing would have been blown over.

I am now thinking a cat decided to go exploring.

Unfortunately, the squash seedlings are now all mixed up. The gourds still haven’t emerged, so at least we can guess that if there is no seedling, it’s a gourd, but there were still some other squash that hadn’t germinated.

I think the few fennel seeds that germinated and promptly bolted are a lost cause. :-(

Most disappointing.

Still, I’ll transplant what I can, tomorrow. One of the seed packets I got was a “surprise” mix. Now, they’re all going to be a surprise! :-D

This is where we focused on today.

Even though this area is turning out to be pretty well sheltered from the wind, there is still enough to really dry out the soil. I watered it earlier in the day, then watered it again before planting.

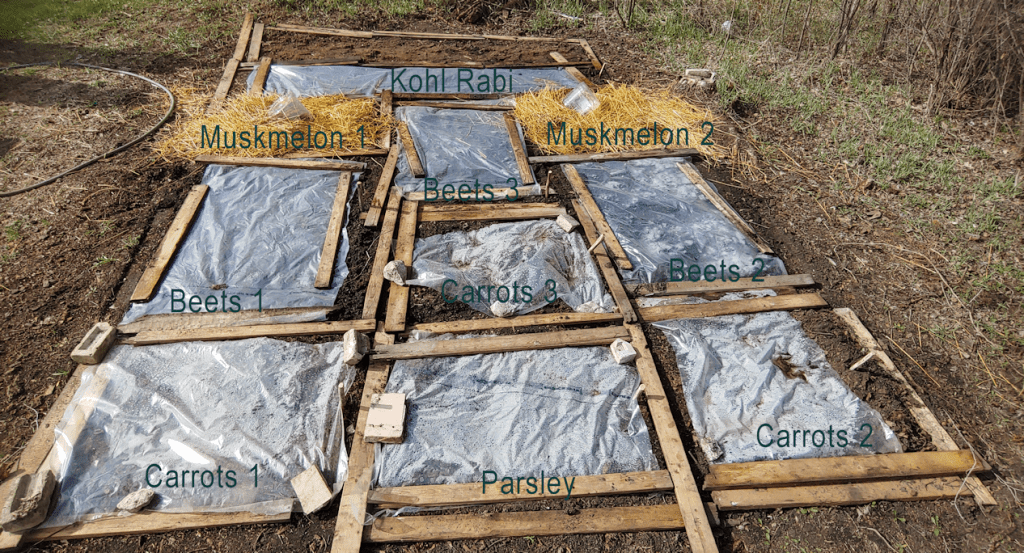
I also re-arranged the pieces of wood to make different sized beds, taking into account that I now have kohl rabi seeds and muskmelon transplants.

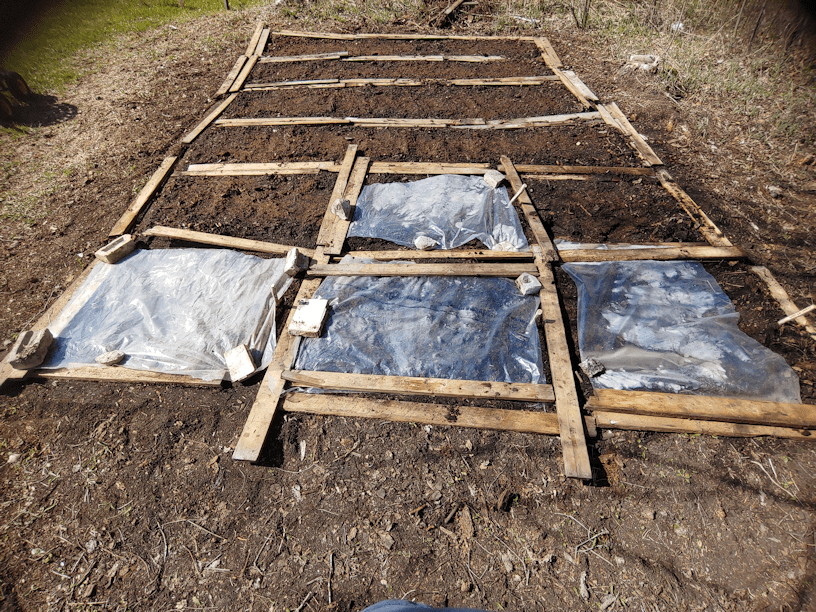
This is how it looks after the girls and I finished.

We still have seeds from the 3 varieties of beets, and kohl rabi left.

One of the things I’ve been doing is keeping the large plastic containers from some treats we sometimes get at Costco; cheese balls and pork rinds. I took two old cheese ball containers, drilled holes all around the sides near the bottom, then cut off the tops. I have a wood burning kit that includes a knife, and I used that to cut the tops off. Much better than hacking away at it with a utility knife or scissors! :-D These are now being used as cloches for the melons, which are surrounded by a mulch of straw. The cloches are tipped a bit sideways right now, but I will put them down for the night, when I do my evening rounds. In the morning, I will tip them over again.

Before the melons grow much bigger, I plan to add a trellis of some kind for them to climb.

Once the seedlings emerge, we’ll remove the plastic and the boards. The seeds were planted with square foot gardening in mind, and after the boards are removed, I will most likely add straw in between the beds for foot paths. An odd problem to have here, is that the soil is so soft, we sink when we walk on it. Our usual problem is the opposite. :-D

Here’s a bit more about square foot gardening.

When we do get do building raised beds, they will be quite a bit taller than the ones made in the video, for accessibility requirements. For those, we plan to use materials to fill the beds that turn out to have a name. Hugelkultur.

Or maybe more like this…

Basically, we’ll use whatever we’ve got to fill the bases, then topping with a soil mix. It might be a few years before we reach this point, though.

There is still one section of the new garden plot with nothing planted, and that may just stay empty. Tonight, I’ll be prepping the area in the old garden, where we will be planting our squashes, so we can start transplanting tomorrow. Then we’ll focus on the sunflowers next. Depending on how things go, we might plant some of our leftover seeds from the beets and kohl rabi, elsewhere. There is still the old kitchen garden area available, so we’ll see how things turn out.

The Re-Farmer
Kitten adventures

The pharmacy my daughter works at now has a small yarn display. Yay! I saw some t-shirt yarn and grabbed it, because I haven’t seen t-shirt yarn in stores in ages.

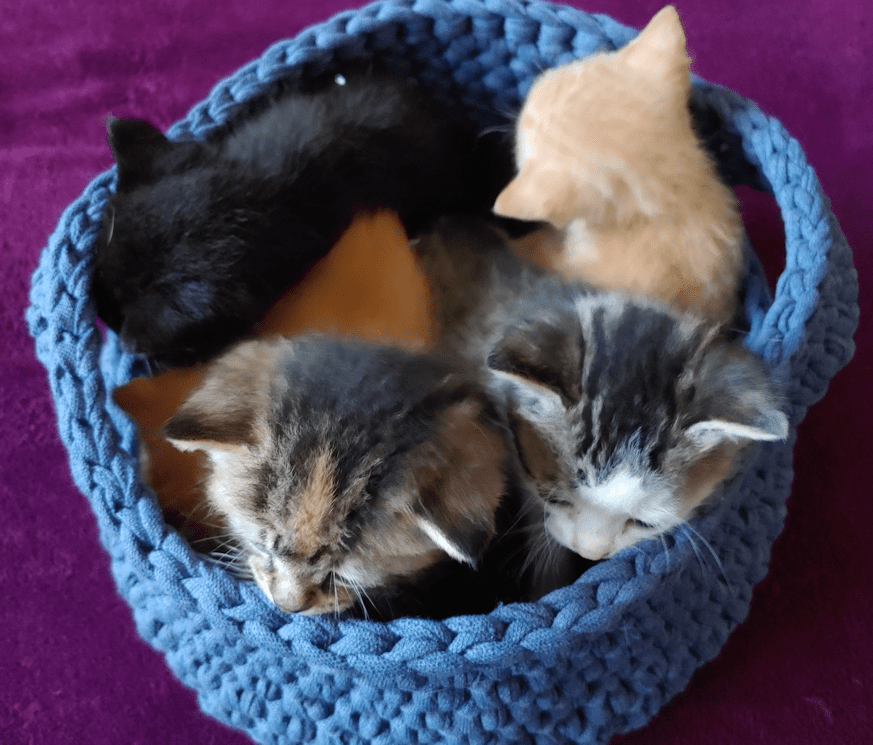
I made a basket.

It’s 5 kittens big.

Beep Beep tried to get in with them, but it’s not 5 kittens plus mama big. :-D

For my fellow crocheters, the yarn is Madolinni, 97% cotton 3% lycra and 130 meters. It’s 100% “recycled product from the textile industry”. Unfortunately, it turned out to be much coarser and unpleasant to work with, compared to what I was expecting from a t-shirt yarn, but it does make a very sturdy basket.

The base is a disc done in single crochet, starting from 7 stitches, and increased rounds worked in a spiral until about 9 inches across. The first round for the sides is single crochet worked in the back loop only. The next 4 rounds were done in split single crochet, then I switched back to normal single crochet for the remaining rows. This resulted in an almost cauldron shape. The handles were made by making chains of 10 and skipping 7 stitches, on opposite sides. In the next round, a single crochet was worked into each stitch, including into each chain stitch. One more round of single crochet was done, then it was finished with a round of slip stitch worked into the sides of the final round of single crochet, to add stability and reduce stretch.

For those who are not into crochet, here are more kitties!

Of all the cats that were curious about the kittens, Two Face wasn’t really one of them.

Until we started taking the kittens out and putting them on my bed to run around.

She suddenly turned into a mother!

Beep Beep is her mother, but now Two Face is jumping into the nest to mother her mother, and her little siblings. The kittens are even trying to nurse on her! With her belly still half nekkid from being fixed, the nips are easy for them to find. :-D I think they are confused about not getting any milk, though. :-D

The kittens are almost big enough to start scrambling out of their nest! We’re going to have to find a way to get them back into the basement, and walling off a corner or something, where there is less for them to get into and potentially hurt themselves. Plus, they are going to need room for food/water bowls and a litter pan, so they learn how to use them, soon!

What a bunch of cuties. :-)

The Re-Farmer

Evening visitor, and escape attempts

While doing my rounds yesterday evening, I spotted a stinky visitor crossing the barn yard. He caught up with me some time later.

He moves pretty fast! :-D

I often see signs of where they have been digging up grubs during the night. Last night, I could hear their odd screeching noises out in the old garden – soon followed by some distinctive whiffs! – so I made a point of checking the area out when doing my rounds this morning. As long as they aren’t digging up our potatoes, I’m happy.

The potatoes beds are looking untouched. :-)

The kittens, meanwhile, are getting so much more active! And Beep Beep has been leaving them alone more often, even if it’s just to lounge nearby.

The kittens are also getting increasingly curious about that big world out there!

Leyendecker (the tuxedo) came very close to scrabbling his way out!

They may want to climb out, but if we actually take them out, they can’t wait to get back into their nest! :-D

Hard to believe they’re almost a month old, now.

With their increased activity, we’re going to have to find some way to set them up in the basement again. It is much safer for them down there.

Today, I’m hoping to get some more planting done, but at the moment, it’s amazingly windy out there! I was happy to find that our new garden bed, where we planted carrots and parsley so far, is quite sheltered from winds. Meanwhile, I’ve set up the trays of transplants in the open mini-greenhouse, next to the open door. I want to expose them to some wind as they harden off, but not too much! It’s a bit difficult to harden off the larger seedlings, when there are still new seedlings emerging in other ares of the trays.

Still no gourds, though.

Oh, my goodness! Looking out my window as I write this, I can see that the winds have increased again. Those maple branches are really swinging!

Hopefully, it will settle down a bit and I’ll be able to get some more planting done. Until then, I’ll use the time to head down to the basement workshop and help my daughter make some more plant markers. :-)

The Re-Farmer

Garden progress

This morning, when checking the soaking carrot seeds, I FINALLY spotted some roots!

For those who are new to following this blog (welcome!), this video shows the technique I am trying.

The first thing I needed to do was make the conrstarch gel. I noticed in the comments that people found the ratio in the video made too thick a gel, so I used 2tsp cornstarch to 1 cup of water. I made more than I needed, since I figured if it worked well for the carrots, I would use it for other things with very small seeds.

It took a while to cook the mixture down to gel state, and I think if I do it again, I would increase the cornstarch a little bit more.

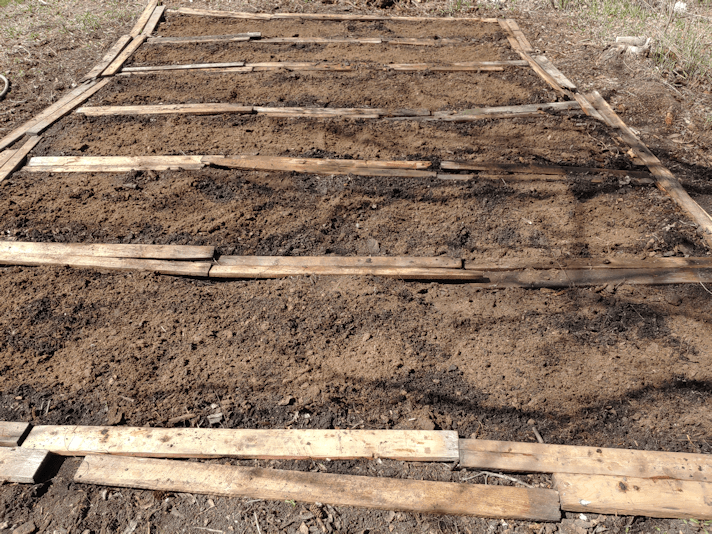
Once the gel was cooked and cooling down, we started getting the new garden bed ready.

I had already raked the soil to even it out, and we gave it a thorough soaking. Then I added a bit of peat to each section and raked it out evenly. After the above photo was taken, it was given another thorough watering.

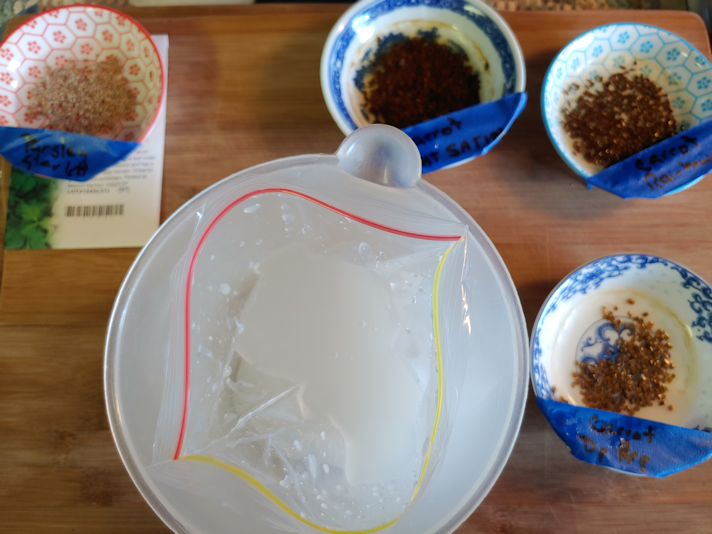
The gel took a while to cool down so, in between getting things ready outside, I put some of the gel into slide lock bags to cool down after. Then put them in the fridge, and finally putting them in the freezer. They didn’t have to get cold, but they at least had to be cool enough not to harm the seeds.

I prepped 4 bags. One for each variety of carrots, plus one for the parsley.

The instructions for the parsley said to let the seeds soak for a half hour, so that was done while I worked on the carrots. I used a measuring cup to hold the bag of gel up.

Also, the cats somehow managed to knock one of the dishes of carrot seeds upside down. :-( It was the deep purple variety. I was able to salvage most of the seeds, but there was a fair bit of seed loss, too. :-(

Once the seeds were added, I squeezed out as much air as I could, then smooshed the package around to evenly distribute the seeds in the gel.

When it came time to plant the seeds, a corner was snipped off, to make like an icing bag, and the seeds were squeezed into the prepared soil in short rows. By the time that was all ready, the parsley had soaked long enough and those were planted, too.

I’m using a combination of techniques, and one of them is based on square foot gardening. Rather than long rows, they’re being planted in squares. I’ve got the carrots planted in alternating sections, and the parsley is in the middle of the group of three.

I found a roll of plastic in the basement (I think it’s for roofing), so we used some of that to cover and protect the seeds. Those will be removed as soon as sprouts can be seen.

The squares seem very close together, but there really is a fair bit of space in between the plantings.

Also, my daughter is a sweetheart.

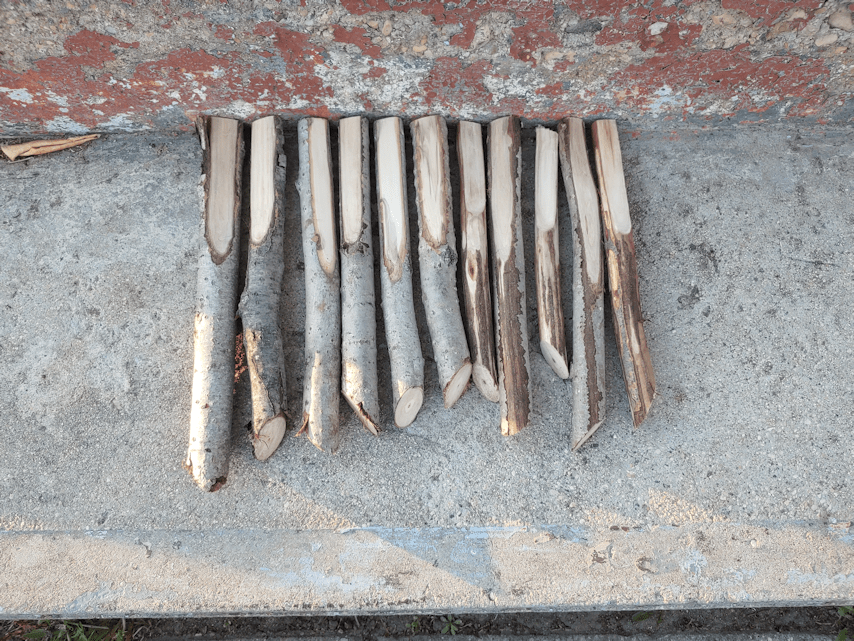
She trimmed some branches and made labels for me. :-)

The way things are looking, and using the square foot gardening method, we might be able to plant more here than originally planned. The three varieties of beets will go here, plus I ended up buying some kohl rabi. I don’t know if we’ll have much success with the fennel transplants; there really isn’t much improvement there. What few have sprouted can fit here. The parsley and fennel was originally going to be planted in the old kitchen garden, but I think we’ll continue to build up the soil in there and save that for next year.

Today turned out to be surprisingly hot, so we didn’t stay out for too long. We were forecast to hit 22C (71F) this afternoon, but we ended up reading 26C (78F). We will continue planting tomorrow. I think it is safe for us to start planting things that are supposed to wait until after the frost date. Looking at the long range forecast, we seem to have passed that point early.

Which reminds me. I was hoping to use the fire pit and burn barrel in the next while, so I checked the municipal website to see what the burn bad status was at. We are now on a total burn ban, which means no fire pits or burn barrels, either. That sure didn’t take long! And we still have standing water in the ditches and ponds. Ah, well.

The next few days are going to be very busy ones, as we get more things out into the gardens! I’m looking forward to using that soil auger to prep where we will be planting our giant sunflowers. :-) My mother also gave us some pumpkin seeds that were being given away for free at her local grocery store. They had tiny little envelopes, each with 3 seeds in them, and I had grabbed one, not realizing my mother had already included 2 packets in with a bag of stuff she’d prepared for me to take home. I don’t know what variety they are, but my mom tells me her town has annual pumpkin growing contests, so these might be a giant variety.

I think we’ll just plant them and see what we get! :-D

It should be interesting to see how our first year of gardening since we moved here will turn out. :-)

The Re-Farmer
Haskap conditions

We got some gardening done today, and in the process I made a point of seeing how the haskap bushes are doing.

The male haskap is leafing out very enthusiastically! It’s looking very healthy.

The female…

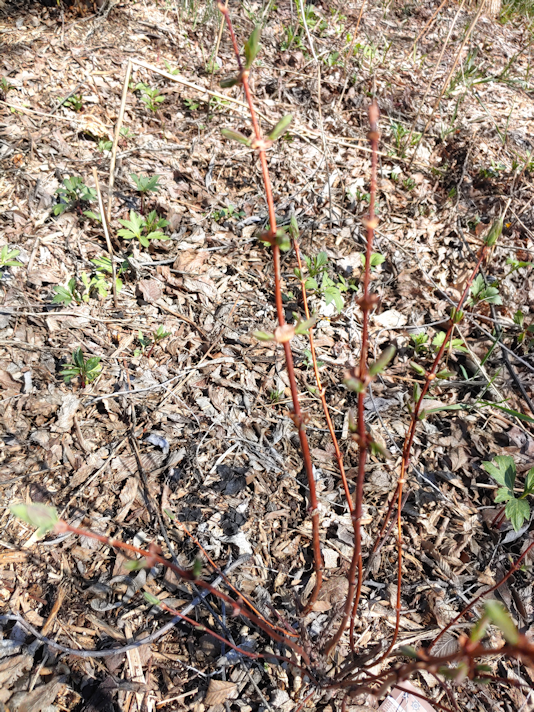
… is struggling. I couldn’t even get the camera to focus on those skinny little branches. It is still alive and leafing out, though, which is so much more than we expected, after seeing its condition last fall.

(The greenery popping out of the mulch in the background are flowers my mother had planted here; they grow quite tall and have bright yellow flowers. I have no idea what they are called.)

Normally, based on what I’ve read, the haskap would start producing in their second year, which would be this year. I doubt we will get any berries this year at all, though, as the female recovers from whatever almost killed it off last year. It had been doing so well, too!

If I get a chance, I will pick up another female this year. We can get up to 2 more, before we have to pick up another male, based on what I’ve read.

All part of our gradual plan to have lots of food bearing trees and bushes, that can survive our Zone 3 climate. :-)

The Re-Farmer

Things that make me smile

I’m just loving the longer days and weather conditions we’re having right now. I was doing my evening rounds of the yard some time past 9:30 last night, the temperatures were perfect, and I got to watch this gorgeous sunset through the willow branches and spruce trees.

This morning, I was thoroughly entertained by feline antics.

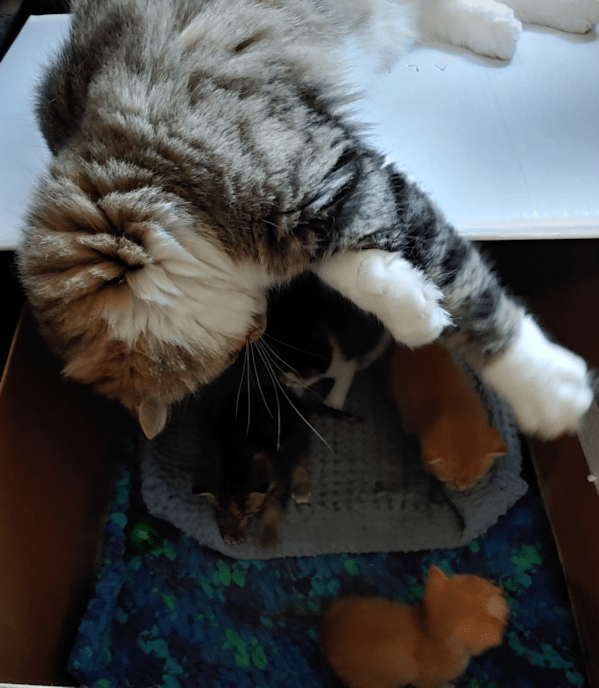
David so wants to play with the kittens! When he jumps into their nest with them, though, and they come running over, he gets skittish and leaves. Lately, he’s taken to dangling at them from above, and waving his furry paws in the air above their heads. :-D

They are so funny!

The Re-Farmer

Town stuff, and new fish set up

My day in town, after dropping my daughter off at work, turned into an all day in town!

I had a 9:30 drop off time at the garage for my van. As soon as he saw me, the mechanic came over to let me know that several other vehicles already dropped off ahead of me. I’d even come early! No worries, though. I was planning to meet my daughter for lunch, anyhow.

I did have some confusion when I parked next to what I thought was my mother’s car, though, and then saw my mother’s car in a different spot. I kept looking at the license plate, then back and the car, wondering how my mother’s car got so dirty? And why was there damage at the back?

And how did it turn into a Chevy?

It turned out to be another generic little black car with a license plate only one digit off from my mother’s! :-D The car I’d pulled up next to really was my mother’s car! :-D

There were a couple of downsides to having several hours to myself, but no vehicle. With the shut down continuing (and extended once again, as of today, even though there have been zero new cases of the Wuhan virus in our province, which never got hit hard by it in the first place), there was no place to go just to sit for a while. No seating in restaurants or coffee shops available, and what stores are open are not open to simply browsing anymore. The other downside is that it rained most of the night and even the outdoor seating was wet.

Ah, well. I had a 5km goal in my Pokemon Go to meet, anyhow.

Which I hit rather handily.

One of the places I went through was a park near the lake, were I spotted this contented couple.

They were just fine ignoring me as I walked by. :-D

I also went to the beach.

Yes, there’s still some ice on the lake, some of which got blown into a corner against the main dock. The wind off the lake was freezing! That didn’t stop people from fishing off the dock, or families visiting the beach. There were plenty of joggers and dog walker, too. It’s the first day of a long weekend, and plenty of people were determined to enjoy it!

My daughter’s lunch turned out to be perfectly timed. It was nice and sunny by then, too, so we were able to eat comfortably on a picnic table not far from where she works. After lunch, I walked back to the garage and arrived moments after they’d finished with our van. I still had some errands to run that needed a vehicle, and by the time I was done, there was no point in driving all the way home, so I stayed in town until my daughter was done her shift.

It’s a good thing my to-do list for the day was kept flexible and tentative!

I did get one big job accomplished, and it was one I’d started last night.

We have had issues with our 20 gallon fish tank. Part of the problem is that it was next to the kitchen window. Sunlight tends to promote algae growth. The other problem seems to be our well water. While it’s great that we don’t need to deal with chlorine, when I did a 20% water change last spring, we had all sorts of problems show up, from a suddenly algae bloom, to pond snails appearing.

No, we don’t drink our well water from the tap anymore. I’m hoping, now that the sump pump is draining well away from the well again, these issues will resolve themselves!

We’d managed to get control of the algae a bit, though over the past year it killed off some fish and most of our plants. We’re down to one fish – an algae eater that doesn’t eat this type of algae! – and I’d fairly recently added a bunch of new plants. The snails, we were okay with, since they seemed to be helping keep the tank clean. There was some concern that they might take over the tank, but I think the fish keeps the snail population under control!

Then a few days ago, the water, which had been turning increasingly green, suddenly turned completely green and murky. We hadn’t even topped up the evaporated water or anything. The only thing that has been changing is the angle and amount of sunlight.

That poor little fish.

What we ended up doing was buying several 15L bottles of spring water and, last night, we completely emptied the tank and cleaned it out. I’d put some of the water in a gallon sized jar and stuck in the heater to warm it up before adding the plants and that poor little fish. The water was so murky, I couldn’t actually see the plants. I got them out by feel. At the same time, I removed sheets of algae growth that we couldn’t see through the water. !!!

The next several hours was spent emptying the tank, removing the substrate and decorations, scrubbing, rinsing and scalding everything we could – with no cleaners, since we didn’t want to accidentally poison the tank. I even kept what snails I could find. :-D

The cats were absolutely fascinated by the entire process.

In preparation for this, we decided on a new spot in the living room, found a old table in the storage shed, and set it up.

The cleaned out tank was then set up in its new location and filled with the bottled spring water and the appropriate additives.

The fish and plants, however, had to wait. The heater was set up in the cleaned tank, but it took quite a while to warm the water sufficiently. I wasn’t able to get the plants and fish in until morning.

We have an extra 15L bottle of the purchased spring water to top off the tank, instead of using our well water. Hopefully, this will solve the main problems. I don’t expect to never have algae problems again, but we shouldn’t get the crazy growth we had been!

Also, the cats are obsessed with all this. Susan is sitting on top of the big tank that we can’t use, since the part that broke on the filter during the move apparently is not available for purchase, even from the manufacturer. We found a way to cover the top solidly, and it has become a favorite place for the cats to hang out.

Now, they’ll have something else to watch from above!

:-D

Hopefully, the surviving plants will establish themselves and spread, like they are supposed to. I saw some pretty good root systems had started to develop. Once we get some good plant growth in there, we will get a few more fish again. :-)

This turned out to be a much bigger – and longer – job than I expected. But it’s finally done, and I think the fish is much happier in clean water again! :-D

The Re-Farmer