Home Made Chicken Stock

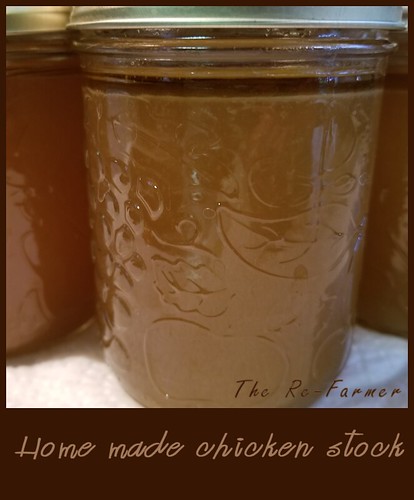
The following is a “use watcha got” recipe to use up the carcasses of your cooked chicken (or turkey).  This stock is cooked down to be more concentrated, and should result in a rather firm, gel-like consistency when cool.

Decide ahead of time how you will store your stock, and prepare in advance as needed.  I used pint sized canning jars and sterilized the canning funnel, jars, lids and rings during the last hour or so of cooking.  You could also pour the stock into ice cube trays for freezing, or use freezer bags.

You will also need a colander and bowl large enough to hold your stock, plus a sieve and cheesecloth for straining.  Having a giant measuring cup is also very handy to stain into, making it easier to pour the stock into jars.

Ingredients:

bones and skin from roasted chickens (or turkey)
pan drippings
onion and/or leeks
garlic cloves
vegetables such as carrots, celery (including leaves), celeriac, parsnips
herbs such as rosemary, thyme, savory, sage, bay leaves, ginger, parsley or dill
peppercorns
salt; optional
cold water
optional additions: lemon or orange zest, a splash of apple cider vinegar or white wine vinegar

homemade.chicken.stockNote: Quantities will depend on how many carcasses you are using.   For 3 carcasses, I used 1 large onion, a whole head of garlic, 4 carrots, and whatever herbs I had handy in my cupboard.

Seasonings will also depend on how the chickens were seasoned when cooked.  When I roasted ours, I first rubbed them with lemon juice and put the lemon pieces, with some bay leaves, into the cavities.  I also rubbed lemon salt, paprika, pepper and oil into the skin.  Because of this, I was able to be light on the salt and pepper when making the stock.  What salt I did use was lemon salt.

  1. Place your chicken bones and skin into a large stock pot.  Scrape pan drippings in (cooled pan drippings may be gelled, which is awesome).
  2. Add onions, cut into large pieces (skin can be left on, if you wish), or leeks cut into 2 inch or so chunks.
  3. Crush garlic cloves with the side of a large knife (skins can be left on, but I like to remove them) and add to the pot.
    Note: If you don’t have fresh onions or garlic, dried can be used.
  4. Vegetables do not need to be peeled.  Just scrub them, and remove the root ends.  Chop them into about 2 inch pieces, then add to the pot.
  5. Add fresh or dried herbs and other seasonings of your choice.
  6. Add peppercorns (or ground pepper, if that’s what you have) and salt.  If you’re not sure about the salt, leave it for later, after tasting.
  7. Add enough cold water to cover everything by about 1 or 2 inches.
  8. Bring to a boil, then reduce to simmer.  Do not stir, as that will make your stock cloudy.
  9. Simmer for about 3-4 hours.
  10. Place a colander over a large bowl.  Carefully pour everything in the stock pot, into the colander.  Gently lift out the colander, allowing to drain, and set aside.  Colander contents can be discarded.
  11. Wash the stock pot out and place back on the stove.  Pour the stock, through a sieve, back into the stock pot.
  12. Taste for seasonings.  Adjust as desired.
  13. Bring the stock to a boil.  Reduce heat and continue to simmer the stock down until reduced by 1/3rd.
  14. Line a sieve with several layers of cheesecloth and place over a bowl or large measuring cup.
  15. Gently ladle the stock into the lined sieve.
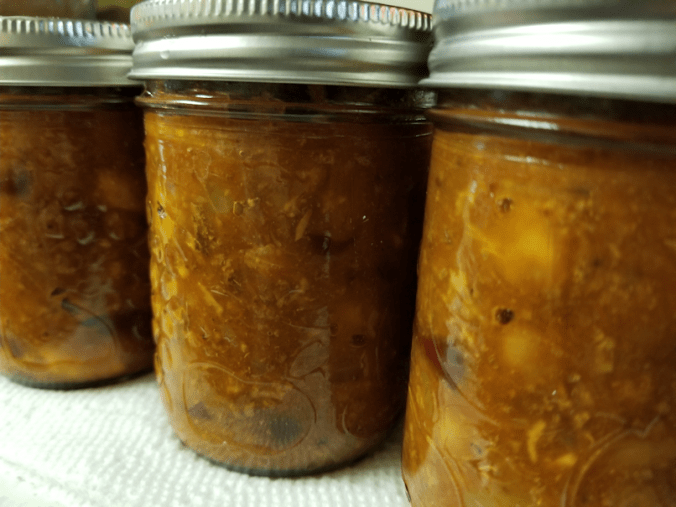
  16. Fill prepared containers with strained stock (in batches, if need be) and seal.
  17. Refrigerate or freeze, as desired.


Using the carcasses of 3 chickens, I was able to fill 11 pint sized canning jars (all the ones I had available), plus have 3 cups of stock left over.

The second cooking down of the stock concentrates it a bit; if you wanted to, you could continue to cook it down more, for an even more concentrated stock.  Keep this in mind when you use it, as you may need to water it down a bit.

Enjoy!

The Re-Farmer

Small Batch Grape Jelly

During the summer, as my mother’s grapes ripened, I gathered them and froze them.  I didn’t even bag them; just put them in bowls and stuck them in the freezer.

We’ve been nibbling on them, little by little, ever since. ;-)

I had originally planned to put them through the juicer, but for the amount we had, it just didn’t seem worth the effort.  So I went back to something I wanted to try, earlier.

Making jelly.

20181019.grape.jelly.spoon This is a new thing for me – we made jam, when I was growing up, never jelly.  I got the recipes and instructions from my copy of the Ball Complete Book of Home Preserving (affiliate link).  It’s a great book for small batch canning, with recipes that are easily modified for quantity. I’m rather pleased with how it turned out!

The frozen grapes made for 5 cups.  The first thing I had to do was extract the juice. For this you need a large, stainless steel saucepan (you need room for the boiling liquid to expand), a jelly bag or a colander or sieve lined with layers of cheese cloth, a deep bowl, and a way to hang the bag over it.

Grape Juice for jelly

  1. Wash and drain the stem-less grapes.  Place into saucepan with just enough water to prevent scorching – about 1/4-1/2 cup for every 4 cups of grapes.  (For my 5 cups of frozen grapes, they were already washed, so I gave them a rinse, left them to thaw in my saucepan, then used about 1/2 cup of water.)
  2. Bring to a boil over medium high heat, stirring frequently.  Reduce heat, cover loosely and boil gently.  Stir often, crushing the grapes if needed (my frozen grapes split in the freezer, so it wasn’t really needed), until just softened – about 5-10 minutes.
  3. Transfer into a dampened jelly bag or cheesecloth lined colander, over a deep bowl.  Hang and allow to drip for at least 2 hours, or overnight.


That’s it! I used a large measuring cup as my bowl, and let it hang overnight.  The 5 cups of frozen grapes yielded just under 2 cups of juice.  I then put the pulp outside for the birds. :-) To make the jelly, you’ll need a stainless steel saucepan – this will bubble up a lot, so have one big enough to give it plenty of room – sterilized jars, rings and lids, a spoon to stir with, plus a cold spoon to do the gel test*, and a canning funnel. 20181019.grape.jelly.jars

Grape Jelly (based on Old-Fashioned Jellies, pg. 120, in the cookbook)

2 cups juice
1 1/2 cups sugar

(ratio of 3 cups sugar to 4 cups juice)

  1. Combine juice and sugar in a large, stainless steel saucepan.  Bring to a boil over medium-high heat, stirring to dissolve the sugar.  Keep at a hard boil, stirring frequently, until mixture begins to sheet from a metal spoon*, about 25 minutes.  Remove from heat and test gel*.  If gel stage has been reached, skim off foam.
  2. Quickly pour hot jelly into hot jars, leaving 1/4 inch headspace.  Wipe rim.  Center lid on jar and screw on ring until finger-tip tight.

After this, you could can them, as per your canner’s instructions.  I don’t have a canner, but the 2 cups of juice made barely 1 1/2 pints of jelly, which were left to cool overnight.  They will be kept refrigerated, instead.

* Sheet test for gel

Dip a cold metal spoon into the boiling soft spread.  Lift the spoon and hold it horizontally, edge down, and watch how the mixture drops.  When the mixture reaches the gel stage, it will begin to “sheet”, with the jelly breaking off the spoon in a sheet or flake, rather than pouring or dripping.

20181019.grape.jelly.leaf.bowl

We taste tested the jelly this morning.

Now, this is where I admit, I don’t actually like jams or jellies.  I find them too sweet, and the texture off-putting.

I love this jelly!  Using our own grapes, this jelly has a sweet-tart flavor that is just awesome.  It also gelled really well.

Obviously, the flavor will always depend on the type of grapes used, but using grapes that had been frozen first would have changed the flavor was well.

I am hoping that, next year, I’ll be able to free up our grape vine from the spirea it’s surrounded by, and be able to trellis it, for increased productivity.

Over the years, I plan to get more, and different varieties, that can grow in our climate.

Next year, I invest in canning equipment. :-D

The Re-Farmer

Brined Turkey with bacon

I was interrupted while making our Thanksgiving dinner today. I got a call from home care, telling me that there had been a sick call, and no one would be able to do the meal assist with my mother.  I did confirm that she would still be getting her bed time assist, then said that I could go over to do the meal assist.  So I turned all over to the girls to finish, and headed out to help out my mother.

Everything was ready by the time I got back, so we went straight to setting up for dinner.  I half carved the turkey before I realized I forgot to take a photo! :-D  So here is half of our bacon covered, brined turkey! Continue reading

Happy Thanksgiving!

It’s Thanksgiving Weekend, here in Canada, and our turkey is ready for the oven. :-)

20181007.turkey.for.oven.png

Though Thanksgiving is officially tomorrow, we decided to have a quiet family dinner today.  A large family dinner is being planned for later in the month.

The turkey was brined overnight, rubbed with lemon halves (which were then tucked into the cavity) and covered with bacon.

A trick I learned from my late mother-in-law. :-D

The Re-Farmer


Home canned chili

Last night, I made up some chili in the slow cooker, for ourselves and my mother when she gets home form the hospital.  You can see my recipe here, though I slightly modified it this time.  I added a rutabaga with the vegetables, an extra can of beans, and used two cans of crushed tomatoes, instead of one, plus tomato paste.  I also skipped the cream.  Lots of fibre and iron in here, which my mother will need for the next while.

This morning, I put up 12 pint sized jars of the chili.

20180913.home.canned.chili

I don’t have the equipment to pressure can these, but these are not intended for long term storage.  Done this way, they should last 6 weeks or more, in the fridge.

I found a flat bottomed, rectangular roasting pain with rack while cleaning the Old Kitchen.  It was the perfect size to hold all the jars.  I put the jars on the rack and, after setting kettles to boil water to scald them, added hot tap water to the roasting rack, so there would be no chance of anything cracking.  I scalded the lids and rings in a stainless steel bowl, then poured boiling water into all the jars to disinfect them all.  I scalded my jar funnel, too.  I am so glad I picked that thing up!!

Once the jars were scalded and emptied, I could use the roasting pan to carry them all together to the crock pot.  I left the hot water in the pan.  To fill the jars, I would put some chili in, then use a (scalded) fork to poke at it and get out any air pockets, fill it the rest of the way (with a half inch head space) then poke at it again to get rid of the air pockets.  After removing the funnel, I popped a lid in place, then moved on to the next one.  Using the roasting rack made it much more organized.

Once filled, I put on the rings, but did not tighten them all the way, then moved them all onto some paper towel to cool slowly.  Once fully cooled, I’ll tighten the rings the rest of the way.  Not too tight, though.  I don’t want my mother to have a hard time opening them!

This took up about half of our 8 quart crock pot of chili.

So I had chili for breakfast. :-D

The Re-farmer

Corn on the cob, cookout

It’s been some time since we’ve done a cookout.  It’s either been way too hot to sit around a fire, or raining!

Not a complaint, really.

Today, we cooked supper outside, but brought it inside to eat because… flies.  They like our faces.  And hair.  And ears.

So the idea of eating outside wasn’t very attractive. :-D

I recently picked up a campfire grill, and today I picked up some fresh corn on the cob.

A perfect way to break in the grill!

20180703.cookout

Before starting the fire, I removed the outer leaves on the husks, as much of the cornsilk as I could, then left them to soak in cold water.  We turned them a few times, flipped them and changed their positions, because the coals were not evenly heating.

Once they’re cooked and cool enough for eating, the husks can be pulled back and used as a holder for the corn, or broken off completely.

We cooked the cheese hoagies in batches.

A lovely summer treat!

The Re-Farmer

Flame Roasted Potatoes

I roasted potatoes in yesterday’s cookout, and I thought I’d share. :-D

To make these, you will need;

20180604.fire.roasted.potatoes1

  • Large potatoes (1 per person)
  • Butter and seasonings
  • heavy duty aluminum foil, pieces sized to wrap each potato in a double layer
  • fire

Start by thoroughly scrubbing the unpeeled potatoes, then stabbing them all over with a fork.

For the butter and seasoning, you can use plain butter, then add coarse salt (how we usually do it), or you can make a flavored butter using whatever 20180604.fire.roasted.potatoes2seasonings you like.  This time, I added paprika, fresh ground pink Himalayan salt and fresh ground pepper, dill and garlic powder.

Generously cover the potatoes with the butter and seasonings.  Tightly wrap each potato in a double thickness of heavy duty aluminum foil.

Don’t skimp on the foil.  ;-)

Time to go outside!

Prep a small fire and let it burn down.  When you have a layer of coals, place the foil wrapped potatoes directly on top of the hot coals.

Build the fire up again on top of the potatoes.

Enjoy your fire for about an hour, letting it burn down to coals. Gently move the foil wrapped potatoes out of the coals and remove to a container that can handle high temperatures.

The time is completely a judgement call.  A lot depends on the size of the potatoes and how hot the fire gets.  You might want to try for 45 minutes the first time you do it, and adjust for the next cookout.

Because there will be another cookout! :-D

20180604.fire.roasted.potatoes7

Carefully unwrap the foil (I used two forks) and cut a potato in half.

As you can see, this potato was VERY well done!  Which I’m okay with, as the skin serves as a bowl.

While the potato is cooling, roast some wieners over the fire.

20180604.fire.roasted.potatoes8

Add flavorings to taste.  I had some of the flavored butter used on the outside of the potatoes left, so I put some of that on one half, and sour cream on the other.  Then I used a fork to mix in the flavorings, in the skin “bowl”.

I think, the next time we do this, I’ll roast 2 potatoes per person instead of one!  It was SO good!

These can also be left to cool and eaten later.  Just unwrap and reheat in the microwave, or chop into cubes to use to make hash browns, or to make a potato salad.

Enjoy!  And please remember to exercise fire safety precautions, at all times.

The Re-Farmer

First Wiener Roast of the year!

Last night, we decided to take advantage of the lovely evening, and have our first wiener 20180603.wierner.roast.fire3roast of the year! :-D

When I was a kid, we used to have these quite often.  I would go into the bush with a machete-type knife (we even found it while packing away my parents’ stuff!) and cut dogwood branches for roasting sticks.  They were perfect for it, naturally growing long, straight and supple.  Sometimes, I could get ones with a perfect Y shape.  The bark came off easily, and I would strip off the top several inches, then sharpen them to points.

At the end of the day, we’d get a fire going, roast wieners and stuff our faces with hot dogs, then finish off with marshmallows.  When we were done eating, it would be quite dark, and we would start burning our roasting sticks until the tips were glowing, then wave them around in the dark, using the red tips to create shapes of light in the air.

Sometimes, my parents hosted parties, and their friends from the city would come out with their kids, and there would be dozens of people all over.  Most of the time, though, it was just us kids.  We had a blast!

20180603.wierner.roast.tableThanks to the burning my daughter and I did earlier, when I cleared the yard to mow the lawn, I had a nice pile of sticks ready to set up for a fire.  We brought the hose (of course) and chairs.  We were thinking of moving the picnic table over, but it’s in serious need of cleaning, so the girls brought out one of our small folding tables, instead.

We’re going to have to invest in metal roasting forks soon.  I picked up a package of wooden roasting sticks along with the S’mores kit, and they are a bit too flammable and bouncy! :-D

I had hoped my husband could join us, even if just to sit on his walker while we roasted wieners for him, but he had to lie down for the night, before we even started. :-(

It got to watch a beautiful sunset while we set up and got the fire going.


I’m going to have to get out there with the weed trimmer. *L*

20180603.wierner.roast.cat.company

The outside cats were all over the place, checking out what we were doing!  Rolando Moon staked out a spot on the log pile to watch us.  The hose sprays water at where two hoses join, and at the nozzle, and the cats played with the spray!

At one point, while I was sitting and eating, Rolando Moon actually jumped up onto my knee!  That’s a first.  Even the friendliest ones are still quite stand offish, so this is a big step in at least Rolando Moon’s comfort levels with us.

20180603.wierner.roast.fire2

Ah… perfect for toasting those wieners!

20180603.wierner.roast.fire4

We made some S’mores – that’s something we never did when I was a kid.  I didn’t even hear of them until after I had my own kids.

I find I really enjoy toasting marshmallows, and getting that perfect state of golden brown on the outside, and all melty on the inside.

Problem with that is, I don’t actually enjoy eating them.  Too sweet!

None of us are all that big on sweets, so while the hot dogs disappeared quickly, there’s still lots of S’more making supplies! :-D

Best part was, the entire night, we only saw one mosquito!

There is at least that one benefit to the dry spring we had!

20180603.wierner.roast.fire5

After a while, we just hung out to watch the fire die down.

I hope we will be able to do this often.  Even if we don’t have wiener roasts, to at least get a fire going and enjoy the evening.  We have a lot of wood we need to use up, and will be adding more as the clean up continues, so why not? :-D

It was a fantastic evening!

The Re-Farmer

Garlic Soup

Well, I’ve gone from having an irritating cough to a full blown spring cold.

Ugh.

As I was sitting with my lemon tea, feeling awful, it occurred to me that I had all the ingredients to make garlic soup.

This is a recipe that my late mother-in-law shared with me, many years ago.  She told me that it was an old pioneer recipe that was especially made in the late winter/early spring, when everyone was getting low on energy.  This was a time of year when people’s stores of preserved food was probably starting to get low, too, so between the long winters, lack of sunlight, lack of vitamins, and nary a fresh vegetable to be seen, people were getting worn down.  This soup would be made and apparently resulted in a big boost of health and energy.

Oh, how blessed we are to be able to get fresh fruits and vegetables, any time of year!

I don’t know about it being a boost to energy, but garlic has long been known to help fight off colds and boost the immune system.

Plus, it’s easy and tasty.  What more can you ask?

Quantities are pretty loosey-goosey, so this is more general instructions than a recipe.  You will need:

garlic.soup.1

garlic cloves; about 5 per person (I used a whole head, just for myself)
butter (enough to brown the garlic)
milk (about a cup or two per person; I used 2 cups this time)
bread (1 slice per person – I used a thick slice of sourdough bread)
shredded cheese (cheddar or whatever kind you like; about 1/2 – 3/4 cup per person)
seasoning to taste (this time around, I used onion salt, pepper and a dash of paprika)

  1. Peel and prep the garlic.  It can be whole, crushed, chopped, minced or whatever you wish.  I like to pass it through a garlic press.  Then scrap all the bits stuck to the press into the pot, too.  Big pieces are not a problem, here! :-D
  2. Melt the butter on the bottom of a saucepan on medium heat.  Add the garlic and cook gently until transparent.
  3. Add the milk and heat until scalding.  Do not boil!garlic.soup.2
  4. Season as desired.
  5. Place a slice of bread on the bottom of a bowl.  Top with shredded cheese.garlic.soup.3
  6. Pour the hot soup over the bread and cheese.  garlic.soup.4
  7. Eat while as hot as you can handle it.

You can also give the bread time to soak up some soup, then break it apart and add more shredded cheese to the top.  I had to do that, just to be able to fit all the soup into the bowl. :-D

garlic.soup.text

Now that I’ve had my bowl of soup, I think I’m going to go back to bed.

The Re-Farmer