Well, I finally got around to doing two more soil tests.
You can read how the first two tests went, here, here, here and here. (Links will open in new tabs)
One of the areas I tested was the soil under where we planted potatoes last year. The other sample was from the northwest corner of the garden area, where we will be planting blocks of corn and sunflowers, and where no one has ever tried to grow anything before.
Here is the potato bed soil. We tried the Ruth Stout method of simply putting the potatoes on the ground and topping it with a thick layer of mulch. Straw mulch, in our case, because that’s what we had. In the fall, I had removed the mulch to find the potatoes, turning the soil a bit in the process, then put the mulch back again. Though I’d done nothing to the ground other than put mulch on it, the soil was quite soft and easy to dig into to get the potatoes. It was still very soft when I dug down to get my sample.
As with the other tests, the soil is very alkaline. That green is darker than the darkest green on the scale, which is a pH of 7.5. Like all the other soil samples, our pH is probably 8.
The orange is potash (potassium), and the blue is phosphorus. Both tested at about the medium range; almost, but not quite dark enough to rate a “high”.
The purple is nitrogen, which is as low as it goes!!
Now for the soil that has had no amendments of any kind.
This area gets very hot, with only a couple of hours of shade at sunrise. There is more grass and green at the south end of this area, but in the north corner, even weeds have a hard time growing.
I think we can see why!
As with the other samples, the soil is very alkaline. There is some potash (the colours appear darker in the photo than in real life), but basically nothing for phosphorus (blue cap) and nitrogen (purple cap)! And we’re going to be growing corn there!
Have I mentioned how glad I am we were able to buy so much garden soil?
I think I’ll be mentioning it more than a few times, over the summer! :-D
After the girls finished planting the Strawberry Spinach, they went ahead and spaced out the concrete blocks to they would run from end to end across the garden. The gaps in between were fairly large, so they had the idea of filling them with bricks and brought a bunch over.
I liked the idea, so I ran with it. With a bit of adjustment on some blocks, I could fit three bricks in between each block. Then, because we have them, I used only red and white bricks, alternating with 2 red and 1 white, them 1 red and 2 white. Soil needed to be added under them, so they would be the same height (more or less) as the blocks.
That done, I finished filling the space against the wall with larger rocks. I ran out, so I took the wagon to various spots around the old garden, where rocks had been pulled out and left against trees or posts, etc. Once those were in, small rocks were added. When I ran out of those, I just walked around the garden with the wagon, picking them as I went along, and had more than I needed in no time at all. The hard part was not picking too many bigger rocks, because I had nowhere to put them.
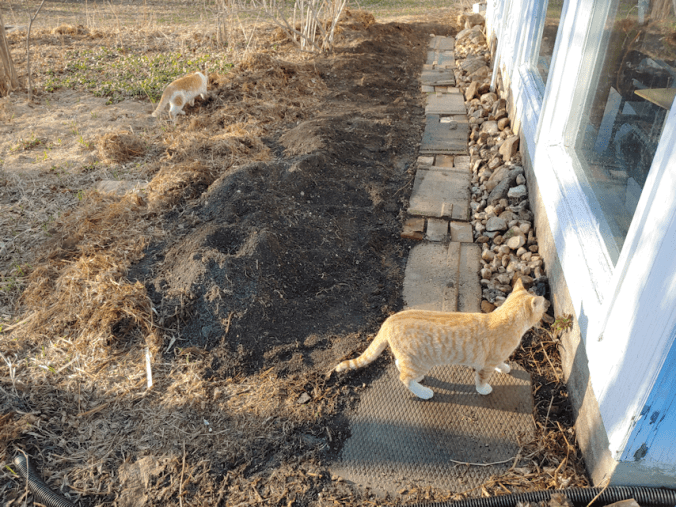
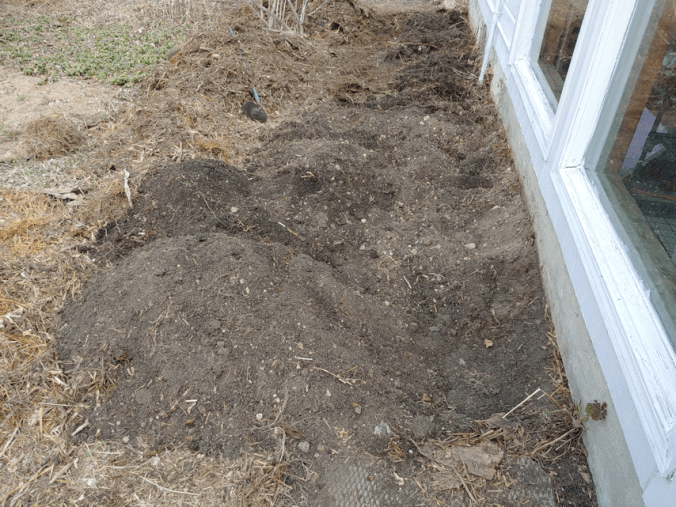
Once that was done, I filled gaps between the bricks with soil, and pushed more soil up against the blocks and bricks, then used a hose to clean them off. This is how it looked when it was done.
The path is uneven and lumpy, but it serves its purpose!
Of course, the cats were already using the dirt as litter. *sigh*
We haven’t even finished clearing that soil of roots, and it’s sitting on soil that wasn’t loosened. The next step will be to spread the piles of soil out, taking out as many roots as we can. At least we got what I think are the last of the big roots out. They were all under where the blocks and rocks are, and spreading away from the house, so they were getting smaller as they got further out. The ground slopes slightly downward from the house, which is why we added the retaining wall. We’ll be building up more soil at the wall, to level things off a bit, so shifting this soil downwards will just help with that.
This is what we cleared out so far. They will go into the burn barrel, since much of this is from invasive plants. We’re under a fire ban, but burn barrels should still be okay. I’ll have to check, first.
There will be another path running through roughly the center of the garden, towards the retaining wall. We have more of those concrete blocks. There were two stacks, but I found more, half buried under grass and weeds. I think we have at least 5 more of them out there. Maybe more. Hard to say what we’ll find once we start moving things!
Then we can start adding new garden soil, and finally start planting in some sections. There are flowers on the north side of the garden that I want to dig up and split, but I’m not sure where I want to put them yet. Then there are those flowers my mother now wants me to keep (I checked before I started laying cardboard down that first summer, and she’d told me there was nothing she wanted to keep. The next summer, she changed her mind!). In the photos, you can easily see them, as they’re the only green in there right now. They are invasive, but pretty, so I want to transplant some into a contained space, then get rid of the rest to free up garden space. Or maybe I’ll find someplace to plant them as a ground cover. We’ll see.
Long term, this will be our kitchen garden, and will have a combination of herbs and quick growing vegetables and greens, nice and handy for quick picking as needed. It will be a challenge, with the two big ornamental apple trees, the double lilac, the honeysuckle, and the roses. There’s a rose that was struggling, but actually bloomed last year, after we pruned the tree above it. It’s a lovely pink rose – and it got broken! I think by a deer. I’d like to transplant it somewhere where it can get full sun. The white roses are lovely, but remarkably invasive. Then there are those vines that keep making their way through the mulch and spreading!
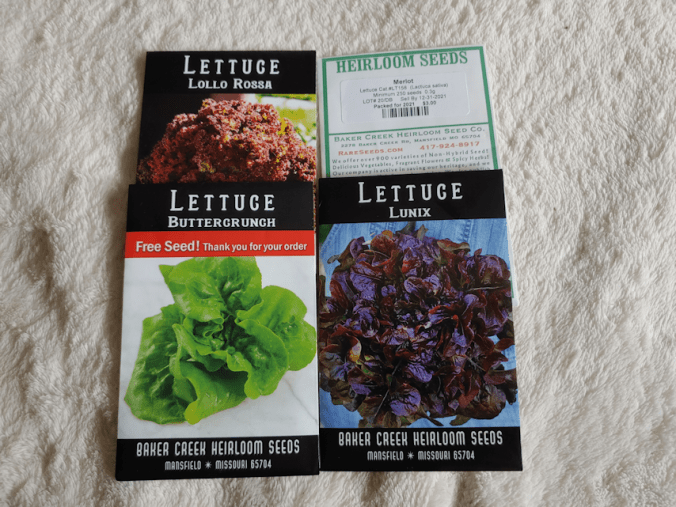
We’ll work it out slowly, over the next few years. For now, the poppies will go in the corner near the new path, and the lettuces will go along the west end, where they will be lightly shaded by the trees for much of the day. We’ll see what else we can fit in, if needed.
For now, I’m really wishing we had a hot tub. Or one of those tubs for old people, with a door and a seat. I could really use a hot soak, but if I try to take a bath, I am not sure I’d be able to get up again without help. Being broken sucks! :-D I’ll just have to borrow my husband’s bath chair and take a not shower, instead.
Getting a hot tub really would be a good idea. It would be very therapeutic for my husband’s back, too! Not that we have anywhere to put one right now. I’m sure we could figure it out, though!
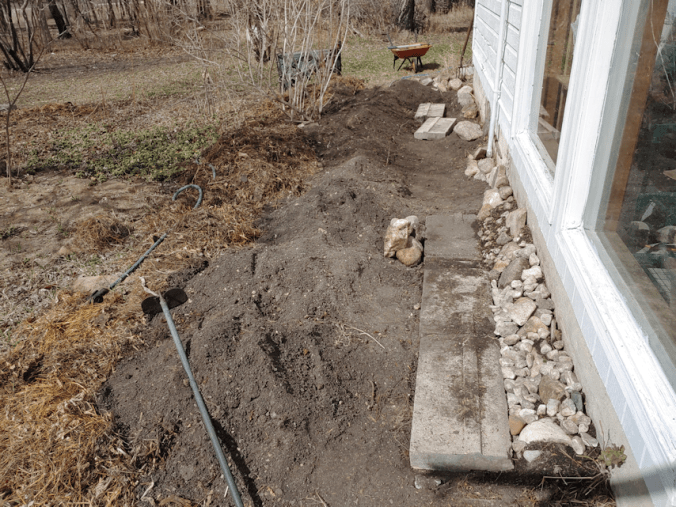
Today, I wanted to get started on the old kitchen garden, where we intend to plant the poppies.
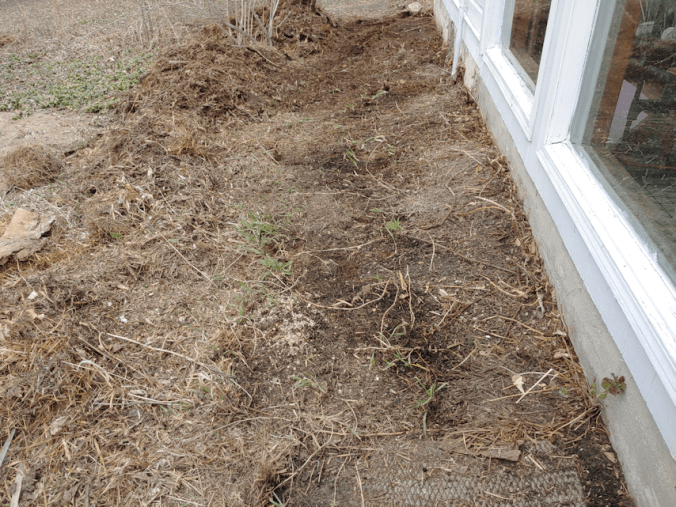
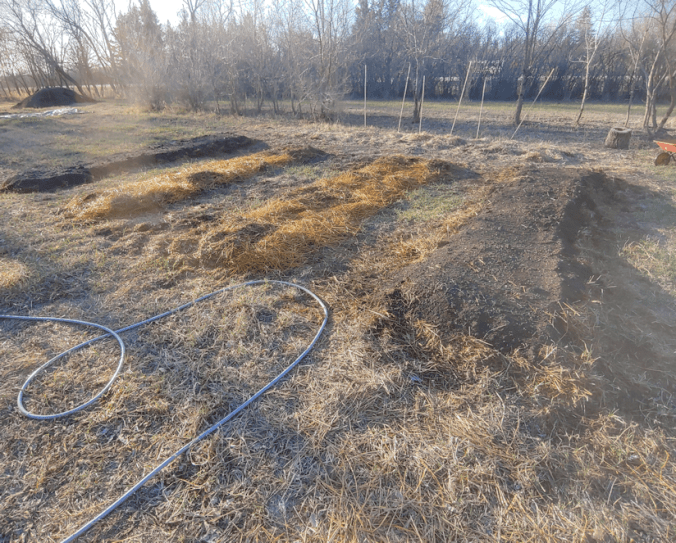
This is how it looked at the start.
The hose is from the sump pump in the old basement.
It has not turned on in ages. It’s simply been too dry.
You can see a path has started to form, a couple of feet from the wall. This is mostly from the cats crossing the garden, though we sometimes walk through there, too. The plan was to add new soil against the wall, to plant the poppies, and put in a stepping stone sort of path where one naturally formed. We found some concrete blocks out near the barn that we decided to use for the paths.
But first, it needed to be cleared.
Our first summer here, we did a major clean up of this old garden, removing a fence, cleaning it out as best we could, laying down cardboard, then covering it with straw, grass clippings, kitchen waste, and any soil from various places that we could get it. You can read about the clean up we did here, here, here and here. Yeah. It took a while! (all links will open in new tabs)
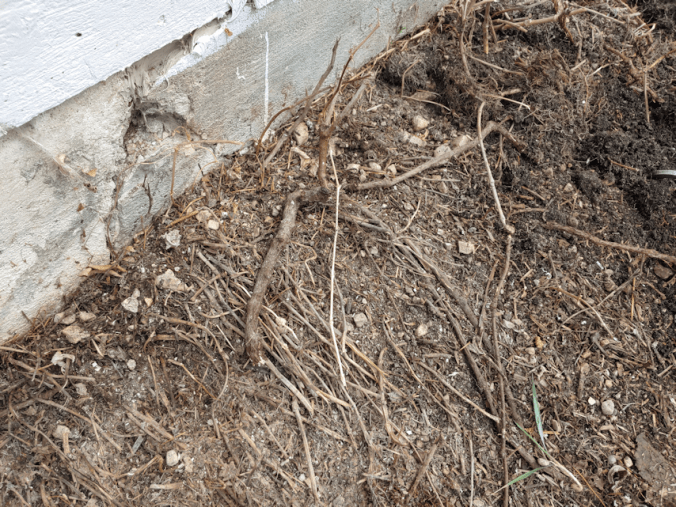
My mother had flowers growing here, and quite a few of them made their way through the layers. So did the crab grass and a vine we’ve been fighting continually since moving here. So the first thing I had to do was rake away the mulch, down to what was left of the cardboard layer. You can see lots of roots that were uncovered!!
Most of the biggest ones were from that invasive vine. It used to cover the entire wall until my brother and his wife pulled it down while painting the house, the summer before we arrived. They were causing damage, so we don’t want them growing back.
Speaking of damage, that crack is in the foundation under the old kitchen, which was tacked on to the log cabin portion of the house at some point. There’s a crawl space under there.
My brother told me about fixing the broken attic window above the old kitchen. It never occurred to me that the glass would still be on the ground! We’d laid cardboard over it, and never new it!
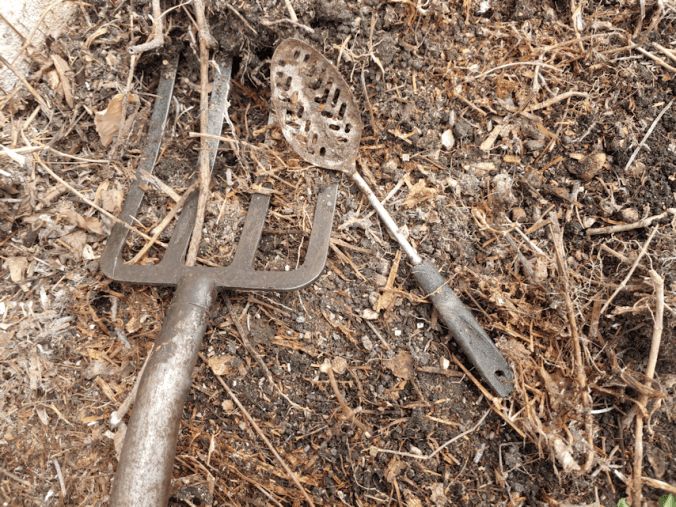
Finding glass from a broken window, I can understand. But this?
Why a spoon?
At this point, I was breaking up the soil with the fork and pulling out lots of roots.
Lots of roots.
So many roots.
Which created a problem I did not expect.
I was pulling roots out from under the old kitchen foundation, and the concrete floor of the sun room. In the process, soil started falling out from underneath.
No wonder the windows in the sun room are cracking as it shifts!!!
This required a change in plans. There was no way I was going to turn this into a garden bed, where watering it might continue to undermine the concrete. I needed to get those roots out, then shore up the sides.
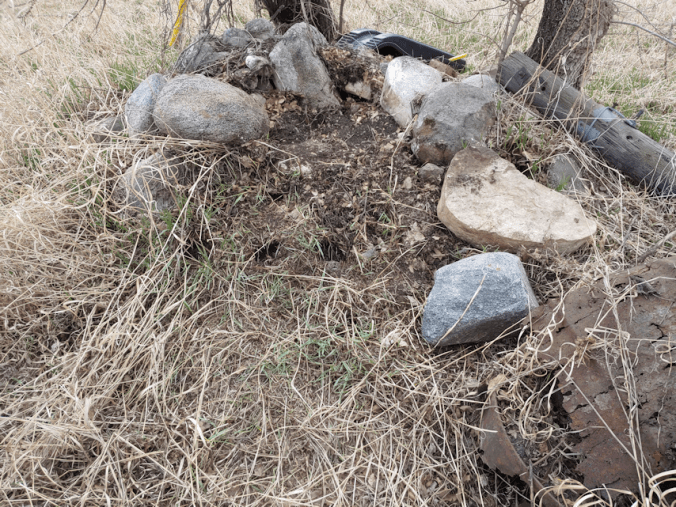
It’s a good thing we have a nice big rock pile over by the power pole. We also had piles of smaller rocks we’d gathered from the garden, though not very many.
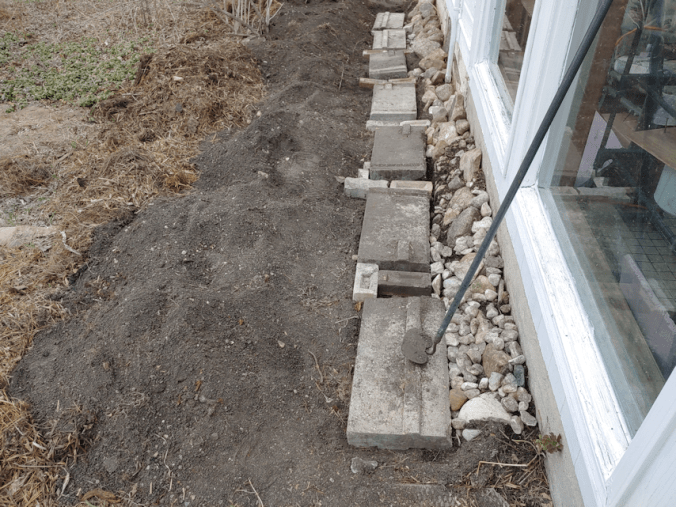
Large rocks were placed against the wall, soil put back to fill gaps and support the rocks, smaller rocks are added on top, and the concrete blocks were placed to begin the path.
We brought those blocks over in the wagon, which is rated to 300 pounds. I don’t know how much they weight, but with three blocks, the wagon didn’t want to roll. My daughter pushed while I pulled. After that, I only put in two blocks at a time.
The wagon was used to bring rocks over, too.
After a while, it started to get hard to find smaller rocks. There is decades of detritus that has decomposed on them, with a very strong layer of crab grass rhizomes!
As we worked our way down, still clearing away roots, we got hung up by an old rose bush. It took a while, but I finally got it out!
That is one weird looking root clump!!
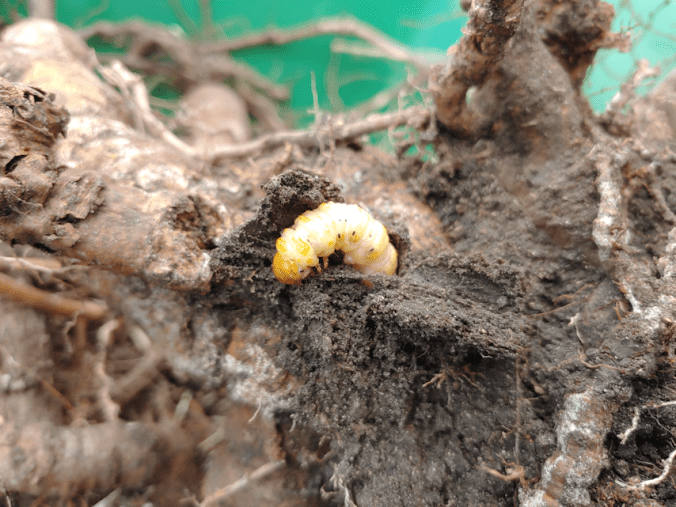
My daughter was just coming back from a break (we were very careful not to overdo it; the last thing we need is to injure ourselves!!) as I put it in the wheelbarrow with all the other roots. She was checking it out when she suddenly dropped it in alarm.
This thing had been exposed and wriggled at her!!
I don’t know what this grub is, but considering it was burrowing in the rose roots, I’d say it’s not a beneficial creature to have in the garden. :-/
This is where we stopped for a longer break. Sustenance was needed!
There are enough larger rocks to line the wall. My daughter used some to make a little wall around the power cables that run under the old kitchen. We also found a cable running along the wall to the corner, which is going to be carefully covered with rocks.
There are two more of those blocks in the wagon. They will be spaced out from one end to the other, and the gaps filled with soil and rocks.
As for the poppies, they will now be planted on the other side of the path!
Meanwhile, as I’ve been working on this post, the girls have gone back outside and are planting the Strawberry Spinach. :-)
I was going to have to head into town this afternoon, so I made sure to get out and continue working on the garden beds as early as I could.
I didn’t think to take a picture until after I’d hauled loads of soil onto one of the beds. Before I started on the soil, I made sure to soak down all the straw again.
Note the pile of soil in the background for later. ;-)
After leveling the soil and wetting it down, I decided to go through the piles of wood from when we had the power lines and roof cleared and lay the thinner pieces I could find around the bed. We weren’t going to do that originally, but we paid for that soil; I didn’t want to end up walking on it, and it was starting to run down the sides with the watering.
Filling this bed took at least a dozen wheelbarrow loads of soil, and it took me all morning. Which is when I threw in the towel. There was no way we could keep this up. We would just have to bite the bullet, go through the budget, and see what we could afford for a new wheelbarrow. I checked online and a local hardware store had two options in our budget in stock. So one of my daughters and I headed into town and made our first stop at the hardware store.
When I came in, I went straight to a clerk. When I told them I’d looked online and found something it said they had in stock, the clerks just started shaking their heads, saying that didn’t mean they actually did! LOL I had the link on my phone and read off about the one I hoped to get. Again, I just got head shaking! They had no wheelbarrows at all. Then they suggested I go to the place were I got my baby chainsaw. The two businesses are linked. The hardware store’s building is just too small to have much inventory, so for a lot of the bigger things, it’s all at this other place.
So we went there, and they had only 3 wheelbarrows in stock, in 2 sizes! I got the bigger one, at 5 cubic feet. It was smaller than the one I hoped to get, but it was still bigger than what we had, and 2/3rds the price of what I had in mind, so I wasn’t going to complain!
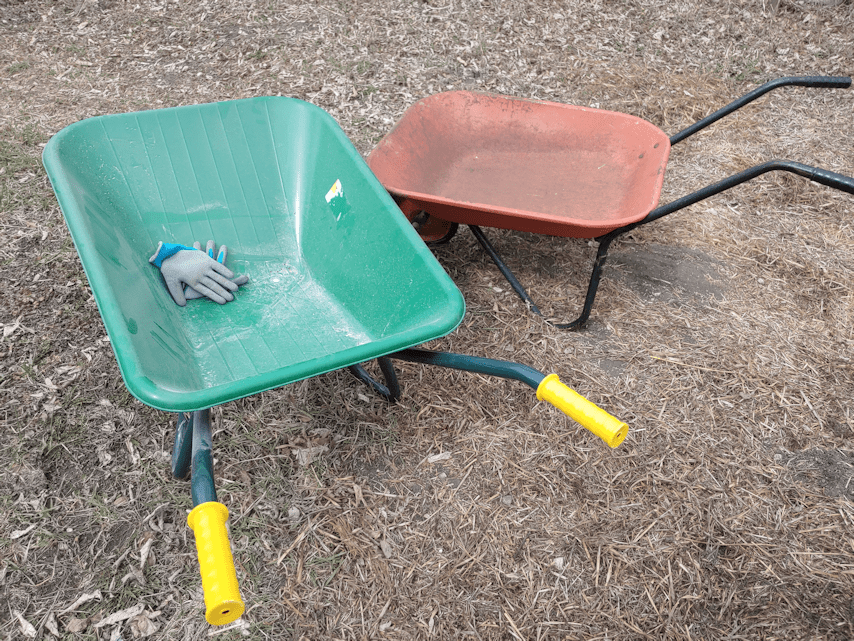
Here’s our new toy, next to the little wheelbarrow we’ve been using the most.
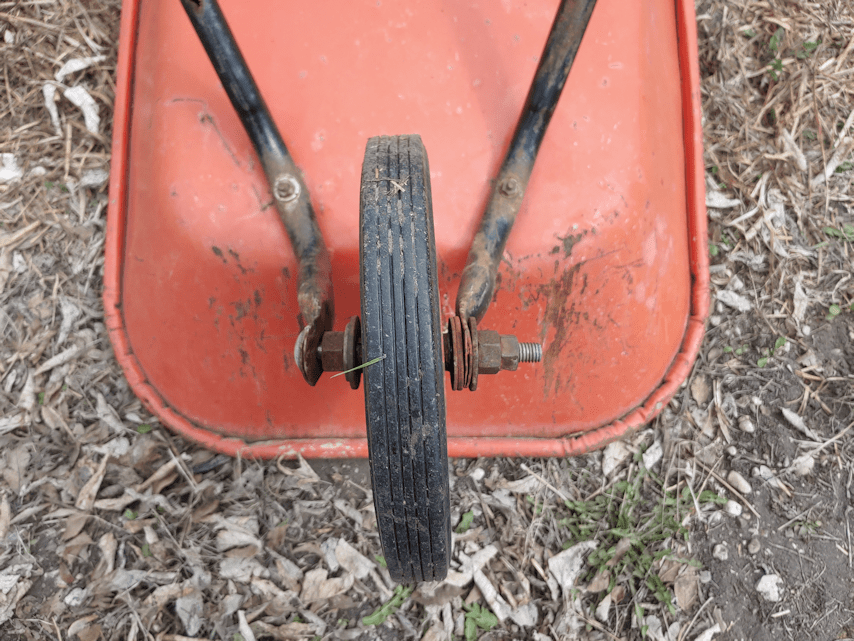
When we moved here, we found two wheelbarrows kicking around. This is the problem with the little red one we’ve been using the most.
It looks like someone jerry rigged a wheel that’s the wrong size. The axle is bent. It continually loosens, but if it’s tightened too much, it doesn’t turn as well because of the bent axle. Basically, it makes hauling the soil much, much more strenuous than it should be!
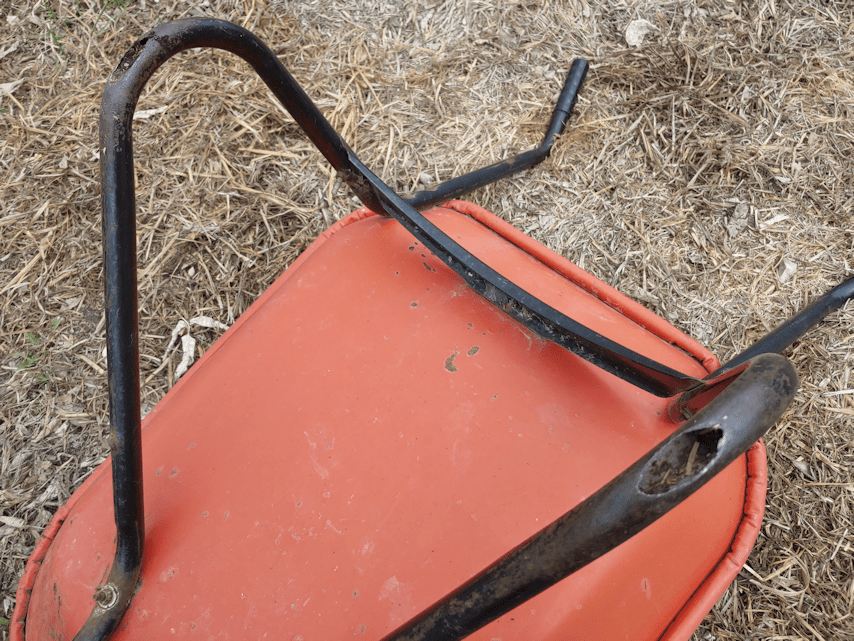
It’s been used so much, the bottoms of the legs are worn away!
It’s still sound, overall, so I’m thinking we could probably replace the wheel assembly and get more use out of it.
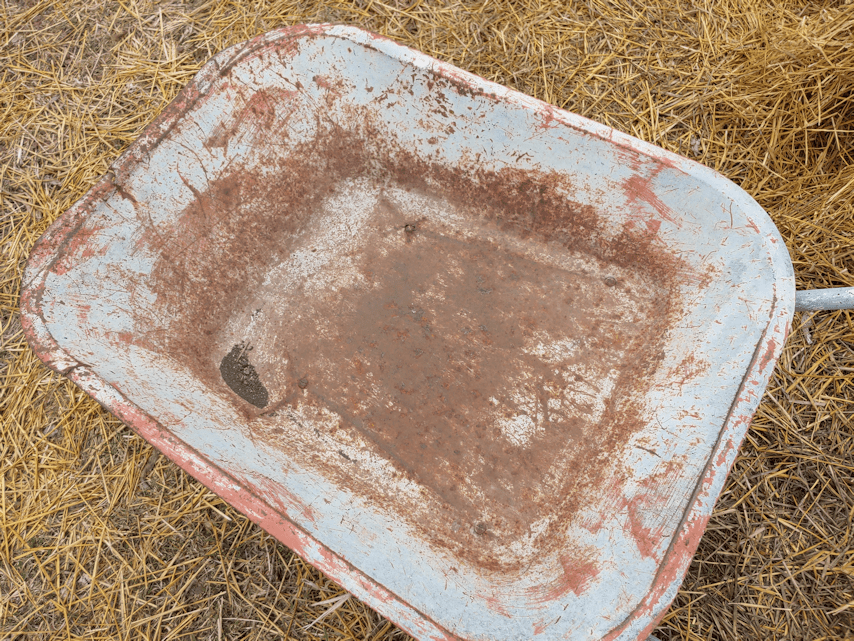
The other, larger wheelbarrow is not worth fixing.
The barrow has holes in the bottom, and the end is bent up. The metal is very thin, too. Though larger, it can’t handle as much soil as the little one.
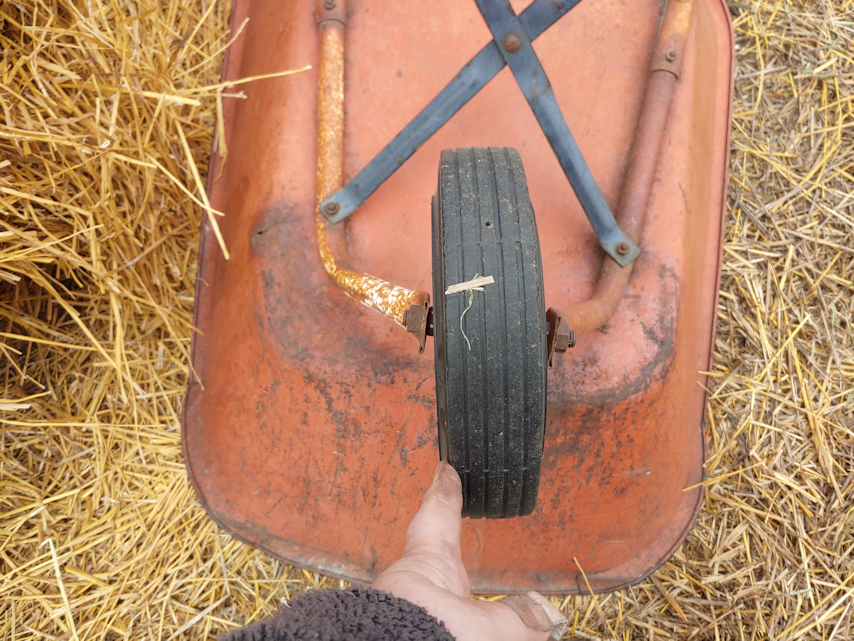
You can see one of the holes in this picture, too! :-D I haven’t been able to tighten this wheel, as it’s too rusted. I have a spray I can use to loosen it up, but it’s really not worthy the time and effort. Structurally, the frame on this one is a lot weaker, too. It’s fine if we want to use it to haul straw or something, but using it to haul soil was really pushing it’s capabilities!
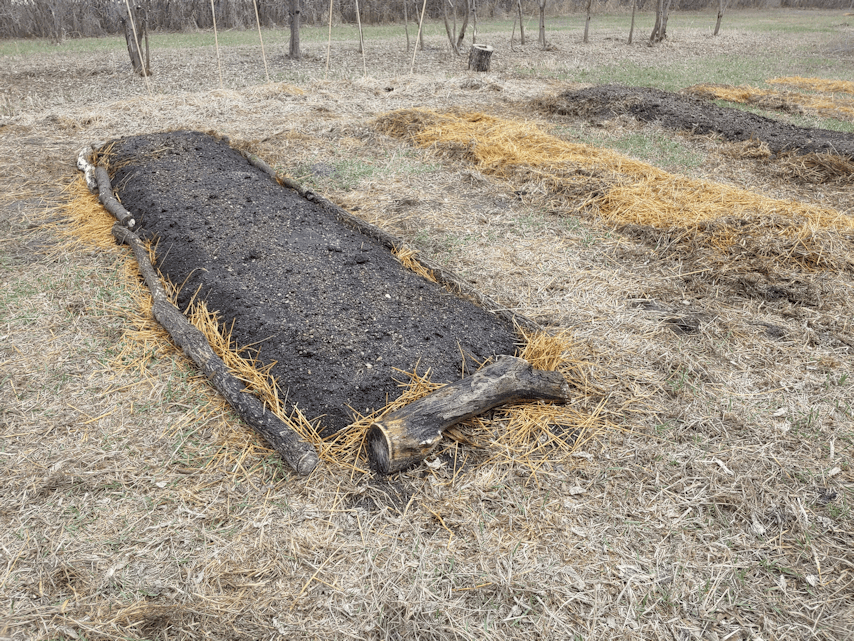
In starting the next bed, I put logs around the sides before I started hauling soil. It made it more awkward to dump the soil, but it worked out better. Here is how it looked when done, but before being wet down.
I was having a hard time finding shorter logs for the ends, and ended up using the comically large piece of maple. :-D
Finishing this bed went SO much faster than the one next to it! What a difference it made to have a wheelbarrow with a good wheel on it! :-D Though I didn’t fill it completely with each load, it still took fewer trips to fill the bed.
That done, we put logs around the last two beds that needed soil. By then, we were rifling through 3 different piles of logs, trying to find suitable pieces. Most were cut to about the same length, but we were running out of the thinner ones. Finding short ones for the ends took a bit of creativity. We do actually have a whole stack of shorter ones, but they are all way too big around.
Once we managed to find enough logs to frame the beds, we started adding the soil.
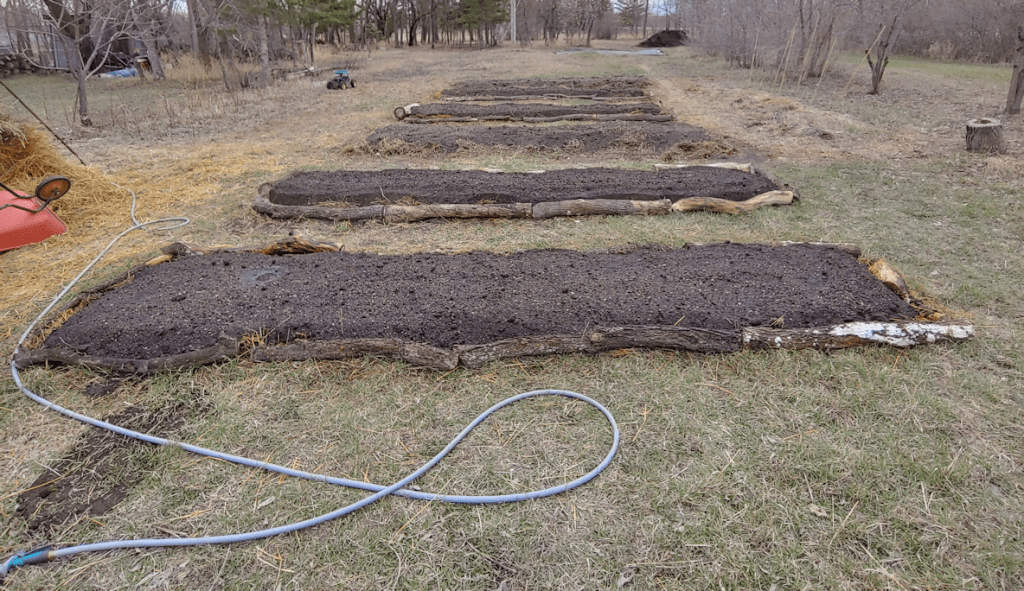
And they’re done!!! Six beds, ready for planting!
We’ll probably add logs around the first two, at some point.
Notice the pile of soil in the background?
We haven’t used half the pile yet, but we’re pretty close! I’m rather please with how much is left!
Now that these beds are done, there are no others that need to have such a deep layer of soil added over such a wide area. I did measure the beds, and they are roughly 3 – 3 1/2 ft wide by about 15 ft long. (About 1m x 4.5m) Plus the width of the logs, which is variable. When we build our high raised beds, Hugelkultur style, those logs will be on the bottom of the beds. :-) With the dimensions we have now, the permanent beds will be pretty much exactly where the current beds are.
The weather forecasts have been changing pretty much every day, with the predicted warm days being pushed further and further back. We should still be able to plant something in these beds right away, though.
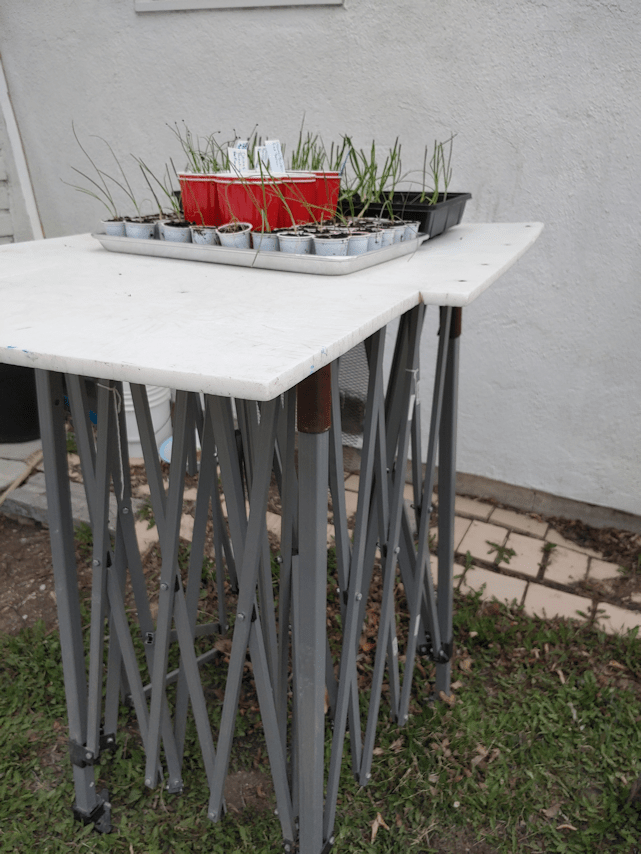
Our onion starts are still in the process of hardening off.
I found a way to keep them away from the cats. We still have the broken frame of my daughter’s market tent (if we could replace the piece that broke, I would be very happy, as it was a very excellent tent), so I used that to hold the puck board cut to cover the old basement window over the winter. The outside cats have shown no interest in the set up.
Those are the last of the onions we grew from seed; I’m hoping we’ll still have some salvageable red bunching onions. While in town today, I noticed onion sets and checked them out, and was very happy to find sets for shallots! It’s only a dozen per pack (I got 2 packs), but that’s okay.
Along with the transplants, we now have sets for the shallots and yellow onions, with sets for red onions to arrive in the mail this week. Once they’re in, the transplants should be hardened off enough, and we can plant all our onions.
Now that these beds are done, the only area we need to work on for things that need to be planted right away is the old kitchen garden. We’ll be using the soil from the other pile. While the one in the old garden area is closer, it would require going over the roughest part of the crappy plow job, and through the maple grove. The distance to the other pile is all nice and flat, with only a gate to go through. I’ll take a longer, smooth trip over a shorter, bumpy one, any day!
After hauling to many loads of soil over the rough, rough ground, none of us were up to doing it again today.
So our Sunday remained a day of rest!
We did still go out to soak down the beds we are working on, though, along with other watering and checking of things. There is fresh new growth on the grapes, which was good to see. I wasn’t sure they’d survived February’s deep freeze. We’ve got rhubarb coming up, and the one haskap is leafing out nicely. The other is still struggling. :-( The garlic is looking awesome. Unfortunately, the birds are digging into the soil, as they have been digging into all the leaves on the ground all over the place. They’re not after the garlic, but they’re scatting soil all over, and some are getting partially uncovered in the process. We’re going to have to come up with a way to cover those!
While checking out the snow crocuses and grape hyacinths (so many are coming up now!), we found a strange, furry, orange mushroom in a tree.
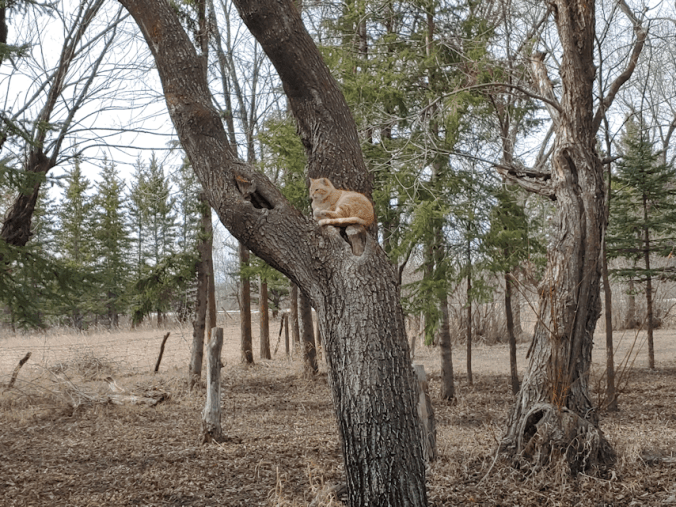
Rolando Moon found a perfect spot to settle down and groom herself! :-)
The girls and I talked about where we are going to plant things; the space we have to work with is turning out very different than we expected while working with the satellite image, and we’re going to have open spaces where we had expected to have garden beds.
Which is okay. Nothing is written in stone, and most of the beds are going to be temporary.
We then went through our seed packets, sorting out the ones that need to be planted before the last frost date.
There are a lot of things that should have been planted “as soon as the ground can be worked”, but we aren’t ready for all of them.
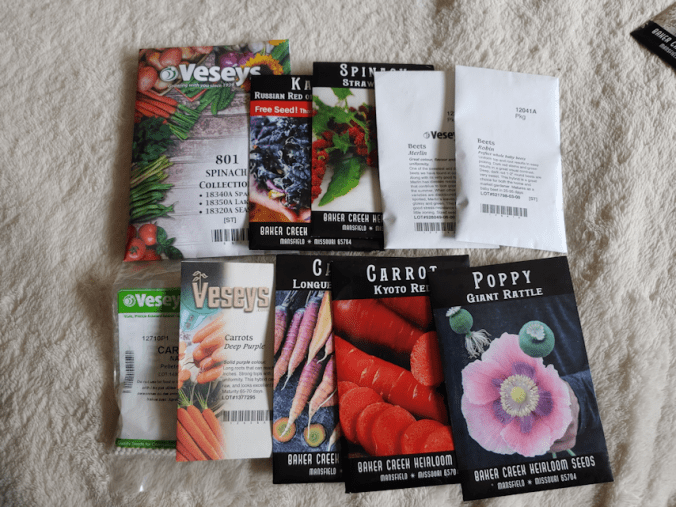
These are the ones that should be in the ground right now.
Two of the three beds for the spinach collection are not ready yet. The kale will be interplanted with onions, and one of those beds is ready. The bed for the strawberry spinach is ready. The beets will be going into the new bed beside the garlic, and that one’s not quite ready. It’s a small bed, so we will probably be planting one type there, and another somewhere else. The poppies will be going in the old kitchen garden, which also is not ready yet.
We still aren’t sure where the carrots will go. They need deep soft soil, so I think they will be going where the potato beds were last year. We are making those longer, so only the part that was used last year will have the soft soil needed. Some might end up in the old kitchen garden, too.
Then there is the next batch.
We can start planting lettuces now, with successive sowing every couple of weeks until about the middle of June, before it gets too hot. These will go in the old kitchen garden, with some of them going into the retaining wall blocks, which are ready now, and others further into the garden, once we’ve worked out where the paths will go and add more soil.
These can be planted in the middle of May. It’s a bit surprising for a corn to be planted before first frost. Once we’re done with the beds that need to be direct sown right away, I’ll be marking off the block the corn will be planted in. At the same time these are being direct sown, I will be starting the Montana Morado corn indoors, along with half of the sunflowers.
The kohlrabi will be interplanted with onions. Onions are supposed to repel those beetles we had issue with last year.
While going through the seed packets, we discovered an oops.
The pink celery should have been started 8-12 weeks before last frost!!
So we quickly planted them now.
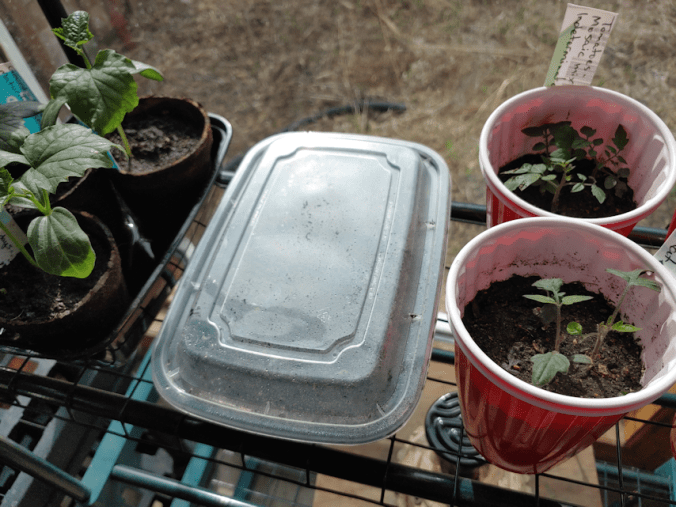
The seeds are absolutely minuscule! They are surface sown, so they just needed to be scattered on the soil and pressed down, so we used a take-out container as a mini-greenhouse. The sun room is warmer than the house, and there’s no room in the aquarium greenhouses, so we set it up with the tomatoes and luffa. We still use the ceramic heater bulb at night, but according to the thermometer in the sun room, it reached almost 30C/86F in there today!
They’re getting less than half the time to start than they should, but we’ll see how it goes. Who knows? We might have a long summer this year.
Everything else that needs to be direct sown has to wait until after our lost frost date. Especially the Peaches ‘n Cream corn collection. The radishes (two varieties) will be interplanted with some of them, to help break up the soil. They mature very quickly, so being overshadowed by the corn will not be an issue. The sunflowers will be a mix of transplants and direct sowing, to see which works better. And finally, there are the three varieties of bush beans.
If all goes well, we’ll be transplanting all the squash, gourds, cucamelons and tomatoes at about the same time. The potatoes and asparagus should be in and ready to plant by then, too.
The first few weeks of June are going to be very busy, and we’ve got a lot of manual labour to get done ahead of that!
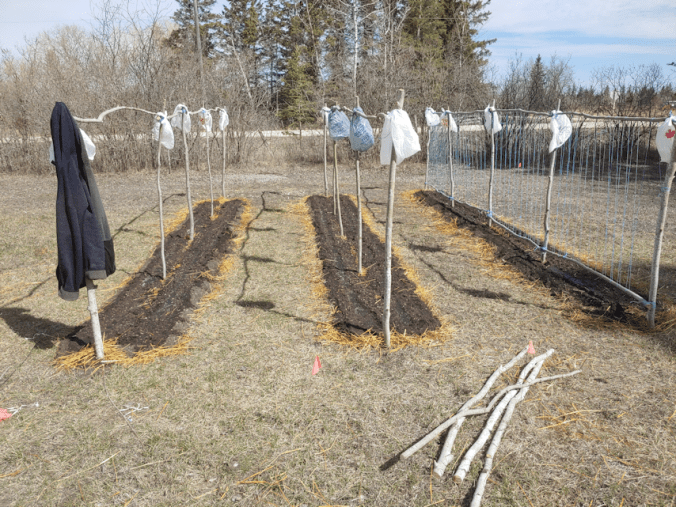
This morning, I got the peas planted in their new beds.
I also added our first line of defense against birds and deer: flappy, noisy grocery bags.
As soon as we can, those will be replaced with whirligigs, wind chimes, flags, flashy things – whatever we can find that will startle critters, but not act as potential sails and pull the trellises down!
While covering up the seeds, I made a point of pressing down little trenches on either side of the seeds, where water can collect and soak in, rather than flow off the soil. I made slightly deeper trenches on the insides. The more water gets through the soil to the straw and old soil below, the better for the ground to soften up and encourage worm activity. That was one thing I noticed when digging the post holes. I think I saw only one worm, and I’m not even sure if I’m remembered that correctly or not. :-/
Everything else being planted in this area has to wait until after the last frost date, so when I was back from helping my mother with her grocery shopping (I showed her pictures of what we’ve done so far. She had nothing positive to say, of course. ;-) ), then making a dump run, the girls and I moved on to where we will be planting things that can go in before our last frost date.
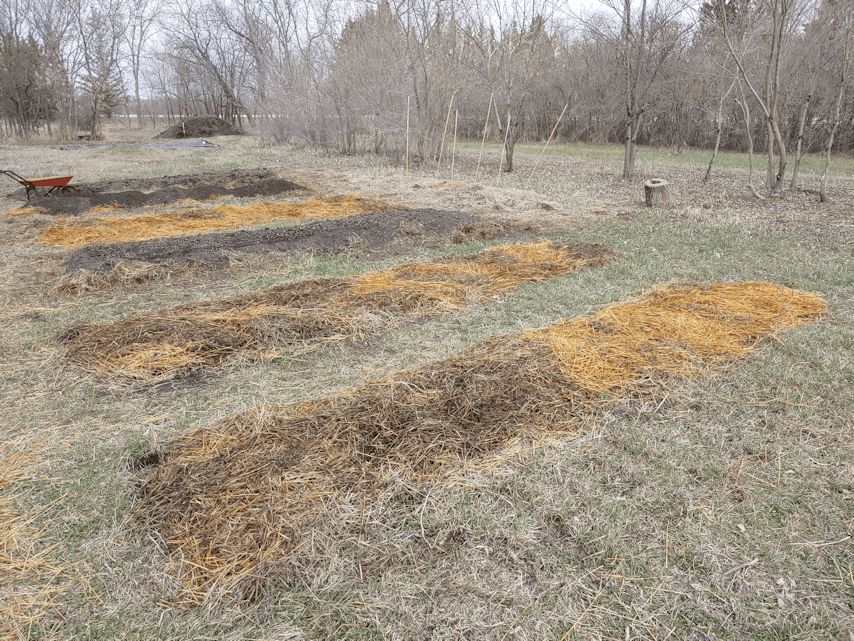
The two beds now covered in soil had looked like the long bed with the bamboo poles, before. Aside from raking around the edges to clean them up, adding the raked up material onto the beds, all we did was cover them with several inches of new soil.
The straw layered beds were rakes around the edges and evened out to more or less match the first two in size, then got thoroughly soaked. Then the soil beds got soaked, too.
Tomorrow, they will all get another soak, and then the straw will be covered with soil. After that, the two short beds that are off frame will be lengthened to match these ones in size, then they’ll be soaked, topped with soil and soaked again. Meanwhile, our onion seedlings are being hardened off for transplanting. Until they’re ready, we will continue to soak down the beds to get them thoroughly, deeply moist. This area had a summer under mulch and black plastic before we planted in it last year, so the soil is decently soft. We mostly want to encourage the break down of the straw.
Once these beds are ready, plus a couple in other areas we will be planting cold-hardy seeds, we will be able to move back to where the peas are and continue marking off and preparing beds for what will be planted there in June, after the last frost date.
I am so glad we were able to get that soil!! It’s going to make such a difference.
Oh, I’m going to be in for a world of hurt, tomorrow.
It’s going to be worth every bit of it! :-D
But first, I have to show off the little Crespo squash baby!
I got this photo last night.
This is how it looked, less than 24 hours later.
Then I checked it this morning, the leaves hadn’t broken free of the soil yet. Every time I look at it, it’s noticeably bigger! It’s still the only one of the Crespo squash that has sprouted. Hopefully more will emerge, soon. :-)
Today, the priority was to get the pea beds ready, and that took me pretty much all day! Thankfully, the girls were able to come out and help quite a bit, which made some jobs faster.
The first thing that needed to be done was to dig post holes and set up the uprights for the new pea trellises.
That… got interesting. The posts could not be buried at all the same depth, that’s for sure.
My apologies for the out of focus photo, but you can still see the bottom of this post hole. Yeah, that’s a rock. A rock big enough I couldn’t dig around it to pull it out!
Others were more like this one.
What I ended up having to do was to start with a spade to remove the sod on top. Then I used a trowel to pull out the bigger rocks or find and remove pieces of roots. Then I would use the post hold digger until I hit more rocks it couldn’t get through. If I needed to go deeper, I’d use the trowel again to get the rocks out, then use the post hole digger again.
I set the posts at each end first, between the flags marking the width, then strung a cord between them to make sure the other posts were in a straight line. Every 5 feet was marked with the post that would be going there.
Then the holes got dug, and the line put back across again, and I’d double check the distance for each pole before setting it.
With the girls helping, tying the cross pieces in place was much, much easier and faster!
I tried the cordless drill to see if I could drill pilot holes and place at least one screw at each pole of the first trellis we did. The batteries couldn’t hold enough charge to finish drilling a hole. I had a hard time just to reverse the drill back out again! So that jobs is going to have to wait.
We put all our hoses together, and it wasn’t enough to reach all the way, so we moved the rain barrel to a new spot. For the first bed, we had shredded paper that we soaked on the mesh top of the rain barrel, then placed along the row before topping it with straw. We were able to wet the straw down, before taking a break for lunch, and my older daughter went back to working on commissions.
Then my younger daughter and I continued preparing the beds. These are now ready for planting! The new trellises are not done yet, though. The first trellis will have a single row of peas in the middle, with the seeds planted alternately on either side of the bottom cross pieces.. The other two will have double rows, planted about 2 ft apart. After the peas are planted, the trellises will get A frame supports at each upright, with cross pieces at the bottom, and then they will be strung similar to the first one. Once the top cross pieces were in place, I got the measurement I needed. To finish this, I’m going to need 20 poles at about 5 1/2 ft long, plus another 12 poles at 5 ft long for the bottom cross pieces. My husband went ahead and ordered some more cord that I can use to string supports for the peas, sweetheart that he is. :-)
We made quite the dent in the pile of soil! :-)
Before we finished for the day, the girls started laying down straw for a pair of re-oriented beds, then hosing them down.
The three, small beds in the middle that ran East/West are being turned into two longer beds oriented North/South. For the peas, we could get away with laying down the soil in narrow rows where the peas will be planted, rather than the entire space. These beds are going to be intensely planted with onions, spinach, purple kohlrabi and purple kale, at the very least. There are two more smaller, former potato beds that are going to be lengthened to match these ones, and they will be intensely planted, too, similar to Square Foot gardening. So these beds are going to need a whole lot of soil added all over. Thankfully, these beds are much closer to the pile of soil!
By this time of the day, the winds had picked up significantly, so wetting the straw was needed as much to keep it from blowing away as for preparing it to have the soil added on top. I’m going to see if I’ve got anything else I can layer on there before adding the soil. I tried digging into the old compost pile yesterday, and the first thing I hit was the remains of some Styrofoam packaging, of the sort you might buy meat in. Plus a hard plastic lily, which was actually kind of pretty. I know my mother would never had thrown things like that into the compost pile, which means that someone else was using it for garbage, after she’d moved to her apartment. *sigh*
I might not be able to work on this area tomorrow, as I’ll be helping my mother with her grocery shopping in the afternoon, but I hope to at least get the peas planted in the morning. We’re supposed to get very warm tomorrow afternoon, so it would be good to get them in early.
I’m pretty excited about finally getting our first seeds into the ground! :-)
A while back, the girls and I decided to create a bed in an unplanned area. Today, things got pleasant enough outside that I quickly finished part of it.
This is the side that will have the Strawberry Spinach planted. These can be successively sown every two weeks, starting before the last frost date, so I wanted to get it finished.
It’s warm enough to have the garden hoses out, though we still have to be careful to make sure they don’t have water in them overnight. This meant I was able to give the cardboard layer a solid soak, first. Before we lay the cardboard down, the dead grass and leaves had been raked away, and that got put back on top of the cardboard, followed by another soak, a layer of straw, another soak, then a layer of garden soil, followed by a final soak. Over the next while, weather willing, I want to continue to soak the new garden beds as often as I can before planting, to get them damp through the layers (at least those we can reach with hoses!). That will help the layers break down faster, plus they will act as a sort of sponge, so the beds will need less watering later.
At least, that’s the theory!
The rest of this area still has just the cardboard, which also got a thorough soaking, to kill off the grass and soften the soil a bit until we get the asparagus crowns that will be going there.
At least I got one area done today! The winds had picked up quite a bit, but this corner seems to be more sheltered. That should be good for the plants!
This morning, we had snow coming down with flakes so big, I could see them without my glasses! :-D
They even triggered the motion sensor on the security camera during daylight. That happens all the time at night, with the infrared flash (and I wake up to hundreds of emails with images of snow or rain streaking across… :-D ), but almost never, during the day.
The outside cats are completely unphased by this little bit of snow. :-)
The future tomato bed got some much needed moisture! The more the better, to help break down that cardboard and straw.
The garlic sprouts don’t mind the snow at all. :-) The snow actually made it easier to see how many more have sprouted since I last checked them out.
It was interesting, going through the maple grove and checking out the areas we planted bulbs and corms in. There was a void in the snow, under every single spruce tree. This is a good visual to ID which areas are getting the least moisture, so if/when we do water where we planted, we know which areas need it more. Of course, once the other trees and bushes leaf out, there won’t be any difference, but that’ll be a while, yet.
There are still only two tulips showing, and that one onion that’s managed to survive from when this was my mother’s garden, in the areas my daughters planted their bulbs. They don’t seem to mind the snow at all!
In the sun room, while it was still just below freezing outside, the thermometer was reading 10C/50F. That is more than adequate for the onion seedlings. The light and heater bulb kept the tomato and luffa seedlings nice and warm through the night.
By the time I finished my rounds, much of the snow was already melted away, and from what I can see on the security camera live feed, there isn’t a bit of it left.
I don’t know that we’ll have a nice enough day to continue working outside today, but we’re supposed to get warmer over the next couple of days, then cool day with rain. As much as it slows down how much progress we can make on the garden beds, I am thankful for every drop of moisture we’re getting right now! After one hot day, the temperatures will drop down and basically flat line at around 8C and 10C (46-50F) for highs, and hovering at or just above freezing for the overnight lows, for the next two weeks. We might even get a bit more rain in there, too!
The weather for today is still saying we’ll have a high of 7C/45F, but that it’ll feel like 4C/39F. I’m hoping to be able to get some more progress outside, but we shall see. The melted snow might actually make it easier to dig more post holes for the other pea trellises we’ll be making. If we can’t get to that, there’s plenty of other things we need to work on! :-)
Wow. It’s coming up on 10pm as I start this, and this is the first time I’ve had to sit down for most of the day!
Today was our monthly shop, so after doing my rounds, my younger daughter and I headed out to the city. We were going to do our usual shop when I remembered I wanted to pick up some wood pellets to try as a litter replacement, so we added a stop at Canadian Tire, first.
Canadian Tire is a dangerous place for me to be, on payday! ;-)
While we were there, I got my daughter to choose a paint colour so we can finally paint the kibble house. We’ll be able to paint the cat house, too. This is the colour she chose.
She actually chose two colours, then asked me which one I preferred, and I chose the darker one. “Citrusy”, I think it’s called. The girls have declared we don’t have enough colour around the farm, and they would like to change that.
It’s going to be colourful, all right! :-D The kibble house is going to be really bright!
One of the other things we picked up was a new axe. We’ve found a whole collection of them, mostly in the old basement, but the girls have examined every one, and they’re all in terrible shape. I suppose we could fix them, but we’d much rather have something new and higher quality. After we paid for our stuff and were heading for the van, my daughter suddenly asked, “where’s the axe?”
Yup. We’d forgotten it at the cash desk!
So off my daughter went with the receipt to get it. It was so hilarious to see her coming out again, long flowing hair, skirt swirling in the wind, and an axe over her shoulder. A woman happened to be getting out of her vehicle beside us and called out, “walk proud, and carry a big axe!” Too funny!
With our rather meager success with onion seeds, when I saw some onion sets at Canadian Tire, I did pick some up.
When we got home and I quickly checked my email, I found a shipping notification from Vesey’s. The onion sets we ordered from them have shipped, with an expected arrival of May 7. Those are a red variety, so between the two, we’ll have a couple hundred onion sets to plant, on top of the surviving seedlings. We shall see how they compare! I’d rather grow onions from seeds, if only because there are so many more choices in varieties, but I’m not too fussy about it! We use a lot of onions, so I’ll take whatever will grow.
After all the shopping was put way and we had supper, the girls and I then worked on planting the squash seeds. That required taking everything out of the big tank to make room for the new starts, so the tomatoes, luffa and the last onion seeds I started have all been moved to the sun room.
All of the onions have been moved to the new shelf we got for our transplants.
This photo was taken somewhere around 9pm. I love how bright it still is outside! It was an overcast and rainy day today, so not a lot of light, but the sun room was still quite warm.
Not warm enough for the new seedlings, though. I had to get creative.
I rigged up the light we’ve been using to keep the small tank warm, so it hangs from the support bar holding the top points of the mini greenhouse in place. It has a full spectrum bulb in it, so they’ll get both good light and warmth from above, as well has warmth from below, where the ceramic heater bulb is set up. We still need to use that at night.
The small tank now has all the remaining gourds that have not sprouted yet. Without the light fixture that was helping to keep the tank warm, I added a couple of bottles filled with hot water help maintain the temperature.
We changed the level of the base in the big tank, so the cups would be closer to the lights. One of the fixtures does give off warmth, but the other does not, so I added bottles of hot water to this tank, too.
This tank now has the one cup with the Tennessee Dancing Gourds, and one cup with a single tomato seedling in it that isn’t doing well, but we just can’t bring ourselves to get rid of. Everything else is summer and winter squash. We planted fewer of the winter squash, pumpkin and zucchini, and lots of the melons and pattypan squash.
We are really looking forward to lots of summer squash in particular! The pattypans are our favourite vegetable, and we really miss being able to pick a bunch of summer squash every morning, for that day’s meals. :-)
We now have a couple of weeks or so before we start the last of our seeds; the Montana Morado corn, cucamelons, and half of our sunflowers. The corn will be in toilet paper tubes, so they’ll be in their own bin to keep the tubes supported. By then, we should be able to use the sun room exclusively, instead of the aquarium greenhouses. The gourds might even have germinated by then! ;-)
The next few days are going to be odd ones. Our days are going to warm up again, but check out those expected lows…
Tomorrow, we’re supposed to have a fairly decent 7C/45F, but then drop to -4C/25F with flurries overnight! Then, two days later, we’re supposed to reach a high of 19C/66F, only to drop to 4C/39F overnight. Then Sunday’s overnight low is back below freezing again! At least the long range forecast shows no lows below freezing after that, but… well, we do have a frost date of June 2, so there’s a good chance will dip below freezing a few times more. I just wish it wouldn’t lurch back and forth like that! Still, those daytime temperatures will give us plenty of opportunity to get garden beds prepped, and the early planting started. We have lots of work to do outside, and will need to take advantage of every good day we get!