First year gardens: what worked, what didn’t

With snow on the ground and a chill in the air, we’re already thinking ahead to what we can do next year.

Since moving here, our long term goal has been to be as self sufficient as possible/realistic for our needs. Growing up here, my parents were subsistence farmers. My mother had a huge vegetable garden, we had a few fruit trees and raspberries, and pin cherries grew wild in one area. We had chickens, sometimes adding ducks, geese, and turkeys. We had sheep at one point, but I’m not sure I was even born yet when we had those. We had a comparatively small herd of cows for milk and beef. There used to be a small creamery in our little hamlet, and we sold our cream to them – sometimes in exchange for butter! Aside from beef for our own use, once a year we’d sell cattle at auction, and that was the bulk of our annual income. Sometimes, we had pigs, too. We grew crops and hay to feed our own animals, with very little purchased feed to supplement. If the money was tight, my parents would go and get short term jobs. My dad had been working full time after they first moved here from the city, but when he asked his boss for a few days off to do the haying, he was told he could either be a farmer or work for him, not both. So my dad quit the job, right then and there!

We don’t plan to go quite that far in our goals. Our first focus will be on vegetable gardening and planting food trees, including nut trees. The challenge with the trees is finding varieties that will produce in our Zone 3 climate.

There is a great deal of work that needs to be done to get to that point, with limited resources, while also dealing with varying levels of health and able-bodied-ness.

All of which we can work with. It just tends to slow things down.

We really weren’t ready to start gardening this year, as far as clean up and soil preparation, but we went ahead and did it, anyhow. If we waited for everything to be perfect, we’d never start at all! :-D

So for what we had to work with, we were pretty ambitious with our gardening this year. My expectations were actually pretty low for this year. As we plan ahead to what we will do next year, it’s a good time to assess what worked, what didn’t, and why.

Let’s get started!

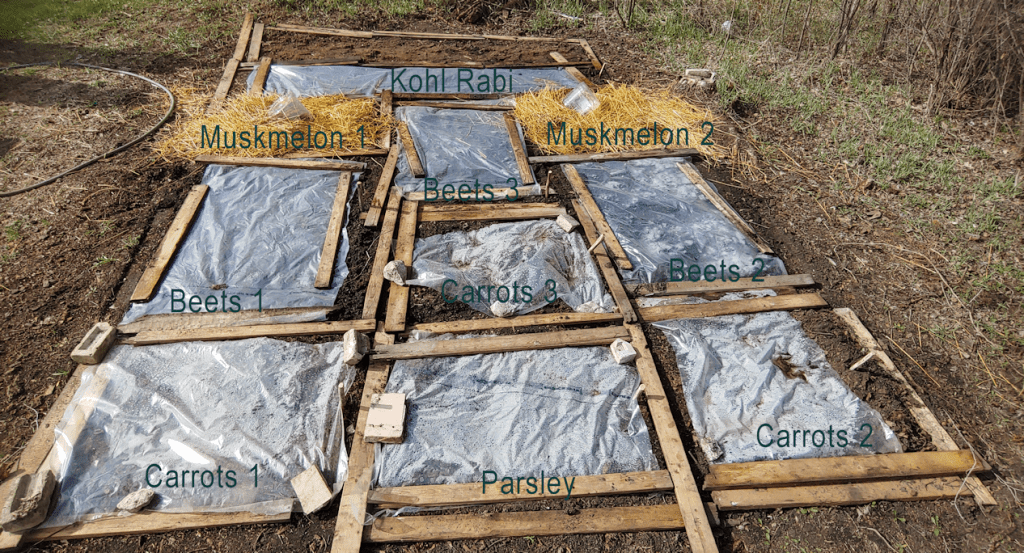
The one area that was easiest to work in was where the old wood pile used to be. Cleaning that up revealed incredibly soft soil, perfect for root vegetables.

How did this area do?

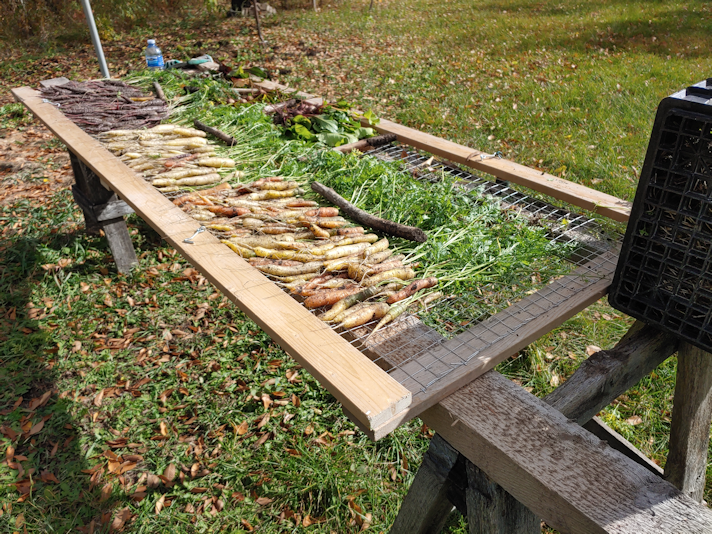
Carrots: pretty darn good, really. Of the three varieties we got, the purple carrots were a favourite. As far as taste, they were all good, but the purple carrots seemed to have a better, more robust, shape to them, and of course the colour is awesome.

Looking ahead: we definitely want to do carrots again. The purple carrots, for sure, plus there are a couple of other varieties suitable for our climate that I’d like to try.

Beets: Well, they could have been better, but deer were a problem, leaving us with a paltry crop. Even so, we enjoyed the three varieties we got. The girls especially liked the deep red Merlin variety.

Looking ahead: we definitely want to do beets again, but we are going to have to find ways to protect them from deer!

Parsley: those did really well. So well, in fact, that after harvesting and drying them, we have enough parsley to last us quite a long time.

Looking ahead: we don’t plan to grow parsley again next year. In the future, we will be growing herbs in a more permanent location, where we can try growing root parsley (which can take a couple of years for the roots to be mature enough to harvest).

Kohl rabi: this was a disappointment for me. I really hoped they would turn out! For all the seeds we planted, only a few sprouted, only two got big, and between the deer and the tiny cabbage beetles that showed up, they were decimated. The few plants we had ended up on the compost heap.

Looking ahead: I really want to grow these, but I don’t think we’ll try again next year.

Muskmelon: this was a last minute addition, with 2 purchased transplants. They seemed to do very well at first. Then one just up and died. The other grew and even started blooming, but remained very tiny. Then the first frost killed it.

Looking ahead: I remember we’d grown muskmelons when I was a kid, and really enjoyed eating them. My mother didn’t even do anything special to grow them. They were just in with everything else in the big garden. So I know they can grow here. I wouldn’t mind trying them again next year, but we shall see.

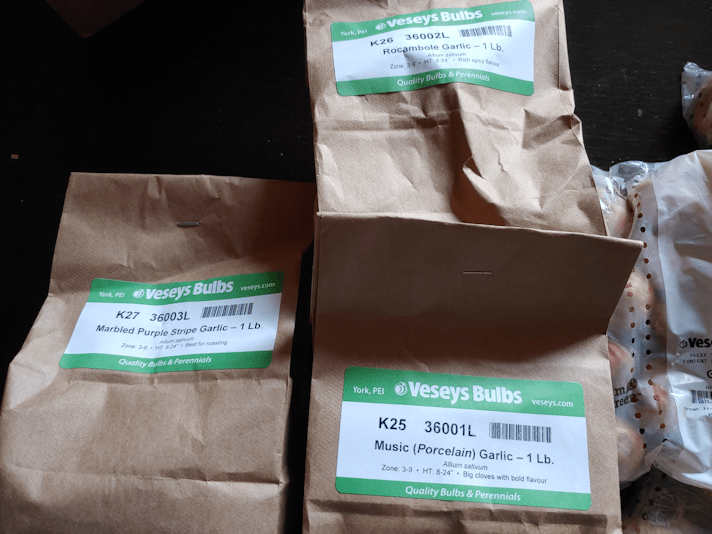
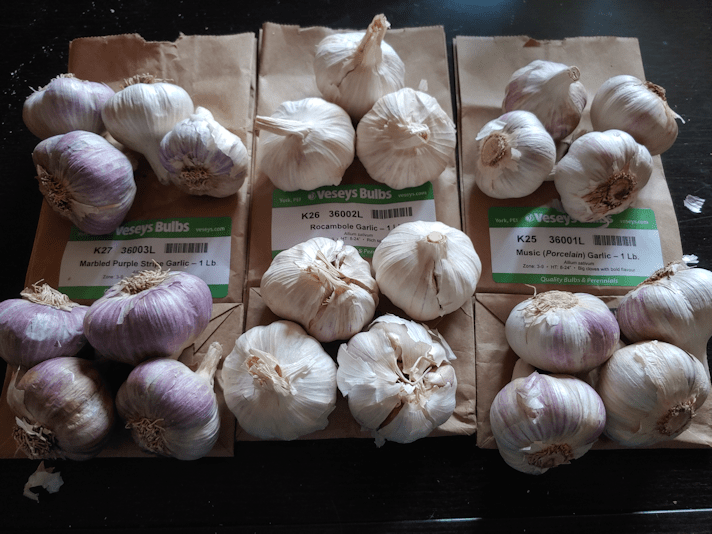
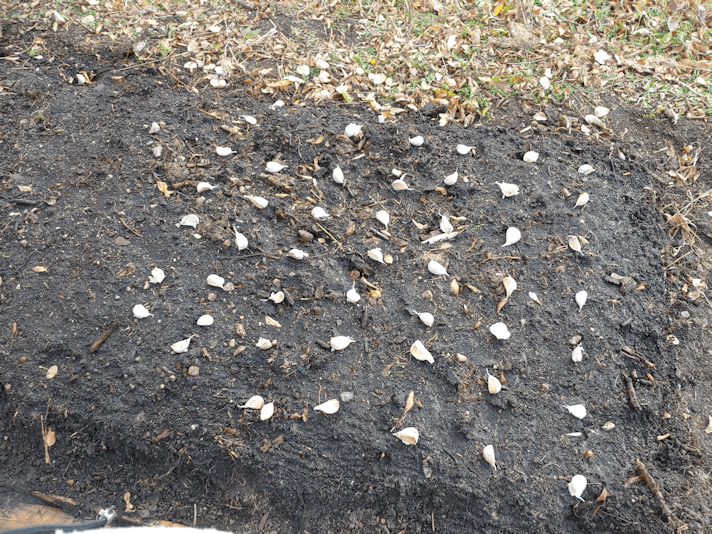
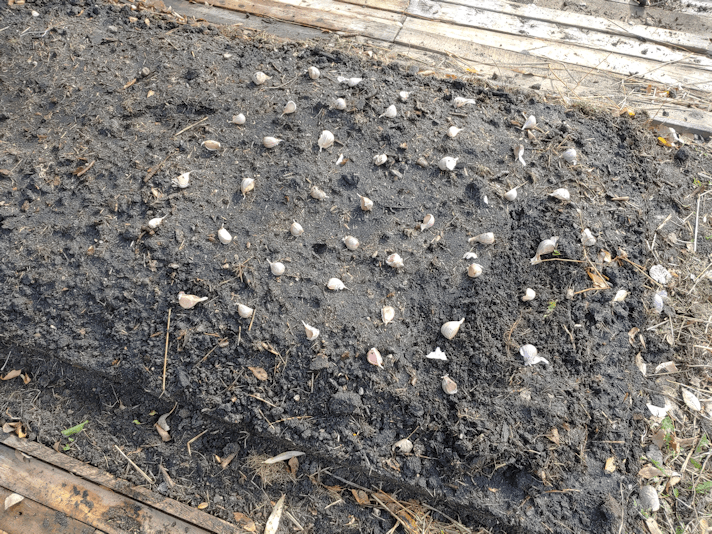
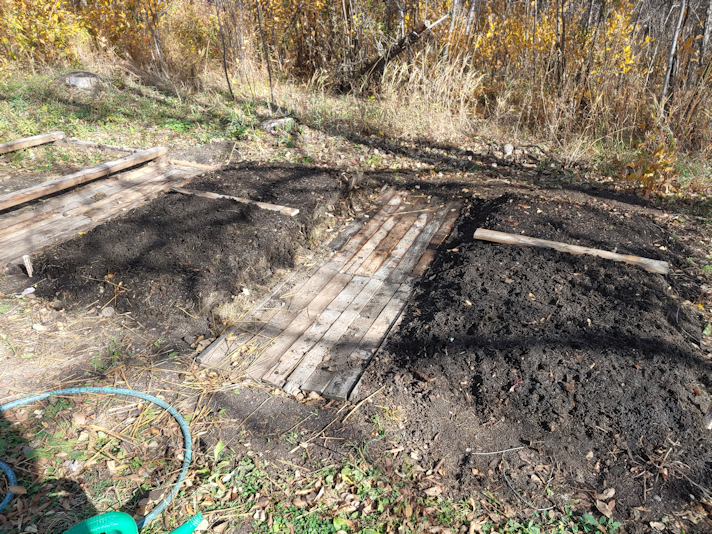
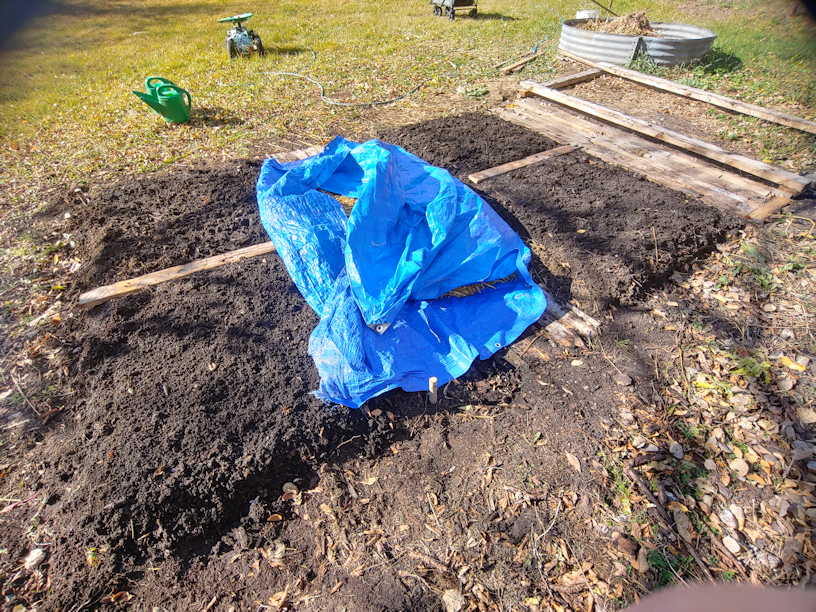
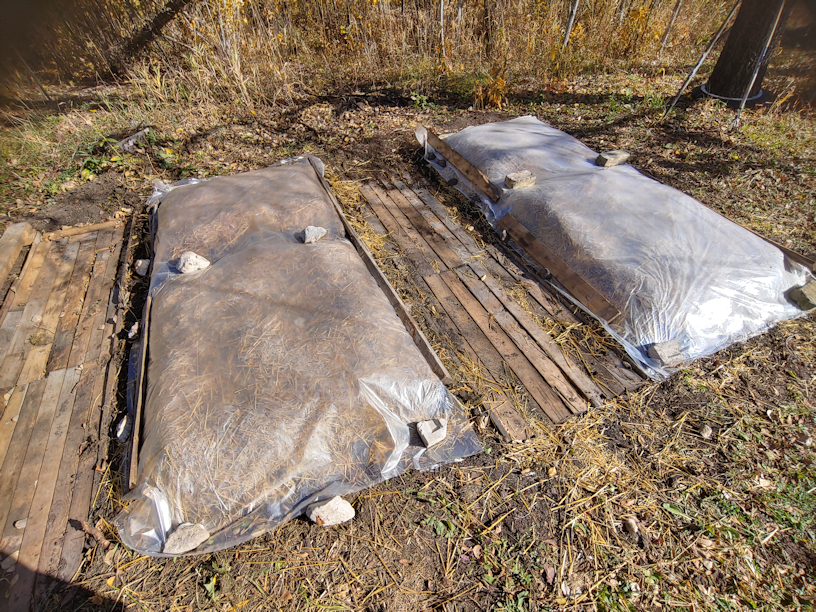
For this garden area next year: well, we’ve already got things completely changed in this area, with two slightly raised beds planted with fall garlic. There is still room for another bed the same size, so there is still potential to add to this area. Given the quality of soil, most likely we would plant root vegetables here again.

The next section we planted in was the retaining wall in the old kitchen garden. In this area, my mother had flowers and it’s where she planted her onions and garlic. Unfortunately, she also planted trees and bushes, which has greatly reduced the usability of this area.

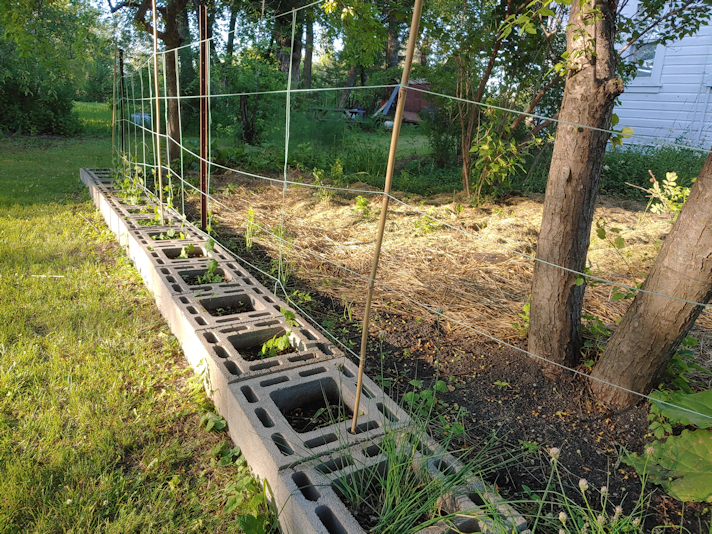
Cucamelon: these were not planted were we originally planned, and with less sun than recommended for them, I did not expect much at all. So we were very pleasantly surprised by how well they did! This is something we’ve never even seen before, other than photos, never mind tried to grow. We really liked the tiny little fruits, and even had enough to try a quick pickle.

Looking ahead: We definitely will be growing these again. When cleaning up at the end of the year, I found they had amazing tubers, which are now planted in buckets, in a cool indoor location. From what I’ve read, we should be able to transplant these tubers to get an earlier crop next year. We still plan to drag the rest of the chimney blocks out of the old basement and set them up by the chain link fence in the south yard, which should make for a more ideal growing location for them, too.

Fennel: they… got really nice fronds! No bulbs formed, though. To be honest, once we transplanted the few leggy seedlings we managed to sprout, I tended to forget they existed.

Looking ahead: I’d like to try growing these again, but probably not for another year or two.

Chives: when setting up the retaining wall, I transplanted some of the chives growing in one corner into a couple of blocks that would otherwise have been right on top of them. They grew just fine, and we were able to snip some greens any time we needed. The original clump of chives I dug them up from is still there, too.

Looking ahead: nothing needs to change here.

For this garden area next year: my daughter planted a border of Gardenia Daffodils and Eye of the Tiger irises along the south edge of this area. There is rhubarb growing under each of the ornamental apple trees. They aren’t really doing well, and I might transplant them somewhere else, eventually. Some asparagus still shows up on the north edge of the garden, but not enough to harvest. If we plant fresh asparagus, it will be somewhere else.

Though we have done a lot to amend this garden area, which had been overtaken by spreading vines and invasive flowers, there is still much work that needs to be done before the whole garden can be used, including building the soil up more at the retaining wall, to level it off. The mulching we’ve added has already improved the soil considerably, but there is so much in this tiny space, it’ll be hard to get it to a functional garden. My thought is for this area to be a kitchen garden; the place for those vegetables and herbs we use the most. There are perennial flowers in there that I want to transplant elsewhere, and while I want to keep the main rose bushes, there are lots of little rose bushes spreading that are going to be difficult to clear out. Not as difficult as those invasive vines, though!

So while we’ll be able to use parts of this garden, other parts still need lots of work. With the poles by the retaining wall being to ideal to hold a trellis, the chimney blocks are ideal for planting anything that climbs.

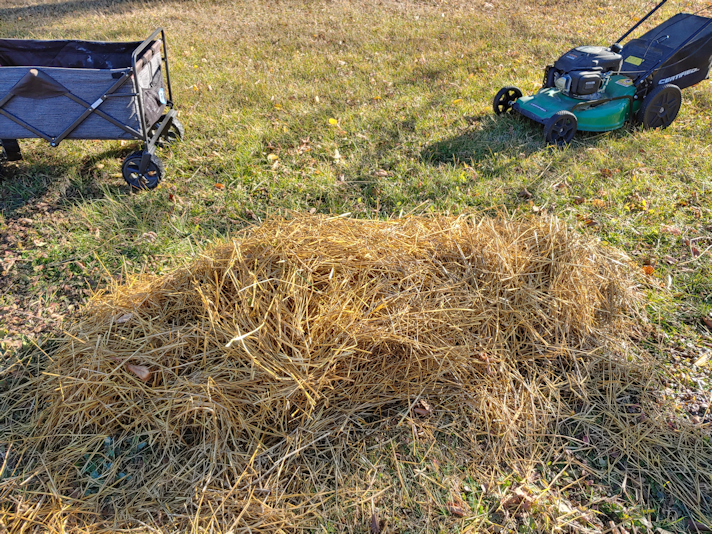
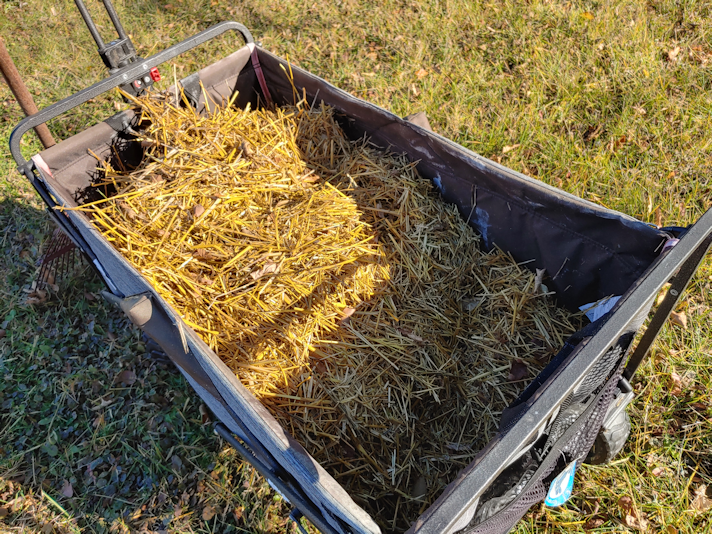
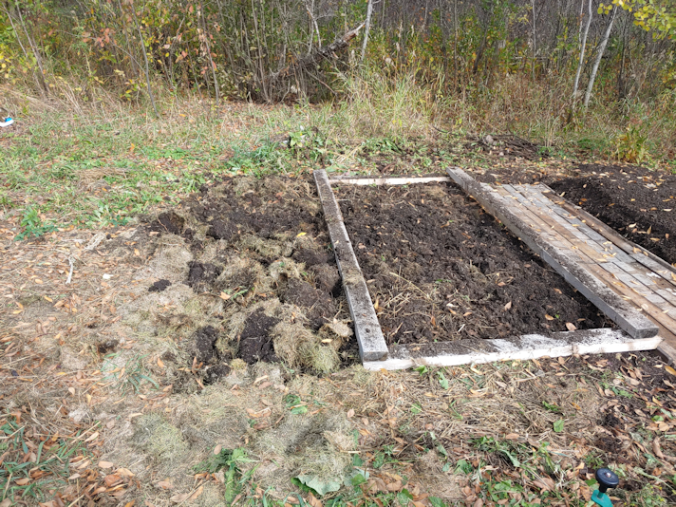
The next area we planted in was where my mother’s big garden used to be. It is in such rough shape; poorly plowed, largely neglected, full of rocks – and rock hard soil! We’d gone so far as to use Round Up on one area, then mulched it with straw, the previous year.

The mulched area became our squash beds.

Summer Squash: these probably had the roughest start, yet were our greatest success! We planted sunburst squash and a summer squash mix. A late frost damaged the first transplants, most of which never recovered, but the second group of transplants did very well.

The sunburst squash were very prolific, and we all really enjoyed eating them, too. The zucchini varieties had a harder time of it, but still did fairly well. It was great to be able to include picking squash for the day as part of my morning rounds.

Looking ahead: we are most definitely planting these again! We did end up transplanting them later than they should have been, but late frosts are an issue here, so we need to be better prepared for that.

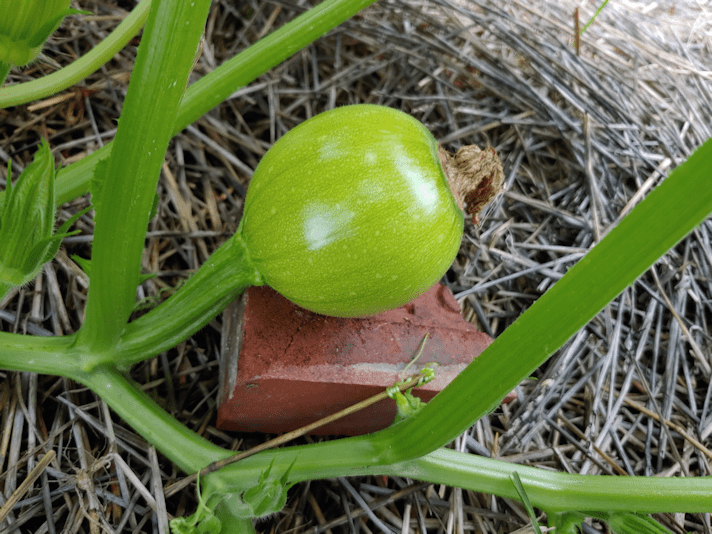
Birdhouse gourds: these were a sad disappointment for me. They took forever to germinate, and when the first batch was transplanted, they got hit with frost. Amazingly, more germinated later, but in the end, this tiny little gourd was all we got – and it got killed by the first frost.

Looking ahead: There are a variety of gourds I want to try growing, as I want to use them for various projects. I want to try these again, but now know I need to start them indoors much earlier, and will probably need to invest in a warming mat.

Pumpkins: these were planted very, very late, using seeds my mother got for free. No idea what the variety was. I quickly made some mounds to plant the seeds in, but honestly didn’t expect to get anything. Ultimately, they just didn’t have enough of a growing season.

Looking ahead: we do want to grow different pumpkin varieties. We’ll just have to make sure to start them earlier! I’m not entirely sure why I want to grow pumpkins. We’ve only ever eaten it as pie. But there are lots of recipes out there, and I’m sure we’ll find something we like! :-D

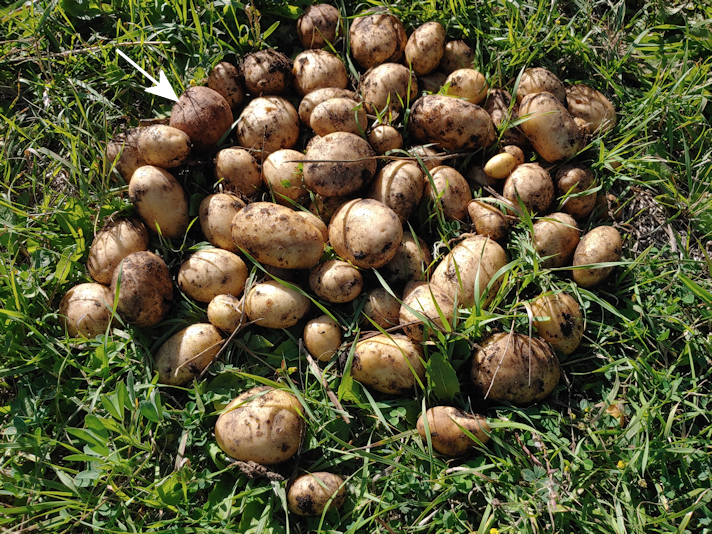
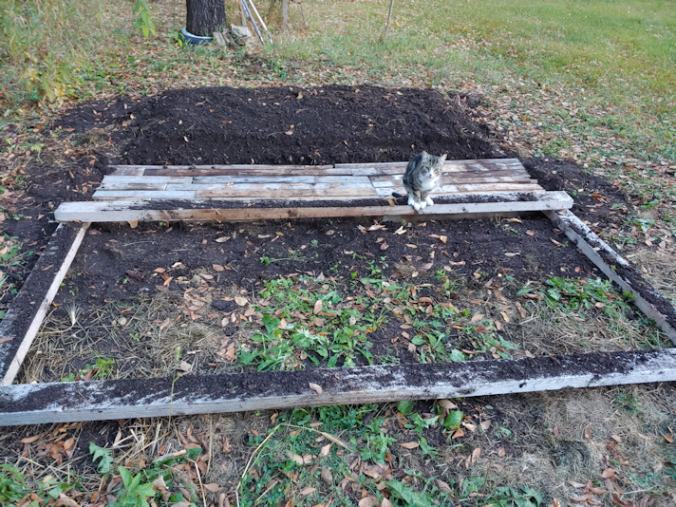
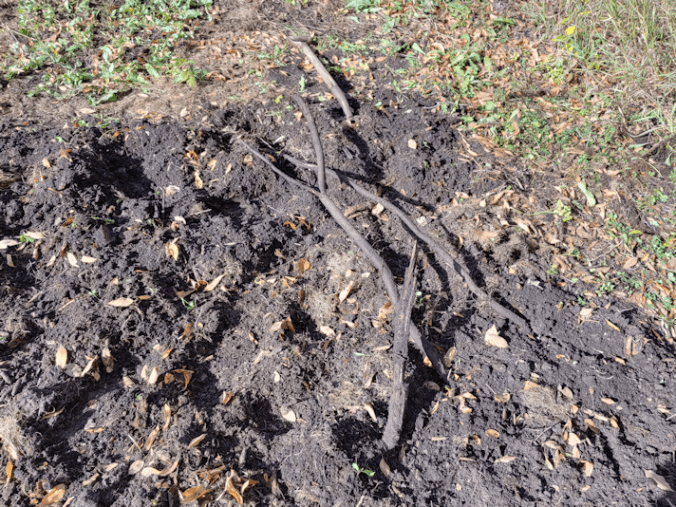
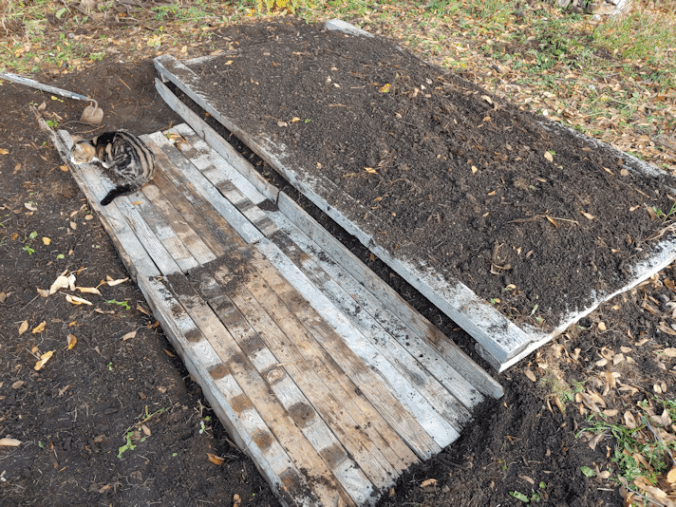
Yukon Gem potatoes: These were an experiment for us. We planted two beds, using the Ruth Stout method, because our soil is just too hard and full of rocks.

It did work, though it wasn’t a particularly large harvest. The odd thing was finding seed potatoes, still intact!

Looking ahead: we do want to grow more potatoes, and try other varieties. We’ll still probably use the Ruth Stout method of growing under mulch for a few years, until we can start building raised beds. For now, I’ve taken the seed potatoes I’ve found and replanted them along the north side of the garden, covered in mulch. It should be interested to see if they grow at all, next spring! We planted only 6 pounds of potatoes this year. Next year, we definitely want to plant more, now that we know we can successfully grow them without digging and hilling.

Giant Sunflowers: We had several goals with our sunflowers. Some were met, some were not!

Growing them for bird seed seems to be a miss. We likely planted them too late, as it doesn’t look like they reached maturity at all.

While I did harvest a couple of heads that are hanging in the basement, we’ve decided to leave the rest out over the winter. If there’s anything the birds can get out of them, great. It looks like the deer are still trying to eat them, too, as I find more and more of them, broken.

The other purposes we grew them for is as a privacy screen, and wind break. With a 50% loss of our first planting, likely to deer, we planted another variety, just to fill in the gaps. We did not expect to get seeds from them. It sort of worked. There just wasn’t enough of them.

Looking ahead: yes, we want to plant these giant varieties again, but if we do, we need to get at least double, if not triple, the amount of seeds to create the windbreak and privacy screen we want. Hopefully, we can plant them earlier, too. We also want to try other varieties, including one that is the source of a purple dye. We definitely have to figure out how to protect them from deer, though!

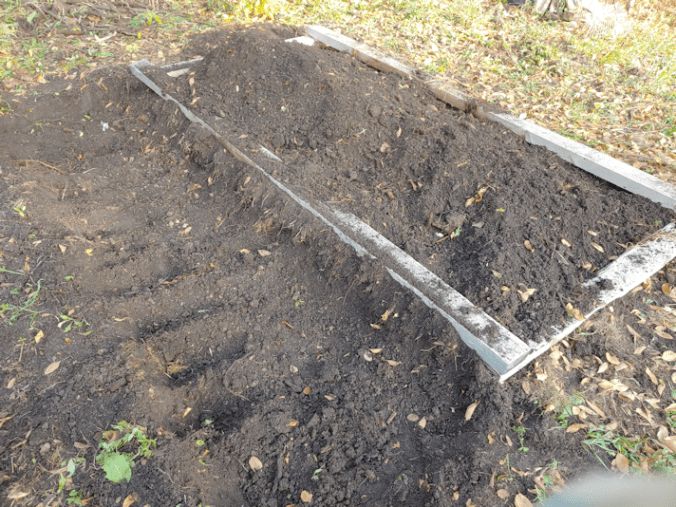
For this garden area next year: In the mulched area the squash were in, the soil is so much softer! Except for all the rocks that are still a problem. In cleaning up for winter, I turned the pumpkin mounds into larger beds, so that area now has 6 beds, including one long thin one at the back, prepped for next year. Plus, there are the two potato beds nearby. Any potatoes we plant next year will be in a different location, to avoid attracting the Colorado Potato Beetle. We will likely continue to reclaim more of the old garden area, but not all of it, as we intend to plant a nut orchard in here in the relatively near future. The sooner we can get that done, the better, since it takes so many years before nut trees start producing. So we will focus mostly on where we have already planted, but when it’s time to do more, it will be elsewhere.

Final thoughts: so it’s been a year of successes and failures, but we did learn a lot from our first year of gardening here.

We have a better idea of what works for us, what we like and what we want to plant next year. For the longer term, we definitely will need to look at getting poly-tunnels – possibly a greenhouse – to be able to extend our growing season and protect from frost. We are looking to claim more of the outer yard, towards the barn, where there is more sun, for things like that. We also know that winds from the South are more of a problem than winds from the North, and need to plan accordingly. This year also really hit home for me that we need to built tall, accessible, raised beds. Any raised beds will help when it comes to our rocky soil, but this old body is just too broken, and height will help.

Little by little, it’s getting done!

The Re-Farmer

Fall planting: the last of the flowers, plus other progress

Along with the three types of garlic that came in, my daughters’ flower bulbs arrived.

The tulip collection included 10 bulbs each of Orca, Pinksize and Brownie, and 8 bulbs each of Black Hero, Pamplona and Vanilla Coup. There was also 6 bulbs of Gardenia Daffodil.

So while I was having fun working in the soft soil, planting garlic, the girls did the hard work of digging holes for bulbs in hard soil, and between roots!

They did not take pictures of the process, unfortunately.

The tulips were planted not far from where they’d planted the Bulls Eye tulips that came in earlier. This area was selected for its combination of sunlight and drainage, and because they’re not supposed to be watered, and this is not an area where they might accidentally get watered along with something else.

The tulips need to be planted up to 12 inches deep, if we want them coming back year after year, but that depth includes the depth of any mulch. So they planted the 50+ bulbs at 6 inches, adding a 6 inch leaf mulch. Leaves, however, crumble and settle quite a bit, plus the wind was threatening to blow it way, so they also wet down some peat, which we still have lots of, and added that to the top.

The Gardenia Daffodil had different requirements, so it was planted with the Eye of the Tiger irises planted along one side of the old kitchen garden.

When we are next able to, we’re thinking of picking up a couple of bags of soil to scatter on top of the mulch. The soil under the mulch in the old kitchen garden is much improved from before, but the straw itself, and even the grass clippings, aren’t breaking down very quickly, making it not at all conducive to planting in it. It’s all just too stringy! :-D And now there’s the excess flax straw from inside the cat shelter. Adding some soil and peat, as well as moisture, for the microbes and worms to do their stuff should help it break down faster.

We also got a couple other things off the to-do list today.

Now that the soil around the support post has had a few days to settle (and get stomped down some more, every now and then), our new bird feeder is now hung up. Hopefully, this less decorative design will not get flung around in the wind as much as the church and barn shaped ones were, and with the support now buried in the ground like a fence post, we don’t have to worry about it being knocked over any more!

I also had a chance to work on the grapes, while the girls were still digging holes for tulips.

The first thing that needed to be done was prune them. I hope I did it right. From what I’ve read, they should be pruned above the second bud from the ground, as grapes will be produced on first year vines. The problem was, I couldn’t see any buds at all! So I tried to err on the side of caution.

I had to move the trellis supports so I could get behind to harvest the grapes. Today, I finally set them into the ground in their new locations, so we can squeeze behind them again, if necessary. On the right is a long piece of rebar, but the white support on the left is actually two plastic tubes on a shorter piece of rebar. The bar wasn’t long enough to hold the trellis wire, but it is long enough to support the plastic tube. I had to lift off the piece that was woven into the wire mesh, then reset the position of the other two pieces.

When I set this up as a makeshift trellis, I was able to bang the rebar into the ground with a piece of broken brick I’d found while cleaning up around the storage house. I tried that again, but it broke. So I dug around in the sun room, among the things we’d found in there while cleaning it up. There was an old hammer with a ball peen on one side, and a heavy flat head on the other. Much heavier than a regular hammer. For the long piece of rebar, I had to stand on the stairs to reach the top and start hammering it in.

The head fell off the hammer.

It turned out the handle was rotted out at the head!

Thankfully, I still had the new handle I’d found while cleaning up the old basement. I’d intended it for something else, but it didn’t fit right, so I’d left it for later.

Now, I’m glad it didn’t fit the other thing I’d meant it for!

Mind you, it didn’t fit the head of this hammer, either, but I was able to shave the corners of the top, and got it on. I was able to finish the job!

After hammering the rebar supports into the ground and getting the plastic tube in the wire mesh back in place, I was able to use foam covered garden wires a darling friend found for me, to tie the pruned vines to the mesh. Then I used one of the bamboo poles that we’d used in the squash beds as a support for the top. With the grapes growing so well this past summer, I was able to see the weight of the vines were pulling the wire mesh downwards, so this should add some extra support.

Now, all they need is for some mulch to be added to protect them from the winter’s cold. From what I’ve found out about growing grapes in our zone is that they should be just fine with snow as insulation; the vine would be laid down on the ground to be covered. Planted against the storage house like this, that doesn’t really work out, so mulch it is!

We now have all the flower bulbs we ordered planted – 200 grape hyacinth, 100 snow crocuses, irises, gladiolas, and almost 70 tulips – plus the garlic.

That’s it for fall planting this year.

Now, we need to assess how our vegetable gardening went, and decide what we want to plant next year! :-)

The Re-Farmer

Fall planting: the garlic is in!

I was so excited to finally get our bulbs this morning!

Here are the three varieties of garlic we ordered.

I appreciate how they add things to the label, like “best for roasting” , “rich, spicy flavour” and “big cloves with bold flavour”.

This is what 1 pound of each variety looks like. I wasn’t sure how many bulb heads or cloves that would translate into. That was the main reason I wasn’t sure if the two beds I’d prepared for them would be enough. At least I was reasonably sure it wasn’t going to be too much space! :-)

Today turned out to be a very windy day, so my daughter and I broke apart the cloves inside the house.

Those old take out containers were perfect for keeping the varieties organized!

Also, they made the house smell absolutely amazing!

I had been watering the prepared beds, to try and get moisture down to the layer of compost and straw buried inside. Unfortunately, I wasn’t able to do that as often as I’d wanted to, so I gave them another thorough soak.

The frame used as a guide to dig 4′ x 8′ beds fit in the next space, inches to spare between it and the ring around the new compost pile. It was ready, just in case I needed a third bed.

Thankfully, I didn’t!

Porcelain Music Garlic

The first variety I planted was Music. Directions for planting hard neck garlic I have looked up, say to plant cloves 4 – 8 inches apart, in rows about 12 – 18 inches apart. Since we are doing beds rather than rows, I laid them out in a roughly 6 inch grid. The soil is so soft here, I was able to plant the by just pushing my gloved fingers in to the correct depth, without the need for any tools.

Purple Stripe Garlic

With the number of cloves we got from the Purple Stripe, my grid wasn’t quite as even at the end. :-D The corners on this bed seemed like they would collapse a bit, so I moved the cloves that would have been planted there to the other side.

Once the two varieties were planted, I added boards to mark where the grid ended, and the third variety, which would be in both beds, started.

Racombole Garlic
Roggenrola (Pokémon) - Bulbapedia, the community-driven Pokémon encyclopedia

The last ones to plant were Racombole. Which sounds like a Pokemon.

Meet Roggenrola.

(image source)

The Racombole turned out to have a lot more cloves, including more smaller ones. It was almost like soft neck garlic that way. So these were planted slightly closer together. More like 4 inches apart, rather than 6. I probably shouldn’t have bothered to plant the smallest ones, but I didn’t want to waste a single clove!

Those boards across the beds also came in very handy to put a foot on to brace myself, making it easier for my short little arms to reach the middle. ;-)

Planting in these beds really demonstrated for me that building much higher raised beds for accessibility is a very good idea!

The next step was to add the mulch, and this is where the wind became a real potential problem.

Thankfully, I thought to put the chopped up straw on a tarp.

It was easy to slide the whole thing into the path between the beds. I could then grab handfuls, keeping them low and out of the wind as much as I could, to spread out.

I then had to rush to give the mulch a soak with the hose, more to weigh the mulch down than anything else! As you can see, the wind was already starting to blow the straw away!

The last step was to cover the beds with plastic – which the wind certainly made challenging! Thankfully, we’ve found a couple of rolls of plastic while cleaning up the house and basements, so we have plenty, and I could unroll it directly on the mulch, adding weights as I did.. The plastic is actually folded in half on the roll, and I didn’t bother to unfold it, so this is a double layer of plastic on the beds.

As you can see, those board across the beds came in handy for the weights, too!

The plastic isn’t something I’ve seen suggested, in general, but we are in zone three, and most of the places I’ve looked up are in at least a zone 6. While October is the month for planting hard neck garlic for them, we probably should have planted these at the end of September – and would have, if they had not been back ordered.

The issue is overnight temperatures. We’re consistently hovering just below freezing. In the long range forecasts, our highs for the day will be just barely above freezing.

There are a few things going for these beds that should help with our planting this late in our zone. Burying the organic matter at the bottom of the beds means there should be some warmth generated as they break down, just as it would have if it were in a compost pile. The mulch will also help regulate the temperatures and, finally, the plastic should help keep things a bit on the warm side. I don’t want it warm enough for the garlic to start sprouting, but they do need to start their growth below ground before winter temperatures set in.

I might remove the plastic later on. Snow also acts as an insulator, plus these beds should not need any watering throughout the growing season. Between normal precipitation and the mulch, they should have enough moisture. Letting the snow cover the beds would give them that first burst of moisture in the spring, and the beds being slightly raised means they should thaw out faster than the ground surrounding them. However, the plastic will also keep the moisture they already have from drying out before the snow falls, and will help the soil warm up even faster in the spring, giving the garlic a chance to start growing a bit earlier. I would then remove the plastic once I saw that greens were making their way through the mulch.

My mother grew garlic in the old kitchen garden, but she never used mulch or plastic or any of the other techniques I am using that irritates her so much. :-D So I can’t go by how she did things, in past years.

So if there are any experienced garlic growers here, I would love to hear how you have done it! And would you leave the plastic, or take it off before the snow falls?

I’m really looking forward to seeing how these do. When it comes time to harvest them next year, we will be looking to save the largest bulbs for planting. Hopefully, we’ll have enough large ones to have more to plant than what we started with.

You just can’t have too much garlic, after all!

The Re-Farmer

Thanksgiving lunch, mulch experiment and outside kitten progress

Lats this morning I headed over to my mother’s place with a turkey dinner to have lunch with her.

On the way out, I spotted three sets of ears in the window of the cat shelter.

Tiny sets of years belonging to the little kittens! I didn’t dare go closer for a picture, though, because I didn’t want to startle them away. There may have been more cats inside with them that I couldn’t see, too. I’m so glad to see them in the shelter, rather than hiding under it!

My mother and I had a very nice lunch and visit (how visits turn out is always touch and go with my mother! LOL). I brought a mask exemption card to tape to her door, and another she can carry with her. Hopefully, that will help reduce the harassment from the caretakers. Unfortunately, I think more has happened than she is telling us, because she kept insisting she “doesn’t want a war” and even started asking me not to call the housing department responsible for her building to talk about the caretaker’s abusive behaviour. She wore a mask – under her nose! – to meet me at the side door that’s very close to her own apartment door, and even in that short distance, by the time she was back in her apartment, she was struggling to breathe. She had also mentioned to me on the phone, waking up and struggling to breathe again. So I brought a foam wedge we got for my husband that he ended up not being able to use. Depending on how it’s positioned, it can be used under the knees, to lean against while sitting up in bed, or to sleep in an inclined position. The doctor had recommended trying to sleep more upright to see if that helped. When she saw it, however, she flat out refused to even try it and told me to take it home. Eventually, she said it was because it looked ugly! Which I highly doubt is the real reason. Frustrating!

Still, it was a good visit and my mother was very happy I was able to come over. I think the pandemic social restrictions are really getting to her. There used to be many events and gatherings, either in her own building, or in nearby venues, that she attended. Now, there are none. It seems the only real “social” interactions she’s getting these days are with the nasty caretaking couple. The restrictions seem to be bringing out the worst in people. I think she is getting very lonely, and some serious cabin fever!

Once at home, I took advantage of the warmer weather. With the garlic ready to be picked up when the post office opens tomorrow, I was thinking of how I wanted to mulch the beds. The straw is not breaking down as I had expected, and I decided to try an experiment.

Using the new push mower to chop it into smaller pieces!

The bag filled up very quickly, but it wasn’t until I had already started that I realized I’d forgotten to check the height of the mower. It was at 7; the highest setting! So things weren’t quite as chopped up as I wanted.

I lowered it to 3 and that chopped things up much better.

It took only 2 bags to fill the wagon, it’s so fluffy. LOL I laid out a tarp near the beds the garlic will be planted it, to make it easier to work with when it’s needed – plus I can fold half the tarp over the pile to keep the wind from blowing it away.

Unfortunately, I had an unexpected problem.

The new lawn mower stopped starting.

Right from the beginning, it was harder to start, but every time I had to turn it off to empty that bag, it kept getting harder to restart it until, finally, I just couldn’t start it at all. It had been so easy to start, before! In the spring, when we had so much rain, I was using it a lot and had no problems. Then the rain stopped, and the grass never really got long enough to make it worth cutting again. So it’s been sitting in the garage for the last couple of months. That on its own should not cause the problem. I couldn’t find any reason for it. It just won’t start. After getting only 2 1/2 wagon loads done, I finally gave up.

I will just have to take it in to the small engine shop in town to get it looked at, later in the year.

So the experiment worked, as far as chopping up the straw to make a finer mulch. It was just the lawn mower that failed!

After giving up on that task, I took the time to take the sun room replacement door off in preparation for painting the frame. I plan to get at that as soon as possible tomorrow morning, then go to the mail to pick up our bulbs. I will get the garlic in, while the girls will be doing the digging to get their flowers in.

While working at the door, I spotted this.

That is two little kittens in there! One of the orange tabbies, and Creamsicle Jr. As I walked around after taking the picture, Potato Beetle came out of the entry. I hadn’t seen him at all in there!

So I decided not to go inside after taking the door off, and stayed to see if I could get the kittens to play.

I had a target in mind.

This little lady. In the interest of trying to reduce future litters, we are hoping to get her friendly enough to bring her inside.

Yeah. I know. We have too many cats inside already!

Nostrildamus, meanwhile, couldn’t get enough attention! It was only a couple of weeks ago that we were lucky if we could pet him at all. Now, he’s all over us, asking for pets! He still doesn’t like to be picked up, but he does like chewing on fingers!

The two napping in the shelter eventually came out to see what was going on, and joined in on the play. I was able to pet the little orange one – the smallest of the 4 younger kittens – and even managed to pet Creamsicle Jr. a bit. The calico, however, would not let me touch her! However, my daughter came out to join me for a while, and she tried to play with them. Not only did she get the calico close enough to pet, she was even able to pick her up! Only briefly, and she didn’t like it, but she didn’t run away after jumping down, either.

Aside from Nostrildamus, we seem to be having a better time of socializing Butterscotch’s second litter than the older kittens. Though it didn’t help that Butterscotch was around and growling all the other cats away, including her own babies!

Still, we have made some socialization progress!

The other little orange kitten came by later. That one, the gender is still in doubt, but from what little we’ve been able to see, I suspect it is female.

I thought it was supposed to be rare for orange tabbies to be female, but here, they seem to be the majority! Of the older kittens, Nostrildamus is the only whose gender we are sure of. His one confirmed sister is now inside, but with the luck we’ve been having, his other sibling and Rosencrantz’s baby are also female! And we can’t get anywhere near any of them. :-(

Ah, well. We will just have to do what we can. Mostly, I’m just really, really glad the little kittens are going inside the shelter.

The Re-Farmer

Fall clean up: preparing the second garlic bed

Since I went and build up a bed and walkway yesterday, I kinda had to continue today! :-D

Here is where I left off, yesterday.

The goal was to create another bed with compostable material buried in it, and make a second walkway.

The first thing that had to be done was to break up all the soil inside the frame and pull out any weeds and roots I found. Then I loosened the areas the walkway was going to go. This area had been mulched with grass clippings, so there weren’t a lot of weeks that needed to be pulled out of there.

Then it was time to dig out the new bed, just keep enough to start hitting gravel. Of course, there were more roots – and rocks! – to take out.

There wasn’t much in the new compost pile I could use for this, so I also loaded up a wheel barrow full from the old compost pile. That got topped off with another wheel barrow full of old, damp straw.

The compostable material got buried, with extra soil added from digging out the walkway. I wanted this one to be slightly narrower than the other, to give me more room for a third bed, if I decide to do another one.

I had to make many trips to the junk pile to find enough wood to do the walkway 3 layers deep, like the first one.

Once this was done, I went to clean up the mess I’d made digging for pieces of wood in the junk pile. A lot of the pieces were either too rotten, or too full of nails, staples and screws!

Cleaning that up led to finding all sorts of things, so that will get it’s own post!

So we now have to beds ready and waiting for the garlic to come in. Tomorrow, I will get one of the girls to help me move the frame and see if we can fit a third one in. I don’t even know if we’ll have enough garlic to need three beds, but if it’s feasible, I’d rather have it and not need it, then need it and not have it!

The Re-Farmer

Fall clean up: I think I went overboard!

When I cleared out the old wood pile from the yard last year, the soil I found below was a very pleasant surprise. Still, there was a whole lot of clean up that needed to be done this spring, before we could plant anything. We were still finding some pretty strange things in there! The biggest challenge was all the tree roots crisscrossing the area.

Now that we’ve had our first vegetables growing in there, it was interesting to see what was coming up along with them! After being buried by a wood pile for decades, there were still seeds and root systems that managed to survive and sprout. There was plantain (the weed, not the banana!), which is not surprising; that stuff can grow anywhere and is very hardy. Clover was more of a surprise, but there was also a lot of some long, delicate green plant that I didn’t recognize at all. I thought it might be a flower of some kind, but it never had any. There were flowers that came up, too, and since they came up where the khol rabi failed, to, I let them bed until today, when they were basically done blooming, anyhow.

All this meant that in digging over the beds, I was basically stopping with every fork full to break up the soil with my hands, so I could pull out as many weeds with their roots as I could.

I also found tree roots I’d missed in the spring!

While fighting with the roots, my feet sinking into the soft, soft soil, I kept thinking about where and how we would plant the garlic. The spaces to walk on, in between the beds of carrots and beets we’d planted, was packed down harder than the rest, of course, and it almost seemed like wasted soil!

Also, I discovered that, like the girls had discovered when planting deep bulbs, it seems even here, there is only about 8 inches of topsoil before I started hitting a lot of rocks.

We’ve got three kinds of garlic coming, which meant three beds. How and were did I want to arrange them?

Then I remembered I still had a 4’x8′ frame from the goat catcher we’d built.

Those are coming in very handy!

I dragged it over, and the area I’d worked on turned out to be almost exactly the size of the frame!

That’s when I started to go a bit crazy.

I started to dig out the soil inside the frame.

Hitting more roots, of course.

By this time, plan had started to form in my mind.

All the stuff I’d added to the compost a little while before?

It ended up in the space I’d shoveled out, along with some damp straw that I raked up from around the old dog houses, where they had been used as insulation around them.

When it came time to return the soil to the space, I kinda went overboard again…

I kept digging.

The vague plan in my mind took into account walking paths, and I didn’t want to be sinking in the soil. The pieces of wood I’d used to walk on weren’t very stabled, but what if…

What if they were laid down on an area that was dug down and leveled to just above the gravel?

So after I used a hoe and rake to even out the mound of soil, I used them to even out the pathway and started laying down boards.

This is how far I got before stopping for supper.

This is where I pause to say how much I appreciate the girls. While I’m outside doing stuff like this – which I consider fun – they’re inside taking care of the cooking and housework – which I loathe.

Then I went back to finish the job, and this is how it looked.

The wood I was using was salvaged from the junk pile in the spring, and some of if was slightly wider. I used the wider ones to make “walls” on either side of the path, then laid down three layers of boards in the middle. This made them a lot more stable to walk on, and also made the path the same thickness as the height of the “walls”. I had to cut a few to size to fill in gaps at the ends, which worked out all right.

This is old wood, some of which was already starting to rot. If I’d had the option, I would have put down gravel or something. These will do the job for now, and perhaps some day we’ll replaced them with flagstones or something.

When the girls came out to see how it looked, I snagged one of them to help me move the frame to the other side of the path.

This is where the second bed will be.

With 3 varieties of garlic, it looks like I’ll have to make three of these. It looks like there is just barely enough space to do that, before reaching the metal ring around the compost, though I could put the third one at a right angle to the others, instead.

I don’t know if I’ll be up to doing three of them! I don’t know how many cloves we’ll get out of a pound of seed garlic, each. If I do only two, I could split one variety between the two beds.

We shall see, after the second one is done.

I made a whole lot more work for myself by doing this, but… I think I like it better!

The Re-Farmer

Harvested: what I expected, and what I got

Today, I finally got to harvesting the garden beds we planted where the old wood pile used to be.

This is what we started with, in the spring.

You can read about how the garden plots were doing by August, here, so I won’t repeat myself in this post.

One of the things I’ve been thinking of, while working in the rocky soil of the old garden area, is that we need a soil/compost sifter. That would make clearing the rocks and debris out much easier.

While looking up different design ideas to build one, I suddenly realized…

We already did build one.

The screen “door” we made for the old basement doorway is basically the same idea as the steel mesh sifter my dad had made for gravel, decades ago. It just uses 1 inch mesh instead, and has a support bar across the middle. I’ll just need to reinforce the mesh before using it for something bigger or heavier, since it’s basically just stapled on in between where the wood holds it in place.

Last night, I realized it would also be great to use to lay out the carrots and beets after I harvest them.

It turned out to be perfect for the job.

Here is how I set up to start.

The saw horses were too narrow to support the screen, so I laid out a couple of 8 ft boards we didn’t use when building the goat catcher this past summer, to support the frame. I set up near the new compost pile, as I figured there would probably be a lot going into there!

It turned out to be less than I expected.

The few kohl rabi plants went straight in. That was a disappointment. So few came up and, between the bugs and the deer, only two got big, and then they got eaten. For those, I knew there would be nothing to harvest, so there were no expectations in that regard. I do want to try growing it again, but I’m not sure we’ll try again next year. I think it would benefit from a cold frame to plant earlier, and definitely something to protect from deer. Nothing we grew got attacked by insects the way these were, so we’ll need to keep that in mind before we try growing anything in the cabbage family again.

Of the one remaining musk melon, the frosts killed that off, and it didn’t even make it to the compost pile. It just shriveled away to almost nothing! When clearing away the bricks that were supporting the cloche that doubled as a slow watering container, I found some … friends…

Slimy friends!

That left the carrots, beets and parsley.

As far as expectations, I figured we would get a decent amount of carrots. We’ve been nibbling at them all summer, so I had a good idea of what I would find. I wasn’t expecting many, though, and not very many large ones.

With the beets, I was expecting nothing. Not long ago, the girls picked the biggest ones they could find and cooked them, and with the deer continuing to eat the greens, I didn’t expect any worth keeping at all.

I was pleasantly surprised!

We actually got quite a few decent sized carrots. Not the full size the varieties had the potential to grow to, to be sure, but still more than I expected.

As for the beets, I did actually find some of each variety that were big enough to not go on the compost heap. The smaller ones, this late in the season, were pretty leathery and not salvageable. I expected that of all of them, so getting the few we did was bonus. There’s basically enough for one meal, if we combine then all together. :-D

The last thing to harvest was the parsley.

Parsley is something that I could have left alone. They would come up next year, and I do plan to do that eventually. When I do, I will choose a permanent location for the plants. We don’t actually use parsley all that much, so these will be dried.

Since these were not hidden underground, I got exactly what I expected. A whole lot of parsley! I had to do some cramming to get them in that crate!

These all got left outside while I worked on cleaning up the garden beds – which ended up being completely different than planned, so that will get its own post! At the end of the day, because it’s been getting pretty chilly at night, we brought the entire screen into the old kitchen. The beets will be cooked soon, but we have to figure out what we want to do with all the carrots. :-)

The parsley, on the other hand, will have the greens picked over and trimmed, washed, then laid out on trays to dehydrate in the oven overnight. The new oven has a “warm” setting, which should be the perfect temperature for the job.

Once everything was harvested, the beds needed to be prepped for when the fall garlic finally comes in – hopefully, not too late!!

And… I went a bit nuts on that.

You’ll be able to read about that in my next post…

:-)

The Re-Farmer

Fall clean up: squash beds done

Yay! The squash beds in the old garden area are now all done.

Also, where the pumpkin mounds were, we now have three new beds.

Here is how it looked when I started.

The bamboo stakes are marking where I planted the seed potatoes I found while digging up the potato beds. It should be interesting to see what happens there in the spring!

Being such a narrow row, it shouldn’t have taken long to prep this area. It was, however, incredibly full of rocks. Not even big ones, really. Just so many! If we decide to continue planting here, this area would be the one most in need of a raised bed. If we do build a raised bed in this area, it’s going to be long, narrow (no more than 2 ft wide), and will have a built in trellis for a back “wall”.

Here is how the pumpkin mounds looked before I started.

The black that you see is the ashes cleaned out of the fire pit.

The crab grass growing through it is noticeably brighter!

Once done, here is how the back row looked.

It’s hard to see through the mulch, but I turned the soil and mulch, so the more decomposed mulch was more on top, and the less decomposed mulch was partially buried. I don’t know what we’ll plant here next year, but whatever it is, it’ll need to be pretty hardy, until we can build the soil up more!

Here is how the pumpkin mounds look now.

I was pretty sure about turning one of the mounds into a larger bed, but with so much crab grass, I didn’t think I would do the others. However, after a year covered in mulch, and a lot fewer rocks then in other areas, the soil was much softer than expected, and I ended up turning them all into larger beds. The one on the left had the least amount of grass and weeds to clean up, but it also had the most rocks that needed to be cleaned out! When I started on the middle mound, the soil was so much better than it had been, I went ahead and dug another bed, pulling up as many weed roots as I could. That went fairly easily with the crab grass. They took the easy route, and their rhizomes spread like a net under the mulch, rather than into the ground. Those come up quite easily.

Then I hit a patch of Creeping Charlie, making its way through the mulch. I lost about an inch or two of topsoil, pulling up those root mats. !!

The third bed was even easier to dig up, so that went very quickly.

So this area now has 6 beds in total, ready for next year. :-)

The next area to prep will be the carrot and beet beds. I’ve been leaving them in the ground as long as possible. Which might be working for the carrots, but the beets are mostly a lost cause. Too many visits from deer! That area will be cleaned out and prepped for the winter garlic that should be coming in within the next couple of weeks.

I will leave that for tomorrow, however. Today, we need to strain the crab apple cider vinegar. We meant to do it yesterday, but so many things went sideways, it got postponed.

I am happy to say that the septic truck did show up yesterday, shortly before 6pm. The poor guy looked so tired! All I could say after greeting him was “long day?” I think he had been bracing himself to be given a hard time for being so late, because all the tension seemed to just droop out of his body as he simply said, “yeah.” He ended up spending half an hour on the tank. I honestly don’t know how my parents emptied the tank only once a year with 7 of us. We didn’t empty it this past spring, since we’d had him come out in the winter, when things started backing up into the basement. So it was more than 6 months since it was cleaned out, and it showed!

When we booked him to come in, I asked how much it would cost so I could take out cash; it’s not like these guys can take debit. ;-) I didn’t have exact change, but when it came time to pay, I didn’t ask for any, even when I confirmed the amount and he gave me a lower number! Maybe he was giving me a deal for being so late but I figure, if anyone deserves a tip, it’s the septic guy! If I’d had more to give him, I would have!

I really, really appreciate people like him. What would we do without people willing to do such dirty jobs?

Meanwhile, I have not heard back from the plumber. We’re getting near the point of having to call someone else. Our plumber knows this place and has been doing work here for many, many years, plus he’s really gone above and beyond for us, so I would rather not go with someone else. But we need to get that well pump changed. We should have done it months ago, but all our “spare” funds went to paying for the new differential on my mother’s car. If it does turn out to be something wrong in the well itself, we want to find that out now, not when there’s snow on the ground! We shall see how that pans out.

The Re-Farmer

Fall clean up: starting the squash beds, plus… this could be bad!

On my list of things to do today was to prep the squash beds for winter.

Of course, things happened, so I started much later than intended – past 2pm – and didn’t get as much done as I’d planned on.

Here is how it looked when I started.

The first thing I had done we pick up the bricks we’d used to weigh down the plastic we used to cover the beds in the spring, and again under some of the plants to protect the stems or support heavier squash.

You can really see which bed had the most successful plants!

Also, notice the raspberry canes to the left on the foreground? Or, should I say, the bare raspberry canes?

The deer have been nibbling the leaves off those, as well as the sunflowers!

I had brought out both the potato fork and the spade to see which would be better to work on the beds.

It turned out to be the fork. After a year under the mulch, the ground was a lot softer than before, but even with the fork, I had difficulties getting past the rocks. We have only one good spade. I don’t want to break the blade on a rock!

Here is how they looked when I finished for the day.

The bed on the left was still a real chore to dig up. With each section I lifted with the fork, I had to break up the soil by hand. That gave me the opportunity to pull out weed roots and the more in-the-way rocks. The bed on the right was much easier to work, and I had a lot fewer rocks that needed to be pulled out. The squash plants were also buried so they can compost directly into the soil.

I was really happy with how much easier the soil was to work with. To compare, I had pushed the spade into the ground next to the mulched area. After working for a while, I took off my jacket and hung it on the spade. A few minutes later, and a gust of wind turned my jacket into a sail and down it went. So I pushed it into the ground again, this time, standing on the foot supports and bouncing my ample weight on it a few times, then hung my jacket back on the handle. The next stiff breeze, and it fell over again! And I didn’t even hit and rocks when I was pushing in the spade! What a difference, working under the mulched squash beds. Not only was the ground much easier to work, I was finding SO many worms! What a great sign. :-)

The next area I will dig up will be the long row at the back, and then the pumpkin hills in the middle. The one hill nearest the back row, I might enlarge to create another longer bed, but the other two are so surrounded with crab grass, I’m just going to dig up a roughly 4′ x 4′ area and pull out as many rhizomes from there as I can.

The main reason I had to stop, though, we because I started to feel rather unwell. It took a while for me to realize something.

I hadn’t eaten yet, other than a couple of freshly baked cookies, before I headed outside.

Usually, I do my morning rounds outside, then have breakfast while going over the trail cam files. Today, I was out earlier to make sure the gates were open for the septic truck. (Which still hasn’t shown up.) Then I heard someone in the kitchen and with our kitchen being so small, I decided to wait until they were done.

Then my husband came over and informed me we were almost out of butter. He is having a good pain day today for a change, and was up to making cookies, not realizing we didn’t have enough butter to make them. Normally, we would have done our monthly shop by now, and there would have been a whole bunch in the freezer, but we had to take care of other things. We’ll be going in a couple of days.

So I made a quick run into town to pick up a few things along with the butter. I’m glad I did, because once I had a data signal, I started getting texts from our plumber. I’d sent him pictures of our well pump when I was in town yesterday, as he requested, and he was responding to them

*sigh*

The first thing he noted was that the new pump is 1/2 hp, while the old pump is 3/4 hp. My brother bought this pump and he knows the system very well, so I knew it would work. It’s just not as powerful. After seeing the pictures of the old pump, from various angles, he thought the problem might be in the well itself. This is something my brother and I had talked about, as he thinks the foot valve might be leaking. The problem is, this is a very old system. He has actually worked in there before – about 20 years ago! – and that was probably the last time anyone has gone into the well.

So aside from it getting harder to find parts for it, it’s going to be fragile. If he starts opening things up to see what’s what, we might end up with no water at all. I could go to a company that specializes in wells, but they don’t like these old systems, either, and he said we would most likely be told we need a new well drilled. We could instead replace the submersible pump in the well, along with the pump in the basement, and that would take care of all sorts of potential problems down there. I asked him for an idea of what those pumps cost, but before he could get back to me, I had to leave town and head home, where I would no longer be able to get text messages. I sent him a message to phone me later and headed home.

Once at home, I emailed my brother to pass on the info, since he knows the system way better than I do. We both agreed that we should just get the pump in the basement switched to the new one, then see how it goes. If we still have problems, then it would be time to have someone go into the well and see what’s what. I hope it doesn’t come to that. Over the years, the well cover has been damaged. It’s a concrete circle with bent rebar handles embedded in the concrete. At some point, one of those handles got broken right off, and the other is bent down against the concrete. I’m not sure how we would get it open.

So I ended up calling the plumber back and leaving a message about starting with switching out the old pump in the basement and seeing how that goes. I also called the septic company to see if they are still coming out today, but we’ve had no call back from them, either. Which is really, really unusual for them.

I don’t like have the gate not only unlocked, but open, for so long. At least I can keep an eye on it through the live feed of the garage security camera.

It’s still afternoon as I write this, but it feels like it should be several hours later, right now!

I have such an urge to just go to bed right now.

The Re-Farmer