When it hits the fan…

… the fan eventually gives out.

After some 40 years or so, our bathroom fan gave out.  Yesterday, our electrician friend came by to take a look.  I had asked him if he could install the fan my husband bought, and how much it would cost.

It turns out the motor for this fan is still manufactured.

So he took it out to take home and see what he could do with it.  It’s likely unfixable, but he would be in the city today and would look for a replacement motor, which would be much cheaper than having him install the new one.  I am expecting to hear from him some time tonight about that.

Meanwhile, this is how it looked.

20180807.fan.space

To be honest, I really expected it to be worse. :-D

I’ve since cleaned it out as much as I could, and washed the other parts and pieces.

20180807.fan.pieces

I figure, if he does find a new motor for it, this is probably going to be the only opportunity to clean all this out for… oh, who knows how many years!

It’ll be nice to have a fan again.  One that doesn’t scream when we turn it on, even. ;-)

Soon, I hope!

The Re-Farmer

Clean up: firepit area, gate and fence line start

This evening, I decided to be methodical about clearing the west yard trees, and get right into the fence line.

It was a lot more work than I expected!

This is what it looked like when I left it last time.

I didn’t get photos from this angle today, but if you look behind the dead trees I cut down, that’s the area I focused on.

I had not really intended to start on the fence line on this side yet, but the mess was starting to get to me.

I am using the row of elm trees as my guide line for clearing the fence.  Anything between where those trees are and the fence line will be taken out.  This will leave a walkable path to access the fence.

I started at the gate post and made a discovery.

20180806.cleanup.firepitarea.gateposts

There’s two of them.

From what I can figure out, as the older gate post started to become unstable, a second post as added, and new and old were tied together with a loop of barbed wire.

It was most likely a temporary fix that ended up a permanent one.

The problem is…

Both posts are rotten and broken at the bottom.

The hedge that had grown into the fence was pretty much the only thing holding it up.

I don’t really want to replace this fence.  I’d rather take it out completely.  I am wanting to install new fencing that will include both driveways, instead.  So for now, this old fence will remain for as long as it holds up.

As I worked down the line, I also discovered that there’s not just two gate posts, but two fences!  Somewhere along the way, the old barbed wire fence got a mesh wire fence added with it.  Then other cable type wire was also added, along the bottom.  You can see part of it at the bottom of one of the gate posts, above.

This made clearing away the lilacs more challenging, because it was woven through both the barbed and mesh wire.  For many of them, I had to cut them at least twice, so I could get the pieces out of the fence.

A surprising amount of the lilac was already dead.  Most of the living lilac is on the other side of the fence.  Which I will leave for now.  It’s keeping the fence from falling over.

In the end, it took me almost two hours to clear barely 8 feet of fence line!

20180806.cleanup.firepitarea.fenceline.start

I’m also clearing in between and around the lilac and caragana that is in line with the row of elm trees.  That included taking down a dead lilac that was a thick as a tree!

I’m going to have to change up when I work in the yard.  We’re getting heat wave weather warnings for the next week.  I like to do the work in the afternoon or evening, but the hottest part of the day tends to be around 5pm.  It’s almost 9pm as I write this, and we’re still at 25C, with a “feels like 29C”.  I’m going to have to start working on this stuff in the morning, instead, when it’s cooler, because by afternoon, it’s supposed to reach 29C, and feel like 34C, but be only 18C in the morning.

I am not a morning person. :-D

Well, if I’m driving my daughter to her shifts that start at 8 or 9am anyway, it will work out for me to do yard work when I get back in the morning, instead of after I pick her up at 4 or 5pm.

She has a road test booked in September.  She’ll be able to drive herself to work, if we don’t need the van for something else.

It is becoming increasingly clear we are going to need a second vehicle for the girls.  That and our utter dependency on having a vehicle makes me extra paranoid about having only one.  It’s not like there are any buses we could use instead, or anything is close enough to walk to!  We went about a month not driving our van until we had the money to replace the fuel pump, to avoid causing more damage (which our mechanic really appreciated), and that was enough for us!

At least we’ve finally reached a point where we are caught up.  As of this month, we have no expenses left related to our move.  Yay!  It only took us 9 months. :-/  Starting next month, we can start diverting money to a contingency fund to pay for things like getting the trees cleared from the power lines and roof in the fall, or towards getting a second bathroom installed.  Or unexpected emergencies, like the van breaking down!

The problem is, there are SO many things that need work around the house and yard, it will be hard to prioritize.  We had hoped to get the second bathroom installed this summer.  It’s high on the priority list, but clearing the trees became the higher priority since… well… we’d really like to NOT have our roof damaged or have branches knock out our power lines.

Little by little, it’ll get done.

The Re-Farmer

Clean up progress; west yard trees

Today, I went back to around the west side of the maple grove to continue cleaning up.  This time, however, I focused on the area nearest the fire pit and gate.  This area seemed to have been mostly spruces, though only a few have survived.

Let’s look at the before pictures.

20180730.cleanup.firepitarea.1before

This spruce tree is right behind one of our piles of wood for the fire pit.  It’s doing rather well, though as with most spruces, the lowest branches on the trunk were dead and hidden by the ones above.

20180730.cleanup.firepitarea.2before

Right at the wood pile is an elm tree that we thought was dead, but after we finally got some decent rain, suddenly shot out some green.  It is still mostly dead, but we’ll be leaving it for now.

Most of the spruces behind it are completely dead.  Only two are still alive, plus one scrawny little thing that I’m hoping will survive now that I’ve cleared away the dead stuff.

I went further under the trees for these next photos.


Going through here, looking at all the dead wood, all I could think of was “that’s a fire hazard, that’s a fire hazard, that’s a fire hazard…”

I started by pruning the spruce in the top photo and working my way in a bit, then went to taking down the two bigger dead spruces.  These ones have been making a mess of my nerves, every time we used the fire pit and a breeze blew towards them!

I took the bigger one down first, because it was easier to get at.

20180730.cleanup.firepitarea.1tree.down.1

When it finally started to drop, it got hung up on the trees on the other side of the gate.  The cut part also just stayed on the trunk.  I finally grabbed a piece of wood from the log pile and swung it like a baseball bat against the trunk.

20180730.cleanup.firepitarea.1tree.down.2

It still just dropped straight down, being held up by the other trees.

I finally got it to fall, though!

20180730.cleanup.firepitarea.1tree.down.3

After this, I cut the tree up into small sections so I could move it and work on the next one.

20180730.cleanup.firepitarea.2tree.down.1

Which also got stuck and needed whacking.

20180730.cleanup.firepitarea.2tree.down.2

It, too, was being held up by the trees on the other side of the gate.

20180730.cleanup.firepitarea.2tree.down.3

My older daughter happened to come out to ask me something, so she got to do the whacking…

20180730.cleanup.firepitarea.2tree.down.4

And also got it down from the other trees.

After this, I took down the two smaller dead spruces.

Then I realized I had completely blocked the gate, so the smaller stuff I would have taken to the pile outside the yard with a wheel barrow had to wait.

Here are the after pictures.

20180730.cleanup.firepitarea.1after

In the foreground is the spruce from the top photo.  As I cleaned up after taking down the dead spruces, including cutting back some spreading lilac and caragana, I kept finding more and more dead stuff, buried under dead leaves and grass, and especially along the fence line.

20180730.cleanup.firepitarea.6after

I’m leaving the stumps of the trees I took down for now.  You can see the pruned trunks of the two remaining spruces here; the skinnier one has just a few live branches at the top.  There are still dead branches I want to prune away, but for those, I’ll need the extended pruner, so it will wait for now.

There’s still lots to clear out of here but, at this point, the heat was becoming and issue and I was getting ready to head inside.

20180730.cleanup.firepitarea.trees.down.after

The remains of the 4 dead spruces I took down, plus some of the larger dead pieces I dragged out while cleaning up.  Lots of dead caragana and lilac hidden among the living.  It seemed every time I thought I was done, I kept finding more and more to pull out!

I was just taking these last photos when my daughters came out to haul it all out of the yard for me.

They are so awesome!

Though it’s no where near done, the difference is still pretty amazing.

The Re-Farmer

Clearing the apple trees

This afternoon, I got out the weed trimmer and started going around the edges of the yard, in preparation for mowing.  I wanted to trim all the way to the end of the row of crab apple trees by the main garden, so I grabbed an extra extension cord.  This made for a total of 250 feet of cord, and it was enough to do almost the entire yard, without having to move from the outlet outside the kitchen to the one in the sun room.

20180726,apple.trees.trimmed

I also tried to go further into the overgrown main garden a bit.  The plow line is there, and my goodness, it’s rough.  What a mess.  Still, I was able to go into the overgrown area a bit to trim out some burdock, before it got too bid, as well as some thistles.

Mostly, though, I’m glad to get the area around the apple trees finally done all the way to the end.

20180726,apple.tree,dying

This is the very last tree in the row, and as you can see, the main trunk is mostly dead.  It’s just got a few little branches with a handful of leaves on them.

I am planning to take the main trunk down completely.  What greenery is there is mostly from the saplings at its base.  I will select the one that looks the strongest and healthiest, then cut away the rest.

It you look in the background of the photo, you can see the north edge of the spruce grove, though a fair number of poplars have seeded themselves further in.  That north side is a straight line of spruces which, I learned only recently, was planted by my oldest brother.  I’m not sure if I was even born when those were planted!

When I am done in the maple grove, I plan to start working on the spruce grove from here.  I want to clear away the majority of the self-sown trees, but mostly, I want to clean out the bottom branches of the spruces.  They are all dead, though hidden by the living branches higher up.

I think, for the spruce grove, instead of working from one end to the other, as I have been with the maple grove, I will start with clearing the circumference.  Especially the fence lines.  They are getting away too overgrown, and I want to reduce the damage being done to the fence as long as I can (though when we moved here, there was already one tree that had fallen right on the fence).  Hopefully, I’ll at least be able to get that done this year.  The bulk of the clean up in the spruce grove will be done next year.  This is going to eventually involve clearing out many downed trees, and cutting down lots of dead ones, too.

It’s going to be a huge job!

The Re-Farmer

Clean up, west maple grove, continues

Such a lovely day today!

We had a gentle rainfall this morning, and when it cleared up, it stayed nice and cool.

Perfect weather for some manual labour!

So after a run into town this morning for a medical appointment for my husband, I spend the afternoon working on the next section of the west side of the maple grove.

Photo heavy post, ahead! :-D

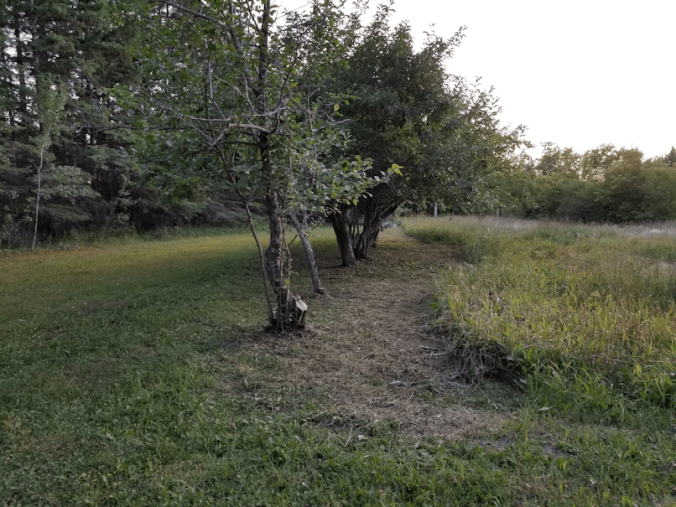
Here are some before and after pictures, starting from the south side.  I took this from where I last finished off. (click on the images to see larger versions)

I decided to take out the little caraganas, since there are two large ones in the areas I’d cleaned up before.

I didn’t use the weed trimmer first, as I had last time, since it’s corded and there had been rain.  I suppose the electrical cords likely would have been fine, but trimming damp greenery just makes a mess that needs to be scraped off the trimmer guard, frequently.  That, and I didn’t mind leaving the flowers to bloom longer, though dragging trees or pushing a wheel barrow through them sort of negated that particular thought! :-D

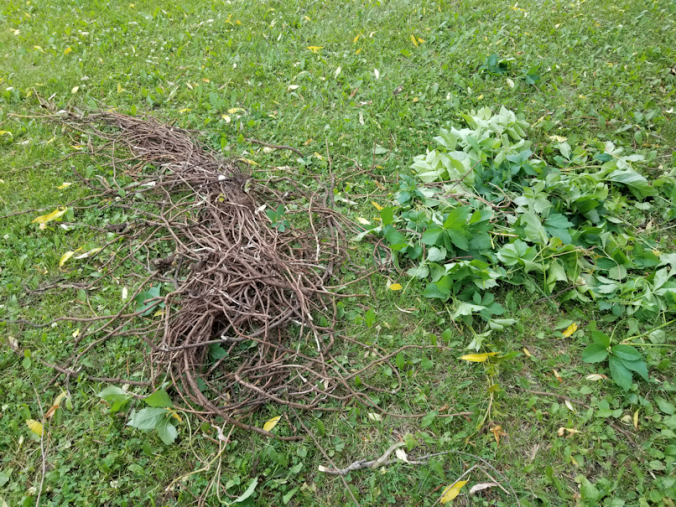
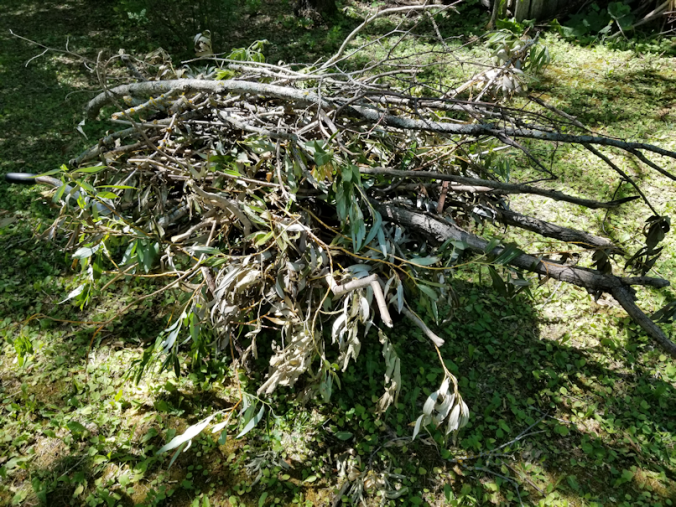
In the background, you can see the dry, small-wood pile that we use for the fire pit.  Almost everything I took out today got hauled outside the yard, mostly by wheel barrow, so very little was added to that pile.

Mostly little things to clean out here.  I am finding quite a bit of these…

20180725.cleanup.maplegrove.west.stump

… very old stumps of either maple or elm (this one is maple) that have a whole lot of suckers around it.  When I find these, I choose one that looks the strongest, straightest and healthiest, then cut away the rest, plus any dead suckers that are around as well.  After this, I’ll just need to maintain around them, cutting back suckers and doing judicious pruning, and the remaining sucker should survive.  With proper care, ten or twenty years from now, they should be very big, strong trees. :-)

I didn’t need to do a lot in this section.  A bit of clearing away in one area, and finding plenty of dead branches buried in the tall grass.

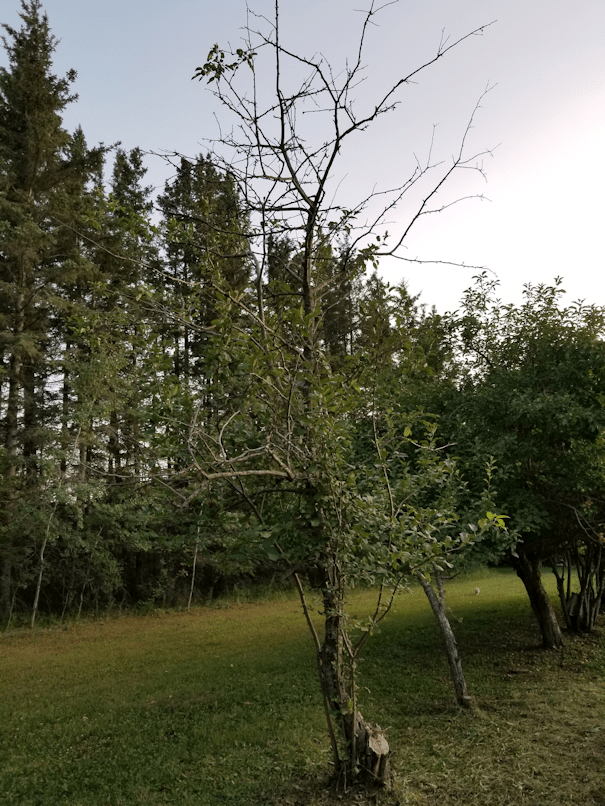
I was able to do a fair bit of clean up on the nearer willow, which you can see somewhat better in these pictures.  The willow was as far west as I worked, today.  There are two big old willows in here, including one you can see way out at the very end of the row, at the fence line.  The nearer one, unfortunately, it showing a lot of rot.  It sounded quite hollow as I worked around it.  It has had sections at the bottom cut away and, at one point, I climbed up on them to reach a dead branch to trim away, only to have one part of it collapse under my foot, because it was so rotten.  I am actually not sure how it’s still standing, to be honest.  And yet, it looks quite green and healthy at the top!

Another area that needed very little work; I mostly used the pruning saw to take down dead branches higher up.  That and removing dead branches hidden in the grass.

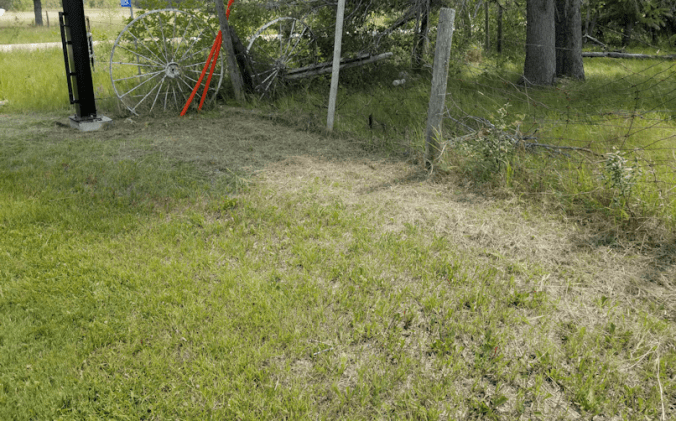
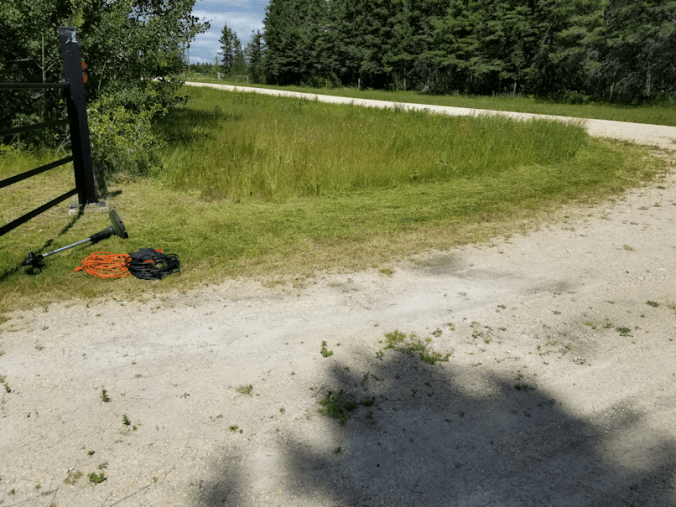
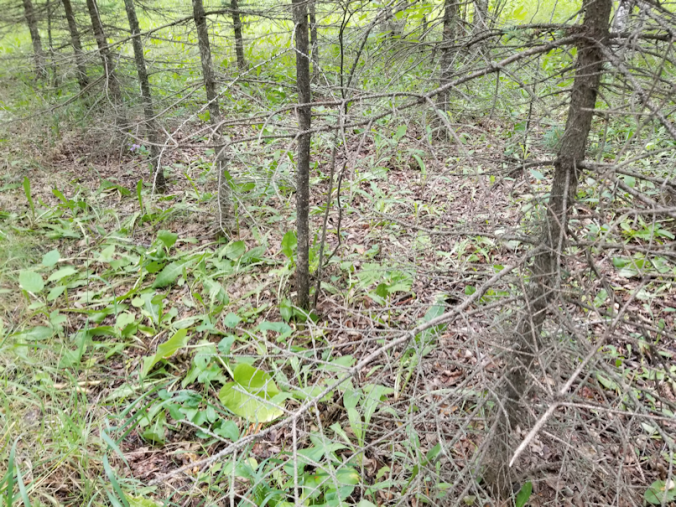
Here, things started needing a lot more clean up.  The wheel barrow in the background is as far West as I worked.

There were some small, dead and dying spruce trees that I took out.

Removing these is a multi-stepped process.  As you can see in the before picture, there are a lot of dead branches on the lower trunks.  I would cut away these branches from the bottom 5 or so feet, then top the tree by cutting the trunk at about 4 1/2 feet.  After dragging the top out to the wood pile, I’d then cut the remaining trunk to between 1 and 2 feet.  I will go back to them later to cut them as level to the ground as I can.

After I had topped one dead spruce tree, I starting cutting the remaining trunk at about 2 feet from the ground.  The trunk, however, would vibrate so much, my saw blade would bounce right out of the cut.   So I grabbed it and gave it a yank, watching the ground as I did.  The tree looked like it could just be torn from the ground, so I set myself up and started pulling.

Things where going well, until there was a sudden crack; the next thing I knew, I was flat on my a$$, my hat flying one way, and my glasses another.

Crud.

I very carefully squirmed to my knees, making sure there was no chance of me accidentally crushing my glasses, and began looking for them.  The problem with this was, I needed my glasses to be able to see!

Thankfully, I eventually saw some metallic reflections next to the wheel barrow.  They were fine!  What a relief.  That last thing we would have needed is the expense of a new pair of glasses!
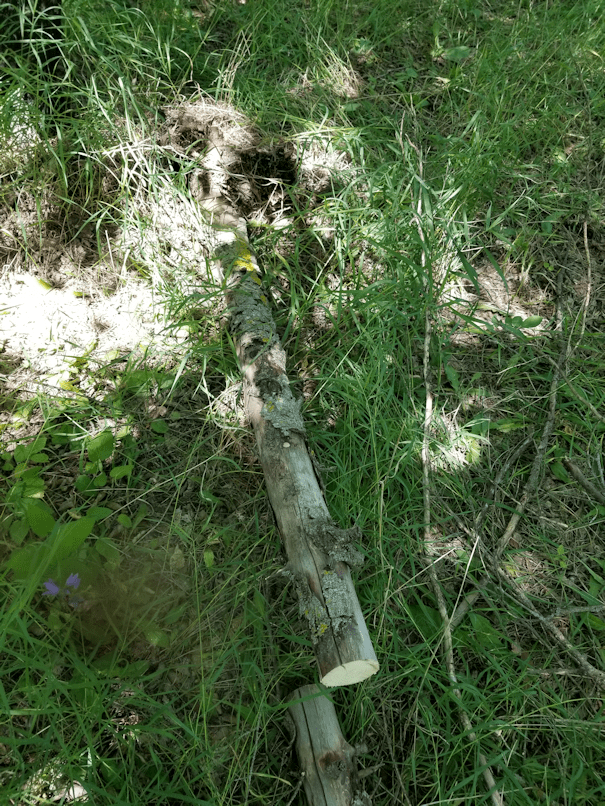
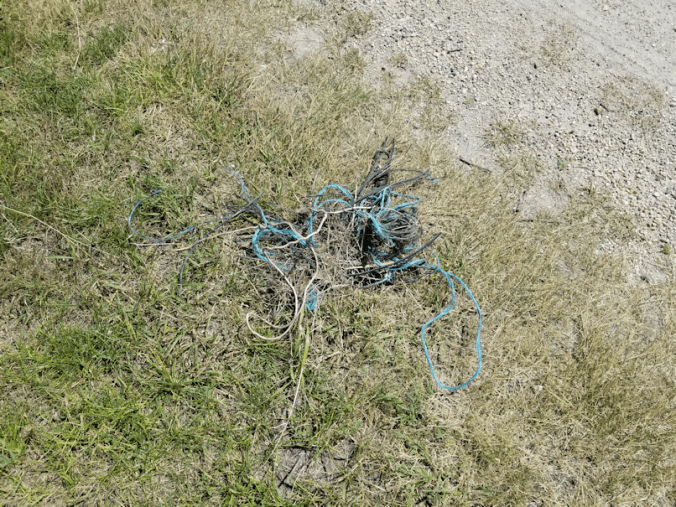
This is why I fell.

20180725.cleanup.maplegrove.west.break

That little tree had been dead for a good long time!

When looking through this section of spruces before, I had estimated that I would need to take out 2 out of every 3 spruces, just to get them spaced well enough to thrive.

20180725.cleanup.maplegrove.west.crowded.row

I hoped that taking out the dead and dying trees would be enough to take care of that spacing I wanted, though they were all looking pretty dead.

I was mostly right.

As I began taking down some spruces and pruning the dead branches of the ones I hoped would survive, I worked my way over to where I figured I should take down another spruce, only to realize…

20180725.cleanup.maplegrove.west.crowded.row.tamarack

…it wasn’t a spruce at all.

It was a sad little tamarack, hidden in between the dead and dying spruces.

Spacing wise, it was right where I should be removing a tree, so I could salvage the spruces.  There was a second tamarack a couple of trees over, and that’s it.

None of them look all that healthy, to be honest.

I decided to keep the tamaracks and took out the spruce, instead.

Which turned out to be a good thing.

After topping off the spruce I had originally intended to keep, I discovered it was so weak, I was able to tear it out of the ground.

I didn’t work beyond the second tamarack.  I think there’s a different type of spruce in there.  There are some Colorado blues in there, but one of them has almost silvery needles.  There are so few living branches on it, though, it’s hard to tell if it’s a different type, or if it’s just dying.  When I get to that section, I’ll take a closer look and figure it out.

The birch trees are as far North as I’m working in this section.  Aside from picking up fallen branches from them, I didn’t do anything with the birch, yet.  From what I can see so far, they aren’t going to need much.

Here, I had some interesting finds.  While pruning the lower branches of some spruces, there were a few times where I would decide that some particular branches were high enough and strong enough to leave, but on top of them were dead branches, fallen from nearby trees!

My pruning saw has a really well designed hook at its very end that is perfect for grabbing these and pulling them down.  Some, however, had been dangling there for so long, when I tried to pull them down, they would just shatter into pieces!

Now, I think I’m going to have a hot soak in the tub.  My shoulders are a bit achy for some reason.  ;-)

The Re-Farmer

After and after-after shots

This afternoon, I went back to the area in the maple grove I worked on last.  Rather than working my way farther down the rows of trees, I focused on taking down dead and dying trees, pruning away lower branches, and so on.

So here are the after pictures from before, and the after-after pictures from today. :-D (click on them for larger images)

When I took pictures last time, I had worked closer to ground level, so you can’t really see as much of what I cleared away higher up.  There’s a nice, straight spruce tree in the middle that had a lot of dead branches that I pruned away.  In this section, that tree saw the most work.

I pruned as many branches as I could reach.  One tree has a large dead and rotting branch that will have to wait until I’ve got a full size chain saw.

Aside from pruning, this area had a small, dead spruce tree taken out, too.

I did nothing with the big dead spruce tree in front (with the rock at its base), though some of the lower branches were a bit in the way.

This area is where I started to need to do a lot more picking and choosing.

The maple that’s under the power lines came down.  I left the stump tall for when I have a full size chain saw.  If I were to just leave it, it would probably start growing new branches.  Maples are resilient that way.

More small trees had to come down.  I’m trying to salvage some of those spruces, but the more I look at the one on the right of the photo – the healthiest looking one out there – the more I realize I will probably need to take it down completely.  It’s just too close to the power line.  It’s not a problem now, but it can potentially grow another 20 ft or more, and it’s already just a few feet shorter than the height of the line.

I think I will leave it for now and ask the arborists when they come out.

Lots to clean up in this area.  I got to one tree that was clearly planted deliberately; the sticks that had been put in the ground to mark and protect it when it was planted were still there.  When I got to it, however, I discovered that the only green leaves on it were from those vines!  Once I pulled those free, I could see the tree was quite dead.  In other areas, I took down a dying spruce that had been planted in the row, but growing out of its base were two self-sown maples.  I ended up taking out one of them.  We shall see how the other one survives.  In other areas, I was pruning branches from a couple of elms so close together, I couldn’t fit between the trunks, but they seem to be doing fine, so I’m not going to thin them down.  Unlike the dead spruce that was also right next to them.  The spruce was planted.  I think the elms sowed themselves.

As I was working, I noticed I was getting pretty close to the birch trees I’d noticed when I was surveying the area a while back.  I had shown the pictures I took to my mother and she was happy to see them.  She had transplanted them from saplings she dug up while visiting her grandparents’ homestead up north, years ago.

I also found some apple trees further in.  A strange place to plant them.  The one closes to the power pole gets enough light that it is now producing apples, but these ones are practically in the dark.  It will be good when I finally go through that area to thin and prune.  Hopefully, they will be able to do better, next year, because of it. :-)

Not back for a couple of hours.

My branches piles are getting huge. :-/

Next time, I will finally start working further West down the rows.

The Re-Farmer

Die! Die! Die, already!!!

It’s amazing how quickly we went from “gee, that’s a pretty vine!” to, “this in an incredibly invasive plant that needs to DIEDIEDIE!!!!”

Case in point.

I went to clear the vines that had grown back in the tire planter under my mother’s Mary statue, as it was quickly being overtaken again.

I ended up pulling out this.

20180719.tire.planter.invaders

The greenery also includes some suckers growing outside the tire planter, out of the base of a tree I had cut back in the spring.

Those rhizomes?

20180719.tire.planter

They are almost all from under the lip of the tire, where they have worked their way around and around in ropy masses.  The two spots where the tire lip is deformed is where the bulk of the vines were growing out of.

I did not get all of it out, by any stretch.

To the left, inside the tire, you can see lots of little white dots.  Those are ant eggs.  I disrupted a nest in the process, and tiny red ants were scurrying around, trying to pick up the eggs that had come out with the rhizomes.

20180719.tire.planter.behind

The area behind was also filled with new, viny invaders.  I wasn’t able to get any rhizomes out, though.

I think the only way I’m going to be able to reclaim this area it so either use some glyphosate (from my research, the only thing that will reliably kill this vine), which I might do in the short term, or remove all the dirt, take out the rhizomes, and burn them.

Long term, that’s what I’ll likely do, since I want to get rid of the tire planter completely.

On a more pleasant note;

I have seen one of Butterscotch’s kittens today.  It looks like she moved them to the area behind the old dog house, where the firewood pile used to be.  My younger daughter and I had been talking about them and came up with tentative names.  The orange ones are Flooftus and Pooftus, and the calicos are Rosencrantz and Guildenstern.

And we will never know which is which. ;-)

The Re-Farmer

An Afternoon’s Work

Yesterday afternoon, I got some progress done in the maple grove.  I don’t expect to do more later today, as it’s supposed to get quite hot again.  We shall see.

At this point, I’m just slowly working my way Westward from the garden path I recently cleared out.  I had already gone through here and taken out the fallen branches that I could find.  Well.  At least the bigger ones.  I’m always finding more, hidden under the tall grass!

Here are some before and after pictures. :-)  (click on them for larger images)

This is the area directly North of the trees I’d been working on a little while ago.  Quite a bit of dead brushes that I couldn’t tell what they were.  Some seemed to have either very long thorns, or very pointy twigs!  Those pretty much pulled out of the ground, they’ve been dead for so long.

Just past the elm tree on the right of the photo was this…

20180717.cleanup.maplegrove.west.mossy.maple

I really liked it when I found it; that moss covered stump of an old maple looks to nice.

Most of what was around it was dead or dying, with little bitty new growth coming up and making it look more alive than it really was!  I did keep the two strongest ones, which you can see in the after photo above.

Lots to clean up, here!

I would have loved to keep the two maples in front (you can see their remains in the after photo), but they were right under the power lines.  Maples can get so huge, there was just no way it was worth leaving them.  Better to take them down when they’re small then when they’re big.

I had gone in with the weed trimmer, first, just enough to clear away the grass so I could see any hidden branches.  Even though I’d cleared a lot out already, there was quite a lot left to take out, even before I could start cutting and pruning.

The spruce tree with the rock at the base is dead, and is the one we will be getting the arborists to take down when they clear the power lines.  It isn’t at the line, but is tall enough that if it falls, it could land right on it.

You can’t see it in the after pictures, but I was able to clear a smaller dead spruce behind the big one.

I didn’t think to take a before picture that included the power pole.  I hadn’t expected to clear anything that far.

The maple tree in the foreground is going to have to come down.  I hate to do it, as it’s a nice, healthy tree, but it’s also right under the power lines.

I also cleared some small elm and maple from by the power pole for the same reason.  I cut away the bottom branches of the spruce near the pole, but am considering if it’s worth the risk of keeping.  It’s not directly under the power lines, but when it reaches its full height, it would be a falling risk.  I think I’ll wait until we are ready to get the arborist in and ask them.

20180717.cleanup.maplegrove.west.spruce.down

Some of the dead spruces could just be torn out of the ground, like this one!

I cut back the lower dead branches on a couple of little spruces, but some of them have only a few living branches barely above my head.  As I work my way down, I’m going to have to pick and choose which to keep and which to take down.  Once there’s more space between them, while also clearing away more from the trees near them, I’m hoping the survivors will have enough sun and space to fill out and grow stronger.

Oh, and those vines!!  They are everywhere!

Unfortunately, I may have done something to my new little chain saw!  After a while, it start to “scream” and get easily jammed.  I took it into the sun room (where I keep the packaging, and the tools that came with it), opened up the side and started cleaning out the blade oil soaked sawdust that was jammed around the blade.

Then the blade and chain fell off.  I was hoping to avoid that.

No worries.  I’ll just pop it back on, right?

Suddenly, I couldn’t remember if the blade had landed upside down, or right side up!  I took out the instruction booklet and read it over.  According to the diagram, the logo should be facing me as I put it on; except the logo is already warn off.  The print on the other side is still very visible, but that isn’t anywhere on the diagram.

If I look at the image elsewhere, however, the logo is on the other side of the chainsaw.

Now, I know I put it on facing the right way.  My head knows that.  But I can’t help but keep double checking.  Finally, I was done, brought it back to where I was working, tried to cut my first branch and…

It’s still screaming, and jams easily.

So I just stopped it and set it aside.  Then went back to using a hand saw.

Not going to take any chances!

Some of what is in here is going to have to wait for a full size chain saw, anyhow.

It’s going to look so good in here when I’m done!

The Re-Farmer

I have the power! See; there it is.

You know how you decide to do a thing that should be pretty straightforward? Then you start the thing and it ends up being more complicated than you thought?

Yeah. You know what I’m talking about, I’m sure! :-D

That was how it turned out for the job I just finished.

Since we only have the riding mower, when I do the driveway, I’ve only done the driveway inside the gate and as close to the gate and fence lines as I can. I didn’t go outside the gate at all because I wasn’t sure how clear it was. Plus, I don’t usually carry the gate key with me when I’m doing yard work.

Today, after mowing the areas by the storage shed and to the other driveway that I wasn’t able to do earlier, I decided to grab the weed trimmer and an extension cord and clear by the gate, and the driveway outside the gate. The grass there was starting to encroach into the gravel a fair bit. There is a heavy duty power line running from the side shed of the garage, where I park the mower, to the gate. It’s for some Christmas lights that are on the fence line.

Now, I’ve seen where the cord ends by the gate, and I could see where the Christmas lights started at the gate end, so I figured the plug was somewhere hidden in the bushes there. With that in mind, I grabbed the 30ft extension cord for the weed trimmer, instead of lugging one of the 100ft cords. 30ft should have been enough to do the areas I wanted to. Maybe a bit tight on the south side, though.

Over I go with the weed trimmer and cord, plug the power cord in at the garage, open the gate, then go to where I knew the Christmas lights started to plug it in. I was impressed to see the lights were actually working, too!

That’s when I discovered I wasn’t looking at the start of the Christmas lights.

I was looking at the end.

Hmm. Okay. I’ll just follow the lines. Both the string of Christmas lights and the power cord were woven along the top wire of the fence, wrapped around posts or tree branches along the way, until… there it was! I found the plug in!

20180716.plugin

This picture was taken after I moved the outlet box, which was carefully set facing downwards, so no moisture could get into the plugins. (Yes, I did remember to put it back that way when I was done!)

What you can’t see is the broken light bulb, right by the plug in. I’m sure there are plenty more of those along the two strings of lights!

This was about 30 feet away from the gate.

Well, now.

Back I go to the house, where I know there’s another extension cord that’s 50ft long. I also grab gloves, saw and pruning shears, because there were things that needed to be cleared before I could start.

First, I cut away some dead stems from a bush by the gate. Then some little trees that had seeded themselves along the driveway that were big enough to mess with the trimmer line. Then I cut away a poplar that was growing outside the fence line and was half blocking access to the power. You can see part of it to the left of the plug ins in the photo. I had to move some just to get the picture.

Then I could finally plug in my extension cords (I used both) and start trimming.

This is the first area I finished.

20180716-inner-driveway-south.png

This is the south side of the gate. The old barbed wire gate was still there and, after finding the loose barbed wire with the weed trimmer, I wrenched it all out and over the fence.

Those orange things? I’m pretty sure they are to mark where the culvert is on either side of the drive way in the winter, but they would fit over pre-existing posts. Which I don’t see anywhere.

Then I started clearing the north side.

20180716.inner.driveway.north

When mowing on this side, I don’t try to go all the way to the fence line with the mower at all, because it is very rough and I don’t want to break the mower. So I trimmed by the gate to match the mowing line.

While clearing between the gate post and the wagon wheel, my trimmer found this.

20180716.things.found.with.weed.trimmer

The black pieces are the remains of some kind of bungee cord type thing. It has a hook at only one end; I’m guessing at least half the cord itself is simply gone. Someone just hung it there, rather than throwing it away. The ball of twine was completely hidden by the tall grass. The wire was partly hanging on the bottom wire of the fence, its other end buried in the grass for me to find when it got tangled in the trimmer line. :-/

Finding stuff like this is why I don’t want to use the mower out there until I am sure it’s clear!

Here is how the outer part of the driveway looks now. First on the south side;

20180716.outer.driveway.south

And here’s the North side.

20180716.outer.driveway.north

The eventual goal is to clear the fence line of trees completely. When I get to working on the spruce grove, I want to open it up enough that we can see the gate from the house, so we know if anyone is there and needing us to open it.

That will probably not be started until next year.

Before then, though, I am think it would be nice to replace the strings of Christmas lights. I’m thinking some LED lights all in one colour, and then using them all year. :-)

Now that we have the power. ;-)

The Re-Farmer

Windblown clean up, and finding things

While cleaning up after yesterday’s winds, I did the usual circuit around the yard, including behind the storage house.

Funny how, no matter how many times we go through different areas, we still find things we missed before.

Somehow, I missed this.

20180715.lava.rocks

It looks like someone dumped the lava rocks from their BBQ behind the storage house.

My parents didn’t BBQ.  Though I do remember seeing several old BBQs in the barn at some point.  I believe they are all gone now.

Well, it’s better than old cat litter and toilets, I suppose.

20180715.windfall.cleanup

By the time I finished my round, this is what I’d picked up.

Yes, there is a wheelbarrow under there.

This isn’t everything, of course.  Just the stuff that was big enough that they would be in the way of mowing.  There will always be little stuff around.  I did end up getting a rake out to pick up what was under the Chinese elm outside the kitchen window.  They were all of a size I would normally leave behind, but there was so many of them, they would have hampered mowing, while also too small to be practical to pick up by hand.  That, alone, half filled the wheelbarrow.

Before I started cutting down the apple tree that fell, I checked the few raspberries we have, and found this lovely Painted Lady.

20180715.painted.lady.butterfly

I’d actually seen another, larger, butterfly first – I don’t know what kind – but it flew away before I could get a photo.  This, and another Painted Lady were quite content to stay and pose for me. :-)

After breaking down the fallen tree (oh, how good it is to have my little chain saw, and a supply of chain oil!), I took a look at the next closest apple tree.  It had a dead branch that I decided to take down as well, but on closer inspection, I noticed something.  This tree splits into 3 major trunks, one of which had split off to make a fourth that grew straight up.  The part that grew outwards had already been pruned back quite a bit, but did have new green branches growing out of it.  The part growing straight up was dead.  While I had noticed a few dead branches before, it was so hidden by the leaves of the rest of the tree, I didn’t see that the whole thing was dead.  I was able to cut it free and untangle it from the living branches, finding it much larger than I expected.   By the time I took off the dead branch, plus this dead trunk, the tree looked a lot less crowded!  Which should be good for the crab apples.  More light, air and room to grow.

While talking to my sister in law about their apple trees that they’ve been pruning back due to an insect infestation, she commented that apple trees seem to be very susceptible to problems.  Judging from what I’ve been seeing with ours, I tend to agree.  Thankfully, we don’t seem to have insect issues, but I don’t think the signs of fungus I’m seeing on so many of them is any better. :-(

Ah, well.  We deal with what we find!

The Re-Farmer