Today, I found the self adhesive felted pads that I wanted to use on the covers for the fish tank.
I found them while looking for something else, of course. :-D
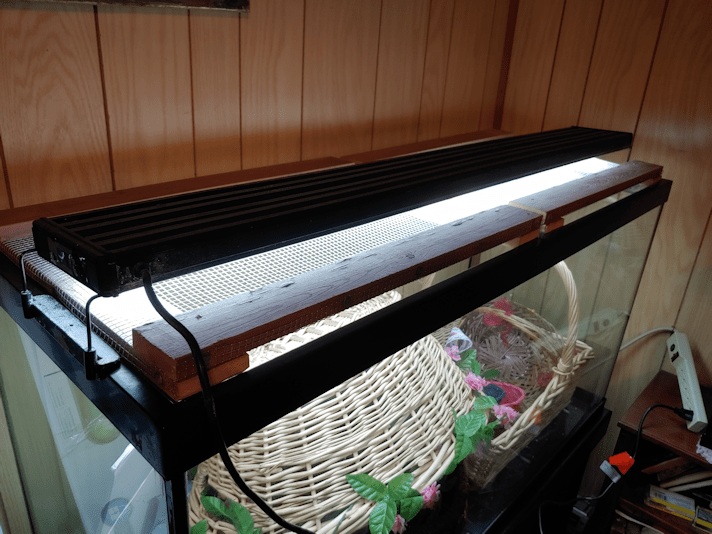
Here is where, on the tank, I want them to sit.

The bar across the middle has extra surface area in the corners of the ledge the covers rest on. There’s lots of room, here.

The outer corners, however, don’t have that, so there’s a lot less margin for error in positioning the pads well.
The first step was to clean off the ledge the frame rests on. An old toothbrush worked very well for that!

Since the cross pieces of the frames have an angled edge, to better fit into the space, I figured it would be easier to place the felt pads in position on the ledge first, adhesive side up, then placing the frame on top.
The felted pads I have were from a larger package with mixed sizes of circles, plus long, narrow ovals. The larger circles were used up, and all I had left were smaller ones, and some of the long ovals. I’d hoped I still had some larger circles left. If I had, I would have cut them in quarters, and fit them right in the corners, but half circles would have to do!
Once they were in position, I lined up the cover and dropped it down, pressing just enough to make sure the adhesive stuck, then removed it to press the adhesive in more thoroughly.

In this corner, you can see the pad will protect the tank’s frame from the wire. This was the edge of the roll, so no sharp bits sticking out, like the edges I had to cut, so I didn’t trim it.

And this is why I lined the pads up to the corners of the tank, rather than the frame. Yes, there’s a likelihood that the pad will get pulled off where it’s overhanging, if I leave it like that (I will trim it later), but it also isn’t sitting on the screw head. It was supposed to be countersunk, but some of the screws simply stopped and would not screw in any further. I am not sure what was stopping them but, whatever it was, I was wrecking my screwdriver’s tip, trying to get them to go in further, so I stopped. The others were just fine.
So the corners are padded now, protecting the tank’s frame from being scratched up, should a cat decide to jump onto the cover.
When I was fussing with everything to prepare for this, I did have a kitten not only jump onto one of the covers while I was there, but also walk across on the light fixture! Not a problem for a light kitten, but a potential problem, if one of the heavy adults tries to do it. Thankfully, they seem to not like the new covers and are staying off. At least while we’re around to see! The few times I’ve seen one of the adult cats up there, they have stuck to walking on the wood and stayed off the wire and away from the light fixture.
Meanwhile, the baskets and other items stored in the tank have been removed. I’ll need to take a vacuum to the bottom to clean it, then see how my seed trays fit on the bottom. That will help me decide whether the rigid insulation will be lining the inside, or the outside, of the tank. Whatever I do with the sides, the bottom will have its own layer of insulation lining it, too.
It’s remarkable how handy that insulation has been. I’m glad my daughter bought so much extra!
I’m going to need the little step ladder to be able to access the bottom of the tank. I could barely reach to get the smaller baskets out!
The joys of being short! LOL
Another little bit of progress made! :-) I can hardly wait to see how this works for starting seeds!
The Re-Farmer