Sump pump hose fix

Well, today ended up a bit going off plan, but we still got a couple of things off the to-do list for outside.

The main one being, the broken flexible hose for the sump pump has been replaced!

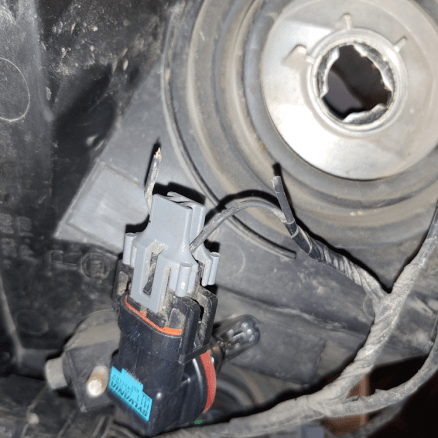
This is what the connection looked like, before I started.

After talking to my brother, I was confident there wouldn’t be any weird surprises when I took off the flexible hose.

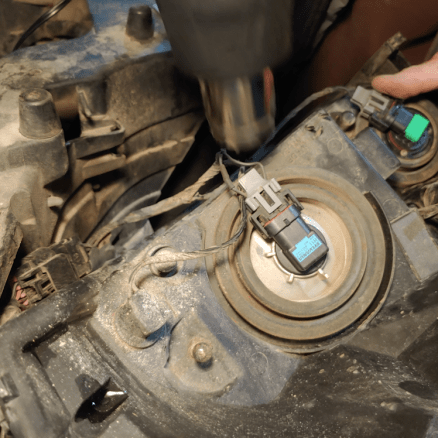
The first order of business was to make sure the pump wouldn’t go off while I was working on it. The reservoir was pretty full, so I lifted the float to trigger the pump and let it drain before unplugging the pump.

My brother had suggested I might want to push the pipe from the inside, through the opening to maybe add a bit of length on the outside. The pipe is so snug in there, though, that it wouldn’t budge. Which told me I wouldn’t need to have one of my daughters in the basement to brace it while I was attaching things on the outside, at least!

Once I took the flexible hose off, I could see that the batting or whatever that is, and the rest of the hose, was wrapped in a thick later of electric tape.

I started taking that off and found…

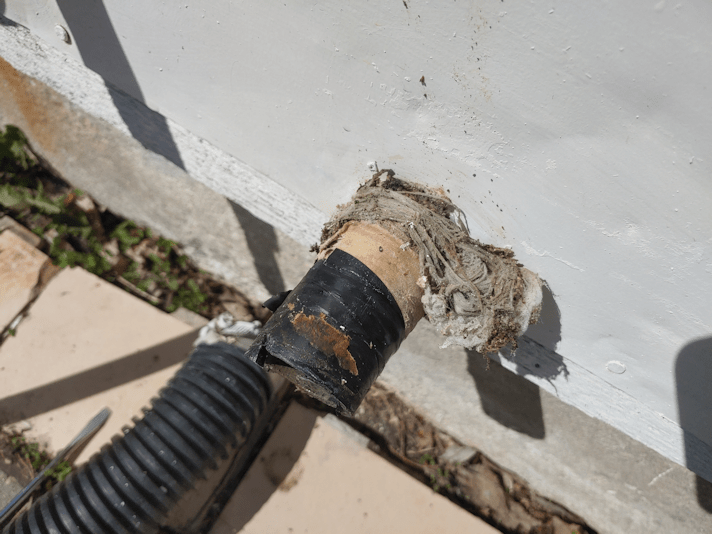
… something that looked… almost like fabric? Canvas??

It turned out to be hockey tape. Several layers of it.

I got all the old tape and the batting-looking-stuff off and discovered…

… the end of the pipe had a big ole crack.

I guess that’s why it was taped so thoroughly, and why a larger hose was added over it.

I wonder. If the previous hose had indeed been wrecked by someone running over it with a lawn mower, it’s possible the hose was yanked hard enough to crack the pipe at this end, too.

I cut off the cracked part, which didn’t leave a whole lot of pipe sticking out the wall. I did try and push more through from the basement, but didn’t seem to accomplish anything.

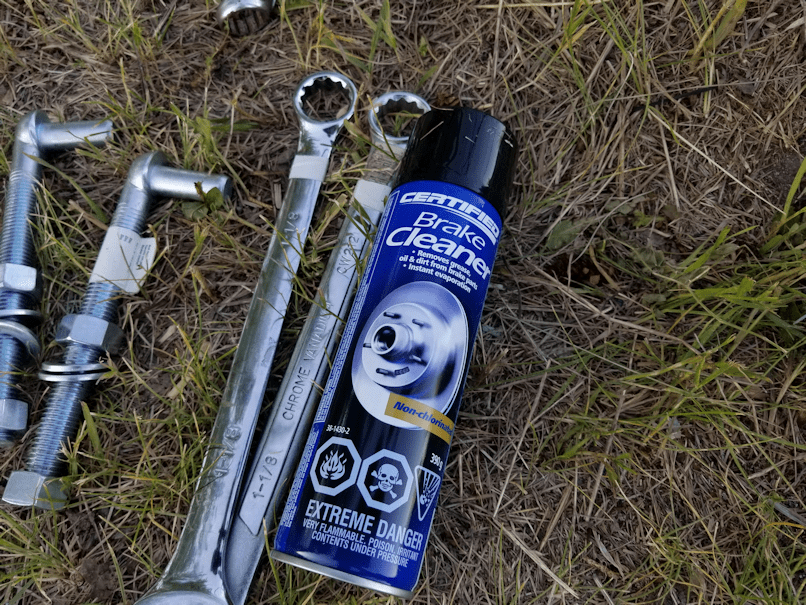
The next thing to do was clean up the inside of the pipe, then use the connector piece the guy at the hardware store picked out for me, in case I needed to attach the two hose kits to each other.

Pushing the connector into the pipe did finally start moving the pipe through the opening – making it shorter, of course, but not enough that I couldn’t get it done. I brought out a hair drier to soften the plastic of the pipe, which made pushing the connector the rest of the way in much easier.

That didn’t quite work with the flexible hose part. I could get it through the flat part easily enough, but once the end started to go into the flexible rings, it just wouldn’t go any further.

So I tightened the clamps as it was. It really should be closer together, but I know the important parts of the connector are through to the flexible rings of the hose and, together with the clamp, that should be enough. We’ll just have to keep an eye on it, to see if it leaks. If it does, I should just need to tighten the clamps a bit more. I put a container under the connections, so if it does leak, I’ll be able to see water in the container.

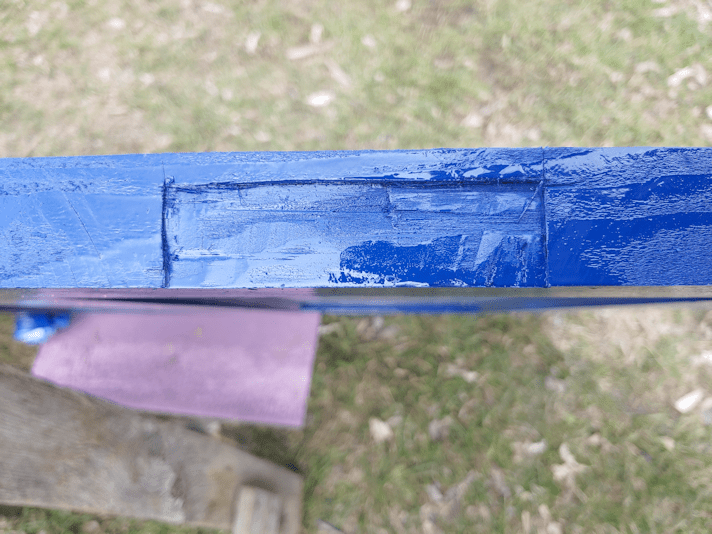
Next, I ran the hose down the side of the house.

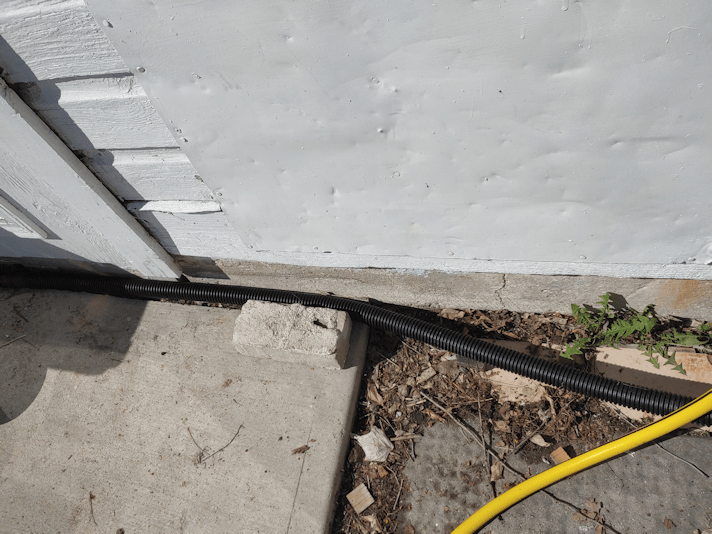
There is adequate space along the house to tuck it under, so it won’t be in the way at all. It’s also being held in place by a shelf, garbage can and rain barrel along it’s length. The brick was just a little extra to hold it in place, closer to the pipe.

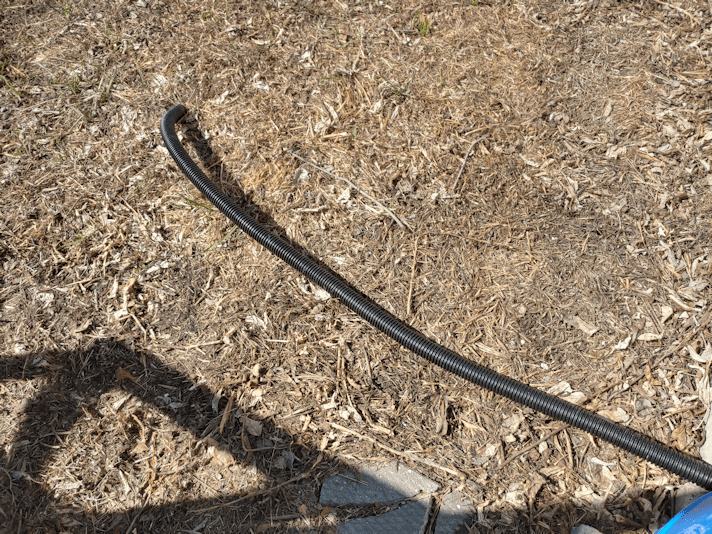
The hose reaches several feet into the old kitchen garden. I would have preferred an extra foot or two, but this should be fine. If we find it needs to be further from the sun room’s foundation, we can always get another connector and attach the hose from the spare kit onto it.

Once it was all done, the sump pump was plugged back in, but so far it hasn’t had to go off, yet. I’ll be sure to check on it, later today.

While I was working on this, the girls dragged the table saw out of the old shed we’d found the door in and brought it by the house. They plugged it in and turned it on and YES!!! It works!

It is currently sitting in the sun room. We won’t be able to work on the replacement door for the sun room today, as I’d planned. It likely won’t be worked on tomorrow, either.

Oh, I don’t think I’ve mentioned it here, yet. My husband got a call from the cardiac clinic in the city a couple of weeks ago. When they cancelled all appointments, they were looking to June for rescheduling. It seems they were no where near as busy with the Wuhan virus as they expected, and could start re-booking earlier. The appointment is early tomorrow afternoon, but he and I will be leaving in the late morning.

I have to figure out what to do after I drop him off, though, as I will not be allowed to go in with him, as normal. Which is frustrating, but whatever. Unfortunately, it’s not like I can find a coffee shop or something and hang out for more than an hour. My FIL actually lives nearby but, like where my mother lives, the building is locked down to visitors, since so many people living there are very high risk, including my FIL.

If I can find someplace free to park, maybe I’ll get some Pokemon Go in or something. :-/

Meanwhile, I have had to take it a bit easier today than I intended. It’s been a slightly worse pain day, and I don’t want to overdo it when I have what will likely be a long day, tomorrow.

For now, I think I’ll painkiller up and find something more sedentary to work on. :-/ Normally, I’d work on some crochet, but the pain is mostly in my arms and finger joints today, so that might not be possible.

Ah, the joys of being old(ish) and broken. :-D

The Re-Farmer

Replacement door progress: almost there!

Today, I finally got a chance to continue working on the replacement door for the sun room.

Cutting out recesses for the hinges.

To line them up with the recesses that are already in the door frame, I dragged the broken door over and lined it up with the replacement door.

After making sure they were facing the right way, I used one of the hinges we took off to line up the recessed area, then traced around it.

And only now, as I look at this photo, I realize that for all the care I took to line it up and facing the right way, I got it backwards.

Dangit!

Ah, well. We’ll work it out.

*sigh*

I ended up carving out the recess with a combination of chiselling it, and shaving it with a utility knife.

My daughter then turned the door to access the outside of it, painted the carved out areas, and gave the outside of the door a final coat. It’s got some rough areas in the wood, so she really wanted to make sure it was well coated to protect it from the weather.

Now that I realize I goofed on the recesses, I’ll just carve out the remaining bit, so the recess runs across the door, then we’ll paint that over, too.

Ugh. I can’t believe I made such an obvious error. I even remember telling myself, when thinking about it a couple of days ago, to make sure I didn’t do that!

What a goof I am! :-D

The Re-Farmer

Not the problem I expected to have!

When we rigged up the shelf outside the sun room to be a cat shelter, there were a few things I identified as potential problems. The tarp is staple gunned in place, for example, and I could see those giving out easily.

What I never imagined happening, however, is what I found this morning.

Continue reading

Headlight fixed

Have I mentioned before, that I have the most awesome brother?

Maybe just a few times.

Because it’s true!

After spending about 6 or 7 hours working on the garage door, while packing up his tools, he remembered he also wanted to fit the headlight on my van.

We burn lights out on the van rather quickly; there seems to be an electrical problem in the system. My driver’s side low beam bulb was burnt out again, but the passenger side low beam light would sometimes be on, sometimes be off.

When I bought a new bulb, I got a pair of them to replace both bulbs. While changing the bulb on the passenger side, I discovered why it was doing the flicky thing.

A wire was breaking. While changing the bulb, it finally broke completely.

20190919.broken.wire

There was not a lot of wire to work with there, but when I sent a photo to my brother, he said he thought he could fix it.

And he did.

After stripping, cleaning and tinning the wires, he slipped a piece of shrink wrap over one wire, then soldered the exposed ends together. There wasn’t enough wire available to twist them together, as I would normally have thought to do. I couldn’t even help him, other than to hold a light for him, because there was just no room for more fingers in there! He managed to hold the wires together, while also holding the hot soldering iron in one hand, soldering wire in the other.

20190921.fixing.headlight.wire

The shrink material has adhesive on the inside, so after using a heat gun on it to shrink it, it formed a permanent, water tight seal.

Which didn’t stop him from also adding some electric tape around it, too!

There used to be a both soldering irons and soldering guns here, and while packing things up and looking around, I have found soldering wire, but that’s it. I do have my own soldering iron; just a tiny thing that’s part of a wood burning kit. This is one thing I might have been able to do on my own, and now that I’ve seen it done, I know I can. I don’t have the shrink wrap or a heat gun, so I couldn’t do that part, though.

The main thing is, I now have two working headlights again! :-)

The Re-Farmer

Fixing the garage door

The last couple of days have been very, very wet! :-D First, we had a series of thunderstorms that lasted all day Friday and on through the night. On Saturday, we were no longer getting thunderstorm warnings, but we were still getting weather warnings for heavy rain.

As usual, the weather systems were more to the north and south of us, but we did still get quite the light show, and a lot of rain.

Oh, and our internet cut out.

Repeatedly.

So I have some catching up to do!

The rain and damp did not stop my amazing, fantastic, wonderful brother from coming out to fix our garage door!

I honestly thought it wasn’t going to happen, and we’d need to get a new one – something we certainly cannot afford – but he found a way!

Have I mentioned my brother is amazing?

Continue reading

Gate installation: it’s done!

I have the most awesome brother in the world.

He made the hour + drive out this morning to get the gate up for us, early enough that it was finished well before I drove my daughter to work! He even had enough time to swing by and join my mother for church before heading home.

What a sweetheart!

I got to help. :-)

Continue reading

Gate posts: progress – first coat of paint done

Yesterday, we went into the city for the last of our Costco shopping. In the process, I swung by a Canadian Tire and picked up the cleaner my brother recommended to get rid of all the lubricant used to get the old hing pins off.

Gotta love all those warnings.

EXTREME DANGER
VERY FLAMMABLE, POISON, IRRITANT

Continue reading

Gate Repair: removing damaged hinges and adding new

I’m absolutely thrilled that my brother and his wife are over for the weekend! Their RV trailer fits in the inner yard, so they even brought their own “house” with them.

My brother, being how he is, was soon working on the damaged gate. More specifically, the gate posts. He’d actually been working on it for a while before he asked me to come and document what he was doing, so he’d managed to get the first of the remaining hinges off by then.

Continue reading