After sitting overnight, tucked away in the oven, it was time to take out the cheese and do the final steps.
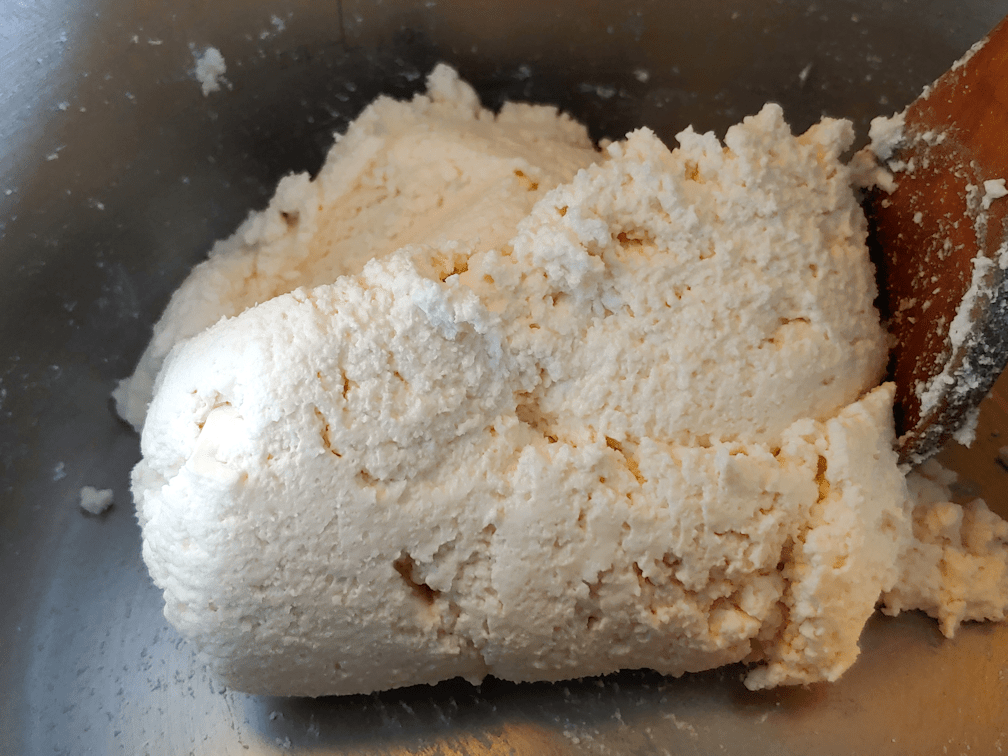
This is what it looks like this morning, after stirring.
It… looks like dry cottage cheese.
The next instructions were:
Add salt to taste, if desired. Add colour if desired. Add herbs/spices, if desired.
For this first attempt, I am only adding salt.
If you look closely, you can see the salt on the curds in front of the spoon. My mother would have just plain table salt, since that’s what she would have had. I stole some of the powdered salt my daughters use in the popcorn pot. It’s just coarse salt that has been run through a coffee grinder, so it can be added to the oil that popcorn is popped in, and actually stick to the popcorn as it pops. That got very thoroughly mixed in while I started the next step.
Put to frying pan on low heat, in batches, and heat. Mix while heating.
The more the curd got mixed, the more dough-like it got in consistency.
Then, it actually started to melt!
I know that’s what my mother said, but I still felt surprised by it!
I even had to change spoons. By this stage, the texture was a bit like cake batter.
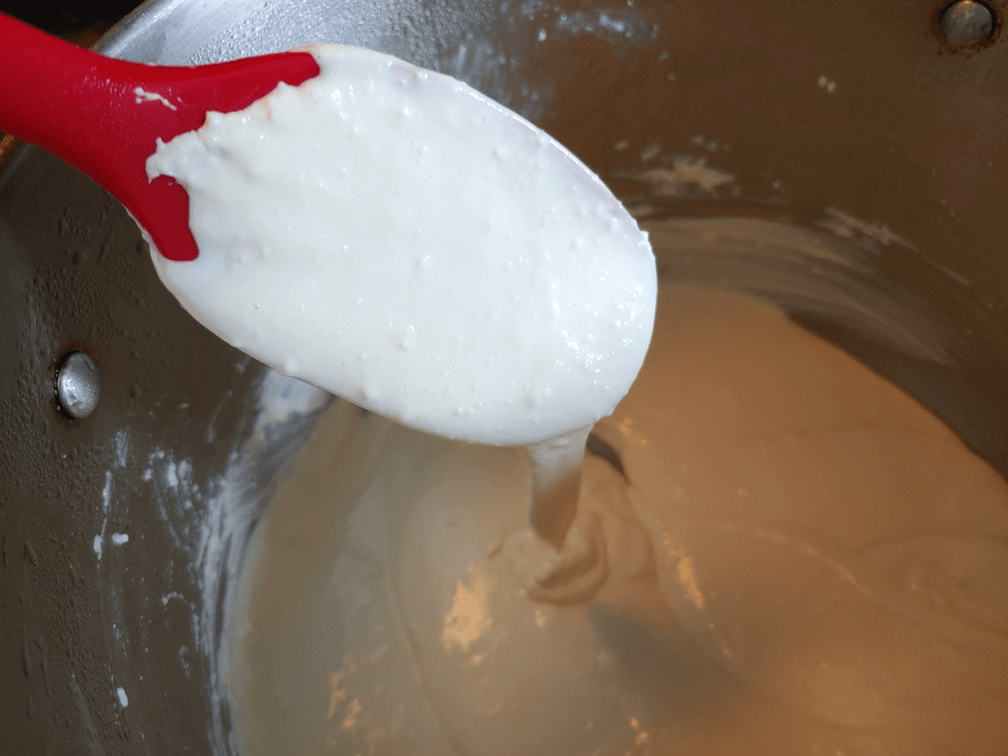
When melted completely, pour into form.
I didn’t know how long it needed to be stirred, but my mom said to pour it, so I just kept going.
Just look at this! It really did get to a pour-able consistency, unlike any other cheese I’ve ever worked with! At this stage, it was like well stirred sour cream in consistency.
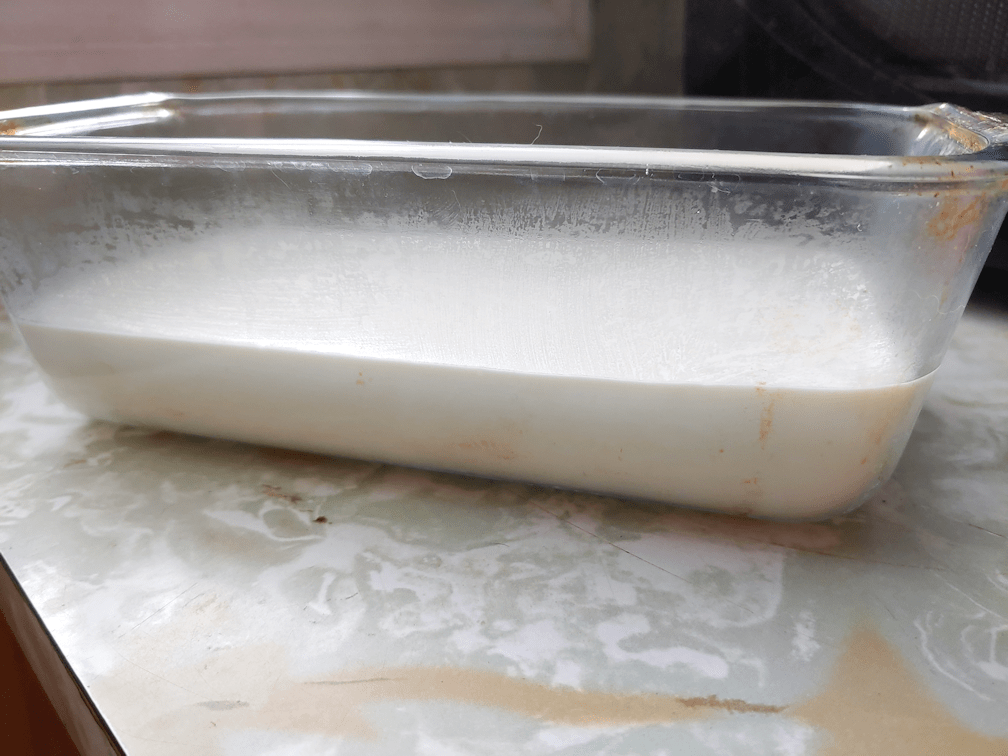
I then poured it into a loaf pan I’d scalded and had ready. This level if what 1 gallon of milk was reduced to.
Leave to rest until cool. When cool, ready to slice.
This is the stage we are at now. I covered the loaf pan with a narrow wooden cutting board I have. I considered covering it with plastic wrap, but I wasn’t sure I wanted the condensation build up, and the board would keep the dust off while also allowing a bit of air.
I’m hoping that, as it cools, it shrinks a bit, so it’ll be easier to remove from the loaf pan.
I did taste it after pouring it into the mold (I admit it. I licked the spoon!). The salt definitely improves the otherwise bland flavour. There is another flavour in there that I just can’t identify or describe. I’m hoping after we do a taste test, later, someone in the household will be able to describe it!
Just a bit of catching up on how things went yesterday.
The short version: Long.
It went long. Very long!
For me, it was working on pickling beets using the water bath canner. Until now, we have only done refrigerator canning, and my only experience with water bath canning was helping my mother, as a child. This is the first time I’ve done it myself, from start to finish.
It took WAY longer than I expected!
I have a Ball cookbook of canning recipes. The pickled beets recipe was for a half dozen 500ml jars. They had the basic pickle recipe, but also variations. After looking over our quantities of beets, I figured I could do two batches, with one batch being a “sweet pickle” using cloves and cinnamon sticks instead of the pickling spice mix of the basic recipe.
One batch called for 10 cups of beets. I decided to use up as much of the little beets as I could. Since they would be blanched and trimmed, and their small size would pack tighter than cubed larger beets, I made sure to grab more than 10 cups. I figured, if there was extra, we could just include them with supper or something.
While the first batch was blanching, which filled the blanching pot I found stored in a barely accessible space in the kitchen, I prepped a second batch to blanch. At the same time, I cooked the liquid with the pickling spice bag, and had everything ready to do the sweet spice version.
I was all ready to can the first batch, when I realized I had a problem.
These are the first batch of fully prepared beets.
I doubt I could have filled three jars with that, never mind six!
So I added the second batch.
I still wasn’t sure there would be enough to fill the six jars I had prepped in the canner!
The next step was to put them into the pickling liquid and bring it to a boil, then start filling the jars. After my first jar, I realized I would likely have another problem. Not enough liquid! So I started the spiced version going and continued. I ended up being able to do only four jars with the basic pickling liquid, and the last two got the sweet spice version.
I started working on this before my daughters headed out to work in the garden. They came back four hours later, and I was JUST reaching the point where I actually start putting beets into jar. Most of that time was spent scrubbing beets, blanching beets, removing the outer skins, trimming the tops and tails, and waiting for water to boil.
I know “a watched pot never boils”, but my goodness, it takes a long time for large amounts of water to come to a boil!
But, if finally got done! Our first time canning AND our first time canning our own produce!
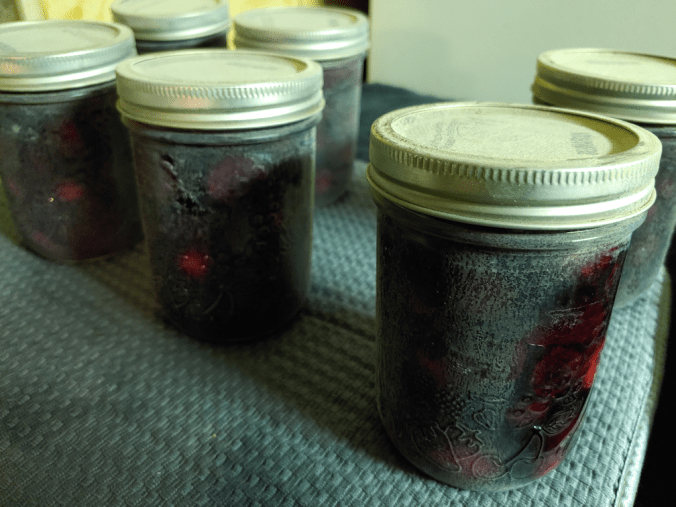
Pulling my first jar out of the water, though, was a bit of a surprise.
I mean, I know our water is hard, but wow! For the jars to come out with a layer of scale like this is crazy! You can see on the jar on the far right, where I wiped some of it with a paper towel. They’re going to need to be washed!
I finally had a chance to remove the rings and check the seals, just a little while ago, and they all came out fine! I made sure to keep track of which ones had the different pickling liquid, for when the scale gets washed off and they can be labelled.
Except the jars we open to taste test! :-D
By the time I was done, it was full dark, so it wasn’t until this morning that I could get a photo of the girls’ hard work outside.
They got three of the four remaining beds in the main garden area done – and most of that time was spent on just one of them! The first two weren’t too bad, but the third one was filled with crab grass, and it took them ages to get as many of the rhizomes out as they could!
I am amused by all the cat footprints in the loose soil! :-D
I’m glad they were able to get these done. Today turned out to be a write-off for outside work, but I will cover that in my next post. :-)
While doing my evening rounds, I was able to gather quite a substantial harvest from the garden!
The yellow beans are, as could be expected, winding down right now, but there was still quite a lot of them. There were plenty of green beans, too, but it was the purple beans that stole the show! There were so many ready to pick this time!
I picked a few sweet corn that seems like they might be ready, just to see how they were. Though their silks are drying, they are still quite immature. My expectations are on the low side for these, given how nitrogen poor the soil is, but we shall see as time goes by.
I was really happy to have so many sunburst squash and zucchini! I also had to straighten up a lot of the support poles, as the wind had blown them over somewhat. However, I can definitely say it was much easier to find and harvest the summer squash grown vertically! Last year, I was picking sunburst squash and zucchini pretty much daily, but this is the first time we’ve had a substantial amount to pick. They did not get eaten before we could get to them! The cayenne pepper is definitely working!
I applied more over everything after I finished picking things. The rains would have washed it all off by now. We might get more rain today, then off an on over the next week, but I don’t expect to get much here, so I wanted to make sure the garden beds had their spicy protection.
There was enough picked that we could blanch and freeze some more, but this time I’m keeping them for having with our meals. In fact, I’m enjoying some of those beans with my lunch as I write this, sauteed with our Purple Stripe garlic (crushed and chopped) in butter, then braised until tender, then seasoned and stir fried with rice and some of the grass fed beef we got with the package we ordered a while back. It turned out very well!!
It may almost be the end of August, but we’re finally getting to where we can probably eat from our garden every day. :-)
Well, the forecasts have changed again. Instead of things starting to cool down starting today, we’re now supposed to hit 33C/91F with a humidex of 40C/104F this afternoon, and hit 30C/86F over the next couple of days. Thunderstorm warnings are back for tomorrow, but now extending over two days.
I really hope we do get them!
Overnight temperatures are high, too, making it hard to sleep. Especially since the box fan I had in my window broke. I suppose I could take the one we’ve got in the root cellar, but I think our curing garlic needs it more than I do.
The cats, meanwhile, are melting.
David is just so… magnificent!
Layendecker spent hours in my butt spot, splayed out like this, until I had to claim my chair.
We were able to have our very first BBQ (grilling, for the purists) yesterday.
This is the first time we’ve used the BBQ my brother gave us. It was insanely hot, even in the shade, but being able to cook everything at the same time, and not heating up the house, was worth it.
After the meat was set on the warming grill, I took the zucchini strips and put them directly on the grill, just enough to get some char on them. It was awesome! Unfortunately, the photos I took of the finished meal did not turn out, but it was as pleasing to the eye as to the palate. The purple corn was interesting. The kernels were far harder than I expected. I liked them. I look forward to growing enough for both fresh eating (or making chicha morado) and to make corn flour. That will be a few years, which will also give us time to pick up a decent quality mill.
The steaks are the sirloin steaks from the meat pack we got from a local ranch. I kept it simple. Just a bit of oil (okay, maybe not so simple; I used (fake) truffle oil), salt and pepper. Oh, man. It’s been so long since we’ve had steak! My husband and I even made a “date” of it and ate at the table. He usually isn’t able to sit at the table for very long, but he put up with the pain for steak! :-D
We got a nice little haul of tomatoes yesterday evening; these are mostly the Spoon tomatoes.
I am quite enjoying having these, but have found I still can’t eat fresh tomatoes. About the best I can say when I tasted one last night is, at least I didn’t gag.
Much.
Which is weird, because I like tomato in things, to a certain extent. I just can’t handle eating them fresh. My younger daughter is much the same. No loss, though. We planted these for my older daughter and my husband. They enjoy tomatoes!
As the temperatures started to drop a bit, yesterday evening, my husband opened up various windows and the inner door in the dining room – setting up the little step latter so the cats can look out the window of the outer door, of course. We still have food and water set up on the concrete steps for Butterscotch and her kittens. Even though they have moved to the empty property across the road, she still brings them over.
Not long after things were opened up, I heard a commotion outside the door, and the cats were very interested in whatever was under their perch. So I popped over to the living room window to see what was on the steps.
I never saw anything on the steps, but I did find a shadow on the post for the hanging bird feeder! It was getting dark by then, but I could tell it was a raccoon. Not the big one we saw the first time, but a slightly smaller one.
So I went outside to shoo it away.
Now, normally, they run off as soon as they hear the door open, and I come around the corner just in time to see them dashing away.
Not this time!
As I came closer to the feeder, making shooing noises, the raccoon was far too busy eating to take off. It was sitting with its lower body on the bird perch – what used to support a platform feeder on the post before we cleaned it up and painted it – and was grabbing the base of the hanging feeder with its front paws. When I got to the post, it just froze.
And stared at me.
So there I am, standing RIGHT next to the post, face to face with a raccoon.
Before anyone starts, yes, I know what to watch out for re: rabies and so on. I am very aware that wild animals are unpredictable and can F you up, in general. I was being cautious and giving it plenty of opportunity to jump down and run away.
I think, however, the way it was hanging onto the feeder, it couldn’t just let go, and with this big human standing there, it probably didn’t want to off balance itself and drop to the ground.
So it froze.
And stared at me.
With that adorable face.
Since it wasn’t moving, I carefully reached out and poked the end of its tail.
Nothing.
I poked it again.
Nothing.
I wiggled its tail a bit.
Still nothing!
I poked its hip.
It just kept staring at me.
I even gently poked at its strange little man-hand foot.
Not a twitch.
Finally, I reached out and began to pet its lower back.
It let me.
The only time it really moved was then Potato Beetle started weaving around my feet. I paused to pick him up and the two of them stared at each other for a bit, but Potato Beetle was far more interested in being held than in the creature on the bird feeder post.
So I pet the raccoon some more for a while, the left it be. It took a minute or two before it finally got down and ran off.
I got to touch a raccoon. !!!!!
The rest of the family missed all this. I didn’t even have my phone with me to try and take a photo, though it was probably too dark for one. I certainly wasn’t going to use a flash on the poor thing. When I told them, I got chastised by my daughters, first for taking the risk, then for terrorizing the poor raccoon. :-D
Meanwhile…
With today’s heat, the garden beds are getting a thorough watering. Instead of standing out there in what is already 28C/82F, I’ve been using the sprinklers, moving them every 45 minutes or so, and will be finishing with the spray and soaker hoses. Though someone had already put kibble out for the cats, I did have to top up the containers by the junk pile and concrete steps already.
The kittens were out and about.
Toesencrantz won’t come anywhere near us, but she will watch from a distance.
I was watering the tomatoes and cucamelons from the rain barrel, going back and forth, and in one of my trips, I found I had an audience!
I love how Toesencrantz has her toes on the log like that. So adorable!
Since the rain we did get, and now the heat being back again, the squash are all blooming like crazy.
I really like the luffa flowers!
Still no luffa, though. For those who grow luffa, is that normal? Shouldn’t there be gourds by now?
The ants really like the luffa vines. I’m not sure why. They seem to just be climbing them. As long as they are not damaging them, I don’t mind. Ants are pollinators, too. I find it odd that they are only climbing the luffa, though, and nothing else growing at the squash tunnel.
The one Red Kuri squash is getting bigger. :-)
I am starting to think we can harvest some of our melons, but I’m not sure. The bigger ones don’t seem to be getting any bigger, so I figure we can at least start harvesting those.
Maybe I’ll pick one of each type, when I hook up the soaker hose, later on. :-)
Well, we had at least one good thing happen today.
I was able to finish the chive blossom vinegar.
The bottle has had two weeks in the cupboard to infuse. Any time we went into the cupboard for something, we’d turn the bottle upside down a few times, to get the blossoms out of the bottle neck and mix with the vinegar.
I was curious how the colour would turn out. The site I’d found instructions on had a final product that was bright pink. I used white wine vinegar, though, which is pale yellow.
The final colour is quite dramatic, isn’t it?
After straining the vinegar, the bottle got cleaned and scaled, the vinegar added back, and we replaced the little plastic thing in the top, that controls the flow of vinegar when pouring.
We haven’t tried it in anything yet, but the smell of it is absolutely fabulous!! I can’t wait to try it!
Today has been another day of rain and high winds.
After today, we’re going to be back to high temperatures and sun. My Weather Network is forecasting 37C/99F on Wednesday! I think that must be some kind of typo, because I’m not seeing that anywhere else. The highest I’m finding is on my phone’s app, which is forecasting 27C/81F on the same day. Even so, it’s going to get hot again, and I am really, really glad we’re getting this rain right now!
In between rainfalls, we managed a trip into town, and I even got a bit of weeding done in the garden. We’re going to need to do a LOT of weeding once this rain passes. The weeds are loving the rain as much as the things we actually planted.
Speaking of which, while weeding among the corn earlier, I did find some radish sprouts. They are recent sprouts, not the ones that came up before the corn did, then disappeared. So we will have at least a couple of radishes. Unless these sprouts disappear, too!
Gosh, I’m just watching the trees outside my window as I write this. If a section of that big maple came down right now, it wouldn’t surprise me at all!
With this weather, our internet is seriously cutting out. It’s taken me more than an hour just to be able to start this post, and I still can’t get images to load. So this will be a quick one!
I wanted to share some of the new things we’re trying this year. The chives are blooming, and we decided to try making chive blossom vinegar.
I got a small bottle of white wine vinegar, and we’re simply putting clean, dry chive blossoms into it (after removing a bit of vinegar to make space. Some of the blossoms are left whole, while others had the bit at the bottom taken off, so all the individual flowerettes are loose. We’ve been adding to the bottle as more blossoms open up, then we’ll let it sit for a couple of weeks, in a cool, dark place, giving it a few turns every now and then. After that, the vinegar will be strained and re-bottled. I’m looking forward to seeing how this turns out!
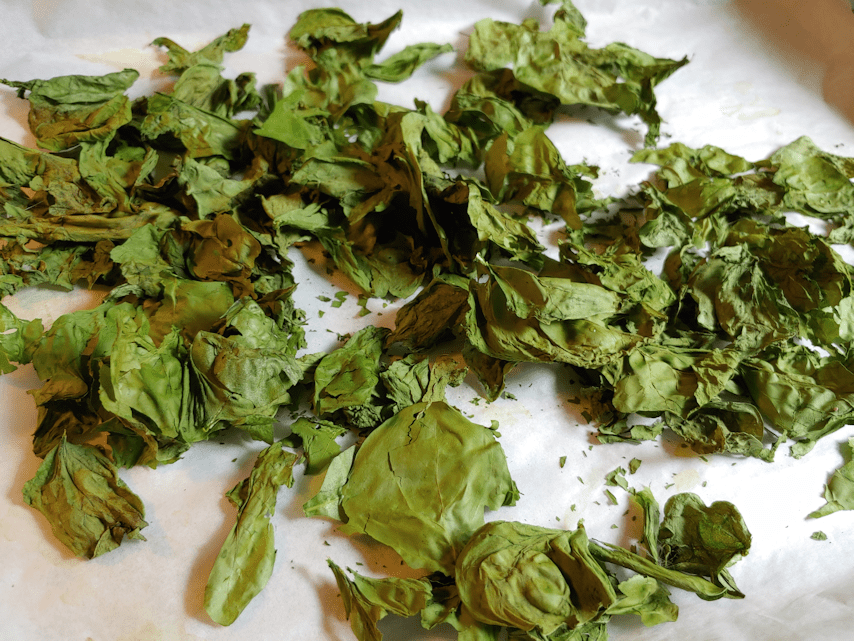
I’ve also started to dehydrate spinach leaves.
I use our oven to dehydrate things, using the “warm” setting, reduced to it’s lowest temperature of 145F (default is 170F). For something as light and thin as spinach leaves, I shut it off and let the oven light on to stay warm. We can only fit two trays in the oven at a time, but after I went to turn the leaves and found they’d shrunk enough, I combined them into one pan and left it for the night. In the morning, I just crushed them lightly, and put them in an air tight canister. There’s maybe 1/3rd of a cup of dried, crushed leaves from the 2 trays. We’ll keep doing small batches like this and, eventually, we’ll reduce them to a powder instead of flakes. It kind of reminds me of dehydrating celery. You start off with what looks like so much, but by the time it’s completely dehydrated, it looks like there’s nothing there! :-D
Now it’s time to see if I have enough connection to publish this!
While heading out to feed the outside cats, I heard a noise from an unusual direction.
I had startled Nicky the Nose on the sun room roof!
I always get a giggle out of how he pancakes himself like that when he’s startled. As if he can somehow make himself small. :-D
Our cats never go on the sun room roof, that we’ve seen. They’ll go onto the new part roof, where they can look at the girls through the second floor windows, but it’s quite a leap to go onto the rest of the roof from there. It was a surprise to see Nicky there!
My daughters had a Mother’s Day treat planned out for me. In our tiny little hamlet, we have a small hotel with a bar and itty bitty restaurant. Well, with all the restrictions in place, they’ve had to change things up. About a month ago, the separate bar and restaurant was reworked as a single country style pub, and quickly got a good reputation for their excellent food. It’s a small menu for a small town, but we’re just excited to have options at all.
Of course, the government promptly pulled the rug out from under restaurants again, so they’re limited to take out, only. I guess the government isn’t done killing small businesses, yet. So we wanted to give them some support!
I saw them post a photo on their Facebook page for a platter that is not on their menu, so I had to ask about it. They were able to put together an appetizer platter for us, including deep fried mushrooms, which are also not on the menu yet. It was awesome! Even with 4 of us, by the time we were done, I could only manage one slice of the pizza I got for myself. My daughters ordered their cheeseburger platters, and were thoroughly impressed just by the size. There was enough there for two meals! And yes, they tasted really good, too! It’ll be much nicer to be able to order food from just a few miles away, instead of having to go to another town. Unless we want Chinese food. ;-) I’m glad we were able to order there today. Driving by over the past month, I was always seeing vehicles and people out front and, on nice days, people sitting and eating at the tables outside. Today, with the increased restrictions kicking in at midnight, there was nothing. Just two employees, and me, and I only heard the cook, but never saw him. So we’ll be trying to order food from there as often as our budget allows. Hopefully, lots of other people will be doing the same. Considering how few people live here, that still won’t be much, but it might be enough to keep them going.
In other things…
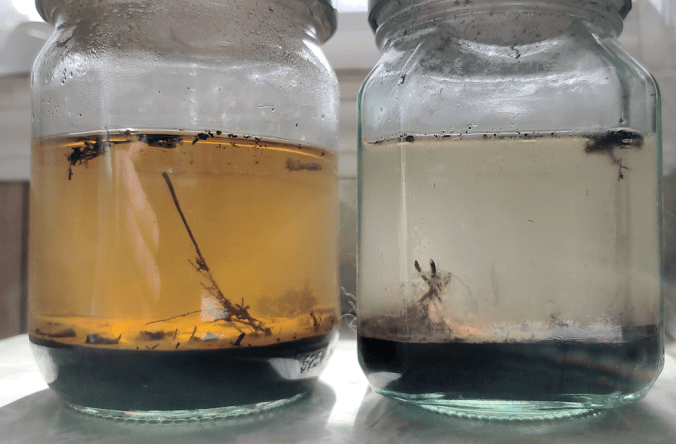
I had hung on to the soil samples from the tests done in them, and today I finally got some photos before getting rid of them. Here are the jars from the first two tests we did.
The first sample was from the soft soil uncovered when the old wood pile was cleaned up. The water is still very distinctly orange! The second sample is from the new garden soil we purchased.
These are from the third and fourth tests we did. The one that’s more orange and still cloudy is from where we’d planted potatoes using the Ruth Stout method, while the other is from the unamended soil that has never had anything planted there before. I find it interesting to see how clear – or not! – the water became, after letting the samples sit undisturbed for so long.
Later this afternoon, my daughters and I went out to do some watering, and to plant onion sets in the last of the beds in the old garden area. The 2 bags of shallots had only a dozen sets each, so they were planted in one row along one side, while the yellow onions were planted in a three row grid on the other. Later next week, kohlrabi will be planted in between the two. Besides that, there’s still half a bed left that will be planted with carrots. Aside from successive sowing the spinach, that will be it for those beds.
There were still maybe a dozen onion sets left over, so I’m thinking of interplanting them with the beets that will be planted near the garlic beds. Hopefully, they will help deter deer from going after the beet greens. If all goes well, that will be completed tomorrow.
Before heading back indoors and out of the high winds we were having, the girls and I checked on the flowers we’d planted in the fall.
We’re finding more and more of the teeny, tiny crocuses blooming! I know these are not large flowers, but I didn’t expect them to be this minuscule! I suspect, after they’ve had a year to establish themselves, they will come up a bit larger, next year.
I then spent some time tending the seed starts in the sun room. The gourd pots got moved to the sun room awhile ago, but there is still nothing of the Ozark Nest Egg, Thai Edible Bottle gourd, and birdhouse gourds. I am hoping it’s just because they take so long to germinate normally. I probably should have started them earlier. It’s the squash and melons that I’m eyeballing more. They haven’t been in the sun room long, but I was hoping the increased warmth would help. I’m happy to say that I did see a couple of seedlings trying to push their way through, but most show no sign of any germination. I keep second guessing myself about what we used to plant them in and all the things we did differently this year, thinking that maybe I’ve gone and killed them off somehow. :-/ It’s still just under a month before we can transplant anything outside, so there’s lots of time yet for them to germinate.
At least, that’s what I keep telling myself!
Oy. Today has been a really bad day for internet connectivity – as happens every time we have high winds. This post took forever to get done! Time to stop trying to do internet things for a while.
Hmm… I still have lots of my Mother’s Day pizza left. Maybe a late snack is in order? :-D
I hope that your day was full of joy and blessings.
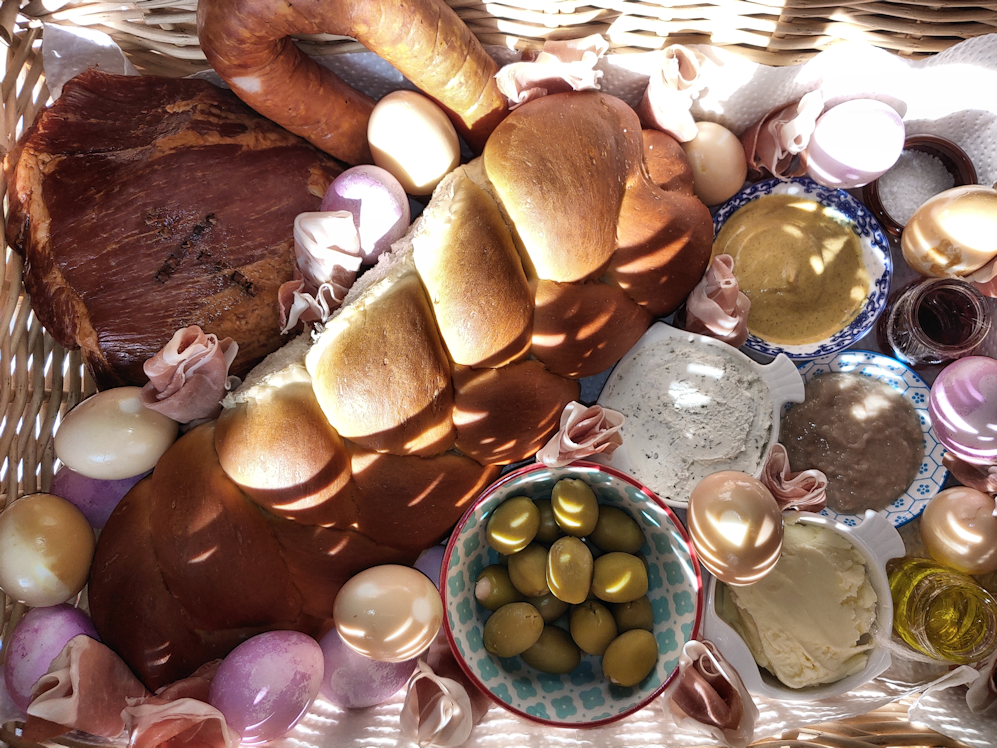
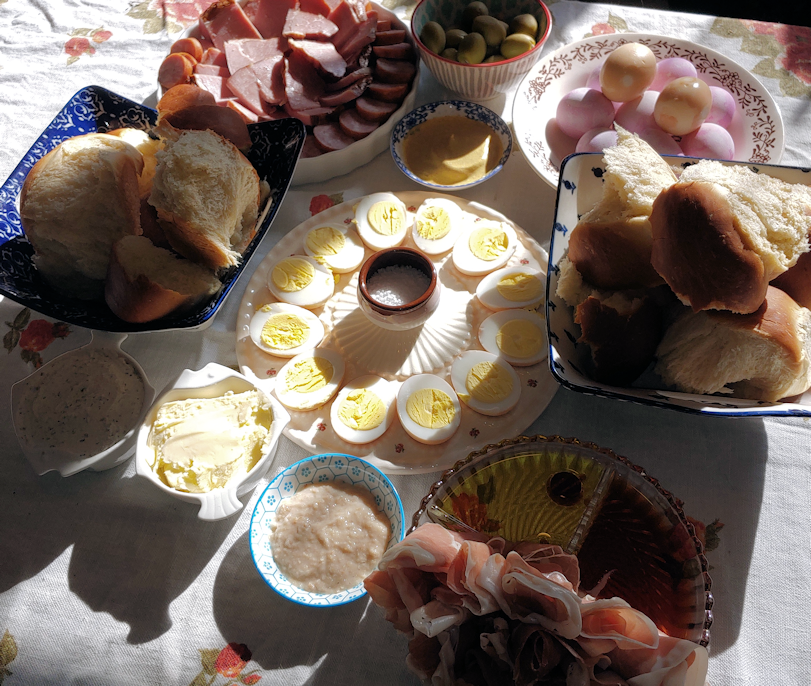
Our favourite tradition is our Easter basket.
The traditional items include bread (I made a challah this year), eggs (half were pickled, half were coloured with beet juice), ham, sausage, cheese (goat cheese with herbs this year), horseradish (we purchased a spread this year, as our ground it still too frozen to dig up fresh roots), butter and salt. In place of the traditional bacon, we twisted prosciutto rosettes. Among the non-traditional items, we have mustard, olive oil, wine vinegar and olives (almond stuffed, this year). Other items that some people like to include are wine, grapes or an apple, a bottle of wine, or a single white candle. Every item has symbolic meaning. It’s not in the photo, but the basket was covered with a hand embroidered linen cloth; a small table cloth, stitched and gifted to me by my godmother, many years ago. I have a small collection of hand embroidered linens that I like to use to cover our baskets. Lots of people cover their baskets with crocheted lace doilies.
Typically, the basket would be taken to church for blessing on Holy Saturday (as my mother was able to do), but we blessed it ourselves again, this year. I’ve seen people with very elaborate baskets, with added decorations on the basket itself, along with sprigs of flowers, greenery or pussy willow branches. I’ve also seen baskets as simple and elegant as a loaf of rye bread in a small basket covered with a cloth napkin.
A while back, we tried a recipe for overnight bread, which you can read about here, and find a link to the original recipe we used.
I then tried an “over day” version, using the dough baby from my Babcia’s bread experiment. It was fantastically successful!
We’ve made it again, as a pretty basic no-knead bread and, once again, it turned out awesome!
If you are new to this blog and don’t know the background to this, you can read the story behind my experiment to try and recreate the bread my grandmother made in pre-WWII Poland, as my mother remembers it. Or you can check out all the posts about it at this link. All links will open in new tabs, so you don’t lose your place here!
Here is how we made No-knead bread, using the old dough method.
The first step is to dig the dough baby out of the flour it sleeps in.
My Babcia did bread baking once a week, and when the old dough sits that long, it tends to be dry enough to break apart into pieces before reconstituting it. This time, the dough baby had not been sleeping in its bed of flour for that long, and it was still quite… doughy! :-D
So I just pulled it apart a bit and placed it in the bottom of a very large bowl.
I don’t know how much that is. Maybe about 2 cups, including the flour stuck to it? The dough baby rises and collapses while stored in the flour, and I made no effort to measure the quantity.
I also pre-measured 2 Tbsp each of course salt and sugar, and 1 Tbsp of yeast.
The yeast would be optional. The dough would need more time to rise without it, which would give more of a sourdough flavour.
Four cups of very warm water was added to the dough baby. Since it wasn’t dry enough to break into pieces, I spent some time stirring it and breaking it up in the water.
Then, the sugar and yeast was added and mixed in, the bowl loosely covered, and it was left for about 10 minutes.
I like to use traditional active dry yeast, rather than quick or instant dry yeast, but that’s just me. The traditional yeast needs more time to proof in the liquid compared to the quick yeast, and the instant yeast wouldn’t need to be added at all at this point, but would be mixed in with the flour.
If I were not using yeast, I would leave the water, dough baby and sugar mixture in a warm place for much longer, checking regularly to see how active it was.
Here is how it looked after 10 minutes. I stirred it again to break up the dough baby a bit more.
Then it was time to add some flour.
I started by adding 3 cups of flour. It’s easier to mix in that amount compared to starting with just one cup.
I decided to use Durum wheat flour at this point, just because I have it. Use whatever flour, or mix of flours, you like best!
After the first 3 cups was thoroughly beaten in, I added another cup of flour and the salt.
More flour was beaten in, about a cup at a time at first, then a half up at a time.
How much flour to use is something I’ve never been precise about. I know there are bread bakers that weigh and measure precise amounts, but in my experience, that just doesn’t work. The amount of flour needed can depend on things like how fresh the flour itself is, to how much humidity there is in the air.
With 4 cups of water, I would have expected to work in at least 8 cups of flour for this recipe (with my usual kneaded bread, I typically used 5 or 6 cups of flour to 2 1/2 cups liquid).
We are very, very dry right now.
Today, I worked in 7 1/2 cups of flour, and probably could have done with a bit less.
By this point, I was working the flour in with my hand rather than trying to stir it with a spoon. If you have an electric mixer with a dough hook, go ahead and use it!
Before setting it aside to rise, right in the same bowl, I sprinkled some flour over the top and sides, in case it rose high enough to touch the bottom of the bowl’s lid.
Lightly cover the bowl, then set it in a warm place for about an hour. With our chilly our kitchen is in the winter, I heated our oven to its lowest setting (145F on “warm”), then shut it off before I started mixing the flour into the dough. The covered bowl is left in the warm oven, with the light on, to rise. Anywhere that is warm and draft free will do.
Here it is, after an hour. It just barely touched the bottom of the lid! :-D
The dough it then pushed down and worked a bit to incorporate the flour that had been dredged on top.
Next is a very, very important step.
A piece of the dough needs to be removed and set aside for the next batch of bread!
I dumped some flour on a container and plopped about a cup of dough onto it.
Once the new dough baby was set aside, the rest of the dough was dumped onto a 9×13 inch baking sheet that was lined with parchment paper. The last time I made this, I used a parchment paper lined lasagna pan, but I could also have split it into two parchment paper lined loaf pans.
If I didn’t have parchment paper, I would have well oiled the pan, first.
Speaking of oil…
After spreading the dough out to fill the bottom of the pan, I stabbed at the dough with my fingers to create “dimples”, then topped it with oil, course salt and dried parsley flakes.
I happened to still have some fake truffle oil that I used, but an olive or avocado oil would work just was well.
The pan was then set aside for the dough to rise again. Since this batch is so flat and thin, I started preheating the oven for 450F right away. Had I used loaf pans or the lasagna pan again, I would have let it rise longer before preheating the oven. If I had used no yeast at all, it would be left in a warm place until doubled in size.
While the shaped loaf was waiting to go in the oven, there is this to deal with…
The bottom of the bowl still has quite a bit of dough stuck to it!
We can’t let that go to waste!
Into the bowl went the new dough baby, and the flour it had been resting on.
While working the flour dregs into the dough baby, scrape as much of the dough stuck to the sides and incorporate it into the dough baby.
You probably won’t get all of it off the sides, which is okay.
The dough baby is now ready for a nap. I have a canister of flour that I bury it in, but it can also be buried right in a bag of flour, as long as you’re not planning to use the flour for anything else in between bread baking!
After the dough baby has been buried, it will rise quite a bit before collapsing in on itself, breaking through the surface of the flour. Remember to check on the dough baby later on, to make sure it is still covered in flour.
Once the oven is ready, place the pan of bread into oven and bake. If you wish, place a container with about a cup of water on the rack under the bread pan, to add some steam to the oven as it bakes.
For a very flat loaf like what I made today, it took about 25 minutes. A deeper loaf, or a pair of loaf pans will likely need 30-40 minutes. Bake it until it looks like this.
With the oil added to the surface, it will have a deep, golden colour when it’s ready.
When baked, remove from the oven and left to cool for a few minutes. Once it is safe to do so, remove the bread from the pan and onto a cooling rack (parchment paper makes that job a LOT easier!).
I really like the big, flat slab of bread, but it is a bit hard to cut a slice off! :-D
Here is how it looks on the inside.
The crumb is light and fluffy, yet still wonderfully chewy. The star of the show, however, is that golden, flavorful top crust! It’s just a lovely and delicious combination of textures and flavours.
The only problem with this bread is how difficult it is, not to just scarf it all down right away! :-D
Here is the recipe.
Old Dough No Knead Bread
Ingredients:
old dough set aside from previous bread baking
4 cups warm water
2 Tbsp sugar
1 Tbsp traditional active dry yeast (optional, or use 2 Tbsp if you don’t have old dough)
2 Tbsp course salt
about 7 or 8 cups of flour
small amount of good quality oil (olive oil, avocado oil, etc.)
small amount of dried parsley and course salt
Break up the old dough into a large bowl. Pour water over the old dough and stir. Add the sugar and yeast and leave to proof for about 10 minutes. If you do not have old dough, use the larger amount of yeast and proof it in the sugar water. If using only the old dough and no added yeast, leave the bowl in a warm place until the mixture is bubbly.
After the yeast and old dough has proofed, add 3 cups of flour and mix thoroughly until it forms a very smooth batter. (An electric mixer can be used at this stage.)
Add the salt and 1 cup of flour, mixing thoroughly.
Add more flour a little at a time, mixing thoroughly after each addition, until it reaches a thick but sticky consistency. Use your hands to mix in the last of the flour. (If you have an electric mixer with dough hook attachments, switch to the dough hooks at this point.)
Leaving the dough in the bowl, dust the top of the dough with flour and cover loosely. Place in a warm spot to rise until doubled in size.
Prepare baking pans by lining with parchment paper or oiling thoroughly.
When the dough has risen, punch it down again, folding it into itself to incorporate the flour dusted on top.
Dust some flour on a small plate or bowl. Remove about a cup of dough for the next batch of bread, setting it aside on the floured container until later.
Pour the remaining dough into the prepared baking pan(s). Using your hands, press the dough to fill the pan to the edges and corners, then stab into the surface with your fingers to create dimples in the dough.
Carefully sprinkle oil across the surface of the dough, then use your hand to spread it evenly across the surface.
Sprinkle the oiled surface with course salt and dried parsley.
Set aside in a warm place to rise.
While the bread is rising, return the dough set aside earlier to the mixing bowl, along with any flour in the plate or bowl. Use the flour and the dough ball to scrape off any remaining dough stuck to the surface of the bowl, working the dough ball until smooth. Shape the dough into a ball, then bury it in a container of flour, for use in the next batch of bread.
When the pan of rising bread is almost doubled in size, preheat the oven to 450F.
Place the bread in the centre rack of the preheated oven; if desired, place about a cup of water in an oven proof container on the lower rack to create steam.
Bake until the bread is a deep, golden colour – about 25 minutes when using a 9″x13″ baking sheet, about 30-35 minutes if using loaf pans, or a cake or lasagna pan. The finished loaf should sound hollow when the bottom is tapped.
Set aside to cool in the pan for a few minutes, then transfer the bread to a rack to finish cooling.
Today, we got to use our pasta machine for the first time, while making pasta for the first time. :-)
Granted, I have made pasta-like noodles before, before, but nothing quite like this.
Of course, I did some research first. I wanted something really basic for a recipe. This turned out to be just flour and eggs. Most places I found went with a ratio of 2 eggs per 1 cup of flour. I did find one that used a ratio of 2 eggs per 3/4 cup of flour. As for quantities, it was recommended 1 egg per person.
Based on that, we could have gone with 4 eggs and 2 cups of flour, but I went ahead and did 6 eggs with 3 cups of flour.
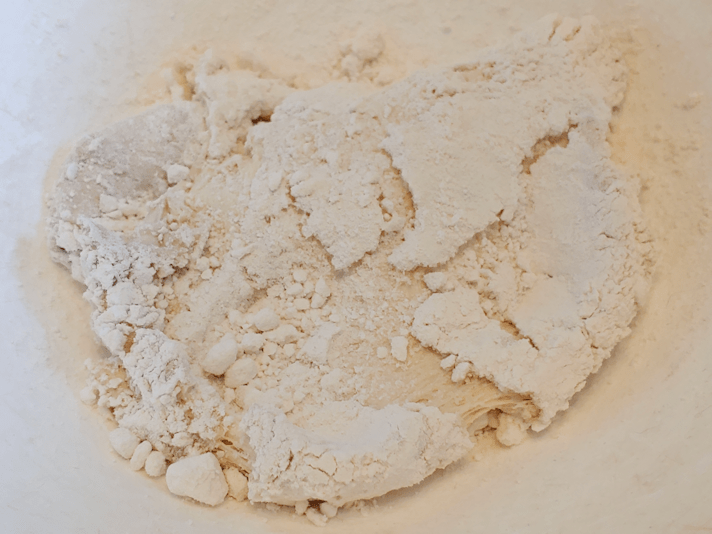
I worked the dough in a bowl until the dough was well formed, then turned it onto our kneading mat.
This turned out to be waaaayyy too dry! I would expect relative humidity would affect the dough, like it does with bread, and we are very dry right now. I simply could not knead in the rest of the flour.
The flour had bits of dough in it, though, and I wasn’t about to let that go to waste.
If you are a pasta aficionado, you may want to look away right now… ;-)
I remembered that one resource I found that used the 2 eggs: 3/4 cup flour ratio. It had a recipe calling for 7 eggs to 3 cups of flour.
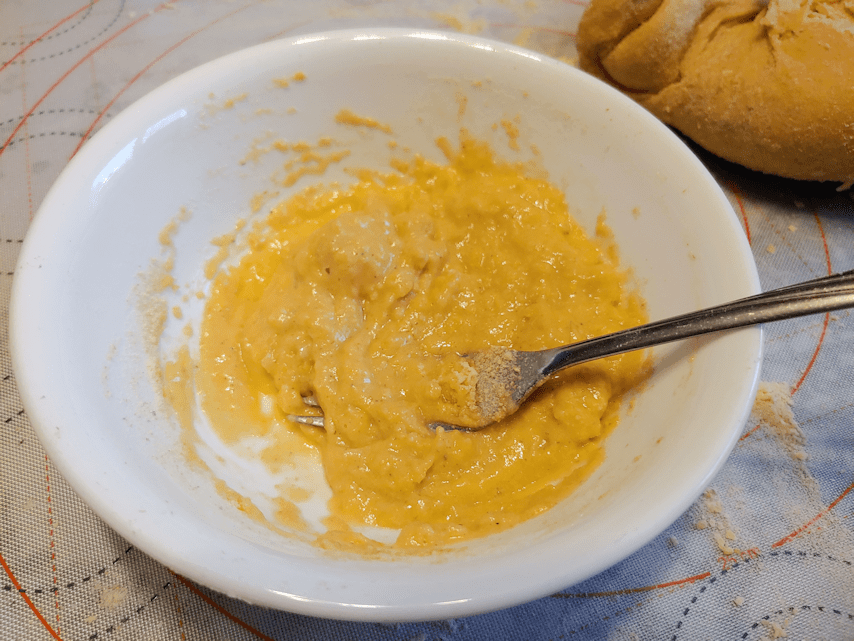
I decided to add an egg.
Of course, I couldn’t just knead in an egg, so I beat it in a bowl first, then beat in the flour that I couldn’t work into the dough. I even broke off some pieces of the dough and mixed that in, to get it thicker.
I then opened up the dough so I could add the additional egg mixture into the middle, then fold the dough over it.
Kneading that in was pretty messy, anyhow!
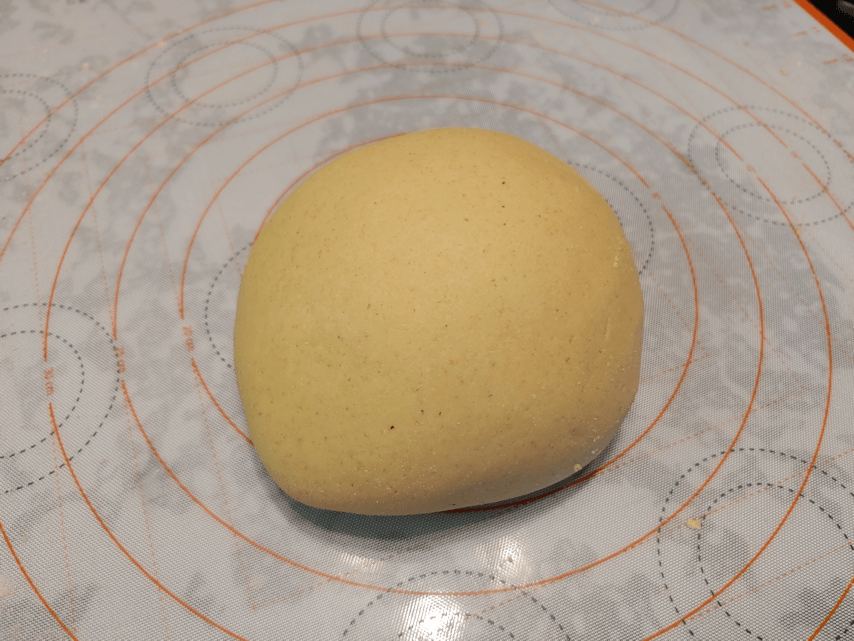
Once it was thoroughly worked in, I only needed to add perhaps a tablespoon of flour onto the mat to clean up the stickiness, then I kneaded it for 10 minutes.
I’m sure I broke all sorts of rules or committed some terrible faux pas in doing this, but hey – it worked! The dough was wonderfully smooth and elastic, and just barely sticky.
At this point, I covered it with some plastic wrap and let it sit for 20 minutes.
While I was looking things up, there were a few points I kept seeing repeated. One was that the pasta cooked extremely quickly, so before I even started it, I made a use-watcha-got meat sauce. The other thing I kept seeing was to use extra salt in the water the pasta would be boiled in. Since they cook so quickly, they don’t have the chance to absorb salt from the water, if the usual amount was used.
So while the pasta was resting, I made a few final touches on the meat sauce, then prepped a pot of salted water. No one mentioned how much more salt to add, so I winged it. :-D
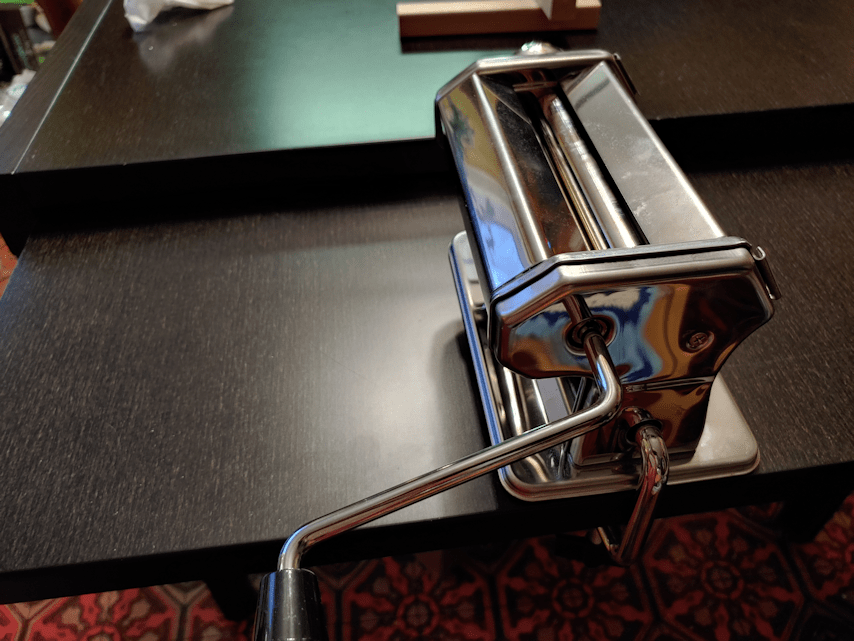
The next thing to do was set up the pasta machine.
What’s hilarious is that the first image has the pasta photoshopped onto the machine completely wrong. It shows cut pasta coming out of the flat rollers. :-D
The machine comes with a clamp to attach it to a table, but our table has a different design. It can expand to twice its size. The two halves of the table top slide one over the other when it’s closed, with a support piece running under them at each end. The whole thing is about 6 inches wide – way too much for the clamp to fit around.
It worked out though.
I was able to partially slide out the extension, and still have a stable surface to clamp on to.
When it was time to start rolling the dough, I started with only half of it. The first time I rolled it through the machine, though…
It just tore apart!
I spent some time going through the instruction manual to figure out why. I ended up using a rolling pin to thin it out more, first, and dusted more flour on each side. That seemed to do the trick.
Another thing I kept reading was to make sure to roll the dough thin enough to see through. I kept reading that the pasta will thicken as it cooks, so it’s better to roll it thinner.
In reading the instructions, it said to set the machine at 1, for the widest setting, rolling the dough through, folding it in half, rolling it again, about 5 or 6 times, then working it thinner and thinner until about 3.
There was one problem with that.
The numbers on the machine are backwards from the numbers in the instructions! The widest setting is 7, not 1. :-D Which doesn’t really matter, as long as it works, but I did find that funny.
It took a while to get the hang of it. One problem I encountered was that the crank handle kept falling off! The pasta also tended to go off to one side. After a while, a daughter was able to come give me a hand, too, which made things much easier to handle.
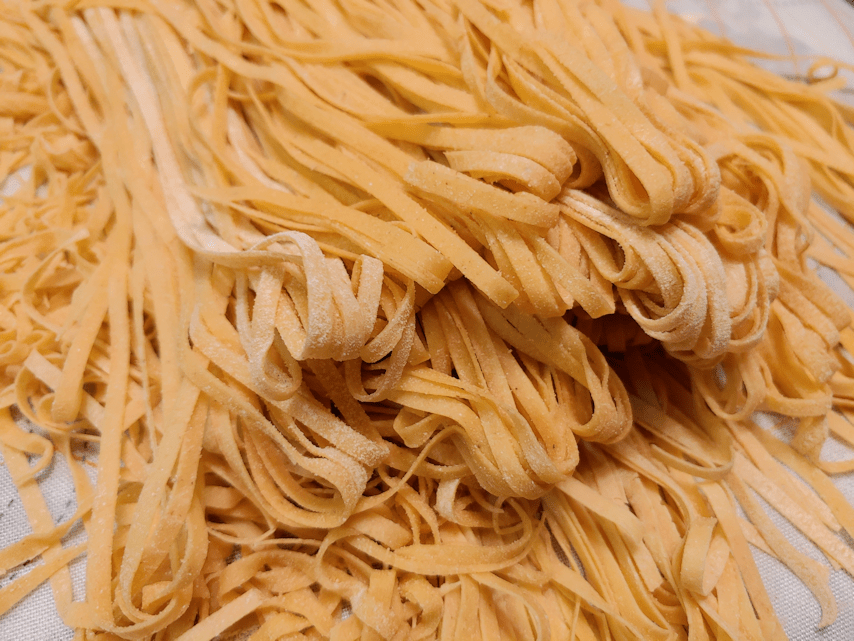
The pasta sheets kept getting longer and longer, and I ended up having to cut them in half. Then do it again! In this photo, we have the 4 sheets draped on the pasta drier, ready for us to put the cutter attachment on and start cutting them.
I have to add that I’m really glad I waited until we found Durum flour for this. We could really feel the difference in how well the pasta held out to all the stretching and handling.
The first ones we cut were still hilariously long, so we cut the remaining sheets in half again.
Their widths might have been consistent, but their lengths certainly weren’t! :-D
After finishing the first batch, they got to dry while the second half of the dough was prepped. This half went much faster, now that we knew what we were doing! Also, we split the second batch of dough in half, right from the start.
Once they were done, it was time to get the water boiling. After a while, I took the longest pasta pieces and broke them in half, to make them a more reasonable length!
Just before the water was boiling, I took them all off the drying rack, to make them easier to handle and carry and break any really long pieces that got missed..
Don’t they look pretty?
And yes. I did cook the whole lot!
Here, I have pretty much just added them to the water. It hasn’t even come back to a boil, yet, and already the pasta is half cooked!
I boiled them for 2 minutes, but that was probably at least half a minute too long! :-D
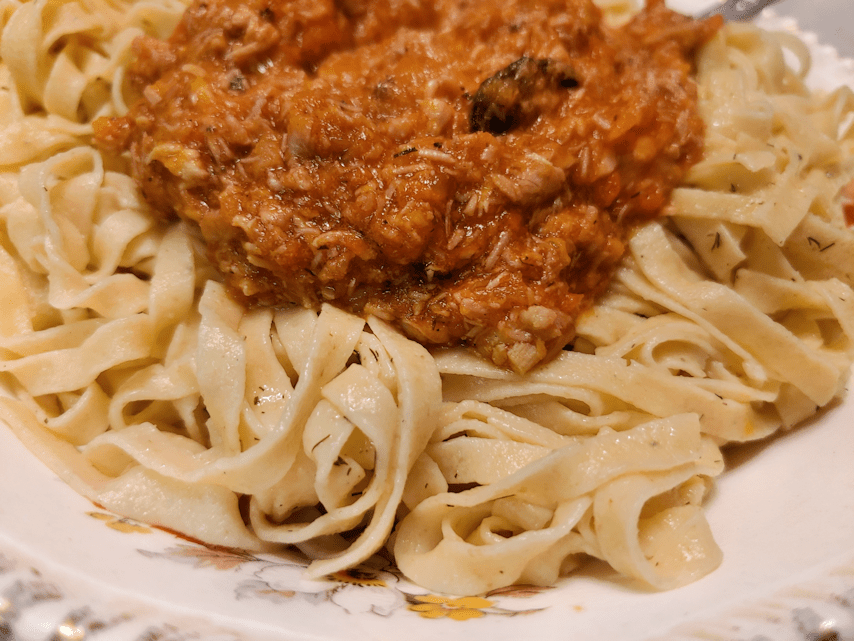
After draining them, I tossed them in some herbed butter my husband made earlier in the day.
There was have it! Fresh made pasta, with meat sauce.
So, how did it taste?
Many of the sites I found with recipes raved about how good they were, and how you’ll never want to eat store bought pasta again, and so on.
It was good, but I don’t know that I would say it was that good! At least, not when considering the amount of physical labor involved. The family did all really enjoy it, though.
I actually found the pasta a bit thin. I like a toothsome pasta. In rolling it out, I went to the recommended “3” on the knob, based on what I’d read (the instructions with the machine suggested going to 3, but with the numbers reversed on the knob, that actually meant 4). It was certainly thin enough to see through, but I think that, next time, I’ll just bring it down to 4 on the machine.
It does use a lot of eggs, though. We’ll have to buy more, before we can do this again! Or we could make it with just water. The instruction manual has a recipe, too.
We definitely can do some experimenting! :-D
All in all, I’d say this was a success, and I am quite glad we got the machine to make the job easier! Even with the handle falling off so often! :-D