My daughters were sweethearts and took care of feeding the cats outside for me, as I’m still feeling pretty unstable, so the cats weren’t out and about by the time I headed outside. I did get to briefly pet a kitten, though! :-D
While checking out the garden, there was some new progress – and a bit of deer damage – to find.
The Carminat beans are reaching the top of the trellis, and you can see their flower buds. At my fingers, however, you can see the stem of a missing leaf! There was a vertical row of missing leaves, a few feet along the trellis. Right about deer height! Time to find more noise makers and flashy things to set up.
On this side of the trellis are the Seychelles beans, which are starting to get pretty tall, too. None of them show deer damage, which is good, since less of them germinated. In the foreground are the self seeded (or should I say, bird-seeded) sunflowers that I left to grow. The beans can climb them, too! With the flooding this spring, we did not plant any of the Hopi black dye or Mongolian Giant sunflower seeds we’d collected from last year, so I don’t mind letting these one grow. These would be the black oil seed that we put out for the birds in the summer. We’re finding them all over the place, thanks to being spread by birds!
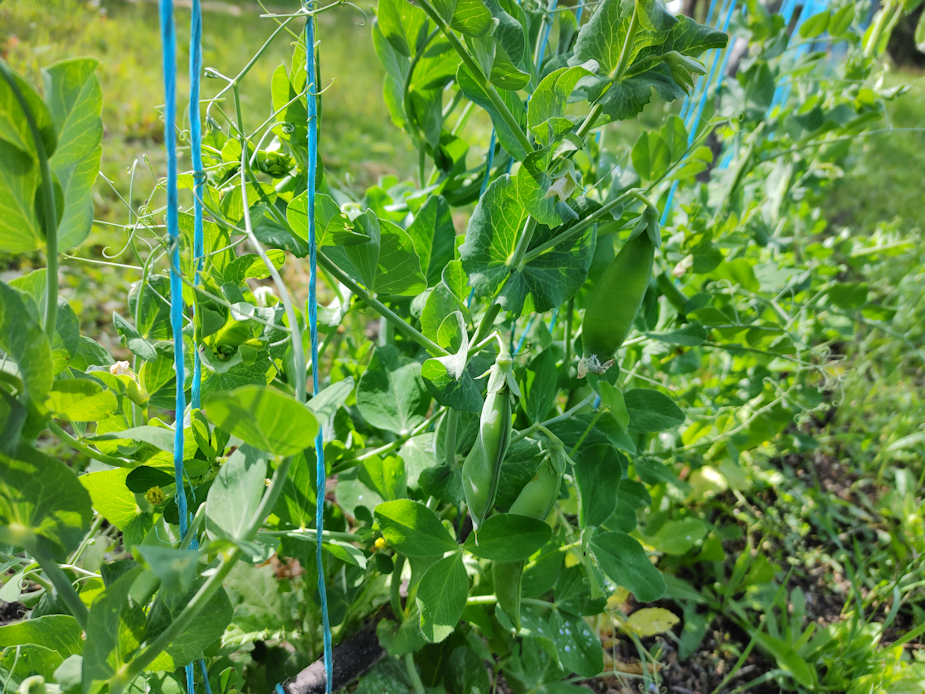
The first sowing of shelling peas may be about half the size they should be, but they are loaded with pods. At least on the north end of the pea trellis. Towards the south end, the sugar snap peas are barely surviving, and the shelling peas on the other side of the trellis are much weaker, too. The entire trellis gets an equal amount of sunlight, so this would be a reflection of soil conditions.
This should be the last year we use this spot for growing vegetables. Next year, they’ll be moved closer to the house, and this area will be made available for planting fruit or nut trees. We haven’t decided what to get next, yet.
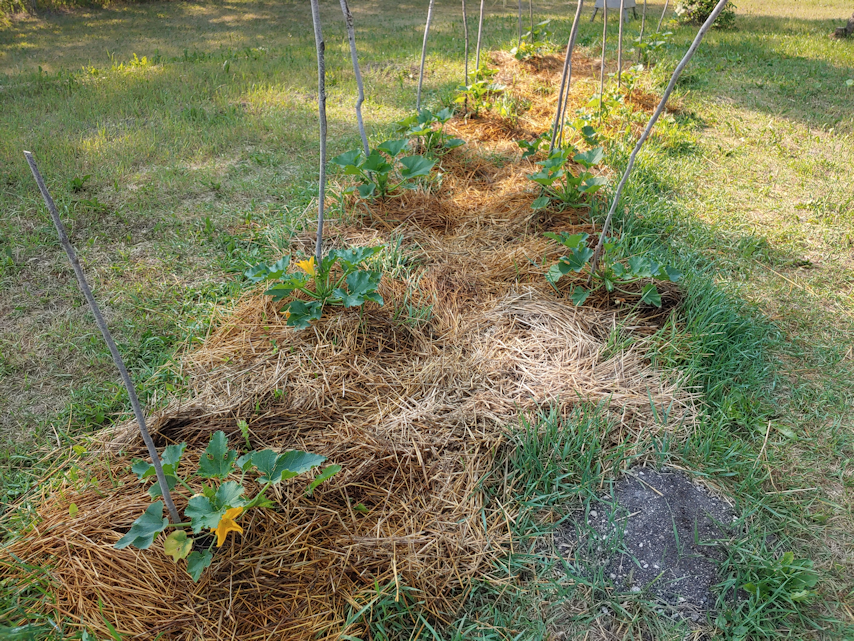
The cucumber row is a mixed bag of plants that are growing nice and big, and filled with little cucumbers, and others that are barely bigger than when they were first transplanted!
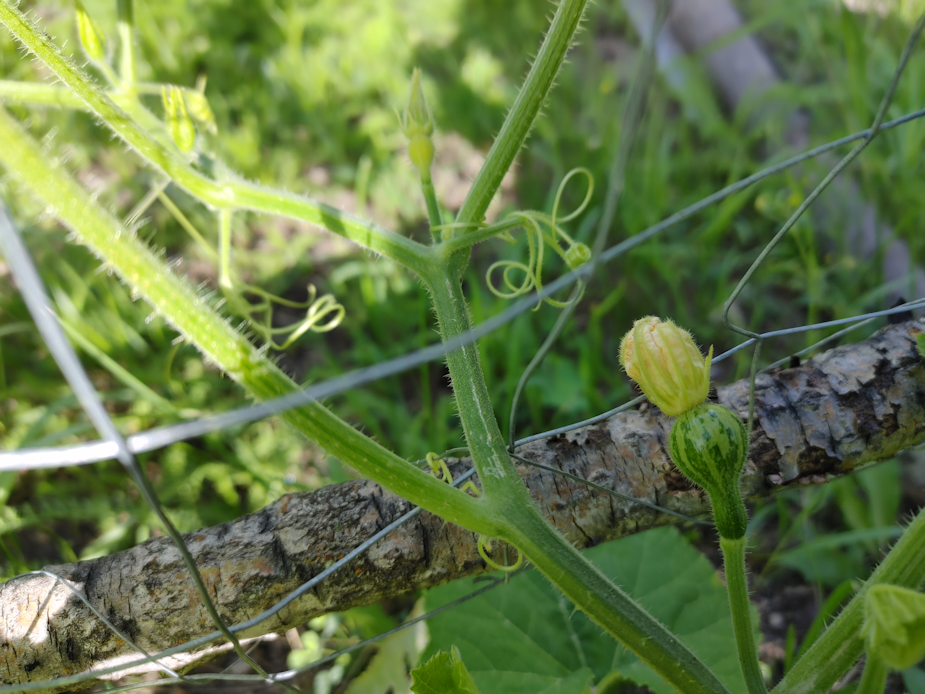
I had an adorable find at the big trellis.
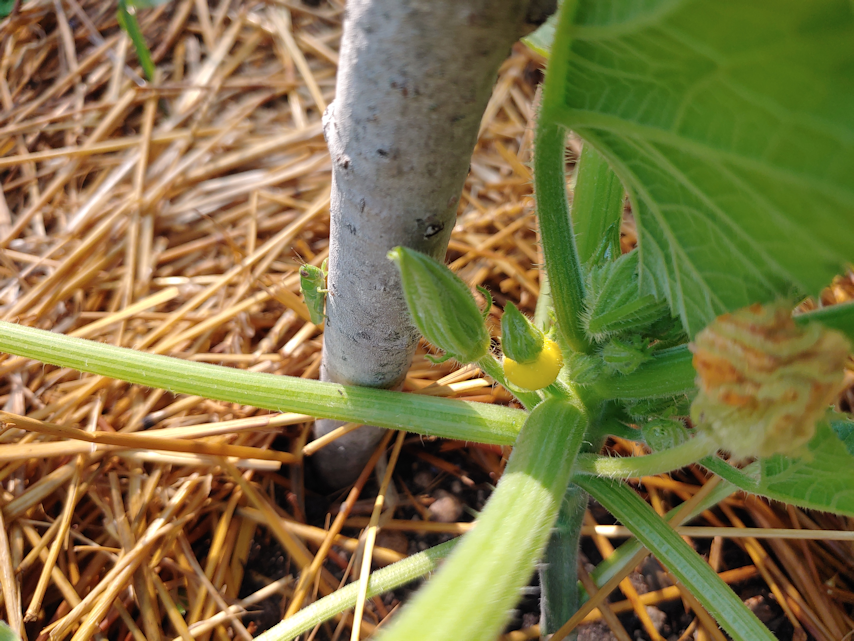
We have a first Tennessee Dancing gourd developing! It is so cute!
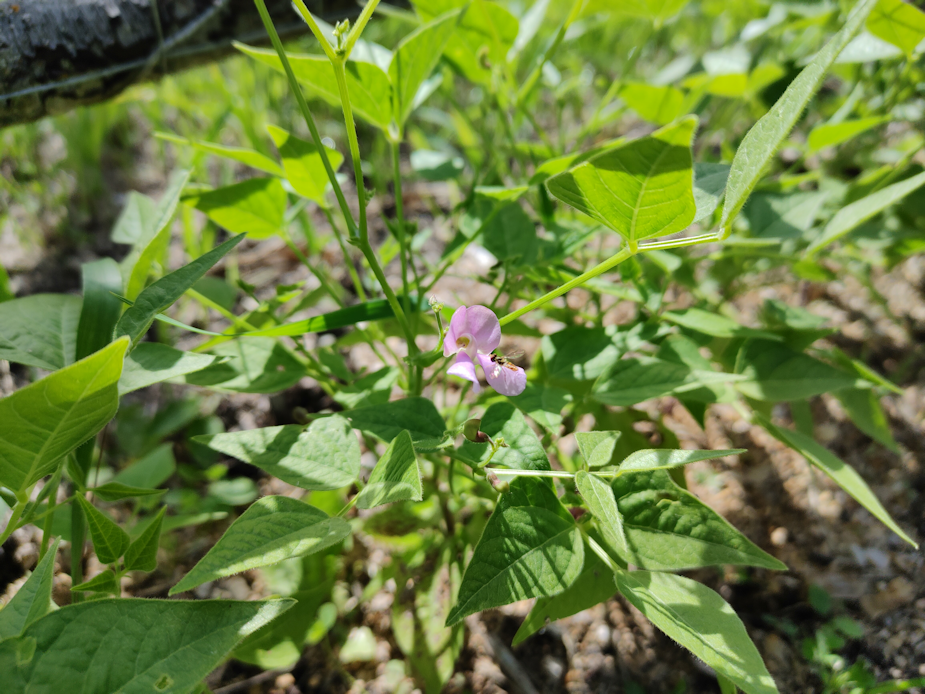
The beans on the same side as the dancing gourds are the red noodle beans. The plants are pretty large, but they are still not at the point of climbing. The shelling beans on the other side, however…
The are much smaller, but have tendrils climbing the trellis, and have even started to bloom!
The most adorable little pollinator showed up just as I was taking the picture.
I startled a bee when checking out this HUGE pumpkin flower.
Yes, it’s on a giant pumpkin plant. 😁
I’d seen some female flowers previously, but now I can’t find them, so there are no pumpkins starting to form, yet. While we are not shooting for super big pumpkins, and won’t be pruning them down to just one pumpkin per plant, it feels like it’s too late in the season for any giant pumpkins to mature. We’re near the end of July already, and none have formed, yet!
In the south yard, we finally have Chocolate cherry tomatoes! Just this one plant, yet. Of the 4 varieties we planted this year, the Chocolate cherry have been the most behind – and they are planted where tomatoes had done so well, last year. The plants themselves are getting nice and tall, and we’ve been adding supports and pruning them as needed, but there are much fewer flowers blooming, and only today do we finally have tomatoes forming. Thankfully, the other varieties are much further along.
I also spotted some ground cherry fruit forming! These plants are doing remarkably well, given how much water they had to deal with this spring. It took a while, but not they are quite robust plants, and I’m happy to see them setting fruit!
Hopefully, it won’t be too much longer before we start getting actual food from the garden. Everything is so, so behind, I am extra happy to see progress like this.
It occurred to me that, while I’ve been posting lots of pictures of our garden, some areas get focused on more than others. As we are now in July, I figured it would be a good time to do a “tour” of all the garden, and review how things are doing so far.
This is going to be a very photo heavy post! :-D Which is probably silly of me, as our internet connection is horrible right now, so it will probably take me at least a couple of hours to get it done! :-D
Let’s get started!
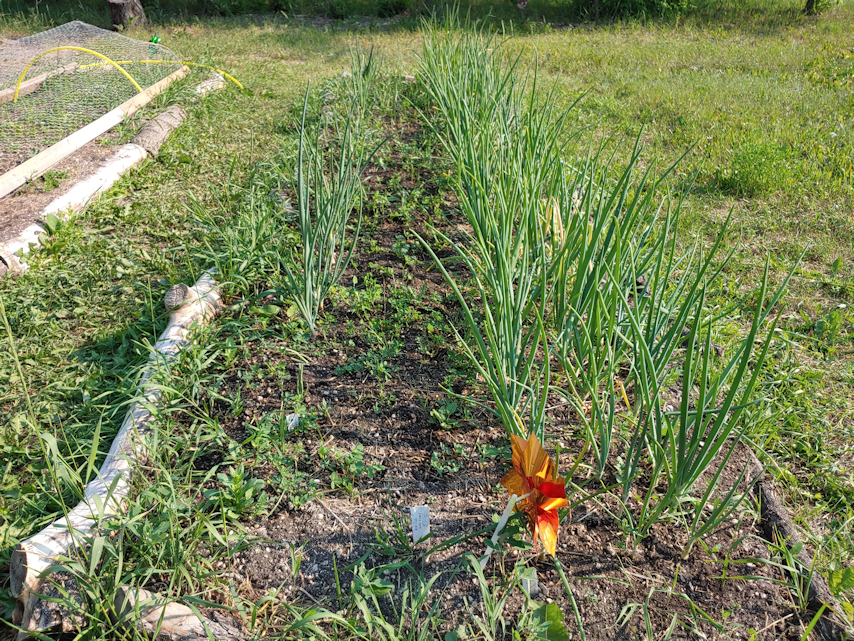
Asparagus bed with onions
Our first photo shows both success and failure.
In the foreground is the asparagus bed. We planted 6 crowns of Purple Passion Asparagus. The crowns came in at the same time as our Mulberry sapling. I didn’t get a photo of that. It did not survive that one unusually cold night in late may. :-( But the asparagus did emerge, and we are very happy with them!
Along two sides of the asparagus bed are some tiny onions. These were some last minute Norstar onions we started indoors after having so many of the other onions seeds we started get destroyed, one way or another. They are incredibly tiny, and yet they are forming bulbs!
In the other bed is where we planted the Strawberry Spinach. That is a total loss. We have no idea what happened to them after they sprouted. I do want to try them again, next year, though. These are both intended to be permanent beds.
Royal Burgundy
Lewis Green
Golden Rod
Here we have our three bush bean beds, planted in a temporary garden location. The photo on the left has the Royal Burgundy beans. We are totally amazed by how vigorously they are growing! The middle photo shows the Lewis Green beans, and the final photo shows the yellow Golden Rod beans. It’s interesting to see how the colours of the leaves show differently with the different coloured beans!
I would call all of these a success, so far. Aside from the odd deer walking through them, or a cat rolling around in them, they have not had any external issues, and they seem to be growing very well. I’m really looking forward to eating fresh beans! We pretty much never buy them at the grocery store, as they never look good, so these will be a real treat. :-)
Robin beets with onions
This is the new bed in the old wood pile area, built this spring. It was seeded with Robin beets, a new variety we got along with some Merlin beets, which we tried last year. Later, when we planted onion sets, some were planted around the beets to act as a deer deterrent.
It didn’t work.
Need more onions.
The beets do seem to be recovering, though. A while back, shredded Irish Spring soap was scattered in the bed, and this morning I added the Critter Ridder granules, so hopefully, it will not be a deer buffet again!
This bed, and the two others near it, are intended to be permanent beds, and we will eventually build boxes around them, and figure something better out for the paths in between.
Beets and lettuce beds
Mixed beets bed
These are the rest of the beets, in the old kitchen garden. They have not been nibbled on by critters, thankfully.
The beets planted along the retaining wall blocks are of the Merlin seeds we got this year, plus seeds from last year, which was a collection of Merlin, Boldor and Chioggia. The girls planted them in blocks. There were still seeds left, and when we finished planting in the other beds, I went ahead and mixed all the remaining beet seeds together and planted them in the L shaped bed, so that is a beet surprise!
All of the beets here are looking to be quite a success. Mostly because the deer haven’t gone into the garden, and apparently our woodchuck doesn’t like beet greens.
We planted 4 types of lettuce in the retaining wall blocks, alternating with Lunix, Merlot, Lollo Rossa and Buttercrunch. We added the mosquito netting wall later, as a deer deterrent. The Lollo Rossa seemed to struggle, but the others were doing okay.
Right up until the woodchuck ate them all.
We will be planting more lettuce later this month, well after the current heat wave is over. The seed packets were together in a slide lock bag that got knocked about, and there was spillage, so they’re all mixed up now, so we’ll have lettuce surprise! :-D
Napoli and Kyoto Red carrots
Deep Purple and Longe Rouge Sang carrots
Here we have our carrot beds. The large bed has two types of carrots; Kyoto Red, at the far end, and Napoli. These were pelleted seeds, which made it much easier to plant them without having to thin them later. We also had plenty of seeds left over for next year.
They had been doing so well, until the woodchuck ate all the greens! The wire cover isn’t going to stop a woodchuck, but will hopefully at least slow it down or discourage it. I’m still holding out hope that they will recover, and will be spraying around them with repellent soon.
In the old kitchen garden, we have two other varieties of carrots. Deep Purple and Longe Rouge Sang. There were far fewer seeds in these packets. I’d made a cornstarch gel to make planting them easier, which we did last year successfully, even though the gel was way too thin. This year, however, I made the gel too thick. When my daughters planted them, it came out unevenly, but it still worked out. These have, unfortunately, also been nibbled on, but not decimated like the others were. At the moment, we have a motion sensor light set up that will hopefully startle critters away, and this morning, I sprinkled Critter Ridder granules around this bed, and the beet beds nearby.
The two leafy things in the triangular bed are, I hope, white kohlrabi. These were seeds left over from last year, which had failed so spectacularly. Thankfully, we have seen no flea beetles this year. Still, I’m not even sure these plants are kohlrabi at all! I would call them a definite fail, unfortunately.
Next year, I want to try kohlrabi again, but will start them indoors. They are supposed to be good to sow directly before last frost, but they just don’t seem to do well that way.
Cucamelon
Here we have our cucamelon transplants. We did these last year and, in spite of a poor location, they did really well. This is where we had intended to plant them last year, in the rest of the chimney blocks we have left over after using some for the retaining wall. I am hoping the increased sunlight in this location, plus the chain link fence to climb, will lead to an even better crop than last year. :-)
Montana Morado corn
Dorinny corn
Here we have our two experimental corn blocks!
The purple Montana Morado corn (the photo on the left) were started indoors and transplanted, and so far they seem to be a success. A few of them don’t seem to be thriving at all, but most of them look like they are doing just great.
The Dorinny corn were planted before last frost, and you can see the remnants in the photo on the right. Though they are a cold hardy hybrid that would have been able to handle a normal frost, it turned out they couldn’t handle the -8C/18F night we had in late May. The seeds that had germinated before then did look like they survived, but after a few days, they were gone. Thankfully, more germinated later, and of those, they are doing quite well. As long as more don’t get eaten by the deer! The ones that did get nibbled on seem to be recovering, but I doubt we’ll get any corn on those ones.
Just yesterday, I used one of the empty rows in the Dorinny corn block to transplant some Hopi Black Dye seedlings. I’ll talk about those more, later. I also transplanted the few, spindly pink celery seedlings. I don’t expect those to survive. They should have been started indoors much, much earlier. I want to try them again, next year.
Where the Dorinny corn is planted is temporary. Where the Montana Morado corn is planted will probably become a permanent part of our garden. I was really surprised by how much better the soil was in this location, compared to other parts of the old garden area.
Porcelain Music
Purple Stripe
Racombole
Racombole
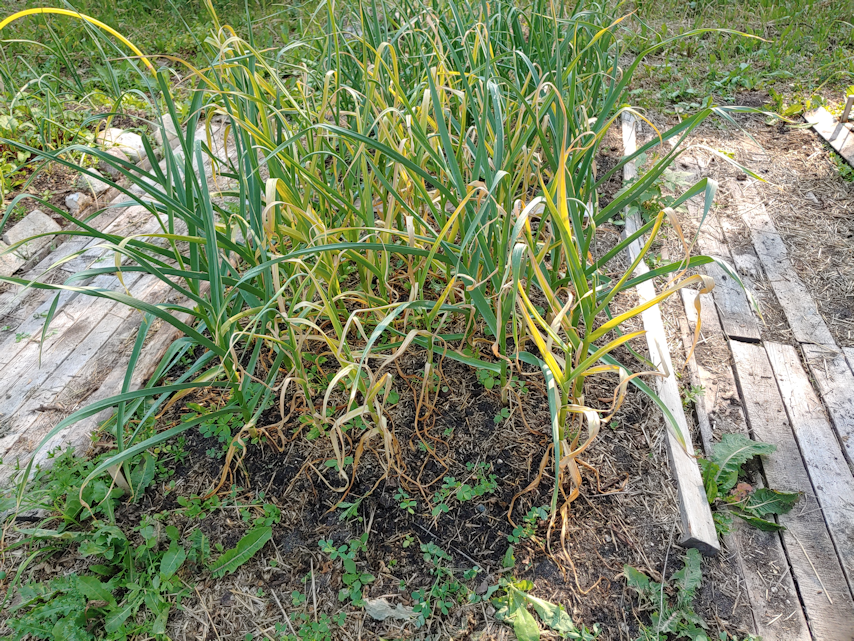
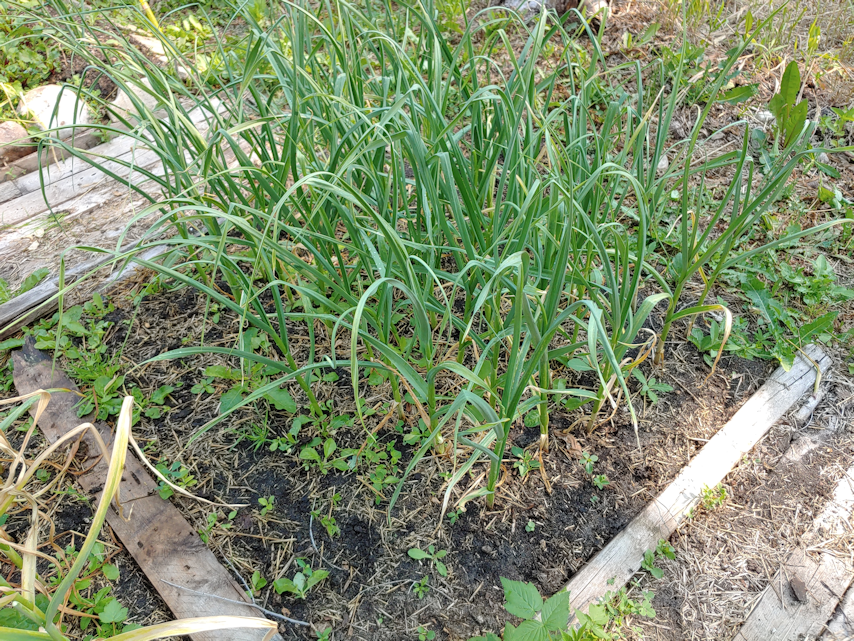
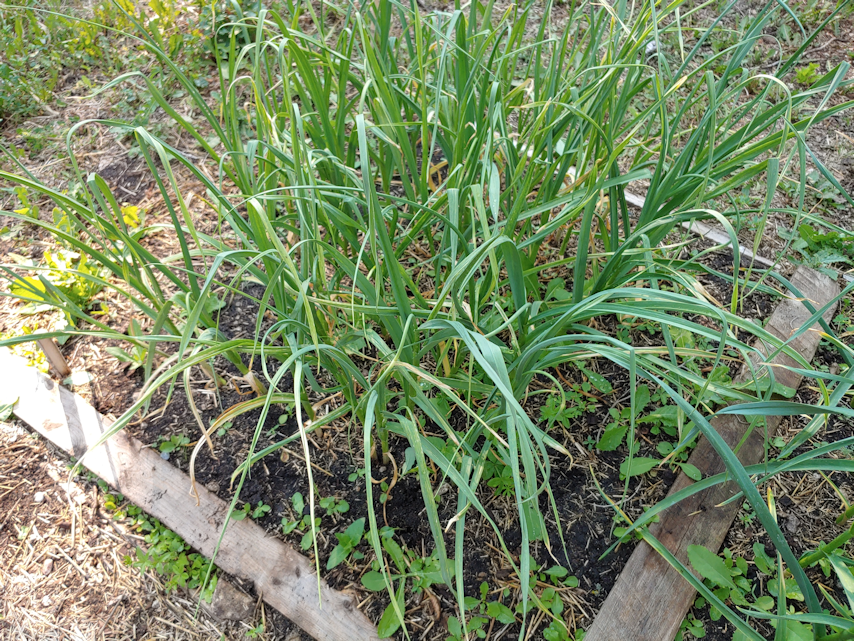
Here we have our hard neck garlic beds, which were planted last fall.
The Porcelain Music is looking amazing! Big, strong plants. They started showing scapes first. As I write this, we’ve gathered scapes from all these plants.
The Purple Stripe is looking like they will be ready to harvest soon – but they are still producing scapes! I’m not sure if this is a problem, or if this is normal for the variety!
The Racombole got split between the two beds. They came up later than the others, and the plants are smaller and slighter. They were also the last to start producing scapes. I don’t know if that’s normal or not for this variety. It’s possible, being on the East ends of the beds, they had slightly less sunlight than the others.
So far, these are looking like a fabulous success.
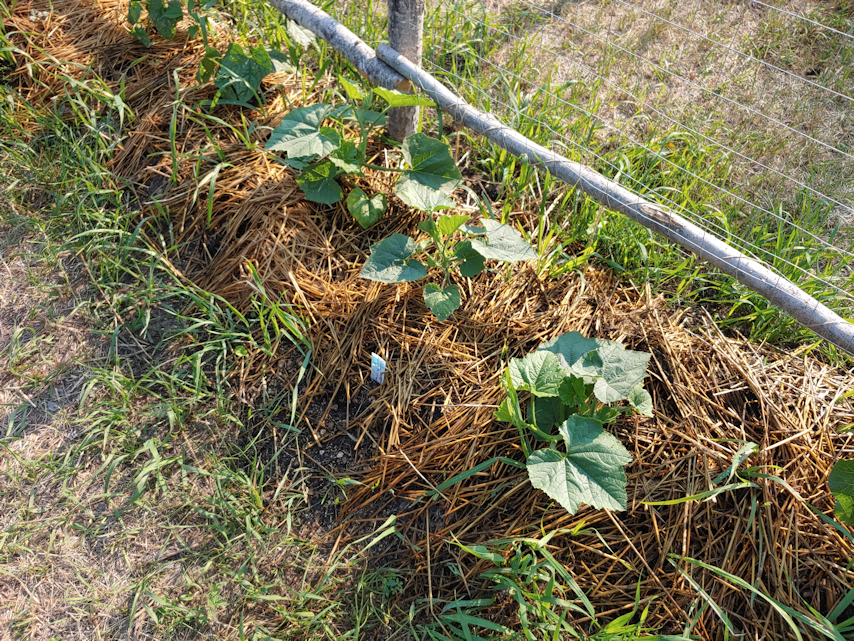
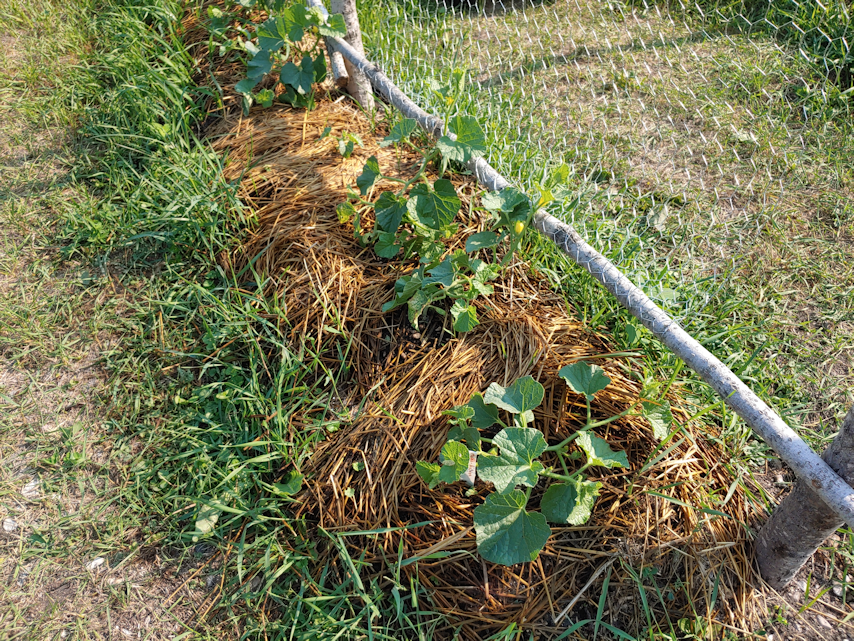
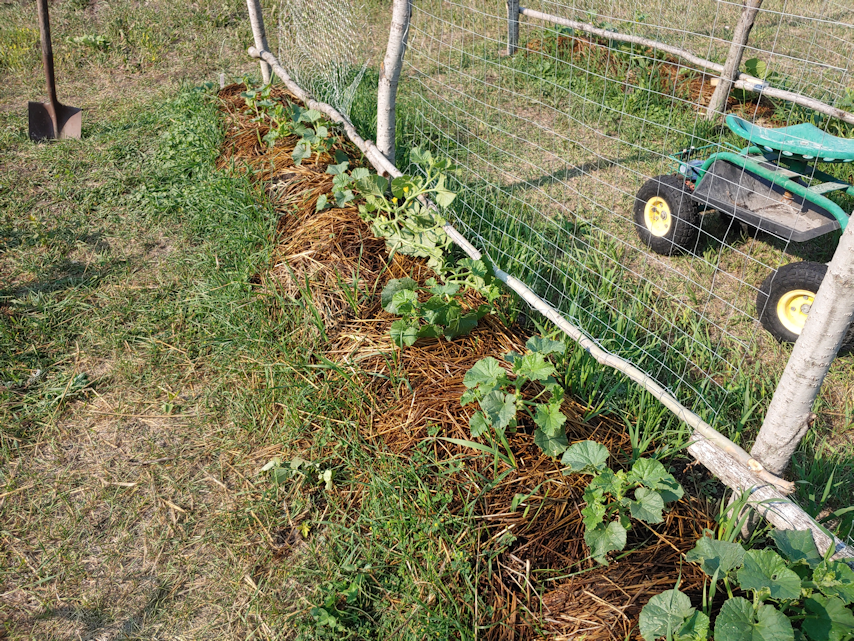
Now, we move on to the gourds. :-)
I honestly didn’t expect to have gourds this year. We started them indoors early, yet they didn’t germinate until much later.
These first ones are next to the cucamelons, in an area that will be a permanent bed.
Ozark Nest Egg gourd
Ozark Nest Egg gourd
These ones are the Ozark Nest Egg gourds. These had one plant germinated per pot, even though several seeds were in each. This morning, I noticed one of those seeds had germinated!
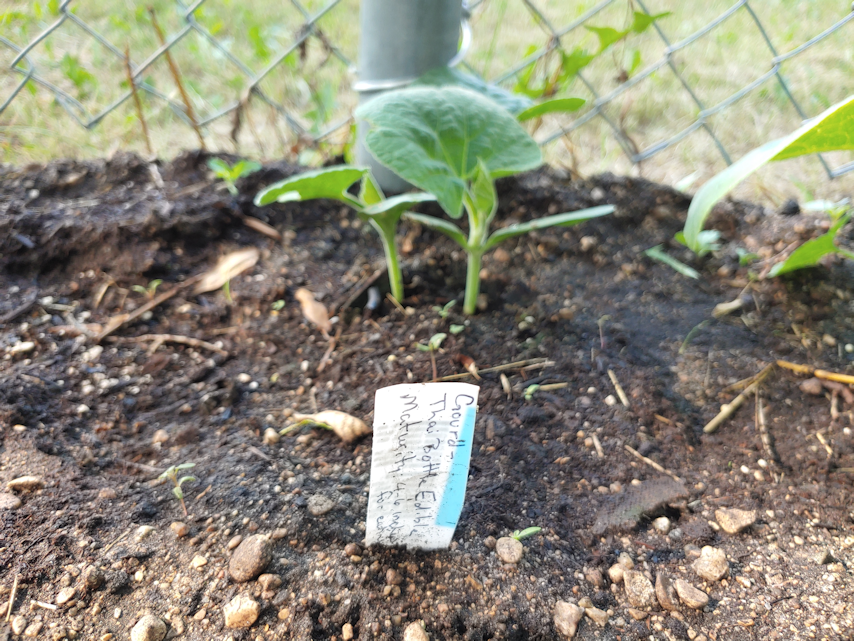
Thai Bottle Edible Gourd
Last time I posted about these, I mistakenly referred to them as the Tennessee Dancing gourd. Silly me. These are the Thai Bottle Gourds. There’s just the two of them.
Tennessee Dancing Gourd
Luffa Gourd
The Tennessee Dancing Gourd were among the first to germinate, and we got quite a few of them! If they are as prolific as I’ve read in reviews, we’ll be up to our eyeballs with them. :-D
It’s the luffa I am most eager to see how they turn out. They also germinated faster, though that’s not saying much, considering how long it took for the other gourds to germinate!
This area is temporary, even though we built a squash tunnel for them to climb. We intend to plant trees in this far-flung area, but this area, and the squash tunnel, might see another year of use. I’m pretty sure there is a telephone line buried under here, so we will probably not be planting trees exactly here.
As late as they all started, they all seem to be doing surprisingly well! They are really loving this heat wave. I’m looking forward to seeing how they climb the structure!
Here we have our grapes. There are two vines. We did not plant these. My mother did, but she does not remember what variety they are. I was talking to my mother today, and she worked out how long ago she planted them here, and figures it was about 12 years ago. !!! They had been completely engulfed by spirea when we first moved here, and we’ve been slowly working at getting them strong and healthy again. They are producing tiny clusters of grapes right now, and I look forward to seeing if they grow bigger this year, than last year. :-)
Halona Melons
Pixie Melons
I am really excited at how the melons are doing! We stared them indoors at the same time as we started with summer squash, but everything took a long time to germinate. That we ended up with so many is totally bonus. I love melons and really look forward to how these do! They are currently blooming, and starting to get big enough to train up the mesh, so I hope that means they’ll have a good summer’s growth.
Norstar and Red Karmen onions
Shallots and Stuttgarter onions
Here we have more successes and failures.
The Norstar onions were started from seed, and they are growing nice big bulbs right now! They may have been small when they were transplanted, but they easily match the Red Karmen sets they share a bed with.
What you don’t see is what should be growing in that gap in the middle. The very first seeds we planted outdoors was purple kale; seeds we got for free with one of our Baker Creek orders. If they ever germinated, we never saw them.
Because the bunching onions and shallots we tried to start from seed died a glorious, cat induced death, we ended up buying sets. Unsure if the Norstar seedlings would survive, I picked up some onions sets when they came out in the stores. When I found shallots as sets, too, I grabbed a couple of bags. They both seem to be doing well.
However, they too should have a neighbor.
In the middle, our purple kohlrabi was planted. Like the kale, if anything sprouted, we never saw them.
I do want to try the purple kohlrabi again, but will start them indoors next time.
Dalvay green peas
King Tut purple peas
Here we have our peas. We planted all of the purple peas in the one row, while there were so many of the green peas, we were able to replant in spaces where peas did not germinate, and still have some left over!
They are currently blooming and growing pods, but I am not sure if they are actually doing well. They aren’t very big! It could be because of the poor soil in this temporary location. Quite a lot of whatever was trying to grow here before is now making its way through the straw and garden soil we added, quite enjoying the watering and feeding the peas are getting!
We shall see how they do over the next few weeks.
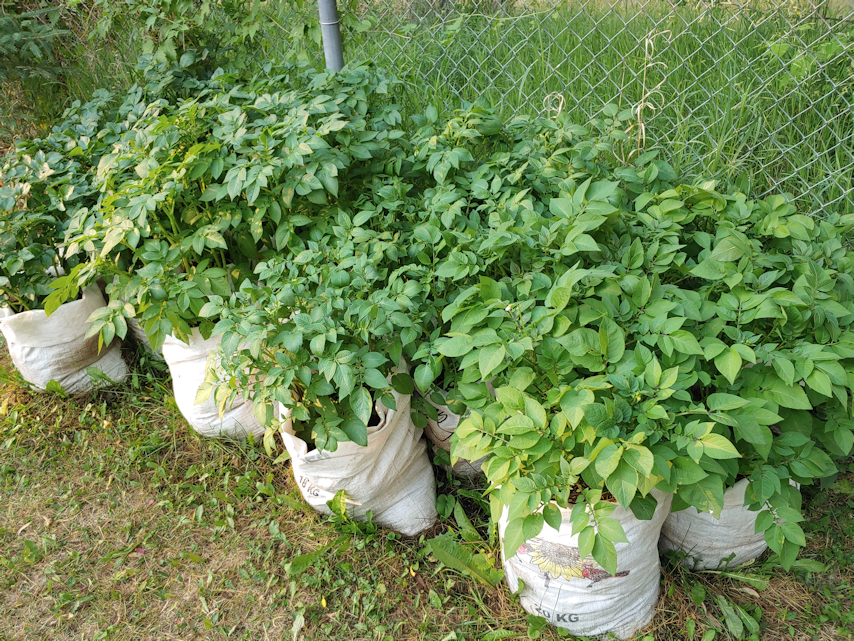
Here we have before and after pictures of our potatoes.
The first picture was taken four days after they were “hilled”. The other was taken 10 days later.
I can’t believe how huge they are! All four varieties are just thriving in these home made grow bags.
And now for something a bit different.
Heritage raspberries
Unknown raspberry variety
Raspberry bushes.
We bought raspberries for the first time this year, as a birthday gift for my daughter. She chose the Heritage variety. They were doing great after transplanting – until they got nibbled on by deer, and then hit by that late May frost.
They won’t do very well this year, but they will survive, and should be fine, next year.
The others are a combination of raspberries my mother transplanted many years ago, and other self-seeded plants we transplanted when we mulched the area that now has our main garden beds in it. They, too, were hit hard, not just by that one bitter night, but also the Polar Vortex we got hit with in February. Yet, they survived, and we will probably get raspberries from them this summer!
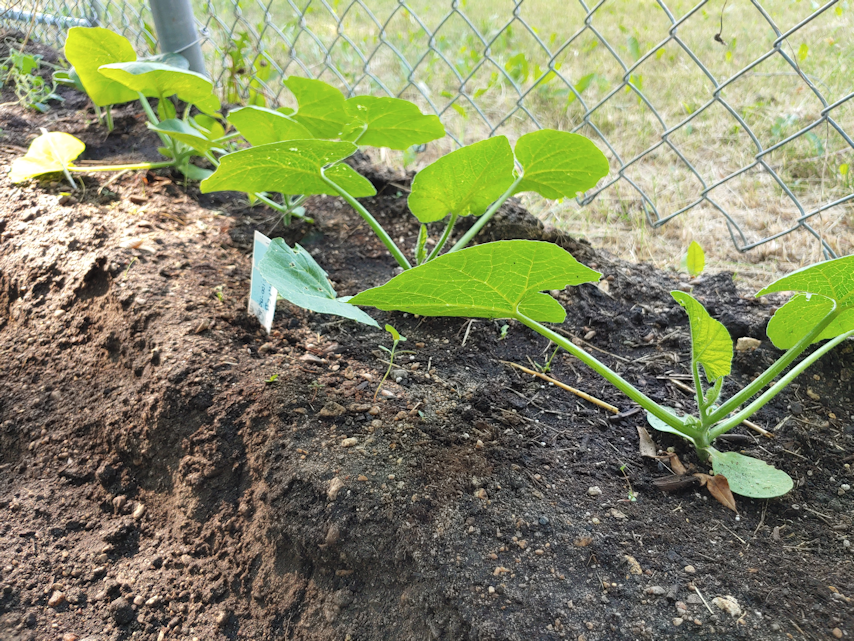
Crespo Squash
Crespo Squash blossom
Here we have our Crespo squash. This is another one we weren’t sure would work – and I’m still not sure we have a long enough growing season for them, even with starting them indoors. They seem to be doing very well, though, and one of them is starting to bloom quite nicely!
and now, the summer squash!
Summer Squash
Magda
Endeavor Zucchini
Sunburst pattypan squash
This morning, I finally saw some little Sunburst squash! They were our favourite, last year. We are also seeing the green Endeavor zucchini, and the lighter green Magda squash. Still no sign of the yellow Goldy zucchini.
This year, we are trying to grow them vertically, but not all of them are big enough to tie to the stakes yet. But we’ve already got squash forming on those little plants! I am so excited by these! :-D
Winter Squash
Here we have our two varieties of winter squash, Little Gem and Teddy, both chosen for their shorter growing season and smaller size. They look like they are doing very well in this heat wave, too! They’re not big enough to train up the mesh, yet, but I do see some tendrils forming on some of them.
Mystery squash
Then there are these mystery squash, growing out of the old compost pile. We think they might be from the pumpkins we tried to grow last year. Hopefully, they’ll grow well enough that we’ll find out!
Mongolian Giant sunflowers
Hopi Black Dye and Mongolian Giant sunflowers
Here we have our sunflowers, in between blocks of corn. The corn are from a collection that included, Early Eh, Montauk and Sweetness. I didn’t bother taking separate photos of them. They are doing remarkably well, considering the poor conditions in this temporary location.
The sunflowers that are supported by twine are the Mongolian Giant sunflowers we started indoors, then transplanted. None of the Hopi Black Dye we started indoors had germinated… until they finally did! Long after these were done, which is why they are now planted near the Dorinny corn. Aside from losing a few to deer, I think they are doing well. At least as well as can be, in these conditions, and surrounded by weeds! Last year, none of our giant sunflowers reached full maturity before the first frost hit. I’m hoping at least the transplanted ones will have the time they need. If not… well, they make a good privacy screen.
If all goes well, we will be planting our first nut trees in the area next year.
Mosaic Mix cherry and grape tomatoes
Spoon tomatoes
Here are our wee little tomatoes! The teeny Spoon tomatoes have fruit developing already, while the Mosaic Mix is still just blooming.
In front of the Spoon tomatoes, you can see tiny wisps of onions. Those are the Red Baron bunching onions, from a very late start with the last of the seeds, indoors. In front of the Mosaic Mix, we have little Norstar bunching onions, again a late planting of the last seeds indoors. Starting these were a bit of a Hail Mary, and I doubt much will come of them, but hwo knows? :-D
Here we have a bit of a mish mash.
The photo on the left is where we seeded the Giant Rattle poppies. They came up in patches, mostly beside the rhubarb in the background (which predates us living here!). At the tip of this triangular bed, my daughter planted an iris that was shipped for spring planting – only to get hit by that late May frost, which killed it off. Other irises were planted in a trench along the south side of the old kitchen garden. One type has come up. They are hard to see, but several are by the laundry platform in the middle photo, with a few along the edge in the left photo. The ones planted in the trench towards the rhubarb never came up at all.
However, while trying to weed the area, I noticed something. You can barely see one in the photo on the right.
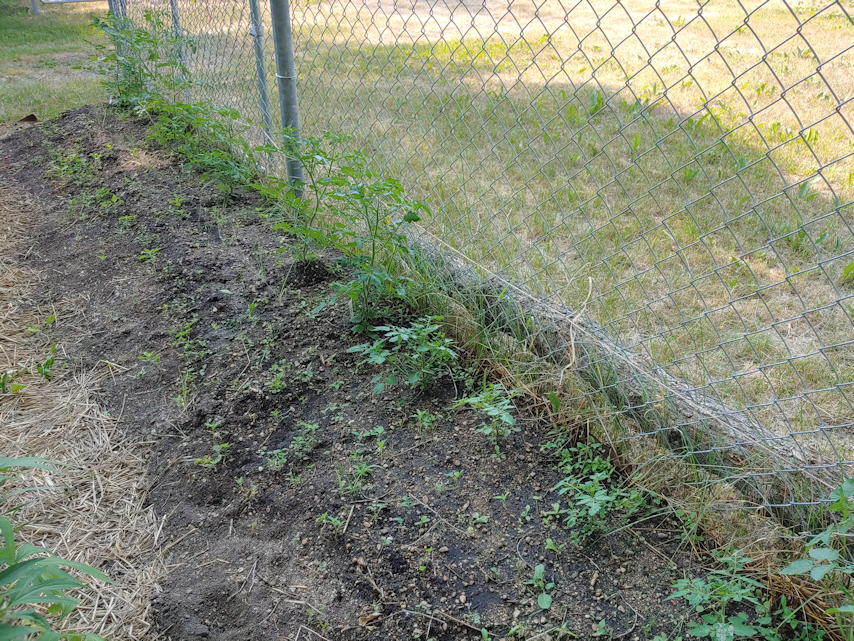
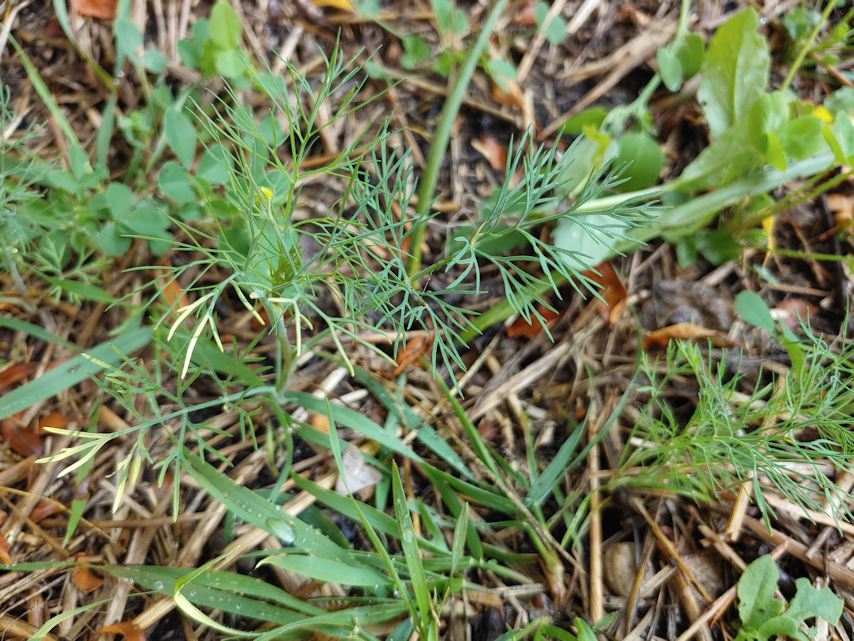
Dill!
All in a row, along the edge of where the trench to plant the irises last fall was dug!
We did not plant any dill. In fact, we have not seen any dill coming up since we moved here!
My guess is that, in digging the trench to plant the bulbs last fall, any dill seeds in the ground were brought closer to the surface, and this year, they could germinate.
I’m letting them be. We were intending to plant dill eventually, anyhow! :-D
Not pictured: our spinach beds. Because they’re all harvested and the beds are empty right now. The three varieties of spinach were a huge success, even with loosing some to deer. We will be sowing more in late July, for a fall crop. :-)
Also not pictured are our little pumpkins, Baby Pam. None germinated. We have seeds left over, though, so we can try again next year.
Also, also not pictures. The radishes we interplanted with the Peaches ‘n Cream corn blocks. They germinated, then disappeared, and we have no idea what happened!
That is finally it!
And now I hope I can actually publish this. I’ve lost internet over and over while trying to write this, almost lost the entire post while the editor was stuck on “autosaving” – and now it’s stuck there again!
I might have to do some browser magic to save this post and finally get it published… more than 4 hours after I started!
If you’re reading this now, I succeeded, and didn’t give up in a fit of rage. LOL
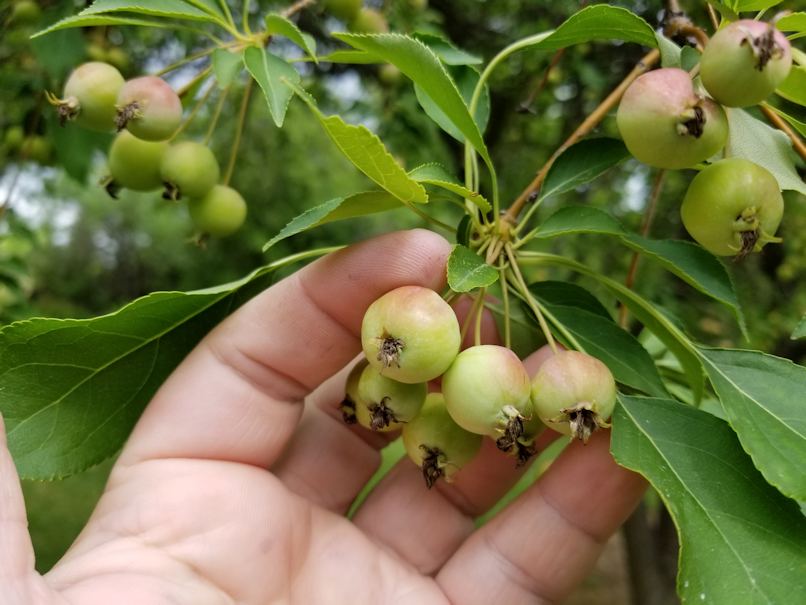
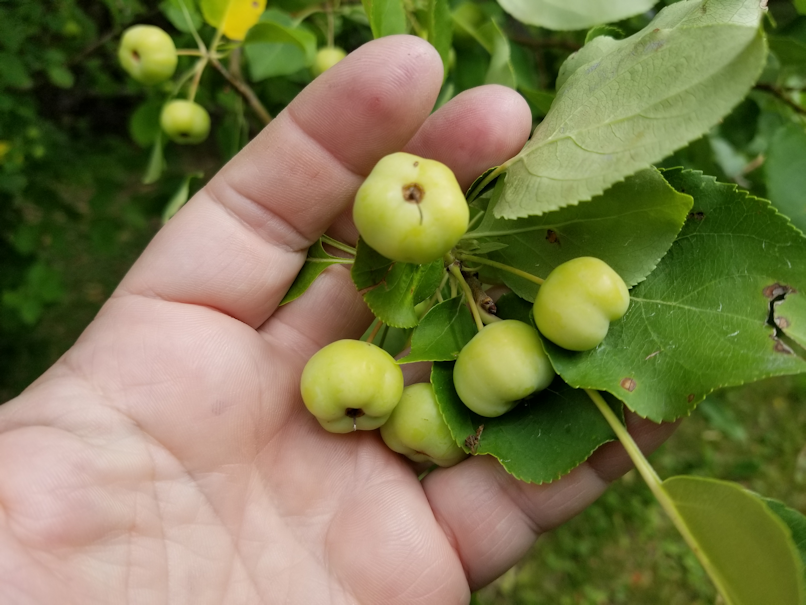
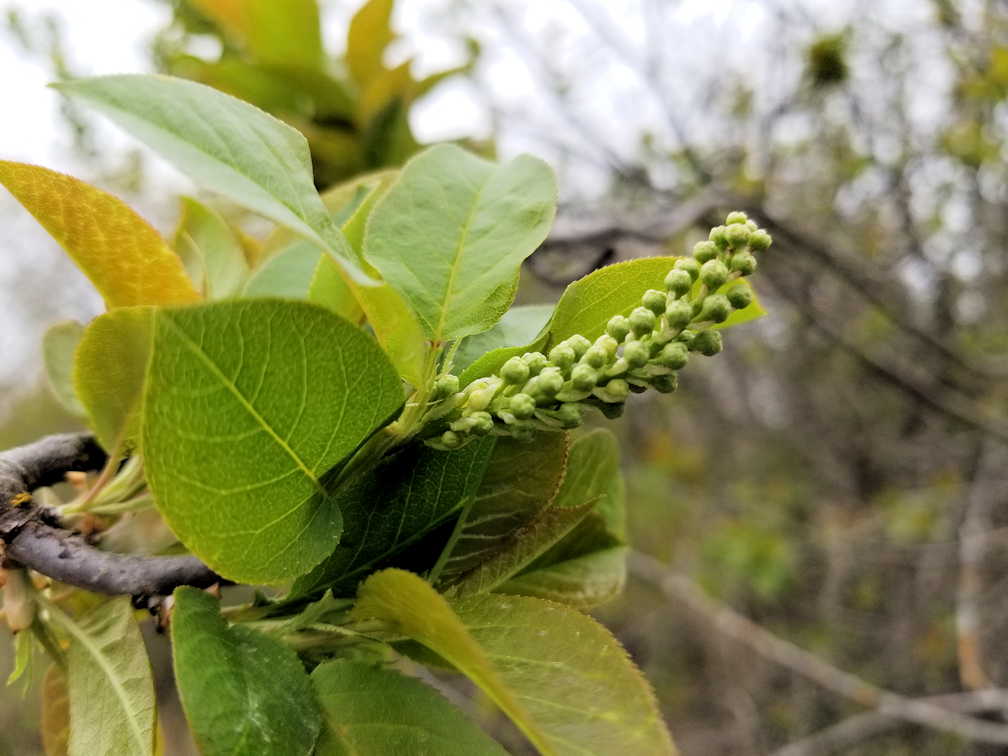
While checking on the apple trees along the garden, I couldn’t help but notice just how different they are.
They are all crab apples, but I know nothing about the varieties. I don’t know where my parents got them from.
This first batch of pictures are from different trees, with my hand there to give perspective. (click on them to see bigger images)
At least one tree was pruned back so severely, it is not producing any apples at all. I am not sure if it will survive to next year.
There is another at the far then that has two large trunks that are mostly dead, surrounded by suckers have have been allowed to get quite large. I am debating what to do with it. I am thinking to just take out the dying trunks completely, while choosing one, maybe two, of the strongest suckers to leave behind, and cutting away the rest.
As for the pruning done last year, I believe what was cut away are dead and dying parts, because most of them still need to have their branches thinned out. I will also look at thinning the apples on some of them, so the remaining ones will have more room to grow, and to take some weight off of the branches.
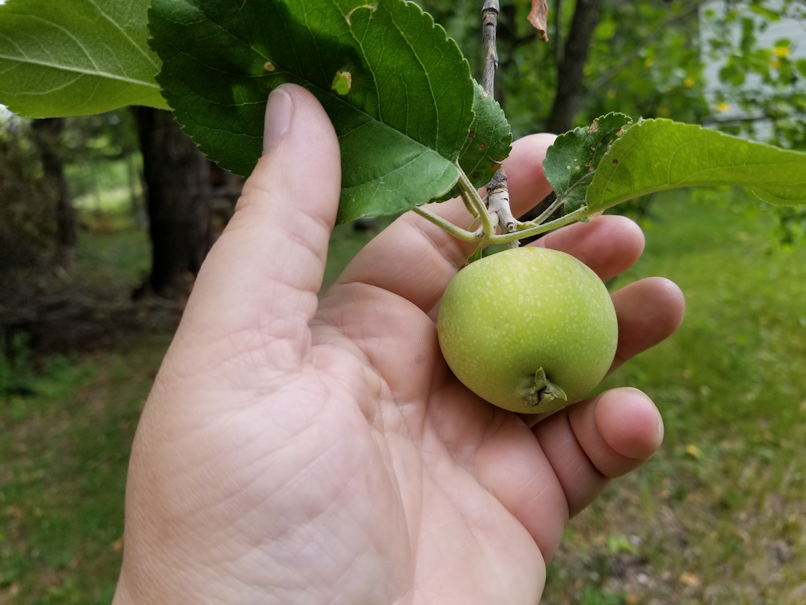
This next photo is from one of the ornamental apples by the old kitchen flower garden.
From what my mother told me, these apples remain quite small and are not edible.
The next photo is from a very old crab apple tree, near the ornamental apples.
This is the one that, as I was mowing the lawn as a teen, I would go under the branches, grab about 5 or 6 apples, and eat them while I continued mowing. By the time I worked my way back to the tree, I was finished eating one batch and ready to grab some more! They were to very tart, and I loved that. The apples in the photo are about the size they were when I did that. So not ripe at all! :-D
The next photos are from another tree near the ornamental apples.
It has two main trunks that are looking very dead. One has a lone branch reaching to one side, with a few leaves at the end, and a single apple.
It’s probably the largest apple of all the ones I looked at today!
From what I can see, there are no other apples from this trunk.
This next photo is from the other side of the tree.
I would say that these are two, completely different trees!
And yet, they are together…
This is the base of that apple tree. I wonder if it was grafted at some point? I can’t really tell.
I think the larger trunk on the right in the photo is actually completely dead. The branches are so entwined, it’s hard to say for sure.
What I will likely do, probably in the fall, is simply cut out the two big trunks completely, and leave behind the strongest looking of the young growth.
One of the things my mother had but never used is a juicer. I can see us making good use of that when it’s time to harvest the apples!
While checking on the crab apple trees this morning, I found this in the branches of one of them.
The birds have been done with it for some time.
Getting the photo from above involved reaching as high as I could, and hoping my phone’s camera was pointing at least somewhere in the right direction. *L*
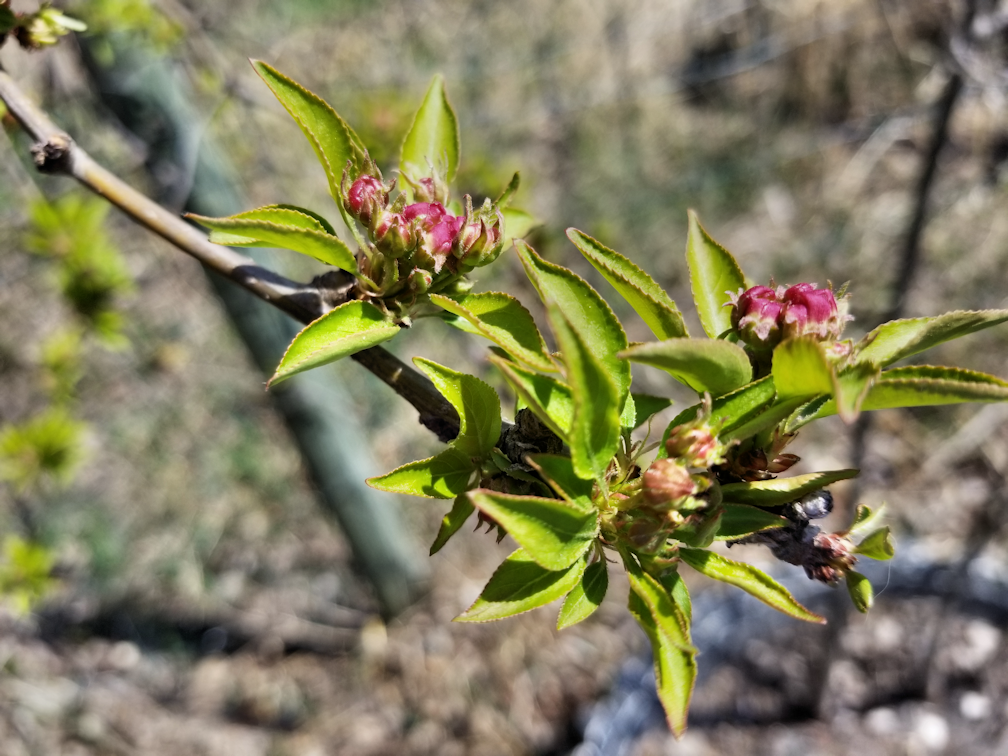
The ornamental apples in the flower garden are very enthusiastically blooming right now!
While working under it last night, I could hear a constant hum of bees over my head!
I worked on layering cardboard onto the cleaned out flower garden for as long as I had light. Most of the time was spent taking tape off the boxes.
That’s one way to use up all those boxes from moving!
I was able to clear out most of the boxes in the Old Kitchen that my sister gave me to pack up my parents’ stuff before the movers arrived. I kept the strongest ones for packing the books and whatnot that are in the sun room when we finally get to it. Then we started on our own moving boxes. Getting those up the stairs from the new part basement was surprisingly dangerous. We have to close the door behind us because it’s not safe for our cats to go down there until we start cleaning the basements out. The door opens inward, over the steps. There’s just no good way to open a door from a steep set of stairs while clutching a bunch of boxes that are busily working on sliding out of your grip and falling down the stairs! :-D
At least the stairs are not as steep or skinny as the ones to the old part basement!
I could really tell which boxes were ones we packed, and which the movers packed. I was reminded, again, of what a terrible job they did. :-( The ones packed by the movers were a lot easier to remove the tape from, though, since there was hardly any, and they didn’t make any effort to make sure it stuck to the cardboard. :-/
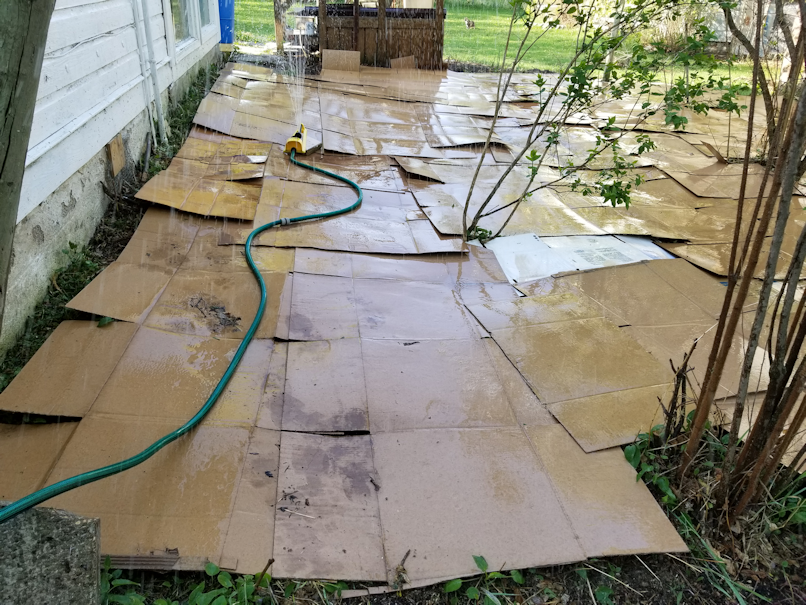
So this is what the flower garden looked like last night.
When I ran out of boxes again, I just stopped. By the time I brought up more and removed the tape, it would have been full dark.
The temperatures were just perfect, though. :-D
I actually stayed out after taking this picture and started spraying the cardboard with water, more to add the weight of water, just in case a wind picked up. The hose we were using was too short, so I found a much longer one in the garden shed (using a flashlight) and set that up.
It wasn’t until hours later that I remembered that there is another tap on the other side of the Old Kitchen. Without the sun room to go around, that tap is much closer to the garden.
Oops. :-D
I brought up more boxes this morning – I even managed to bring up more than I actually needed. Which is good. More boxes available to pack up the sun room and the Old Kitchen.
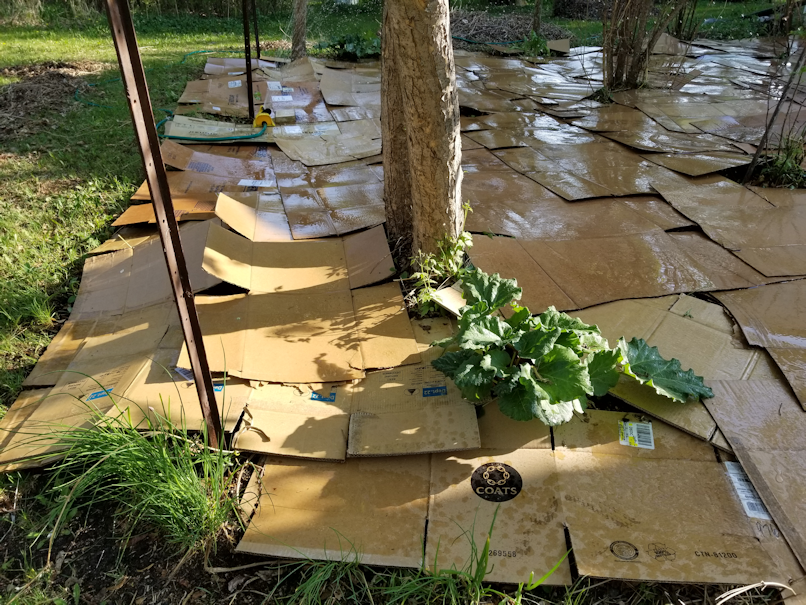
This is what it looked like this morning, after I finished layering the cardboard.
Next thing to do was saturate the cardboard.
I’d grabbed a lawn sprinkler from the garden shed last night, only to have 3 others come with it. Turns out they were tied together. This morning, I went through them to try and figure out which was the least broken and hooked it up.
The adjustment was jammed in one position, so I took advantage of that and started from close to the house and left it there a while. It didn’t quite reach the opposite side, plus there were voids here and there from the bushes and the clothes line platform. After a while, I moved it to the other side.
There were still some voids, but I got more coverage in more areas missed.
After some fighting with the knob, I did eventually get the sprinkler on the “full” setting, so I could put it in the middle.
I left it there for maybe half an hour, so the whole thing got probably an hour or more of watering.
It wasn’t enough, but things were starting to heat up fast.
I didn’t get pictures yet, but after clearing out the hose, I started moving over the flax straw that was used to cover the septic tank cover for the winter, plus the straw that was in front of the cat house by the old kitchen, then started working on one of the piles of leaves my daughters had left by the garden for me.
For all the soaking it got, by the time I stopped, the cardboard was already starting to dry in many spots!
After I finish covering the cardboard, I will set up the sprinkler and have it run for the night, to make sure everything it thoroughly saturated. Well. At least as much as the sprinkler can reach.
This is some of what I’d pulled out of the flower garden while using the weed trimmer.
No wonder the rake kept catching on things.
I’d made the mistake, yesterday, of doing a bit of raking without gloves. This was the result. :-(
I have learned that this is a very bad place for an open wound. It seems everything I try to handle with my left hand (being left handed, that’s most things) hits it.
Nothing a bit of aloe vera and open air can’t handle. :-)
It’s not even 11am yet, and already we’re at 16C, with a “real feel” of 21C. Our high is supposed to be 23C today.
No more yard work today until things cool down.
Tomorrow is supposed to be even hotter, with a possible thunderstorm. Which works out, since my husband has medical appointments both today and tomorrow.
While working on the garden and cleaning up today, I couldn’t help but notice all sorts of areas that we need to get into, and think; that job is going to be SO much easier, now that we have a working weed trimmer! :-D Having the right tools makes all the difference!
It was much more pleasant working outside in the cooler temperatures! We were heading well towards 30C today.
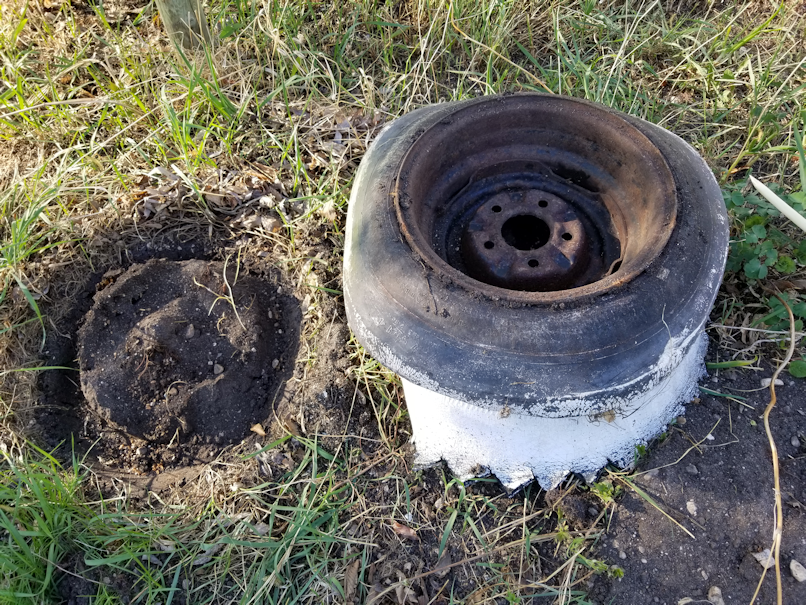
One of the first things I wanted to do when I went back out was to empty the second tire planter and move it out.
This one still had the other half of the tire attached as a base.
Also…
It was on top of an ants’ nest. The rim was full of ants, some carrying eggs, trying to find their way back to the nest.
I left the planter right where it was. I can get it out tomorrow! :-D
For the garden itself, I focused on trimming, pruning and cutting. There were a few rose bushes at the fence line that I was going to leave, but determined that they were not deliberately planted there, so I took them out. I pruned the apple trees a bit, and cut away deadwood from trees and bushes alike. I cut away lots of those vines, and so on.
Then this happened.
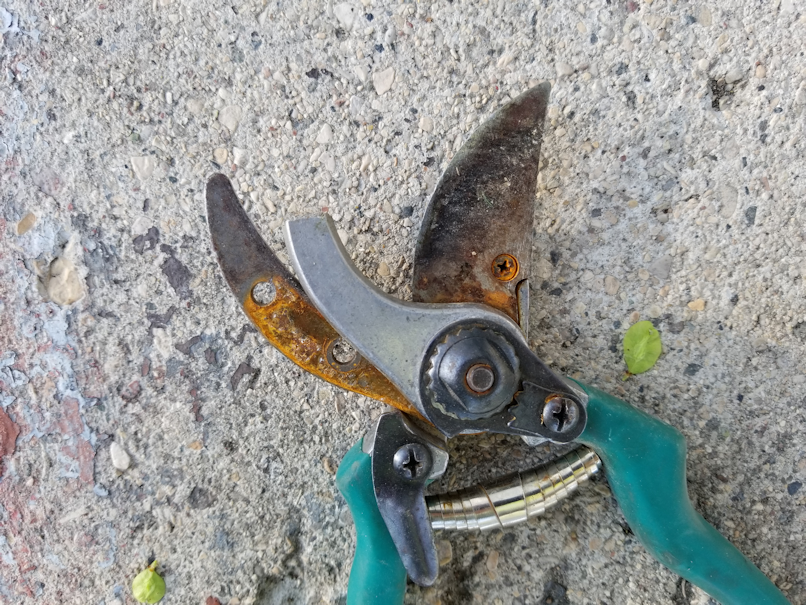
One of the problems we’ve found since moving here, is that so much of my parents’ stuff is gone. The good, working stuff, that is. Tools, equipment, supplies… This was a fully functioning farm and, after 40 + years of farming, my parents had pretty much everything anyone could need, and then some. What we’re finding now is basically the left behind junk. Like these old pruning shears. My husband was able to sharpen them, but they were clearly not going to last long.
Still, I didn’t expect a chunk to actually break off like that!
We’ll have to add “pruning shears” to our list of purchases. Or, should I say, bump it up higher on the list.
So I made do with a small hand saw. There is a large collection of old saws (and axes) here, with most of them being quite large. I remember using smaller saws that would have been perfect for the work I was doing, but I have not seen any of them, anywhere. Instead, we are using my older daughter’s hand saw, that she bought for herself a few years ago.
It did the job. That’s the main thing.
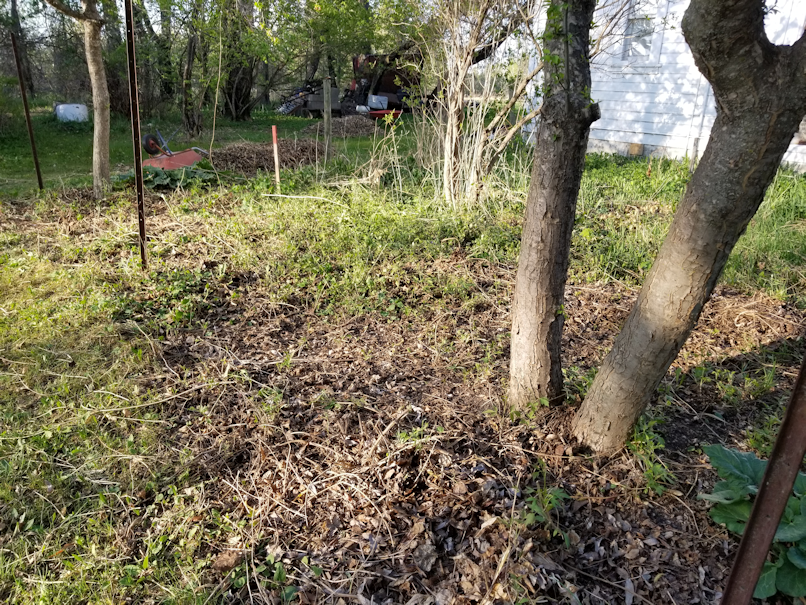
Here is the garden now, from the south west corner.
Clearing that west fence line was the most work.
Here is the garden from the north west corner.
There is still a stick in there, that is supposed to me marking something my mom planted, but I don’t think there’s anything there anymore. I’ll check more thoroughly when I start raking, tomorrow.
The fence posts are going to take a bit more effort to remove. I can wiggle them from side to side quite a lot, but can’t pull them out.
Today, I decided to get started on the flower garden off the Old Kitchen. When my mother came by a couple of days ago, we talked about what was there, what she wanted, and what I was thinking of doing. I now know that the vines, while deliberately planted, turned out to be invasive, so she wants them gone. There are several bushes she wants to stay, but the greenery below can go completely. The fence will also be removed, but she doesn’t care if any new fence gets put up again later. It can stay down.
I had already started clearing the area a bit. Now that I know my mother is good with the greenery being gone, I have decided that I will start doing “lasagna garden” type layering to build up the soil, while at the same time killing off the invasive plants.
I intend to keep the rhubarb, which will be fairly easy to work around, and the chives are on the outside of the fence line, but whatever onions are growing among the crab grass will be buried, too.
First order of business, then, was to remove the fencing. My daughters would continue to clean around the yard, but instead of taking the raked leaves to the big garden, I asked them to pile it near the flower garden, and I will use it later.
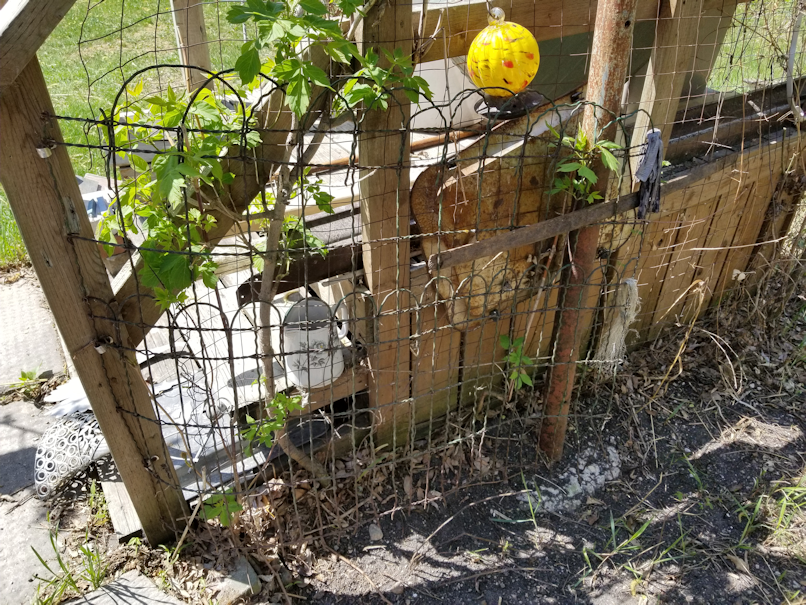
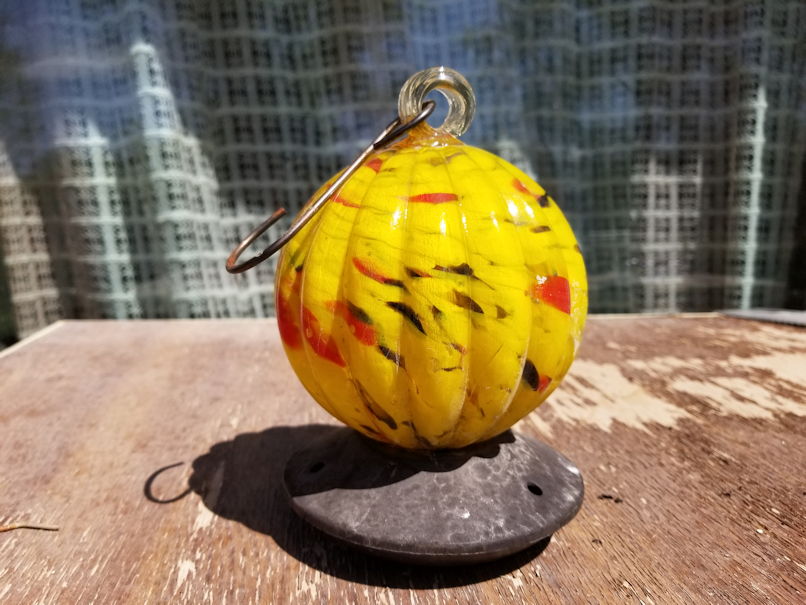
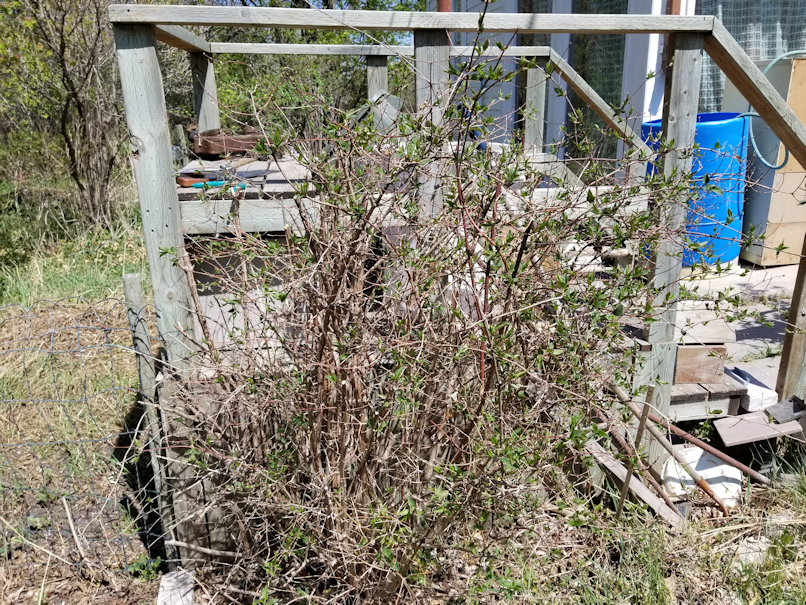
The first section to work on was the “gate”. I’d used a stick to prop it open, because it kept flopping.
When I moved the bright yellow thing hanging there, it was actually the first time I’d looked closely at it. I had just thought it was some sort of decoration.
Turns out, it’s a glass hummingbird feeder!
I really like it.
No idea why it was left hanging there, instead of being taken inside for the winter. Now that I think of it, it may well have been hanging there for years.
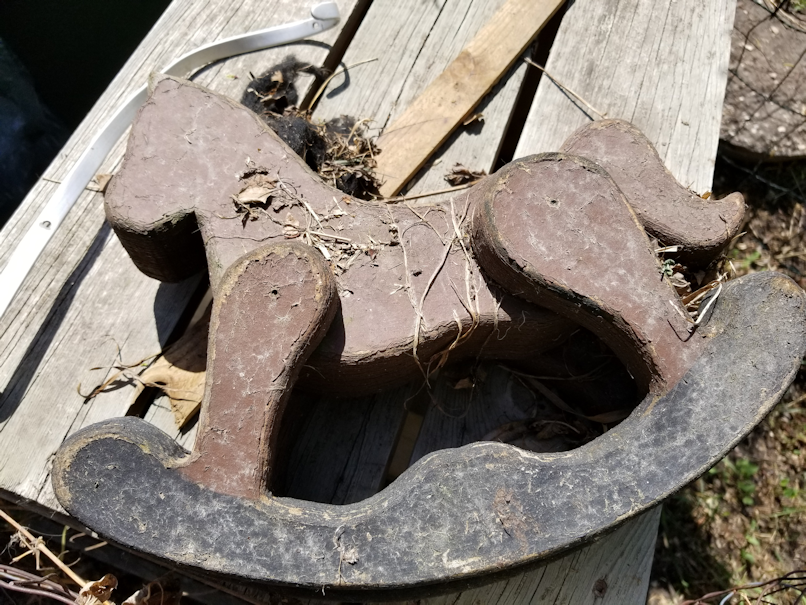
This is the toy rocking horse I’d found buried in the leaves and other dead foliage, when I had first started cleaning the area.
This is the opposite end of the fencing by the gate. It just sort of ends, sticking out past the clothes line platform.
I honestly can’t think of why any fencing was added there. It was attached to the platform in places, so it’s not like it was added before the platform was rebuilt. It serves no purpose that I can think of.
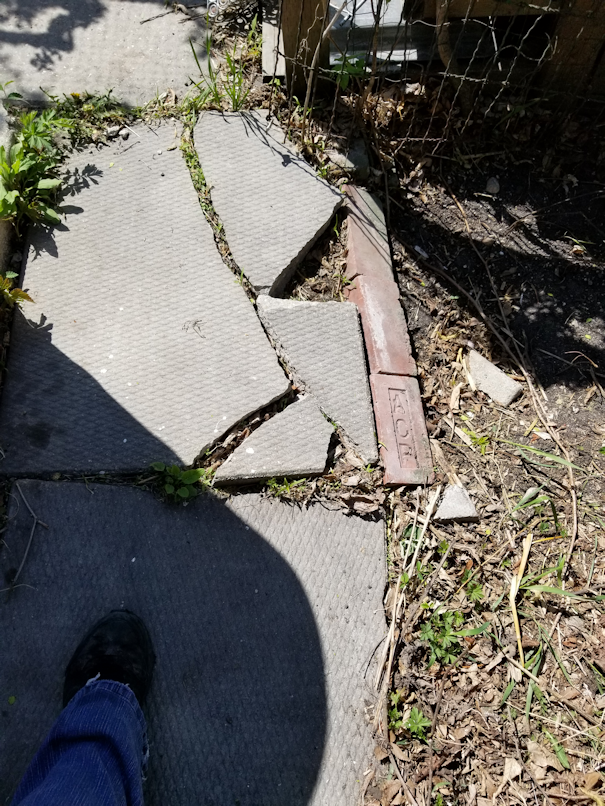
While working on the gate, I quickly discovered I needed to watch my step; these broken blocks and bricks move when you step on them!
There is a downspout near there, currently with a rain barrel under it. I am guessing these were added because the area would become muddy.
We’ll have to figure something else out, later. I don’t know about right by the Old Kitchen, but in the garden itself, I might look into putting some stepping stones or some other decorative, yet useful, elements.
After removing the gate portion, I found a challenge.
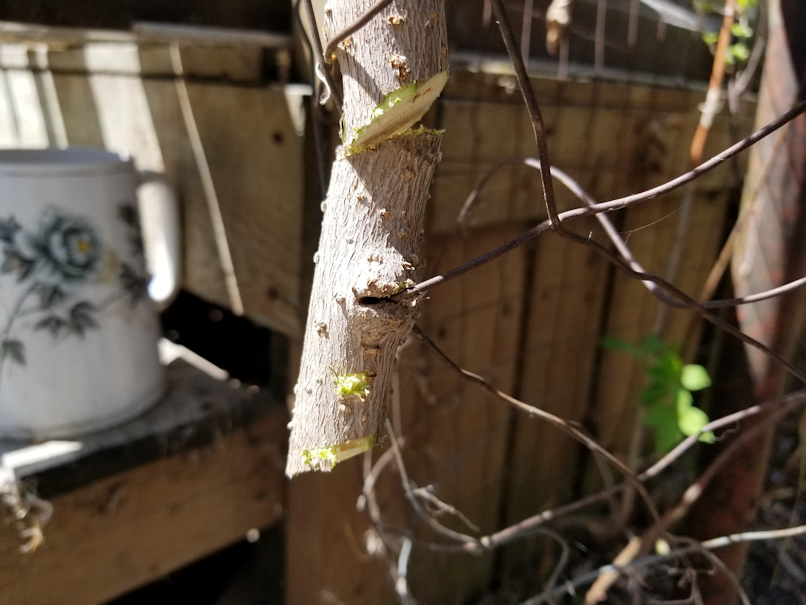
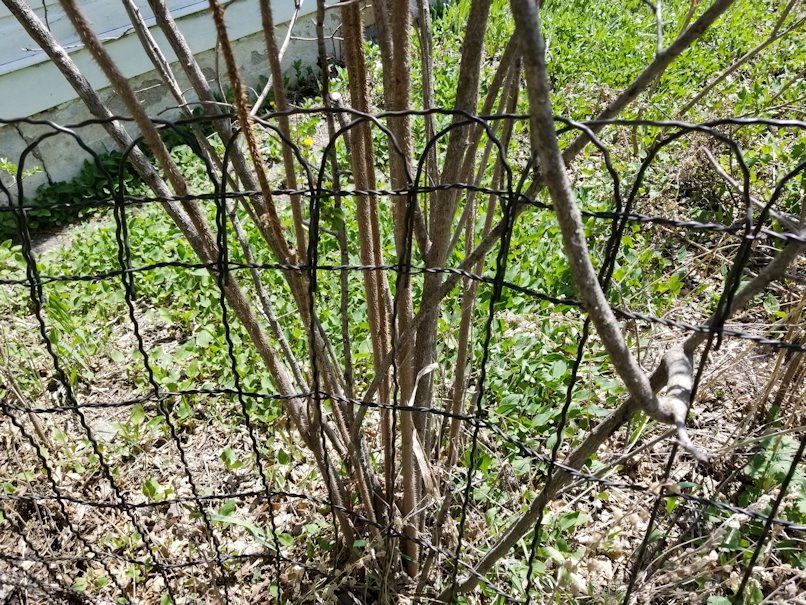
The self-sown trees can actually grown around the wire of the fencing. To remove the fencing, I had to free it by cutting the trees.
That was another reason the fencing needed to go, here. There was no way to clear away the self-sown saplings. They have to be cleared away, or they will destroy the clothes line platform as they get bigger. Plus, of course, they’re close to the house, and the roots would cause problems, too.
First section clear! Yay!
I’ll come back later to cut away the remaining bits of saplings and do other clean up.
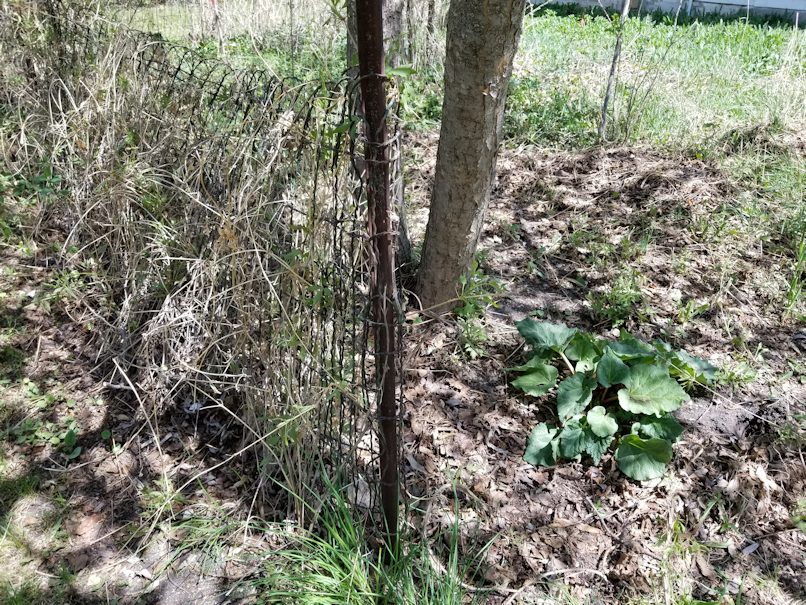
Here is how things looked from the inside of the garden, as I started.
This is the south side section.
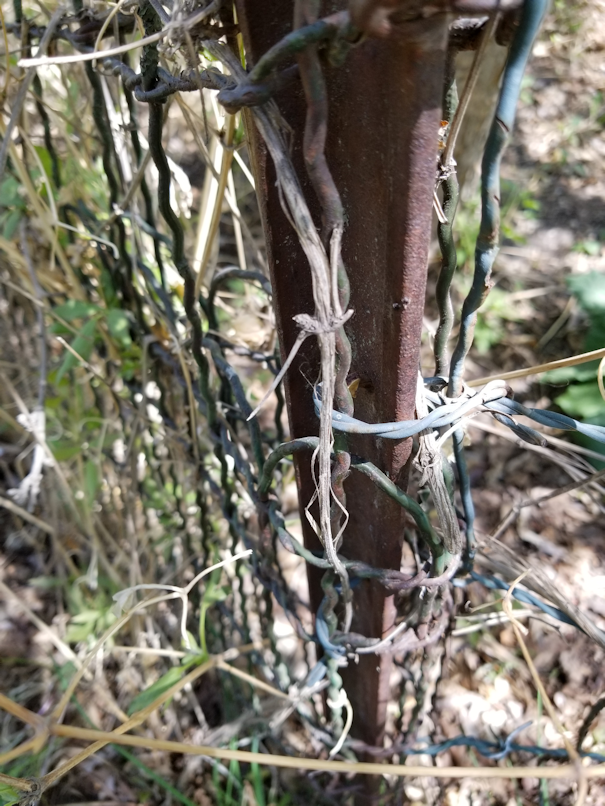
Note the wooden post, at an angle, supporting the metal post.
That comes up, later.
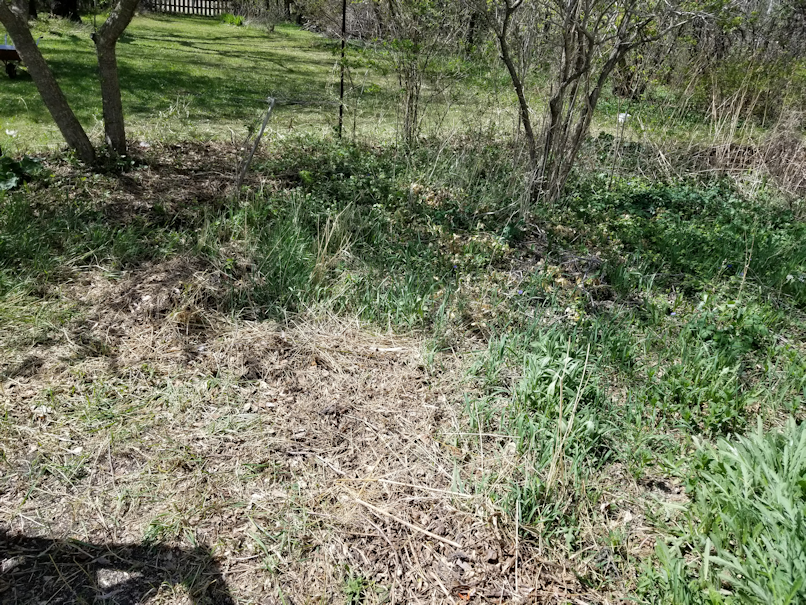
This is what the middle looked like. All that greenery on the bottom is invasive plants.
It was now time to work on the side section of the fence, which started at the corner of the clothes line platform.
But first, I needed to be able to get to it.
I’d talked to my mother about the trees in the re-purposed tire planters, and the bush that was in the way of hanging anything from the planter. She was good with me getting rid of the planters, and the saplings in them were self-sown. While she didn’t say it outright, it was clear she wanted to bush under the clothes line to remain, but she was okay with it being pruned.
The saplings in the planter had shallow enough root systems, that I could pull them up fairly easily, except for one in each planter. The toughest one had to be sawed at the tap root.
Then I pruned the bush under the clothes line.
Very stabby little branches!
I will have to work on it again, later, to get rid of the dead branches and stuff, but for now, I just needed to get it cut back enough to clear the rail, and access the fence post at the corner.
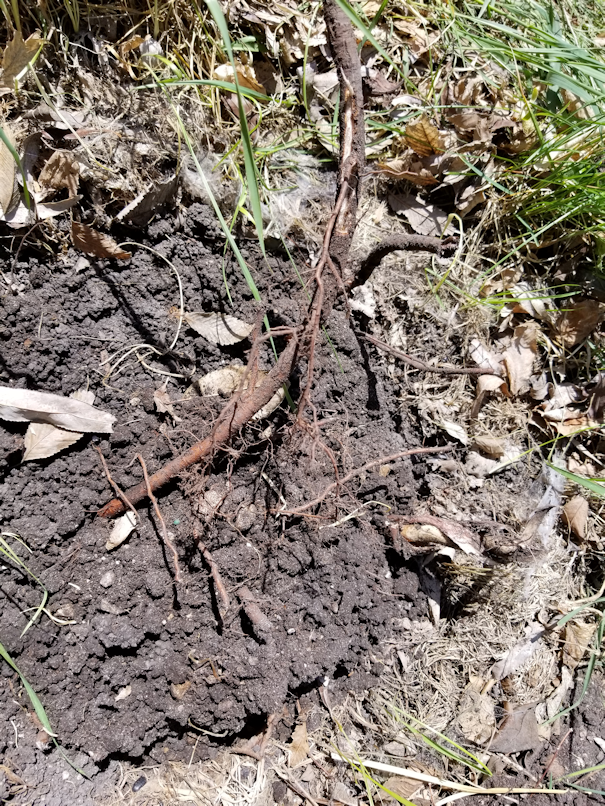
After starting on removing the fence from the post, I quickly realized I needed to get the planter next to it out completely. It was in the way. So, I dumped out the soil and discovered…
There was still a rim attached!
How utterly strange!
A couple of longer roots that had been giving me trouble could now be seen. One, I had been able to break. The other, the one to the right, had to be sawed.
Something else to go back to and clean up, so no one will trip over them. Plus, once it’s all cleared and cleaned, we will be mowing there.
I finally was able to reach the post and start removing this section of fencing which was, for the most part, nailed in place with U nails.
Lots of U nails.
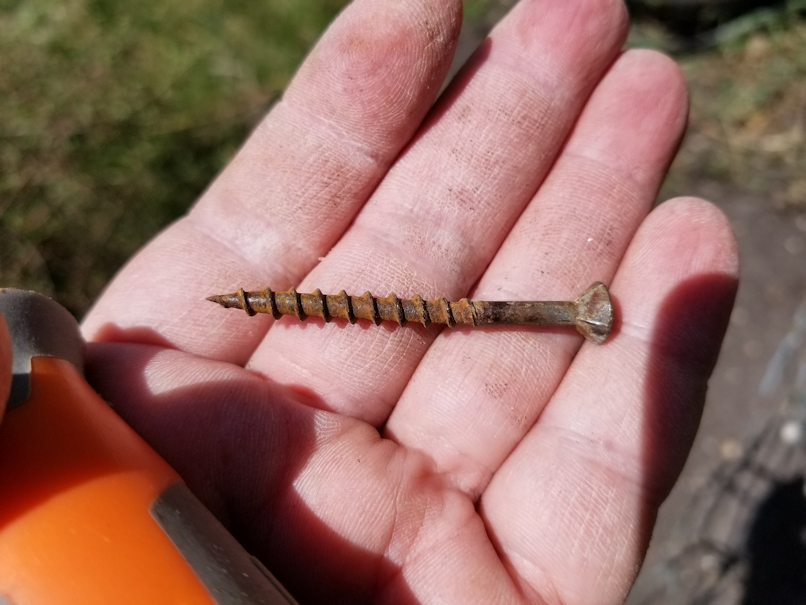
At the very bottom of that first post, however, there was one nail sticking out. I tried several times to pull it out with the claw of my hammer, and it wouldn’t budge.
I did, however, knock off some dirt and rust, which is when I could see it was no nail at all!
Yeah. No wonder I wasn’t able to get it out with my hammer!
I am really appreciating the tool set my older brother and his wife gave us for Christmas. I went into it quite a lot, today!
I got the fencing off up to the corner, where I found this.
It turns out that the section I had been working on ended at this post. It was held in place with twisted wire, which went through holes in the metal post. The fencing on the end section was folded around the post, then pieces were bent back to form hooks that held onto the continuing fence.
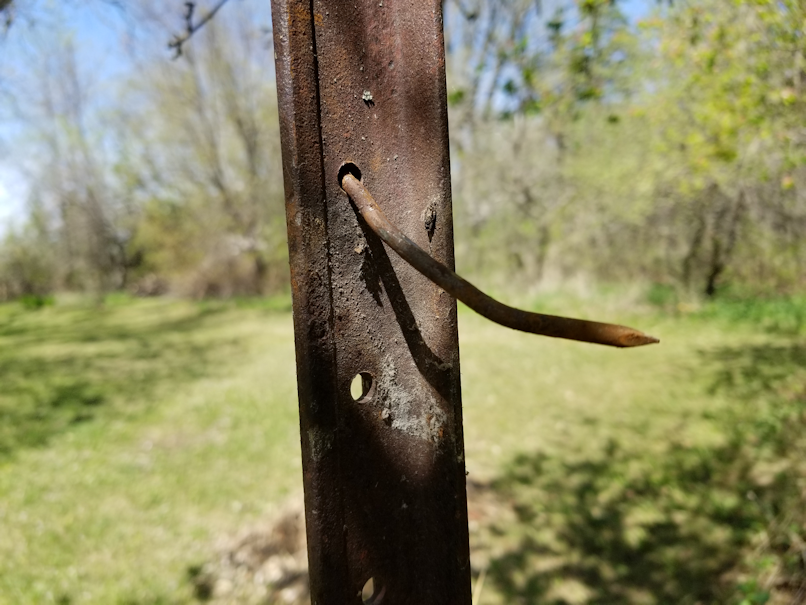
And that supporting wooden fence post at the top?
It was held in place with a large nail, through a hole at the top of the metal post, which was then hammered to a right angle to hold it in place.
In the end, it was easier for me to pick up the wooden post and hammer away at it, near the nail, then to try and pull the nail out from the other side.
Which actually served to straighten out the nail.
About half of the length of that nail was in the wooden post, while the other half or so was bent down on the other side of the metal.
Then I had to use pliers to untwist the wires that held the first section of fencing in place. The wire was so old and rusting, several pieces broke off.
By this point, I’d found a bucket to take along with me, to put in the assorted nails, screws and bits of metal that I managed to keep out of the grass.
Side fence, gone!
The next section was a different challenge. After removing the twisted wire that held the fencing to the posts, I then had to cut away the rose bushes that had come up on the outside of the fence, more stems that had woven themselves through the gaps of the fencing, and cut away the vines at the base of the fence.
Then I just left the fence there, and took a break! There was just the north side section to do, with two more fence posts and more roses to trim out of the fencing.
My mother tells me this is a white rose bush. I cut away just what I absolutely had to, to get the fence loose. I noticed some dead stems and branches that will need to be cleared away, so it’s another thing to go back to, later.
Much to my surprise, the rest of this fence was held up by what looked like a broken broom handle, shoved into the ground, a length of pipe stuck into the ground, and at the corner of the house, it was tied to the fence post with twine. The other fence post in the middle? Nothing. It wasn’t attached to it at all!
Once that was done, we only needed to roll up the fencing (still full of plant matter in some areas) and haul it away. We’ve selected a spot to leave all the detritus we find, so when we hire someone to haul the junk away, it’ll mostly be in one place.
Here is what the south corner looked like, after…
And the centre.
Later today, when it is cooler, I will go back and do some more clean up, and see if I can take out the fence posts.
The next major step is to first lay down a layer of cardboard (after our move, we’ve got lots of that!) and wet it down, then start to layer the leaves the girls have been piling up for me, as well as the straw that was over the septic tank like, and the straw that’s in front of the dog houses the outside cats have been using all winter.
Throughout the summer, we will continue to layer grass clipping and other yard waste, and the kitchen trimmings that would normally go onto the compost pile. I plan to use what’s currently the compost pile as well.
By the end of fall, I hope to have some pretty solid layers on there, and by next year, it should be well-built-up soil.
For all the lower temperatures and overcast skies, and forecasts of 80% chance for rain, there has been none today. Going into town with another errand, my daughter and I played a bit of Pokemon Go. In the game, which is linked to local weather in some way, showed pouring rain on our maps. In the real world, there wasn’t a drop.
Once home again, I did a quick check around the yard and garden area. After talking to my mother yesterday, I learned that the trees in the flower garden are not cherry trees, after all, but ornamental apple trees. The cherry trees, she tells me, are in the spruce grove, behind where the wood pile used to be. No sign of blossoms there, yet. I am not sure why edible cherries would be planted among spruce trees, while ornamental (I assume that means they don’t produce anything edible) apples are planted next to the house.
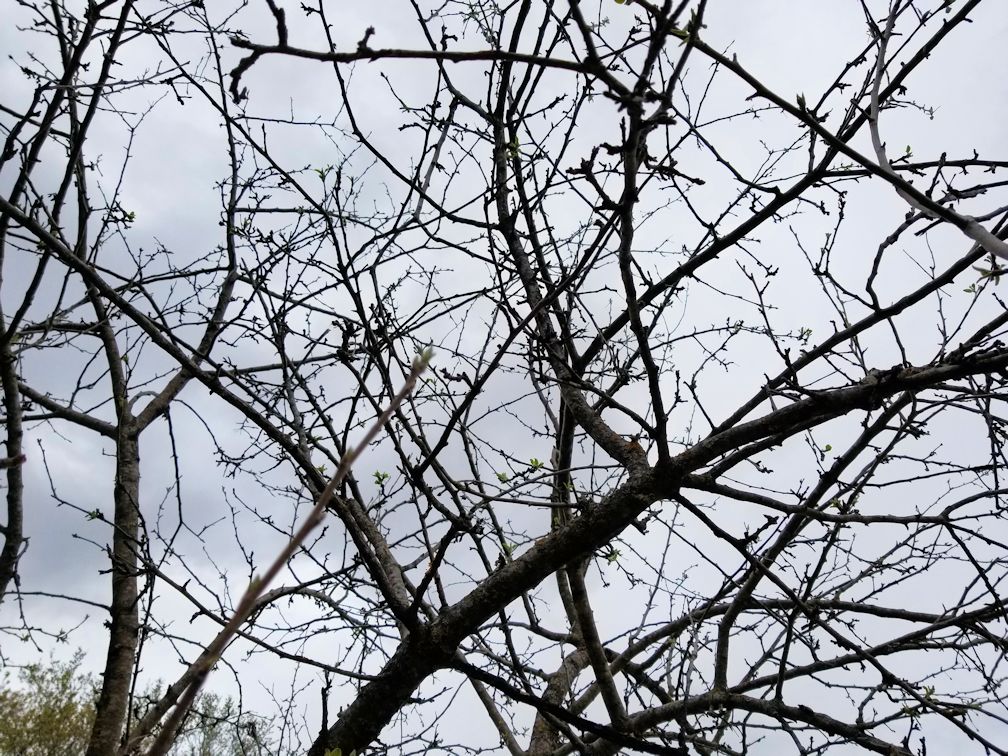
The apple trees in the flower garden are leafing and budding up nicely, too. The row of apples (all varieties of crab apples, as I recall) are barely in leaf.
Planted on the north side of the spruce grove, they wouldn’t have anywhere near as much sun as the ones in the flower garden, which is the most likely reason why they are so much slower to revive for the season.
On the far side of the garden, along the fence line, the lilac border is showing flower buds already on some bushes. I was looking for a sign of the chokecherry tree that used to be there. The lilac border runs the entire length of the fence line now, but when I was a child, it was only about half the distance, and the chokecherry tree was at the end of the row, about the middle of the length of the garden at the time. I may have found it, but can’t be sure, as it’s behind lilac bushes. The tree I saw that might be it also seems to be dead; likely the chokecherry tree was choked out by the lilacs. :-( I will see if I can confirm that with my mother one of these days.
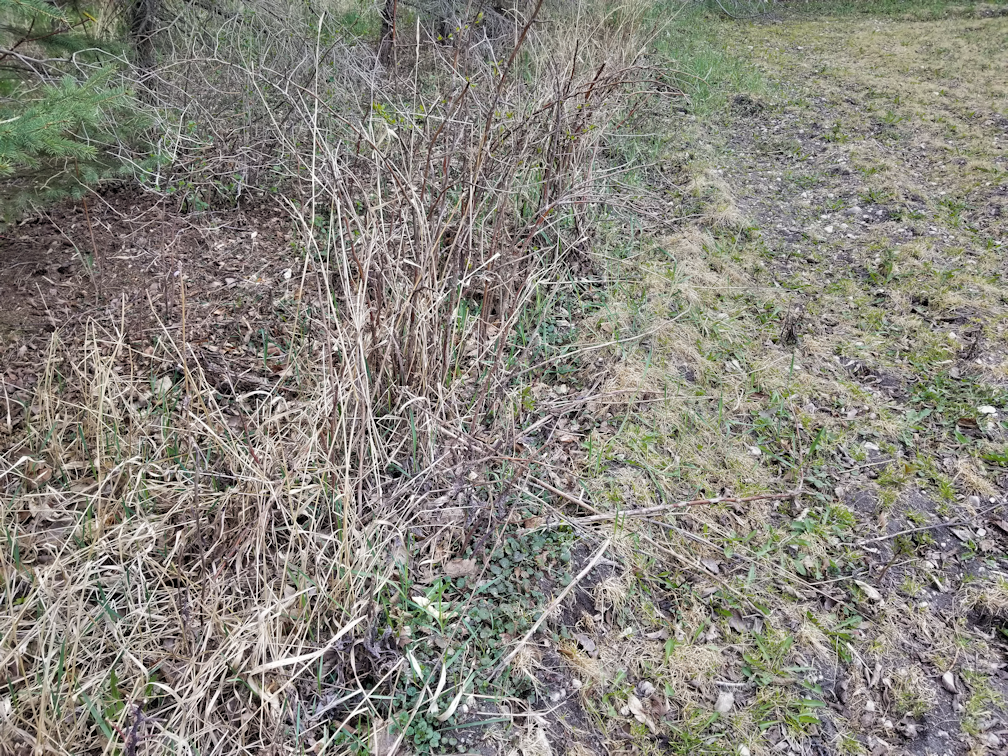
This is part of a row of what appears to be raspberry canes, though it’s hard to identify them among the scrub and without any leaf buds to be seen. On one side, it’s almost right up against a row of spruces. On the other, I can see that it was plowed within inches of the stems. They would be getting light only in the early hours of the morning, now that the sun is rising so much farther to the north than it did in the winter. By about 9 or 10 am, they would be in shade until sunrise. We’ll see what raspberries we get this year, if any. Most varieties of raspberries have canes that produce in the second year, before dying back. At that point, the spent canes should be cut away, but that is something my parents never did, as far as I can recall; they just let them be until it was decided to transplant them. I remember when they were planted on the far side of the garden, beyond where a row of trees is now planted. At the height of raspberry season, we could pick several ice cream pails’ worth of berries in the morning, then come back by evening and have more ripened berries to pick. On our list of things we eventually want to plant are three different varieties of raspberries, each with a different harvesting period, so we could have raspberries from July through September.
Whenever that happens, we will be sure to plant them somewhere that actually gets full sun.
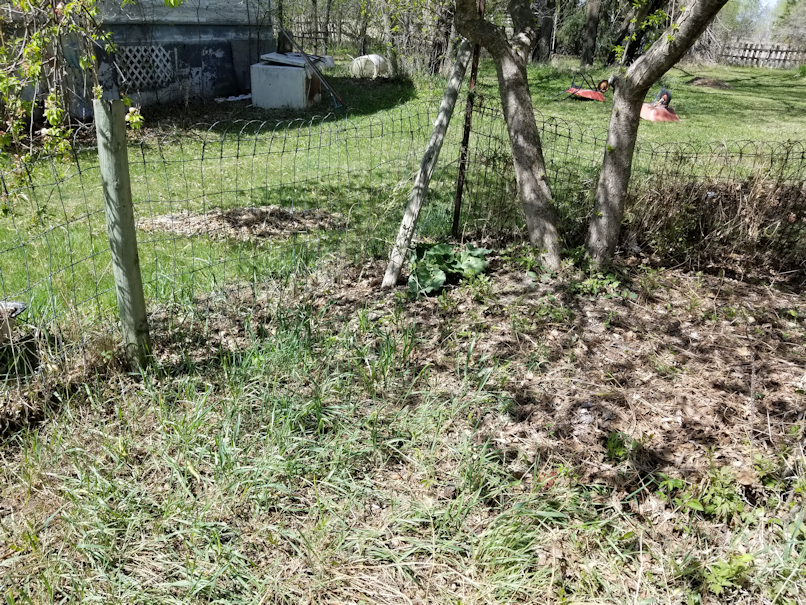
As we clean up around the house and yard, we are starting to discover where things are growing, and even what some things are.
These pictures are of the biggest of my mother’s flower gardens, at the old kitchen. It actually has a fence around it and everything.
Here is what I am seeing in it, now that growth is starting to happen.
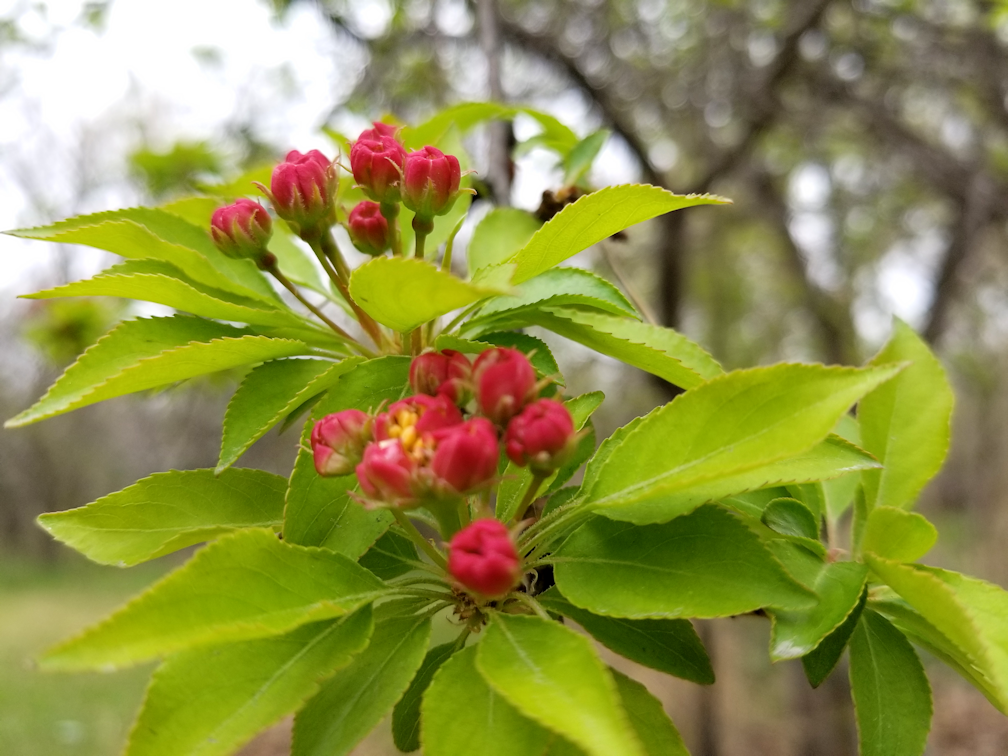
I am enjoying the sight of leaves and flower buds on this cherry tree. It looks like we have a second, smaller one. I look forward to seeing them in full bloom!
Under the bigger cherry tree, outside the garden fencing, chives are coming up. Plus what looks like an onion, over on the right.
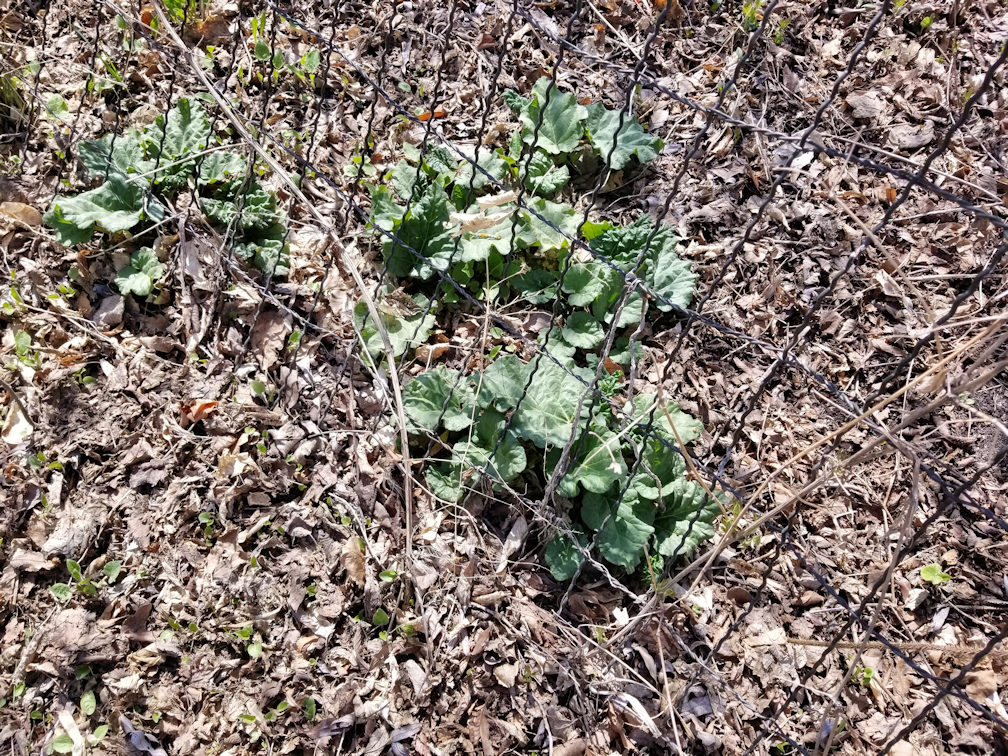
There is also some rhubarb growing just inside the garden, near the base of the tree. I am happy to see it. I love rhubarb!
Near this rhubarb, there appears to be a whole lot of onions coming up. It should be interesting to see what all we find once we get to raking in here. Though my mom has always called this a flower garden, she’s had onions planted in here for as long as I can remember, though there may have been some years without them. I remember tomatoes planted in here, too.
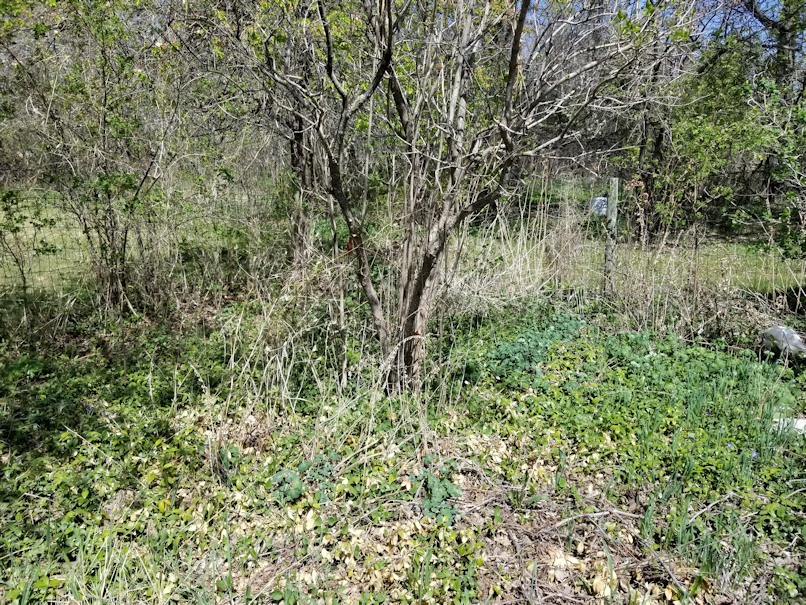
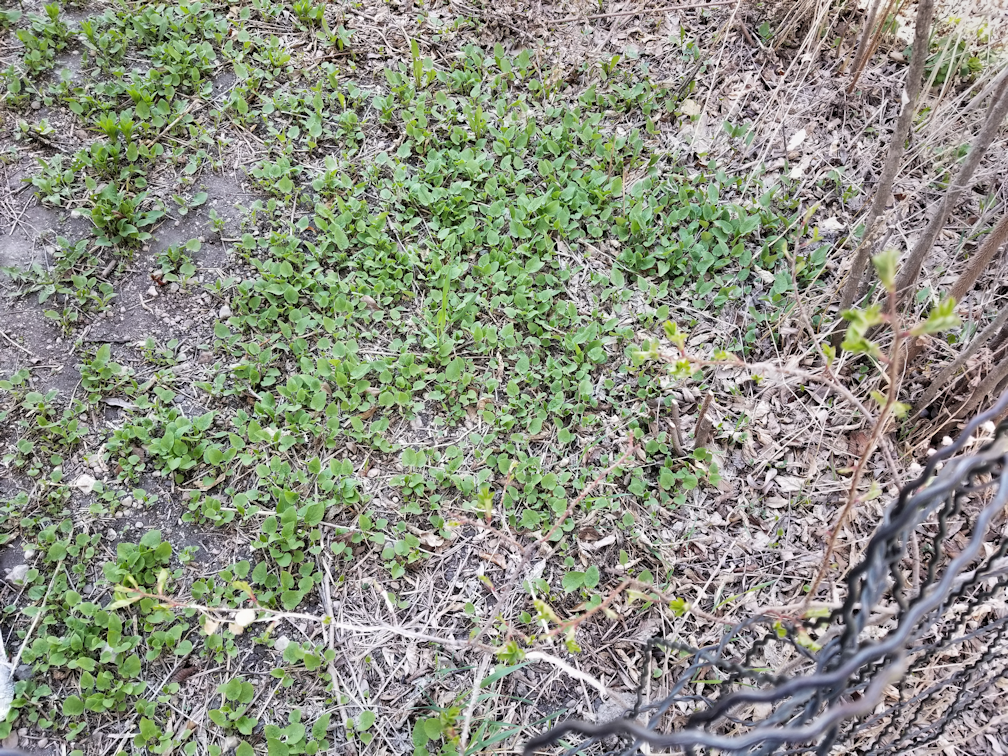
The middle of the garden is completely overrun with these plants. My mom told me the name of them, but I don’t remember what it is. She had planted them, only to discover they are quite invasive, and has told me that she would like me to get rid of it.
That is not going to be easy.
Along the outside edge of the garden, I can see some wild columbine starting to come up. Next to what looks like a wild rose? I like wild columbine. So do hummingbirds. :-)
Around the corner, on the opposite side of the garden, there is a whole bunch more rhubarb. Hmmm!
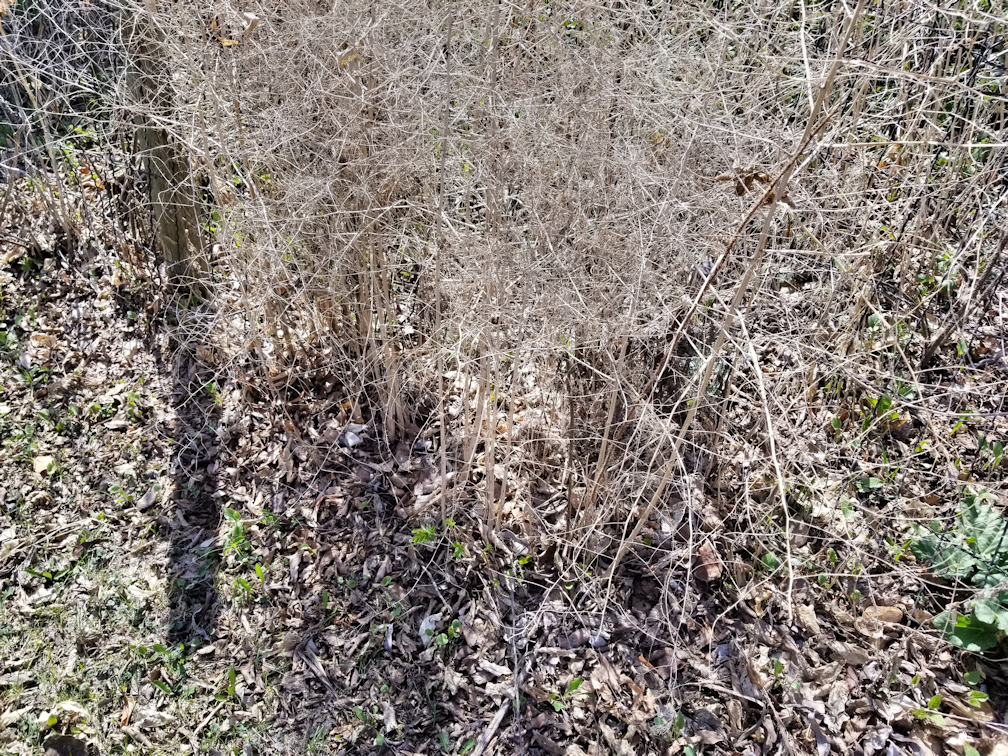
This tangled mass of last year’s growth is asparagus fern. We have had it for as long as I can remember; as a child, I used to love looking at the fine sprays of greenery. What I don’t remember is us ever eating asparagus! I think it may have just been too much of a hassle, so my mom left it to itself. I’m hoping to get it cleaned up soon, and see if there is new asparagus growing.
Then there is this mass of greenery, near the house, under a rose bush. I have no idea what it is, or even if it was intentionally planted.
The soil is rock hard and bone dry. It’s going to take a lot of work to get this garden going again!
I think it will be easier if we start by removing the fencing, which is falling down. Even the fence posts are starting to fall over.
I do hope we get some rain soon. There hasn’t been anything more than a few sprinkles all spring.
I got very few photos today, but we got good progress on the wood pile in the garden.
The deer path goes through not far from some of the new piles we’ve made, so I half expected the deer might be a bit stand-offish about coming over, but nope; Hungry Girl and Barbecue came right on over, soon after we left the garden area.
It is nice to finally be able to get outside and get more stuff done, even if the snow made our footing a big treacherous. I am really looking forward to more manual labor!