Let’s give this a try

While my daughters and I were in the city, my darling husband finally got through to our internet provider and had a little chat with them.

We had internet soon after.

The problem is still not solved, though. It’s just a make-do until a tech comes out to check the secondary account’s satellite disk.

When they first brought this up with my husband, they said it would cost us $125, just to have someone come out.

By the time he was done with them, that fee was waived!

Also, we are back to using our primary account for now, and we will NOT be charged double the price per gig. However, anything we do use is that much more on our bill, so we will be rationing our data for a lot of things.

While we do have a signal with this dish, it is not the same as it was, before all these problems started, just a few days ago. Data transfer speeds are insanely slow, and it can take several attempts just to get a web page to load. WordPress has always been troublesome, but it took me about 8 minutes just to get the editor loaded so I could write this post!

Still, it should mean I can catch up on posts with images. I always resize the images into smaller file sizes, so they don’t take up much data. The following photos all uploaded faster than I could get the editor to load!

So these go back a couple of days. 🙂

In the last while, we have been regularly putting the kittens and Beep Beep in the basement for the night, then my husband is usually the one who opens the door for them in the mornings. So we still have cat food both upstairs and down.

The cats, of course, always act as though they’re starving, even though there’s plenty of food in the upstairs bowls. What they’re really begging for is wet cat food, and they get that only once a day. The dry kibble is always available.

Since the adults cats now go into the basement regularly, they’re also going for the kittens’ food bowls, so I added larger tin, so that the kittens could still get at some.

Just look at those buggers! They’re crowing around the smaller containers, like they haven’t eaten in a week!

We have been mixing kitten kibble in with the adult kibble. I think the adult cats like the kitten kibble better! 😀

While I was tending to the kitties that day, it was also the day to check the temperature and humidity in the root cellar. While there, I noticed something I had forgotten about.

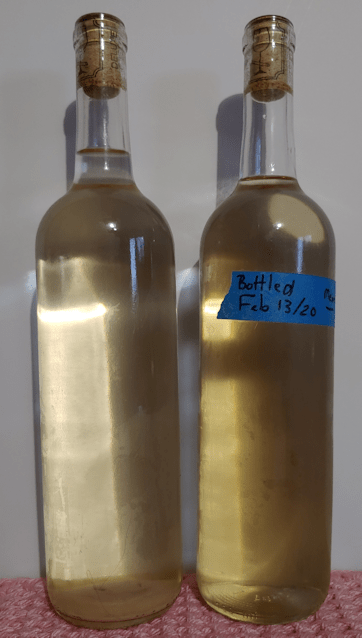
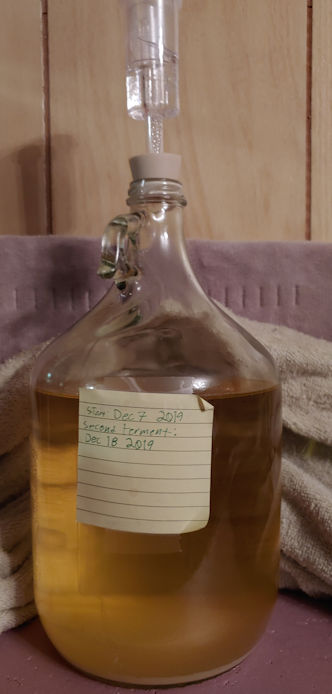
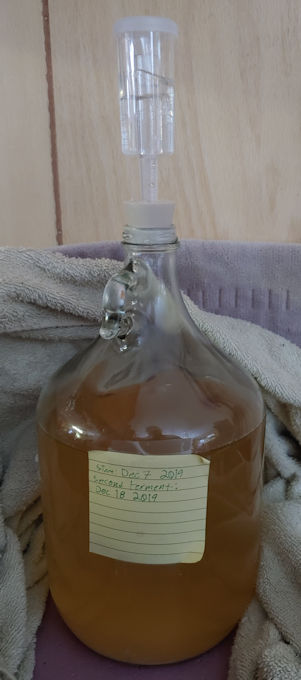
The two bottles of our most recent batch of mead!

We were supposed to taste test a bottle after different lengths of time. One of them was supposed to be opened up on my birthday. I completely forgot about it!

At some point, I’ll grab one and bring it up for a taste test. 🙂

While checking the garden plots, I discovered something unfortunate.

All three beds of beets had quite a lot of their greens missing. It seems we had a deer visiting! She especially seemed to like this Baldor variety.

In the squash bed, I had a more pleasant surprise.

The largest squash plants that I thought were green zucchini turned out to be…
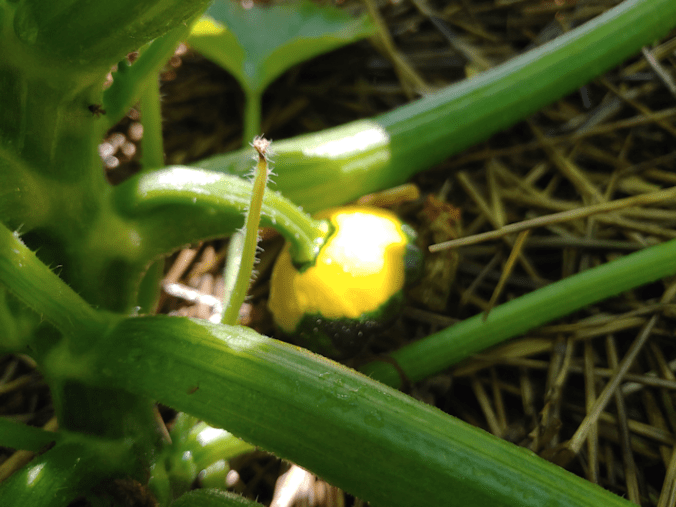
… sunburst squash!

From the number of buds we’re seeing, it looks like we’ll have quite a lot of them over the summer, too. 🙂

I had one last surprise that morning.

While checking the usual spots for fallen branches, I went by the fire pit, which hasn’t been used in over a year. I noticed the skunks had been digging in the dirt, right beside it, and something in the dirt caught my eye.
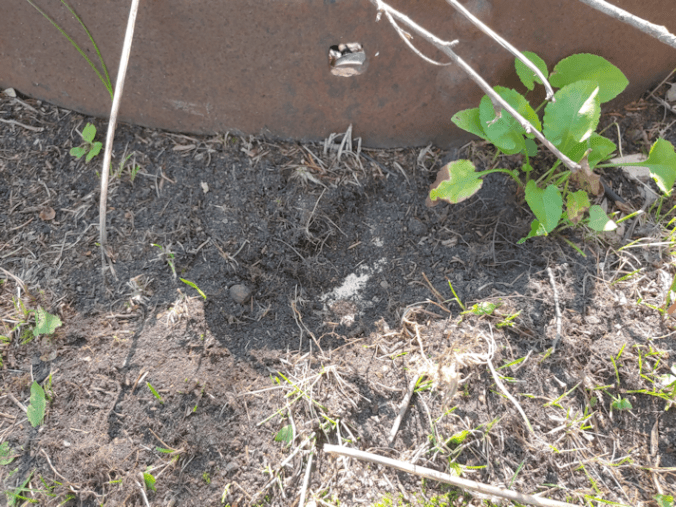
That white you see?

That’s a glazed brick. One of the many we have all over the place.

Looking around at other spots the skunks had dug up, I saw signs of more.

The fire pit has a ring of bricks around it, completely buried.

It must have taken years for them to be covered by that much soil!

With no fire bans right now, we can actually use our fire pit, and uncovering the bricks will be a good thing to get done, too.

I am really looking forward to being able to do cook outs again!

The Re-Farmer

Another taste test, for comparison

For those new to this blog (welcome! Thanks for stopping by! 🙂 ) we have made a couple of attempts at making mead. If you want to read more about how that went, you can visit here for the first attempt, and here for the second. Both links are for bottling day, but have links to the entire process as well.

Today, I decided to open a bottle of each batch to compare them. Both of these bottles were kept in the fridge, so no additional fermentation would happen.

Both meads are very clear (any cloudiness in the photo is of condensation on the outside of the bottles), but the one on the left, bottled 6 months ago, has sediment – lees – on the bottom. All the bottles from this batch do. This means that it, potentially, could continue to ferment. Given that these are corked bottles, we don’t want that. There is a potential for bottles to explode, which is why they are being kept cold.

Mead Baby 2.0, bottled almost 2 months ago, is clear on the bottom.

The older mead is lighter in colour, too. This is likely because the honey to water ratio was lower in this batch, which was made in a 5 gallon carboy, while Mead Baby 2.0 was a 1 gallon batch. We had a 5 kilo bucket of honey for the first batch; about 11 pounds. We probably should have added 15 pounds of honey for the big carboy, but didn’t have that much. For the 1 gallon batch, we weighed out 3 pounds of honey for it.

I decided to take a hydrometer reading of both. I still don’t quite understand what it’s telling me, though the fact that these were both refrigerator cold would likely have affected the reading, too.

In pouring the mead into the test cylinder to get a reading, both meads were effervescent, bubbling up as though lightly carbonated. By the time I poured the tested mead into glasses, though, there was no carbonation left.

My hydrometer has 3 readings on it, and part of my confusion is that the scales on the hydrometer don’t match what’s on the printout it came with.

When we bottled the first batch, the Potential Alcohol by Volume reading was at only 1%. Today, it’s at 4%, which put the specific gravity reading was 1.032, and the Balling/Brix reading at 8. (My hydrometer says Balling, the printout says Brix)

Mead Baby 2.0 had an AVB reading of 8% on bottling day, and today it’s at…

…8%.

Specific gravity is at 1.062 and Balling at 15.

I should probably test them again after they reach room temperature, but… I just don’t feel like it. LOL Still, the fact that the reading changed for one, but not the other… it might mean fermentation is still happening, albeit very slowly.

So how do they taste?

The first batch has a light, almost crisp flavour and an aftertaste that I would definitely attribute to our using bread yeast. Also, it doesn’t taste like something with 4% AVB. I would think it’s closer to that 1% when we bottled it.

I don’t really like it.

Mead Baby 2.0 is REALLY sweet, almost syrupy, and much smoother. It tastes a lot like Port.

I like it better than the first batch, but… not by much.

Keep in mind, though, I don’t really like alcohol in the first place. I’m far more interested in the making of it, than the drinking of it. 😀

The flavours should continue to change with time, however. There are 2 bottles of Mead Baby 2.0 in the root cellar. One will be opened at 6 months, the other at 12 months, so I will likely do another comparison, then.

The next time we get a bucket of honey, we plan to make a batch using fruit. Hopefully, that will help resolve some of the fermentation problems we’ve had.

The Re-Farmer

Mead Baby 2.0: third ferment

Time for an update on our mead making!

The last time I posted about it, we had added a few raisins to the mead to boost fermentation.

Yesterday, my daughter was a sweetheart and racked it to another 1 gallon carboy.

It is now back in its little corner, all swaddled like a baby.

The mead was very clear before it got racked, but between the raisins floating on top and the sediment on the bottom, a fair bit was lost in the process. The jug wasn’t full anymore, already, and now it’s about 2/3rds full.

We’re still going to keep it in the 16C – 20C range, though I’ve read that cooler temperatures are just find by this point. We really could have bottled it, but we will leave it to ferment with an air lock for a while longer.

Now that it’s separated from the sediment, it should not develop any off tastes. At least according to what I’ve been reading. Any fermentation that continues at this point will be very slow.

I figure a couple more weeks, maybe a month, we’ll bottle it and do another test with the hydrometer to check the alcohol level. Given how much was lost to racking away from the sediment, I’m hoping we get 2 full bottles, plus a some left over to test and taste. 🙂

The Re-Farmer

Mead Baby 2.0: boosting fermentation

For those who have recently started to follow this blog (welcome!), here are the previous posts about our second attempt to make mead. All links should open in new tabs, so you won’t lose track of this page. 🙂

Mead Baby, redux (includes links to our first attempt)
Mead Baby 2.0:
active fermentation
it’s a temperature thing
temperature success
overnight temperature status
second fermentation

Since then, we have been monitoring the Baby closely. While there has been virtually no visible activity in the air lock, when we looked at the liquid itself, we could see that it was clearing up, and there was a steady stream of tiny bubbles of carbonation moving upward. If the temperature dropped to 16C, we would turn on the warming pad, which would typically bring it up to about 18-19C.

Recently, its temperature would drop to 16C a lot faster, and we could no longer see the carbonation. It was looking a lot clearer, and we could see a fair bit of sedimentation at the bottom.

However, it was less than 2 weeks since we started the second fermentation. While I’ve read a mead can be ready in that time, most videos and websites I’ve been looking at showed active fermentation for about a month, and gave advice on how to reactivate fermentation if it stopped to early.

Since that was the problem we had with our first attempt, we debated. Is it done and time to bottle it? Should we rack it into another bottle to get it away from the sediment and leave it longer? Do we add something to boost the fermentation?

I’ve read various ways to boost fermentation in mead, including those that recommend adding a chemical that is used in wine making.

Or we could just add some raisins.

So that’s what we decided to do.

With a 1 gallon carboy – and it’s not full – not a lot of raisins would be needed.

We added three.

Here are photos, taken a day apart, showing before and after we added the raisins.

As you can see in the photo on the left, the mead had gotten quite clear, and there’s a pretty thick layer of sediment on the bottom. It’s hard to tell with the reflections, but in the second photo, you can actually see a couple of the raisins floating at the top. The mead is cloudier, but when we shine a light into it, we can once again see that steady stream of bubbles going up to the top.

We’ve been checking its temperature regularly and, aside from an initial warm up after adding the raisins, it’s been keeping its own temperature at 19C.

Right now, the plan is to leave it until we can no longer see those bubbles, rack it into another carboy to get it way from the sediment, then leave it for a while longer before bottling it.

A lot of the information about mead making I’m finding is conflicting, but one thing that all our sources agree on is, the longer the mead sits after bottling, the better it tastes. Most recommend at least a year.

I doubt we’ll wait that long, but with bottles at 750ml, even with having less than a gallon in the carboy (and I expect we’ll lose more after racking it again), we should still be able to get 3 – 4 full bottles out of it, so we can have one right away, then try the others at different ages.

So if we want to start a malomel (mead made with fruit) as we planned, we should pick up another air lock and two, so we can have multiple batches going at once.

You know, for someone who doesn’t actually like alcohol all that much, I find the process of making it quite enjoyable!

😀

The Re-Farmer

Fail, times three!

I’ve posted about our first time tries at making several fermented products.

There was the mead, small batches of plain sauerkraut and a probiotic sauerkraut/fermented vegetables version. Plus, there was the crabapple cider vinegar I posted progress on recently. (all of these links will open in new tabs)

The jars of sauerkraut and cider are in locations that I can easily check on them. With the lack of fermentation in the mead, I’ve found myself eyeballing the jars harder.

I was feeling suspicious.

So this evening, I took down a jar of plain sauerkraut and took the filter off. It seemed okay, but I went to check the other two, anyhow.

Oh, dear.

Continue reading

How Sweet it is! Making Mead, part 1

Today, we started up a batch of mead, using the wine kit we recently acquired.

Here are the contents of the kit, plus a 5 kilo bucket of my cousin’s liquid gold!

Looking up how to make mead had us all over the place. At its simplest, you can mix honey, water and yeast into a sanitized glass jug. Stick a balloon over the opening to allow the gasses to expand, tuck it in a cool dark place and forget about it for a few weeks.

Other sources had elaborate recipes with multiple steps and finicky measurements every step of the way.

We’re going to be doing something in between.

Continue reading