Today, I was able to get back to working on our first low raised bed. The first thing I had to do was scrounge through a shed and the barn, looking for something I could use to support the long sides and prevent them from bowing outwards once the bed is full of soil.
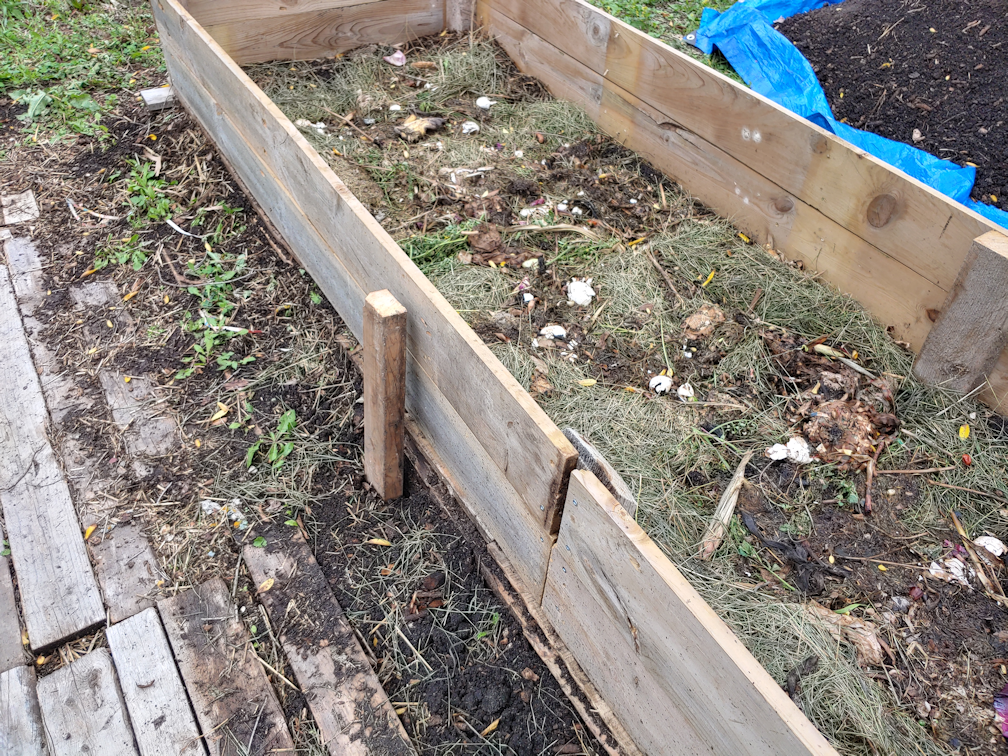

I found a piece that was strong enough, and long enough that I could cut it in half, first, then cut the two pieces in half at an angle, so they could be driven into the ground. Two were used for this bed, and the other two will be for the next one. The soil here is soft enough that I was able to use the pretty sledge hammer I found in the pump shack to hammer them in. I wasn’t too worried about them being perfectly straight. If this were a high raised bed, I’d be sinking posts to support them.
Next, I shoveled about half of the soil into the box, raking it out against the sides a bit, then added soil all around the box to bury the wood foundation. In total, that took up about 2/3 of the soil on the tarp. The wood foundation will break down over time, and I expect the whole box will slowly sink with it, but I don’t expect this to last more than a few years. Hopefully, by the time these need to be replaced, we’ll have access to more permanent materials and can replace them with high raised beds.
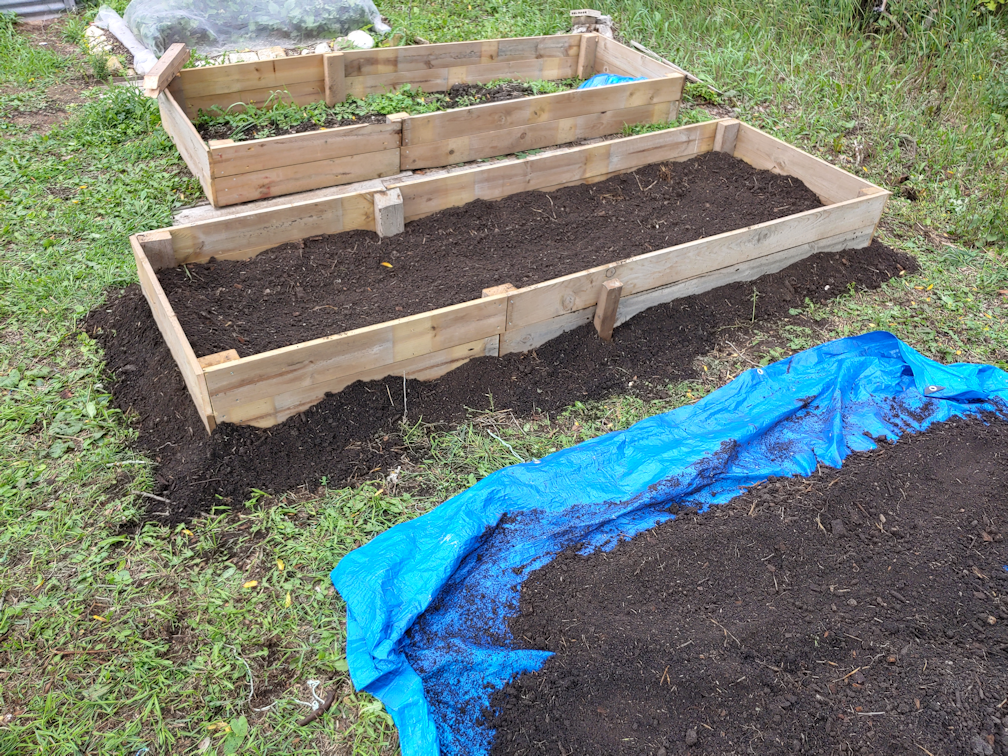
Now it was time to amend the remaining soil.

First I added about half a bag of wood pellets (roughly 20 pounds), maybe less, then got a load of the garden soil we bought in the spring.

An arm full of grass clippings was added on top of the load of soil, then a second load of soil was added.
The whole thing was mixed together using a garden fork and the tarp itself. After a while, I shoveled about a third of it into the box, then used the tarp to mix it some more, shoveled more into the box, mixed the remains with the tarp again, and by then I was able to use the tarp to heave the whole thing into the box and dump the mixture out.
Then it was time to level it all out.
I also used the back of a hoe to tamp down the soil around the outside of the box a bit. If I can figure out how to transport it, after all the beds are done, I want to bring gravel from the pit over, to put around the boxes and in the paths.
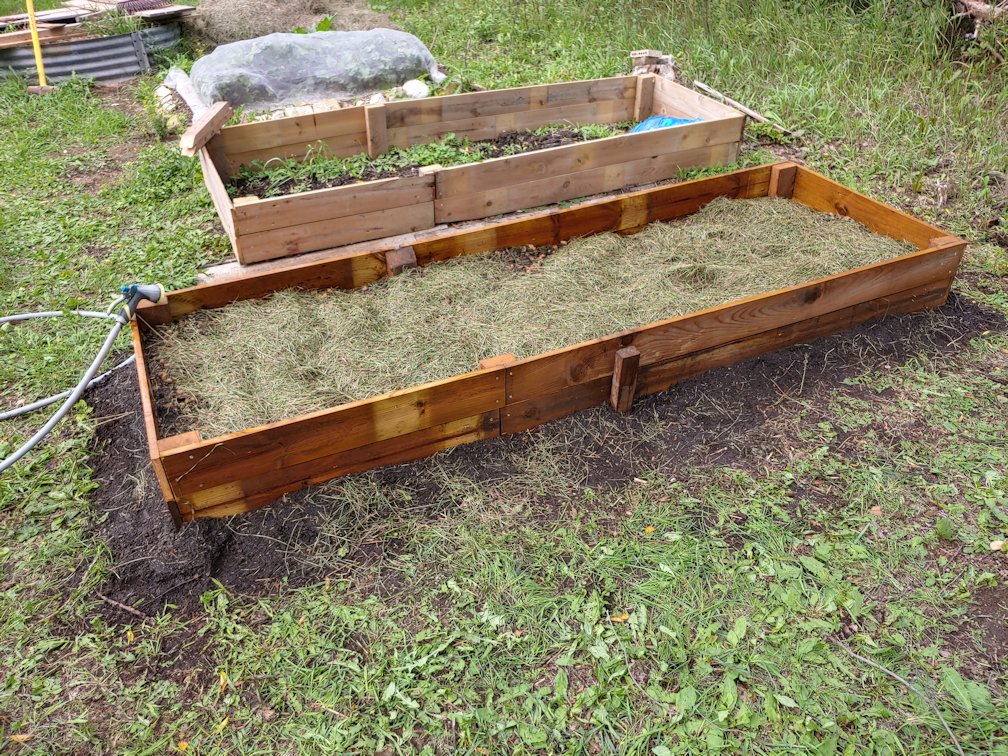
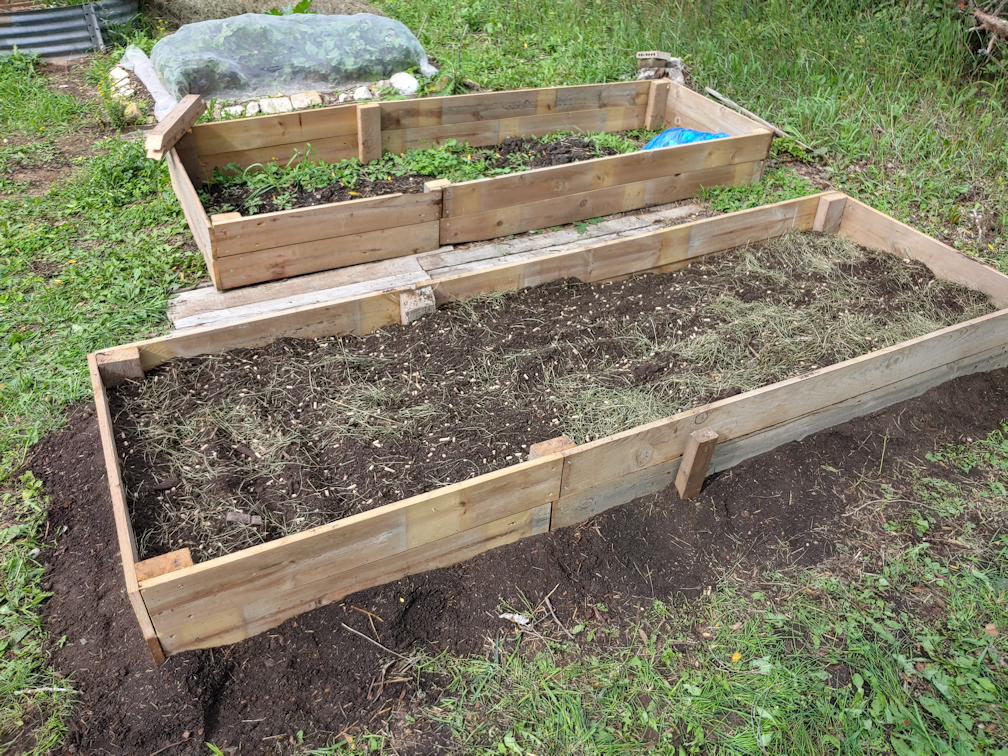
The final step was to cover it all with a grass clipping mulch and give it all a soak. It was a good chance to power wash the box itself a bit, in the process.
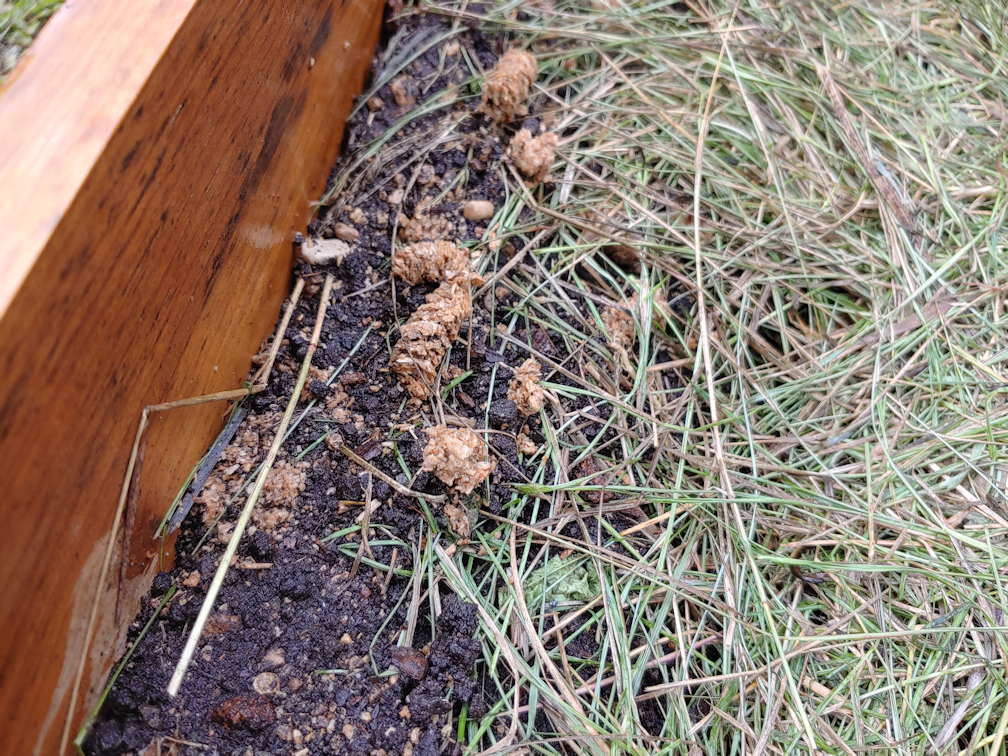
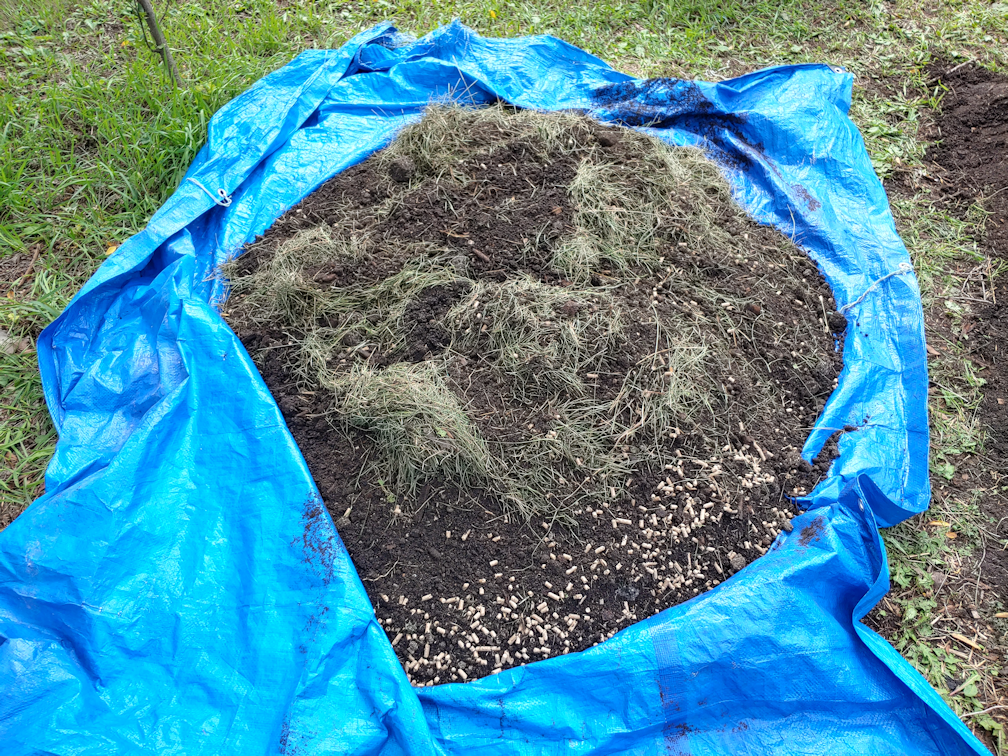
Here, you can see some of the wood pellets. This is why I decided to use these. Once the water hits the pellets, the sawdust begins to absorb it and expands pretty much immediately. Which means that all the pellets that are buried in the soil will push the soil away, breaking it up and preventing compaction. Depending on the conditions for the next while, these should decompose completely by the time we’re ready to plant into here, together with the grass clippings, adding organic matter that will keep the soil light and increase moisture retention.
As you could see from the previous photo, the box is not full to the top. It is, however, at a stage that it could be left as is, and be ready for planting in the spring. I might have a lead on getting a truck load of manure. If that pans out, and we can get some this fall, I would use some and, together with the garden soil and probably other organic material, top up the boxes. We shall see. Either way, this should all settle further over the winter, so I expect to need to add more material in the spring, before planting.
For now, the bed is done. The next two will be done the same way, though I still have to build the box for the bed that has beets growing in it. That will wait until after the second box is set up, since there’s nothing to do with that bed until the beets are harvested.
The Re-Farmer


You did an amazing job on those raised beds! If lumber wasn’t so expensive right now, we’d have some too lol
LikeLiked by 2 people
Thank you!
If we didn’t have salvaged wood scattered about the place we could rifle through, we wouldn’t be able to do it, either. The price of lumber is insane!!
LikeLiked by 2 people
I’m glad you were able to salvage some wood for those! It’s insane how much lumber, along with a lot of other things, has sky rocketed 🤦🏻 That’s why we did the no-till method instead.
LikeLiked by 2 people
Grog condos? O_O
LikeLiked by 2 people
A side benefit of putting wood on the bottom; it will serve somewhat as a tunneling critter barrier!
LikeLiked by 2 people
Pingback: Second low raised bed: done! | The Re-Farmer