First time canning, and garden clean up progress

Just a bit of catching up on how things went yesterday.

The short version: Long.

It went long. Very long!

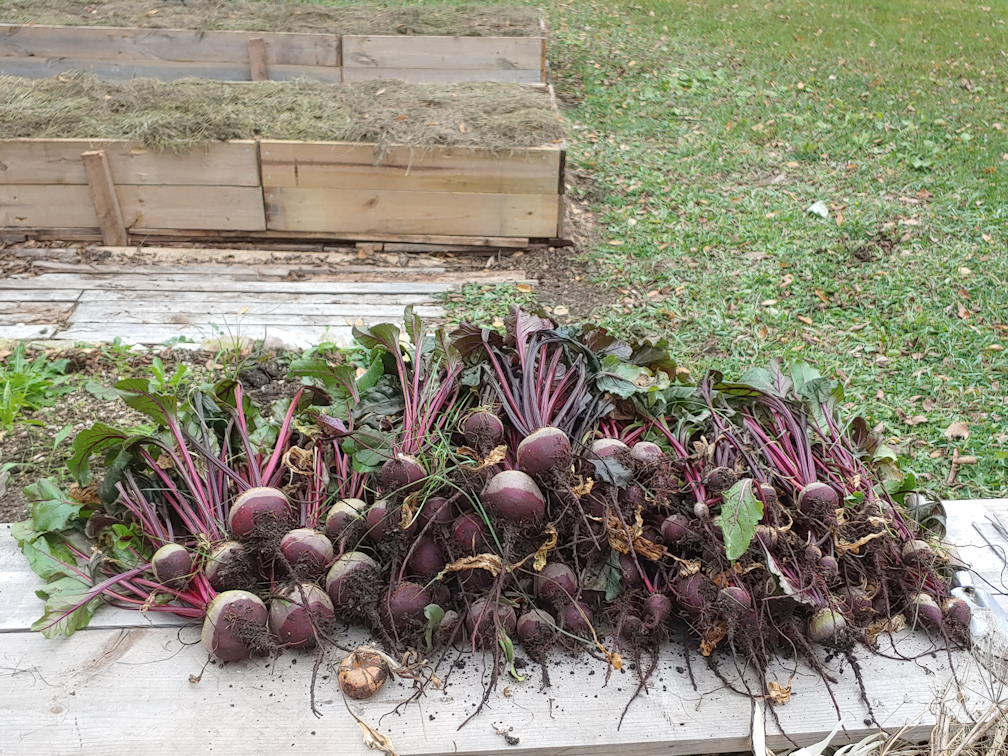
For me, it was working on pickling beets using the water bath canner. Until now, we have only done refrigerator canning, and my only experience with water bath canning was helping my mother, as a child. This is the first time I’ve done it myself, from start to finish.

It took WAY longer than I expected!

I have a Ball cookbook of canning recipes. The pickled beets recipe was for a half dozen 500ml jars. They had the basic pickle recipe, but also variations. After looking over our quantities of beets, I figured I could do two batches, with one batch being a “sweet pickle” using cloves and cinnamon sticks instead of the pickling spice mix of the basic recipe.

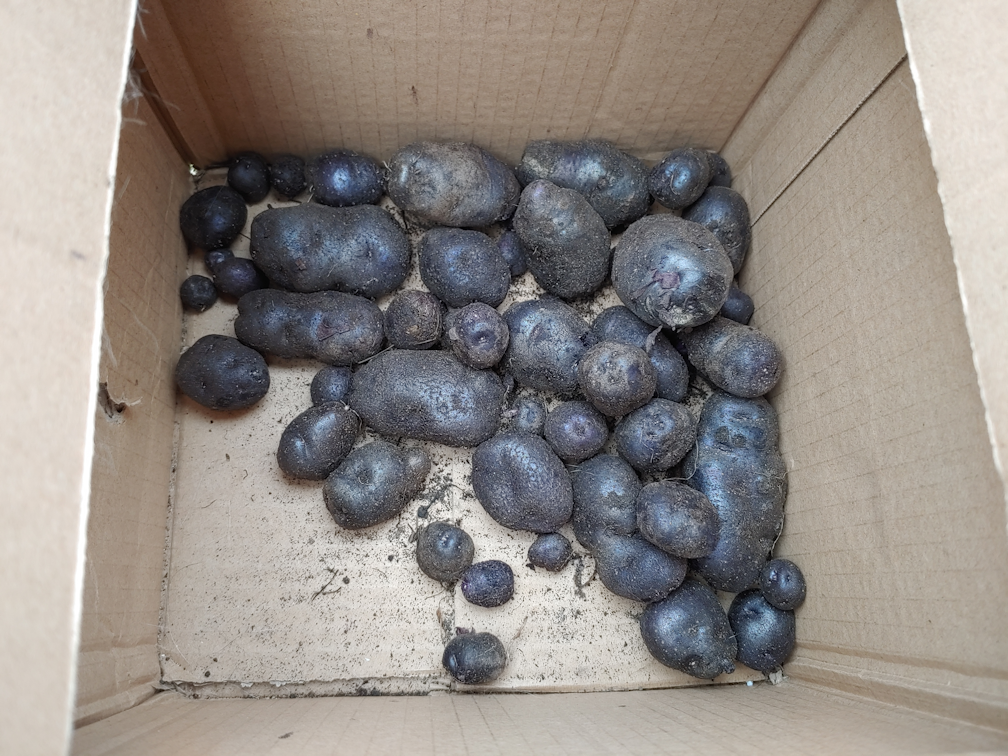
One batch called for 10 cups of beets. I decided to use up as much of the little beets as I could. Since they would be blanched and trimmed, and their small size would pack tighter than cubed larger beets, I made sure to grab more than 10 cups. I figured, if there was extra, we could just include them with supper or something.

While the first batch was blanching, which filled the blanching pot I found stored in a barely accessible space in the kitchen, I prepped a second batch to blanch. At the same time, I cooked the liquid with the pickling spice bag, and had everything ready to do the sweet spice version.

I was all ready to can the first batch, when I realized I had a problem.

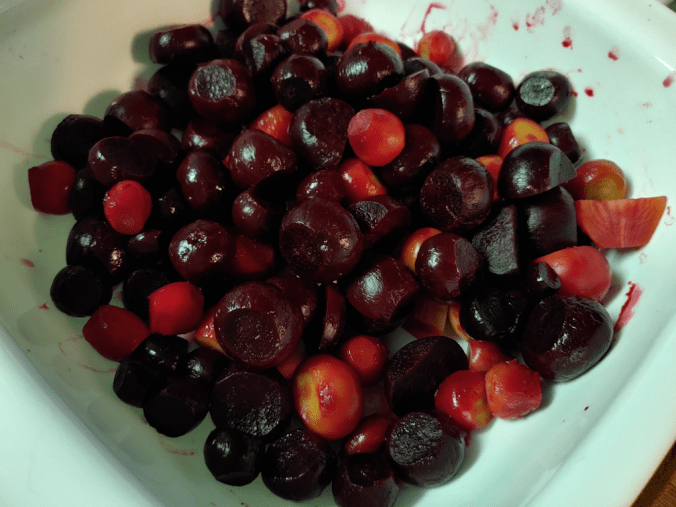
These are the first batch of fully prepared beets.

I doubt I could have filled three jars with that, never mind six!

So I added the second batch.

I still wasn’t sure there would be enough to fill the six jars I had prepped in the canner!

The next step was to put them into the pickling liquid and bring it to a boil, then start filling the jars. After my first jar, I realized I would likely have another problem. Not enough liquid! So I started the spiced version going and continued. I ended up being able to do only four jars with the basic pickling liquid, and the last two got the sweet spice version.

I started working on this before my daughters headed out to work in the garden. They came back four hours later, and I was JUST reaching the point where I actually start putting beets into jar. Most of that time was spent scrubbing beets, blanching beets, removing the outer skins, trimming the tops and tails, and waiting for water to boil.

I know “a watched pot never boils”, but my goodness, it takes a long time for large amounts of water to come to a boil!

But, if finally got done! Our first time canning AND our first time canning our own produce!

Pulling my first jar out of the water, though, was a bit of a surprise.

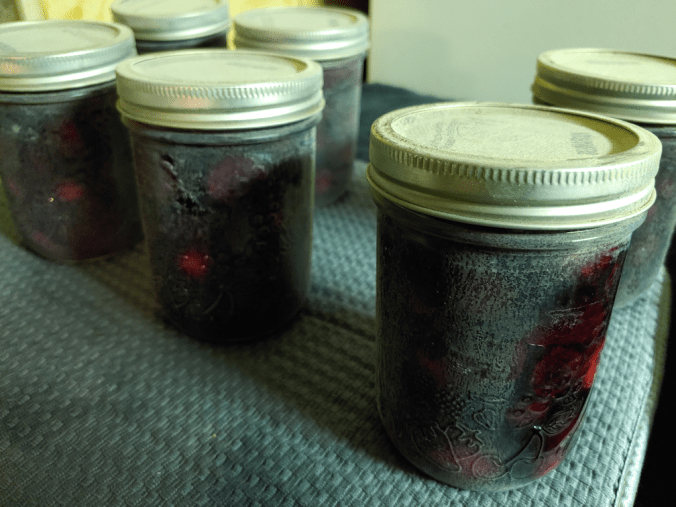
I mean, I know our water is hard, but wow! For the jars to come out with a layer of scale like this is crazy! You can see on the jar on the far right, where I wiped some of it with a paper towel. They’re going to need to be washed!

I finally had a chance to remove the rings and check the seals, just a little while ago, and they all came out fine! I made sure to keep track of which ones had the different pickling liquid, for when the scale gets washed off and they can be labelled.

Except the jars we open to taste test! :-D

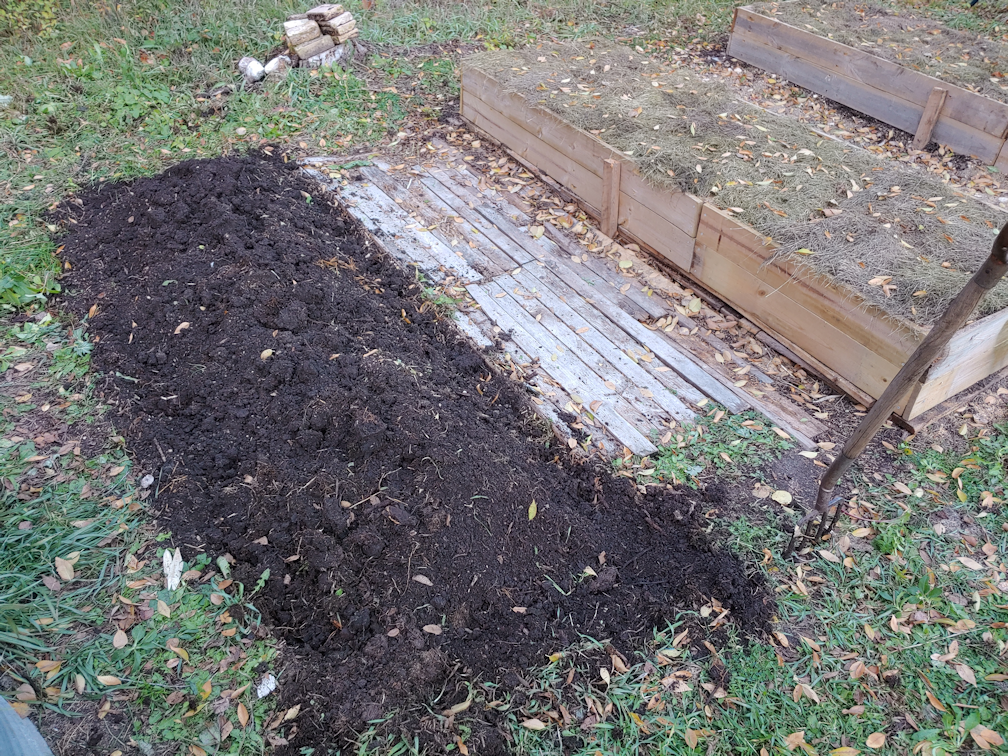
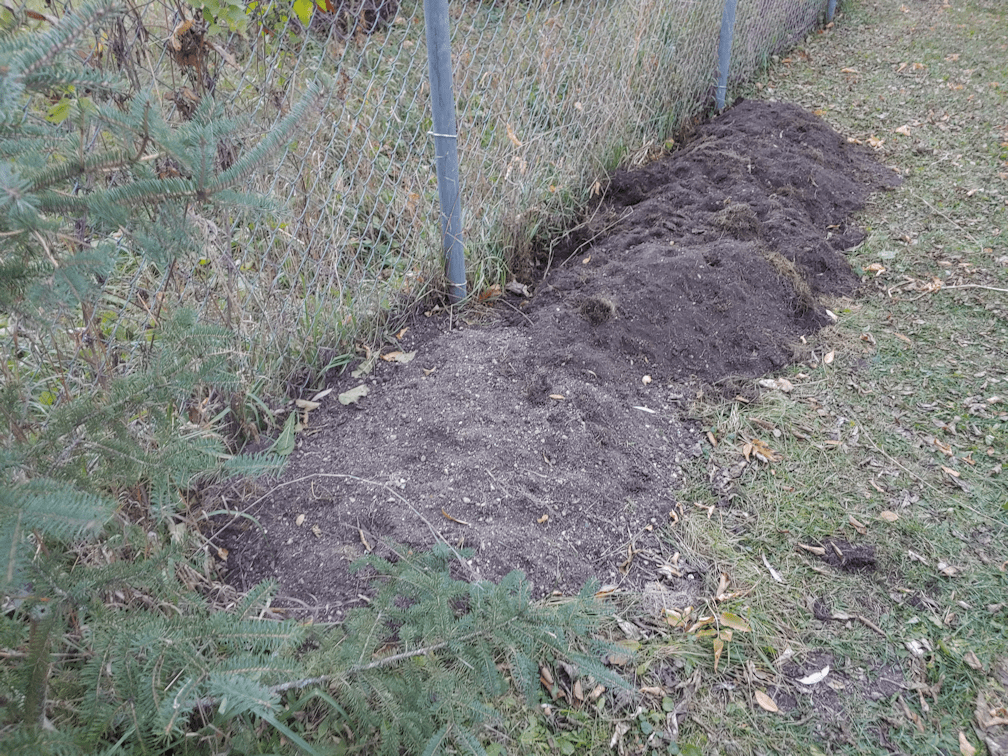
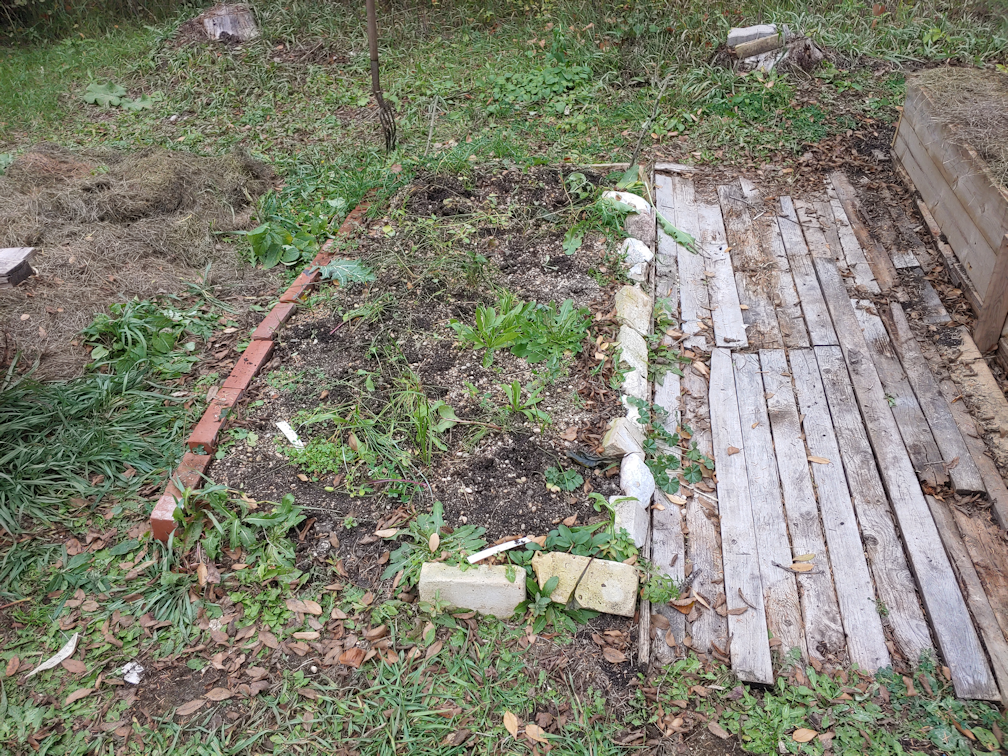
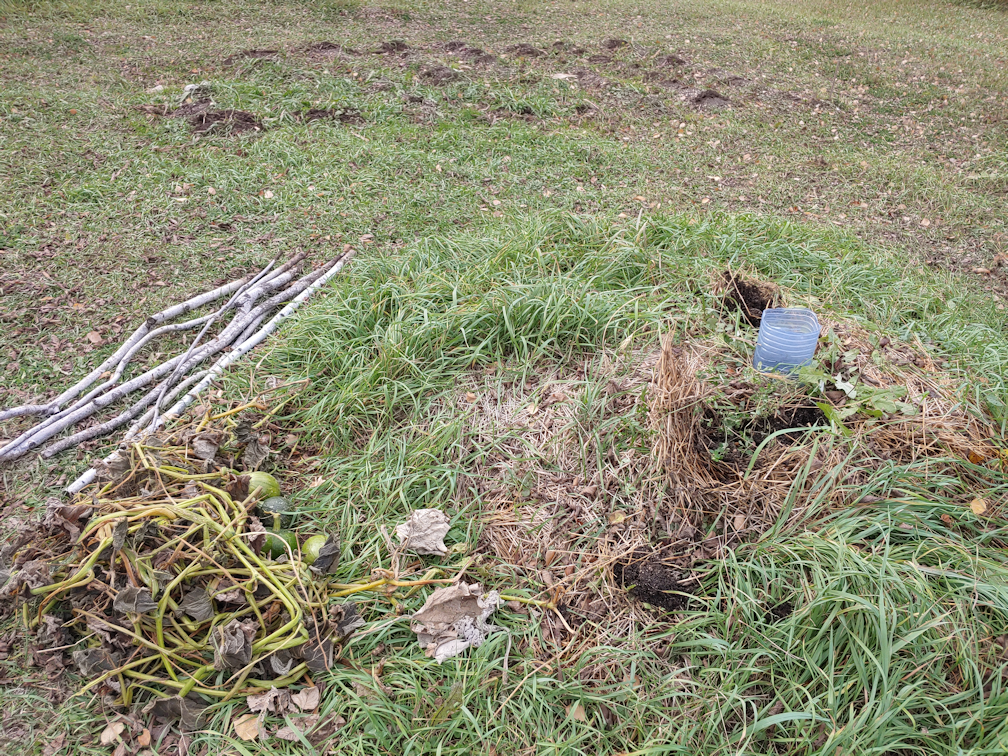
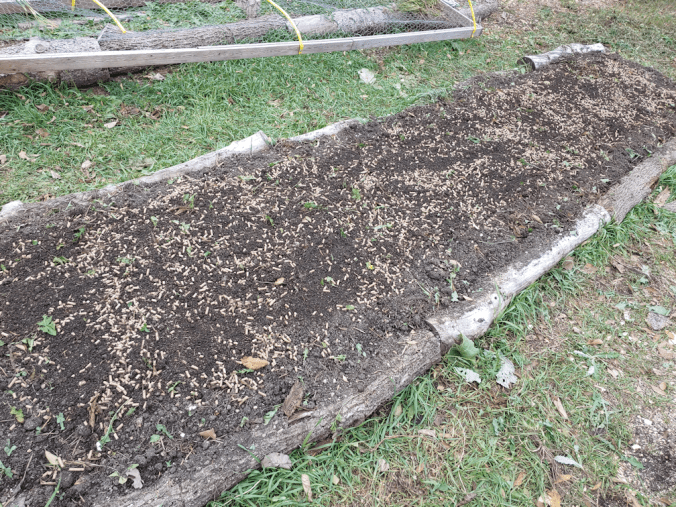
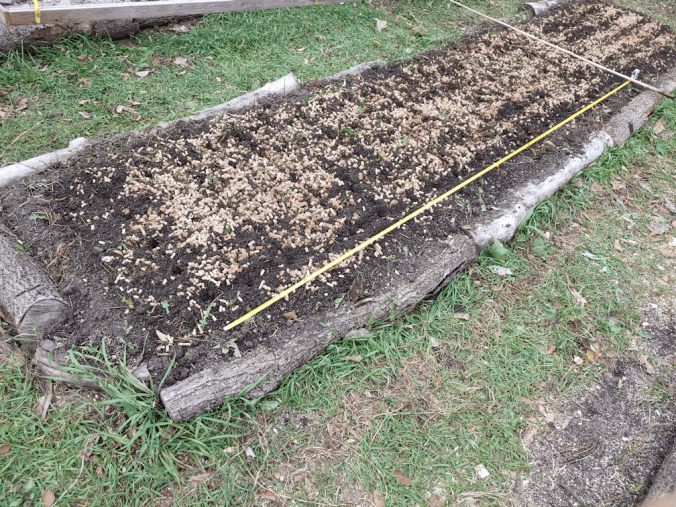
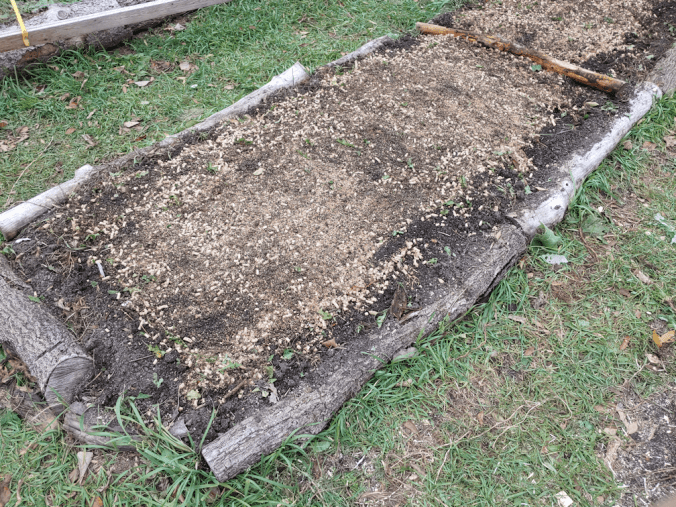
By the time I was done, it was full dark, so it wasn’t until this morning that I could get a photo of the girls’ hard work outside.

They got three of the four remaining beds in the main garden area done – and most of that time was spent on just one of them! The first two weren’t too bad, but the third one was filled with crab grass, and it took them ages to get as many of the rhizomes out as they could!

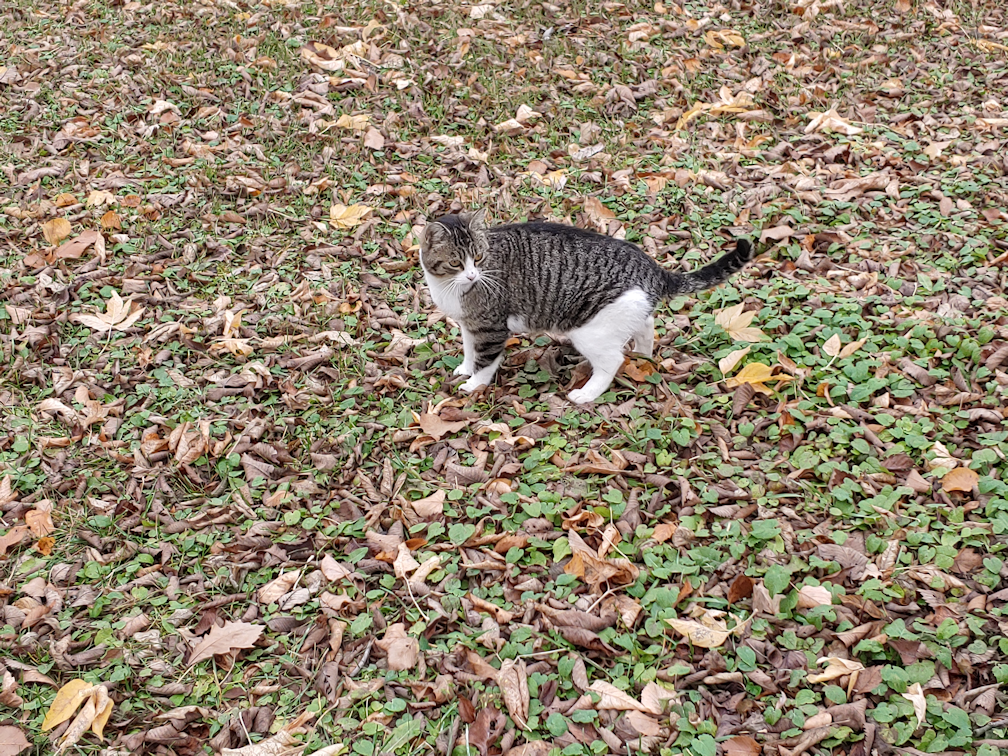
I am amused by all the cat footprints in the loose soil! :-D

I’m glad they were able to get these done. Today turned out to be a write-off for outside work, but I will cover that in my next post. :-)

The Re-Farmer

Our 2021 garden cleanup: progress and plans for the day

I worked on some of the garden beds yesterday, until it got too dark to keep it up. Here is what I managed to get done.

The first bed I worked on was the beet bed by the garlic, as this one will be getting a box frame soon. I started by removing the bricks and rocks around the edges, some of which you can see in the background.

I had to come back this morning to get a picture of this area. The beet bed had a row of red bricks along one side, which I moved over by the tomato bed. Then I went around the house and yard to pick up all the red bricks I could find and brought them over. When this bed gets cleaned up, we’ll re-do the boards along the fence, so that they fit better between the fence posts and line the entire length of the fence, to keep soil from washing through the chain link. The rest of the bed will be framed with these bricks, to keep the soil from washing into the path.

Amazingly, even though the vines are quite dead, there are still tomatoes ripening. I did not expect that, with the temperatures we’ve been having!

The beet bed then got weeded, and lengthened to match the garlic beds. I also moved the soil more towards the middle. I will not be digging out the soil to do the layering like I did with the others on this one. We only have wood enough to make a box frame one board high, so even though the boards I found are wider than the ones used in the other beds, it still won’t make a bed as deep as the others. This bed also got layers of material buried in it as it was made this spring, and quite a lot of the new garden soil was added, so it won’t need as much material to fill it. Once the box is built, it’ll pretty much just be laid over the existing bed. About the most I’ll do is make a “foundation” of old boards, like I did with the other two beds. Once that’s in place, I will make a trench in the middle of the soil and bury more organic material from the compost pile, but that’s about it.

The next area I worked on was a quick job. I just had to spread out and level the soil from the potato bags (and even found a few missed potatoes!). Nothing fancy is happening here. There are some lilies that need to be broken up, and they will be transplanted here.

The last spot I worked on before it started getting too dark was where the poppies had been. One of the things my daughters and I observed over the summer is that we needed to make areas to walk through, without stepping on plants. So at one end, by the rhubarb, I used the flat stones I found under the old wine barrel planter along the spruce grove as stepping stones. The rhubarb covered the poppies that had been planted near it, so I’m considering transplanting those somewhere else completely, but that won’t be done until the spring. We have only three interlocking bricks, so I used them as stepping stones at the end nearer the laundry platform.

The poppies that were here would have self seeded, which my loosening of the soil would have disturbed, but that’s okay. I did harvest a few little pods. I will broadcast more seeds some time over the next few days, then do it again in the spring. Once they have established themselves, this should end up being a permanent bed for Giant Rattle Breadseed Poppy. I do plan to get another variety of edible poppies I found from a Canadian source, but those will be planted in a completely different area.

So that’s as far as I got, yesterday evening. Today, I won’t be working on the garden clean up at all. My daughters will be working on that, later today. It’s supposed to warm up a bit more, but I’m really hoping the winds will die down. They made things quite bitter while I did my rounds this morning!

I’ve asked them to take before and after pictures for me. :-D

As for me, I have decided that I will can some of our beets. After going over my recipes, we do have enough to pickle. My daughter has been doing refrigerator pickles with the summer squash, which is great, but they take up a lot of room in the fridge, so I want to do water bath canning, so they will be shelf stable. I should at least get a half dozen 500ml jars.

I’d better get started!

The Re-Farmer

Morning Cuteness

For some reason, I just couldn’t sleep last night, so I much appreciated my husband being able to feed the outside cats for me and let me get what little sleep I did. Usually, that means I don’t really see the yard cats when I do get out, but he hadn’t been up to giving them water. We’re regularly giving them warm water in the mornings now, so I took care of that when I headed out. There were no cats around at first, but as soon as the warm water was available, a whole bunch of them came out of the cat’s house to indulge!

Agnoos was the only one who was willing to pose for a photo.

Oh, the cuteness!

I am very happy to see the kittens are making full use of the cat’s house. It’s become common, now, for me to walk past it and find several kitten faces watching me through the window. The shelf in front of the sun room, where the bottom two shelves were modified to make insulated shelters for them last winter, is also being used regularly.

I totally get why my later father loved the yard cats so much! <3

The Re-Farmer

Pretty faces, and most of a day gone

Just look at who I got to say hello to, this morning!

The beautiful Nosencrantz let me pet her, but wasn’t too happy about me coming any closer, so I let her be.

While this handsome gentleman (yes, we have been able to confirm Agnoos is male – and I may as well spell his name phonetically! LOL) was the opposite. He started off stand-offish, letting me pet him, but moving away, letting me pet, moving away… Then I straightened up and was about to move, then I felt a cat winding around my legs. Yup! Agnoos actually came over for more pets, and I was even able to pick him up and cuddle him!!! Yay!!!

I had a bit of a change in plan today. I had called my mother last night to see if she needed any help with grocery shopping. She said no, but then mentioned the heat wasn’t turning on at her place, and it was very cold. She had just been talking to my brother and he had said something to her about it, for me to check. She couldn’t repeat what he had said, and I couldn’t figure out her paraphrase. But it wasn’t a big deal, she insisted. I didn’t have to come over. She would wait until my brother came out to check it. *sigh* It was a short call, as her program was about to start, so I called my brother immediately after I got off the phone with her. It turned out he wanted me to check the breakers. Which I could never have been able to figure out from what my mom had said! I mentioned her saying she would wait for him to check it, which just left us shaking our heads. Why make him drive almost 2 hours after work, when I’m less than half an hour away and can do the same thing?

So this morning, I did a short version of my rounds, then called my mother up about coming over. It turned out she’d had a sleepless night, so she asked me to come in the afternoon. That gave me enough time to finish my rounds and grab a quick lunch, then I headed over.

The breakers were fine. She though she’d turned her thermostats up to 25C, but it was only at 20C, and wasn’t turning on. So I turned them up. Then, since she knew I would be coming this afternoon, she asked if I could help her with grocery shopping.

I had used her car, just in case that would happen!

So we did that, but as I was folding up her walker in and out of the car, I noticed the seat was falling off. Once back at her place and the groceries were put away, I checked it out. The seat is attached to the frame with a pair of loops, so it’s like a hinge. I could see both screws were getting loose, but one was falling out completely. I flipped it around to look at the other side, and discovered that both loops were already missing their screws on the other side!

Of course, these aren’t ordinary screws. For starters, they needed a hex key to tighten them, which I didn’t have, but I did have a screwdriver with Robinsons tips (square tips: it’s a Canadian thing), which worked well enough.

While I was working on that, my mother made tea, so of course, I had to stay for a visit. ;-) I don’t mind, since I know she is lonely will all the social activities still banned in her building. Still, by the time I was leaving, I had to rush to get to the post office before it closed, to pick up a package.

Oh, and I remembered to turn her thermostats down before I left. When we got back from grocery shopping, the apartment was way too warm, so I turned it down just a few degrees. Hopefully, she will be happy with that!

By the time I got home, I noticed that, while we have a nice, warm and sunny day, the wind has picked up a lot. I had intended to be working outside today, but have missed the best hours for the work. Ah, well. Hopefully, I’ll be able to get some of it done before it starts getting too dark, and the weather holds over the next while. In fact, now that I’ve finished grabbing a quick supper, I’ll be heading out now!

So much work to go, so few daylight hours to do it in!

The Re-Farmer

Our 2021 garden: final harvest!

Today, I went out to get together with some friends. When I got back, the girls were in the old kitchen garden, starting our final harvest!

I started off helping with the beets in the L shaped bed, before heading over to quickly do the beet bed next to the garlic.

What a difference!

In the old kitchen garden, all the beets were very small. I was expecting that in the bed along the retaining wall, since they had been eaten by the groundhogs, but I expected more from the L shaped bed.

The girls don’t take pictures like I do, so I just got a shot after they were done. The piles of greens in the beet beds include beets too small to keep. This will all be worked back into the soil. In the carrot bed, you can see the Kyoto Red fronds that had gone to seed, left behind as well. I figure those can be worked back into the soil, too. And if we find little carrots coming up in this bed next year, I’m okay with that! :-D

We got a lot more bigger beets out of the little bed by the garlic! Now that this bed is clear, we can build the last low raised box for it, and the bricks used to frame it will be used elsewhere.

Then my older daughter and I started picking the fingerling potatoes. Being able to dump a bag into the kiddie pool, then go through the soil to pick the potatoes, made the job very easy! We moved the bags away from the fence, so that the picked over soil could be dumped back against the fence before we moved on to the next bag, which also made it easier.

The Purple Peruvians are SO dark, it was hard to find them in the soil! We got a lot more of them than expected, and had to start using another container to hold them.

Of course, some of them got used for our supper! Here, you can see the Purple Chief on the left, and the Purple Peruvian on the right. I cubed them, as well as three types of carrots, added some garlic cloves, tossed them in flavoured olive oil and seasonings, then roasted them. I can hardly wait to try them!

While I worked on supper, the girls finished cleaning the vegetables and set out the beets and carrots in the sun room, with the ceiling fan going, since leaving them outside in the sun is not an option right now. There are three types of carrots here; Deep Purple, from Veseys, Kyoto Red and Lounge Rouge Sang from Baker Creek. It’s hard to tell which ones are the Lounge Rouge Sang, as the colour gradient isn’t very visible. All the beets from the small bed are on here, plus most of the beets from the old kitchen garden as well. We did take some straight inside, and a few of them are in the oven, too. They got peeled and chopped, tossed in olive oil and seasonings, then roasted at the same time as the potatoes.

With the beets, we may actually have enough to make it worthwhile to pickle them. I’m not sure. Mostly, though, we’ll just eat them fairly quickly. As for the carrots, I think we’ll either be eating them quickly, too. I don’t think there is enough to even be worth blanching and freezing.

It’s a very small harvest, considering how much we planted, but I’m still happy with it, since we came so close to not having anything at all.

Now our work is really cut out for us! All the beds can now be cleaned out and prepared for next year.

The Re-Farmer

On growing garlic

This year, I joined a number of gardening groups on social media. Either local groups or cold climate/zone 3 gardening groups. It’s pretty cool to see how many first time gardeners have been joining the groups and asking all sorts of questions.

This is the time of year for planting hard neck garlic, as we did yesterday, and there is a LOT of discussion on these groups right now, and people are sharing some really good links.

One really good video I saw shared was uploaded just yesterday, and it give a lot of good information. I think you’ll enjoy it, too.

He talks about hard neck garlic, soft neck garlic, seed garlic and even using store bought garlic, too.

I didn’t realize Elephant garlic isn’t actually garlic!

He talks about lots more, including harvesting “wet garlic”, which was something I wondered about when checking our own garlic last year.

Among the most discussed things I’ve been seeing in the gardening groups has been how deep to plant the cloves. There is a LOT of differing, even conflicting, advice. The thing is, the conflicting advice isn’t necessarily wrong. There can be quite a bit of variance, based on climate zones. For those in zone three, like myself, this was an excellent link that was shared. I also found this video, specific to planting garlic in zone 3.

I found it interesting that he says to leave the curing garlic out in the rain!

For those who aren’t necessarily in colder climates, here’s a video from MI Gardener (published September, 2018)

A lot of gardeners on my groups get seeds from MI Gardener, too, and are very happy with what they get.

There is a lot of information and advice out there, but if you can’t follow all of it, you know what? You can still get good garlic! We didn’t plant our cloves as deep as recommended for out zone, yet they survived the Polar Vortex just fine. We don’t have compost or manure to add, and we still got decent sized bulbs. That’s one of the beauties of gardening. You can do all sorts of things “wrong”, and chances are, you’ll still get decent results. What works in your own specific garden may also be quite different from what works in other places, too, so it will always be a learning experience.

Which is half the fun of the whole thing!

For those reading, do you have other things you plant in the fall? I’ve read about a number of vegetables that can be seeded in the fall, and plan to try it in the future, as we get our garden more established. If you plant garlic, do you plant hard or soft neck varieties? What works for you?

The Re-Farmer

Kitties, kitties, everywhere!

Lately, while doing my morning rounds, I’ve find myself being watched and followed. Today, I had a whole crowd interested in what I was doing, while fixing up the fallen window to the storage house.

So. Many. Kitties!

I’m rather surprised that Junk Pile has been following me around more often, and coming closer. Not enough for me to pet her, but almost.

She may not be willing to let me touch her, but she’s comfortable enough to flop on the ground and start rolling!

She made some maternal noises while she was rolling about.

They got answered!

Her boy, Tuxedo Mask, came running, meowing away!

Then one of the tabbies showed up. I believe this is Chadicous, one of Butterscotch’s two tabbies.

Chadicous wasn’t willing to come any closer, but Nosencrantz sure was!

Such a cutie!

The kitties do love that picnic table!

I’m not sure which of the ‘icusous is on the table, but it’s one of Junk Pile’s babies.

I got distracted by a Caramel going by and suddenly…

… two kittens at the picnic table became five!

I believe that’s Chadicous under the table. The other four look to be all from Junk Pile’s litter.

Then I heard the strangest little beeping noise and found…

… Toesencrantz, checking out the replaced window set up!

I was not the only one curious about the beeping noise.

His cousins came to check him out, too!

Meanwhile, Caramel was checking out her… brother? Cousin? One of the ‘icouses, anyhow. :-D

Oh, look! I’m being watched from above, now! :-D

The cats just love climbing all over these huge old maples.

Even Toesencrantz tried his hand (claw? paw?) at climbing an elm.

He didn’t get any farther than this. :-D

So many kitties!!!

The Re-Farmer

Window Down

When doing my morning rounds, I make a habit of checking various things, looking for fallen branches, weather damage, etc.

This morning, I found this.

This is the back window to the “basement” of the storage house. The cats – and skunks! – use it to get in and out, so we put an old bench we found in the spruce grove under the window to make it easier for them to do so, without knocking more of the glass out. The board was there to keep some of the weather out.

My guess: there was another cat fight that made its way under here, and a cat went through the window with more force than usual. The only thing holding the window frame in place are those hinges in the frame above, and a bent nail on the side.

Since the window was out anyhow, I took advantage of the open space to take another look under the storage house. I’ve taken pictures under there before, but that had been by sticking my hand through the window frame, where the pane is missing.

This is looking straight in from the window.

That massive root is looking bigger than I remember it. It looks like the cats have been rolling around in the dirt beside it, as it seems more uncovered than before.

I do wonder about that metal tub, with all those holes in the bottom.

What I could see – and reach – this time, was the glass from the broken pane that you can just see a corner of, in front of the tub. I got that out, so no critters will get cut on them.

This is looking to the north side. There are three windows there. Once is completely covered, the one with light showing through is protected by a lattice on the outside, and there is a third window near it, where you can just see a bit of light. I can’t tell wasn’t on the inside, but on the outside, there is a bench sheet of what I think it aluminum in front of it. One corner at the bottom is bent outwards, and that is the usual way the critters get under here. What usually happens is, when they get started away from the kibble house, the dash in through that opening in the corner, then come out through the window I’m looking through to take this photo.

In the opposite direction, there is another boarded up window on the south side.

Here, you can see the concrete blocks the house is sitting on. It’s on a double row of blocks, with the outer row lined up with the outside of the building, so there is nothing sticking out. The weight of the house has caused all these bricks to sink into the soil. Because the inner row of bricks are not completely under the house, they are all tipping towards the middle.

There are SO many of these concrete blocks! There’s the double rows holding the house itself up, the pillars supporting the floor, and even loose ones scattered about.

I admit, I’m pining for those bricks. I’m seriously considering crawling under here, just to get those loose bricks! They are incredibly useful. I used to play under here with my late bother, but I’m not quite as small and agile as I used to be! :-D We would go under there, using the remains of the basement steps that are still attached. There is a remarkable amount of space under here. I should be able to move around all right. Plus, I admit to being curious about what else I would find.

My parents intended this house to be moved to a permanent location onto the quarter section the younger of my brothers lives on now, but obviously, that never happened. I guess it never occurred to them that their sons would want to have newly built homes, rather than an old one that’s been moved a couple of times. Now it just sits, filled with old junk and stuff we don’t know where else to put!

As for the fallen window, I just put it back as best I could. I don’t want to board up the window, as the space under here is one of the safe places critters can use to get out of the weather. The cats use it a lot. They go in and out through that small hole in the wood. When we first moved there, there was an old metal pipe running through it for some reason. I think it was there to brace the window or something. The board leaning on the bench will keep the worst of the weather out of where the window pane is missing, but should still give the cats enough space to get in and out easily.

I can’t see this building being moved again, which means at some point, we’re going to have to go in there and start clearing it out and cleaning it up.

I am not looking forward to it.

The Re-Farmer

Our 2021 garden: cleanup up and high raised bed progress

While I was working on the garlic, my daughter did a whole bunch of clean up!

She pulled the Dorinny corn stalks that were next to the squash tunnel, then pulled all the squash, gourds and melon. Aside from the sunflowers, which we will be leaving for the deer to nibble on in the winter, we just need to weed and prep the beds that will be used next year, and put away things like the bin we keep tools and supplies in, empty the rain barrel and put it away for the winter, and take down the last of the critter barriers.

Then she pulled all the purple corn stalks, removed the three layers of barriers we had around the Crespo squash, and pulled those, too. I’m not sure what I’ll be doing with the corn block. There’s some very good soil there. It would be good to plant some sort of legume there, next year, to replace the nitrogen the corn used up. As for the squash hill, that’s something else I’m not sure what do do with. When we plant squash again next year, I want it to all be on the other side of the main beds, where they get more hours of sunlight.

What a sad sight. The Crespo squash had recovered so well from the critter damage! I definitely will be trying these again – with critter barriers, right from the start!

Once I finished with the last garlic bed, I pulled the frozen chard and the remaining radishes we’d hope to grow for pods.

All those radishes we planted, and these are the only ones that survived the grasshoppers!

It’s a shame we don’t have chickens. They would have loved all the greens we pulled today! Not that they will go to waste. They will get buried in the beds as we prepare them for next year. There are still four more beds in the main garden area, including the one with lettuce still in it, to clean up. The lettuce is handling the overnight cold very well, but they have become very bitter tasting, so they will be pulled. Of course, there is still the high raised bed to work on.

I had company while I worked on the garlic. The cats do like the high raised bed. I’m sure the wood is much warmer on their toes than the ground. :-)

My daughter was able to help with the high raised bed this time. She finished making the notches on the next end piece, in the background, while I cut another 9′ side piece from the last tree we cut down. She does not like using the baby chainsaw, and much prefers a hammer and chisel, so I started on the notches on the end piece in the foreground, until the second battery on the baby chainsaw ran out. By then, it was starting to get dark, so my daughter finished up the end piece she was working on and we called it a day. You can’t see the cuts I made on the end piece in the foreground, as I rolled the log onto them. They make it less likely to roll around, should the cats decide to climb all over it again.

The side pieces that are waiting are from higher up in the tree trunk, and quite a bit thinner than the other logs. Almost too thin. Since we will probably make this bed four logs high, I am thinking I should wait until I have thicker logs to use, and save the narrower ones for the top row. The tree that’s still stuck on the branches would give me logs that are just the right size – if we could get it the rest of the way down! :-D It’s either that, or find another dead tree to cut down. The problem with that is, most of the trees that need to be cut down are all really huge. They might be too big!

As glad as I am to have so many dead trees available that are still solid enough for this project, I’m a bit sorry to be using them. These are the trees we intended to use for the walls of the cordwood shed we plan to build as an outdoor bathroom. It’s possible, however, that we will be able to get a load of cast-off electricity poles. These are the remains of poles that broke in storms or had to be replaced for some reason, and we’re on the mailing list with the electric company. They don’t come available often, and not always in our area, but these are cedar poles and would be much better to use for cordwood walls than spruce. So maybe it’s for the better, that the dead spruces are being used to build high raised bed gardens!

The Re-Farmer

Our 2021-22 garden: garlic is in!

When it became clear we would be using our low raised beds to plant the garlic when it came in, I thought about how much space the garlic we planted last fall had taken, and thought we might be able to plant all three varieties in one bed. Maybe one and a half.

Boy, was I wrong. :-D

The garlic is sold by weigh so, technically, we got the same amount of seed garlic as we did last year, but when I opened the bags, it just seemed like… more.

It’s a good thing I take pictures and document everything, because I was able to look at last year’s post and compare.

The photo on the left is from last year, the one on the right is the garlic that came in today.

I even just happened to lay them out in the same order! The Purple Stripe is actually less than last year. Seven bulbs instead of eight, but this year’s bulbs were more consistent in size. Last year, we got seven Rocambole, but this year there is nine. The Porcelain Music had eight bulbs last year, and this year there is nine.

Separating hardneck garlic cloves is rather a lot more difficult than the soft neck garlic at the grocery store! :-D

Last year, we planted all the cloves. Even the little ones. The Porcelain Music had fewer cloves per bulb, but they were all large. With the other two, I separated out the little cloves for eating, and kept the larger ones for planting.

Which turns out to have been a good decision!

Last year, I planted the cloves at approximately six inches apart, but this time, I actually measured and marked a six in grid. Which was SO much easier now that the bed is raised up higher! Now I’m thinking I must have been closer to four or five inches, when I planted last year. At six inches, I filled one bed almost completely with Purple Stripe. There were maybe three prepared holes that did not get a clove planted in them. Which means this bed has 82 cloves planted.

The second bed got the Rocambole, which actually had more cloves. This bed is just a little bit longer than the first one, which gave me an extra row. I had exactly enough cloves to fit! That gives us 90 Rocambole garlic in that bed.

The third bed here still has beets in it, but thankfully, we finished cleaning up the carrot bed, yesterday.

The first thing I did was add half a bag (about 20 pounds) of hardwood pellets and work them into the top couple of inches of soil. Then the bed got watered, so the pellets would start absorbing moisture.

As with the other bed, I marked off a six in grid, though with this bed being so much lower, I did it by dragging a bamboo stake to mark the lines, first, then poking holes in where the intersected. Far less painful doing it that way!

I marked far more than I needed. Having just cleaned this bed out, I know that the edges get invaded by crab grass pretty heavily, so I tried to keep further away from the edges. I marked out 5 rows but, knowing I had fewer cloves with Porcelain Music, I laid the cloves out along four rows, first. I turned out to have exactly enough to fill a 4 x 13 grid, making for 52 cloves.

Which ended up being pretty much exactly half the bed. I placed the piece of wood across to mark how far the garlic is planted, so we know how much space we have when we plant something in the other half in the spring.

While I was working on the third bed, my daughter covered the low raised beds with a grass clipping mulch before moving on to other areas of the garden, then I used grass clippings the last bed. I hope to replace it with straw, when the bale comes in. The mulch has to be removed in the spring, once the overnight temperatures are warm enough. The garlic should be showing through the mulch by then. That is fine with straw, but the grass clippings may be too dense for the garlic to work its way through, so when the straw comes in, I plan to replace the grass clippings with it.

All three beds were finished with a fairly decent watering. Mostly to dampen the mulch than try and soak through it. We are still expected to warm up over the next few days, so this should be enough for now. Later on, as overnight temperatures drop and before the snow comes to say, we’ll cover the beds with plastic.

One thing is for sure. Working with the newly framed low raised beds is SO much better than the ground level beds, even though those ones are technically considered raised beds, too. It was easier to mark out distances, easier to reach the middle, and much MUCH easier on the back. Everything went so much faster because of this, too. I look forward to when all our garden beds are at least this high, or higher!

We had originally intended to double how much garlic we planted this year, but I am glad we decided not to, at the last minute. We would not have had enough beds ready to plant them all, if we had!

It should be interesting to see how these do next year. Not only will be be able to compare with the highly amended low raised beds in the same location as last year, but also the third bed in the main garden area. The low raised beds get full sun (meaning, at least 6 hours), but are shaded longer in the morning by the spruce grow and nearby Chinese elm. The third bed has nothing to shade the morning sun, and is far enough away from the trees by the house that it’s not affected by evening shadows, either.

Our 2022 garden now has its first plantings!

The Re-Farmer