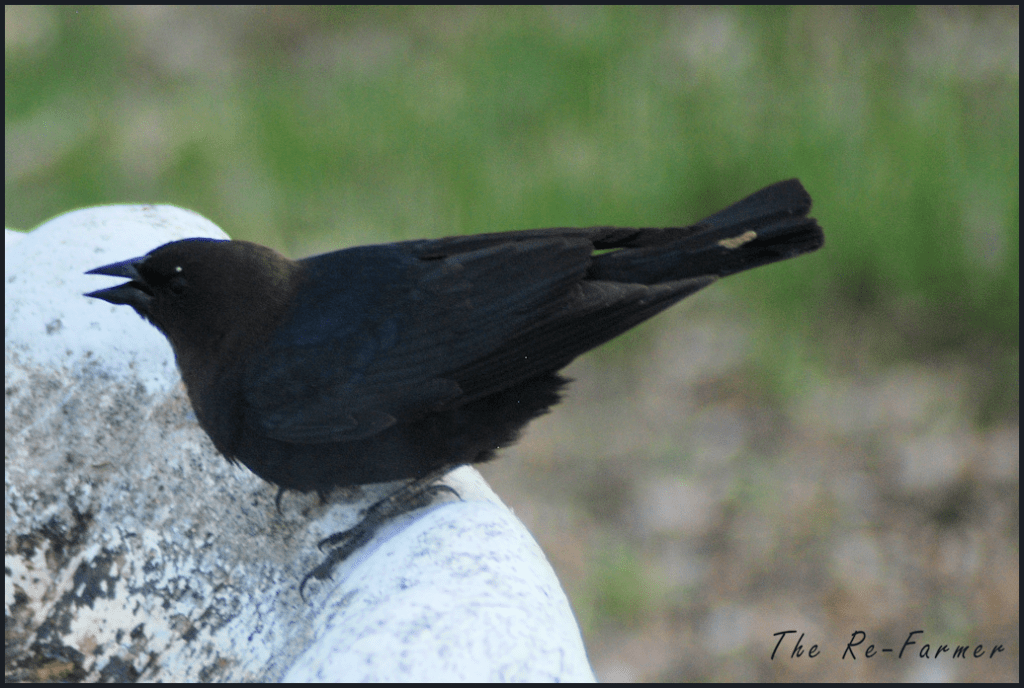
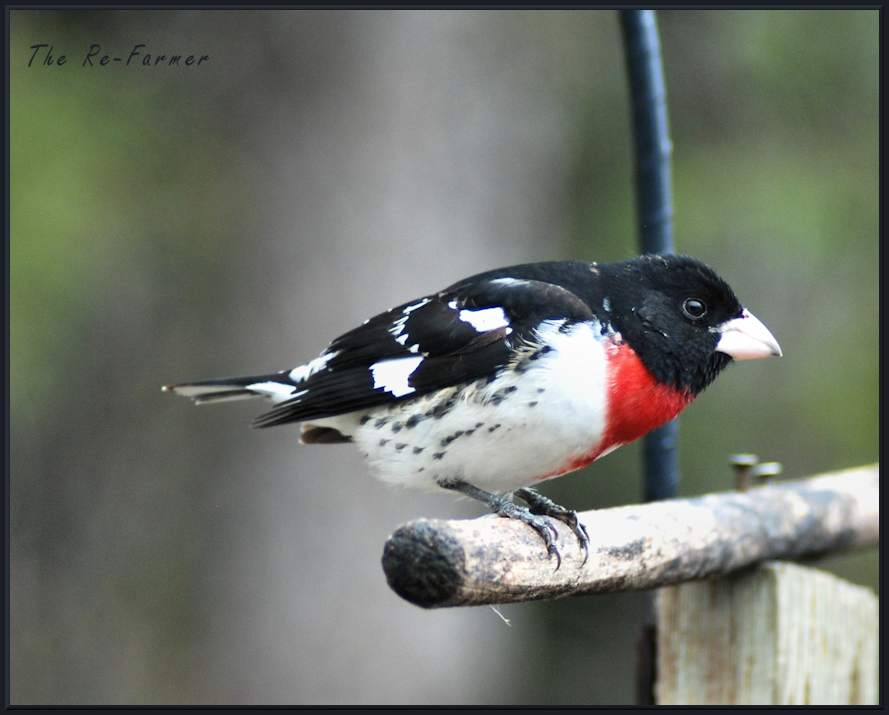
Yesterday, I posted a picture of a common grackle. I almost posted it together with this picture, but on closer inspection, I realized this was a different bird!
This is a brown headed cow bird. The body looks a lot like the grackle! The differences are in the beak (which is shorter on the cow bird) and the eye (which is yellow on the grackle).
I’ve never been much of a bird watcher, but I’ve been trying to make sure I accurately identify the birds we get out our window. In the process, I’m discovering that, for a lot of them, it’s really hard to be sure what I’m looking at! Some are so similar, it’s easy to miss the little details that separate them. Usually, I don’t see the differences until I’ve uploaded the pictures and started to process them for here!
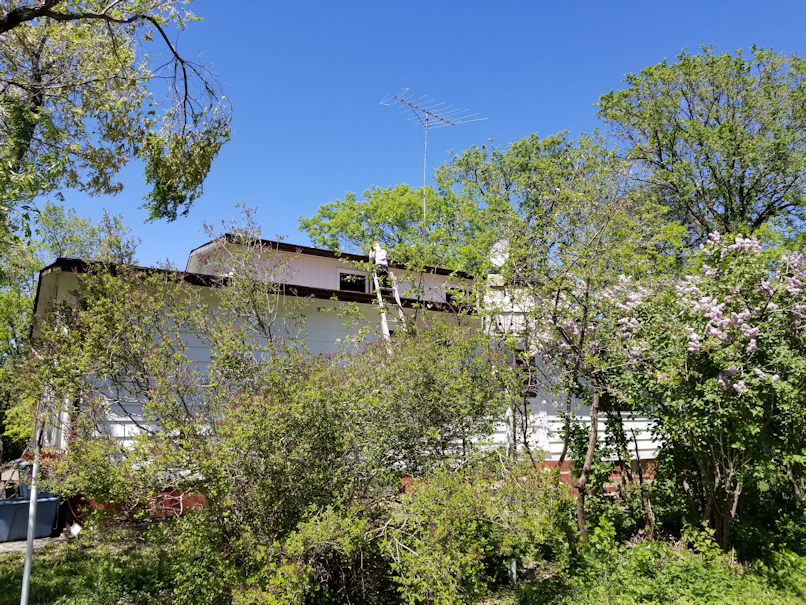
I called several companies to get estimates to get our roof done.
The first one came by today to do an estimate.
He spent quite a bit of time checking things out and taking measurements, after we did a walk around. During the walk around, we talked about the chimney from the wood furnace that will need to be removed. I couldn’t tell him, one way or the other, if the TV antenna would be going back up after the roof is done. There is an unused satellite dish to take down that he included as a removal, though my brother might take it down himself before any roof work is done.
Among the things he noted was that, whoever did the roof last time, did not do the valleys properly (I think the roof was redone by my late brother, with various family members helping out), which could be easily seen from the ground. When on the roof, he identified two leak spots that corresponded to leaks we’d found inside during the winter. I brought up the possibility of finding rotten wood under the shingles, so he included the rate per foot that would be added on, should any be found.
The guy clearly knew his stuff, was very professional and efficient, gave me a very detailed estimate, then took the time to explain some of it. Such as how the step flashing would not be under warranty, because they would not be able to install it properly, due to the existing flashing being under the siding. They’re not going to break the siding to install new flashing, so they would have to install it over the siding. A silicone bead would be run across the top that would have to be redone every year, until we redo the siding and the flashing is property covered. At which point, that flashing would also be covered by the 30 year warranty.
His estimate also included things like converting plumbstacks, applying and supplying ice and water shields, one and two ply underlay for the different slopes, and replacing the goose neck exhaust vent. Clean up is included, too. It was all quite thorough.
The final number was almost $8,500, plus 5% GST. Given that I am sure they will find rotten wood to replace, I would expect the total to reach about $10,000. Which is pretty much in line with what I was expecting.
I also got a call from another company my SIL passed our phone number to (someone she knows personally), so we should have a total of 4 estimates to go over, by the time all is said and done.
I expect the other estimates to be similar, except the metal roof one, which I expect to be higher. Those come with lifetime warranties, so it’s a longer term investment.
So now we have to figure out how to come up with $10,000, or more if we go with a metal roof.
With so many branches of all sizes fallen during the storm, I’m still picking up ones I’ve missed around the yard, along with new ones that have fallen since.
While I have been staying away from working on the outer yard, I did notice a fairly large branch had fallen near the chain link fence, so yesterday evening, I went and dragged it out.
I ended up dragging out other dead branches that had been there before, as well, but none were as big as this one.
It will be good to finally clean up around and between these old maples. When I was a kid, the fence was on the other side of them, and they were part of the inner yard.
They are not doing very well.
I’m pleased to find, however, that another maple IS doing well.
When I cleared here last year, taking out a rotting stump, I found it had actually been supporting the still living part of the tree. It tipped over precariously, so I straightened it and tried to give it support at ground level. It tipped again, if not quite so much, and I had my doubts if it would survive.
I’m happy to say, it is looking quite healthy! Just a couple of dead branches that will need pruning.
As I doing my rounds in the morning, I pick up any branches that have fallen during the night. I was doing just that in the south yard, under one of the Chinese elms, when I heard some noise above me – looking up just in time to see another dead branch fall down and land next to me!
Picking up fallen branches is one of those never ending chores. Like dishes. No matter how many times you do them, they always come back!
The Re-Farmer
Addendum:
Sorry! I had to hurry because a roofing company was coming over to do an estimate, and didn’t get to include the kitten news!
With my daughter’s help, I was able to get photos of each of the kittens, and the 2 moms. I’d already got permission from the administrator of a regional Facebook group that includes the city, and posted the pictures last night.
The first person who responded told me I should go to a rescue society, get them fixed, because there were too many kittens.
It was very condescending.
Then I got a response from someone talking about how we probably have more all over the place beyond the ones she’s seen, and even made a comment about how she thought they looked “demented.”
This person has never been here, and has never seen these kittens.
I recognize the last name, so this is probably someone who lives in the area. In fact, she might even live on the property on the other side of my brother’s place, at which point, she might be thinking of his yard cats. I don’t know, but it was a weird comment!!
Thankfully, I also got three people expressing an interest in adopting. One lives 2 hours away, but if things work out, we might be able to meet half way, in the city, at the end of the month and we can deliver a kitty when we do our monthly shop. The kittens will be old enough to leave by then.
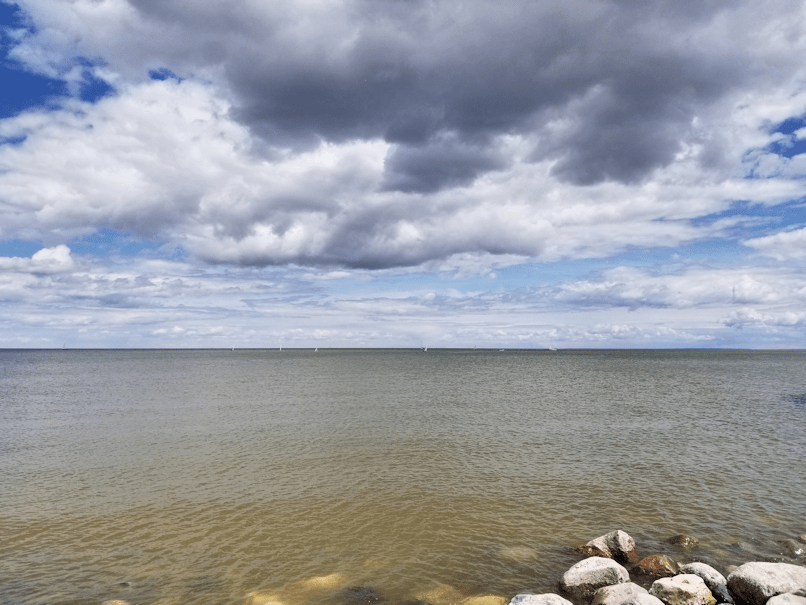
My daughter had a short shift today, so I just stayed in town until she was done. At times like this, weather willing, I like to check out the beach (and play some Pokemon Go… ;-) ).
On a beautiful day like today, lots of people were at the marina, getting their boats out for the summer, while others were already out on the water.
If you click on the first picture, you should be able to see the row of sails at the horizon. :-D
Near the main dock, you could really see where the tide was working away at the beach stones. I like looking in this area for interesting things.
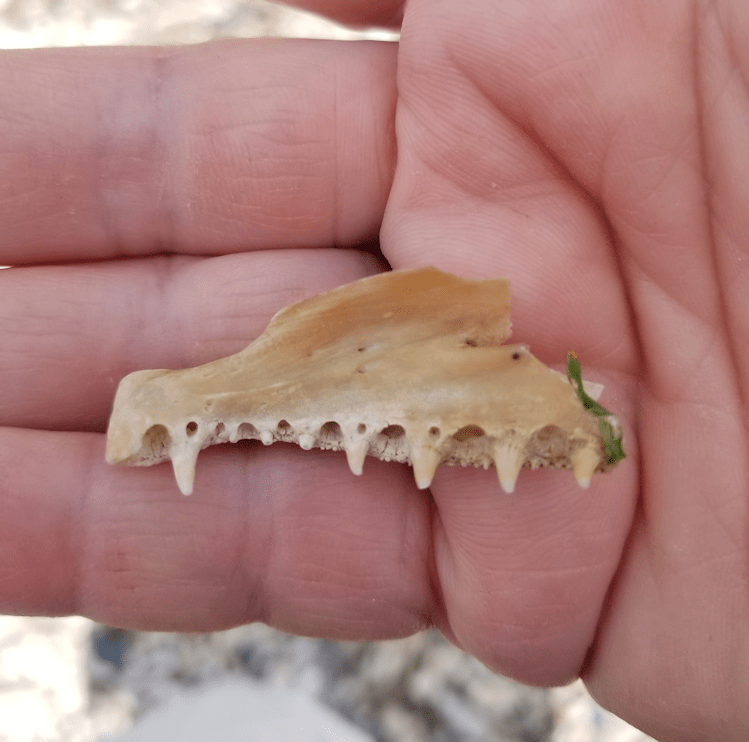
Like this.
This one is much bigger than the last one I found.
When I showed a picture of that one to my older daughter, the first thing she asked was, “did you keep it?”
I hadn’t, and she was quite disappointed, so this time I brought it home.
She was thrilled! :-D
Further down the beach, I found a pile of rocks someone had made. One of them reminded me of a nose.
My darling brother happened to need to come out here for other things, so he was able to take a look at the wiring, and we got it done.
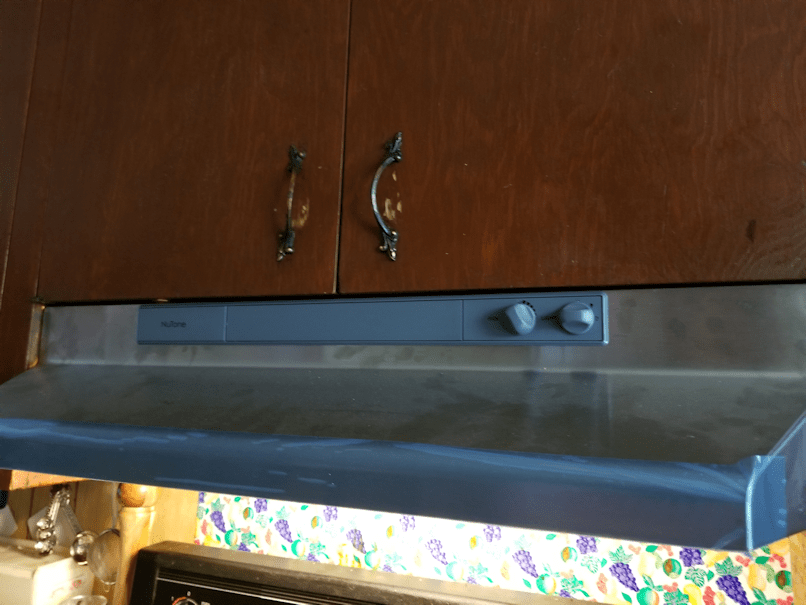
No more exposed wires, and now the entire stove top is lit up. The light even has 3 brightness settings, so we’ll have to pick up a dimmable bulb, so there won’t be any flicker.
The fan also has a variable speed adjusting knob; the previous one had a switch for fast or slow.
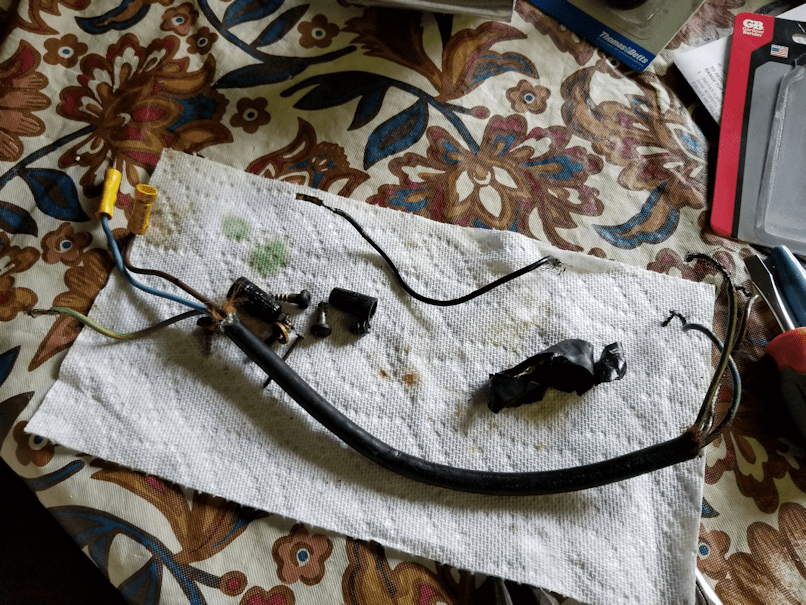
Also, here is the mystery wire that perplexed us.
I had a hard time even describing this extra piece of wires. It’s just… a piece. Of wire.
Why was it there?
My brother, once he saw it, was able to tell me.
It’s an extension.
I don’t know when work was done on the old fan, but at some point, the wires from the fan no longer reached the wires from the wall, and this piece was added. It’s about 6 inches longer than was needed, too.
Meanwhile, we tested the wires to ensure hot was hot, neutral was neutral, and we had the right voltage. Going through all the safety checks and precautions took longer then hooking the wires together. We don’t cut corners with that. Then it was just a matter of attaching the ground to where it belongs, applying a bit of anti-oxidant cream (also, it was confirmed that the new range hood wires were tinned copper – thanks, 53old!) and using marrettes to twist the ends together.
It just blows me away that there was that big nest of exposed wires before, when it should have just been two connections and a ground, covered.
So glad this is done!
And we can even keep this one clean.
Ah, the things I’ve come to appreciate since moving here… :-D
Last year, before it finally got too cold to work on cleaning and clearing the trees, I did manage to get some areas on the south side of the spruce grove done. Just a bit by the garage, and more more by the gate.
One of my goals for the day was to finally start working on clearing that middle section. Since we now have a working electric chain saw, which is the perfect size for the job, I figured it would be nice and quick. When cutting some of the larger trees, I’d made a point of leaving fairly tall stumps, so they would be easily visible and no one would trip over them. I intended to cut those flat with the ground, too.
This morning, my older daughter and I moved the gates and got started on prepping them for painting.
Those things are fekking heavy!
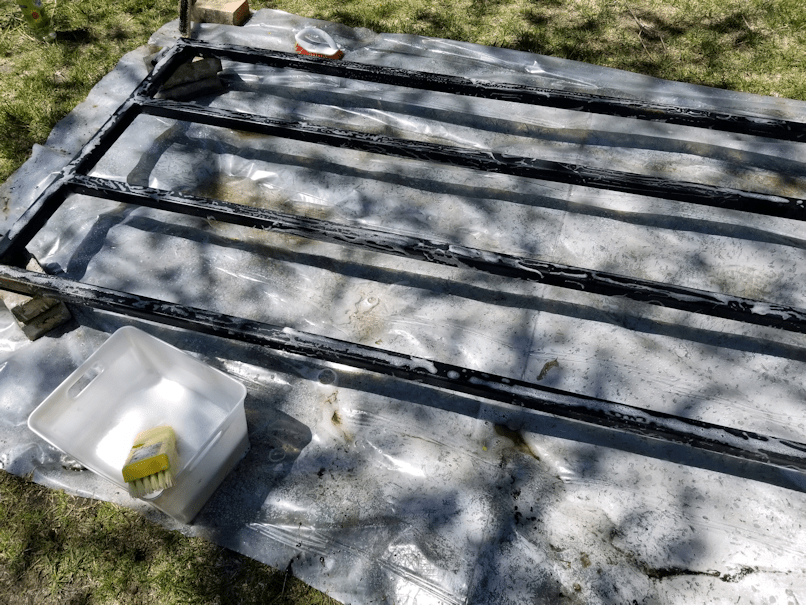
After considering our options, we ended up digging out a roll of plastic I found in the garage to use as a drop cloth and set one half of the gates up on bricks.
It’s hard to see in this picture, but even though I’d already hosed the gates down before we put it over the plastic, after hosing it down second time, the water puddled under it is really dirty!
We went over the gate on one side with a wire brush to scrub any areas that looked like the paint was peeling of, or were particularly rusted. Then we washed it.
We found an eco-friendly detergent for the job.
After doing the one side, we rinsed off the suds, flipped it over, then did it again.
We also took the sliding bar off the other half and that got scrubbed, cleaned and rinsed, too.
As of this writing, it’s still sitting in the sun, drying. We forgot to get paint thinner to clean our brush, so I will get some when I go to pick up my other daughter from work. By then, it should be dry enough to start painting. :-)
Once that one is done, we’ll do the same to the other half of the gate.
We’ll also need to do the gate posts, though for that, we’ll have to get those bottom broken hinges off, before we can clean it. We’ve been applying penetrating lubricant to them, every now and then, in hopes that that will finally get them loose.
While scrubbing and cleaning the gate, I could see that there was red paint under the black – and in some places, a bright blue! The gate construction is not very usual; gates tend to be made wither either a lighter material, or in a triangular shape, so they aren’t so heavy in the middle, which would stress the hinges and cause the posts to lean inwards. I’m thinking my late brother built the whole thing from scratch! As for the gate posts, which he designed so that they could easily be leveled as needed, they are actually starting to lean outward, due to the shifting of the ground. Heavy as the gate is, it’s not enough to overpower the forces of freeze and thaw!
I’m looking forward to how it looks when everything is all painted and fixed up.
I’m also looking forward to having a working gate again.
The Re-Farmer
Update: first coat of paint on the first side of the first gate is done.
That’s a lot of firsts. LOL
I am loving that blue!
The piece by itself on the brick is the slider bar. When the gates are hung back up, the bar will be placed on one side, with two bolts holding it place. One of them also acts as a stopper, when the gate is closed and the bar is slid across to hold the other side in place. At the other end is a hole for a pin to keep the bar from sliding back again. There had also been some electrical wire, used like a twist tie, to further secure the gate. We replaced the wire with a length of chain and a carabiner, before we had to start locking it.
For as long as I can remember, the pin was just a long screw tied to the opposite gate with some bale twine. When the gate was vandalized, the screw was bent into a semi-circle. Our vandal didn’t move the slider bar before he jacked the first side of the gate off its hinges. So we will have to think of what to use as a pin. Hopefully, we’ll find something nicer than a screw and bale twine. Not that that was anything to sneeze at. It worked for many years, after all!
The paint needs to cure for at least 6 hours, so tomorrow we will be able to flip the gate and do the other side. Then we will have to wait for all the paint to cure for 24 hours before we can put on a second coat. If all goes well, we’ll be able to move this one aside to cure while we prep and paint the other one.
I will have to find something soft to put over the bricks so as not to scratch the new paint after we flip it. :-)